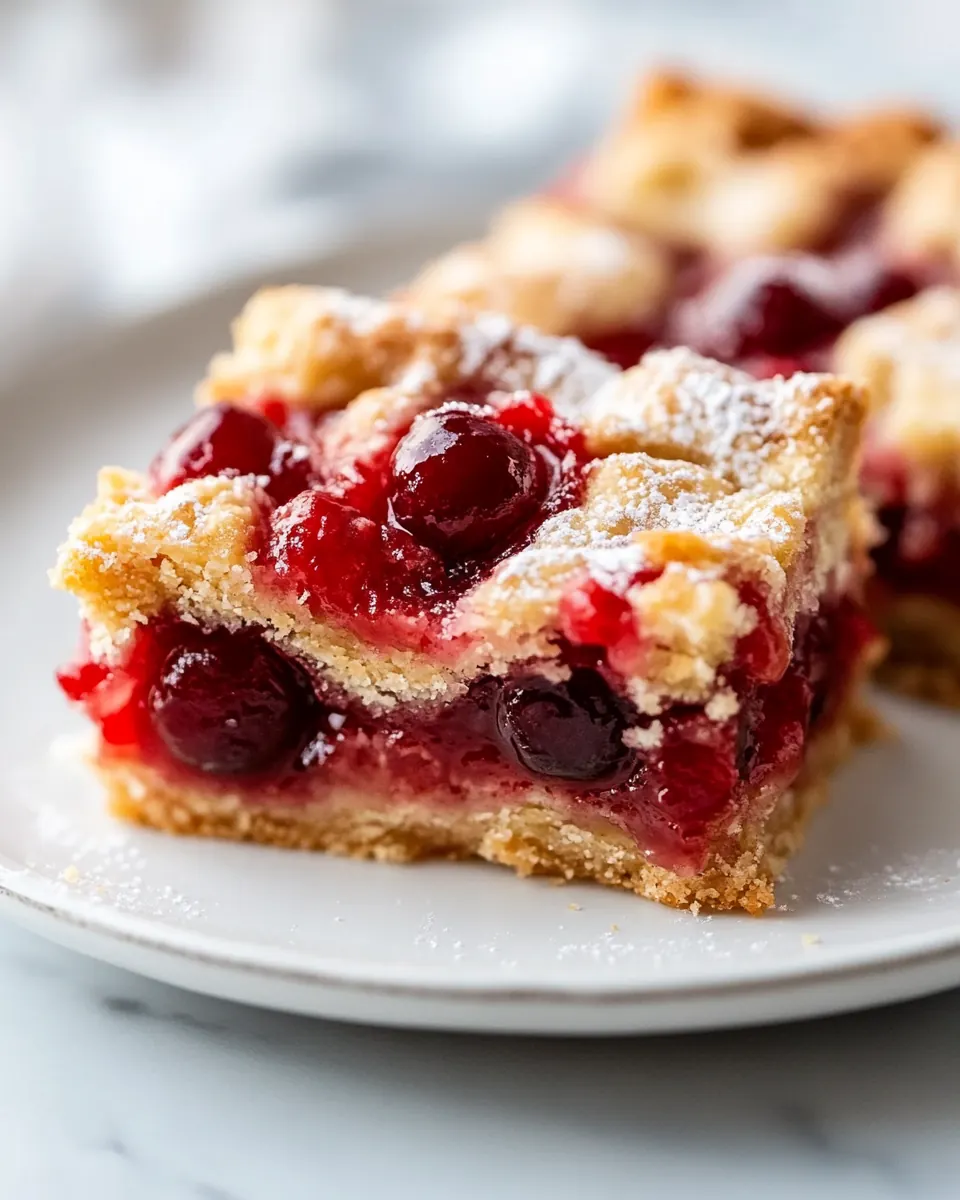
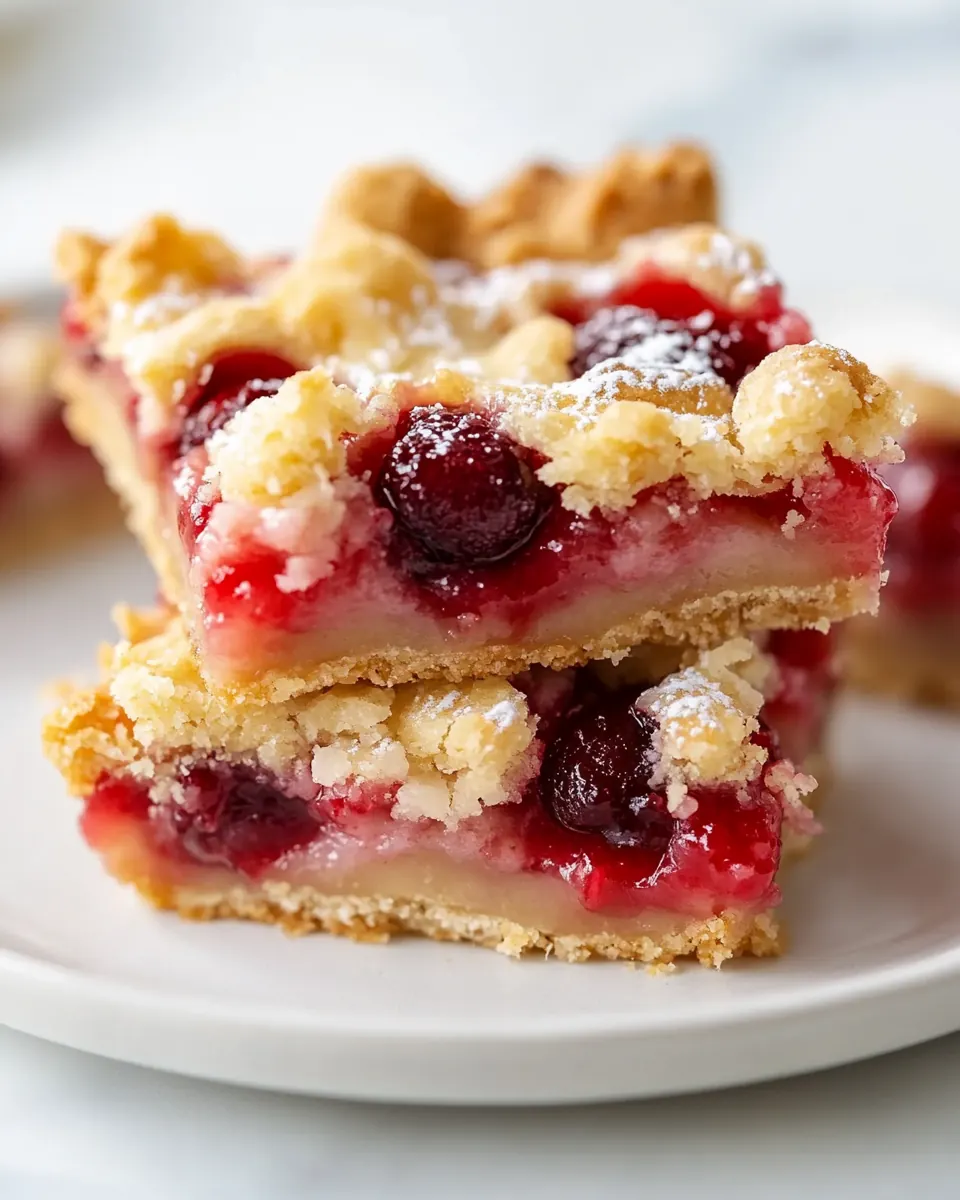
Cherry Pie Bars
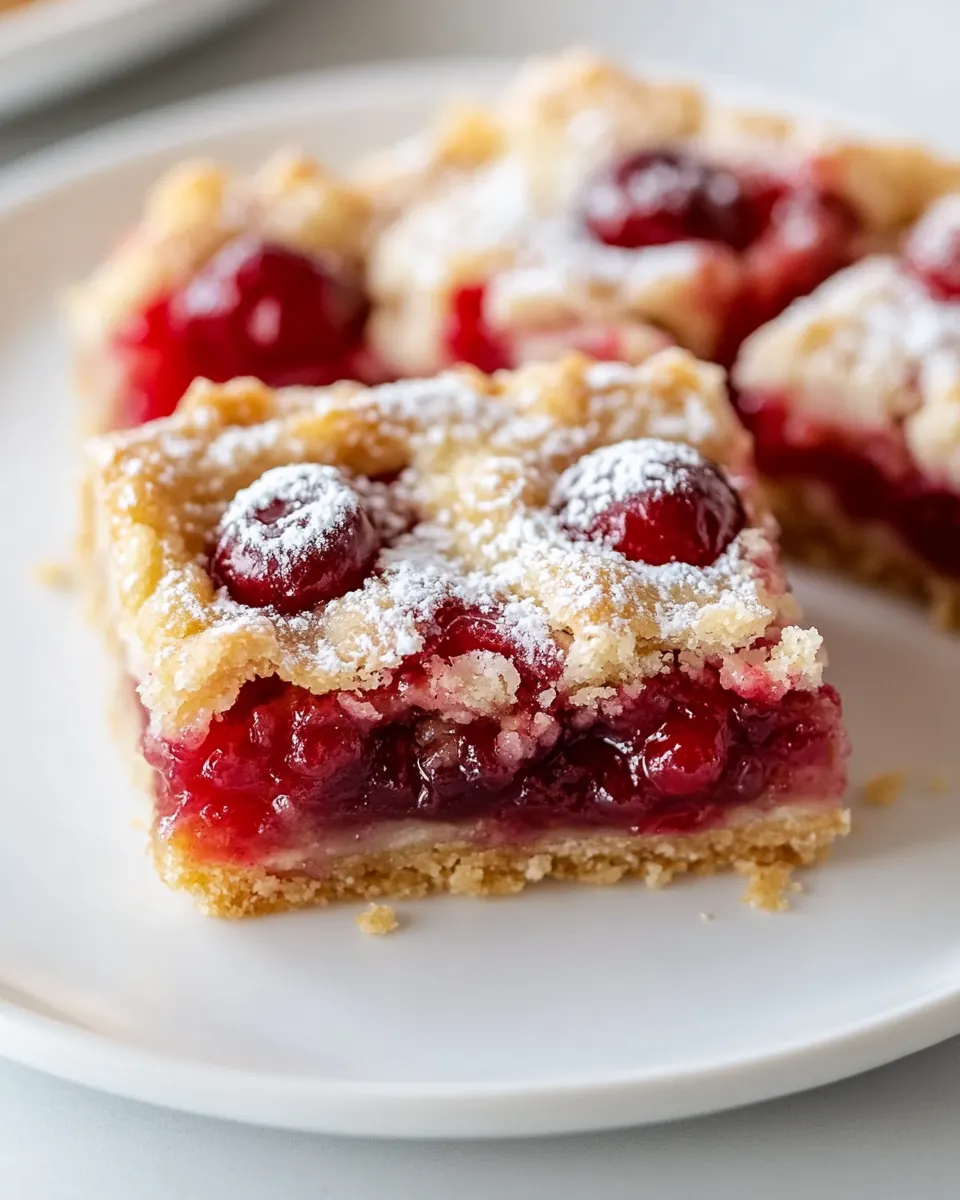
Cherry Pie Bars have been my go to treat whenever I need something nostalgic and reliably crowd pleasing. The first time I baked them I was chasing the memory of a summer picnic where my grandmother set out a tray of fruit bars that vanished by dusk; I wanted that sticky cherry sweetness with a tender, buttery crust, and these bars deliver exactly that feeling. From the very first bite you get a crisp edge, a tender crumb, and a bright cherry burst that takes you back to long, slow afternoons.
Over the years I have tweaked the balance between crust and filling so the texture is just right, and I love how simple pantry staples transform into something worth celebrating. When I bring a pan of Cherry Pie Bars to a potluck, they are always the first to go, and I enjoy watching people debate whether the filling is homemade or from a can, because either way, the outcome is pure joy. I remember one rainy weekend test where the glaze set faster than I expected, turning the bars into a glossy, photo ready dessert without any fuss.
Recipe Snapshot
1 hr 5 mins
20 mins
45 mins
Medium
250 kcal
American
Gluten-Free, Low FODMAP
Desserts
Stand mixer, 9 x 13 inch baking dish or 10 x 15 inch jelly roll pan, Parchment paper, Rubber spatula, Small bowl
Why This Cherry Pie Bars Stands Out
Comforting nostalgia with very little fuss
I love Cherry Pie Bars because they bottle that old fashioned pie feeling into a sheet pan, making it effortless to feed a crowd. I can mix the dough with a paddle attachment in minutes, and the result still tastes like a hand pressed crust. This recipe gives you the warmth of a pie without the flakiness challenge, so you can focus on sharing rather than fretting over crust edges.
Reliable texture that holds up
The combo of all purpose flour and almond flour creates a tender crumb that is slightly more complex than plain butter sugar bars. I find the almond flour adds a subtle toasted note and helps the crust hold the cherry filling without getting soggy, which is priceless when you want neat slices for serving. You’ll notice an even bake, with golden edges and a soft center.
Bright cherry flavor that shines
Using cherry pie filling gives an immediate, punchy fruit flavor that everyone recognizes and loves. I appreciate how the cherries contrast the buttery crust, and when the bars are glazed, the sweetness is rounded out, not cloying. If you want to make a statement, these bars do it with color as much as taste.
Flexible for gatherings and storage
I often make a pan a day ahead, chill it, and let the glaze set overnight. These bars travel well, stack well when wrapped between parchment, and can be portioned into large squares or smaller bites depending on the occasion. For summer picnics or potlucks they are an all around winner, because they stay moist and slice cleanly when chilled.
Simple, dependable ingredients
The ingredient list reads like a pantry inventory, and that is part of the appeal. With unsalted butter, granulated sugar, eggs, and a couple cans of cherry pie filling, you can create something that tastes special without special shopping. I often teach friends to bake these as a confidence builder, because the techniques translate to other bars and tarts.
What to Buy for Cherry Pie Bars
The ingredients for Cherry Pie Bars work together like a small orchestra. The crust components provide richness and structure, while the cherry filling brings sweetness and moisture. Key players like unsalted butter and all purpose flour give you that golden, tender base, and the almond flour adds a mild, nutty lift. The glaze ties everything together with a shiny finish and a touch of sweetness that keeps the bars feeling polished.
- 2 sticks unsalted butter softened (1 cup): Soften to spread easily and provide a rich, tender crumb and flaky texture; creaming with sugar creates structure and aeration for the bars. Contributes buttery flavor and helps brown the crust while carrying the vanilla and cinnamon flavors evenly. Measure at room temperature for proper incorporation into the dough.
- 1 1/2 cups granulated sugar: Sweeten and tenderize the bars while assisting creaming with butter to trap air for lift; helps balance the tartness of the cherry filling. Dissolves into the batter to create an even texture and slight caramelization during baking. Adjust slightly if preferring a less sweet finish.
- 2 large eggs: Bind and enrich the dough while adding moisture and structure through coagulation during baking; eggs also contribute to leavening and a glossy finish. Beat into the butter–sugar mixture to emulsify fats and liquids, promoting a uniform, tender crumb. Use large eggs for consistent results.
- 1 tablespoon vanilla extract: Flavor and aromatize the batter with warm, floral notes that enhance the overall sweetness and complement the cherries. Stir into the wet ingredients so the vanilla disperses evenly throughout the dough. Use pure extract for best flavor clarity.
- 1 teaspoon salt: Enhance overall flavor balance by accentuating sweetness and reducing flatness; salt also strengthens gluten slightly, improving dough structure. Incorporate with dry ingredients so it distributes evenly and prevents overly salty pockets. Use measured amount to avoid overpowering the other flavors.
- 1/2 teaspoon ground cinnamon: Impart subtle warmth that complements the cherries and adds depth without dominating; cinnamon pairs well with fruit and butter. Mix with the flour so the spice is evenly distributed throughout the crust and crumb. Use ground cinnamon for consistent flavor intensity.
- 2 1/2 cups all-purpose flour: Form the primary structure of the bars by providing gluten and bulk; flour creates the base for the crust and holds the filling in place. Combine with almond flour to balance tenderness and chewiness, and mix minimally to avoid toughness. Sift or spoon into the bowl for accurate measurement.
- 1/2 cup almond flour: Add nutty flavor and tender crumb by contributing fat and texture; almond flour reduces gluten development for a softer bar. Blend with all-purpose flour to create a balanced base that is slightly moist and flavorful. Use finely ground almond flour for even distribution.
- 2 – 21 ounce cans cherry pie filling: Provide the sweet, fruity filling and moisture contrast between the buttery crust layers while delivering classic cherry pie flavor. Spoon evenly over the partially baked or prepared crust layer to avoid soggy bottoms and ensure even fruit distribution. Use two cans for adequate coverage and generous fruit pockets.
- 1 cup powdered sugar: Create a smooth glaze that adds sweetness and a slight powdered finish to the top of the bars; powdered sugar dissolves easily for a silky coating. Whisk with the milk or half & half until drizzling consistency is reached, then drizzle over cooled bars for an attractive finish. Adjust quantity for thicker or thinner glaze.
- 2 tablespoons milk or half & half: Thin the powdered sugar to a pourable glaze that adheres to the bars and adds a creamy finish; half & half yields a richer glaze than milk. Stir until fully smooth and no lumps remain before drizzling, and add a bit more liquid for a thinner drizzle if desired. Use sparingly to avoid overly sweet topping.
Preparation Steps for Cherry Pie Bars

I like to approach these steps like a gentle routine that produces consistently great results. The directions below expand each instruction with sensory cues, the why behind the technique, and one troubleshooting tip so you can feel confident at every turn.
- Preheat the oven to 350°F. Set out a 9 x 13 inch baking dish, or a 10 x 15 inch jelly roll pan. Line the pan with parchment paper and set aside.: Warm air will soon surround your kitchen as the oven approaches 350°F , and that scent of gentle heat signals that browning and caramelization are coming. By preparing a 9 x 13 inch baking dish or a 10 x 15 inch jelly roll pan now, you avoid scrambling later when the dough is ready to be pressed in. Lining the pan with parchment creates a nonstick surface so the edges lift cleanly, which helps with neat slices. If the parchment is wrinkled press it flat into the pan, or use a strip over the long side for easy removal. A common mistake is skipping parchment, which risks tearing the crust when you try to remove the bars; take the few extra seconds to line the pan properly.
- Set out a stand mixer. Cream the softened butter and sugar together on high speed until light and fluffy, 3 to 5 minutes. Then scrape the bowl with a rubber spatula, turn the mixer on low, and beat in the eggs, vanilla extract, salt, and cinnamon.: As the beaters move, listen for the change in sound from a heavy thump to a smoother whip, and watch the color shift to a paler, ribbon like consistency, which indicates trapped air. This aeration is why the pastry becomes tender instead of dense, giving you a lighter crumb. Scrape the bowl with a rubber spatula to capture any butter hiding on the sides, so everything is evenly incorporated. One pitfall here is using butter that is too cold, which will not cream properly, or butter that is melted, which will produce a greasy texture. Aim for softened, still slightly cool butter.
- Scrape the bowl again, then turn the mixer on low and add in the all-purpose flour and almond flour. Beat until just combined and turn off the mixer.: You will hear the mix go from airy to slightly more fluid when the eggs are added, and the aroma of vanilla extract and ground cinnamon will bloom. The eggs hydrate the batter and help it set while adding richness. Mixing on low prevents splashing and ensures the wet ingredients fold in gently without collapsing the creamed mixture. If you overbeat at this stage the batter can become too slack, leading to a denser finished bar; stop as soon as everything looks uniform.
- Scoop 2/3 of the dough into the lined pan. Press or roll the dough out into an even layer. Dump the cherry pie filling on top of the bottom crust and spread in an even layer. Then pinch off pieces of the remaining dough and drop them over the surface of the cherries, until it is mostly covered.: When you add both flours on low, you will hear a quieter, thicker sound as the mixture gains body. The all purpose flour gives structure, while the almond flour adds tenderness and subtle nuttiness. Mixing briefly prevents overdeveloping gluten, which keeps the crust tender rather than chewy. Use the spatula to check for any streaks of dry flour at the bottom of the bowl. A frequent mistake is overmixing after the flour goes in, producing a tougher crust, so aim for just combined.
- Bake the cherry pie bars on the lowest rack, 45 to 50 minutes for a 9 x 13 inch baking dish, or bake for 35 to 45 minutes if making in a jelly roll pan. Once the top is golden, remove the pan from the oven and allow the cherry bars to cool completely.: Pressing or rolling the dough creates an even base that will hold the filling without gaps. As you press, you will feel the dough give and form a compact surface that should be uniform in thickness. Take care to push the dough up to the corners so the bars bake evenly; thin spots will brown faster and may become crisp rather than tender. If the dough resists, let it rest for a few minutes at room temperature to ease spreading. Avoid overworking it which can warm the butter too much and lead to spreading in the oven.
- In a small bowl whisk together the powdered sugar and milk. Drizzle the glaze over the top of the cherry pie bars, then place the whole pan in the refrigerator to chill and set.: When you spoon on the cherry pie filling , the glossy red fruit will contrast beautifully with the pale crust. Spread the filling gently with a spatula so you maintain some of the cherry pieces without mashing them into a puree. Even distribution ensures every square has cherries and prevents the crust from becoming soggy in places. A misstep is piling too much filling in one area, which can cause uneven baking and leaking; use a light hand and a steady pace.
- Once the glaze has set, cut the cherry pie bars into 12 large squares, or up to 24 smaller pieces.: Dropping small bits of dough over the cherries creates a rustic top that bakes to golden pockets of crust and leaves glimpses of cherry beneath. As the dough bakes it will meld slightly with the fruit at the edges, creating delicious pockets of chewy crust. Try to distribute the pieces evenly so large bare patches do not remain. If you press them too flat you will lose the appealing contrast of crust and filling, so keep the pieces slightly airy.
- Cover and refrigerate until ready to serve.: Placing the pan on the lowest rack encourages even bottom browning and prevents the top from overbrowning before the center sets. You will notice the top take on a golden hue and the filling begin to bubble gently, which are signs of doneness. The edges should be firm and the center spring back slightly when touched. A common error is opening the oven too often, which drops the temperature and can lengthen bake time; check only near the end of the suggested window.
- Once the top is golden, remove the pan from the oven and allow the cherry bars to cool completely: As the bars cool, the filling will thicken and the crust will firm up, making it much easier to slice neatly. The kitchen will fill with a warm, fruity scent and you may hear a faint settling sound as residual steam escapes. Cooling completely prevents the glaze from melting when applied. Cutting too soon is a common mistake that causes the filling to run, so be patient and let the pan reach room temperature.
- In a small bowl whisk together the powdered sugar and milk: The powdered sugar and milk whisk into a glossy, smooth glaze. Start with less milk and add a drop at a time until you reach a drizzle able consistency that is not too runny. The glaze should coat the back of a spoon and drip slowly, forming a shiny finish. If the glaze is lumpy, sift the powdered sugar before mixing. A runny glaze will soak into the bars, so err on the thicker side.
- Drizzle the glaze over the top of the cherry pie bars, then place the whole pan in the refrigerator to chill and set: The glaze will form a thin, sweet shell as it cools, adding a pretty shine and a pleasant textural contrast to the fruit and crust. Chilling shortens the setting time and makes slicing cleaner. You will feel the pan go cool to the touch after refrigeration, a cue that the glaze is stable. A typical misstep is skipping the chill, which can leave the glaze tacky and smear during slicing.
- Once the glaze has set, cut the cherry pie bars into 12 large squares, or up to 24 smaller pieces: Using a sharp knife, make confident, single strokes to produce neat squares; wipe the blade between cuts to keep edges clean. The glazed top should show a glossy finish and the interior will reveal a ribbon of cherry throughout. If the cuts are ragged, chill a bit longer to firm the bars further. Cutting while still warm will cause the filling to drag and create messy slices.
- Cover and refrigerate until ready to serve: Refrigeration keeps the bars tasting fresh and firms the filling so they slice and transport well. Stored in an airtight container, they hold up for several days and remain moist. If you plan to serve at room temperature, remove them from the fridge 20 to 30 minutes before serving so flavors soften. Leaving them uncovered will dry the edges, so always cover securely.
Pro Tips and Tweaks
These pro tips help you get consistent results and adapt the recipe to different needs. I include storage advice and finishing tweaks that make a real difference when baking for a crowd or prepping ahead.
- Room temperature ingredients make mixing faster and ensure a uniform dough without overworking.
- Measure flour correctly by spooning into the cup and leveling, to prevent a dry, dense crust.
- Even filling distribution prevents soggy or dry spots and helps every bar look and taste balanced.
- Chill before slicing to allow the filling and glaze to set, yielding cleaner cuts and prettier presentation.
- Storage in layers with parchment between pieces prevents sticking when stacking or freezing.
- Use high quality canned filling for bold cherry flavor and thick syrup that holds up during baking.
Perfect Matches for Cherry Pie Bars
These serving ideas show how versatile Cherry Pie Bars can be, from casual gatherings to more formal dessert spreads. I include pairing suggestions, storage guidance, and occasion ideas so you can plan accordingly.
- Serve with whipped cream for a lighter finish perfect for afternoon tea or summer gatherings.
- Plate with a scoop of vanilla ice cream for a classic warm cold contrast after dinner.
- Bring to potlucks as portable squares that people can grab and enjoy without utensils.
- Store chilled in an airtight container for up to 7 days to maintain texture and flavor.
- Freeze individual bars with parchment between, for up to 3 months, great for make ahead dessert planning.
- Occasion friendly for picnics, summer parties, Ramadan if served after iftar, and holiday dessert tables where a reliable crowd pleaser is needed.
FAQ
Conclusion
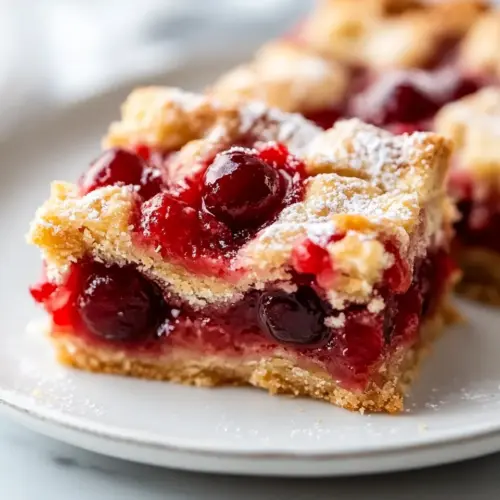
What makes these bars special is their perfect combination of buttery crust and bright cherry filling, finished with a glossy glaze that ties everything together. Give them a try the next time you need a dessert that travels well and disappears fast, because they are simple to make and reliably loved by friends and family. I hope you enjoy the process of pressing, spreading, and slicing these into cheerful squares, and that they become a favorite you return to for gatherings and cozy weekends alike.
Cherry Pie Bars
Equipment
- Stand mixer
- 9 x 13 inch baking dish or 10 x 15 inch jelly roll pan
- Parchment Paper
- Rubber spatula
- Small Bowl
Ingredients
- 2 sticks unsalted butter softened (1 cup) Soften to spread easily and provide a rich, tender crumb and flaky texture; creaming with sugar creates structure and aeration for the bars. Contributes buttery flavor and helps brown the crust while carrying the vanilla and cinnamon flavors evenly. Measure at room temperature for proper incorporation into the dough.
- 1 1/2 cups granulated sugar Sweeten and tenderize the bars while assisting creaming with butter to trap air for lift; helps balance the tartness of the cherry filling. Dissolves into the batter to create an even texture and slight caramelization during baking. Adjust slightly if preferring a less sweet finish.
- 2 large eggs Bind and enrich the dough while adding moisture and structure through coagulation during baking; eggs also contribute to leavening and a glossy finish. Beat into the butter-sugar mixture to emulsify fats and liquids, promoting a uniform, tender crumb. Use large eggs for consistent results.
- 1 tablespoon vanilla extract Flavor and aromatize the batter with warm, floral notes that enhance the overall sweetness and complement the cherries. Stir into the wet ingredients so the vanilla disperses evenly throughout the dough. Use pure extract for best flavor clarity.
- 1 teaspoon salt Enhance overall flavor balance by accentuating sweetness and reducing flatness; salt also strengthens gluten slightly, improving dough structure. Incorporate with dry ingredients so it distributes evenly and prevents overly salty pockets. Use measured amount to avoid overpowering the other flavors.
- 1/2 teaspoon ground cinnamon Impart subtle warmth that complements the cherries and adds depth without dominating; cinnamon pairs well with fruit and butter. Mix with the flour so the spice is evenly distributed throughout the crust and crumb. Use ground cinnamon for consistent flavor intensity.
- 2 1/2 cups all-purpose flour Form the primary structure of the bars by providing gluten and bulk; flour creates the base for the crust and holds the filling in place. Combine with almond flour to balance tenderness and chewiness, and mix minimally to avoid toughness. Sift or spoon into the bowl for accurate measurement.
- 1/2 cup almond flour Add nutty flavor and tender crumb by contributing fat and texture; almond flour reduces gluten development for a softer bar. Blend with all-purpose flour to create a balanced base that is slightly moist and flavorful. Use finely ground almond flour for even distribution.
- 2 – 21 ounce cans cherry pie filling Provide the sweet, fruity filling and moisture contrast between the buttery crust layers while delivering classic cherry pie flavor. Spoon evenly over the partially baked or prepared crust layer to avoid soggy bottoms and ensure even fruit distribution. Use two cans for adequate coverage and generous fruit pockets.
- 1 cup powdered sugar Create a smooth glaze that adds sweetness and a slight powdered finish to the top of the bars; powdered sugar dissolves easily for a silky coating. Whisk with the milk or half & half until drizzling consistency is reached, then drizzle over cooled bars for an attractive finish. Adjust quantity for thicker or thinner glaze.
- 2 tablespoons milk or half & half Thin the powdered sugar to a pourable glaze that adheres to the bars and adds a creamy finish; half & half yields a richer glaze than milk. Stir until fully smooth and no lumps remain before drizzling, and add a bit more liquid for a thinner drizzle if desired. Use sparingly to avoid overly sweet topping.
Instructions
- Preheat the oven to 350°F. Set out a 9 x 13 inch baking dish, or a 10 x 15 inch jelly roll pan. Line the pan with parchment paper and set aside.: Warm air will soon surround your kitchen as the oven approaches 350°F , and that scent of gentle heat signals that browning and caramelization are coming. By preparing a 9 x 13 inch baking dish or a 10 x 15 inch jelly roll pan now, you avoid scrambling later when the dough is ready to be pressed in. Lining the pan with parchment creates a nonstick surface so the edges lift cleanly, which helps with neat slices. If the parchment is wrinkled press it flat into the pan, or use a strip over the long side for easy removal. A common mistake is skipping parchment, which risks tearing the crust when you try to remove the bars; take the few extra seconds to line the pan properly.
- Set out a stand mixer. Cream the softened butter and sugar together on high speed until light and fluffy, 3 to 5 minutes. Then scrape the bowl with a rubber spatula, turn the mixer on low, and beat in the eggs, vanilla extract, salt, and cinnamon.: As the beaters move, listen for the change in sound from a heavy thump to a smoother whip, and watch the color shift to a paler, ribbon like consistency, which indicates trapped air. This aeration is why the pastry becomes tender instead of dense, giving you a lighter crumb. Scrape the bowl with a rubber spatula to capture any butter hiding on the sides, so everything is evenly incorporated. One pitfall here is using butter that is too cold, which will not cream properly, or butter that is melted, which will produce a greasy texture. Aim for softened, still slightly cool butter.
- Scrape the bowl again, then turn the mixer on low and add in the all-purpose flour and almond flour. Beat until just combined and turn off the mixer.: You will hear the mix go from airy to slightly more fluid when the eggs are added, and the aroma of vanilla extract and ground cinnamon will bloom. The eggs hydrate the batter and help it set while adding richness. Mixing on low prevents splashing and ensures the wet ingredients fold in gently without collapsing the creamed mixture. If you overbeat at this stage the batter can become too slack, leading to a denser finished bar; stop as soon as everything looks uniform.
- Scoop 2/3 of the dough into the lined pan. Press or roll the dough out into an even layer. Dump the cherry pie filling on top of the bottom crust and spread in an even layer. Then pinch off pieces of the remaining dough and drop them over the surface of the cherries, until it is mostly covered.: When you add both flours on low, you will hear a quieter, thicker sound as the mixture gains body. The all purpose flour gives structure, while the almond flour adds tenderness and subtle nuttiness. Mixing briefly prevents overdeveloping gluten, which keeps the crust tender rather than chewy. Use the spatula to check for any streaks of dry flour at the bottom of the bowl. A frequent mistake is overmixing after the flour goes in, producing a tougher crust, so aim for just combined.
- Bake the cherry pie bars on the lowest rack, 45 to 50 minutes for a 9 x 13 inch baking dish, or bake for 35 to 45 minutes if making in a jelly roll pan. Once the top is golden, remove the pan from the oven and allow the cherry bars to cool completely.: Pressing or rolling the dough creates an even base that will hold the filling without gaps. As you press, you will feel the dough give and form a compact surface that should be uniform in thickness. Take care to push the dough up to the corners so the bars bake evenly; thin spots will brown faster and may become crisp rather than tender. If the dough resists, let it rest for a few minutes at room temperature to ease spreading. Avoid overworking it which can warm the butter too much and lead to spreading in the oven.
- In a small bowl whisk together the powdered sugar and milk. Drizzle the glaze over the top of the cherry pie bars, then place the whole pan in the refrigerator to chill and set.: When you spoon on the cherry pie filling , the glossy red fruit will contrast beautifully with the pale crust. Spread the filling gently with a spatula so you maintain some of the cherry pieces without mashing them into a puree. Even distribution ensures every square has cherries and prevents the crust from becoming soggy in places. A misstep is piling too much filling in one area, which can cause uneven baking and leaking; use a light hand and a steady pace.
- Once the glaze has set, cut the cherry pie bars into 12 large squares, or up to 24 smaller pieces.: Dropping small bits of dough over the cherries creates a rustic top that bakes to golden pockets of crust and leaves glimpses of cherry beneath. As the dough bakes it will meld slightly with the fruit at the edges, creating delicious pockets of chewy crust. Try to distribute the pieces evenly so large bare patches do not remain. If you press them too flat you will lose the appealing contrast of crust and filling, so keep the pieces slightly airy.
- Cover and refrigerate until ready to serve.: Placing the pan on the lowest rack encourages even bottom browning and prevents the top from overbrowning before the center sets. You will notice the top take on a golden hue and the filling begin to bubble gently, which are signs of doneness. The edges should be firm and the center spring back slightly when touched. A common error is opening the oven too often, which drops the temperature and can lengthen bake time; check only near the end of the suggested window.
- Once the top is golden, remove the pan from the oven and allow the cherry bars to cool completely: As the bars cool, the filling will thicken and the crust will firm up, making it much easier to slice neatly. The kitchen will fill with a warm, fruity scent and you may hear a faint settling sound as residual steam escapes. Cooling completely prevents the glaze from melting when applied. Cutting too soon is a common mistake that causes the filling to run, so be patient and let the pan reach room temperature.
- In a small bowl whisk together the powdered sugar and milk: The powdered sugar and milk whisk into a glossy, smooth glaze. Start with less milk and add a drop at a time until you reach a drizzle able consistency that is not too runny. The glaze should coat the back of a spoon and drip slowly, forming a shiny finish. If the glaze is lumpy, sift the powdered sugar before mixing. A runny glaze will soak into the bars, so err on the thicker side.
- Drizzle the glaze over the top of the cherry pie bars, then place the whole pan in the refrigerator to chill and set: The glaze will form a thin, sweet shell as it cools, adding a pretty shine and a pleasant textural contrast to the fruit and crust. Chilling shortens the setting time and makes slicing cleaner. You will feel the pan go cool to the touch after refrigeration, a cue that the glaze is stable. A typical misstep is skipping the chill, which can leave the glaze tacky and smear during slicing.
- Once the glaze has set, cut the cherry pie bars into 12 large squares, or up to 24 smaller pieces: Using a sharp knife, make confident, single strokes to produce neat squares; wipe the blade between cuts to keep edges clean. The glazed top should show a glossy finish and the interior will reveal a ribbon of cherry throughout. If the cuts are ragged, chill a bit longer to firm the bars further. Cutting while still warm will cause the filling to drag and create messy slices.
- Cover and refrigerate until ready to serve: Refrigeration keeps the bars tasting fresh and firms the filling so they slice and transport well. Stored in an airtight container, they hold up for several days and remain moist. If you plan to serve at room temperature, remove them from the fridge 20 to 30 minutes before serving so flavors soften. Leaving them uncovered will dry the edges, so always cover securely.
Notes
- Room temperature ingredients make mixing faster and ensure a uniform dough without overworking.
- Measure flour correctly by spooning into the cup and leveling, to prevent a dry, dense crust.
- Even filling distribution prevents soggy or dry spots and helps every bar look and taste balanced.
- Chill before slicing to allow the filling and glaze to set, yielding cleaner cuts and prettier presentation.
- Storage in layers with parchment between pieces prevents sticking when stacking or freezing.
- Use high quality canned filling for bold cherry flavor and thick syrup that holds up during baking.