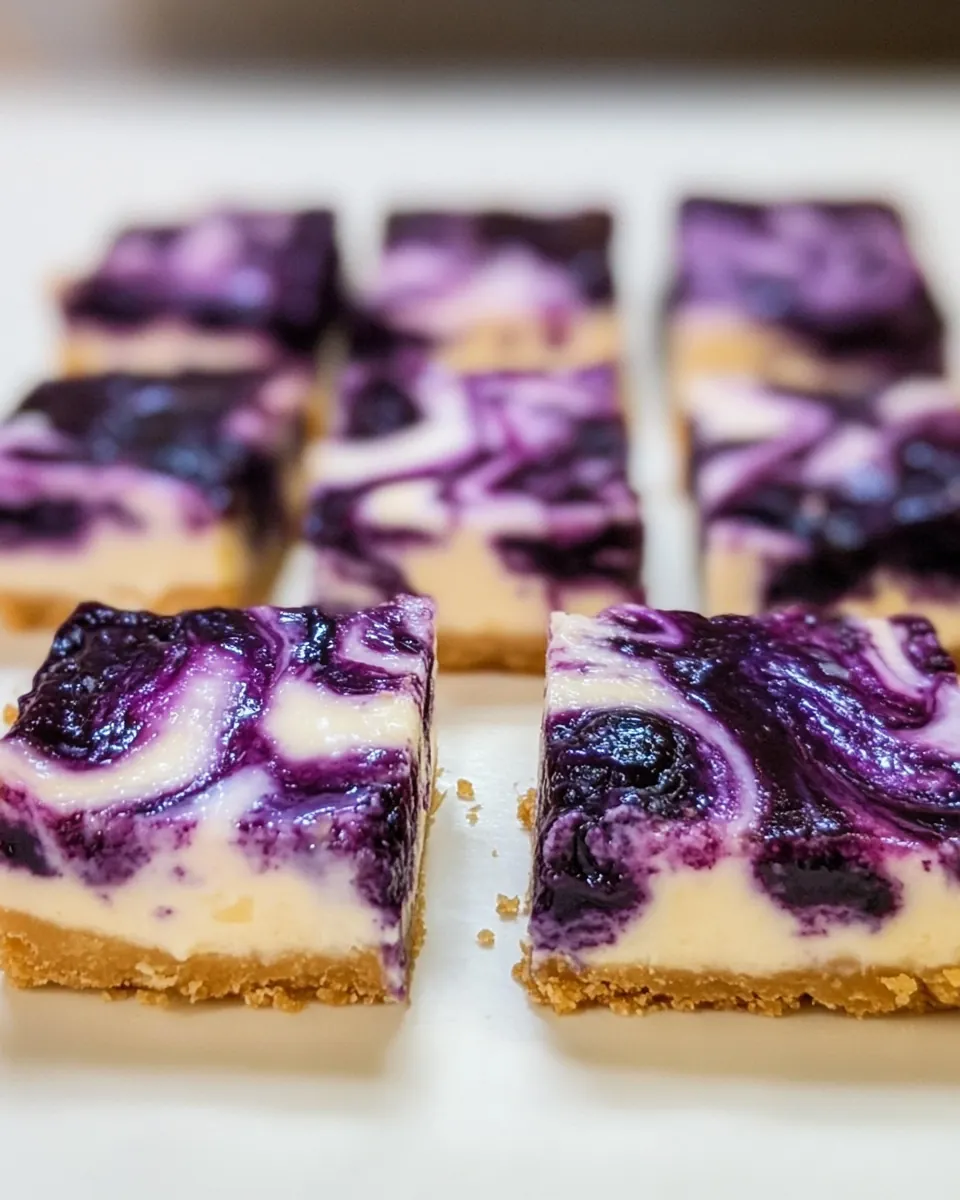
Blueberry Cheesecake Bars
Blueberry Cheesecake Bars have been my go to when I need a dessert that feels both elegant and easy, a sweet that somehow says celebration without a lot of fuss. The first time I made these I was hosting a small summer brunch and wanted something I could get mostly ready the day before. I remember the bright pop of blueberry flavor mingling with the creamy tang of cream cheese, and how the whole kitchen smelled faintly of lemon as the bars cooled. Right away I knew these would be a repeat request.
I love how versatile Blueberry Cheesecake Bars are. You can keep them simple with just the filling and fruit, or press in a crumbly crust for added contrast. Over the years I tweaked the filling to be a touch lighter by folding in plain yogurt, and that little change made the texture silkier without losing richness. Friends comment on the gentle jiggle when they come out of the oven, which somehow makes the final chilled slices feel that much more indulgent.
What I find comforting is how forgiving the recipe is. If your berries are a bit more tart, a tablespoon or two of sweetener will balance them. If life gets hectic, you can make everything the night before and relax on the day of serving. Each time I slice into a pan I remember those early gatherings, the laughter, and how easily these bars became a staple for potlucks and quiet nights with tea.
Recipe Snapshot
35 mins
10 mins
25 mins
Easy
150 kcal
American
Gluten-Free, Low FODMAP
Desserts
8 inch baking pan, Parchment paper, Small saucepan, Mixing bowl, Immersion blender or fork
Why This Blueberry Cheesecake Bars Works
Bright seasonal flavor
I adore how Blueberry Cheesecake Bars capture summer in a bite. The blueberry topping brings a fresh, slightly tangy note that wakes up the creamy filling. When berries are at their peak you get a natural sweetness that reduces the need for extra sugar, and I find that makes every forkful feel cleaner and more vibrant.
Comforting texture contrast
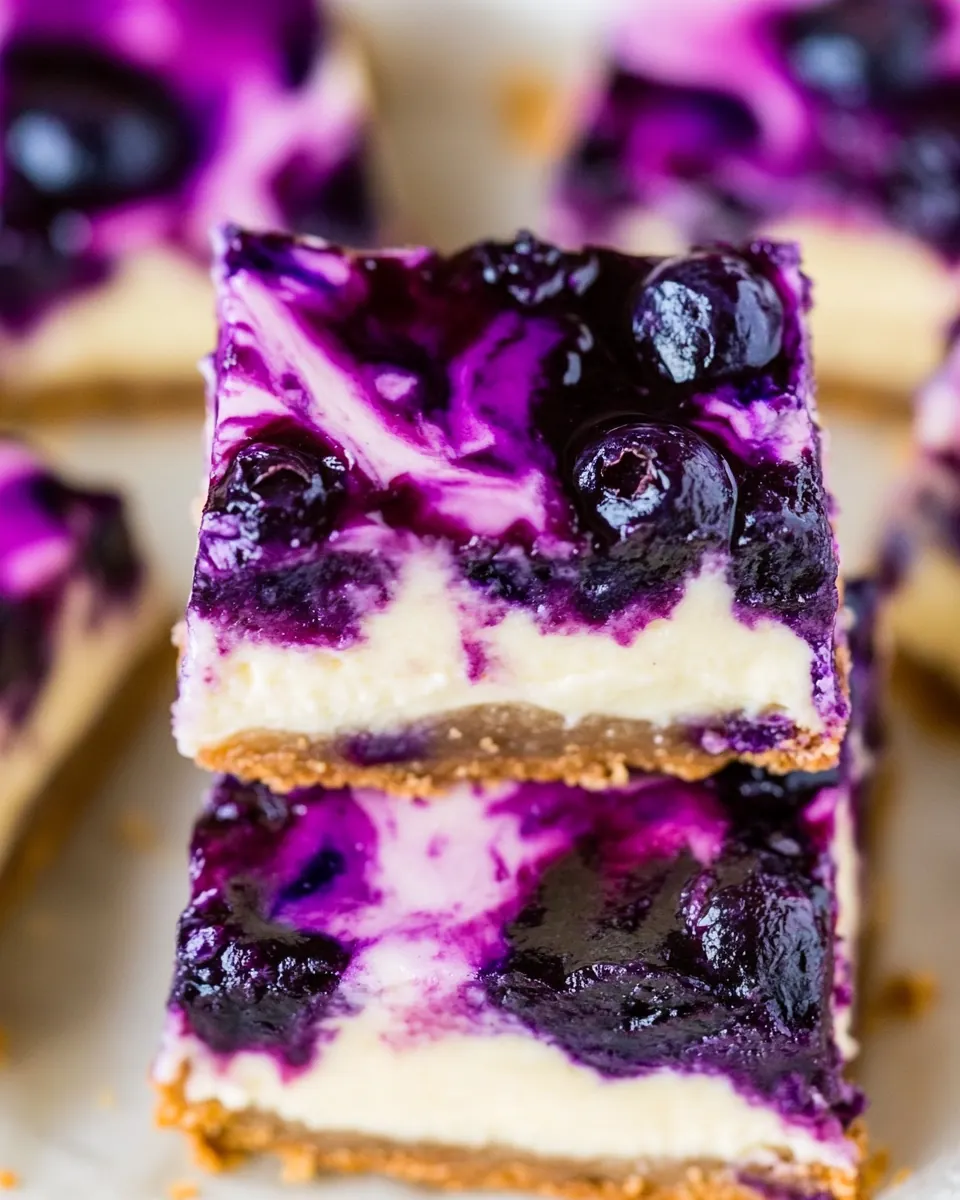
The interplay between velvety filling and either a soft crust or crustless base is what keeps me coming back. The filling, made with cream cheese and plain yogurt, is lush yet light, while the optional crust adds a bit of chew and structure. I love how the blueberry swirls create pockets of concentrated flavor, so each bite has a slightly different profile.
Hands off baking ease
I value recipes that let you do most of the work ahead of time, and these bars fit that bill. After a short bake they rest in a warm oven, which helps prevent cracks, then chill in the fridge to set. That hands off approach means you can prepare early and focus on whatever else you are hosting, which is exactly what I recommend when entertaining.
Flexible for dietary needs
Because the list includes options like vegan cream cheese and alternative thickeners, I often make a batch that suits different eaters. Swapping in a plant based cream cheese keeps the flavor profile similar while making the dessert approachable for those avoiding dairy, and I appreciate that flexibility when planning a diverse menu.
Great make ahead dessert
These bars actually improve with time, which is a huge win for busy cooks. Chilling overnight firms the texture and lets the flavors meld, so if you ask me, making them in advance is almost always the best move. It saves stress and guarantees neat, clean slices when serving guests.
Main Ingredients for Blueberry Cheesecake Bars
These ingredients are intentionally straightforward, designed to do most of the heavy lifting for texture and flavor. The key players are the creamy base, the bright blueberry topping, and a touch of thickener to ensure clean slices. Together they balance richness, acidity, and structure so each bar holds up and tastes fresh.
- 1/2 cup blueberries: Freshly pick or rinse and gently fold to add bright, juicy bursts of flavor and little pockets of sweetness throughout the bars.
- 1 tbsp sweetener of choice: Granulate and sprinkle to provide sweetness while allowing control over sugar type and intensity in both filling and topping.
- 2 tsp lemon juice () (optional): Squeeze and stir in to brighten the filling with acidity and balance the sweetness; optional for a tangier blueberry note.
- zest of one lemon (optional): Zest and grate lightly to introduce concentrated citrus oils that lift aroma and enhance overall flavor complexity when used.
- 12 oz cream cheese or vegan cream cheese: Soften and beat until smooth to create the rich, creamy base that gives the bars their classic cheesecake texture and body.
- 3/4 cup plain yogurt: Whisk until combined to contribute tanginess, moisture, and a slightly lighter texture, helping balance the richness of the cream cheese.
- 1/2 cup sweetener of choice (see above for options): Measure and blend to sweeten the filling; offers flexibility in sweetness level and type depending on dietary choices.
- 1 1/2 tsp pure vanilla extract: Add and mix in for warm aromatic depth and to enhance the perceived sweetness and overall flavor balance in the filling.
- 1 tbsp cornstarch (or 4 tbsp almond flour): Starch and thicken or swap with almond flour to stabilize the filling, prevent weeping, and produce a firmer sliceable texture.
- crust (two options are listed above) (optional): Prepare or omit as preferred to provide a crunchy or nutty base option that supports the creamy filling and adds contrast.
Blueberry Cheesecake Bars Instructions

I like to think of baking these bars as a gentle, deliberate process. The goal is a silky filling, a well reduced topping, and a calm cooling period so the bars set perfectly. Read through the steps once, then move through them at a steady pace.
- Line an 8 inch pan with parchment. If using a crust, press it into the pan. Bring cream cheese to room temperature. Preheat the oven to 350 F. If you have an extra baking pan (of any size), fill it halfway with water and place it on the lower rack of the oven. This optional step adds moisture to the oven and helps prevent the blueberry cheesecake bars from cracking. Whisk the blueberries, lemon, and 1 tbsp sweetener in a small saucepan over medium heat, stirring constantly. Mash with a fork or immersion blender. Set aside. Blend all filling ingredients just until smooth. Do not over-blend. Smooth filling into the prepared pan. Add spoonfuls of blueberry topping, then use a knife or toothpick to swirl it into the filling. (You can see a visual in the recipe video above.) Place on the oven's center rack. Bake 25 minutes, then do not open the oven door even a crack, but let the bars sit in the turned-off oven for an additional ten minutes. Remove from the oven, and allow to cool fully before transferring to the refrigerator for a few hours (or overnight). The still-jiggly bars will firm up considerably as they cool in the fridge.: The aroma of baking is comforting, and lining the pan makes unmolding effortless, ensuring neat edges when you lift the bars out later. Use parchment that extends over the sides to create handles, and press it snugly into the corners so the filling cannot seep underneath. A common mistake is not smoothing the parchment, which can cause the filling to pool unevenly. If your pan is slightly larger, use extra parchment to compensate so you can lift the final bars cleanly.
- If using a crust, press it into the pan.: Pressing the crust creates a stable base that supports the filling and gives a satisfying bite contrast. I press firmly with the bottom of a measuring cup so the crust is compact and even. You should feel resistance under the cup as the crust compacts, and the surface should look uniform. Rushed pressing can leave gaps that allow the filling to seep, so take your time to ensure an even, packed layer.
- Bring cream cheese to room temperature.: A room temperature cream cheese blends smoothly, preventing lumps and giving a silky texture to the filling. It should be soft enough that a spoon glides through with little resistance, yet not melting. If you skip this step, you risk a grainy filling from over mixing to break up cold chunks. If you are short on time, cut the block into small pieces to speed softening, but avoid using heat which can change texture.
- Preheat the oven to 350 F.: Preheating ensures even baking from the start, so the filling sets uniformly rather than baking unevenly from the edges in. You should feel warm air and see the oven indicator reach temperature. A common issue is placing the pan in before the oven is ready, which lengthens bake time and can alter texture. Always wait until the oven signals it is fully preheated.
- If you have an extra baking pan of any size, fill it halfway with water and place it on the lower rack of the oven.: Adding that pan of water creates steam which tempers the oven heat and helps prevent the filling from cracking by keeping the environment humid. The water should sit calmly and not splash as you place the cheesecake on the center rack. Avoid boiling water spills which can be hazardous, and do not skip this if you live in a very dry climate, as cracking becomes more likely.
- Whisk the blueberries, lemon, and 1 tbsp sweetener in a small saucepan over medium heat, stirring constantly.: As the mixture heats, you will hear a soft simmer and see the berries begin to burst, releasing their juices. Constant stirring prevents scorching and helps break down the fruit evenly. Cook until it becomes jam like, taking on a glossy sheen. A typical mistake is turning the heat too high, which can burn the sugars and produce a bitter taste, so keep it moderate and attentive.
- Mash with a fork or immersion blender.: Mashing creates texture, giving you both smooth swirls and small fruit bits that pop with flavor. If you prefer a completely smooth topping, use an immersion blender briefly, watching for a puree that still holds some body. Over blending will make the topping too thin, while under mashing can leave large chunks that may make swirling harder, so aim for a balance that pleases you visually and on the palate.
- Set aside.: Letting the topping cool slightly stops it from dissolving the filling when swirled in, preserving visual contrast and preventing the filling from becoming too wet. The cooled fruit will still be warm, offering aroma and softness without melting the cream layer. A common slip is adding piping hot topping which can thin the filling and change bake behavior, so patience here makes a big difference.
- Blend all filling ingredients just until smooth.: Blending briefly gives you a luxuriously smooth filling with a tender mouthfeel, and prevents over aeration which can lead to cracking. Watch for no visible lumps of cream cheese and a glossy, homogenous batter. Over blending incorporates excess air, which causes the filling to puff and then sink or crack, so stop as soon as smooth.
- Do not over-blend.: The texture will remain dense and creamy when you avoid over mixing, and the filling will hold without trapping too much air. If you notice bubbles or foamy peaks, reduce mixing time next time and scrape the sides of the bowl gently. Overwork the batter and the finished bars may develop an undesirable texture and surface cracks, so be gentle.
- Smooth filling into the prepared pan.: Spreading the filling evenly ensures consistent bake and thickness across the pan so every square pulls apart uniformly. Use an offset spatula or the back of a spoon to level the surface, watching for a flat, glossy top. If you leave high spots, they may brown or bake quicker, so take the extra minute to smooth carefully.
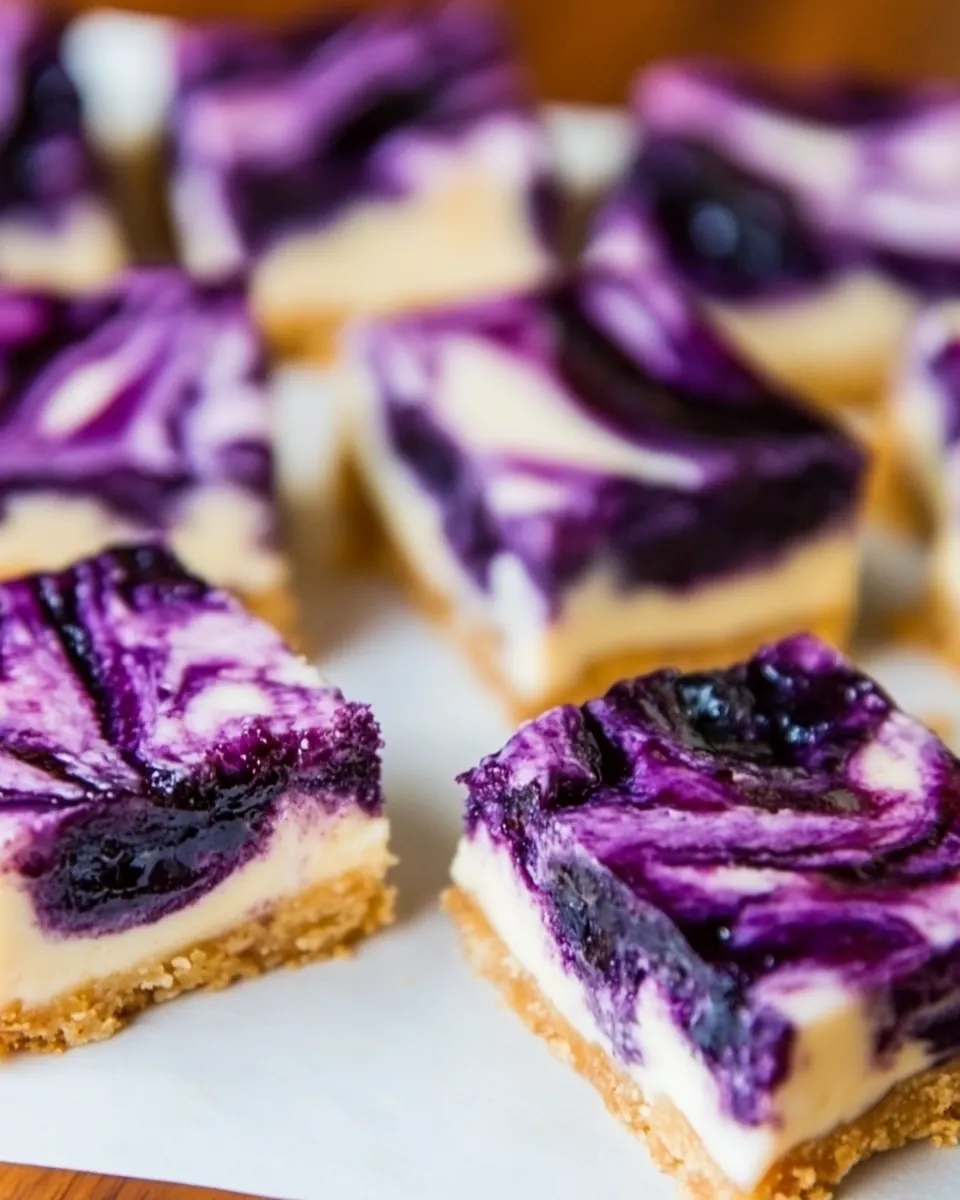
- Add spoonfuls of blueberry topping, then use a knife or toothpick to swirl it into the filling.: The contrast of deep purple swirls against the pale filling is as much for looks as flavor, concentrating blueberry in each bite. Drop the topping in small dollops so it distributes evenly, and drag a knife through in a figure eight to create pretty veins. Avoid over swirling which can blend the topping away and mute its punch.
- Place on the oven's center rack.: Positioning centrally allows even heat circulation, which helps the filling set uniformly. You want the pan level and clear of walls so air moves freely around it. A common error is placing too close to the back or top, causing uneven browning or undercooked centers, so always choose the middle rack when in doubt.
- Bake 25 minutes, then do not open the oven door even a crack, but let the bars sit in the turned off oven for an additional ten minutes.: During baking you will see the edges set and the center remain slightly jiggly, which is exactly what you want. Letting the bars rest in the warm oven gradually completes the set while preventing a sudden temperature drop that causes cracks. Opening the oven too soon leads to a collapse, so resist the urge to peek until the oven has cooled down a bit.
- Remove from the oven, and allow to cool fully before transferring to the refrigerator for a few hours or overnight.: Cooling on the counter first lets residual steam escape slowly, and chilling firms the bars for clean slicing. The texture tightens as the temperature drops, and the flavors meld. A frequent mistake is trying to slice warm bars which results in sticky, messy pieces, so plan ahead and chill adequately.
- The still jiggly bars will firm up considerably as they cool in the fridge.: That final chill creates a creamy, sliceable consistency that holds together when plated. You want the center to feel set but slightly yielding when nudged, indicating a smooth, custardy interior. Cutting too early gives a loose texture and ragged slices, so wait until chilled through for best presentation.
Ways to Adapt This Recipe
These adaptations make Blueberry Cheesecake Bars suit many occasions and dietary preferences. Below are practical tips, each starting with a focused action phrase to guide your choice.
- Use vegan cream cheese: Replace the dairy cream cheese with a plant based alternative to make the bars suitable for vegan guests, watching for slight differences in texture which may need extra chilling time.
- Try almond flour as a thickener: Swap the 1 tablespoon of cornstarch for 4 tablespoons of almond flour to add a gentle nuttiness and a denser set, which I like when I want more body without changing flavor.
- Make a crumb crust: Press a simple crumb crust into the pan for added texture, compacting it firmly to support the filling and help produce tidy slices when serving.
- Adjust sweetness to taste: Use your preferred sweetener and taste the filling before baking, remembering that chilling slightly mutes sweetness so err on the lighter side if unsure.
- Double the batch for a crowd: Use a larger pan or bake two pans simultaneously, increasing bake time slightly and checking for a tender set in the center to avoid overbaking.
Side Dish Ideas for Blueberry Cheesecake Bars
These serving suggestions help pair Blueberry Cheesecake Bars with drinks and accompaniments for different occasions. The list below covers casual gatherings to special events, and includes storage notes so you can plan ahead.
- Serve with fresh berries: A small bowl of extra blueberry or mixed berries complements the bars and adds a refreshing contrast for brunch or afternoon tea.
- Pair with coffee or tea: A medium roast coffee or a fragrant herbal tea balances the creaminess, ideal for a relaxed dessert course after dinner.
- Bring to potlucks: These bars travel well when chilled, making them a great contribution for picnics, potlucks, or family gatherings.
- Make ahead for holidays: Prepare a day early and refrigerate overnight so you can focus on main dishes the day of the celebration.
- Store properly: Keep bars covered in the refrigerator for up to four days, or freeze slices individually wrapped for longer storage; thaw in the fridge before serving.
- Seasonal serving: In summer highlight local blueberry by serving slightly chilled, while in cooler months let the bars sit at cool room temperature a few minutes before serving to enhance flavor release.
FAQ
Conclusion
These Blueberry Cheesecake Bars stand out for their silky filling and bright fruit swirls, delivering a dessert that feels both polished and approachable. I encourage you to make them ahead, chill thoroughly, and serve chilled for the cleanest slices and best flavor. They are forgiving, adaptable, and perfect for sharing with friends or saving a few squares for yourself after a long day in the kitchen.
Blueberry Cheesecake Bars
Equipment
- 8 inch baking pan
- Parchment Paper
- Small Saucepan
- Mixing Bowl
- Immersion blender or fork
Ingredients
- 1/2 cup blueberries Freshly pick or rinse and gently fold to add bright, juicy bursts of flavor and little pockets of sweetness throughout the bars.
- 1 tbsp sweetener of choice Granulate and sprinkle to provide sweetness while allowing control over sugar type and intensity in both filling and topping.
- 2 tsp lemon juice (optional) Squeeze and stir in to brighten the filling with acidity and balance the sweetness; optional for a tangier blueberry note.
- optional zest of one lemon Zest and grate lightly to introduce concentrated citrus oils that lift aroma and enhance overall flavor complexity when used.
- 12 oz cream cheese or vegan cream cheese Soften and beat until smooth to create the rich, creamy base that gives the bars their classic cheesecake texture and body.
- 3/4 cup plain yogurt Whisk until combined to contribute tanginess, moisture, and a slightly lighter texture, helping balance the richness of the cream cheese.
- 1/2 cup sweetener of choice (see above for options) Measure and blend to sweeten the filling; offers flexibility in sweetness level and type depending on dietary choices.
- 1 1/2 tsp pure vanilla extract Add and mix in for warm aromatic depth and to enhance the perceived sweetness and overall flavor balance in the filling.
- 1 tbsp cornstarch (or 4 tbsp almond flour) Starch and thicken or swap with almond flour to stabilize the filling, prevent weeping, and produce a firmer sliceable texture.
- optional crust (two options are listed above) Prepare or omit as preferred to provide a crunchy or nutty base option that supports the creamy filling and adds contrast.
Instructions
- Line an 8 inch pan with parchment. If using a crust, press it into the pan. Bring cream cheese to room temperature. Preheat the oven to 350 F. If you have an extra baking pan (of any size), fill it halfway with water and place it on the lower rack of the oven. This optional step adds moisture to the oven and helps prevent the blueberry cheesecake bars from cracking. Whisk the blueberries, lemon, and 1 tbsp sweetener in a small saucepan over medium heat, stirring constantly. Mash with a fork or immersion blender. Set aside. Blend all filling ingredients just until smooth. Do not over-blend. Smooth filling into the prepared pan. Add spoonfuls of blueberry topping, then use a knife or toothpick to swirl it into the filling. (You can see a visual in the recipe video above.) Place on the oven's center rack. Bake 25 minutes, then do not open the oven door even a crack, but let the bars sit in the turned-off oven for an additional ten minutes. Remove from the oven, and allow to cool fully before transferring to the refrigerator for a few hours (or overnight). The still-jiggly bars will firm up considerably as they cool in the fridge.: The aroma of baking is comforting, and lining the pan makes unmolding effortless, ensuring neat edges when you lift the bars out later. Use parchment that extends over the sides to create handles, and press it snugly into the corners so the filling cannot seep underneath. A common mistake is not smoothing the parchment, which can cause the filling to pool unevenly. If your pan is slightly larger, use extra parchment to compensate so you can lift the final bars cleanly.
- If using a crust, press it into the pan.: Pressing the crust creates a stable base that supports the filling and gives a satisfying bite contrast. I press firmly with the bottom of a measuring cup so the crust is compact and even. You should feel resistance under the cup as the crust compacts, and the surface should look uniform. Rushed pressing can leave gaps that allow the filling to seep, so take your time to ensure an even, packed layer.
- Bring cream cheese to room temperature.: A room temperature cream cheese blends smoothly, preventing lumps and giving a silky texture to the filling. It should be soft enough that a spoon glides through with little resistance, yet not melting. If you skip this step, you risk a grainy filling from over mixing to break up cold chunks. If you are short on time, cut the block into small pieces to speed softening, but avoid using heat which can change texture.
- Preheat the oven to 350 F.: Preheating ensures even baking from the start, so the filling sets uniformly rather than baking unevenly from the edges in. You should feel warm air and see the oven indicator reach temperature. A common issue is placing the pan in before the oven is ready, which lengthens bake time and can alter texture. Always wait until the oven signals it is fully preheated.
- If you have an extra baking pan of any size, fill it halfway with water and place it on the lower rack of the oven.: Adding that pan of water creates steam which tempers the oven heat and helps prevent the filling from cracking by keeping the environment humid. The water should sit calmly and not splash as you place the cheesecake on the center rack. Avoid boiling water spills which can be hazardous, and do not skip this if you live in a very dry climate, as cracking becomes more likely.
- Whisk the blueberries, lemon, and 1 tbsp sweetener in a small saucepan over medium heat, stirring constantly.: As the mixture heats, you will hear a soft simmer and see the berries begin to burst, releasing their juices. Constant stirring prevents scorching and helps break down the fruit evenly. Cook until it becomes jam like, taking on a glossy sheen. A typical mistake is turning the heat too high, which can burn the sugars and produce a bitter taste, so keep it moderate and attentive.
- Mash with a fork or immersion blender.: Mashing creates texture, giving you both smooth swirls and small fruit bits that pop with flavor. If you prefer a completely smooth topping, use an immersion blender briefly, watching for a puree that still holds some body. Over blending will make the topping too thin, while under mashing can leave large chunks that may make swirling harder, so aim for a balance that pleases you visually and on the palate.
- Set aside.: Letting the topping cool slightly stops it from dissolving the filling when swirled in, preserving visual contrast and preventing the filling from becoming too wet. The cooled fruit will still be warm, offering aroma and softness without melting the cream layer. A common slip is adding piping hot topping which can thin the filling and change bake behavior, so patience here makes a big difference.
- Blend all filling ingredients just until smooth.: Blending briefly gives you a luxuriously smooth filling with a tender mouthfeel, and prevents over aeration which can lead to cracking. Watch for no visible lumps of cream cheese and a glossy, homogenous batter. Over blending incorporates excess air, which causes the filling to puff and then sink or crack, so stop as soon as smooth.
- Do not over-blend.: The texture will remain dense and creamy when you avoid over mixing, and the filling will hold without trapping too much air. If you notice bubbles or foamy peaks, reduce mixing time next time and scrape the sides of the bowl gently. Overwork the batter and the finished bars may develop an undesirable texture and surface cracks, so be gentle.
- Smooth filling into the prepared pan.: Spreading the filling evenly ensures consistent bake and thickness across the pan so every square pulls apart uniformly. Use an offset spatula or the back of a spoon to level the surface, watching for a flat, glossy top. If you leave high spots, they may brown or bake quicker, so take the extra minute to smooth carefully.
- Add spoonfuls of blueberry topping, then use a knife or toothpick to swirl it into the filling.: The contrast of deep purple swirls against the pale filling is as much for looks as flavor, concentrating blueberry in each bite. Drop the topping in small dollops so it distributes evenly, and drag a knife through in a figure eight to create pretty veins. Avoid over swirling which can blend the topping away and mute its punch.
- Place on the oven's center rack.: Positioning centrally allows even heat circulation, which helps the filling set uniformly. You want the pan level and clear of walls so air moves freely around it. A common error is placing too close to the back or top, causing uneven browning or undercooked centers, so always choose the middle rack when in doubt.
- Bake 25 minutes, then do not open the oven door even a crack, but let the bars sit in the turned off oven for an additional ten minutes.: During baking you will see the edges set and the center remain slightly jiggly, which is exactly what you want. Letting the bars rest in the warm oven gradually completes the set while preventing a sudden temperature drop that causes cracks. Opening the oven too soon leads to a collapse, so resist the urge to peek until the oven has cooled down a bit.
- Remove from the oven, and allow to cool fully before transferring to the refrigerator for a few hours or overnight.: Cooling on the counter first lets residual steam escape slowly, and chilling firms the bars for clean slicing. The texture tightens as the temperature drops, and the flavors meld. A frequent mistake is trying to slice warm bars which results in sticky, messy pieces, so plan ahead and chill adequately.
- The still jiggly bars will firm up considerably as they cool in the fridge.: That final chill creates a creamy, sliceable consistency that holds together when plated. You want the center to feel set but slightly yielding when nudged, indicating a smooth, custardy interior. Cutting too early gives a loose texture and ragged slices, so wait until chilled through for best presentation.
Notes
- Use vegan cream cheese: Replace the dairy cream cheese with a plant based alternative to make the bars suitable for vegan guests, watching for slight differences in texture which may need extra chilling time.
- Try almond flour as a thickener: Swap the 1 tablespoon of cornstarch for 4 tablespoons of almond flour to add a gentle nuttiness and a denser set, which I like when I want more body without changing flavor.
- Make a crumb crust: Press a simple crumb crust into the pan for added texture, compacting it firmly to support the filling and help produce tidy slices when serving.
- Adjust sweetness to taste: Use your preferred sweetener and taste the filling before baking, remembering that chilling slightly mutes sweetness so err on the lighter side if unsure.
- Double the batch for a crowd: Use a larger pan or bake two pans simultaneously, increasing bake time slightly and checking for a tender set in the center to avoid overbaking.