Blueberry Biscuits
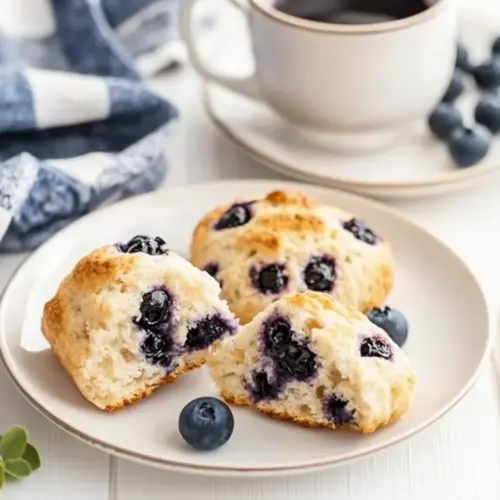
Blueberry Biscuits have been my go to when summer mornings arrive and the market is overflowing with plump berries. I remember the first time I baked them for a sleepy weekend brunch, the kitchen filling with the warm, slightly sweet scent of butter and fruit, and a beloved friend declaring they were the best thing I had brought to the table. That day I learned how simple techniques and a few reliable ingredients can turn a humble batter into something worth sharing.
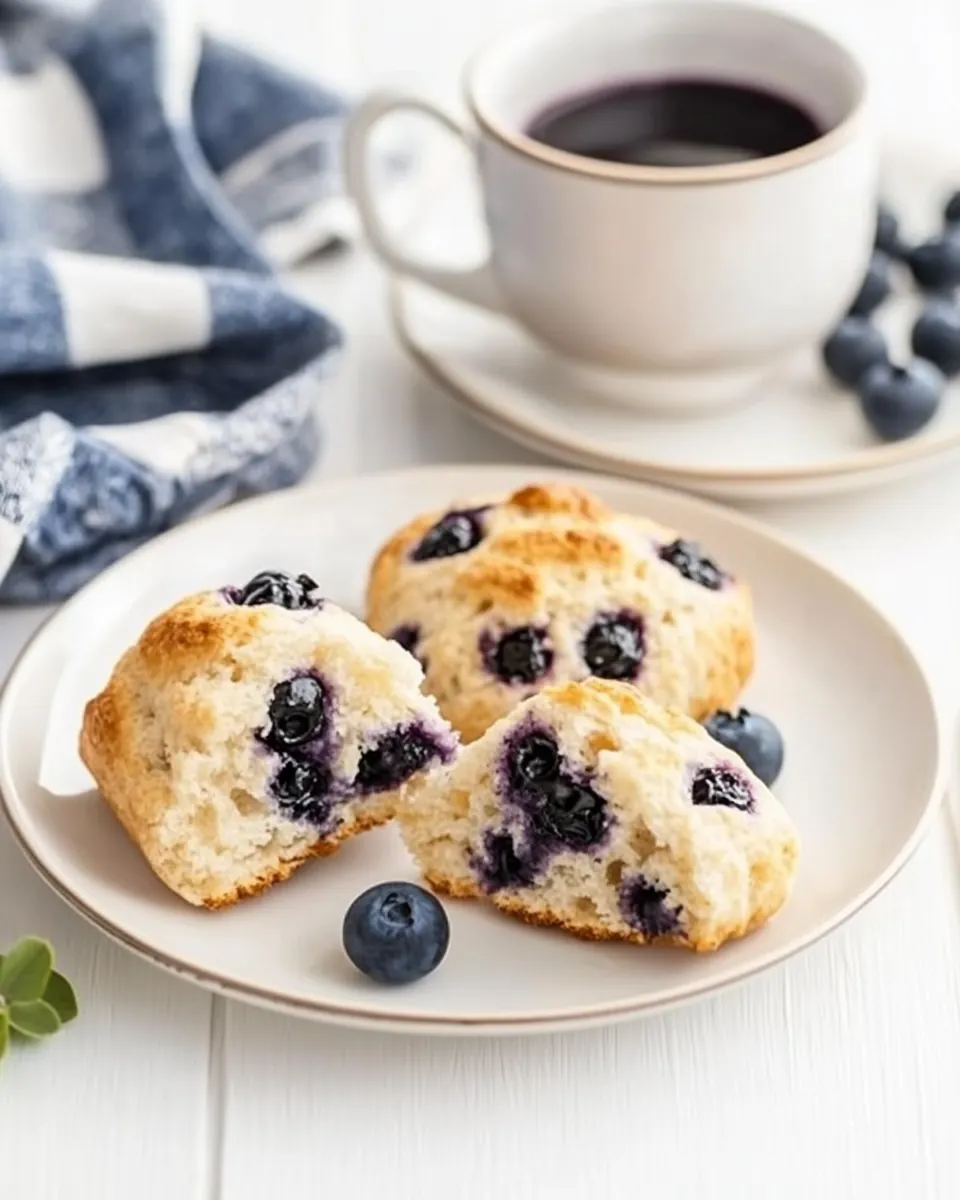
Over time I adjusted little things, like keeping the butter extra cold and scoring the dough precisely so every piece bakes evenly. I love how these Blueberry Biscuits bridge baking and comfort food, delivering tender, fluffy interiors punctuated by juicy pockets of blueberries. I often make a double batch when I know company is coming because they vanish quickly, still warm from the oven, brushed with honey butter that beads and melts into the tops.
Recipe Snapshot
60 mins
15 mins
45 mins
Medium
200 kcal
American
Gluten-Free, Low FODMAP
Desserts
8×8-inch Pan, Basting/Pastry Brush, Measuring cups and spoons
Why You Need This Blueberry Biscuits
Light and Tender Texture
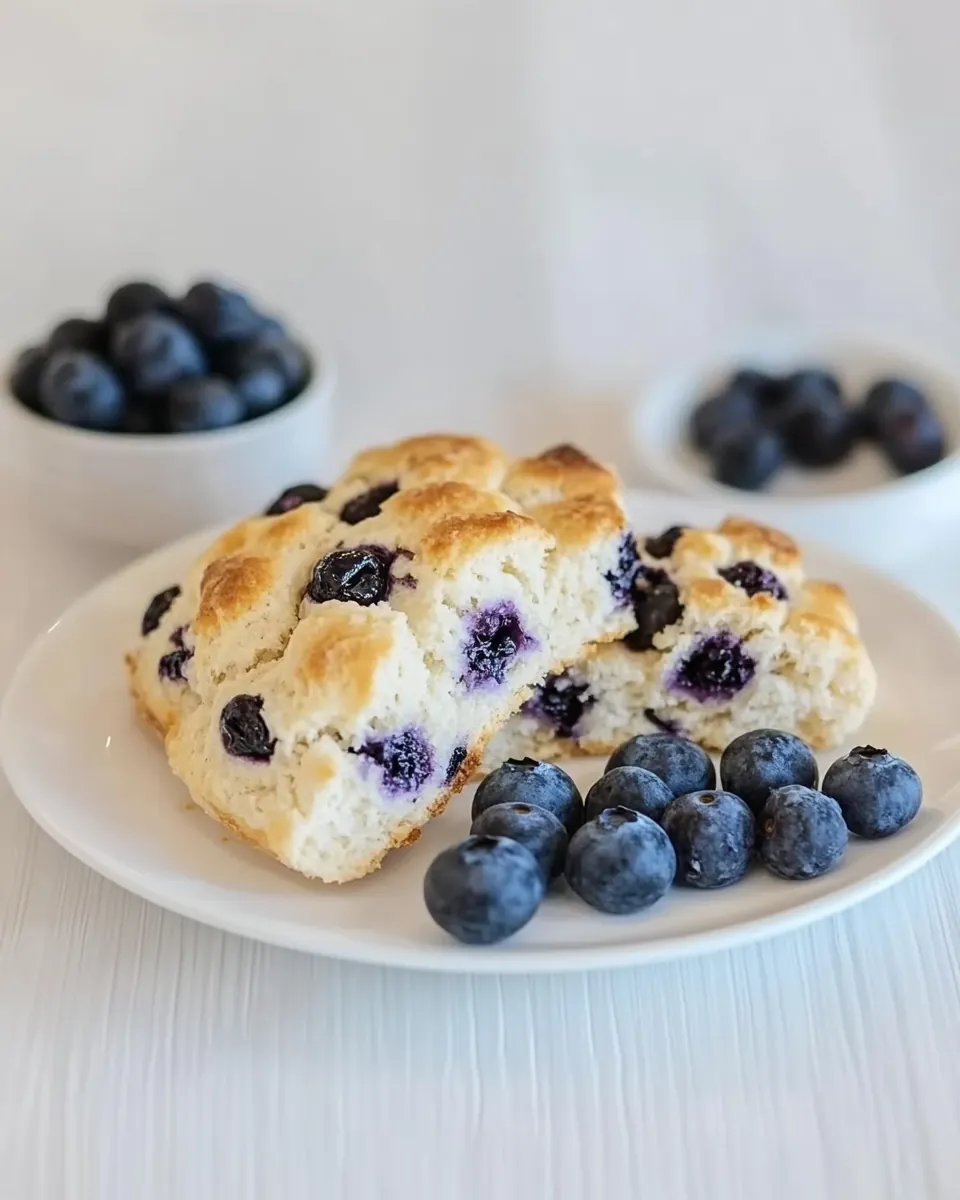
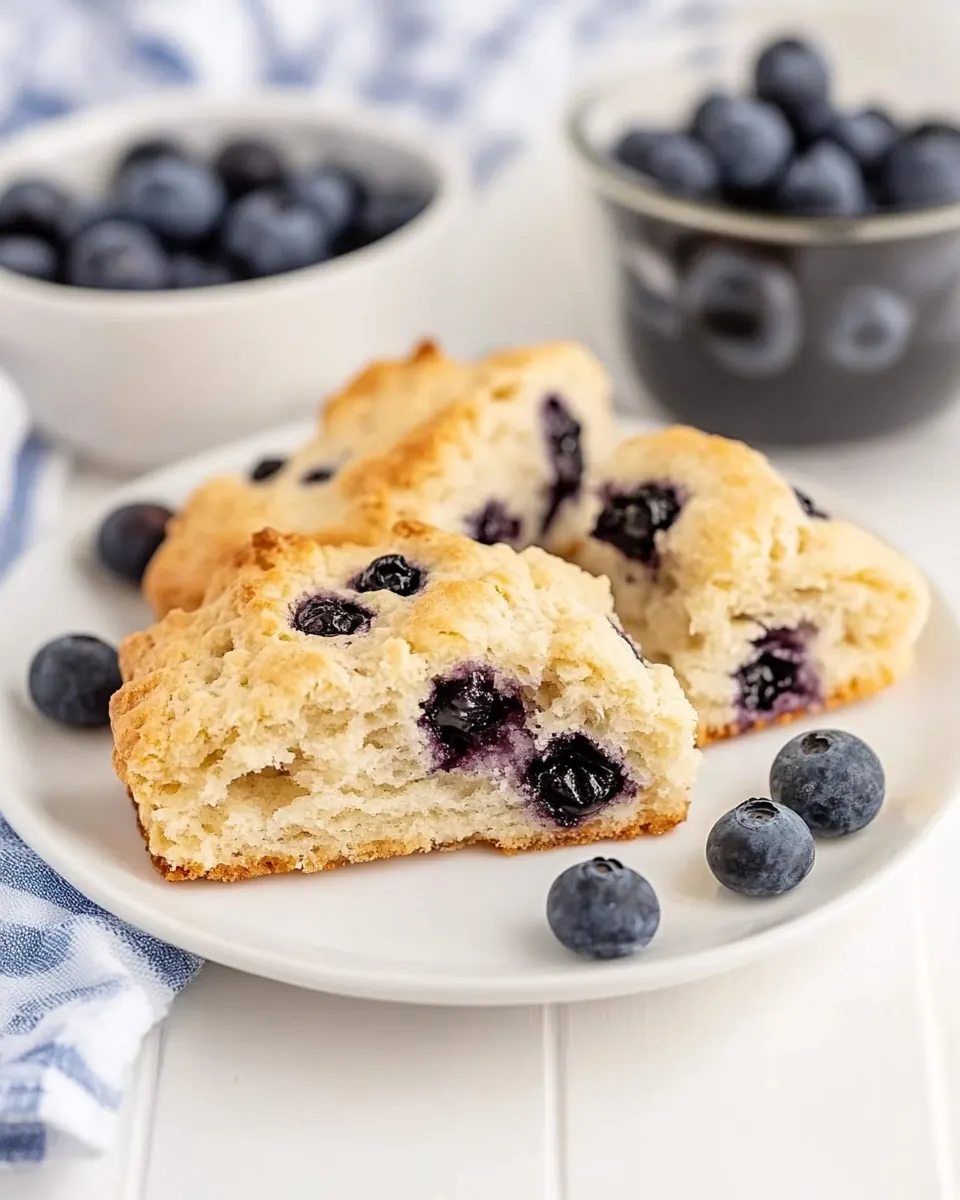
I adore how these biscuits come out airy yet sturdy enough to hold a smear of honey butter. The combination of cold butter worked into the all purpose flour and the quick action of leaveners creates steam pockets as the biscuits bake, delivering a tender crumb. When you break one open and see flakes and layers, you know the technique worked.
Bright Bursts of Fresh Flavor
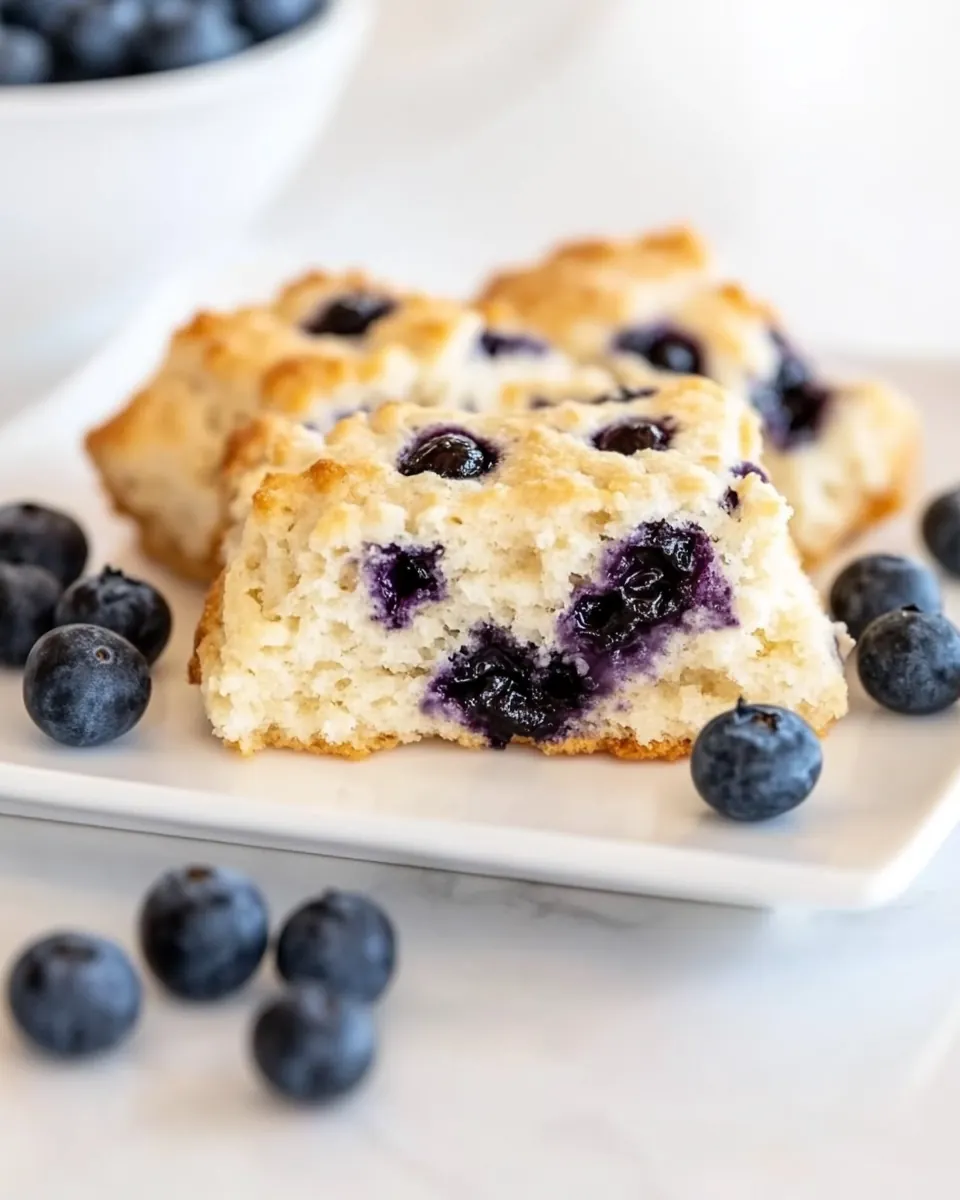
Using fresh blueberries makes a real difference. They burst as they warm, releasing bright juices that contrast the slightly sweet dough. I love that every bite can surprise you with a fruity note without overpowering the biscuit, so the balance feels homey and fresh at once.
Simple, Accessible Ingredients
The ingredient list is short and pantry friendly. You do not need anything exotic, just staples like all purpose flour, granulated sugar, and a splash of buttermilk. That makes this recipe perfect for spontaneous baking when the mood hits, and it is forgiving enough for new bakers to succeed.
Versatile Serving Options
These Blueberry Biscuits work for breakfast, brunch, or a snack with tea. Brush them with the honey butter included in the recipe to add a glossy, sweet finish, or leave them plain if you prefer to top with jam. I often serve them warm, and that warm moment transforms the ordinary into something memorable.
Reliable, Foolproof Technique
The method emphasizes a few small, intentional moves, like keeping butter cold and not overworking the dough. Those instructions protect the biscuit structure and ensure consistent results. I appreciate recipes that equip me to avoid common pitfalls, so I can focus on enjoying the process as much as the outcome.
Ingredients Overview for Blueberry Biscuits
These ingredients are chosen to create a harmonious balance between tender crumb and bright fruit bursts. The key players are the all purpose flour for structure, the cold unsalted butter for flakiness, leaveners for rise, and the fresh blueberries for juicy pockets of flavor. Together with buttermilk they form a dough that bakes into biscuits with golden tops and soft interiors.
- 11 tablespoons unsalted butter cold, divided use: Chill and cut into the dough to create flaky layers; use most for the biscuit dough and reserve some for finishing to brown the tops. Maintain the butter cold to produce steam during baking, which gives tender, layered biscuits with a rich, buttery flavor.
- 3 cups all-purpose flour: Provide bulk and structure to the biscuits by forming the gluten network when mixed with liquids; sift or whisk before combining to ensure even distribution of dry ingredients. Choose all-purpose flour for a balanced texture that yields tender yet slightly chewy biscuits.
- 1/2 cup granulated sugar: Add sweetness to the dough to balance the tartness of blueberries and enhance browning; dissolve into dry ingredients for even flavor. Moderate sugar content helps tenderize the crumb and contributes to a lightly crisp exterior.
- 2 teaspoons baking powder: Leaven the biscuits by producing gas bubbles that expand in the oven, giving lift and a light texture; combine with the flour mixture. Use as directed to ensure reliable rise and prevent dense biscuits.
- 1/2 teaspoon baking soda: Provide additional leavening and react with acidic buttermilk to create fine, tender crumb; measure carefully to avoid soapy or metallic flavors. Work together with baking powder to fine-tune rise and crumb structure.
- 1 1/4 teaspoons fine sea salt: Season the dough to enhance overall flavor and balance sweetness; disperse evenly within the dry ingredients. A fine sea salt integrates smoothly and heightens other flavors without creating gritty spots.
- 1 1/2 cups fresh blueberries: Contribute bursts of fruity flavor and moisture, punctuating each biscuit with bright, juicy pockets; fold gently into the dough to avoid crushing. Choose fresh berries for best texture and flavor, and distribute them lightly to prevent streaking of the dough.
- 1 2/3 cups cold buttermilk: Provide acidity and moisture that react with baking soda to leaven and tenderize the biscuits; keep cold to minimize butter melting before baking. Cold buttermilk promotes flaky layers and adds a subtle tang that complements the blueberries.
- 2 tablespoons unsalted butter: Melt and brush on baked biscuits to add a glossy finish and extra buttery flavor, or cut into the dough cold if divided use requires. Use as directed to enhance mouthfeel and appearance without oversaturating the dough.
- 1 tablespoon honey: Impart a mild floral sweetness when brushed on warm biscuits or mixed into finishing butter for glazing; combine with warm melted butter for easy spreading. Honey also adds a subtle depth of flavor that pairs well with blueberries.
- Pinch of salt: Enhance and balance sweetness when added sparingly to finishing glaze or butter; use a small pinch to round flavors without becoming salty. Sprinkle just enough to lift flavors and counteract excess sweetness.
The Method for Blueberry Biscuits
We are taking a hands on, sensory approach to these biscuits, moving step by step from prepping the pan to brushing warm tops with honey butter. Keep your tools nearby and your butter cold until instructed, because those small details shape the final texture and flavor.
- Preheat the oven to 400°F. Place 1 tablespoon of the butter in an 8×8-inch baking pan and place it in the oven for about 3-5 minutes while the oven preheats. Once the butter is melted, brush it across the bottom and up the sides of the pan. Set aside.: As the oven warms, the butter melts quickly and begins to shimmer, and you can hear a faint sizzle when it reaches temperature. That buttery scent is the first cue that everything is coming together. Brushing the melted butter across the bottom and up the sides creates a nonstick barrier and encourages the outer edges of the biscuits to brown evenly. A common mistake is leaving the butter in the oven too long so it browns or burns, which would impart a bitter flavor, so watch carefully during those 3 to 5 minutes.
- Cut the remaining butter into small pieces. Keep cold until you are ready to use it.: The small cold nuggets of butter should feel firm and cool to the touch, and when you press them they should not slump. Cold butter creates steam pockets during baking that lift and separate layers, so do this step quickly to prevent warming. If the butter softens during prep, pop it back into the refrigerator for a few minutes instead of continuing, because warm butter will yield greasy, dense biscuits.
- In a large bowl, whisk together the flour, sugar, baking powder, baking soda, and salt. Add the cold butter pieces; toss in the flour mixture, then use your fingertips to smash the butter into flat, irregular pieces.: The dry mix should look homogenous and pale before the butter goes in, and after you smash the butter it should resemble coarse crumbs with some larger flakes visible. That visual texture is crucial, because visible pockets of butter mean steam will form and create flakiness. When you press the mixture it should feel cool and slightly grainy. Avoid overworking with too much heat from your hands, which will make the butter merge fully into the flour and reduce flakiness.
- Add the blueberries and toss to combine. Gently stir in the buttermilk until no dry pockets of flour remain.: As you fold in the fresh blueberries , they will contrast the dry mix with cool, juicy weight. Gently incorporate the buttermilk so the dough comes together without smashing or tearing the berries. The mixture should be moist and slightly sticky, not wet and runny. If you see streaks of dry flour, keep folding just until they disappear, because overmixing activates gluten and toughens the final crumb. A frequent error is pressing or stirring vigorously, which bruises the berries and bleeds color into the dough.
- Transfer the dough to the prepared baking pan. Use a spatula to spread the dough evenly across the pan, including into the corners.: When you scrape the dough into the 8×8-inch pan , it should glide with some resistance, and the surface will look matte and slightly bumpy from the berry pockets. Press gently to distribute so the corners are filled, because uneven thickness will lead to inconsistent baking times across the pan. You want an even layer for uniform browning. Do not press so hard that you compact the dough, because that would reduce rise during baking.
- Lightly spray a bench scraper with nonstick cooking spray and use it to score the dough into 9 equal squares, but do not separate.: The scored lines should be clean and visible, and this scoring helps you portion the biscuits after baking while allowing them to bake as one unit, keeping moisture in. The surface gives a hint at structure, with visible flake edges where the butter is concentrated. Resist pulling the pieces apart before baking since separation can create drier edges that bake too quickly and brown too much.
- Bake for 40-45 minutes or until the tops of the biscuits are browned and a paring knife inserted into the center biscuit comes out clean. Let the biscuits cool for 5 minutes.: In the oven you will see the tops develop a deep golden brown and sense a warm, rich aroma of butter and sweet blueberries . The sound is quiet, but the visual cue of even browning and a clean knife test means they are done. Cooling for 5 minutes lets the interior finish setting, so the biscuits hold together when turned out. One mistake is removing them too early which leaves a gummy center, so rely on both color and the knife test.
- Prepare the honey butter: In a small microwave-safe bowl, combine the butter, honey, and salt. Microwave until the butter is melted, 30-60 seconds, and stir to combine.: In a small microwave safe bowl, combine the butter, honey, and salt. Microwave until the butter is melted, 30 to 60 seconds, and stir to combine : When the butter melts, it releases a warm, toasted scent that blends with the floral honey. Stirring creates a glossy mixture that will glaze the biscuits. Be careful not to overheat in the microwave which can make the honey separate; short bursts and stirring prevent that. If your microwave runs hot, reduce the time and stir more frequently to combine evenly.
- After the biscuits have cooled for 5 minutes, turn them out onto a baking sheet, then flip them back onto a wire rack (they should be top-side up again). Brush the tops with all of the honey butter. Cool for an additional 10 minutes before using a serrated knife to cut the biscuits along the scored marks. Serve warm.: The act of turning them out reveals the browned bottoms and ensures the tops remain facing up after flipping. Brushing the warm tops lets the honey butter soak in slightly, creating a glossy sheen and added flavor. The honey will sit in small crevices, and the aroma becomes irresistible. Avoid applying the glaze while the biscuits are piping hot out of the oven, since extremely high heat can cause the butter to run off.
- Cool for an additional 10 minutes before using a serrated knife to cut the biscuits along the scored marks. Serve warm: As they cool, the biscuits set fully and the juices from the blueberries redistribute, so cutting yields clean squares without tearing. The crumb should be tender and moist with visible fruit pockets. Serve when still warm for the best contrast of textures. A common slip is slicing too soon, which can crush the structure and make crumbly edges.
Recipe Tips about Blueberry Biscuits
These tips help you get consistent results and troubleshoot common issues. I include practical, small adjustments that make a noticeable difference in texture, flavor, and appearance when baking Blueberry Biscuits.
- Keep butter cold, and if your kitchen is warm, chill the butter pieces on a tray before using so they stay firm as you work, creating better steam pockets during baking.
- Measure flour carefully, because even slight variations can change the dough consistency; spoon and level or use a scale for accuracy to avoid overly dense biscuits.
- Handle berries gently, folding them in with a spatula just until dispersed to prevent bruising and color bleed that can make the dough overly wet.
- Use fresh leaveners, testing baking powder and baking soda by the smell and age; stale leaveners will give weak rise and denser texture.
- Score but do not separate, which keeps moisture in as the biscuits bake, then cut after baking for clean edges and evenly portioned squares.
Accompaniments for Blueberry Biscuits
These biscuits pair wonderfully with light accompaniments and fit many occasions, from casual breakfasts to festive brunches. Below are thoughtful serving ideas, storage guidance, and seasonal pairings that help you present these biscuits at their best.
- Serve warm with honey butter, brushing the tops just after baking for a glossy, sweet finish that enhances the fruit without overpowering it.
- Offer alongside fresh fruit, such as a simple bowl of berries or sliced stone fruit to emphasize the seasonal nature of the recipe and add freshness to the plate.
- Make it for brunch occasions, they fit perfectly on a brunch spread with tea and coffee, or as a sweet complement to savory mains for a varied table.
- Storage and reheating, keep leftovers in an airtight container at room temperature for up to two days, and reheat in a warm oven to restore the flakiness and warmth before serving.
- Seasonal pairings, these shine in summer when berries are at peak flavor, but they also work for spring or early fall markets when local fruit is abundant.
- Occasion suggestions, serve them for relaxed family breakfasts, neighborhood potlucks, or holiday brunches where a shareable, warm baked good is welcome.
FAQ
Conclusion
Blueberry Biscuits stand out for their tender, flaky texture and bright pockets of fruit that make mornings feel special. I love how a few careful choices like cold butter and gentle folding transform simple pantry staples into something memorable. Give them a try on a weekend morning or for a casual brunch with friends, and enjoy the way warm biscuits brushed with honey butter bring people together. These biscuits are approachable, rewarding, and a delightful way to celebrate seasonal berries in every bite.
Blueberry Biscuits
Equipment
- 8×8-inch pan
- Basting/Pastry Brush
- Measuring Cups and Spoons
Ingredients
- 11 tablespoons unsalted butter cold, divided use Chill and cut into the dough to create flaky layers; use most for the biscuit dough and reserve some for finishing to brown the tops. Maintain the butter cold to produce steam during baking, which gives tender, layered biscuits with a rich, buttery flavor.
- 3 cups all-purpose flour Provide bulk and structure to the biscuits by forming the gluten network when mixed with liquids; sift or whisk before combining to ensure even distribution of dry ingredients. Choose all-purpose flour for a balanced texture that yields tender yet slightly chewy biscuits.
- 1/2 cup granulated sugar Add sweetness to the dough to balance the tartness of blueberries and enhance browning; dissolve into dry ingredients for even flavor. Moderate sugar content helps tenderize the crumb and contributes to a lightly crisp exterior.
- 2 teaspoons baking powder Leaven the biscuits by producing gas bubbles that expand in the oven, giving lift and a light texture; combine with the flour mixture. Use as directed to ensure reliable rise and prevent dense biscuits.
- 1/2 teaspoon baking soda Provide additional leavening and react with acidic buttermilk to create fine, tender crumb; measure carefully to avoid soapy or metallic flavors. Work together with baking powder to fine-tune rise and crumb structure.
- 1 1/4 teaspoons fine sea salt Season the dough to enhance overall flavor and balance sweetness; disperse evenly within the dry ingredients. A fine sea salt integrates smoothly and heightens other flavors without creating gritty spots.
- 1 1/2 cups fresh blueberries Contribute bursts of fruity flavor and moisture, punctuating each biscuit with bright, juicy pockets; fold gently into the dough to avoid crushing. Choose fresh berries for best texture and flavor, and distribute them lightly to prevent streaking of the dough.
- 1 2/3 cups cold buttermilk Provide acidity and moisture that react with baking soda to leaven and tenderize the biscuits; keep cold to minimize butter melting before baking. Cold buttermilk promotes flaky layers and adds a subtle tang that complements the blueberries.
- 2 tablespoons unsalted butter Melt and brush on baked biscuits to add a glossy finish and extra buttery flavor, or cut into the dough cold if divided use requires. Use as directed to enhance mouthfeel and appearance without oversaturating the dough.
- 1 tablespoon honey Impart a mild floral sweetness when brushed on warm biscuits or mixed into finishing butter for glazing; combine with warm melted butter for easy spreading. Honey also adds a subtle depth of flavor that pairs well with blueberries.
- Pinch of salt Enhance and balance sweetness when added sparingly to finishing glaze or butter; use a small pinch to round flavors without becoming salty. Sprinkle just enough to lift flavors and counteract excess sweetness.
Instructions
- Preheat the oven to 400°F. Place 1 tablespoon of the butter in an 8×8-inch baking pan and place it in the oven for about 3-5 minutes while the oven preheats. Once the butter is melted, brush it across the bottom and up the sides of the pan. Set aside.: As the oven warms, the butter melts quickly and begins to shimmer, and you can hear a faint sizzle when it reaches temperature. That buttery scent is the first cue that everything is coming together. Brushing the melted butter across the bottom and up the sides creates a nonstick barrier and encourages the outer edges of the biscuits to brown evenly. A common mistake is leaving the butter in the oven too long so it browns or burns, which would impart a bitter flavor, so watch carefully during those 3 to 5 minutes.
- Cut the remaining butter into small pieces. Keep cold until you are ready to use it.: The small cold nuggets of butter should feel firm and cool to the touch, and when you press them they should not slump. Cold butter creates steam pockets during baking that lift and separate layers, so do this step quickly to prevent warming. If the butter softens during prep, pop it back into the refrigerator for a few minutes instead of continuing, because warm butter will yield greasy, dense biscuits.
- In a large bowl, whisk together the flour, sugar, baking powder, baking soda, and salt. Add the cold butter pieces; toss in the flour mixture, then use your fingertips to smash the butter into flat, irregular pieces.: The dry mix should look homogenous and pale before the butter goes in, and after you smash the butter it should resemble coarse crumbs with some larger flakes visible. That visual texture is crucial, because visible pockets of butter mean steam will form and create flakiness. When you press the mixture it should feel cool and slightly grainy. Avoid overworking with too much heat from your hands, which will make the butter merge fully into the flour and reduce flakiness.
- Add the blueberries and toss to combine. Gently stir in the buttermilk until no dry pockets of flour remain.: As you fold in the fresh blueberries , they will contrast the dry mix with cool, juicy weight. Gently incorporate the buttermilk so the dough comes together without smashing or tearing the berries. The mixture should be moist and slightly sticky, not wet and runny. If you see streaks of dry flour, keep folding just until they disappear, because overmixing activates gluten and toughens the final crumb. A frequent error is pressing or stirring vigorously, which bruises the berries and bleeds color into the dough.
- Transfer the dough to the prepared baking pan. Use a spatula to spread the dough evenly across the pan, including into the corners.: When you scrape the dough into the 8×8-inch pan , it should glide with some resistance, and the surface will look matte and slightly bumpy from the berry pockets. Press gently to distribute so the corners are filled, because uneven thickness will lead to inconsistent baking times across the pan. You want an even layer for uniform browning. Do not press so hard that you compact the dough, because that would reduce rise during baking.
- Lightly spray a bench scraper with nonstick cooking spray and use it to score the dough into 9 equal squares, but do not separate.: The scored lines should be clean and visible, and this scoring helps you portion the biscuits after baking while allowing them to bake as one unit, keeping moisture in. The surface gives a hint at structure, with visible flake edges where the butter is concentrated. Resist pulling the pieces apart before baking since separation can create drier edges that bake too quickly and brown too much.
- Bake for 40-45 minutes or until the tops of the biscuits are browned and a paring knife inserted into the center biscuit comes out clean. Let the biscuits cool for 5 minutes.: In the oven you will see the tops develop a deep golden brown and sense a warm, rich aroma of butter and sweet blueberries . The sound is quiet, but the visual cue of even browning and a clean knife test means they are done. Cooling for 5 minutes lets the interior finish setting, so the biscuits hold together when turned out. One mistake is removing them too early which leaves a gummy center, so rely on both color and the knife test.
- Prepare the honey butter: In a small microwave-safe bowl, combine the butter, honey, and salt. Microwave until the butter is melted, 30-60 seconds, and stir to combine.: In a small microwave safe bowl, combine the butter, honey, and salt. Microwave until the butter is melted, 30 to 60 seconds, and stir to combine : When the butter melts, it releases a warm, toasted scent that blends with the floral honey. Stirring creates a glossy mixture that will glaze the biscuits. Be careful not to overheat in the microwave which can make the honey separate; short bursts and stirring prevent that. If your microwave runs hot, reduce the time and stir more frequently to combine evenly.
- After the biscuits have cooled for 5 minutes, turn them out onto a baking sheet, then flip them back onto a wire rack (they should be top-side up again). Brush the tops with all of the honey butter. Cool for an additional 10 minutes before using a serrated knife to cut the biscuits along the scored marks. Serve warm.: The act of turning them out reveals the browned bottoms and ensures the tops remain facing up after flipping. Brushing the warm tops lets the honey butter soak in slightly, creating a glossy sheen and added flavor. The honey will sit in small crevices, and the aroma becomes irresistible. Avoid applying the glaze while the biscuits are piping hot out of the oven, since extremely high heat can cause the butter to run off.
- Cool for an additional 10 minutes before using a serrated knife to cut the biscuits along the scored marks. Serve warm: As they cool, the biscuits set fully and the juices from the blueberries redistribute, so cutting yields clean squares without tearing. The crumb should be tender and moist with visible fruit pockets. Serve when still warm for the best contrast of textures. A common slip is slicing too soon, which can crush the structure and make crumbly edges.
Notes
- Keep butter cold, and if your kitchen is warm, chill the butter pieces on a tray before using so they stay firm as you work, creating better steam pockets during baking.
- Measure flour carefully, because even slight variations can change the dough consistency; spoon and level or use a scale for accuracy to avoid overly dense biscuits.
- Handle berries gently, folding them in with a spatula just until dispersed to prevent bruising and color bleed that can make the dough overly wet.
- Use fresh leaveners, testing baking powder and baking soda by the smell and age; stale leaveners will give weak rise and denser texture.
- Score but do not separate, which keeps moisture in as the biscuits bake, then cut after baking for clean edges and evenly portioned squares.