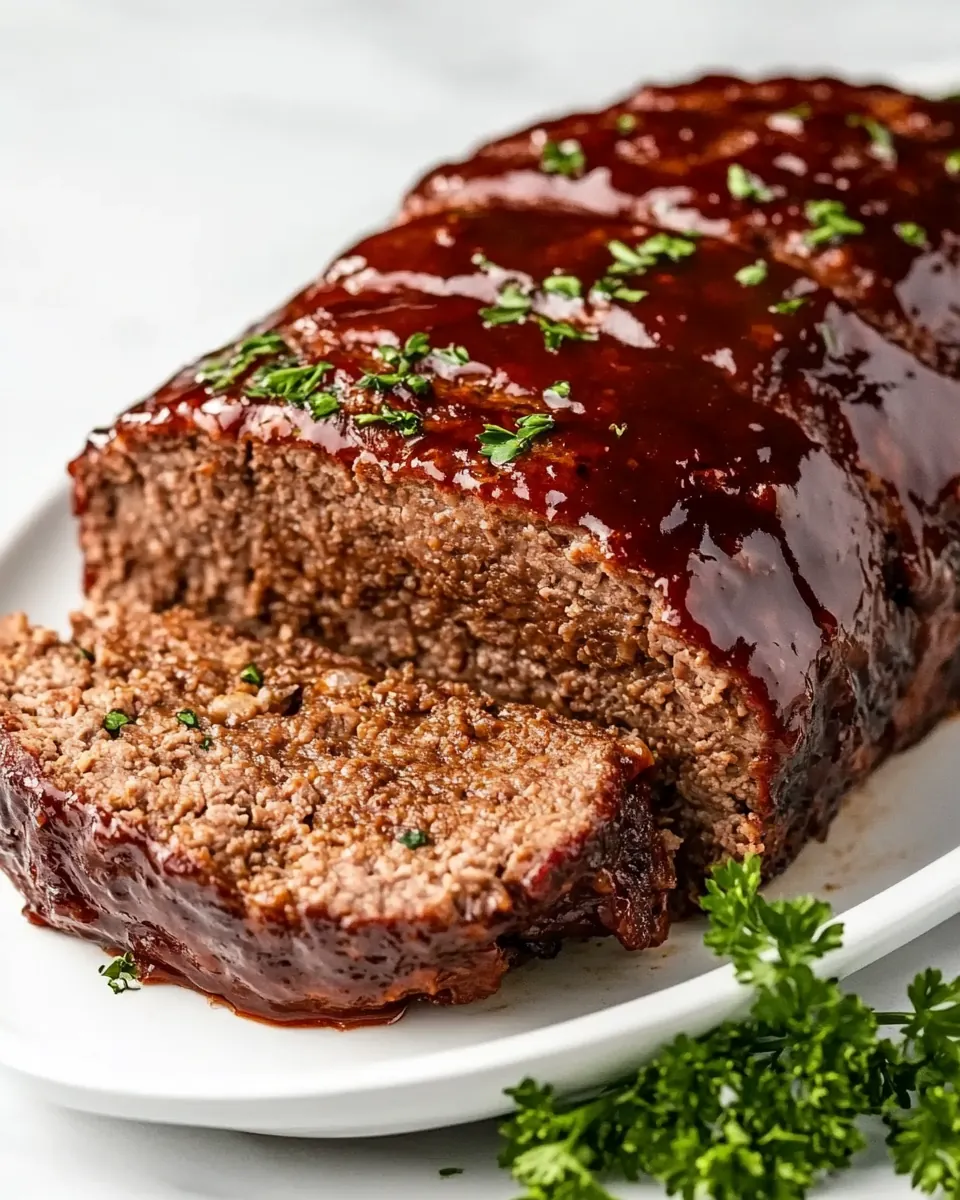
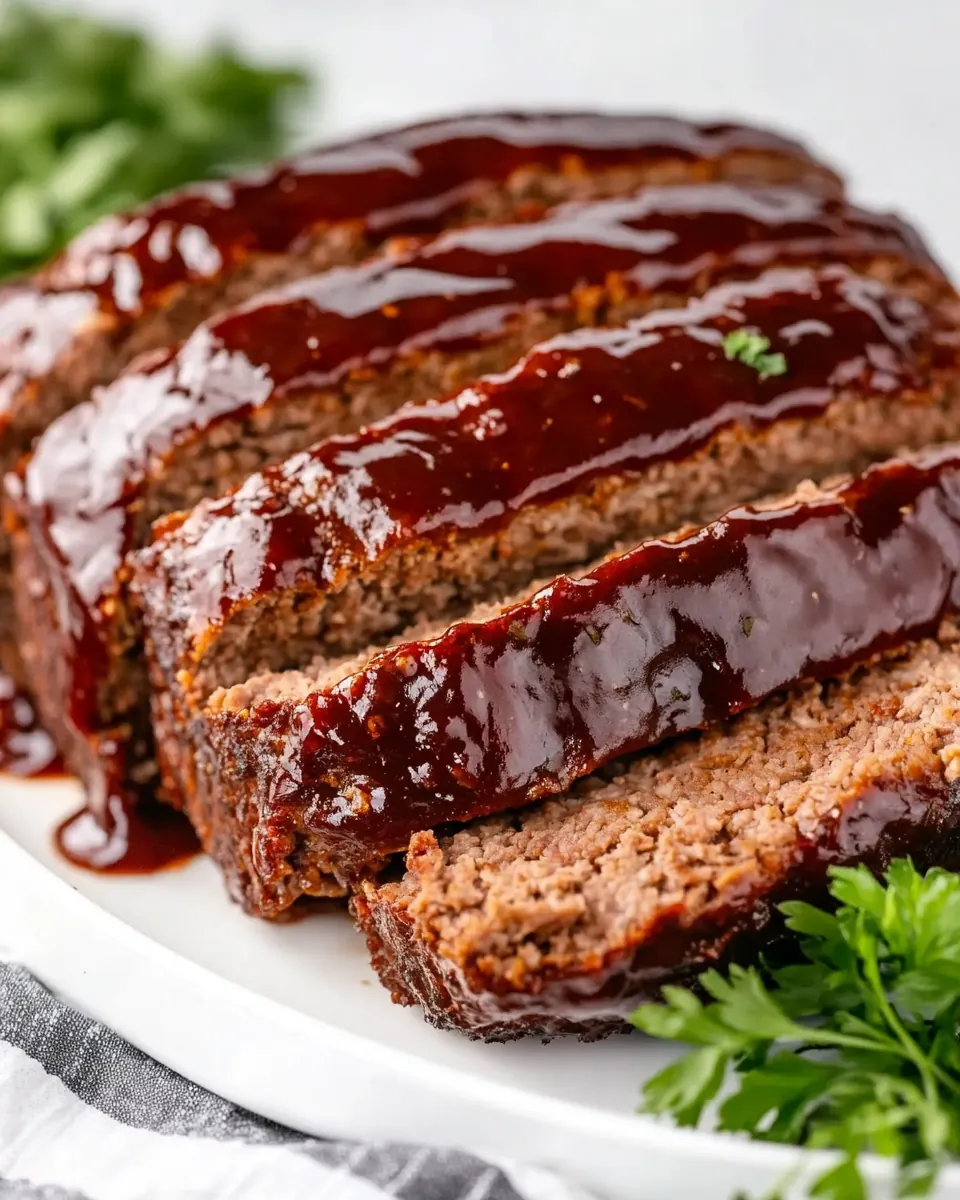
Air Fryer Meatloaf
Air Fryer Meatloaf has been my secret for busy weeknights when I want something comforting without the fuss. I remember the first time I tried shaping a meatloaf to fit my air fryer basket, nervously tucking foil beneath it and hoping the top would caramelize just right. That trial taught me to trust the gadget, and now I turn to this recipe whenever I want hands on flavor with minimal babysitting.
Over the years I’ve adjusted the ratio of breadcrumbs to milk and learned small tricks that make a big difference. The glaze is simple yet transformative, and while the aroma fills the kitchen I like to set the table and let the house slow down for a cozy family meal. This recipe is honest, straightforward, and built for real life, not for show. Give it a go, and you’ll see why I keep coming back to this easy, reliable classic.
Recipe Snapshot
50 mins
10 mins
40 mins
Medium
300 kcal
American
Gluten-Free, Low FODMAP
Dinner
Air Fryer, Large bowl, Instant read thermometer, Small bowl, Piece of foil
The Appeal of This Air Fryer Meatloaf
Fast weeknight comfort made easier
I love how Air Fryer Meatloaf turns a time honored dish into something that comes together quickly. The air fryer trims active hands on time, while preserving that homey, tender interior we all crave.
Deep flavor without fuss
The combination of ground beef, Worcestershire sauce, and the glaze gives you savory, slightly sweet notes. I appreciate how tiny additions, like a spoonful of Dijon mustard, can sharpen the profile without complicating the process.
Reliable texture every time
I get consistent browning and a nicely set crust with the air fryer, which means you avoid the one pitfall of dense meatloaf, overworking the mix. When you follow the method, you get a loaf that slices cleanly yet stays moist.
Kid friendly and versatile
My family responds to the familiar flavors, especially the ketchup glaze. You can serve it with simple sides and everyone feels satisfied, which is a win on busy evenings.
Small batch friendly
Because this recipe fits an air fryer basket, it’s perfect for households that don’t want a giant loaf. I appreciate making exactly what we need, and leftovers reheat beautifully.
Key Ingredients for Air Fryer Meatloaf
These ingredients work together to balance moisture, binding, and savory depth. The ground beef provides the meaty base while the breadcrumbs and milk create a tender crumb. A few seasonings and pantry staples bring complexity and lift, and the glaze seals in flavor and gives a glossy finish that makes every slice feel special.
- 1 1/2 pounds lean ground beef (or meatloaf mix): Provide a hearty, protein-rich base that gives the meatloaf structure and savory flavor; combine thoroughly with other ingredients to ensure even texture and moisture throughout the loaf. Use lean ground beef or a mix to balance fat for juiciness while preventing excessive greasiness during air frying.
- 2 eggs: Bind the mixture together and add moisture while contributing a tender crumb; beat lightly before mixing to incorporate air for a slightly lighter meatloaf. Ensure eggs are evenly distributed so the loaf holds its shape during cooking and slicing.
- 1 cup Italian bread crumbs: Absorb moisture and provide body to the meatloaf, preventing it from becoming too dense or falling apart; choose Italian-style crumbs for added herb and seasoning notes. Measure accurately so crumbs soak up milk and juices without making the loaf dry.
- 1/2 cup milk: Soften the bread crumbs and add richness, helping to keep the meatloaf moist and tender as it cooks; warm or room-temperature milk integrates best for even hydration. Adjust amount slightly if using very absorbent crumbs to maintain ideal texture.
- 1 teaspoon salt: Season the meat mixture to enhance overall savory balance and bring out natural beef flavors; distribute salt evenly to avoid concentrated pockets of seasoning. Be mindful of cumulative salt from other condiments to prevent oversalting.
- 1 teaspoon pepper: Add a mild, spicy note and depth to the meatloaf while complementing other seasonings; grind freshly if possible for brighter flavor. Use the pepper sparingly and taste cautiously because other components contribute additional heat.
- 1 tablespoon Worcestershire sauce: Introduce umami and a tangy, savory complexity that deepens overall flavor profile; mix well into the meat to ensure its concentrated flavor permeates the loaf. A small amount goes a long way, so balance with other wet seasonings.
- 1 tablespoon Dijon mustard: Contribute a sharp, slightly tangy flavor that lifts the richness of the meat and helps bind ingredients; choose Dijon for its sharper profile compared with yellow mustard. Whisk briefly into wet ingredients to distribute its flavor evenly.
- 1 tablespoon ketchup: Add a touch of sweet and tangy glaze flavor when incorporated into the mixture or brushed on top; ketchup contributes acidity and moisture that complements beef. Use sparingly inside the loaf to maintain desired sweetness levels.
- 2 teaspoons onion powder: Provide a concentrated savory and slightly sweet onion flavor without adding moisture that fresh onions would; sprinkle and mix in for uniform seasoning. Use as part of the dry seasoning blend to enhance overall depth.
- 1 teaspoon garlic powder: Offer a warm, aromatic garlic note in a convenient, shelf-stable form that seasons throughout the loaf; integrate with other dry spices to ensure even distribution. Adjust quantity to taste, since powdered garlic can be more subtle than fresh.
- 1/2 cup ketchup: Create a glossy, sweet-tangy topping that caramelizes slightly in the air fryer, adding visual appeal and flavor contrast to the savory loaf. Spread evenly over the shaped meatloaf during the final stage of cooking for best glaze results.
- 2 tablespoons brown sugar: Introduce molasses-like sweetness and depth to balance the ketchup glaze, promoting caramelization and a rich finish; mix with ketchup and other glaze ingredients before glazing. Control amount to avoid excessive sweetness overpowering the meat's savory notes.
- 1 tablespoon Worcestershire sauce: Enhance the glaze with additional savory, umami complexity, tying together sweet and tangy elements; add to the topping mixture to deepen flavor without altering texture. Use as a finishing touch to boost overall savory balance.
Directions for Air Fryer Meatloaf
These directions are meant to be friendly and reassuring. As you go, pay attention to the aroma and the visual cues, and you will know when the loaf is done. I like to move confidently, but if you feel unsure, pause and check the internal temperature rather than guessing by time alone.
- Preheat the air fryer to 350 ℉.: Warmth fills the kitchen with a faint, comforting scent even before the loaf goes in, and starting with a properly heated air fryer ensures the exterior begins to set at once, promoting even browning. You should hear a subtle hum from the unit as it reaches temperature, and if your model has a precise display, wait until it indicates readiness. A common mistake is placing the loaf into a cold fryer, which can cause uneven cooking and soggy edges, so resist the urge to skip this step.
- Mix all the ingredients for the meatloaf in a large bowl. Shape into a loaf shape that will fit into your air fryer basket. Place the loaf on a piece of foil and place it in the air fryer.: As you combine the ground beef , eggs , breadcrumbs , milk , and seasonings, notice the texture change from separate parts to a cohesive mixture, slightly tacky but not wet. The smell will be savory and promising, with hints of the Worcestershire sauce and Dijon mustard lifting the meat's aroma. Use gentle pressing motions to combine, because overmixing releases proteins that can make the loaf dense; a frequent error is vigorous stirring, which tightens the texture, so stop once ingredients are evenly distributed.
- Cook for 35 minutes before adding the ketchup glaze.: Form the mixture into a compact loaf that matches your basket size, smoothing the top so the glaze will sit evenly. The loaf should feel firm, but still soft when pressed, and shaping with slightly tapered ends helps heat circulate. If it is too wet and saggy, it may fall apart, so an important tip is to check consistency before shaping and add a tablespoon more breadcrumbs if needed.
- While the meatloaf is cooking, mix together the remaining ketchup, brown sugar, and Worcestershire sauce in a small bowl.: Lining with foil makes cleanup easier and protects the bottom from sticking while allowing the hot air to crisp the surface. You will see the meat's exterior begin to firm almost immediately, and the foil may discolor slightly as juices render. Avoid sealing the foil into a packet, because that traps steam and prevents browning; the foil should lie flat under the loaf, not wrapped up the sides.
- Top the meatloaf with the sauce, spreading the sauce evenly all over the top, and continue cooking for an additional 5 minutes or until the glaze is set and the meatloaf has reached an internal temperature of 165 ℉.: During this phase the loaf will release a savory aroma, and the top will darken to a warm brown. Listen for a quiet sizzle as fat renders and juices collect at the base. Resist the urge to open the basket repeatedly, because frequent interruptions lower temperature and extend cooking, so only check briefly if necessary.
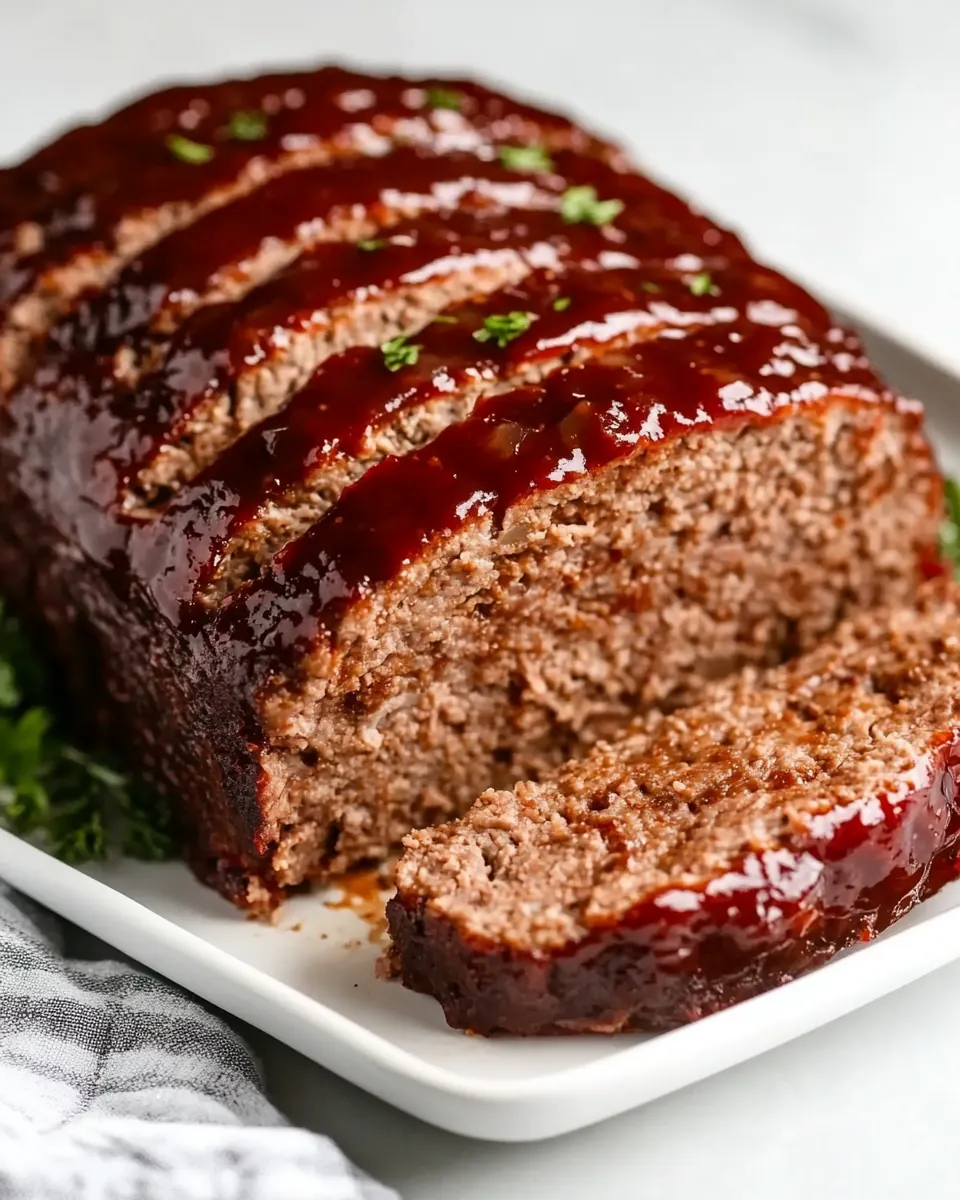
- Let the meatloaf rest for about 15 minutes before slicing it. Serve with mashed potatoes and green beans.: The glaze will taste bright, sweet, and tangy, and whisking it smooth melds the flavors into a glossy, spreadable topping. Test a dab on a spoon to ensure the balance feels right, because an overly sweet glaze can overshadow the meat, while too much Worcestershire can feel intense. If the glaze seems too thin, a brief simmer on the stove reduces it slightly, though this is rarely necessary for the small quantity used here.
- Top the meatloaf with the sauce, spreading the sauce evenly all over the top, and continue cooking for an additional 5 minutes or until the glaze is set and the meatloaf has reached an internal temperature of 165 ℉: Spreading the glaze releases a shiny scent as sugars begin to caramelize, and after a few minutes you will notice the edges turning sticky and slightly darker. Using an instant read thermometer is the surest way to confirm doneness, because visual cues alone can mislead; undercooking is the main risk, so check the center, aiming for 165 ℉ . If the top browns too fast, tent a small piece of foil loosely to prevent burning while the center finishes.
- Let the meatloaf rest for about 15 minutes before slicing it: Resting allows juices to redistribute, yielding slices that hold together and remain moist, and you will detect a faint, warm aroma as you wait. The loaf firms slightly while cooling, making clean slicing easier, and rushing this step often causes juices to spill out, leaving a drier slice. Plan this pause into your meal timing, because patience here rewards you with better texture and presentation.
- Serve with mashed potatoes and green beans: The combination of creamy mashed potatoes and crisp green beans complements the savory loaf, creating a balanced plate of textures and flavors. The warmth of the meat contrasts nicely with the bright snap of the vegetables, and the glaze on the loaf pairs especially well with buttery sides. Avoid overpowering the meat with heavy sauces, because the glaze and loaf flavors are delicate yet complete on their own.
Helpful Hints

I like to share practical notes that save time and improve results when you make Air Fryer Meatloaf. These pointers come from repeated tests and from reading models manuals, because air fryers vary in how they circulate heat.
- Check your manual first: Every air fryer is slightly different, so consult the manufacturer’s guidance for basket size and recommended temperatures to avoid overcooking or placing a loaf that is too tall.
- Use room temperature eggs and milk: Ingredients that are closer to room temperature incorporate more evenly, which promotes a uniform texture and reduces the chance of cold pockets that affect cooking time.
- Mix gently by hand: Combining with your hands helps you feel when the ingredients are evenly dispersed, but stop once they are combined to prevent a dense loaf.
- Form the loaf to allow airflow: Shape the loaf so hot air can circulate around it, not pressed flat against the basket sides, for even browning and consistent internal cooking.
- Watch the glaze timing: Apply the glaze late in cooking so sugars caramelize without burning, and if the top colors too fast, add foil protection and finish cooking until the center reaches temperature.
How to Enjoy Air Fryer Meatloaf
This loaf is versatile and satisfying, ideal for a cozy family dinner or a relaxed weekend meal. Below are ways to serve it, pairings to try, and storage suggestions so you can get the most from every batch.
- Classic dinner plate: Serve slices with creamy mashed potatoes and steamed green beans for a traditional, balanced meal that highlights the loaf’s savory glaze.
- Comfort food night: Pair with buttery dinner rolls and a simple salad for a comforting spread that feels like home, ideal for cool evenings in winter.
- Leftover sandwiches: Cool slices and refrigerate, then layer on bread with a little extra ketchup for a hearty sandwich the next day.
- Make ahead: The meatloaf mixture can be formed, covered, and refrigerated for a few hours before cooking if you want to prep in advance; this makes weeknight cooking smoother.
- Storage: Refrigerate leftovers in an airtight container for up to four days, or freeze slices for up to three months. Thaw overnight in the refrigerator before reheating gently in the oven or air fryer to preserve texture.
- Occasions: Works well for family dinners, casual gatherings, or when you want a satisfying, hands off main in winter months when hearty meals are welcome.
FAQ
Conclusion
Air Fryer Meatloaf stands out because it marries classic comfort flavors with a fast, modern cooking method, delivering a tender interior and a glossy, caramelized glaze. Give it a try on a busy weeknight, and you may find it becomes a reliable family favorite. The recipe is forgiving, adaptable, and satisfying, offering a straightforward way to enjoy a beloved dish with less time and effort, while still hitting all the familiar notes we love in a meatloaf.
Air Fryer Meatloaf
Equipment
- Air Fryer
- Large Bowl
- Instant read thermometer
- Small Bowl
- Piece of foil
Ingredients
- 1 1/2 pounds lean ground beef (or meatloaf mix) Provide a hearty, protein-rich base that gives the meatloaf structure and savory flavor; combine thoroughly with other ingredients to ensure even texture and moisture throughout the loaf. Use lean ground beef or a mix to balance fat for juiciness while preventing excessive greasiness during air frying.
- 2 eggs Bind the mixture together and add moisture while contributing a tender crumb; beat lightly before mixing to incorporate air for a slightly lighter meatloaf. Ensure eggs are evenly distributed so the loaf holds its shape during cooking and slicing.
- 1 cup Italian bread crumbs Absorb moisture and provide body to the meatloaf, preventing it from becoming too dense or falling apart; choose Italian-style crumbs for added herb and seasoning notes. Measure accurately so crumbs soak up milk and juices without making the loaf dry.
- 1/2 cup milk Soften the bread crumbs and add richness, helping to keep the meatloaf moist and tender as it cooks; warm or room-temperature milk integrates best for even hydration. Adjust amount slightly if using very absorbent crumbs to maintain ideal texture.
- 1 teaspoon salt Season the meat mixture to enhance overall savory balance and bring out natural beef flavors; distribute salt evenly to avoid concentrated pockets of seasoning. Be mindful of cumulative salt from other condiments to prevent oversalting.
- 1 teaspoon pepper Add a mild, spicy note and depth to the meatloaf while complementing other seasonings; grind freshly if possible for brighter flavor. Use the pepper sparingly and taste cautiously because other components contribute additional heat.
- 1 tablespoon Worcestershire sauce Introduce umami and a tangy, savory complexity that deepens overall flavor profile; mix well into the meat to ensure its concentrated flavor permeates the loaf. A small amount goes a long way, so balance with other wet seasonings.
- 1 tablespoon Dijon mustard Contribute a sharp, slightly tangy flavor that lifts the richness of the meat and helps bind ingredients; choose Dijon for its sharper profile compared with yellow mustard. Whisk briefly into wet ingredients to distribute its flavor evenly.
- 1 tablespoon ketchup Add a touch of sweet and tangy glaze flavor when incorporated into the mixture or brushed on top; ketchup contributes acidity and moisture that complements beef. Use sparingly inside the loaf to maintain desired sweetness levels.
- 2 teaspoons onion powder Provide a concentrated savory and slightly sweet onion flavor without adding moisture that fresh onions would; sprinkle and mix in for uniform seasoning. Use as part of the dry seasoning blend to enhance overall depth.
- 1 teaspoon garlic powder Offer a warm, aromatic garlic note in a convenient, shelf-stable form that seasons throughout the loaf; integrate with other dry spices to ensure even distribution. Adjust quantity to taste, since powdered garlic can be more subtle than fresh.
- 1/2 cup ketchup Create a glossy, sweet-tangy topping that caramelizes slightly in the air fryer, adding visual appeal and flavor contrast to the savory loaf. Spread evenly over the shaped meatloaf during the final stage of cooking for best glaze results.
- 2 tablespoons brown sugar Introduce molasses-like sweetness and depth to balance the ketchup glaze, promoting caramelization and a rich finish; mix with ketchup and other glaze ingredients before glazing. Control amount to avoid excessive sweetness overpowering the meat's savory notes.
- 1 tablespoon Worcestershire sauce Enhance the glaze with additional savory, umami complexity, tying together sweet and tangy elements; add to the topping mixture to deepen flavor without altering texture. Use as a finishing touch to boost overall savory balance.
Instructions
- Preheat the air fryer to 350 ℉.: Warmth fills the kitchen with a faint, comforting scent even before the loaf goes in, and starting with a properly heated air fryer ensures the exterior begins to set at once, promoting even browning. You should hear a subtle hum from the unit as it reaches temperature, and if your model has a precise display, wait until it indicates readiness. A common mistake is placing the loaf into a cold fryer, which can cause uneven cooking and soggy edges, so resist the urge to skip this step.
- Mix all the ingredients for the meatloaf in a large bowl. Shape into a loaf shape that will fit into your air fryer basket. Place the loaf on a piece of foil and place it in the air fryer.: As you combine the ground beef , eggs , breadcrumbs , milk , and seasonings, notice the texture change from separate parts to a cohesive mixture, slightly tacky but not wet. The smell will be savory and promising, with hints of the Worcestershire sauce and Dijon mustard lifting the meat's aroma. Use gentle pressing motions to combine, because overmixing releases proteins that can make the loaf dense; a frequent error is vigorous stirring, which tightens the texture, so stop once ingredients are evenly distributed.
- Cook for 35 minutes before adding the ketchup glaze.: Form the mixture into a compact loaf that matches your basket size, smoothing the top so the glaze will sit evenly. The loaf should feel firm, but still soft when pressed, and shaping with slightly tapered ends helps heat circulate. If it is too wet and saggy, it may fall apart, so an important tip is to check consistency before shaping and add a tablespoon more breadcrumbs if needed.
- While the meatloaf is cooking, mix together the remaining ketchup, brown sugar, and Worcestershire sauce in a small bowl.: Lining with foil makes cleanup easier and protects the bottom from sticking while allowing the hot air to crisp the surface. You will see the meat's exterior begin to firm almost immediately, and the foil may discolor slightly as juices render. Avoid sealing the foil into a packet, because that traps steam and prevents browning; the foil should lie flat under the loaf, not wrapped up the sides.
- Top the meatloaf with the sauce, spreading the sauce evenly all over the top, and continue cooking for an additional 5 minutes or until the glaze is set and the meatloaf has reached an internal temperature of 165 ℉.: During this phase the loaf will release a savory aroma, and the top will darken to a warm brown. Listen for a quiet sizzle as fat renders and juices collect at the base. Resist the urge to open the basket repeatedly, because frequent interruptions lower temperature and extend cooking, so only check briefly if necessary.
- Let the meatloaf rest for about 15 minutes before slicing it. Serve with mashed potatoes and green beans.: The glaze will taste bright, sweet, and tangy, and whisking it smooth melds the flavors into a glossy, spreadable topping. Test a dab on a spoon to ensure the balance feels right, because an overly sweet glaze can overshadow the meat, while too much Worcestershire can feel intense. If the glaze seems too thin, a brief simmer on the stove reduces it slightly, though this is rarely necessary for the small quantity used here.
- Top the meatloaf with the sauce, spreading the sauce evenly all over the top, and continue cooking for an additional 5 minutes or until the glaze is set and the meatloaf has reached an internal temperature of 165 ℉: Spreading the glaze releases a shiny scent as sugars begin to caramelize, and after a few minutes you will notice the edges turning sticky and slightly darker. Using an instant read thermometer is the surest way to confirm doneness, because visual cues alone can mislead; undercooking is the main risk, so check the center, aiming for 165 ℉ . If the top browns too fast, tent a small piece of foil loosely to prevent burning while the center finishes.
- Let the meatloaf rest for about 15 minutes before slicing it: Resting allows juices to redistribute, yielding slices that hold together and remain moist, and you will detect a faint, warm aroma as you wait. The loaf firms slightly while cooling, making clean slicing easier, and rushing this step often causes juices to spill out, leaving a drier slice. Plan this pause into your meal timing, because patience here rewards you with better texture and presentation.
- Serve with mashed potatoes and green beans: The combination of creamy mashed potatoes and crisp green beans complements the savory loaf, creating a balanced plate of textures and flavors. The warmth of the meat contrasts nicely with the bright snap of the vegetables, and the glaze on the loaf pairs especially well with buttery sides. Avoid overpowering the meat with heavy sauces, because the glaze and loaf flavors are delicate yet complete on their own.
Notes
- Check your manual first: Every air fryer is slightly different, so consult the manufacturer's guidance for basket size and recommended temperatures to avoid overcooking or placing a loaf that is too tall.
- Use room temperature eggs and milk: Ingredients that are closer to room temperature incorporate more evenly, which promotes a uniform texture and reduces the chance of cold pockets that affect cooking time.
- Mix gently by hand: Combining with your hands helps you feel when the ingredients are evenly dispersed, but stop once they are combined to prevent a dense loaf.
- Form the loaf to allow airflow: Shape the loaf so hot air can circulate around it, not pressed flat against the basket sides, for even browning and consistent internal cooking.
- Watch the glaze timing: Apply the glaze late in cooking so sugars caramelize without burning, and if the top colors too fast, add foil protection and finish cooking until the center reaches temperature.