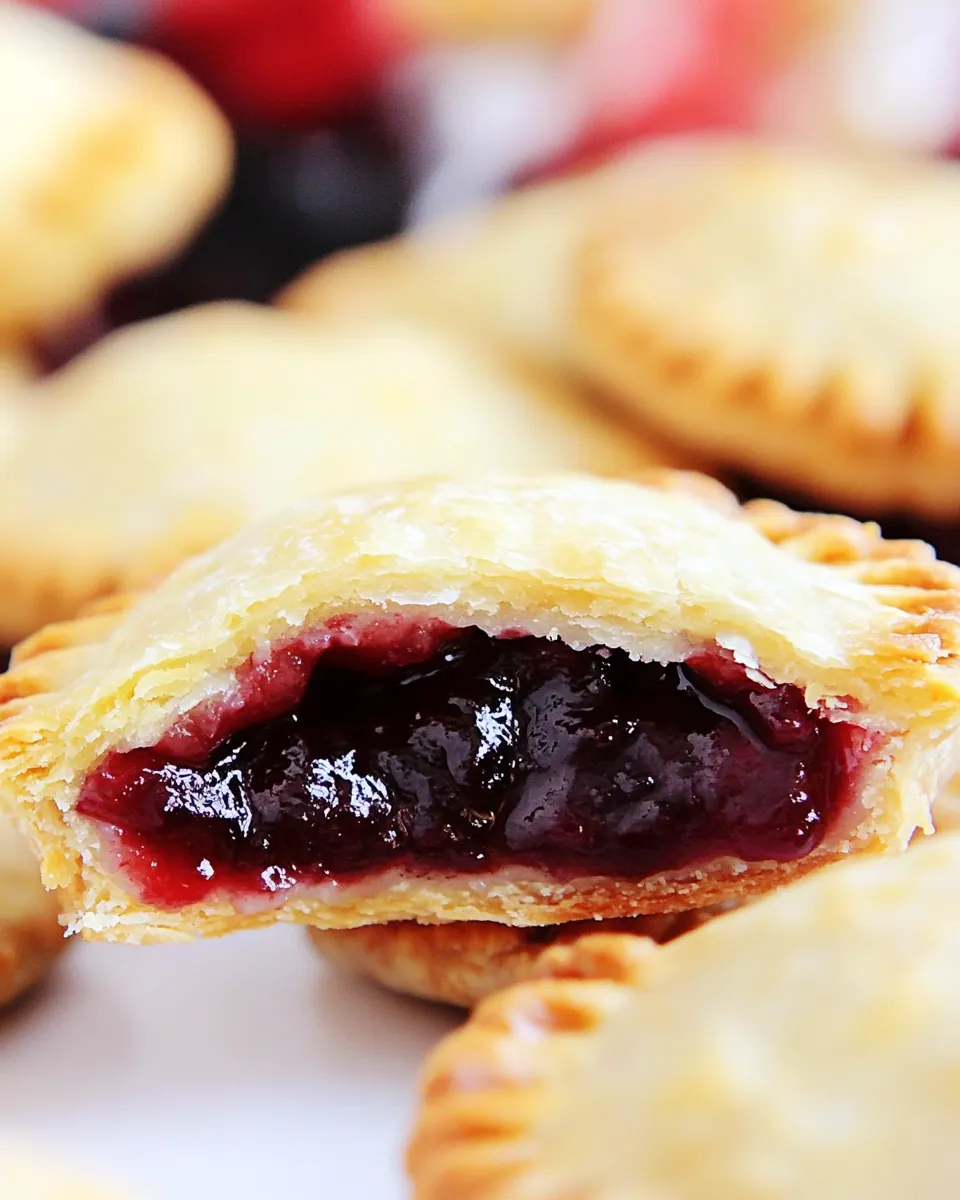
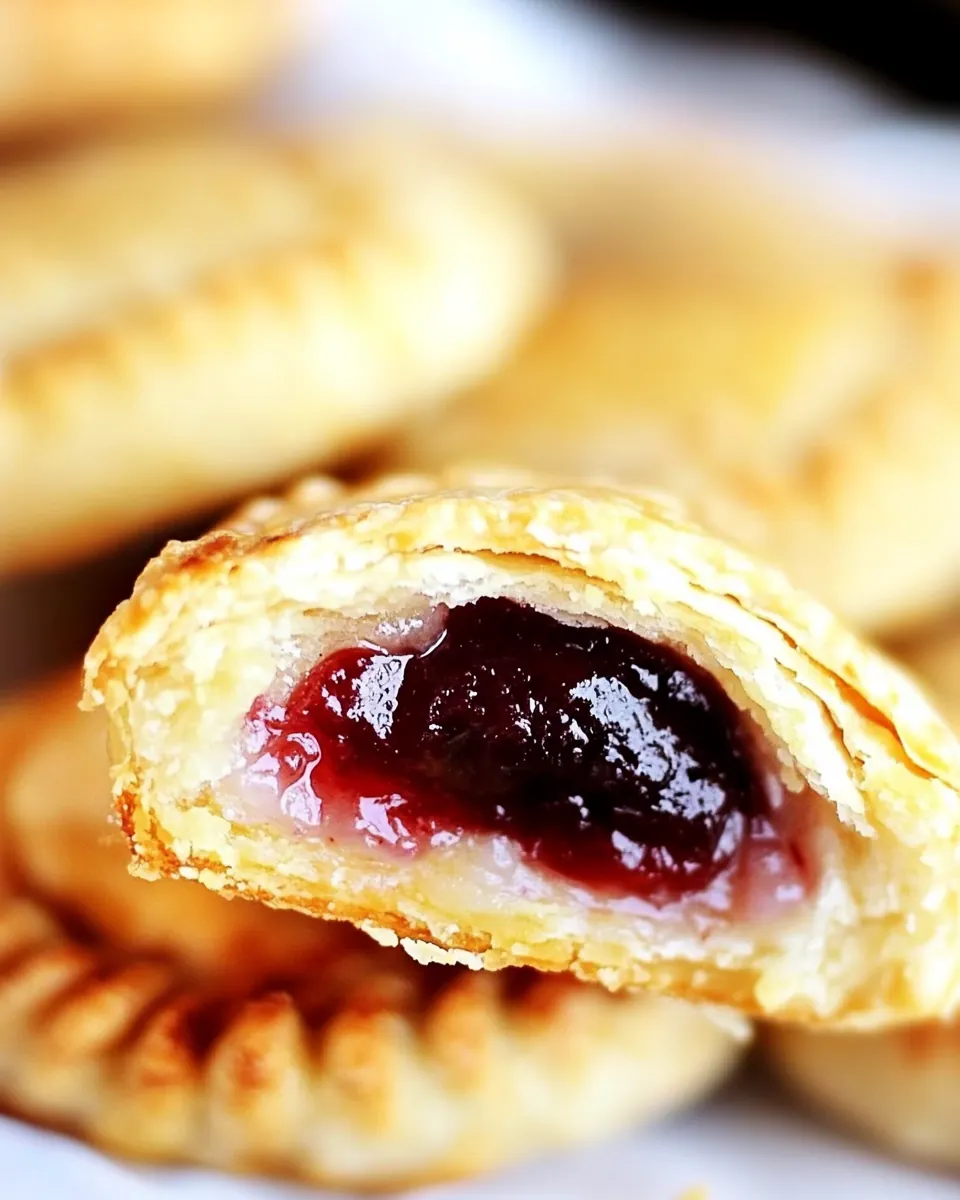
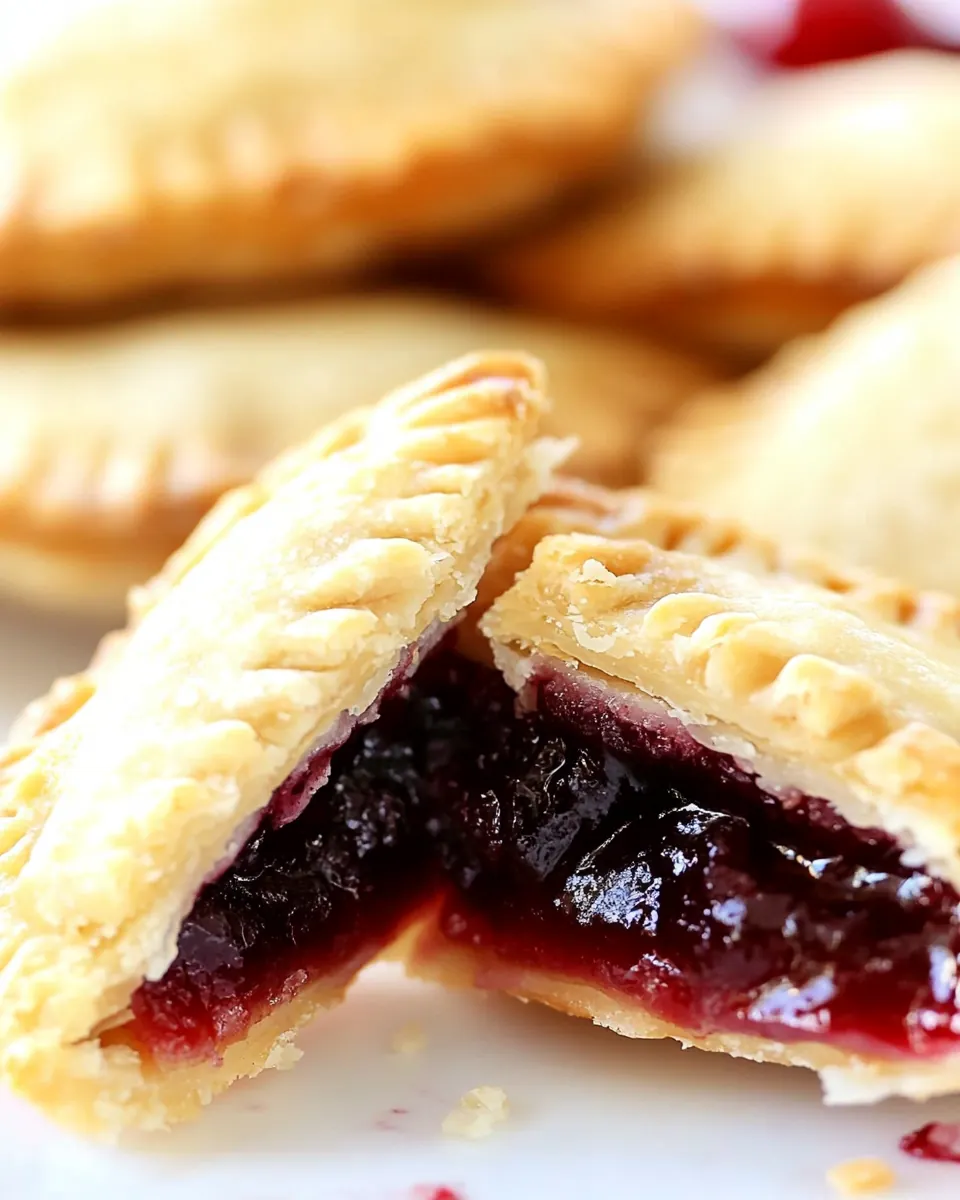
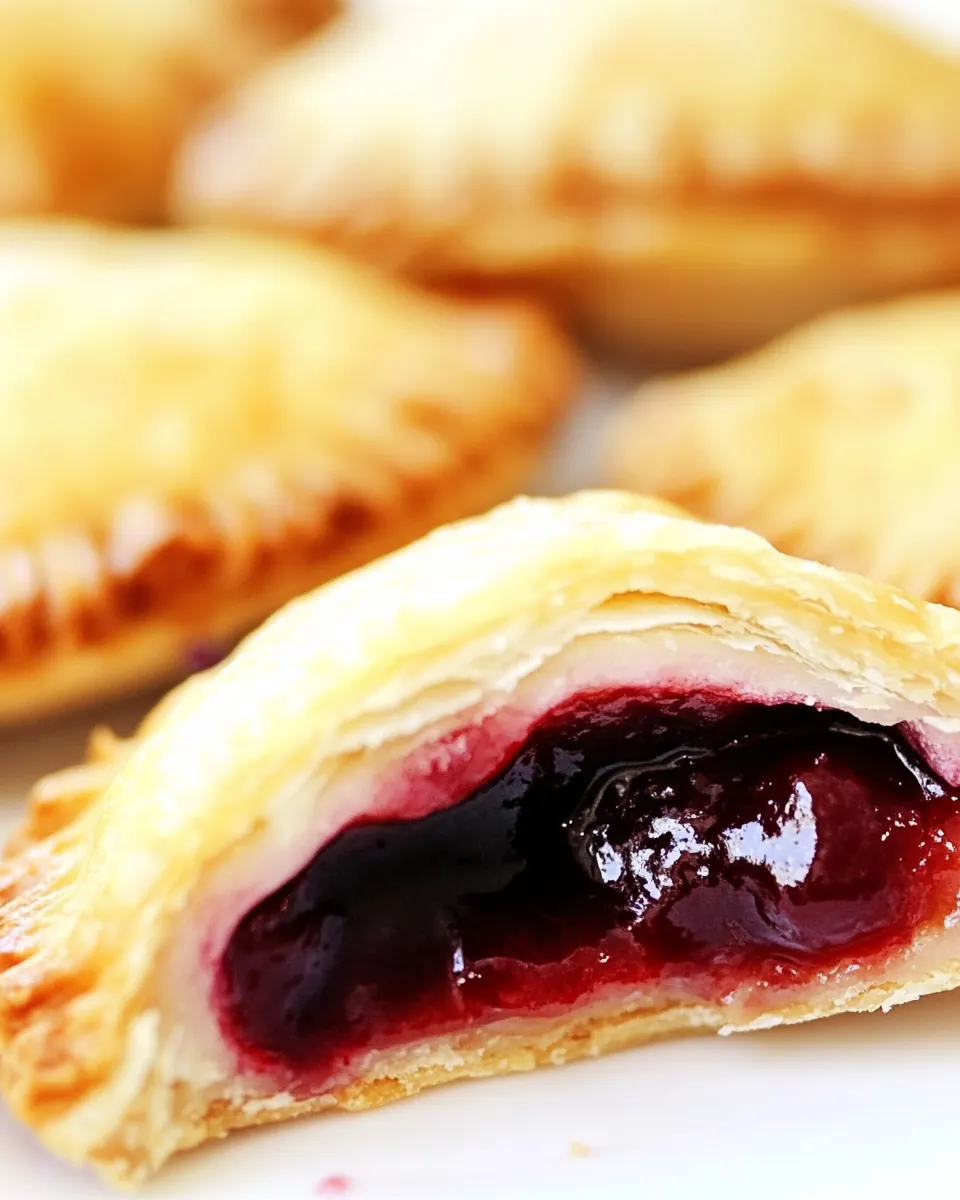
Air Fryer Cherry Hand Pies
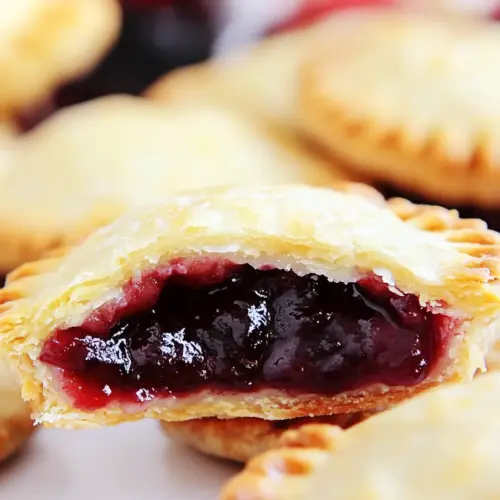
Air Fryer Cherry Hand Pies have been my go to when I want something playful, portable, and a little nostalgic all at once. The first time I made these I was juggling a weekday snack request and a craving for something sweet yet quick, and the Air Fryer Cherry Hand Pies delivered exactly that warm, jammy comfort with a flaky exterior that made everyone at the table smile. I remember laughing as juice bubbled at the edges, and how the kitchen filled with a gentle, sugar kissed aroma that felt like a hug.
Over the years I have tweaked tiny things, like brushing the tops more generously or cutting the vents in a slightly different way, and each change nudged the final result to something I enjoy even more. When you bite into one of these, you get that contrast of crisp, buttery pastry and the bright, slightly tart pop of cherry. I love serving them for casual gatherings because they are hand held, no plates required, and everyone seems to appreciate the homemade touch.
Recipe Snapshot
30 mins
20 mins
10 mins
Medium
210 kcal
American
Gluten-Free, Paleo
Desserts
Air Fryer, Mixing bowl, Cookie cutter, Fork, Basting brush
What You’ll Enjoy About This Air Fryer Cherry Hand Pies
Portable Joy
I adore how these Air Fryer Cherry Hand Pies are perfectly hand held, making them ideal for picnics, lunchboxes, or an easy dessert after dinner. The compact size means you can prep several and people can graze without fuss, which is a real win in my book.
Speed without Sacrifice
Using an air fryer shaves minutes off the cook time and yields a golden, flaky crust that rivals oven baked versions. I personally appreciate that you get crisp edges and a tender inside fast, so weeknights stay relaxed and sweet cravings are satisfied quickly.
Simple, Trustworthy Ingredients
The ingredient list is straightforward, which is one reason I keep this recipe in my regular rotation. With ready made pie crusts and cherry pie filling the flavors are reliably balanced, and the small ingredient count keeps things uncomplicated when I am cooking with limited time or patience.
Great for Customization
These hand pies are a forgiving canvas. I like to experiment with the sugar sprinkle or the thickness of the filling, and slight changes alter the final texture in delightful ways. It’s easy to adapt them to what you already have, which is how I often avoid last minute store runs.
Kid Friendly and Festive
Kids love crafting the little half moons, and the process becomes an activity as much as a recipe. I find that having small helpers brush the egg wash or press the forks along the edges adds to the event like a mini baking party.
Recipe Ingredients for Air Fryer Cherry Hand Pies
I believe great recipes start with a few strong players that know how to collaborate. For these Air Fryer Cherry Hand Pies, the pastry forms the blank canvas while the cherry filling provides bright, jammy flavor. The egg wash brings a golden sheen, and the sprinkle of sugar gives each pie a delicate crunch. Together they balance texture and taste so every bite is satisfying.
- 2 refrigerator pie crusts: Chill and unroll to provide an easy-to-shape pastry base for the hand pies; works as both top and bottom crusts, creating a flaky texture when baked. Handle gently to prevent tearing, and keep cold until rolling to ensure optimal flakiness during air frying.
- 1 1/2 cup cherry pie filling: Add sweetness and fruit filling to give the hand pies a classic cherry flavor and moist interior; spoon evenly to avoid overfilling and leaking during cooking. Drain excess syrup if necessary to reduce sogginess and ensure the crust crisps properly.
- 1 large egg: Beat briefly to create an egg wash that promotes a golden, glossy finish on the crust and helps seal the pie edges. Whisk thoroughly with water to ensure even application and a smooth, attractive surface after air frying.
- 1 tablespoon water: Combine with the beaten egg to thin the wash for easier brushing and to improve adherence for sealing the crust edges. Use sparingly to control shine and browning intensity without making the dough too wet.
- 2 tablespoons white granulated sugar: Sprinkle over the tops of assembled hand pies to add a sweet, crunchy finish and enhance visual appeal after cooking. Apply evenly for consistent caramelization and to complement the fruit filling's sweetness.
- Cooking spray: Coat the air fryer basket lightly to prevent sticking and promote even browning of the crust without adding excess fat. Use a fine mist for best results and avoid heavy application that could alter texture.
How to Prepare Air Fryer Cherry Hand Pies
These directions are friendly and straightforward, and each step guides you toward a flaky, jammy little pie. Follow the sequence and pay attention to visual and tactile cues so your results are consistent and delicious.
- First, thaw the pie crusts per the directions on the package.: The dough should be pliable but still cool to the touch, with a faint chill that keeps it from sticking as you roll. You will notice it becoming soft enough to unroll without tearing, and the surface should feel slightly tacky not wet. Thawing properly matters because over thawed pastry becomes sticky and tears easily, while under thawed pastry cracks when rolled. A common mistake is rushing this step, which leads to ragged edges; if the crust seems too cold to work, let it sit for a few more minutes wrapped in plastic so it remains moist and workable.
- Roll out the pie dough on a lightly floured surface and using a cookie cutter cut out 3 or more 5-inch circles from each crust. Discard the scraps.: As you press the cutter into the dough you'll see clean, defined circles with smooth edges, and the dough will lift off the surface without stretching. The flour acts as a barrier so the pastry does not stick while rolling. Proper thickness helps the crust puff and flake during cooking, while rolling too thin will make the pies fragile. One trap is over flouring which dries the dough; brush away excess flour before filling so you maintain the intended moisture balance.
- Add 2 tablespoons of cherry pie filling to the center of the circles leaving about a 1/2 inch border.: The filling should sit as a glossy, slightly domed spoonful in the dough center, not flattened out to the edges. This border is essential for sealing and prevents leaking as the filling softens during cooking. If you add too much filling, juices will escape and cause soggy bottoms and sticky messes in the basket. A neat mound that stays contained when the dough is folded is the right amount.
- Next, dip a fingertip into some water and run it around the edges of the circles. After that, fold them to create a half-moon shape.: The water creates a light adhesive that helps the two halves bind together when you fold, producing a secure seal. Your fingertip will leave a slightly damp ring that looks matte against the dough, signaling the right place to press. Not wetting the edge enough can lead to fills popping open, so be sure the ring is consistent but not saturated.
- Using your finger pinch the edges together. Crimp the edges together using a fork.: When the dough halves meet they should align cleanly, forming a curved edge with the filling safely enclosed, and any excess dough should tuck in rather than bulge. Folding concentrates heat inside the pocket and helps the filling heat evenly. Folding too loosely will allow steam to escape and reduce flakiness, so press gently along the seam for a tight join, but avoid smashing the filling out.
- In a small bowl, whisk the egg with the water and use the egg wash to brush the surface of the hand pies.: Pinching compresses the seam so the pies hold their shape during cooking and prevents leakage. The edge will show small compressed ridges where the dough bonds, which helps trap steam and encourages even browning. A common error is pinching unevenly, creating weak spots; aim for consistent pressure along the whole seam for a reliable seal.
- Sprinkle with sugar and make 3 small incision cuts on the top.: Pressing a fork along the rim creates a decorative, uniform crimp that further strengthens the seal and gives a classic hand pie look. You should hear a gentle push as the tines compact the dough, and the edge will take on a patterned impression. Avoid pressing too hard which can flatten the pie or force out filling; moderate, even tines impressions are best.
- Preheat the air fryer to 360 degrees F.: The wash should look glossy when brushed on and will transform to a deep golden sheen as the pies cook, signaling even browning. Use a light, sweeping motion so the wash covers without pooling in crevices. Too heavy an application can drip into the basket and create uneven coloration, so wipe away excess from the brush and aim for a thin, even coat.
- Spray the basket with oil spray. Arrange the pies, in one single layer not touching each other. If needed cook in batches.: The sugar will glint on the surface and melt slightly into a subtle crunch, while the vent cuts allow steam to escape so the filling heats without bursting the pastry. The cuts should be shallow slashes, evenly spaced, so they steam rather than leak. Making them too deep invites leakage, while none at all can cause tops to split unpredictably as pressure builds.
- Air fry for 9-10 minutes, or until golden brown.: A properly preheated air fryer gives a quick blast of hot circulating air that crisps the surface and sets the crust before the filling becomes too runny. You'll hear a faint hum and notice the basket is evenly warmed, which helps the first batch brown uniformly. Skipping preheat can lead to greasy, under crisped bottoms, so wait until the fryer indicates it has reached temperature.
- Spray the basket with oil spray: A light mist ensures the pies release cleanly after cooking and that the bottoms brown without sticking. The sheen should be barely visible, just enough to coat the metal. Excess oil pools can cause smoking or uneven browning, so spray sparingly and wipe away any large droplets.
- Arrange the pies, in one single layer not touching each other: Spacing allows hot air to circulate around each pie so edges crisp and tops color evenly, and you should see tiny pockets of airflow between them. Crowding will result in uneven cooking and soggy sides, so cook in batches if necessary. A telltale sign of overcrowding is uneven color and soft edges on pies pushed together.
- If needed cook in batches: Running multiple batches keeps each pie receiving direct heat and crisping appropriately, which is especially important if your basket is small. You will maintain consistent texture by doing this, even if it takes extra minutes overall. A mistake is trying to rush all at once, which leads to variable results; patience here ensures each pie turns out as intended.
- Air fry for 9 to 10 minutes, or until golden brown: Listen for a light sizzling and look for a deep golden brown color on the tops and edges, that indicator shows the crust is fully cooked and the filling is bubbly. The scent will be warm and slightly caramelized from the sugars, and the texture should be crisp to the touch. Overcooking will darken the crust and dry the filling, so remove them as soon as a uniform golden hue appears and the vents show gentle bubbling.
Ways to Customize
These small pies are perfect for playful tweaks. Below I offer a range of easy customizations that keep the core technique intact while leting you personalize texture, sweetness, and presentation.
- Swap the sugar finish Change the sprinkle to coarse sanding sugar for extra sparkle and crunch, it gives a festive look and a satisfying initial bite.
- Vary the filling amount Adjust the filling to your preference; less for a flakier pastry dominated bite, more for a jam packed center, but avoid overfilling which causes leaks.
- Brush with more egg wash For a deeper glossy finish brush twice lightly, but let the first layer set a moment so the second does not pool.
- Chill pies before air frying Briefly chilling the sealed pies firms the edges and reduces the chance of them opening while cooking.
- Use decorative cutters Swap the round cutter for themed shapes for holidays or parties to make them instantly festive and kid friendly.
Serve This Air Fryer Cherry Hand Pies With
These little hand pies are flexible at the table. You can serve them as a casual dessert, a sweet addition to brunch, or pack them for an outdoor meal. Below are ideas for pairings, occasions, and storage so they shine wherever you bring them.
- Serve warm These are best when served slightly warm so the filling is soft and the crust is crisp, making them wonderful for immediate dessert service after a family meal.
- Picnic friendly Their hand held nature makes them ideal for picnics and outdoor gatherings, easy to transport and eat without plates or forks.
- Brunch addition Pair a few with coffee or tea for a sweet brunch item that feels homemade and special, perfect for weekend mornings.
- Party finger food Arrange on a platter for casual parties; guests can graze and enjoy the nostalgic comfort of a familiar fruit filling in a tidy package.
- Storage tips Store cooled pies in an airtight container at room temperature for one day, or refrigerate for up to three days; reheat briefly to refresh the crust.
- Seasonal pairing These shine in late spring and summer when cherries are in season, and their bright flavor complements outdoor get togethers and warm weather menus.
FAQ
Conclusion
These Air Fryer Cherry Hand Pies are a delightful mix of flaky pastry and bright, jammy filling that come together quickly and offer a lot of joy in each bite. They are excellent for casual gatherings, quick desserts, or anytime you want a nostalgic treat without a long bake time. Give them a try the next time you want something sweet and portable; the process is simple, and the results are reliably comforting and fun.
Air Fryer Cherry Hand Pies
Equipment
- Air Fryer
- Mixing Bowl
- Cookie Cutter
- Fork
- Basting Brush
Ingredients
- 2 refrigerator pie crusts Chill and unroll to provide an easy-to-shape pastry base for the hand pies; works as both top and bottom crusts, creating a flaky texture when baked. Handle gently to prevent tearing, and keep cold until rolling to ensure optimal flakiness during air frying.
- 1 1/2 cup cherry pie filling Add sweetness and fruit filling to give the hand pies a classic cherry flavor and moist interior; spoon evenly to avoid overfilling and leaking during cooking. Drain excess syrup if necessary to reduce sogginess and ensure the crust crisps properly.
- 1 large egg Beat briefly to create an egg wash that promotes a golden, glossy finish on the crust and helps seal the pie edges. Whisk thoroughly with water to ensure even application and a smooth, attractive surface after air frying.
- 1 tablespoon water Combine with the beaten egg to thin the wash for easier brushing and to improve adherence for sealing the crust edges. Use sparingly to control shine and browning intensity without making the dough too wet.
- 2 tablespoons white granulated sugar Sprinkle over the tops of assembled hand pies to add a sweet, crunchy finish and enhance visual appeal after cooking. Apply evenly for consistent caramelization and to complement the fruit filling's sweetness.
- Cooking spray Coat the air fryer basket lightly to prevent sticking and promote even browning of the crust without adding excess fat. Use a fine mist for best results and avoid heavy application that could alter texture.
Instructions
- First, thaw the pie crusts per the directions on the package.: The dough should be pliable but still cool to the touch, with a faint chill that keeps it from sticking as you roll. You will notice it becoming soft enough to unroll without tearing, and the surface should feel slightly tacky not wet. Thawing properly matters because over thawed pastry becomes sticky and tears easily, while under thawed pastry cracks when rolled. A common mistake is rushing this step, which leads to ragged edges; if the crust seems too cold to work, let it sit for a few more minutes wrapped in plastic so it remains moist and workable.
- Roll out the pie dough on a lightly floured surface and using a cookie cutter cut out 3 or more 5-inch circles from each crust. Discard the scraps.: As you press the cutter into the dough you'll see clean, defined circles with smooth edges, and the dough will lift off the surface without stretching. The flour acts as a barrier so the pastry does not stick while rolling. Proper thickness helps the crust puff and flake during cooking, while rolling too thin will make the pies fragile. One trap is over flouring which dries the dough; brush away excess flour before filling so you maintain the intended moisture balance.
- Add 2 tablespoons of cherry pie filling to the center of the circles leaving about a 1/2 inch border.: The filling should sit as a glossy, slightly domed spoonful in the dough center, not flattened out to the edges. This border is essential for sealing and prevents leaking as the filling softens during cooking. If you add too much filling, juices will escape and cause soggy bottoms and sticky messes in the basket. A neat mound that stays contained when the dough is folded is the right amount.
- Next, dip a fingertip into some water and run it around the edges of the circles. After that, fold them to create a half-moon shape.: The water creates a light adhesive that helps the two halves bind together when you fold, producing a secure seal. Your fingertip will leave a slightly damp ring that looks matte against the dough, signaling the right place to press. Not wetting the edge enough can lead to fills popping open, so be sure the ring is consistent but not saturated.
- Using your finger pinch the edges together. Crimp the edges together using a fork.: When the dough halves meet they should align cleanly, forming a curved edge with the filling safely enclosed, and any excess dough should tuck in rather than bulge. Folding concentrates heat inside the pocket and helps the filling heat evenly. Folding too loosely will allow steam to escape and reduce flakiness, so press gently along the seam for a tight join, but avoid smashing the filling out.
- In a small bowl, whisk the egg with the water and use the egg wash to brush the surface of the hand pies.: Pinching compresses the seam so the pies hold their shape during cooking and prevents leakage. The edge will show small compressed ridges where the dough bonds, which helps trap steam and encourages even browning. A common error is pinching unevenly, creating weak spots; aim for consistent pressure along the whole seam for a reliable seal.
- Sprinkle with sugar and make 3 small incision cuts on the top.: Pressing a fork along the rim creates a decorative, uniform crimp that further strengthens the seal and gives a classic hand pie look. You should hear a gentle push as the tines compact the dough, and the edge will take on a patterned impression. Avoid pressing too hard which can flatten the pie or force out filling; moderate, even tines impressions are best.
- Preheat the air fryer to 360 degrees F.: The wash should look glossy when brushed on and will transform to a deep golden sheen as the pies cook, signaling even browning. Use a light, sweeping motion so the wash covers without pooling in crevices. Too heavy an application can drip into the basket and create uneven coloration, so wipe away excess from the brush and aim for a thin, even coat.
- Spray the basket with oil spray. Arrange the pies, in one single layer not touching each other. If needed cook in batches.: The sugar will glint on the surface and melt slightly into a subtle crunch, while the vent cuts allow steam to escape so the filling heats without bursting the pastry. The cuts should be shallow slashes, evenly spaced, so they steam rather than leak. Making them too deep invites leakage, while none at all can cause tops to split unpredictably as pressure builds.
- Air fry for 9-10 minutes, or until golden brown.: A properly preheated air fryer gives a quick blast of hot circulating air that crisps the surface and sets the crust before the filling becomes too runny. You'll hear a faint hum and notice the basket is evenly warmed, which helps the first batch brown uniformly. Skipping preheat can lead to greasy, under crisped bottoms, so wait until the fryer indicates it has reached temperature.
- Spray the basket with oil spray: A light mist ensures the pies release cleanly after cooking and that the bottoms brown without sticking. The sheen should be barely visible, just enough to coat the metal. Excess oil pools can cause smoking or uneven browning, so spray sparingly and wipe away any large droplets.
- Arrange the pies, in one single layer not touching each other: Spacing allows hot air to circulate around each pie so edges crisp and tops color evenly, and you should see tiny pockets of airflow between them. Crowding will result in uneven cooking and soggy sides, so cook in batches if necessary. A telltale sign of overcrowding is uneven color and soft edges on pies pushed together.
- If needed cook in batches: Running multiple batches keeps each pie receiving direct heat and crisping appropriately, which is especially important if your basket is small. You will maintain consistent texture by doing this, even if it takes extra minutes overall. A mistake is trying to rush all at once, which leads to variable results; patience here ensures each pie turns out as intended.
- Air fry for 9 to 10 minutes, or until golden brown: Listen for a light sizzling and look for a deep golden brown color on the tops and edges, that indicator shows the crust is fully cooked and the filling is bubbly. The scent will be warm and slightly caramelized from the sugars, and the texture should be crisp to the touch. Overcooking will darken the crust and dry the filling, so remove them as soon as a uniform golden hue appears and the vents show gentle bubbling.
Notes
- Swap the sugar finish Change the sprinkle to coarse sanding sugar for extra sparkle and crunch, it gives a festive look and a satisfying initial bite.
- Vary the filling amount Adjust the filling to your preference; less for a flakier pastry dominated bite, more for a jam packed center, but avoid overfilling which causes leaks.
- Brush with more egg wash For a deeper glossy finish brush twice lightly, but let the first layer set a moment so the second does not pool.
- Chill pies before air frying Briefly chilling the sealed pies firms the edges and reduces the chance of them opening while cooking.
- Use decorative cutters Swap the round cutter for themed shapes for holidays or parties to make them instantly festive and kid friendly.