Whipped Cream Dyed Eggs
Whipped Cream Dyed Eggs are one of those playful projects I keep coming back to in early spring, when I want something cheerful on the table that still feels like simple kitchen fun. The first time I tried this, I was elbow deep in a smear of pastel whipped cream, grinning at how the colors pooled and veined around each egg. I remember balancing a spoon in one hand and a dye-streaked toothpick in the other, feeling like a kid making marbled art, while a friend off to the side narrated the whole process like it was theatre.
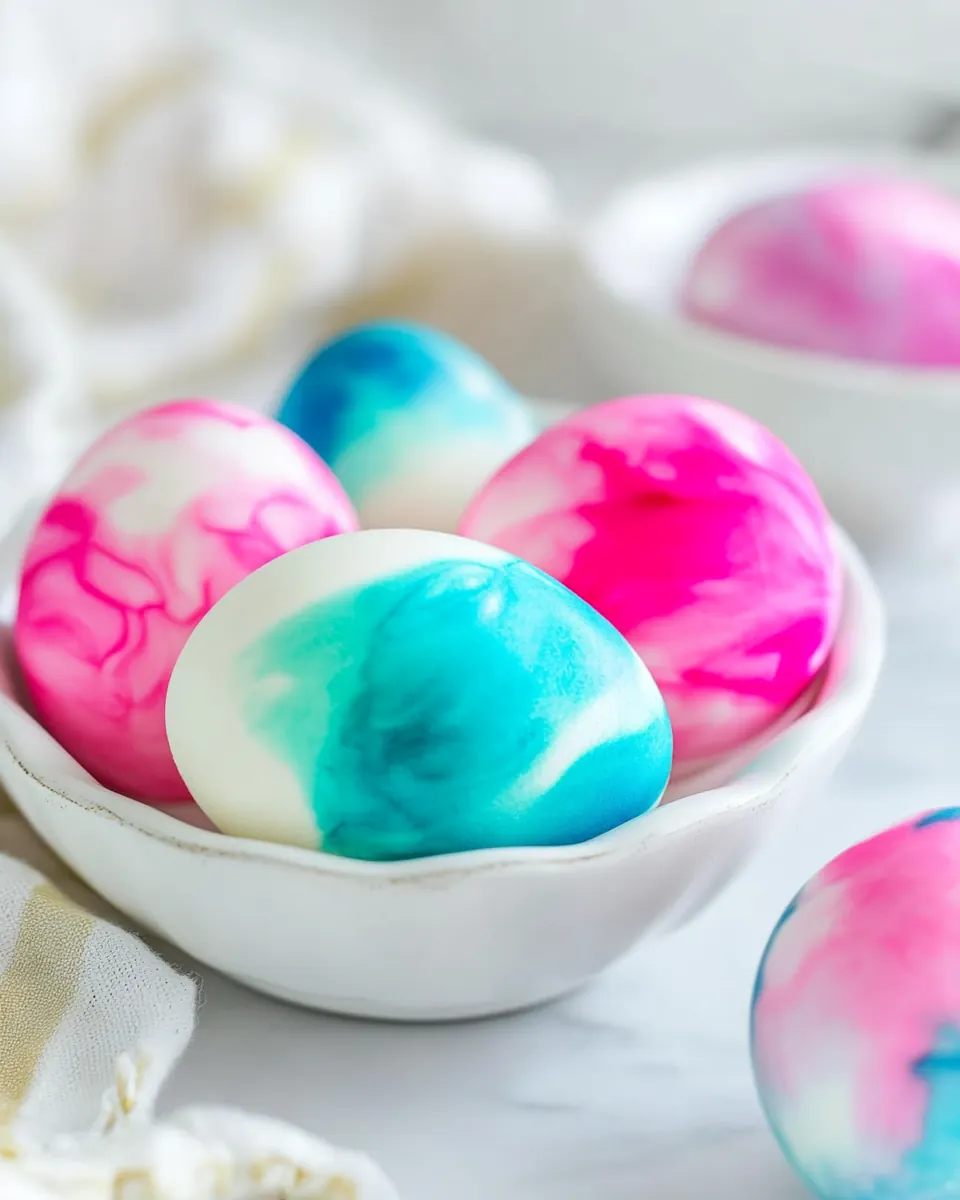
Since then, I make Whipped Cream Dyed Eggs whenever I want a hands on activity that doubles as decor. I love that there is no boiling dye pot, no messy vinegar measurements, just soft, billowy whipped cream and vibrant food coloring that create gorgeous, unpredictable patterns. Each egg emerges with its own personality, some with delicate veins of color, others with bold swathes that look almost watercolor. I often set up a little station for guests, handing out disposable gloves and spoons so everyone can get creative without worrying about stained fingers.
What keeps me coming back is the ease, and the way ordinary hard boiled eggs transform into something celebratory. I like to experiment with color combinations, and sometimes I use a muffin pan to keep hues separate, other times a baking pan for a swirled, tie dyed look. The process becomes meditative, a chance to slow down and play with simple materials. After they dry, the eggs store neatly in the fridge, ready to brighten breakfast, brunch, or an Easter table.
Recipe Snapshot
15 mins
15 mins
Medium
120 kcal
American
Keto, Gluten-Free
Desserts
9 x 13 inch baking pan, muffin pan, spoons, toothpicks, disposable gloves
Why This Whipped Cream Dyed Eggs Stands Out
Easy and Approachable
I adore how accessible Whipped Cream Dyed Eggs are. You do not need fancy tools or special skills, just a tub of whipped cream, some food coloring, and hard boiled eggs. I have hosted this as a last minute craft for friends and it always lands well, because the steps are forgiving and the results are instant gratification.
Visually Stunning Results
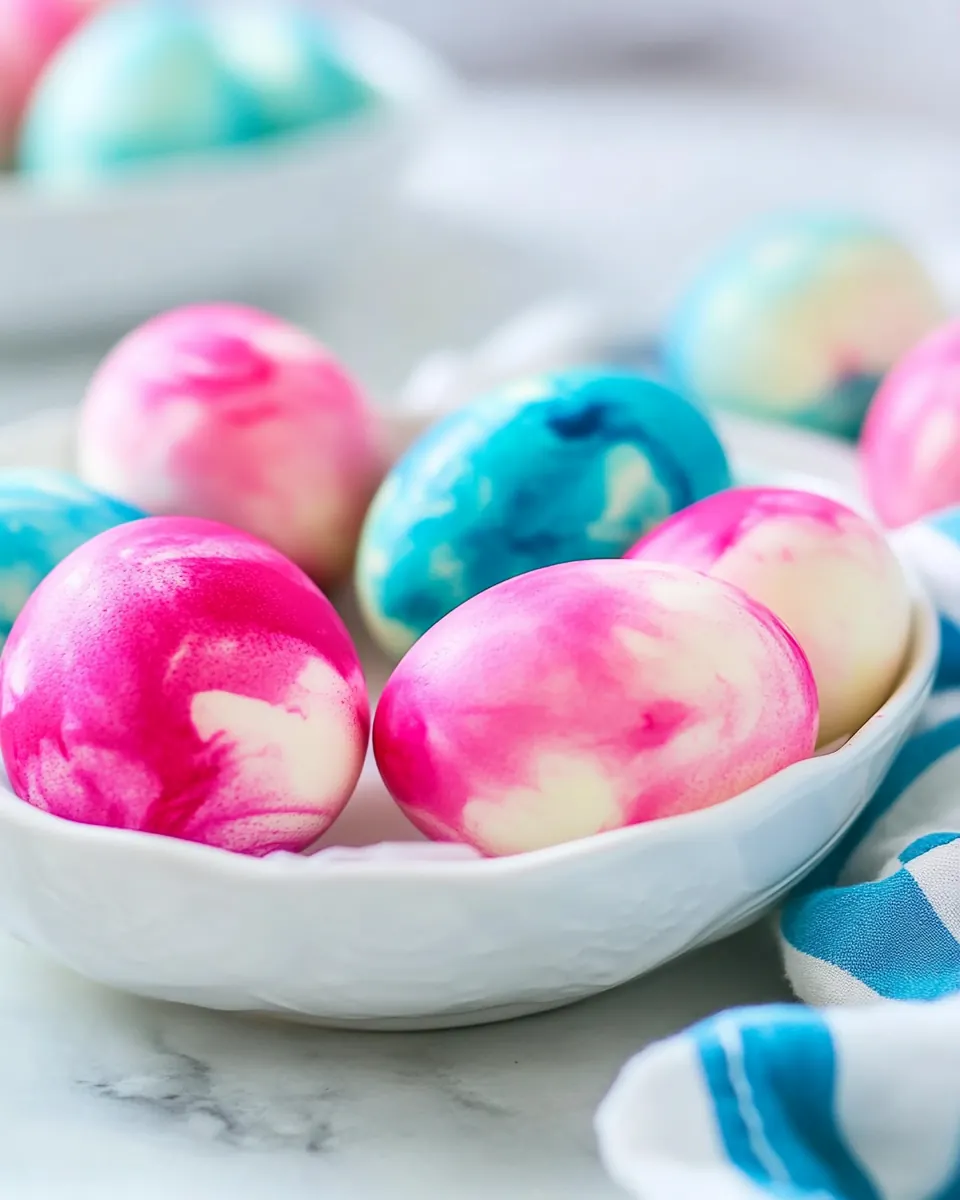
When I peel back the paper towel and reveal an egg with marbled veins of color, it still surprises me. The technique produces a range of looks, from delicate pastels to bold, saturated streaks. I find that even small adjustments in swirling or color placement yield dramatically different aesthetics, so it feels creative every time.
Kid Friendly, With Simple Safety
I’ve done this with children and adults alike, and it is comfortably mess controlled with gloves and spoons. Because the dye sits in the whipped cream and does not require hot liquids or vinegar baths, it is a safer alternative for little hands. I always emphasize gentle rolling so the eggs do not crack, which keeps both the fun and the cleanup easy.
Flexible Presentation Options
I like that you can choose a muffin pan for separated colors, or a 9 by 13 inch pan for a swirled palette. Each approach changes the final look, and I find myself switching depending on whether I want a coordinated scheme or a wild, tie dyed effect. This flexibility lets me tailor the eggs to a theme or table setting effortlessly.
Long Lasting and Practical
Once dried and rinsed, these eggs store in the refrigerator for several days. I appreciate the practicality: make a batch ahead for brunch, and you have ready to eat colorful eggs that taste exactly like any other hard boiled eggs, just with more personality. That balance of pretty and practical is why I keep this technique in my seasonal repertoire.
What Goes Into Whipped Cream Dyed Eggs

These ingredients are intentionally simple and playful. The key players are the airy whipped cream which acts as a gentle dye carrier, and the concentrated food coloring that provides vibrant pigments without soaking the egg shell too harshly. The hard boiled eggs provide a clean, smooth canvas, while small tools like toothpicks and spoons let you direct color and texture precisely. Together, they create marbling and streaks that feel both handcrafted and elegant.
- large tub of whipped topping, thawed, or homemade whipped cream: Provide a light, airy base for dye marbling and gentle coating; use thawed whipped topping or freshly whipped cream to create a smooth, spreadable medium that holds color. Chill briefly if too soft to prevent runoff and use shallow containers for easy dipping.
- 12 hard boiled eggs, cooled completely: Allow firm texture and even surface for dye absorption by using fully cooled hard boiled eggs; handle gently to avoid cracking and choose eggs with smooth shells for consistent marbling results. Refrigerate until ready to dye to keep whites set and minimize breakage during manipulation.
- food coloring: Deliver concentrated color quickly and controllably; use a few drops of food coloring to tint portions of the whipped topping and experiment with color placement for varied marbling effects. Prefer gel or liquid food coloring depending on intensity desired, and add incrementally to reach the perfect shade.
- toothpicks, spoons, disposable gloves: Facilitate application, mixing, and cleanliness during the dyeing process; use toothpicks or spoons to swirl colors and disposable gloves to protect hands from stains. Prepare a workspace with paper towels or trays to catch excess topping and make cleanup easier.
Recipe Directions for Whipped Cream Dyed Eggs
Let the process feel like a relaxed craft more than a chore. The following steps take you from a pan of fluffy cream to glossy, marbled eggs, with sensory cues to help you know you are on track. Keep gloves and a paper towel ready for rinsing and drying.
- Spoon whipped cream into a 9 x 13-inch baking pan. Alternately, you can partially fill each well of a muffin pan with whipped cream. Use the muffin pan technique if you want to keep the colors separate as shown here. Use the 9 x 13-inch pan if you want to swirl the colors together for a tie-dyed effect.: The pan will hold the whipped cream in an even layer so colors can be dropped and swirled; you will notice the cream hold peaks and soft valleys, almost like snow, which helps suspend the food coloring where you place it. Why this matters, the even bed of cream prevents colors from pooling too heavily in one spot and encourages soft marbling as the hard boiled eggs roll across it. Sense cues include the cool, slightly sweet scent of the cream and the quiet, soft thump of spooning it into the pan. One common mistake is overfilling the pan, which makes it hard to swirl without splashing, so keep a shallow layer for the best results.
- Add drops of food coloring to the whipped cream and use a toothpick to lightly swirl the colors into the whipped cream. Don't swirl too much, or you'll lose the beautiful marbleized look and muddy up the colors.: Choosing a muffin pan keeps colors separate for discrete, controlled palettes; you will see small nests of cream, perfect for single color experiments. The advantage is tidy color control, so each hard boiled egg emerges with distinct hues. Touch the cream gently with the back of a spoon to feel the smooth surface, and avoid packing it too firmly which can mute the marble effect. A frequent slipup is mixing colors directly into one well until muddy, so reserve one well per color when you want clear tones.
- Place the eggs into the whipped cream and gently roll using a spoon so the entire egg is covered.: This method yields crisp edges and clean transitions between hues, and visually you will notice small pools of jewel like color when you add the food coloring . The method matters because it prevents bleeding between shades, producing a compact effect that looks deliberate and graphic. A troubleshooting tip, if colors cling together, gently nudge the cream with a toothpick rather than stirring, to maintain separate streams. People sometimes over swirl, which turns everything muddy, so less movement preserves the pattern.
- Let the eggs sit in the whipped cream for 30-45 minutes depending on how bold you would like the colors.: When you prefer a more freeform appearance, dropping multiple hues into the big pan creates a painterly, blended look; you will see ribbons of color and subtle gradients form as you drag a toothpick through them. This technique produces seamless transitions and soft veins of pigment across each egg. The reward is a more organic aesthetic, but beware of over swirling which will dull the vibrancy, so stop when you still see distinct ribbons of color.
- Put on a pair of disposable gloves, remove eggs from the whipped cream and rinse them with water.: The concentrated food coloring blooms into the white cream in tiny droplets, and you will enjoy watching the pigments sit on the surface like little islands. This step controls intensity, because more drops equal bolder hues, while fewer drops yield pastel whispers. For troubleshooting, remember that gel colors are stronger than liquid, so adjust the drop count accordingly. Avoid placing too many drops in one location, which can make a saturated blotch instead of a pretty vein.
- Allow the eggs to dry on a paper towel, this will help absorb any excess dye.: The toothpick should move gently, drawing color through the cream in thin lines; you will hear a soft scraping sound and see delicate marbling develop. This gentle motion preserves the distinct colors while creating visual interest, and it is the moment you decide whether the look will be subtle or dramatic. A common error is vigorous stirring, which will homogenize the colors into an unattractive brown, so keep movements light and purposeful.
- Store in the refrigerator for up to 7 days.: The caution is sensory and practical, you will notice when the cream starts to lose defined streaks and becomes uniformly tinted, which signals it is time to stop. This restraint maintains clarity between hues and preserves the delicate veins that make each egg unique. If you overwork it, you cannot restore the original contrast, so practice restraint and step back when you still see distinct patterns forming.
- Place the eggs into the whipped cream and gently roll using a spoon so the entire egg is covered: As you roll each hard boiled egg , the cream will cling and transfer color in thin layers, and you may hear a faint sliding sound as the shell glides through the cream. Rolling ensures even coverage without pressing too hard, which could crack the egg. The why here is that even contact distributes pigments for a consistent marbled wrap. A typical mistake is forcing the egg into the cream which risks hairline cracks or uneven dye pickup, so be gentle and steady.
- Let the eggs sit in the whipped cream for 30 to 45 minutes depending on how bold you would like the colors: During this waiting period the dye gently migrates into the outer shell surface, and you will notice the cream around the eggs take on faint halos of color. Longer sits produce deeper saturation, while shorter rests keep the look delicate. The sensory cue is subtle change in the cream color near the shell, indicating dye transfer. Watch out for leaving eggs too long if you used very strong gel colors, which can create overly intense spots, so check at the 30 minute mark and adjust from there.
- Put on a pair of disposable gloves, remove eggs from the whipped cream and rinse them with water: Rinsing removes excess cream and stops the dye migration, and you will feel the shells go from tacky to smooth under running water. This step finishes the look and prevents residual cream from streaking during drying. A troubleshooting tip is to rinse gently to avoid smearing paint like streaks; if the dye seems uneven, a soft brush can help even things out without rubbing too hard.
- Allow the eggs to dry on a paper towel, this will help absorb any excess dye: Laying them on a paper towel also prevents smudges as the color sets, and you will hear the faint rustle of the towel and notice damp rings form where the egg rested. Drying is where the final appearance reveals itself, so allow enough time for shells to feel completely dry to the touch. Common mistakes include stacking eggs while wet, which transfers color, so give them space to rest individually until fully dry.
- Store in the refrigerator for up to 7 days: Once dry, place your decorated hard boiled eggs in a covered container and chill, the cool environment preserves freshness and the delicate color finish. I find a single layer keeps them safest from rubbing against one another. Avoid leaving them at room temperature for long periods, because they are still perishable, and check for any shell cracks which can accelerate spoilage.
Expert Tips about Whipped Cream Dyed Eggs

This project benefits from a few small practices that make the process smoother and the results more consistent. Below are targeted tips I use when I want predictable color, tidy workspaces, and happy helpers.
- Keep colors separate when you want clarity, use a muffin pan so each hue stays independent and you avoid muddy blends, especially when working with multiple people.
- Use gloves to protect hands, disposable gloves prevent dye transfer and make cleanup fast, which is especially helpful if you are crafting with kids.
- Start with a light touch on the toothpick, gentle swirling preserves distinct veins of color, and stopping early prevents the colors from blending into an undesirable shade.
- Adjust dwell time for intensity, leave eggs in the cream for 30 minutes for subtle pastels, up to 45 minutes for bolder saturation, and check often if using strong gel dyes.
- Dry individually on paper towels, spacing eggs out prevents smudging and ensures each shell sets without contact marks from its neighbors.
Pairing Suggestions for Whipped Cream Dyed Eggs
These colorful eggs fit many occasions and tables. They work beautifully as a playful brunch centerpiece, a hands on Easter activity, or a pretty addition to snack plates. Below are ideas for serving, storage, and context to help you integrate them into meals and gatherings.
- Brunch platter arrangement, lay the eggs on a platter with small bowls of fresh herbs and rustic bread to create a bright, inviting spread that feels seasonal and festive.
- Kids table activity, set up a decorating station with gloves and spoons so children can each make their own, then display their creations as place markers for the meal.
- Storage tip for freshness, keep the eggs in a single layer inside an airtight container in the refrigerator to prevent rubbing and maintain the decorative finish for up to seven days.
- Occasion pairing, these eggs are ideal for spring celebrations such as Easter or garden parties, they bring color and a handmade touch without elaborate prep.
- Seasonal presentation, choose color palettes that match the season, for spring I prefer soft pastels while for a bold look you can use jewel tones, tailoring the visual impact to your table.
FAQ
Conclusion
These Whipped Cream Dyed Eggs are special because they turn simple hard boiled eggs into colorful, handcrafted pieces with minimal fuss. Give the technique a try and enjoy a hands on, joyful activity that yields beautiful results you can serve or display. I hope this method sparks creativity at your next brunch or holiday table, and that you have fun experimenting with colors and patterns. It is an easy way to add charm to a meal, and the forgiving process makes it ideal for both adults and kids to enjoy together.
Whipped Cream Dyed Eggs
Equipment
- 9 x 13-inch baking pan
- Muffin Pan
- spoons
- Toothpicks
- disposable gloves
Ingredients
- large tub of whipped topping, thawed, or homemade whipped cream Provide a light, airy base for dye marbling and gentle coating; use thawed whipped topping or freshly whipped cream to create a smooth, spreadable medium that holds color. Chill briefly if too soft to prevent runoff and use shallow containers for easy dipping.
- 12 hard boiled eggs, cooled completely Allow firm texture and even surface for dye absorption by using fully cooled hard boiled eggs; handle gently to avoid cracking and choose eggs with smooth shells for consistent marbling results. Refrigerate until ready to dye to keep whites set and minimize breakage during manipulation.
- food coloring Deliver concentrated color quickly and controllably; use a few drops of food coloring to tint portions of the whipped topping and experiment with color placement for varied marbling effects. Prefer gel or liquid food coloring depending on intensity desired, and add incrementally to reach the perfect shade.
- toothpicks, spoons, disposable gloves Facilitate application, mixing, and cleanliness during the dyeing process; use toothpicks or spoons to swirl colors and disposable gloves to protect hands from stains. Prepare a workspace with paper towels or trays to catch excess topping and make cleanup easier.
Instructions
- Spoon whipped cream into a 9 x 13-inch baking pan. Alternately, you can partially fill each well of a muffin pan with whipped cream. Use the muffin pan technique if you want to keep the colors separate as shown here. Use the 9 x 13-inch pan if you want to swirl the colors together for a tie-dyed effect.: The pan will hold the whipped cream in an even layer so colors can be dropped and swirled; you will notice the cream hold peaks and soft valleys, almost like snow, which helps suspend the food coloring where you place it. Why this matters, the even bed of cream prevents colors from pooling too heavily in one spot and encourages soft marbling as the hard boiled eggs roll across it. Sense cues include the cool, slightly sweet scent of the cream and the quiet, soft thump of spooning it into the pan. One common mistake is overfilling the pan, which makes it hard to swirl without splashing, so keep a shallow layer for the best results.
- Add drops of food coloring to the whipped cream and use a toothpick to lightly swirl the colors into the whipped cream. Don't swirl too much, or you'll lose the beautiful marbleized look and muddy up the colors.: Choosing a muffin pan keeps colors separate for discrete, controlled palettes; you will see small nests of cream, perfect for single color experiments. The advantage is tidy color control, so each hard boiled egg emerges with distinct hues. Touch the cream gently with the back of a spoon to feel the smooth surface, and avoid packing it too firmly which can mute the marble effect. A frequent slipup is mixing colors directly into one well until muddy, so reserve one well per color when you want clear tones.
- Place the eggs into the whipped cream and gently roll using a spoon so the entire egg is covered.: This method yields crisp edges and clean transitions between hues, and visually you will notice small pools of jewel like color when you add the food coloring . The method matters because it prevents bleeding between shades, producing a compact effect that looks deliberate and graphic. A troubleshooting tip, if colors cling together, gently nudge the cream with a toothpick rather than stirring, to maintain separate streams. People sometimes over swirl, which turns everything muddy, so less movement preserves the pattern.
- Let the eggs sit in the whipped cream for 30-45 minutes depending on how bold you would like the colors.: When you prefer a more freeform appearance, dropping multiple hues into the big pan creates a painterly, blended look; you will see ribbons of color and subtle gradients form as you drag a toothpick through them. This technique produces seamless transitions and soft veins of pigment across each egg. The reward is a more organic aesthetic, but beware of over swirling which will dull the vibrancy, so stop when you still see distinct ribbons of color.
- Put on a pair of disposable gloves, remove eggs from the whipped cream and rinse them with water.: The concentrated food coloring blooms into the white cream in tiny droplets, and you will enjoy watching the pigments sit on the surface like little islands. This step controls intensity, because more drops equal bolder hues, while fewer drops yield pastel whispers. For troubleshooting, remember that gel colors are stronger than liquid, so adjust the drop count accordingly. Avoid placing too many drops in one location, which can make a saturated blotch instead of a pretty vein.
- Allow the eggs to dry on a paper towel, this will help absorb any excess dye.: The toothpick should move gently, drawing color through the cream in thin lines; you will hear a soft scraping sound and see delicate marbling develop. This gentle motion preserves the distinct colors while creating visual interest, and it is the moment you decide whether the look will be subtle or dramatic. A common error is vigorous stirring, which will homogenize the colors into an unattractive brown, so keep movements light and purposeful.
- Store in the refrigerator for up to 7 days.: The caution is sensory and practical, you will notice when the cream starts to lose defined streaks and becomes uniformly tinted, which signals it is time to stop. This restraint maintains clarity between hues and preserves the delicate veins that make each egg unique. If you overwork it, you cannot restore the original contrast, so practice restraint and step back when you still see distinct patterns forming.
- Place the eggs into the whipped cream and gently roll using a spoon so the entire egg is covered: As you roll each hard boiled egg , the cream will cling and transfer color in thin layers, and you may hear a faint sliding sound as the shell glides through the cream. Rolling ensures even coverage without pressing too hard, which could crack the egg. The why here is that even contact distributes pigments for a consistent marbled wrap. A typical mistake is forcing the egg into the cream which risks hairline cracks or uneven dye pickup, so be gentle and steady.
- Let the eggs sit in the whipped cream for 30 to 45 minutes depending on how bold you would like the colors: During this waiting period the dye gently migrates into the outer shell surface, and you will notice the cream around the eggs take on faint halos of color. Longer sits produce deeper saturation, while shorter rests keep the look delicate. The sensory cue is subtle change in the cream color near the shell, indicating dye transfer. Watch out for leaving eggs too long if you used very strong gel colors, which can create overly intense spots, so check at the 30 minute mark and adjust from there.
- Put on a pair of disposable gloves, remove eggs from the whipped cream and rinse them with water: Rinsing removes excess cream and stops the dye migration, and you will feel the shells go from tacky to smooth under running water. This step finishes the look and prevents residual cream from streaking during drying. A troubleshooting tip is to rinse gently to avoid smearing paint like streaks; if the dye seems uneven, a soft brush can help even things out without rubbing too hard.
- Allow the eggs to dry on a paper towel, this will help absorb any excess dye: Laying them on a paper towel also prevents smudges as the color sets, and you will hear the faint rustle of the towel and notice damp rings form where the egg rested. Drying is where the final appearance reveals itself, so allow enough time for shells to feel completely dry to the touch. Common mistakes include stacking eggs while wet, which transfers color, so give them space to rest individually until fully dry.
- Store in the refrigerator for up to 7 days: Once dry, place your decorated hard boiled eggs in a covered container and chill, the cool environment preserves freshness and the delicate color finish. I find a single layer keeps them safest from rubbing against one another. Avoid leaving them at room temperature for long periods, because they are still perishable, and check for any shell cracks which can accelerate spoilage.
Notes
- Keep colors separate when you want clarity, use a muffin pan so each hue stays independent and you avoid muddy blends, especially when working with multiple people.
- Use gloves to protect hands, disposable gloves prevent dye transfer and make cleanup fast, which is especially helpful if you are crafting with kids.
- Start with a light touch on the toothpick, gentle swirling preserves distinct veins of color, and stopping early prevents the colors from blending into an undesirable shade.
- Adjust dwell time for intensity, leave eggs in the cream for 30 minutes for subtle pastels, up to 45 minutes for bolder saturation, and check often if using strong gel dyes.
- Dry individually on paper towels, spacing eggs out prevents smudging and ensures each shell sets without contact marks from its neighbors.