Swedish Pot Roast
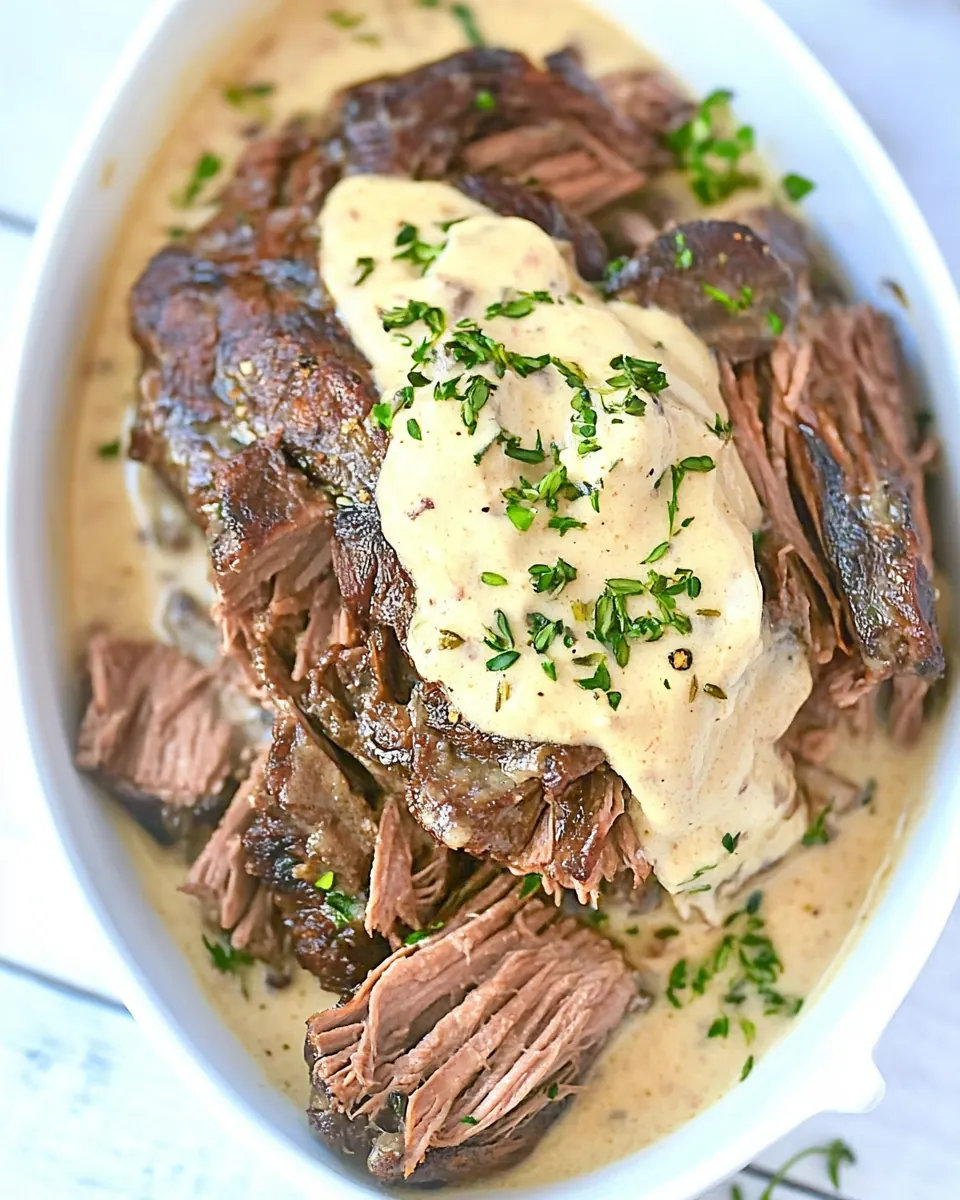
Swedish Pot Roast is one of those recipes I return to when I want something cozy and reliably satisfying on a chilly evening. The first time I made it, I remember the house filling with a warm, meaty aroma that made the whole neighborhood feel like company. I had been craving something slow cooked, comforting, and a little nostalgic, and this pot roast delivered exactly that, layer by layer, with deep, mellow flavors and a velvety gravy that hugs each forkful.
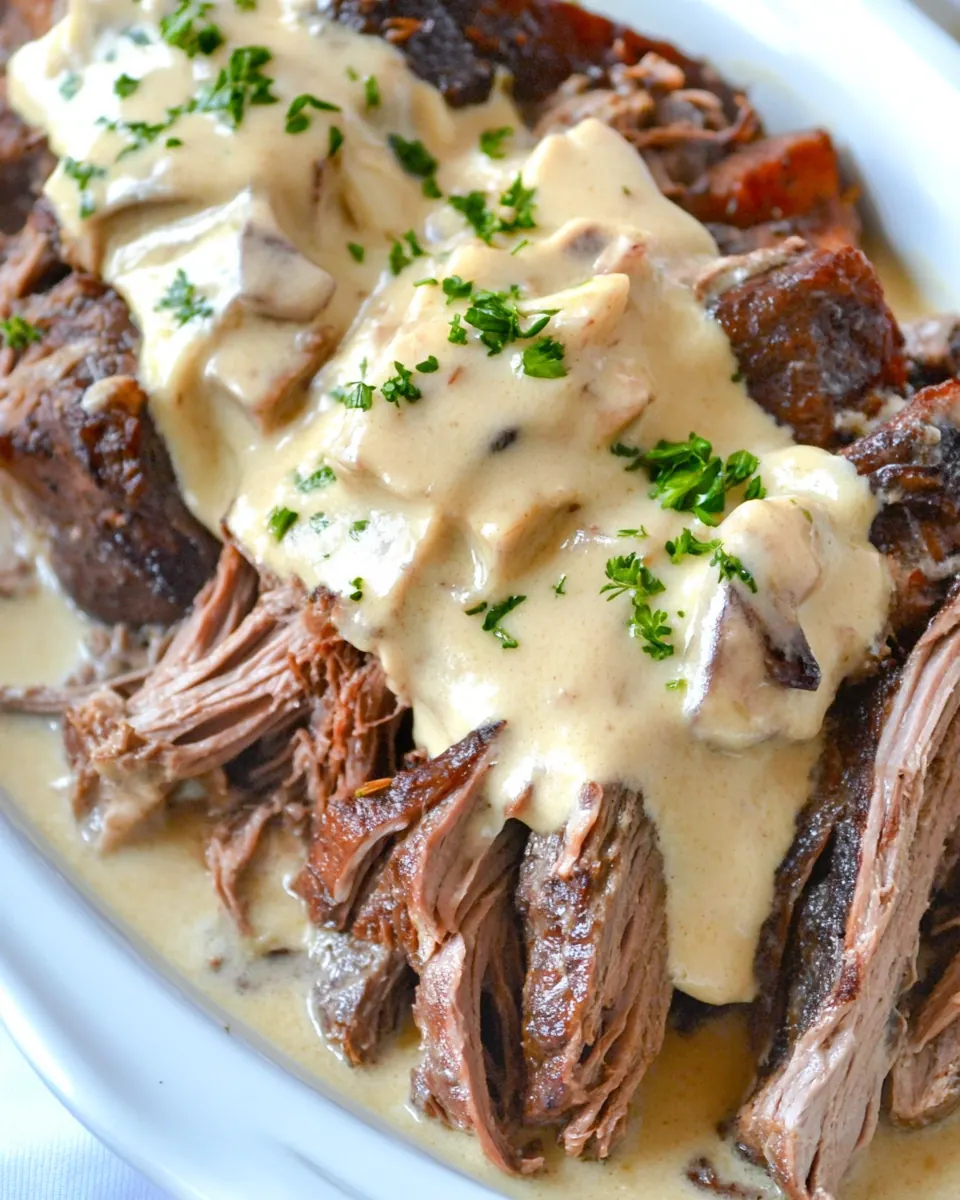
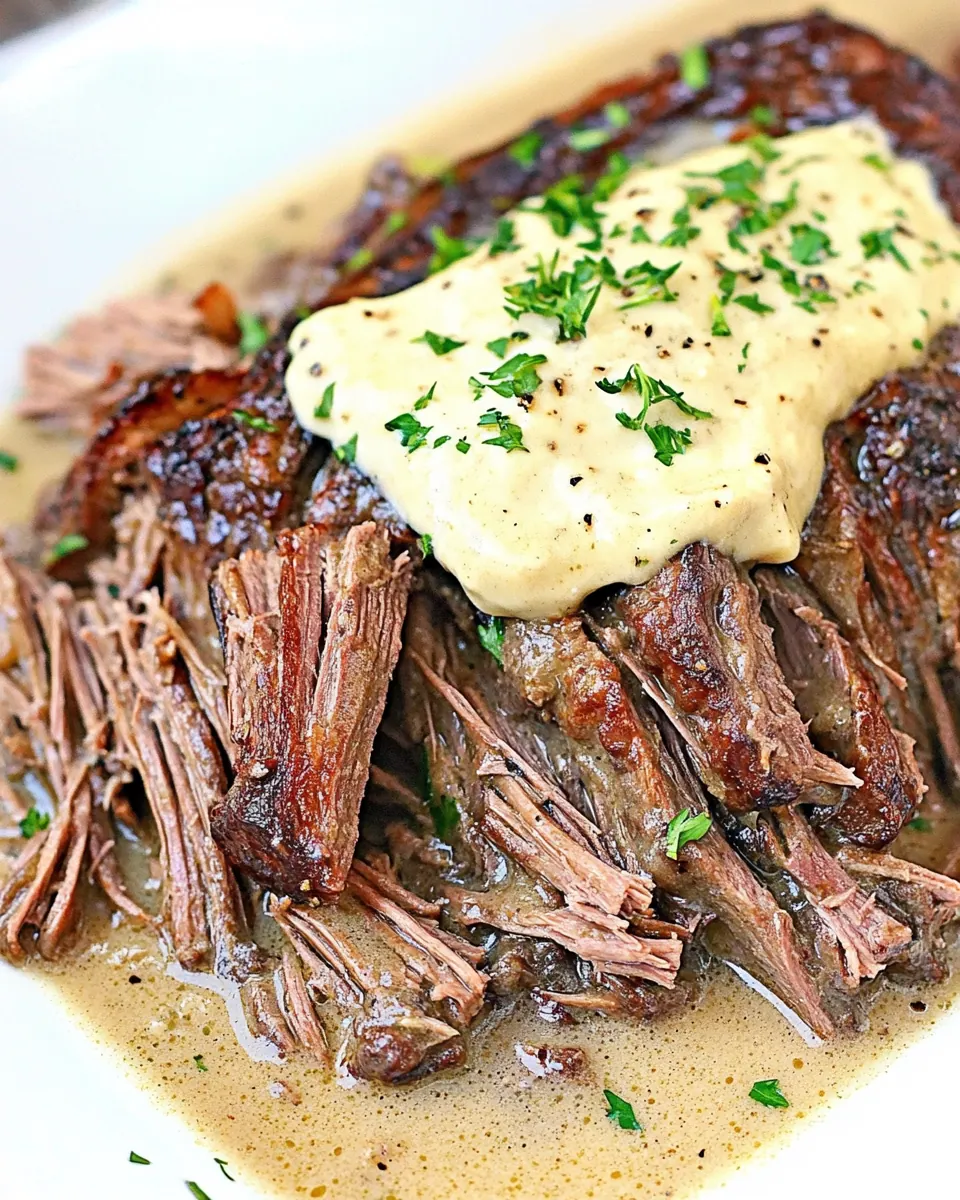
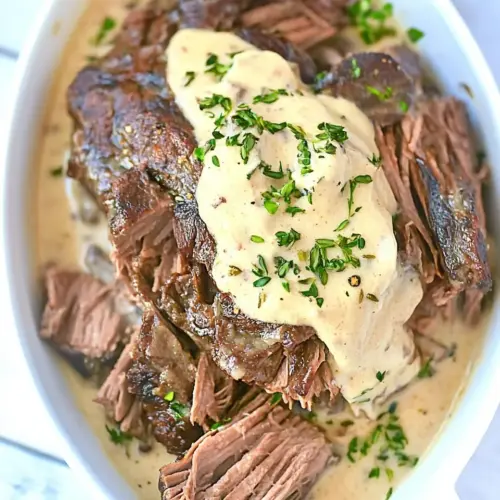
On that night I invited a friend who was having a tough week, and we ate straight from the pot as if we were kids again. The roast was fork tender, the mushrooms browned and fragrant, and the gravy had that silkiness that makes mashed potatoes sing. I loved how the simple seasonings let the beef speak, while the gravy tied everything together. Every bite felt like a small celebration of patience and good technique.
Recipe Snapshot
4 hr 30 mins
30 mins
240 mins
Hard
450 kcal
Swedish
Gluten-Free, Keto
Dinner
Large skillet, 2 1/2 quart dutch oven, Whisk
The Charm of This Swedish Pot Roast
Slow cooked tenderness that feels homemade
I adore how Swedish Pot Roast turns a modest cut of beef into something melt in your mouth tender. The long, gentle baking breaks down connective tissue, so you get that falling apart texture without fuss, and I always find it rewarding to see a knife glide through the meat.
Balanced, comforting gravy
The gravy is a quiet star here. Using pan drippings, butter, a touch of flour, and a bit of milk creates a sauce that is rich but not heavy. I lean on the mushrooms for umami and a meaty counterpoint, and that makes every spoonful deeply satisfying.
Accessible ingredients, big flavor
This recipe uses pantry friendly items like smoked paprika, garlic powder, and bouillon granules, so you can pull it together without a special trip to the store. I appreciate recipes that reward a small investment of time with maximum taste, and this one does just that.
Perfect for gatherings or quiet dinners
I often make this when friends drop by or when I want dinner that practically makes itself. It scales nicely, and because the roast keeps so well, leftovers are great for lunches. The texture improves slightly after resting, so I sometimes make it one day and serve it the next.
Comfort food with technique
There is a little theater in the steps, from searing to browning the mushrooms for the gravy, and that process delivers big sensory rewards. The aromas, the sizzling, the color changes, all feel like small wins, and I enjoy watching the dish evolve.
Ingredients Overview for Swedish Pot Roast
These ingredients are chosen to build a classic, comforting pot roast where each element plays a clear role. The English shoulder roast supplies rich, slow cooked meatiness, while the aromatic powders and herbs create a savory crust. The mushrooms add earthy umami to the gravy, and the combination of butter, pan juices, and flour forms a velvety sauce finished with milk. Together, they create a balanced plate that feels both rustic and refined.
- 2 tablespoons vegetable oil: Heat and sauté to provide a neutral frying medium that prevents sticking and helps brown the roast evenly, contributing a mild flavor and crisp exterior while transferring heat efficiently during searing.
- 1/4 teaspoons salt: Season sparingly to enhance the natural flavors of the meat and vegetables without overpowering them, promoting balanced savory notes and helping proteins develop a better crust when cooked.
- 1/4 teaspoon ground black pepper: Season and brighten by adding a sharp, pungent heat that complements savory elements and deepens the overall flavor profile; used in small amounts to avoid dominating the dish.
- 1 tablespoon dried parsley: Garnish and infuse a subtle herbal freshness that lifts rich flavors and adds visual appeal; sprinkle into rubs or gravy to provide mild earthiness and color contrast.
- 1 teaspoon smoked paprika: Smoke and deepen to introduce a warm, slightly sweet heat that enhances roasted and meaty flavors, giving the dish a rustic, smoky undertone without requiring actual smoking equipment.
- 1/2 teaspoon onion powder: Enhance and amplify savory sweetness with concentrated onion flavor that supports the roast’s umami while blending seamlessly into sauces and gravies for consistent depth.
- 1 teaspoon garlic powder: Aromatize and enrich the dish with concentrated garlic notes that provide pungent, savory depth; ideal for seasoning the roast and the accompanying gravy for a robust taste.
- 2 1/2 pounds English shoulder roast: Roast as the primary protein and slow-cook to tenderize connective tissue, developing rich, beefy flavors and yielding slices that absorb seasoning and sauce while providing hearty substance.
- 8 ounces mushrooms: Sauté or simmer to contribute an earthy, savory element that complements the beef; mushrooms release liquid that enriches the pan juices and add textural contrast when browned.
- 2 tablespoons unsalted butter: Melt and brown to add a rich, creamy fat that helps sauté mushrooms and aromatics, contributing a silky mouthfeel to sauces and a buttery finish to the overall dish.
- 2 tablespoons beef juices from the cooked roast: Deglaze and concentrate by using pan juices to carry concentrated beef flavor into the sauce; small amounts intensify gravy base and provide authentic roast taste.
- 2 tablespoons all-purpose flour: Thicken and brown to create a roux-like base for the gravy that helps the sauce cling to meat and vegetables, while lightly toasting flour improves flavor and reduces raw taste.
- 2 teaspoons beef bouillon granules: Boost and deepen umami by adding concentrated beef flavor that enhances the richness of the gravy and compensates for dilution from milk, ensuring a robust savory profile.
- Salt and pepper black pepper: Season generously to adjust taste and balance flavors at the end of cooking; salt enhances savory notes while black pepper contributes mild heat and aromatic lift when finished.
- 2 cups milk: Dilute and enrich to create a creamy, smooth gravy that melds with the browned roux and beef juices, providing a comforting, slightly sweet dairy note and silky texture to the sauce.
Directions for Swedish Pot Roast
These directions will guide you through searing the roast, baking it low and slow until fork tender, and finishing a mushroom gravy that sings. I’ll walk you through sensory cues and what to watch for so you can be confident at each stage.
- Preheat oven to 300 degrees F.: You will notice a gentle warmth in the kitchen as the oven reaches temperature, which creates the perfect low heat for breaking down collagen in the beef without drying it. A consistent oven temp ensures even cooking from edge to center, and it prevents the exterior from overcooking while the interior becomes tender. One common mistake is rushing this step, placing the roast into an oven that is too hot, which can tighten the meat and make it less tender.
- Mix together the seasonings in a small bowl and rub well all over the meat.: At this point you will detect the aroma of smoked paprika and garlic as they are combined, and rubbing the seasonings onto the surface helps them adhere and form a flavorful crust when seared. The physical act of massaging the spices also helps them penetrate slightly into the surface. Avoid over salting at this stage, which can draw out moisture if left too long before cooking.
- Place a large skillet over medium heat, and heat the oil.: Heating the vegetable oil until it shimmers but does not smoke creates the ideal surface for a good sear. You should hear a light sizzle when you add the meat, and that sound signals a Maillard reaction that builds complex flavors. A common pitfall is using too low a heat which results in steaming rather than searing, so make sure the pan is hot enough.
- Once hot, brown the roast on all sides until nicely seared and browned.: You will see a deep brown crust form and smell rich, toasted notes as the surface caramelizes; this crust is crucial because it becomes the foundation for the gravy’s flavor. Browning also locks in juices and creates savory fond in the pan. Try not to move the roast constantly, or the crust may not develop evenly.
- Place the meat into a 2 1/2 quart dutch oven and cover it with the lid.: Transferring the seared roast into a covered pot creates a moist, even cooking environment that allows the beef to slowly tenderize. The closed pot traps steam and melds flavors, producing that fork tender texture. Be careful not to crowd the pot, which can change cooking dynamics and lengthen cooking time.
- Set aside the skillet with the drippings for the gravy later.: Those browned bits and rendered fat in the skillet are flavor-packed and should be reserved for the gravy. As they cool slightly, they release concentrated beefy aroma that will deepen the sauce. Avoid wiping the pan clean or discarding the drippings, which would be a wasted flavor opportunity.
- Bake the roast for 3-4 hours or until fork-tender.: Over the long bake you will notice the house fills with savory steam and the roast will gradually yield to a fork, signaling it is done. The connective tissue will have softened into silky gelatin, giving the meat its luscious texture. Resist the urge to check too often, since lifting the lid frequently lets heat escape and can prolong cooking time.
- Place the skillet with the drippings over medium heat and add the butter, melt it and add the mushrooms. Cook them stirring until nicely browned and tender.: As the butter melts you will smell a nutty, rich aroma and the sliced mushrooms will release moisture before caramelizing; the sizzling and browning add layers of flavor for the gravy. Browning the mushrooms properly builds depth and texture, and you should avoid overcrowding the pan which causes steaming rather than browning.
- Add two tablespoons of the juices from the roast from the dutch oven.: Those concentrated juices bring immediate, savory intensity to the skillet and marry the mushroom flavors to the roast. When added, you may hear a gentle hiss and notice the sauce start to come together; this is the moment that transforms pan flavors into sauce base. Be cautious using too much liquid at once which can dilute flavors instead of concentrating them.
- Add in the flour, beef bouillon, salt, and pepper, and mix well.: Stirring in the flour and bouillon creates a roux like base that thickens the gravy and infuses it with savory notes. You will want to cook the flour briefly to remove any raw taste and let it absorb the fat, which contributes to a smooth texture. A common error is not cooking the flour long enough, leaving a pasty texture in the finished gravy.
- Slowly pour 1/2 cup of milk and whisk until the mixture is smooth.: Adding the milk gradually while whisking prevents lumps and yields a silky consistency; you will see the sauce start to loosen and gloss. The first addition should be incorporated fully before adding more to ensure a lump free result. If poured too quickly, the sauce can form clumps that are hard to break down.
- Add the remaining 1/2 cup of milk and whisk until smooth and bring to a low boil, whisking constantly.: Bringing the sauce to a gentle boil activates the thickening power of the flour , and whisking keeps it smooth and prevents scorching. You will hear a soft bubbling and see the gravy thicken and become shiny, which signals readiness. Keep the heat moderate to avoid separating or scorching the milk.
- Cook for 5-7 minutes or until the gravy has thickened. Remove from heat.: During these minutes the flavors meld and the gravy achieves a clingy, spoonable texture; you can smell the deepened beefy note and see it coat the back of a spoon. Finishing off the heat preserves that glossy body without over reducing. Overcooking here can make the gravy too thick once cooled, so monitor closely.
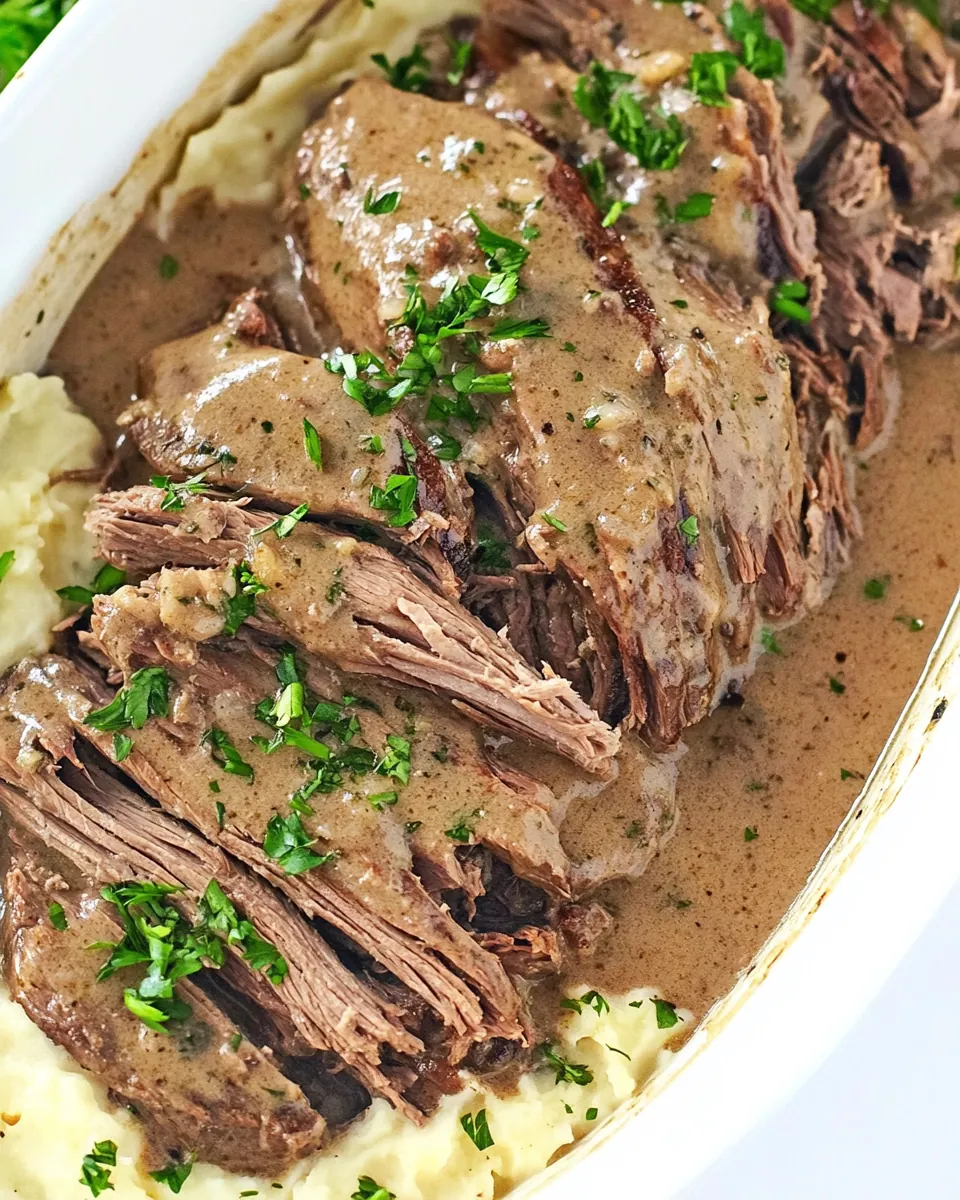
- Serve the pot roast and gravy over mashed potatoes.: The first bite will be warm, saucy, and comforting, with the tender beef yielding easily and the gravy marrying with the fluffy potatoes for perfect mouthfeel. Serving on a starch carries the sauce and balances richness. A common mistake is plating too much gravy which can overwhelm delicate flavors, so taste and adjust portions.
- Garnish with fresh parsley.: The final touch of fresh herb adds a bright color contrast and a clean, herbaceous note against the rich gravy. It lifts the plate visually and flavors-wise, making each forkful feel complete. Avoid heavy garnishes that mask the dish, a light sprinkle is all you need.
Tips for Success
I like to keep a few practical tricks up my sleeve when making Swedish Pot Roast. These help with consistency, texture, and flavor, especially when you are cooking for guests or prepping ahead. Below are expanded, hands on tips that I rely on every time.
- Brown well: Take time to develop a deep sear on the roast, because that caramelized surface creates the savory base for the gravy and adds textural contrast.
- Reserve drippings: Save the pan drippings and use them in the gravy for concentrated beef flavor that store bought broths cannot match.
- Low and slow: Cook the roast at the recommended low oven temperature so collagen breaks down gently, producing tender, succulent meat.
- Whisk continuously: When adding milk to the roux, whisk steadily to prevent lumps and achieve a smooth, glossy gravy.
- Don’t overcrowd mushrooms: Brown them in small batches if needed so they caramelize rather than steam, which intensifies their umami contribution.
- Adjust seasoning at the end: Always taste the gravy before serving and tweak salt and pepper so flavors are balanced and fresh.
Accompaniments for Swedish Pot Roast
This roast pairs beautifully with simple, comforting sides and suits a range of occasions from quiet family dinners to festive winter gatherings. I’ll outline serving ideas, storage tips, and seasonal suggestions to help you present the dish confidently.
- Mashed potatoes: Classic and indispensable, they soak up gravy and provide a creamy counterpoint to the tender beef. Serve piping hot for best texture.
- Steamed vegetables: Lightly steamed carrots, green beans, or peas add color and a fresh contrast to the richness of the roast and gravy.
- Hearty bread: A crusty loaf or dinner rolls are useful for mopping up extra gravy and make the meal feel homey and complete.
- Occasions: This recipe shines at winter family dinners, cozy weekend lunches, and holiday gatherings where you want something comforting and substantial.
- Storage: Cool leftovers quickly and refrigerate in an airtight container for up to three days; reheat gently over low heat to preserve texture, adding a splash of milk or pan juices if the gravy thickens too much.
- Make ahead: The flavors often improve after a day, so preparing it a day early can deepen the taste and make hosting less stressful.
FAQ
Conclusion
This Swedish Pot Roast stands out for its comforting textures and deep, savory gravy that makes every forkful feel like a little celebration. I encourage you to give it a try, especially on a cool evening when you want something that nourishes both body and spirit. Invite a friend, set a simple table, and enjoy the slow cooked rewards that come from a bit of patience and a good sear.
Swedish Pot Roast
Equipment
- Large Skillet
- 2 1/2 quart dutch oven
- Whisk
Ingredients
- 2 tablespoons vegetable oil Heat and sauté to provide a neutral frying medium that prevents sticking and helps brown the roast evenly, contributing a mild flavor and crisp exterior while transferring heat efficiently during searing.
- 1/4 teaspoons salt Season sparingly to enhance the natural flavors of the meat and vegetables without overpowering them, promoting balanced savory notes and helping proteins develop a better crust when cooked.
- 1/4 teaspoon ground black pepper Season and brighten by adding a sharp, pungent heat that complements savory elements and deepens the overall flavor profile; used in small amounts to avoid dominating the dish.
- 1 tablespoon dried parsley Garnish and infuse a subtle herbal freshness that lifts rich flavors and adds visual appeal; sprinkle into rubs or gravy to provide mild earthiness and color contrast.
- 1 teaspoon smoked paprika Smoke and deepen to introduce a warm, slightly sweet heat that enhances roasted and meaty flavors, giving the dish a rustic, smoky undertone without requiring actual smoking equipment.
- 1/2 teaspoon onion powder Enhance and amplify savory sweetness with concentrated onion flavor that supports the roast’s umami while blending seamlessly into sauces and gravies for consistent depth.
- 1 teaspoon garlic powder Aromatize and enrich the dish with concentrated garlic notes that provide pungent, savory depth; ideal for seasoning the roast and the accompanying gravy for a robust taste.
- 2 1/2 pounds English shoulder roast Roast as the primary protein and slow-cook to tenderize connective tissue, developing rich, beefy flavors and yielding slices that absorb seasoning and sauce while providing hearty substance.
- 8 ounces mushrooms Sauté or simmer to contribute an earthy, savory element that complements the beef; mushrooms release liquid that enriches the pan juices and add textural contrast when browned.
- 2 tablespoons unsalted butter Melt and brown to add a rich, creamy fat that helps sauté mushrooms and aromatics, contributing a silky mouthfeel to sauces and a buttery finish to the overall dish.
- 2 tablespoons beef juices from the cooked roast Deglaze and concentrate by using pan juices to carry concentrated beef flavor into the sauce; small amounts intensify gravy base and provide authentic roast taste.
- 2 tablespoons all-purpose flour Thicken and brown to create a roux-like base for the gravy that helps the sauce cling to meat and vegetables, while lightly toasting flour improves flavor and reduces raw taste.
- 2 teaspoons beef bouillon granules Boost and deepen umami by adding concentrated beef flavor that enhances the richness of the gravy and compensates for dilution from milk, ensuring a robust savory profile.
- Salt and pepper black pepper Season generously to adjust taste and balance flavors at the end of cooking; salt enhances savory notes while black pepper contributes mild heat and aromatic lift when finished.
- 2 cups milk Dilute and enrich to create a creamy, smooth gravy that melds with the browned roux and beef juices, providing a comforting, slightly sweet dairy note and silky texture to the sauce.
Instructions
- Preheat oven to 300 degrees F.: You will notice a gentle warmth in the kitchen as the oven reaches temperature, which creates the perfect low heat for breaking down collagen in the beef without drying it. A consistent oven temp ensures even cooking from edge to center, and it prevents the exterior from overcooking while the interior becomes tender. One common mistake is rushing this step, placing the roast into an oven that is too hot, which can tighten the meat and make it less tender.
- Mix together the seasonings in a small bowl and rub well all over the meat.: At this point you will detect the aroma of smoked paprika and garlic as they are combined, and rubbing the seasonings onto the surface helps them adhere and form a flavorful crust when seared. The physical act of massaging the spices also helps them penetrate slightly into the surface. Avoid over salting at this stage, which can draw out moisture if left too long before cooking.
- Place a large skillet over medium heat, and heat the oil.: Heating the vegetable oil until it shimmers but does not smoke creates the ideal surface for a good sear. You should hear a light sizzle when you add the meat, and that sound signals a Maillard reaction that builds complex flavors. A common pitfall is using too low a heat which results in steaming rather than searing, so make sure the pan is hot enough.
- Once hot, brown the roast on all sides until nicely seared and browned.: You will see a deep brown crust form and smell rich, toasted notes as the surface caramelizes; this crust is crucial because it becomes the foundation for the gravy’s flavor. Browning also locks in juices and creates savory fond in the pan. Try not to move the roast constantly, or the crust may not develop evenly.
- Place the meat into a 2 1/2 quart dutch oven and cover it with the lid.: Transferring the seared roast into a covered pot creates a moist, even cooking environment that allows the beef to slowly tenderize. The closed pot traps steam and melds flavors, producing that fork tender texture. Be careful not to crowd the pot, which can change cooking dynamics and lengthen cooking time.
- Set aside the skillet with the drippings for the gravy later.: Those browned bits and rendered fat in the skillet are flavor-packed and should be reserved for the gravy. As they cool slightly, they release concentrated beefy aroma that will deepen the sauce. Avoid wiping the pan clean or discarding the drippings, which would be a wasted flavor opportunity.
- Bake the roast for 3-4 hours or until fork-tender.: Over the long bake you will notice the house fills with savory steam and the roast will gradually yield to a fork, signaling it is done. The connective tissue will have softened into silky gelatin, giving the meat its luscious texture. Resist the urge to check too often, since lifting the lid frequently lets heat escape and can prolong cooking time.
- Place the skillet with the drippings over medium heat and add the butter, melt it and add the mushrooms. Cook them stirring until nicely browned and tender.: As the butter melts you will smell a nutty, rich aroma and the sliced mushrooms will release moisture before caramelizing; the sizzling and browning add layers of flavor for the gravy. Browning the mushrooms properly builds depth and texture, and you should avoid overcrowding the pan which causes steaming rather than browning.
- Add two tablespoons of the juices from the roast from the dutch oven.: Those concentrated juices bring immediate, savory intensity to the skillet and marry the mushroom flavors to the roast. When added, you may hear a gentle hiss and notice the sauce start to come together; this is the moment that transforms pan flavors into sauce base. Be cautious using too much liquid at once which can dilute flavors instead of concentrating them.
- Add in the flour, beef bouillon, salt, and pepper, and mix well.: Stirring in the flour and bouillon creates a roux like base that thickens the gravy and infuses it with savory notes. You will want to cook the flour briefly to remove any raw taste and let it absorb the fat, which contributes to a smooth texture. A common error is not cooking the flour long enough, leaving a pasty texture in the finished gravy.
- Slowly pour 1/2 cup of milk and whisk until the mixture is smooth.: Adding the milk gradually while whisking prevents lumps and yields a silky consistency; you will see the sauce start to loosen and gloss. The first addition should be incorporated fully before adding more to ensure a lump free result. If poured too quickly, the sauce can form clumps that are hard to break down.
- Add the remaining 1/2 cup of milk and whisk until smooth and bring to a low boil, whisking constantly.: Bringing the sauce to a gentle boil activates the thickening power of the flour , and whisking keeps it smooth and prevents scorching. You will hear a soft bubbling and see the gravy thicken and become shiny, which signals readiness. Keep the heat moderate to avoid separating or scorching the milk.
- Cook for 5-7 minutes or until the gravy has thickened. Remove from heat.: During these minutes the flavors meld and the gravy achieves a clingy, spoonable texture; you can smell the deepened beefy note and see it coat the back of a spoon. Finishing off the heat preserves that glossy body without over reducing. Overcooking here can make the gravy too thick once cooled, so monitor closely.
- Serve the pot roast and gravy over mashed potatoes.: The first bite will be warm, saucy, and comforting, with the tender beef yielding easily and the gravy marrying with the fluffy potatoes for perfect mouthfeel. Serving on a starch carries the sauce and balances richness. A common mistake is plating too much gravy which can overwhelm delicate flavors, so taste and adjust portions.
- Garnish with fresh parsley.: The final touch of fresh herb adds a bright color contrast and a clean, herbaceous note against the rich gravy. It lifts the plate visually and flavors-wise, making each forkful feel complete. Avoid heavy garnishes that mask the dish, a light sprinkle is all you need.
Notes
- Brown well: Take time to develop a deep sear on the roast, because that caramelized surface creates the savory base for the gravy and adds textural contrast.
- Reserve drippings: Save the pan drippings and use them in the gravy for concentrated beef flavor that store bought broths cannot match.
- Low and slow: Cook the roast at the recommended low oven temperature so collagen breaks down gently, producing tender, succulent meat.
- Whisk continuously: When adding milk to the roux, whisk steadily to prevent lumps and achieve a smooth, glossy gravy.
- Don’t overcrowd mushrooms: Brown them in small batches if needed so they caramelize rather than steam, which intensifies their umami contribution.
- Adjust seasoning at the end: Always taste the gravy before serving and tweak salt and pepper so flavors are balanced and fresh.