Easter Peep Cake
Easter Peep Cake has been my favorite festive project every spring, the kind of treat that makes the whole kitchen feel like a celebration. The first time I baked one, a sugar-crusted Bunny Peep met a cloud of buttercream and somehow turned an ordinary Sunday into a small, noisy party. I still remember carrying it to the table while children and neighbors peered over my shoulder, drawn by the candy colors and the coconut grass.
Over the years I’ve adjusted textures and techniques to make the cake both sturdy and soft, and I’ve learned to pace the decorating so the process is as fun as the result. I like to bake and chill the layers ahead so frosting feels relaxing rather than frantic. When friends ask for tips, I tell them the secret is confidence plus a good offset spatula, and that a tiny drop of gel color packs more punch than you’d think.
Recipe Snapshot
55 mins
30 mins
25 mins
Medium
400 kcal
American
Gluten-Free, Low FODMAP
Desserts
39-inch cake pans, 3 Parchment paper circles, Electric mixer, Offset spatula
Why This Easter Peep Cake Hits Different
Playful Presentation That Wows
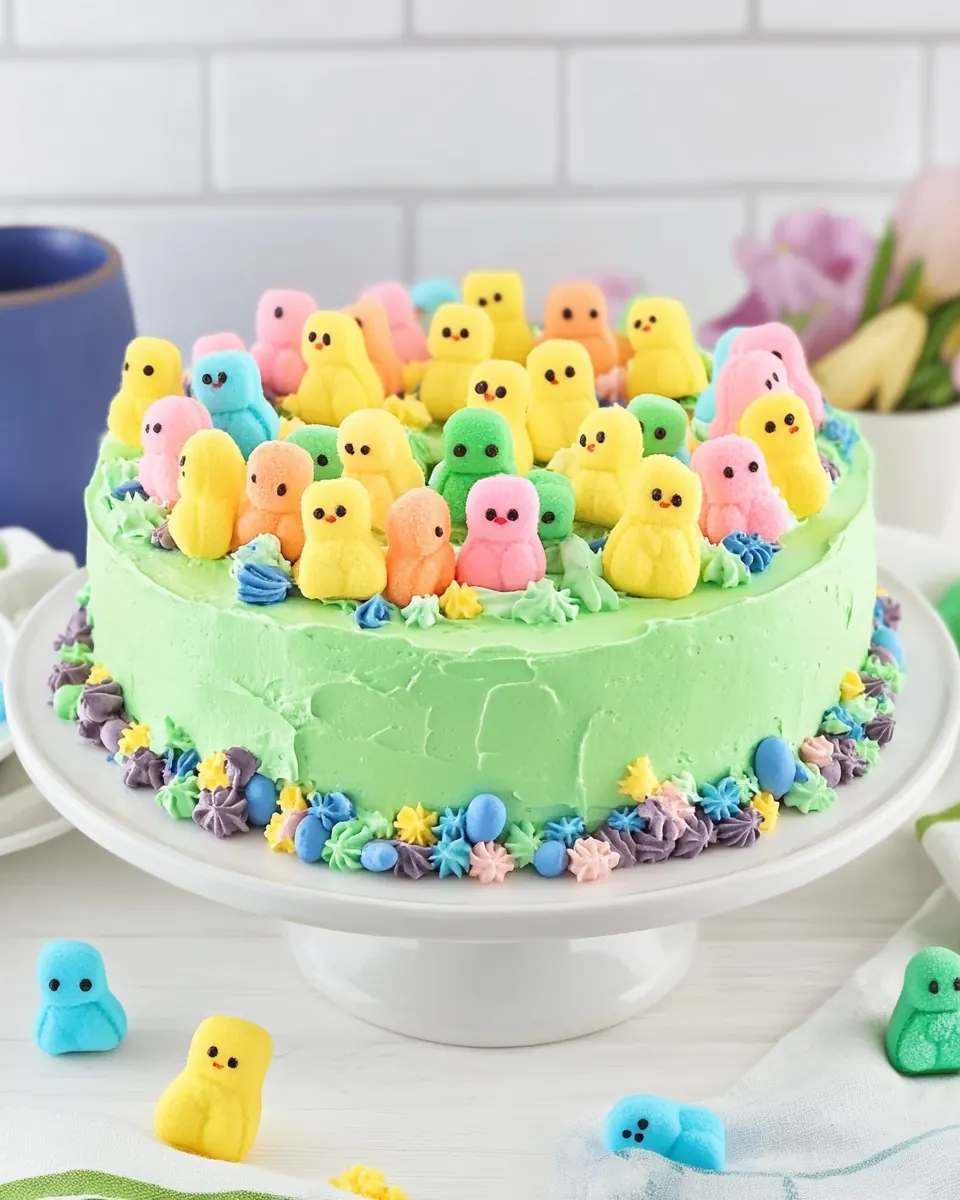
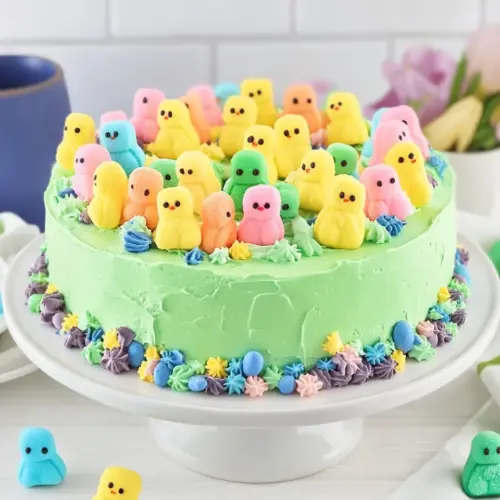
I love how Easter Peep Cake turns a simple layer cake into a holiday centerpiece. The trio of colored layers creates an instant visual impact, and arranging the Bunny Peeps around the sides gives it character and charm. Guests always comment on the candy border first, which makes the cake feel both nostalgic and celebratory.
Texture Balance That Works
The recipe balances a tender crumb with a rich buttercream so each forkful has body plus creaminess. Using buttermilk or whole milk keeps the crumb moist while the frosting adds a silky mouthfeel. I appreciate recipes that give a soft cake that will still support layers and decorations without collapsing.
Flexible Decorating for Every Skill Level
Whether you’re nervous about piping or love to play with colors, this Easter Peep Cake adapts. The instructions include a simple crumb coat and basic piped swirls, so you can stop there or elaborate. I often nudge folks to try small steps, like piping a modest border first, then building confidence for bolder touches.
Kid Friendly and Joyful
Kids adore helping with the coconut grass and placing the Bunny Peeps. It’s a recipe that invites participation, and I’ve found that letting little hands place the final M&M’s takes some of the pressure off the baker. The bright gel colors mean you get impressive results from a tiny amount of coloring gel.
Reliable Techniques for Consistent Results
From measuring flour spooned and leveled to chilling the crumb coat, these small techniques make a big difference. I respect recipes that teach the why behind each move, so you end up with a cake that looks as intended and tastes fantastic. I’ve baked this version enough times to know when an oven runs hot or a batter needs a gentler fold.
What to Buy for Easter Peep Cake
For Easter Peep Cake I focus on ingredients that create a tender, moist crumb and a stable, fluffy buttercream. The key players are the real butter for richness, the right balance of leaveners for lift, and the cream for a silky frosting. Colorful accents and candy give the cake its festive personality.
- 1 cup 2 sticks (250 g) unsalted butter softened: Cream together to provide a rich, tender base and contribute moisture and flavor; softened butter also helps incorporate air when beaten, producing a lighter cake crumb.
- 2 cups (400 g) granulated sugar: Sweeten evenly to balance flavors and aid in creaming with butter for structure; granulated sugar also helps with browning and texture in the baked cake.
- 3 large eggs at room temperature: Bind and leaven slightly while adding richness and moisture; room temperature eggs emulsify better, creating a smooth batter and improved rise.
- 1 cup buttermilk or whole milk: Moisten and tenderize the cake while reacting with leaveners for proper crumb; choose buttermilk for tang and extra tender texture, or whole milk for a milder flavor.
- 2 teaspoons pure vanilla extract: Flavor subtly and enhance other aromatics; pure vanilla extract rounds out sweetness and complements the overall cake profile.
- 3 cups all purpose flour spooned and leveled, plus extra for dusting pans: Provide the primary structure and bulk for the cake; spooned-and-leveled all-purpose flour yields consistent measuring and helps achieve reliable texture.
- 2 teaspoons baking powder: Lighten the cake and help it rise by producing carbon dioxide when heated; baking powder contributes primary leavening for a soft crumb.
- 1 teaspoon baking soda: React with acidic ingredients to produce additional lift and tenderize; baking soda balances pH for color and flavor development.
- 1/2 teaspoon salt: Season and balance sweetness while strengthening gluten slightly; a small amount of salt enhances the cake's overall flavor profile.
- 1 drop Gel Food Coloring each about 1/4 teaspoon: Pink, yellow, and blue: Tint small amounts of batter to create pastel layers without altering texture; gel food coloring provides concentrated color with minimal liquid.
- 2 cups 4 sticks (450 g) unsalted butter softened: Whip into frosting to create a rich, creamy texture and provide flavor; softened butter forms the base of a stable, spreadable icing.
- 8 cups powdered sugar: Sweeten the frosting and provide structure for piping and spreading; powdered sugar dissolves smoothly for a stable, sweet buttercream.
- 1 tablespoon pure vanilla extract: Flavor the frosting and add aromatic depth; pure vanilla extract enhances the sweetness and rounds the overall icing taste.
- 1/2 teaspoon salt: Balance sweetness and stabilize the frosting while enhancing mouthfeel; salt in frosting brings out flavor and reduces cloying notes.
- 1/4 cup heavy whipping cream: Thin and smooth the frosting while adding richness; heavy cream adjusts consistency for spreading and creates a silky mouthfeel.
- 24 Bunny Peeps pink, blue, and yellow: Decorate and add a seasonal, chewy candy element that softens slightly on the cake; Bunny Peeps provide playful color and themed appeal.
- 1 cup sweetened coconut flakes dyed green: Simulate grass for a festive finish and add subtle coconut flavor and texture; dyeing coconut green creates a decorative bed for candies.
- 1 bag Easter M&M's: Garnish with colorful candy for crunch and extra sweetness; Easter M&M's contribute bright colors and bite-sized pieces for visual interest.
Directions for Easter Peep Cake
I approach the assembly of Easter Peep Cake like carving a few calm hours out of the day, so pacing matters. Read each step before you start and gather your tools, because the rhythm of baking and decorating keeps everything smooth. Have your butter and eggs at room temperature, and know that chilling between coats makes frosting easier.
- Preheat the oven to 350°F / 180°C. Grease 3 x 9-inch pans with shortening or butter and dust with a tablespoon of flour each. Set pans aside.: You will smell the faint warmth as the oven reaches temperature, and the air will feel ready for baking. Greasing and flouring the pans creates a thin barrier so the cakes release cleanly after baking, preventing tearing. If you skip proper greasing, cakes may cling and break apart when inverted, so take the extra minute now. A common mistake is overflouring which creates a dusty edge on the cake, so tap out excess flour gently before adding batter.
- In a large bowl, cream together the butter and sugar with an electric mixer on medium speed. Add the eggs, one at a time, and make sure each egg is fully incorporated before adding the next. Add the vanilla extract, and beat until well blended.: At this stage you will hear the mixer hum and see the mixture turn pale and creamy, signaling air whipped into the butter . Each egg should disappear into the batter before the next goes in, creating a cohesive emulsion. This texture traps lift for the cake while keeping it tender. Avoid adding eggs all at once, which can cause the mixture to separate and result in a dense crumb.
- In a separate medium bowl, sift and then whisk together the flour, baking powder, baking soda, and salt to make sure it’s thoroughly combined. With a wooden spoon or spatula, gradually fold in the dry ingredients to the wet ingredients, alternating adding the flour and the buttermilk, until just barely combined. Do not over-mix the batter.: The dry mixture will smell faintly of toasted grain once combined, and folding gently keeps the batter light. Alternating additions helps maintain an even consistency and prevents overworking the gluten. If you overmix, the cake will become tough, so stop as soon as streaks disappear. A common pitfall is vigorous stirring, which ruins the tender crumb.
- Divide the batter equally into three small or medium bowls. (It’s best to use a digital kitchen scale to make sure the weights are equal.) Add a drop of the pink, blue, and yellow food coloring separately to each bowl of batter. Stir the batter gently until the color is well mixed. Pour each batter into each of the 3 cake tins.: You will notice the batter take on bright hues quickly because gel color is concentrated, and the bowls will look festive. Weighing ensures even layers so the tier stacks level. Pour carefully into the prepared pans so edges are smooth and uniform. A slip here is spilling batter, so scrape the bowl with a spatula and keep counters clean.
- Bake on the middle rack of the oven for 20-25 minutes, or until a toothpick inserted in the middle comes out clean. Let the cakes cool in the tin for about ten minutes, then transfer them to a cooling rack to cool the cakes completely.: As the cakes bake you will catch a warm, sweet aroma and see the edges pull slightly away from the pan, a sign of doneness. The toothpick test ensures centers are set without overbaking. Cooling in the tin first prevents the fragile cake from slumping, and transferring to a rack avoids soggy bottoms. A frequent error is rushing the transfer while the cake is hot, which can cause breakage.
- While the cakes are cooling, cream the 2 cups of butter with an electric hand mixer on medium speed. Gradually add in the powdered sugar (about 1/2 cup at a time) until all of the powdered sugar has been mixed into the butter.: You'll hear a steady mixing rhythm and see the butter lighten as sugar is incorporated into clouds of sweetness. Adding sugar slowly prevents a dusty explosion and helps the frosting reach an even texture. If you add sugar too fast, the powder will puff everywhere and make a mess, plus it is harder to fully dissolve into the butter .
- Pour in the vanilla extract, salt, and heavy whipping cream, and blend at low speed until completely smooth. Put about a 1/4 of the buttercream into a piping bag with a large round tip.: The frosting will smell rich and creamy, with the vanilla aroma rounding the sweetness. The heavy whipping cream smooths the texture, making it easier to spread and pipe. Reserving a portion for piping lets you create defined swirls later. Be careful not to overthin with cream which makes piping lose shape.
- Put a small amount of buttercream onto the base of a cake stand or platter, and place the blue cake in the middle of the stand. Pipe the buttercream around the top of the blue cake, and spiral inward until the top is covered. Use a spatula to smooth out the buttercream. Continue with the yellow cake and then the pink cake.: Layering creates visual interest and a pleasing gradient when you stack blue, yellow, then pink. The buttercream between layers acts as glue and adds a luscious cream layer to each slice. Smoothing the frosting helps the layers settle evenly. Avoid shifting the layers while smoothing, or you can smear color between tiers.
- Use a spatula to add buttercream to the sides of the cake and spread thinly. This will be your crumb coat. Place the cake in the freezer for 20 minutes (or in the refrigerator for 40 minutes).: The thin coat traps loose crumbs so the final frosting looks pristine. After chilling, the crumb coat firms to the touch and makes applying the finishing layer easier. Skipping chill time often leads to crumbs in the topcoat, which is disappointing for a clean finish.
- Add a fresh layer of buttercream to the sides so it covers the cake neatly.: The final coat should feel smooth and resilient under the spatula, with no crumbs showing through. This layer defines the cake's clean silhouette and prepares the surface for decorations. If the frosting feels tacky or too soft, chill briefly to firm it up before decorating. A common misstep is applying the final coat while frosting is still warm, which causes sliding decorations.
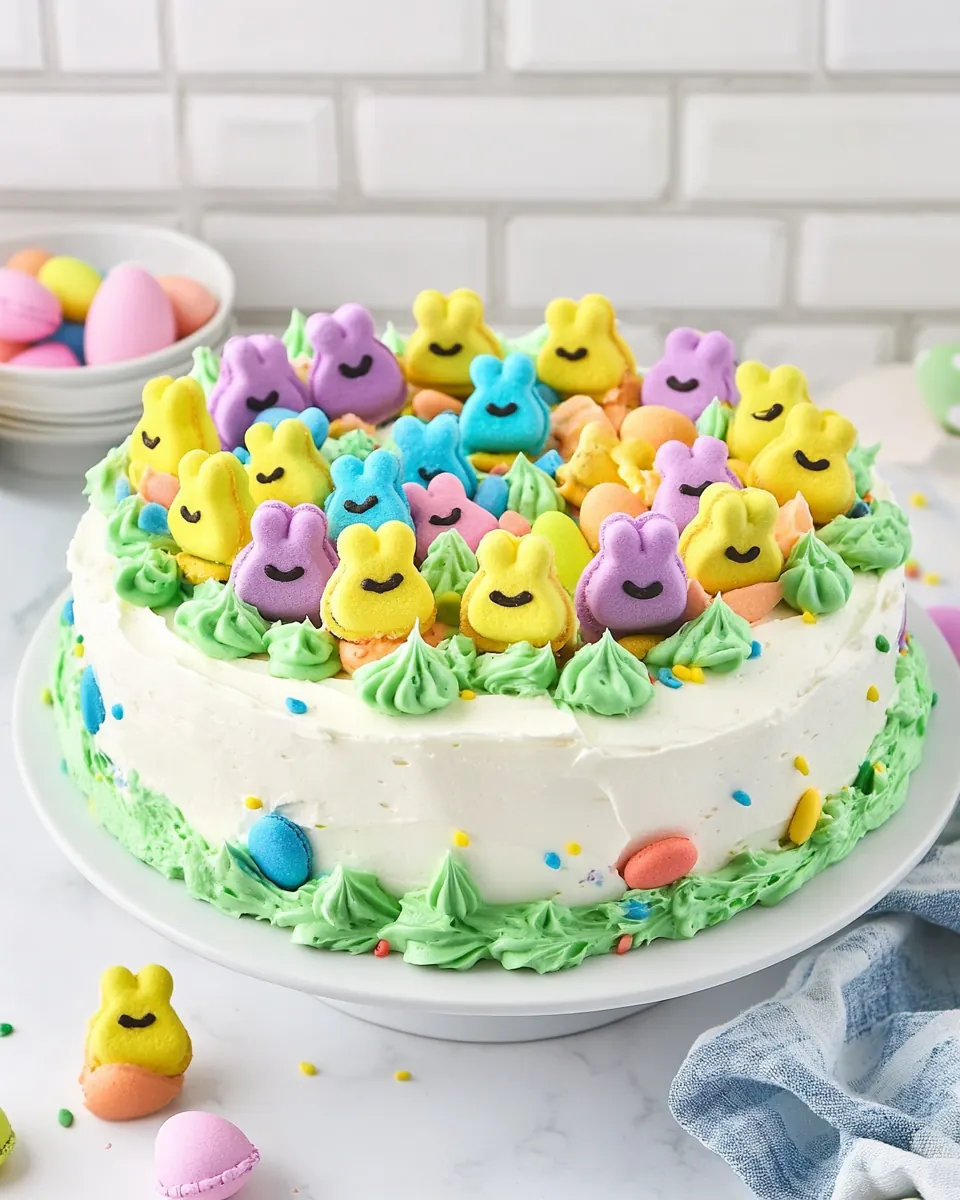
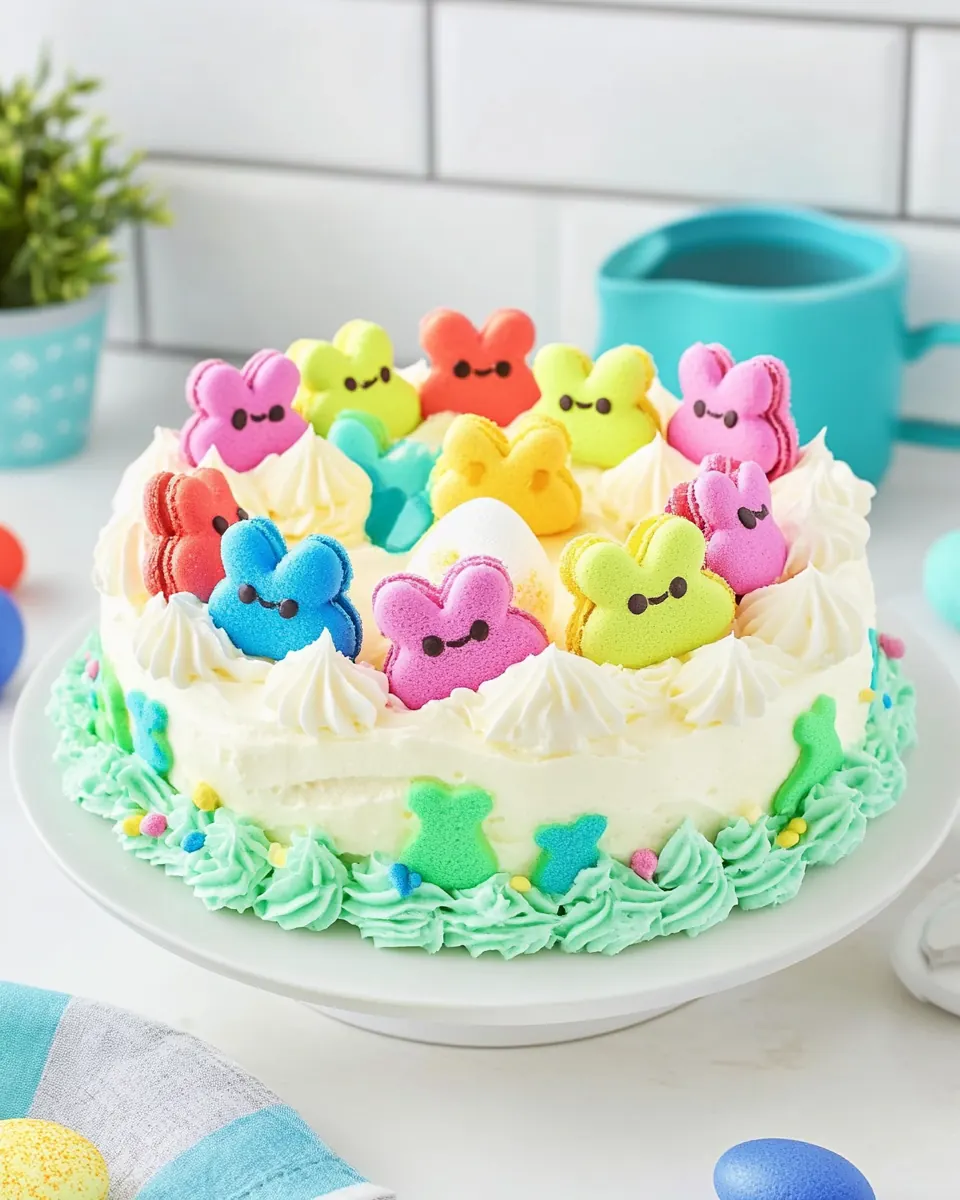
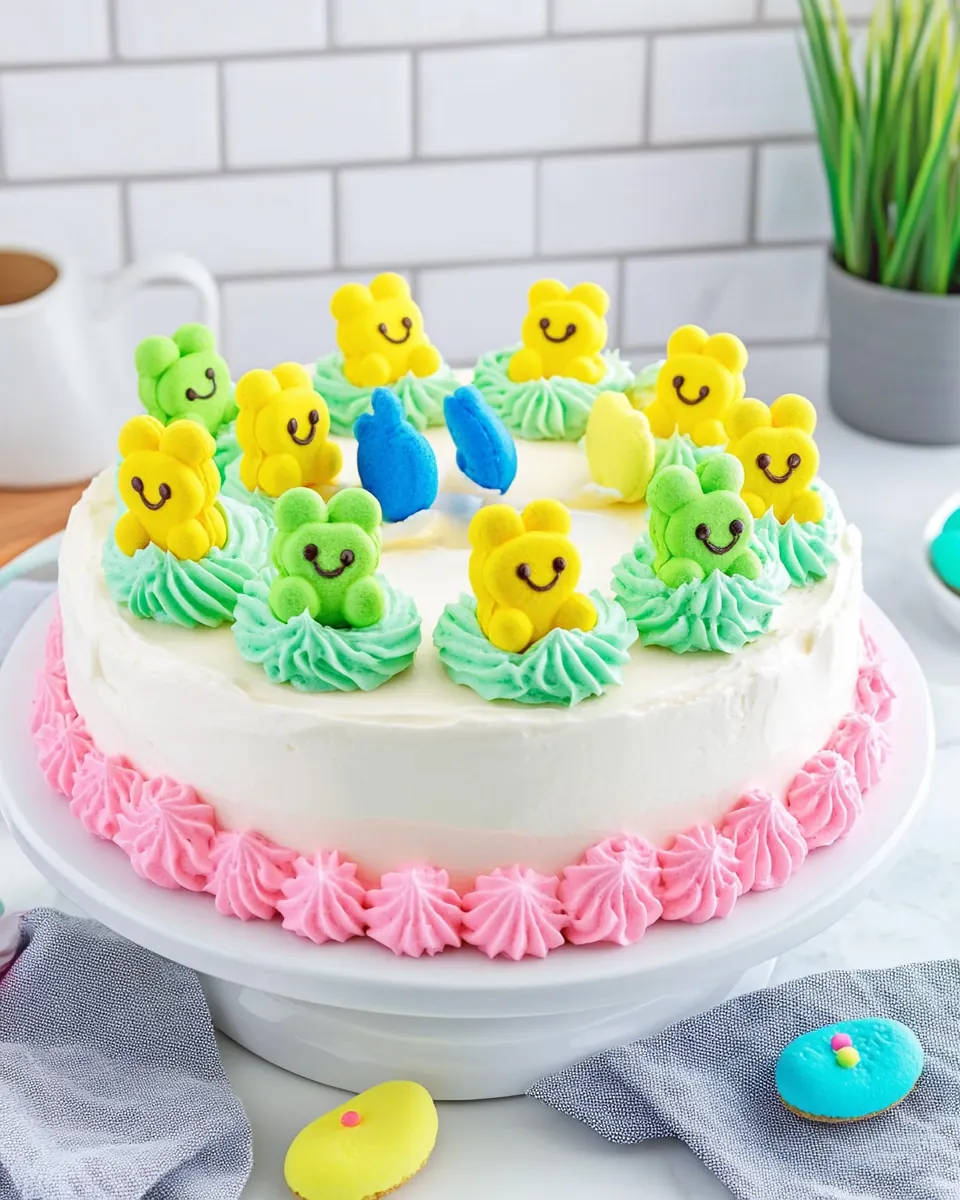
- Then place the Bunny Peeps around the sides of the cake, alternating Pink, Blue, and Yellow.: This is where the cake becomes playful, and arranging the Bunny Peeps creates a whimsical fence. Press them gently into the frosting so they adhere without squashing. Keep them evenly spaced for a balanced look. Pressing too hard can puncture the crumb coat or leave gaps.
- With a large star tip, pipe the remainder of the frosting into small swirls around the edge of the top of the cake. Sprinkle the middle of the cake with green coconut and M&M's.: Piping adds texture and a polished finish, while the green coconut creates edible grass that frames the candy. The contrast between fluffy frosting and crisp M&M shells is delightful to bite into. Work steadily and let each swirl hold its shape; if the frosting is too soft the swirls will slump, so chill briefly if needed.
Make It Your Own
I like offering options so each baker can personalize the Easter Peep Cake. These tips help you adapt color intensity, piping styles, and timing to match your comfort level. Small tweaks yield distinct presentations.
- Use Less or More Color: Start with a single tiny drop of gel food coloring, then increase incrementally to reach the shade you want without overworking the batter or adding excess liquid.
- Swap Stacking Order: Try pink on the bottom, then yellow, then blue for a different gradient effect, keeping the same stacking method so the cake remains stable.
- Chill Between Steps: If decorating feels overwhelming, chill the cake for 10 to 20 minutes between major stages to firm the frosting and make smoothing simpler.
- Adjust Piping Pressure: Practice piping swirls on parchment to find the right pressure so each star holds its shape on the cake edge.
- Make Ahead: Bake the layers a day in advance and wrap them tightly, then assemble and frost the next day for a calmer decorating session.
Side Dish Ideas for Easter Peep Cake
The Easter Peep Cake is a sweet centerpiece so pairings should complement its festive sweetness and bright colors. Think light, fresh accompaniments that offer contrasting textures and flavors. Here are suggestions for serving occasions, pairings, and storage ideas to help you plan the perfect spread.
- Spring Brunch Spread: Serve alongside a selection of fresh fruit like berries and citrus segments to provide refreshing acidity and a palate cleanser between rich bites.
- Afternoon Tea: Pair with hot brewed tea or a light herbal infusion, the warmth balances the buttercream while keeping the mood relaxed and elegant for visits and conversation.
- Holiday Dessert Table: Place the cake as the visual centerpiece and surround it with small cookies or bite size bars that guests can nibble while admiring the decorated layers.
- Kids’ Party: Offer small bowls of extra candy and allow children to personalize individual slices with M&M’s and coconut, which turns serving into a fun activity.
- Storage Tips: Keep the cake refrigerated if your kitchen is warm, but bring slices to room temperature for about 20 minutes before serving so the buttercream softens and flavors bloom.
- Seasonal Pairings: In spring, light citrus salads and berry compotes complement the cake; choose bright flavors that echo the pastel palette without overpowering the buttercream.
FAQ
Conclusion
This cake shines because it pairs a tender, colorful crumb with a silky buttercream and playful holiday decorations. Try the Easter Peep Cake when you want a dessert that doubles as a centerpiece and a conversation starter. Bake confidently, have fun with the colors and decoration, and enjoy the smiles it brings to the table.
Easter Peep Cake
Equipment
- 39-inch cake pans
- 3 Parchment paper circles
- Electric Mixer
- Offset Spatula
Ingredients
- 1 cup 2 sticks (250 g) unsalted butter softened Cream together to provide a rich, tender base and contribute moisture and flavor; softened butter also helps incorporate air when beaten, producing a lighter cake crumb.
- 2 cups (400 g) granulated sugar Sweeten evenly to balance flavors and aid in creaming with butter for structure; granulated sugar also helps with browning and texture in the baked cake.
- 3 large eggs at room temperature Bind and leaven slightly while adding richness and moisture; room temperature eggs emulsify better, creating a smooth batter and improved rise.
- 1 cup buttermilk or whole milk Moisten and tenderize the cake while reacting with leaveners for proper crumb; choose buttermilk for tang and extra tender texture, or whole milk for a milder flavor.
- 2 teaspoons pure vanilla extract Flavor subtly and enhance other aromatics; pure vanilla extract rounds out sweetness and complements the overall cake profile.
- 3 cups all purpose flour spooned and leveled, plus extra for dusting pans Provide the primary structure and bulk for the cake; spooned-and-leveled all-purpose flour yields consistent measuring and helps achieve reliable texture.
- 2 teaspoons baking powder Lighten the cake and help it rise by producing carbon dioxide when heated; baking powder contributes primary leavening for a soft crumb.
- 1 teaspoon baking soda React with acidic ingredients to produce additional lift and tenderize; baking soda balances pH for color and flavor development.
- 1/2 teaspoon salt Season and balance sweetness while strengthening gluten slightly; a small amount of salt enhances the cake's overall flavor profile.
- 1 drop Gel Food Coloring each about 1/4 teaspoon: Pink, yellow, and blue Tint small amounts of batter to create pastel layers without altering texture; gel food coloring provides concentrated color with minimal liquid.
- 2 cups 4 sticks (450 g) unsalted butter softened Whip into frosting to create a rich, creamy texture and provide flavor; softened butter forms the base of a stable, spreadable icing.
- 8 cups powdered sugar Sweeten the frosting and provide structure for piping and spreading; powdered sugar dissolves smoothly for a stable, sweet buttercream.
- 1 tablespoon pure vanilla extract Flavor the frosting and add aromatic depth; pure vanilla extract enhances the sweetness and rounds the overall icing taste.
- 1/2 teaspoon salt Balance sweetness and stabilize the frosting while enhancing mouthfeel; salt in frosting brings out flavor and reduces cloying notes.
- 1/4 cup heavy whipping cream Thin and smooth the frosting while adding richness; heavy cream adjusts consistency for spreading and creates a silky mouthfeel.
- 24 Bunny Peeps pink, blue, and yellow Decorate and add a seasonal, chewy candy element that softens slightly on the cake; Bunny Peeps provide playful color and themed appeal.
- 1 cup sweetened coconut flakes dyed green Simulate grass for a festive finish and add subtle coconut flavor and texture; dyeing coconut green creates a decorative bed for candies.
- 1 bag Easter M&M's Garnish with colorful candy for crunch and extra sweetness; Easter M&M's contribute bright colors and bite-sized pieces for visual interest.
Instructions
- Preheat the oven to 350°F / 180°C. Grease 3 x 9-inch pans with shortening or butter and dust with a tablespoon of flour each. Set pans aside.: You will smell the faint warmth as the oven reaches temperature, and the air will feel ready for baking. Greasing and flouring the pans creates a thin barrier so the cakes release cleanly after baking, preventing tearing. If you skip proper greasing, cakes may cling and break apart when inverted, so take the extra minute now. A common mistake is overflouring which creates a dusty edge on the cake, so tap out excess flour gently before adding batter.
- In a large bowl, cream together the butter and sugar with an electric mixer on medium speed. Add the eggs, one at a time, and make sure each egg is fully incorporated before adding the next. Add the vanilla extract, and beat until well blended.: At this stage you will hear the mixer hum and see the mixture turn pale and creamy, signaling air whipped into the butter . Each egg should disappear into the batter before the next goes in, creating a cohesive emulsion. This texture traps lift for the cake while keeping it tender. Avoid adding eggs all at once, which can cause the mixture to separate and result in a dense crumb.
- In a separate medium bowl, sift and then whisk together the flour, baking powder, baking soda, and salt to make sure it’s thoroughly combined. With a wooden spoon or spatula, gradually fold in the dry ingredients to the wet ingredients, alternating adding the flour and the buttermilk, until just barely combined. Do not over-mix the batter.: The dry mixture will smell faintly of toasted grain once combined, and folding gently keeps the batter light. Alternating additions helps maintain an even consistency and prevents overworking the gluten. If you overmix, the cake will become tough, so stop as soon as streaks disappear. A common pitfall is vigorous stirring, which ruins the tender crumb.
- Divide the batter equally into three small or medium bowls. (It’s best to use a digital kitchen scale to make sure the weights are equal.) Add a drop of the pink, blue, and yellow food coloring separately to each bowl of batter. Stir the batter gently until the color is well mixed. Pour each batter into each of the 3 cake tins.: You will notice the batter take on bright hues quickly because gel color is concentrated, and the bowls will look festive. Weighing ensures even layers so the tier stacks level. Pour carefully into the prepared pans so edges are smooth and uniform. A slip here is spilling batter, so scrape the bowl with a spatula and keep counters clean.
- Bake on the middle rack of the oven for 20-25 minutes, or until a toothpick inserted in the middle comes out clean. Let the cakes cool in the tin for about ten minutes, then transfer them to a cooling rack to cool the cakes completely.: As the cakes bake you will catch a warm, sweet aroma and see the edges pull slightly away from the pan, a sign of doneness. The toothpick test ensures centers are set without overbaking. Cooling in the tin first prevents the fragile cake from slumping, and transferring to a rack avoids soggy bottoms. A frequent error is rushing the transfer while the cake is hot, which can cause breakage.
- While the cakes are cooling, cream the 2 cups of butter with an electric hand mixer on medium speed. Gradually add in the powdered sugar (about 1/2 cup at a time) until all of the powdered sugar has been mixed into the butter.: You'll hear a steady mixing rhythm and see the butter lighten as sugar is incorporated into clouds of sweetness. Adding sugar slowly prevents a dusty explosion and helps the frosting reach an even texture. If you add sugar too fast, the powder will puff everywhere and make a mess, plus it is harder to fully dissolve into the butter .
- Pour in the vanilla extract, salt, and heavy whipping cream, and blend at low speed until completely smooth. Put about a 1/4 of the buttercream into a piping bag with a large round tip.: The frosting will smell rich and creamy, with the vanilla aroma rounding the sweetness. The heavy whipping cream smooths the texture, making it easier to spread and pipe. Reserving a portion for piping lets you create defined swirls later. Be careful not to overthin with cream which makes piping lose shape.
- Put a small amount of buttercream onto the base of a cake stand or platter, and place the blue cake in the middle of the stand. Pipe the buttercream around the top of the blue cake, and spiral inward until the top is covered. Use a spatula to smooth out the buttercream. Continue with the yellow cake and then the pink cake.: Layering creates visual interest and a pleasing gradient when you stack blue, yellow, then pink. The buttercream between layers acts as glue and adds a luscious cream layer to each slice. Smoothing the frosting helps the layers settle evenly. Avoid shifting the layers while smoothing, or you can smear color between tiers.
- Use a spatula to add buttercream to the sides of the cake and spread thinly. This will be your crumb coat. Place the cake in the freezer for 20 minutes (or in the refrigerator for 40 minutes).: The thin coat traps loose crumbs so the final frosting looks pristine. After chilling, the crumb coat firms to the touch and makes applying the finishing layer easier. Skipping chill time often leads to crumbs in the topcoat, which is disappointing for a clean finish.
- Add a fresh layer of buttercream to the sides so it covers the cake neatly.: The final coat should feel smooth and resilient under the spatula, with no crumbs showing through. This layer defines the cake's clean silhouette and prepares the surface for decorations. If the frosting feels tacky or too soft, chill briefly to firm it up before decorating. A common misstep is applying the final coat while frosting is still warm, which causes sliding decorations.
- Then place the Bunny Peeps around the sides of the cake, alternating Pink, Blue, and Yellow.: This is where the cake becomes playful, and arranging the Bunny Peeps creates a whimsical fence. Press them gently into the frosting so they adhere without squashing. Keep them evenly spaced for a balanced look. Pressing too hard can puncture the crumb coat or leave gaps.
- With a large star tip, pipe the remainder of the frosting into small swirls around the edge of the top of the cake. Sprinkle the middle of the cake with green coconut and M&M's.: Piping adds texture and a polished finish, while the green coconut creates edible grass that frames the candy. The contrast between fluffy frosting and crisp M&M shells is delightful to bite into. Work steadily and let each swirl hold its shape; if the frosting is too soft the swirls will slump, so chill briefly if needed.
Notes
- Use Less or More Color: Start with a single tiny drop of gel food coloring, then increase incrementally to reach the shade you want without overworking the batter or adding excess liquid.
- Swap Stacking Order: Try pink on the bottom, then yellow, then blue for a different gradient effect, keeping the same stacking method so the cake remains stable.
- Chill Between Steps: If decorating feels overwhelming, chill the cake for 10 to 20 minutes between major stages to firm the frosting and make smoothing simpler.
- Adjust Piping Pressure: Practice piping swirls on parchment to find the right pressure so each star holds its shape on the cake edge.
- Make Ahead: Bake the layers a day in advance and wrap them tightly, then assemble and frost the next day for a calmer decorating session.