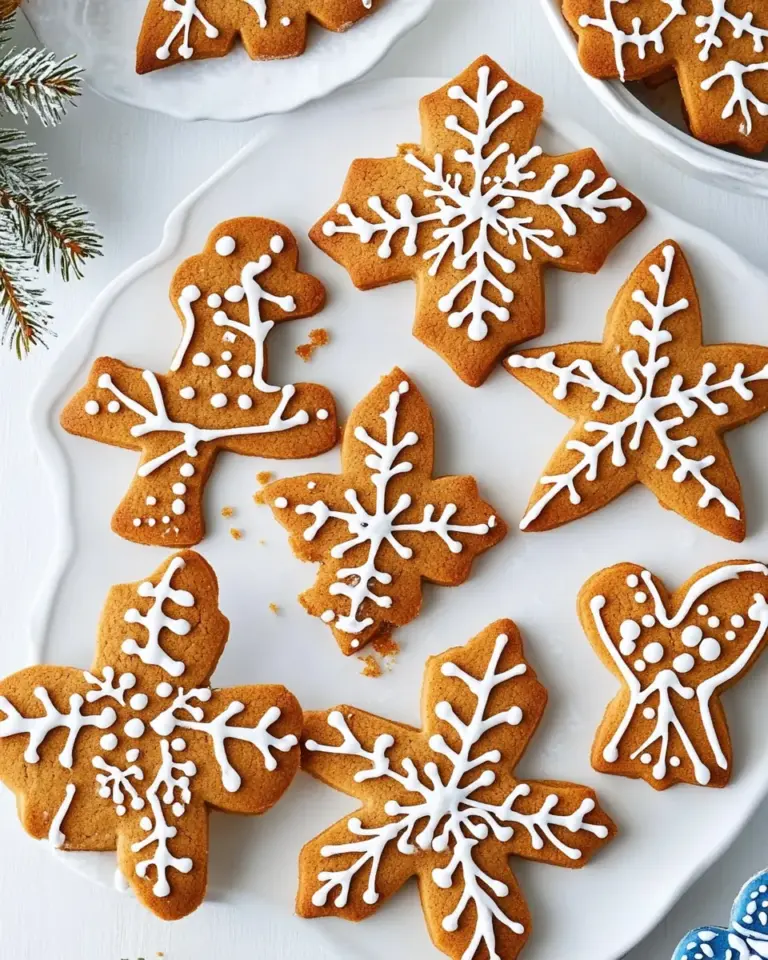
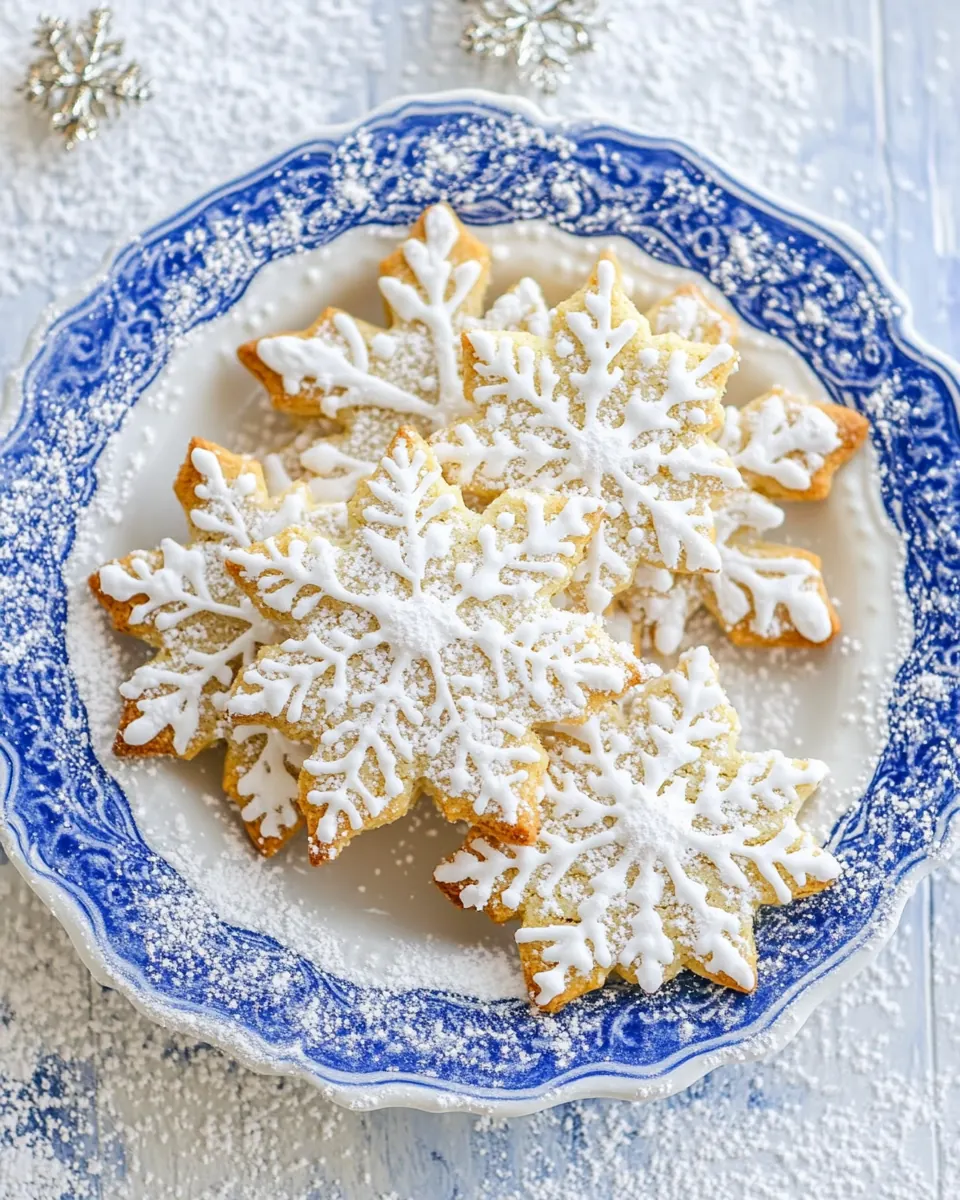
Snowflake Sugar Cookies
Snowflake Sugar Cookies have been a holiday tradition in my family for as long as I can remember, and the very first sentence here still carries the same excitement I felt as a kid when the cookie cutters came out of the drawer.
Every year I find a quiet afternoon to roll out the dough, and the ritual of flour on the counter and laughter from the kitchen fills the house. I grew up loving the ritual more than the perfection, so these cookies are forgiving, playful, and sweet in the way that only childhood memories can make a recipe feel alive. When I tuck a precisely cut snowflake onto a baking sheet, I think about how the shapes are never identical, and how that imperfection is part of the charm.
Some years we pipe delicate patterns, other years we go wild with sprinkles; both ways are beautiful. The texture is tender, the edges barely golden, and the tiny crackle of frost-like icing always makes me smile. While I’ve refined my technique, the heart of the recipe remains the same: simple ingredients coming together to create something festive and shareable. If you love a cookie that is buttery yet delicate, and that invites creativity with frosting and decorations, this is the kind of treat you’ll return to again and again.
Recipe Snapshot
39 mins
30 mins
9 mins
Hard
150 kcal
American
Gluten-Free, Low FODMAP
Desserts
Stand Mixer, snowflake cookie cutters, pastry bag and tips, Silpat baking mats
Why Try This Snowflake Sugar Cookies
Classic Holiday Charm
I adore that Snowflake Sugar Cookies read like a postcard from winter. The straightforward ingredient list means you can get baking quickly, and the result is nostalgic without being fussy. I love how the buttery crumb holds detailed cutter impressions, so your snowflakes look crisp and defined after baking.
Versatile Decorating Options
We often alternate between a thin layer of frosting and delicate piped stars. I appreciate that the cookies accept color and texture easily, so whether you want clean white snow or playful colored sprinkles, the cookie is a blank canvas. That flexibility keeps guests entertained and allows each batch to feel new.
Texture That Pleases Everyone
These cookies find the sweet spot between soft and crisp. I like that they firm up as they cool, so you can enjoy both the tender center and the faintly crisp edge. That contrast is why friends always ask for the recipe, and why I recommend paying attention to the timing when they come out of the oven.
Reliable, Home-Friendly Method
I rely on a stand mixer but note that a handheld mixer works fine, which is great when equipment is limited. The dough chills nicely and tolerates being handled, so even casual bakers can achieve beautiful shapes without advanced pastry skills. I often refrigerate the dough overnight and find the flavor deepens while the texture remains dependable.
Kid Friendly and Festive
We make these with the kids every season. The process of cutting, decorating, and sprinkling is a shared memory maker. I value recipes that invite participation, and these cookies are perfect for little hands and big imaginations alike.
Snowflake Sugar Cookies Shopping List
These ingredients are intentionally simple, and each one plays a clear role. The key players are the butter and confectioners’ sugar for tenderness and sweetness, the all-purpose flour for structure, and a little milk to bring the dough together. The small amounts of baking powder and salt help lift and brighten the flavor.
- 1 cup unsalted butter, softened to room temperature: Soften to room temperature and cream thoroughly with sugar to create a smooth, aerated base that provides richness and tender texture to the cookies. Ensure butter is pliable so it incorporates evenly and helps produce a delicate, melt-in-your-mouth crumb.
- 1 1/2 cups confectioners’ sugar, sifted: Sift to remove lumps and beat with butter until light and fluffy to add sweetness and fine texture without grittiness. Use confectioners’ sugar to contribute a silky mouthfeel and help the cookies hold their shape.
- 1 teaspoon vanilla extract: Add for a warm, aromatic background flavor that enhances the sweetness and complements the buttery notes. Measure accurately to balance flavor without overpowering the delicate sugar cookie profile.
- 3 cups all-purpose flour: Whisk or sift before adding to create structure and bulk that forms the cookie dough; contributes gluten which affects chewiness and spread. Combine gradually with the butter and sugar mixture to avoid overworking and to maintain tender cookies.
- 1 teaspoon baking powder: Leaven lightly when mixed into the dry ingredients to provide subtle lift and prevent cookies from becoming too dense. Use at the stated amount to keep cookies slightly puffy without turning cakey.
- 1/4 teaspoons salt: Season sparingly to balance sweetness and enhance overall flavor; evenly distribute through the dry ingredients to avoid salty pockets. Use the specified small amount to subtly round out the cookie taste.
- 5 tablespoons whole milk, as needed: Incorporate as needed to adjust dough consistency, adding a small amount at a time until the proper pliable texture is achieved for rolling and cutting. Whole milk adds moisture and a touch of richness that helps bind the dough.
- 3 options See Notes: Offer alternative finishes or flavor variations such as colored icing, sanding sugar, or piping details to customize appearance and taste; see notes for suggested options. Use one or more variations to create festive snowflake designs and textures.
Making Snowflake Sugar Cookies
I like to think of the mixing and chilling as the foundation, because a well-rested dough is easier to roll and cut. Below you’ll find each direction rewritten into richly detailed steps that guide your senses and warn you of common pitfalls.
- Cookies– To the bowl of a stand mixer fitted with the paddle attachment (or large mixing bowl and handheld mixer), add the butter, and beat on high speed until light and fluffy. Stop and scrape down the sides of the bowl.: The fragrance of fresh butter hitting the mixer is comforting, and as the mixture fluffs you will hear a light whir that becomes airy and pale. This process incorporates air, which lends lift and tenderness to the cookie's crumb. If the butter is too cold you will not get that pale, fluffy look, and if it is too soft it will appear greasy; aim for room temperature that yields a pillowy texture. A common error is rushing this step, which leaves dense cookies, so take your time and scrape the bowl thoroughly to ensure even texture throughout.
- Sift in the confectioners' sugar, beat on low at first so it doesn't fly everywhere, then increase the speed to high and beat until very light and fluffy, about 2 to 3 minutes.: As you add the sifted confectioners’ sugar , it will smell softly sweet and the bowl will cloud with fine powder until it integrates. Starting on low prevents a sugar storm, then raising speed helps the sugar fully dissolve into the butter , creating a creamy, silky base. The mixture should look pale and voluminous, and the texture should feel airy on the fingertip. If you stop too early the sugar may remain grainy, leaving a gritty mouthfeel; overbeating is unlikely but can warm the dough, so keep an eye on texture and temperature.
- Add the vanilla extract and beat momentarily to incorporate. Stop and scrape down the sides of the bowl.: When you introduce the vanilla , the aroma will bloom, lifting the entire mixture with its sweet, floral notes. This brief incorporation ensures the flavor is evenly distributed without overworking the batter. Failing to scrape the bowl can lead to pockets of uneven flavor or texture, so pause and clean the sides for a uniform result.
- Add the flour, baking powder, salt, and beat to just incorporate, don't overmix. The dough will be very thick.: Adding the dry mix of all-purpose flour , baking powder , and salt changes the bowl from glossy to coarse; the sound becomes quieter as the beaters fight thicker resistance. You want the flour incorporated until no streaks remain, but overmixing develops gluten and yields tough cookies. Watch for a dense, slightly shaggy dough texture; that indicates readiness. A frequent mistake is continuing to mix until smooth, which can make the final cookie chewy rather than tender.
- Add the milk, 1 tablespoon at a time, mixing briefly after each tablespoon, until a thick but smooth dough can come together. Notes– You may not need all of the milk, so don't add it if you don't need it. Stop adding it after your dough has come together. I doubt you will need more milk than called for, but perhaps if you have a very thick or crumbly dough (remember not to over-measure/pack in the flour when you're adding it in the previous step to prevent an overly dry dough) add a bit more milk until your dough comes together.: The small additions of whole milk act like a gentle glue, bringing the dough together while allowing you to control tackiness. As each spoonful blends in, the dough will shift from crumbly to pliable and smooth, and you can feel the difference under your hands when you press a pinch together. If the dough becomes sticky, you added too much milk; add a light dusting of flour to correct it rather than overworking. A common misstep is pouring the milk in all at once, which can make the dough overly wet and hard to handle.
- Take the dough out of the mixer, divide it in half (approximately), pat the dough into large thick disc shapes, cover with plastic wrap, and refrigerate for at least one hour, or overnight, to chill.: Chilling transforms the dough; it firms so it rolls smoothly and develops a more mellow flavor. You will notice the dough tightens as it cools, and handling it becomes easier without sticking. The rest also relaxes the gluten, preventing tough cookies when rolled. Avoid the temptation to skip chilling, as a warm dough tears and loses crisp impressions from the cutters. If you are short on time, refrigerate for at least one hour rather than proceeding immediately.
- After the dough has chilled at least 1 hour and you're ready to roll it out, preheat the oven to 350 F.: Preheating to 350 F ensures even baking; putting chilled dough into a preheated oven yields predictable spread and browning. You will see steam rise faintly from the baking sheet when cookies enter the hot oven. Not preheating can cause longer bake times and uneven texture, so always wait until your oven reaches temperature before baking.
- Remove the dough from the fridge, generously flour a clean countertop so the dough doesn't stick, and roll the dough out to approximately 1/8-inch thick. Tip– If you've been chilling the dough for longer than about 3 hours (especially if you chilled it overnight) give it about 15 minutes at room temp before you attempt to roll it out.: When you roll the dough, the surface should feel cool and slightly tacky under a dusting of flour . Aim for an even thickness so cookies bake uniformly, and you will hear a soft, low creak as your rolling pin glides. If the dough is very stiff from the fridge, let it sit briefly rather than forcing it, which can crack the edges. A common problem is rolling unevenly, which creates cookies that brown unevenly, so use steady pressure and rotate the dough regularly.
- Using snowflake cookie cutters (or your favorite shape of cutters), cut out snowflake shapes, wasting as little dough as possible and cutting as closely as possible to form the snowflakes. Tips– You can ball up and then reroll your scraps of dough. However, I only reroll once. After that the dough gets a bit overworked and isn't at its best. Make whatever shape of circular cookie(s) you'd like for the final bits of dough and call it a day is my advice.: As you press cutters into the dough, the edges should be clean and defined, allowing crisp snowflake points after baking. Transfer shapes carefully to the prepared baking surface, and rework scraps gently for a second pass. Over-rolling scraps will warm and toughen the dough, making final cookies less tender. If your cutter sticks, dip it in flour between cuts to maintain sharp edges.
- Place the cut snowflakes on parchment paper lined or Silpat lined baking mats on baking sheets and bake for approximately 8 to 10 minutes. Baking time will vary considerably based on the size of your snowflakes (or other shapes of cookies), oven and climate variances, etc. Pay close attention to your cookies in your oven, and pull them when the edges are just barely turning golden brown. Cookies will continue to set, firm up, and darken in color as they cool. Tips– I suggest baking one tray of cookies at one time, on the center oven rack, and rotating once midway through baking for best results.: While the cookies bake, the kitchen fills with a warm, sweet aroma; the edges will start to blush into a faint golden tone. Remove them when the edges are only just coloring, because residual heat finishes the set on the baking sheet. Overbaking causes hard, dry cookies, so err on the side of slightly underbaked if you prefer a tender center. A common mistake is crowding the tray which prevents even browning, so leave space between shapes.
- Allow cookies to cool on the baking sheets for about 5 to 10 minutes, or until they've firmed up enough to carefully transfer to wire racks to cool completely.: As they rest, the cookies finish setting and the surface firms while steam escapes, leaving a tender interior. You will notice the cookies releasing from the parchment as they stabilize. Moving them too soon risks tearing or breaking delicate points, while leaving them too long can trap moisture; aim for that sweet window when they feel set to the touch. If cookies feel soft in the center after cooling fully, they may have been underbaked or too thick.
- Frosting– Read the 'Notes' at the bottom of this post to see what frostings you can buy or make. Spread a thin layer of frosting using a butter knife or small spatula over the surface of every cookie. Fun Tip– You can color the frosting red, green, or another color of your choice with food coloring if you'd like.: Applying a thin frosting layer keeps the cookie balanced in sweetness and allows decorations to adhere without sliding. The smell of sweet frosting meeting warm cookie is part of the joy, and spreading thinly prevents cloying sweetness that masks the buttery base. If you use a frosting that is too soft, it will ooze and obscure details, so chill slightly before piping when necessary. A routine mistake is piling on frosting which overwhelms the cookie's texture.
- Spread a thin layer of frosting using a butter knife or small spatula over the surface of every cookie.: The tactile motion of smoothing frosting gives you control over thickness and finish. A smooth pass with a small spatula yields a clean surface for further decoration, and you will see the cookie edges remain visible, which keeps shape and presentation intact. Avoid overworking the frosting or scraping too aggressively, which can remove surface detail or create uneven patches.
- Piping– To pipe the frosting you've made, transfer it into a pastry bag (or the tip of your choice) onto the bag, and begin to pipe small stars over the surface of every cookie.: Piping offers fine control for delicate accents and can create raised textures that contrast with a flat base. The sound of the bag pressing and the sight of tiny stars forming are satisfying and add a handcrafted feel. If your frosting is too stiff to pipe, warm it slightly by kneading the bag, but not so warm that it loses shape. A common pitfall is using a tip that is too large, which obscures finer snowflake details.
- As desired, add sprinkles to the top of each cookie. Fun Tip– Feel free to use Christmas colored sprinkles, or whatever color and type of sprinkles you'd like.: Sprinkles introduce crunch and festive color, and when added while frosting is slightly tacky they adhere well. The visual contrast of bright sprinkles on pale frosting reads celebratory and playful. Avoid adding sprinkles to fully set frosting, which will not stick and may fall off later. If you prefer uniform coverage, press sprinkles gently into the frosting to secure them.
- Shortcut Frosting– The third and final option for frosting is to use another favorite store bought frosting like buttercream. You cannot pipe the frosting, so just spread it on the cookies with a butter knife or small spatula, and add sprinkles as desired.: Store bought frosting is convenient and consistent, and spreading it yields a quick, even finish. The trade off is reduced ability to pipe precise decorations, but you gain time and predictability. If texture matters, chill the spread cookies to firm up the frosting before stacking. Over-relying on tub frosting can reduce the handmade charm, so combine methods if you want variety.
- Storage– The vanilla whipped cream frosted cookies need to be stored airtight in the fridge where they will keep for 3 to 4 days. If you use homemade vanilla buttercream, you can feel confident leaving them airtight at room temp for up to 5 days or in the fridge for up to 1 week. If you use store bought frosting the cookies will keep airtight at room temp for up to 1 week.: How you store the cookies depends on the chosen frosting. Chilled whipped cream frosting demands refrigeration, while sturdier buttercream fares well at room temperature for short periods. Airtight storage prevents stale texture and flavor loss, and separating layers with parchment keeps decorations intact. A mistake is leaving perishable frosting at room temperature for too long, which risks spoilage.
Customization Ideas
These cookies are a perfect canvas for customizations. Below are several ideas that honor the original recipe while giving you playful directions to change appearance, texture, and storage to suit your needs.
- Colorful icing: Tint small batches of your frosting with gel food coloring to create vibrant holiday palettes that brighten cookie trays.
- Texture contrast: Add a sprinkle mix that includes small nonpareils and tiny sugar pearls for a variety of crunch levels on each cookie.
- Shape swaps: Swap snowflake cutters for stars or circles for varied presentation while following the same bake time guidance.
- Frosting choice: Use whipped cream based frosting for an airy finish or buttercream for piping detail, keeping storage needs in mind.
- Decorating tools: Use a fine tip for delicate piped lines or a small offset spatula for quick, even spreads across multiple cookies.
- Make ahead: Chill rolled and cut cookies on a tray, then freeze before baking to have fresh cookies on demand; increase baking time slightly if baking from frozen.
What to Serve Alongside Snowflake Sugar Cookies
These cookies are best shared, and the right accompaniments can elevate a gathering. Below I outline pairing ideas, occasions, storage guidance, and seasonal suggestions so your cookie plate feels intentional and festive.
- Warm beverages: Pair the cookies with hot chocolate or spiced tea for cozy winter hosting, and present drinks in insulated mugs to keep them warm while guests nibble.
- Cookie platters: Arrange Snowflake Sugar Cookies alongside other small cookies for variety, using parchment layers to keep decorations intact and offering a mix of textures on the tray.
- Holiday occasions: These are ideal for Christmas gatherings, cookie swaps, or school parties, because they are easy to transport and decorate ahead of time.
- Storage tips: Keep frosted cookies airtight and separate layers with parchment; whipped cream frostings need refrigeration while buttercream can sit at room temperature for multiple days.
- Seasonal pairings: Serve these at winter brunches or as part of a festive dessert table; their appearance reads seasonal and they pair well with fruit platters or nut mixes for variety.
- Gift giving: Package cooled cookies in airtight tins with parchment, and include a cooling pack if transporting whipped cream frosted varieties.
FAQ
Conclusion
These Snowflake Sugar Cookies stand out because they combine simple ingredients with joyful decorating potential, yielding tender, festive cookies that invite creativity. I encourage you to give them a try, whether you want delicate piped designs or a quick spread of colorful frosting. Baking them becomes more rewarding when you involve friends or family, experiment with small tweaks, and savor the warm memories they inspire. Have fun with shapes and colors, and remember that imperfect snowflakes often look the most charming.
Snowflake Sugar Cookies
Equipment
- Stand mixer
- snowflake cookie cutters
- pastry bag and tips
- Silpat baking mats
Ingredients
- 1 cup unsalted butter, softened to room temperature Soften to room temperature and cream thoroughly with sugar to create a smooth, aerated base that provides richness and tender texture to the cookies. Ensure butter is pliable so it incorporates evenly and helps produce a delicate, melt-in-your-mouth crumb.
- 1 1/2 cups confectioners’ sugar, sifted Sift to remove lumps and beat with butter until light and fluffy to add sweetness and fine texture without grittiness. Use confectioners’ sugar to contribute a silky mouthfeel and help the cookies hold their shape.
- 1 teaspoon vanilla extract Add for a warm, aromatic background flavor that enhances the sweetness and complements the buttery notes. Measure accurately to balance flavor without overpowering the delicate sugar cookie profile.
- 3 cups all-purpose flour Whisk or sift before adding to create structure and bulk that forms the cookie dough; contributes gluten which affects chewiness and spread. Combine gradually with the butter and sugar mixture to avoid overworking and to maintain tender cookies.
- 1 teaspoon baking powder Leaven lightly when mixed into the dry ingredients to provide subtle lift and prevent cookies from becoming too dense. Use at the stated amount to keep cookies slightly puffy without turning cakey.
- 1/4 teaspoons salt Season sparingly to balance sweetness and enhance overall flavor; evenly distribute through the dry ingredients to avoid salty pockets. Use the specified small amount to subtly round out the cookie taste.
- 5 tablespoons whole milk, as needed Incorporate as needed to adjust dough consistency, adding a small amount at a time until the proper pliable texture is achieved for rolling and cutting. Whole milk adds moisture and a touch of richness that helps bind the dough.
- 3 options See Notes Offer alternative finishes or flavor variations such as colored icing, sanding sugar, or piping details to customize appearance and taste; see notes for suggested options. Use one or more variations to create festive snowflake designs and textures.
Instructions
- Cookies– To the bowl of a stand mixer fitted with the paddle attachment (or large mixing bowl and handheld mixer), add the butter, and beat on high speed until light and fluffy. Stop and scrape down the sides of the bowl.: The fragrance of fresh butter hitting the mixer is comforting, and as the mixture fluffs you will hear a light whir that becomes airy and pale. This process incorporates air, which lends lift and tenderness to the cookie's crumb. If the butter is too cold you will not get that pale, fluffy look, and if it is too soft it will appear greasy; aim for room temperature that yields a pillowy texture. A common error is rushing this step, which leaves dense cookies, so take your time and scrape the bowl thoroughly to ensure even texture throughout.
- Sift in the confectioners' sugar, beat on low at first so it doesn't fly everywhere, then increase the speed to high and beat until very light and fluffy, about 2 to 3 minutes.: As you add the sifted confectioners’ sugar , it will smell softly sweet and the bowl will cloud with fine powder until it integrates. Starting on low prevents a sugar storm, then raising speed helps the sugar fully dissolve into the butter , creating a creamy, silky base. The mixture should look pale and voluminous, and the texture should feel airy on the fingertip. If you stop too early the sugar may remain grainy, leaving a gritty mouthfeel; overbeating is unlikely but can warm the dough, so keep an eye on texture and temperature.
- Add the vanilla extract and beat momentarily to incorporate. Stop and scrape down the sides of the bowl.: When you introduce the vanilla , the aroma will bloom, lifting the entire mixture with its sweet, floral notes. This brief incorporation ensures the flavor is evenly distributed without overworking the batter. Failing to scrape the bowl can lead to pockets of uneven flavor or texture, so pause and clean the sides for a uniform result.
- Add the flour, baking powder, salt, and beat to just incorporate, don't overmix. The dough will be very thick.: Adding the dry mix of all-purpose flour , baking powder , and salt changes the bowl from glossy to coarse; the sound becomes quieter as the beaters fight thicker resistance. You want the flour incorporated until no streaks remain, but overmixing develops gluten and yields tough cookies. Watch for a dense, slightly shaggy dough texture; that indicates readiness. A frequent mistake is continuing to mix until smooth, which can make the final cookie chewy rather than tender.
- Add the milk, 1 tablespoon at a time, mixing briefly after each tablespoon, until a thick but smooth dough can come together. Notes– You may not need all of the milk, so don't add it if you don't need it. Stop adding it after your dough has come together. I doubt you will need more milk than called for, but perhaps if you have a very thick or crumbly dough (remember not to over-measure/pack in the flour when you're adding it in the previous step to prevent an overly dry dough) add a bit more milk until your dough comes together.: The small additions of whole milk act like a gentle glue, bringing the dough together while allowing you to control tackiness. As each spoonful blends in, the dough will shift from crumbly to pliable and smooth, and you can feel the difference under your hands when you press a pinch together. If the dough becomes sticky, you added too much milk; add a light dusting of flour to correct it rather than overworking. A common misstep is pouring the milk in all at once, which can make the dough overly wet and hard to handle.
- Take the dough out of the mixer, divide it in half (approximately), pat the dough into large thick disc shapes, cover with plastic wrap, and refrigerate for at least one hour, or overnight, to chill.: Chilling transforms the dough; it firms so it rolls smoothly and develops a more mellow flavor. You will notice the dough tightens as it cools, and handling it becomes easier without sticking. The rest also relaxes the gluten, preventing tough cookies when rolled. Avoid the temptation to skip chilling, as a warm dough tears and loses crisp impressions from the cutters. If you are short on time, refrigerate for at least one hour rather than proceeding immediately.
- After the dough has chilled at least 1 hour and you're ready to roll it out, preheat the oven to 350 F.: Preheating to 350 F ensures even baking; putting chilled dough into a preheated oven yields predictable spread and browning. You will see steam rise faintly from the baking sheet when cookies enter the hot oven. Not preheating can cause longer bake times and uneven texture, so always wait until your oven reaches temperature before baking.
- Remove the dough from the fridge, generously flour a clean countertop so the dough doesn't stick, and roll the dough out to approximately 1/8-inch thick. Tip– If you've been chilling the dough for longer than about 3 hours (especially if you chilled it overnight) give it about 15 minutes at room temp before you attempt to roll it out.: When you roll the dough, the surface should feel cool and slightly tacky under a dusting of flour . Aim for an even thickness so cookies bake uniformly, and you will hear a soft, low creak as your rolling pin glides. If the dough is very stiff from the fridge, let it sit briefly rather than forcing it, which can crack the edges. A common problem is rolling unevenly, which creates cookies that brown unevenly, so use steady pressure and rotate the dough regularly.
- Using snowflake cookie cutters (or your favorite shape of cutters), cut out snowflake shapes, wasting as little dough as possible and cutting as closely as possible to form the snowflakes. Tips– You can ball up and then reroll your scraps of dough. However, I only reroll once. After that the dough gets a bit overworked and isn't at its best. Make whatever shape of circular cookie(s) you'd like for the final bits of dough and call it a day is my advice.: As you press cutters into the dough, the edges should be clean and defined, allowing crisp snowflake points after baking. Transfer shapes carefully to the prepared baking surface, and rework scraps gently for a second pass. Over-rolling scraps will warm and toughen the dough, making final cookies less tender. If your cutter sticks, dip it in flour between cuts to maintain sharp edges.
- Place the cut snowflakes on parchment paper lined or Silpat lined baking mats on baking sheets and bake for approximately 8 to 10 minutes. Baking time will vary considerably based on the size of your snowflakes (or other shapes of cookies), oven and climate variances, etc. Pay close attention to your cookies in your oven, and pull them when the edges are just barely turning golden brown. Cookies will continue to set, firm up, and darken in color as they cool. Tips– I suggest baking one tray of cookies at one time, on the center oven rack, and rotating once midway through baking for best results.: While the cookies bake, the kitchen fills with a warm, sweet aroma; the edges will start to blush into a faint golden tone. Remove them when the edges are only just coloring, because residual heat finishes the set on the baking sheet. Overbaking causes hard, dry cookies, so err on the side of slightly underbaked if you prefer a tender center. A common mistake is crowding the tray which prevents even browning, so leave space between shapes.
- Allow cookies to cool on the baking sheets for about 5 to 10 minutes, or until they've firmed up enough to carefully transfer to wire racks to cool completely.: As they rest, the cookies finish setting and the surface firms while steam escapes, leaving a tender interior. You will notice the cookies releasing from the parchment as they stabilize. Moving them too soon risks tearing or breaking delicate points, while leaving them too long can trap moisture; aim for that sweet window when they feel set to the touch. If cookies feel soft in the center after cooling fully, they may have been underbaked or too thick.
- Frosting– Read the 'Notes' at the bottom of this post to see what frostings you can buy or make. Spread a thin layer of frosting using a butter knife or small spatula over the surface of every cookie. Fun Tip– You can color the frosting red, green, or another color of your choice with food coloring if you'd like.: Applying a thin frosting layer keeps the cookie balanced in sweetness and allows decorations to adhere without sliding. The smell of sweet frosting meeting warm cookie is part of the joy, and spreading thinly prevents cloying sweetness that masks the buttery base. If you use a frosting that is too soft, it will ooze and obscure details, so chill slightly before piping when necessary. A routine mistake is piling on frosting which overwhelms the cookie's texture.
- Spread a thin layer of frosting using a butter knife or small spatula over the surface of every cookie.: The tactile motion of smoothing frosting gives you control over thickness and finish. A smooth pass with a small spatula yields a clean surface for further decoration, and you will see the cookie edges remain visible, which keeps shape and presentation intact. Avoid overworking the frosting or scraping too aggressively, which can remove surface detail or create uneven patches.
- Piping– To pipe the frosting you've made, transfer it into a pastry bag (or the tip of your choice) onto the bag, and begin to pipe small stars over the surface of every cookie.: Piping offers fine control for delicate accents and can create raised textures that contrast with a flat base. The sound of the bag pressing and the sight of tiny stars forming are satisfying and add a handcrafted feel. If your frosting is too stiff to pipe, warm it slightly by kneading the bag, but not so warm that it loses shape. A common pitfall is using a tip that is too large, which obscures finer snowflake details.
- As desired, add sprinkles to the top of each cookie. Fun Tip– Feel free to use Christmas colored sprinkles, or whatever color and type of sprinkles you'd like.: Sprinkles introduce crunch and festive color, and when added while frosting is slightly tacky they adhere well. The visual contrast of bright sprinkles on pale frosting reads celebratory and playful. Avoid adding sprinkles to fully set frosting, which will not stick and may fall off later. If you prefer uniform coverage, press sprinkles gently into the frosting to secure them.
- Shortcut Frosting– The third and final option for frosting is to use another favorite store bought frosting like buttercream. You cannot pipe the frosting, so just spread it on the cookies with a butter knife or small spatula, and add sprinkles as desired.: Store bought frosting is convenient and consistent, and spreading it yields a quick, even finish. The trade off is reduced ability to pipe precise decorations, but you gain time and predictability. If texture matters, chill the spread cookies to firm up the frosting before stacking. Over-relying on tub frosting can reduce the handmade charm, so combine methods if you want variety.
- Storage– The vanilla whipped cream frosted cookies need to be stored airtight in the fridge where they will keep for 3 to 4 days. If you use homemade vanilla buttercream, you can feel confident leaving them airtight at room temp for up to 5 days or in the fridge for up to 1 week. If you use store bought frosting the cookies will keep airtight at room temp for up to 1 week.: How you store the cookies depends on the chosen frosting. Chilled whipped cream frosting demands refrigeration, while sturdier buttercream fares well at room temperature for short periods. Airtight storage prevents stale texture and flavor loss, and separating layers with parchment keeps decorations intact. A mistake is leaving perishable frosting at room temperature for too long, which risks spoilage.
Notes
- Colorful icing: Tint small batches of your frosting with gel food coloring to create vibrant holiday palettes that brighten cookie trays.
- Texture contrast: Add a sprinkle mix that includes small nonpareils and tiny sugar pearls for a variety of crunch levels on each cookie.
- Shape swaps: Swap snowflake cutters for stars or circles for varied presentation while following the same bake time guidance.
- Frosting choice: Use whipped cream based frosting for an airy finish or buttercream for piping detail, keeping storage needs in mind.
- Decorating tools: Use a fine tip for delicate piped lines or a small offset spatula for quick, even spreads across multiple cookies.
- Make ahead: Chill rolled and cut cookies on a tray, then freeze before baking to have fresh cookies on demand; increase baking time slightly if baking from frozen.