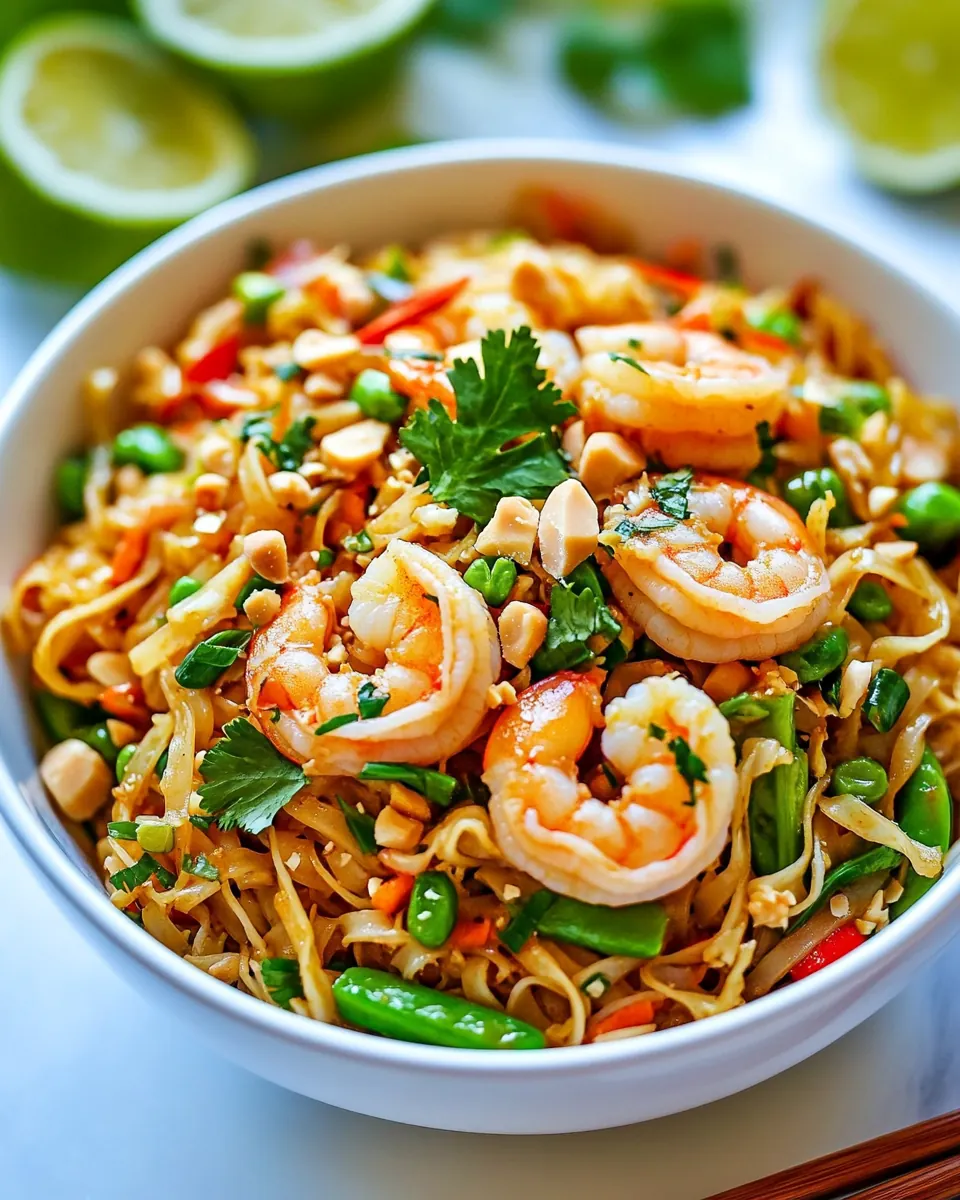
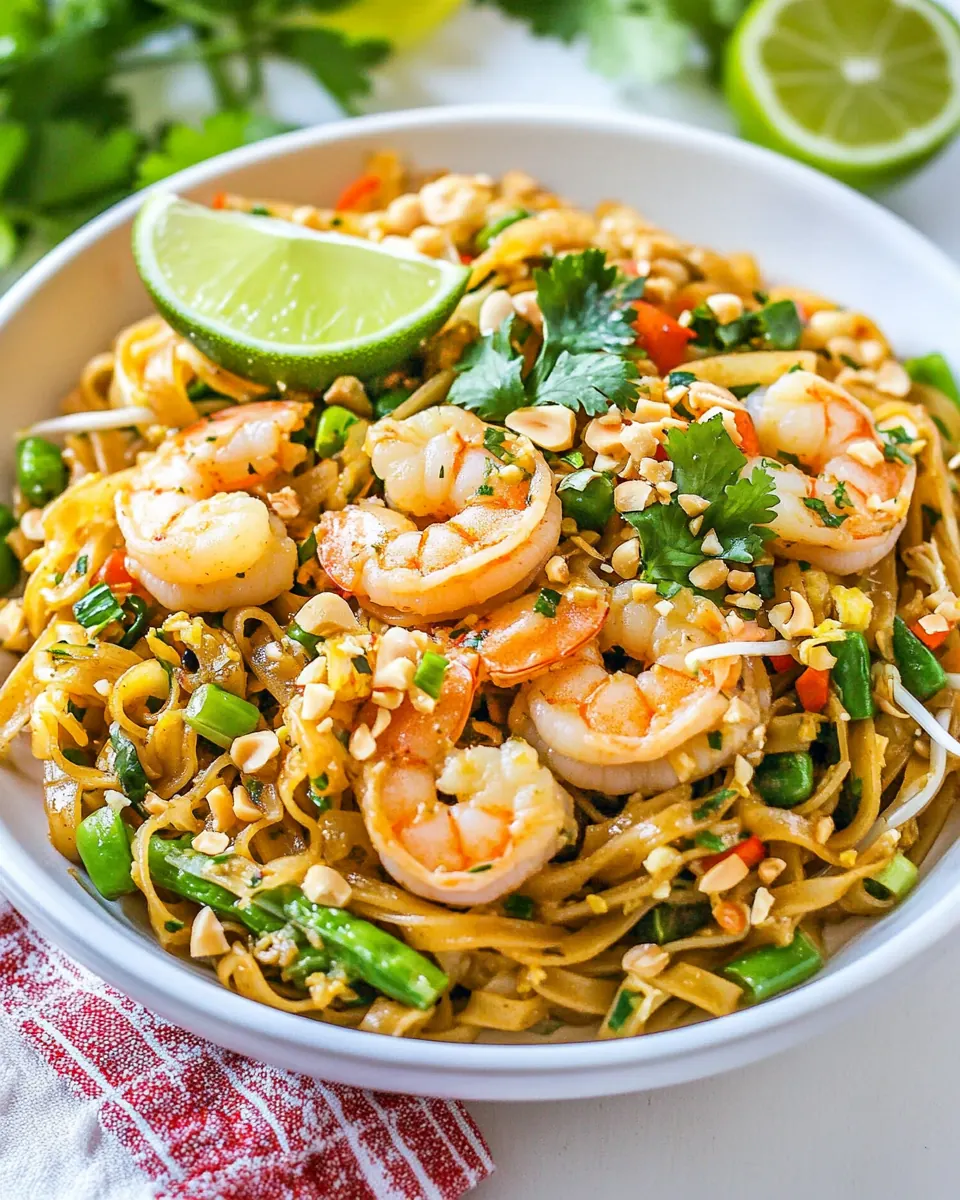
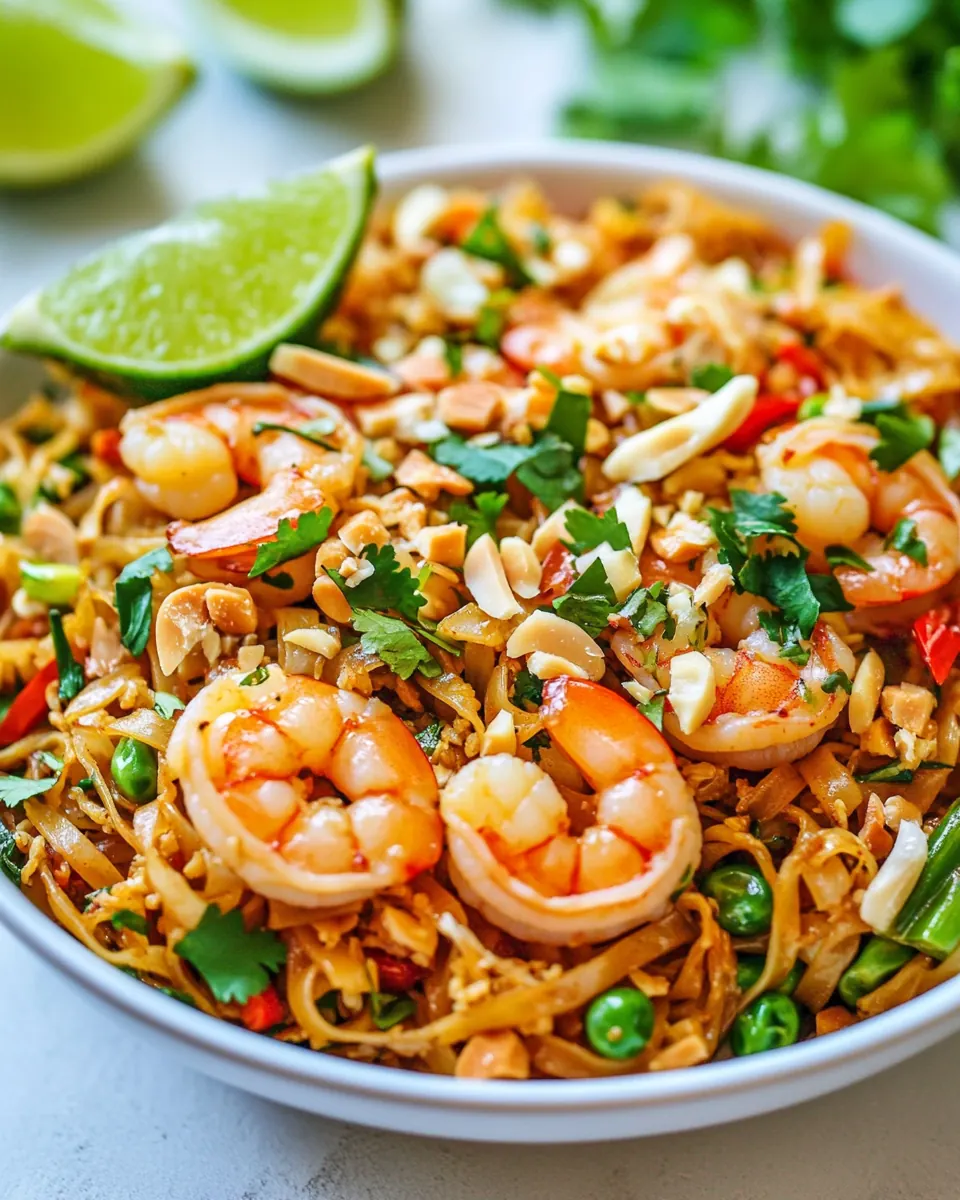
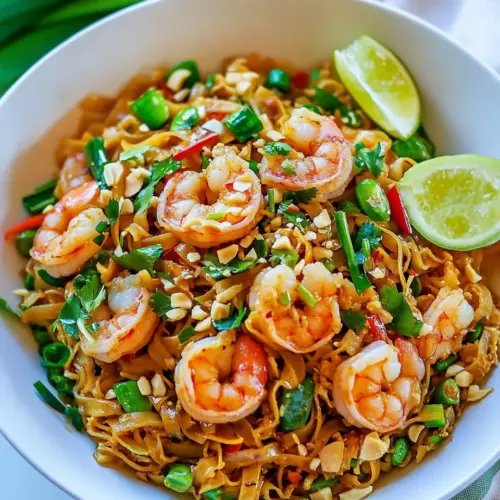
Shrimp Pad Thai
Shrimp Pad Thai has been my go to when I want something bright, fast, and a little bit nostalgic from the moment I first tasted it on a rain soaked street in a bustling market many years ago.
That first forkful was a revelation, the way the slick rice noodles hugged the tangy sauce while the shrimp popped with a delicate sweetness, and I remember thinking how effortless a meal could be when the components sing together. Over the years I have tinkered with timing, the balance of sweet and salty, and the order of additions until this version felt like second nature.
Tonight I make it when I need a comforting weeknight dinner that does not require a lot of fuss, yet still feels like something special. The crunch from chopped peanuts and the zip from a squeeze of lime make it both familiar and exciting. I often hum while stirring the pan, because the sizzle of garlic and shrimp always brings a little theatrical joy to an ordinary evening.
Friends ask me for the recipe when they notice the aroma wafting from my kitchen, and I tell them it is less about strict measurements and more about respecting texture and timing. I show them how to nurture the rice noodles so they are soft but not limp, and how to let the eggs set briefly before folding them through for silkiness. Each time I serve Shrimp Pad Thai I watch people relax, fork by fork, which is really my favorite part.
Recipe Snapshot
15 mins
9 mins
6 mins
Easy
450 kcal
Thai
Gluten-Free, Low FODMAP
Dinner
Large non-stick skillet or wok, Small bowl, Colander, Spatula
Why This Shrimp Pad Thai Works
Bright balanced flavor
I love how Shrimp Pad Thai walks a tightrope between sweet, salty, sour, and spicy. I deliberately lean into fresh acid from rice vinegar and lime, while the honey softens the edges so the dish never feels one note. That interplay makes each bite interesting, and it’s why I often choose this for an easy weeknight dinner when I want something lively.
Speed without sacrifice
We can have a full meal on the table quickly, because the recipe relies on quick cooking techniques and smart prep. The shrimp cooks in minutes, and the noodles only need to be hydrated properly. I appreciate how this saves time while still delivering restaurant style texture and flavor. There is satisfying sizzle and aroma, but no long wait.
Textural contrast
One of the reasons I return to this recipe is the crunch against the tender noodles. The chopped peanuts and crisp bean sprouts bring brightness and bite, while the soft scrambled eggs add richness. I always think about that contrast when assembling the plate, because it keeps every forkful engaging.
Flexible and forgiving
I often adapt this for what I have on hand without losing its soul. The sauce components are forgiving if you adjust slightly, and you can make the dish spicier or milder easily. I like knowing that a quick swap here or a touch more honey there will still produce a satisfying result.
Comfort with a touch of showmanship
Finally, the dish feels homey but still impressive. When I toss everything in the pan and the aroma builds, guests take notice. It is a simple performance that yields big returns, and that balance of comfort and flair is exactly why I keep it in regular rotation.
Shrimp Pad Thai Shopping List
I think of the ingredient list as a small orchestra, where each player has a clear part to play. The rice noodles provide the body, the shrimp supply protein and sweetness, while the sauce ingredients bring harmony. The crunchy and fresh elements, like peanuts and bean sprouts, punctuate the dish so every bite has contrast.
- 4 ounces dry brown rice noodles: Soak the noodles in hot water until pliable; they form the starchy, chewy base of the dish and absorb the sauce for authentic texture.
- 2 teaspoons extra virgin olive oil or canola oil: Heat gently to cook and prevent sticking; oil provides a nonstick cooking surface and helps transfer heat for even searing of proteins and aromatics.
- 8 ounces medium or large shrimp peeled and deveined (you can use either fresh shrimp or thawed frozen shrimp—if using thawed, lightly pat the shrimp dry prior to cooking): Cook quickly over high heat for tender, juicy pieces; shrimp add sweet, briny flavor and protein while taking on sauce and char from the pan.
- 2 cloves garlic minced: Mince finely and sauté briefly to release pungent aroma; garlic builds foundational savory flavor and complements the sweetness and acidity of the sauce.
- 3 large eggs: Whisk and scramble into the pan until just set; eggs add richness, silkiness, and additional protein while binding components together.
- 1/2 cup bean sprouts * (see note): Rinse and drain before adding at the end for crunch and freshness; bean sprouts provide crisp, cool contrast to warm noodles and enrich mouthfeel.
- 1/2 cup freshly grated carrots: Grate finely and toss in for mild sweetness and color; carrots contribute subtle earthiness, visual appeal, and a slight crunchy bite.
- 2 large green onions (or 3 small) finely chopped: Chop thinly and sprinkle toward the end for a fresh, oniony bite; green onions add bright, sharp notes that lift the overall flavor profile.
- 1/4 cup peanuts finely chopped: Roughly chop and toast briefly if desired to enhance nuttiness; peanuts bring crunchy texture and savory depth typical of Pad Thai toppings.
- 1/4 cup fresh cilantro chopped: Chop coarsely and garnish liberally for herbal brightness; cilantro provides citrusy, fragrant herbal contrast to the savory-sweet sauce.
- Lime wedges for serving: Serve on the side as wedges to squeeze over each plate; lime adds vibrant acidity that brightens and balances the rich, salty elements.
- 2 tablespoons fish sauce ** gluten free if needed (see note): Measure and stir into the sauce to provide concentrated umami and salty depth; fish sauce delivers an essential savory backbone to Pad Thai.
- 1 1/2 tablespoons rice vinegar (I used seasoned): Use to add mild acidity and subtle sweetness; rice vinegar balances richness and helps brighten the sauce without overpowering delicate flavors.
- 1 tablespoon low-sodium soy sauce or tamari for gluten free: Use as the gluten–free salty component when needed; soy sauce or tamari provides savory, slightly sweet umami and deepens sauce complexity.
- 2 tablespoons water: Add to the sauce to thin and help ingredients combine; water adjusts consistency so the sauce coats noodles without becoming sticky.
- 1 tablespoon honey plus additional 1-2 teaspoons to taste: Dissolve into the sauce to add balanced sweetness and a slight glaze; honey tempers the salty and acidic components while enhancing caramel notes.
- 1 3 teaspoons ground chile sauce (sambal oelek) or chili garlic sauce: Stir in to control the heat level to preference; sambal oelek or chili garlic sauce contributes spicy, tangy kick and aromatic chili flavor to the dish.
Cooking Method for Shrimp Pad Thai
This recipe moves quickly once you start, so I like to have everything within arm’s reach. Set up your noodles, sauce, and toppings first because the real work is about timing and knowing the visual cues. Below I expand each direction into detailed, sensory forward guidance to help you feel confident at the stove.
- Cook the rice noodles according to package instructions. They should be soft but not mushy. Drain and rinse under cool water.: The noodles should feel tender yet retain a faint bite when pressed between fingers, never mushy. As they simmer you'll notice the water cloud slightly, but when the noodles return to translucence they are near done. Drain them promptly and rinse under cool water to stop the cooking and remove excess starch, which prevents sticking. A common mistake is overcooking so they collapse into a paste, so test them early and often during the last minute. The sound is subtle, just a faint slip as you lift them, and visually they go from chalky to glossy. Let them sit in a colander so any residual water drains away, and toss them lightly with a teaspoon of oil if you are not using immediately to keep them from clumping.
- In a small bowl, whisk together the sauce ingredients: fish sauce, rice vinegar, soy sauce, water, 1 tablespoon honey, and 1 teaspoon chili garlic sauce. If you prefer a sweeter pad thai, add additional honey (or even a little brown sugar). For spicier, add additional chili paste.: The sauce blends fish sauce , rice vinegar , soy sauce , water , 1 tablespoon honey , and 1 teaspoon chili garlic sauce to create a balanced dressing that will cling to the noodles. Whisk until the honey dissolves and the mixture looks homogenous, a slightly glossy amber liquid. Taste and adjust now, because once it hits the hot pan the flavors concentrate. A common misstep is adding everything without tasting first, so I always sample and tweak the sweetness or heat. The aroma should be tangy and savory with a peppery lift from the chili, and the texture should be pourable, not syrupy.
- Heat the oil in a large non-stick skillet or wok over medium-high heat. Add the shrimp and saute just until the shrimp begins to turn pink, about 2 minutes. Add the garlic and noodles. Stir continuously to coat the noodles and shrimp with the garlic, then push the ingredients in the skillet over to one side of the pan.: You'll know the pan is ready when a drop of water dances on the surface and the oil shimmers. Add the shrimp and saute just until the shrimp begins to turn pink, about 2 minutes, so they stay juicy and slightly firm. Hear that quick sear and smell the immediate sweet marine scent of the shrimp . A frequent error is crowding the pan which steams instead of sears, so work in a single layer for even browning. When the edges become opaque and the raw center disappears, pull them slightly aside to avoid overcooking while you add the next ingredients.
- Crack the eggs into the empty side of the skillet. Break apart the yolk with the spatula and let cook for 30 seconds, until just beginning to set. Stir the egg in with the noodles. Stir in the sauce.: The moment you introduce minced garlic the pan will fill with a warm, pungent aroma, but be attentive because garlic burns quickly. Stir continuously to coat the noodles and shrimp with the fragrant oil, allowing the noodles to pick up a light sheen. Then push the combined ingredients to one side of the pan to create a small clear space. Visually you should see the noodles glisten and the garlic color slightly, not darken. Avoid the mistake of leaving garlic in contact with high heat too long, which brings bitterness instead of sweetness. Maintain an active stir so the noodles do not stick and the flavors distribute evenly.
- Add the bean sprouts, carrots, and chopped green onions and let cook until the bean sprouts are crisp-tender, about 1 minute. Sprinkle on the peanuts and cilantro. Serve immediately with lime wedges.: The eggs will sizzle softly when they hit the hot surface, releasing a rich, warm aroma. Break apart the yolk with your spatula and let cook for 30 seconds, until they just begin to set. The edges should look slightly puffed and glossy. Stir the egg in with the noodles, folding gently so you preserve tender curds rather than turning them into dry crumbs. This technique gives silkiness and body to the dish. One common pitfall is overcooking the eggs until they become rubbery, which happens quickly at high heat, so keep the motion steady and remove from heat if they start to tighten.
- Stir in the sauce: As you pour the sauce over the warm noodles, it will hiss gently and the pan will release a complex steam of tang, salt, and sweet. Toss quickly so the sauce clings to every strand, and watch the noodles take on a glossy light brown color. The sound is a soft sizzle, the visual cue is even coating without pooled liquid in the pan. If it seems dry, a splash more water will help distribute the sauce, but avoid making it soupy. A typical error is adding too much sauce at once, which dilutes the flavor profile, so incorporate gradually while tasting.
- Add the bean sprouts, carrots, and chopped green onions: These fresh elements should be added near the end so they remain crisp tender, contributing a bright snap against the soft noodles. Cook until the bean sprouts are just crisp tender, about 1 minute, watching the color shift to slightly translucent in the stems while the leaves stay lively. The sound is a faint crunch when you stir. Overcooking here will erase the contrast, so move quickly and rely on short, vigorous tosses. Visually, you want a mix of glossy noodles with specks of vivid orange and green throughout.
- Sprinkle on the peanuts and cilantro: The final touch of chopped peanuts and fresh cilantro transforms texture and aroma. The peanuts add a nutty crunch and a toasted note, while the cilantro offers an herbal lift that brightens the entire pan. Scatter them and give a final toss so they nestle into the noodles. A mistake I see often is adding cilantro too early which causes it to wilt, so hold it until the last moment to keep that fresh scent and green color.
- Serve immediately with lime wedges: Serve right away while the noodles are warm and the textures are at their peak. A squeeze of lime adds immediate acidity that ties everything together. If you let the dish sit, the noodles will absorb sauce and soften, so plating quickly preserves the intended contrast. Offer extra lime so each diner can adjust acidity to taste, and enjoy the warm aromatics as they release when the lime hits the hot pan.
Recipe Variations about Shrimp Pad Thai
I like to offer a few tested variations so you can tailor Shrimp Pad Thai to your pantry or mood. Below are practical ideas that keep the spirit of the dish while shifting texture, spice, or accessibility.
- Swap proteins – Keep the same sauce and techniques but use tofu or extra vegetables if you prefer no seafood, ensuring you pat tofu dry and press it to get a firm sear.
- Adjust the sweetness – Add an extra teaspoon or two of honey for a sweeter profile, or reduce it if you prefer a more savory finish, tasting as you go.
- Control the heat – Start with one teaspoon of chili sauce and increase gradually, noting that the heat concentrates slightly as the sauce reduces in the pan.
- Use tamari for gluten free – Replace regular soy sauce with tamari and check your fish sauce label for gluten status if needed to keep the recipe gluten free friendly.
- Make it ahead – Prepare the sauce and chop vegetables in advance, but keep noodles separate until just before tossing to preserve ideal texture.
Serve This Shrimp Pad Thai With
This dish pairs well with light accompaniments and suits a variety of occasions, from casual weeknights to festive dinners. Below I outline approachable serving ideas and storage guidance so you can plan the meal end to end.
- Simple fresh salad – A crisp green salad dressed lightly with lime and a touch of sesame oil complements the noodles and adds refreshing contrast for a balanced meal.
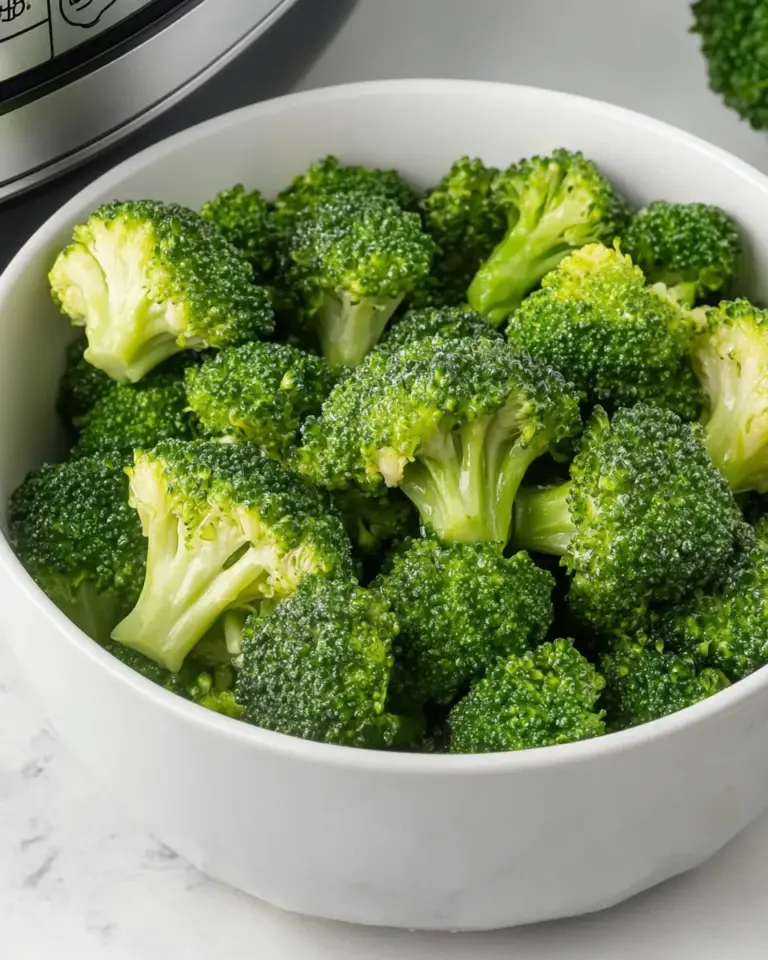
- Steamed vegetables – Lightly steamed greens like bok choy or broccoli add color and fiber without competing with the bold flavors of the pad thai.
- Occasion ideas – Serve Shrimp Pad Thai for a quick family dinner, casual entertaining, or anytime you want an impressive dish with minimal fuss.
- Storage tips – Store leftovers in an airtight container in the refrigerator for 3 to 4 days. When reheating, add a splash of water and warm gently to restore texture and prevent dryness.
- Seasonal pairings – This dish works year round, but in summer I pair it with light citrusy sides, while in cooler months I add heartier steamed vegetables to make it more comforting.
FAQ
Conclusion
What makes this Shrimp Pad Thai special is the way simple components come together to create bright, layered flavors and varied textures. It is fast enough for weeknights but flavorful enough to serve to guests, and the contrast between tender noodles, juicy shrimp, and crunchy peanuts keeps every bite interesting. Give it a try the next time you want a satisfying meal that feels both comforting and a little celebratory, and let the vibrant finishing touches like lime and cilantro personalize it for your table.
Shrimp Pad Thai
Equipment
- Large non-stick skillet or wok
- Small Bowl
- Colander
- Spatula
Ingredients
- 4 ounces dry brown rice noodles Soak the noodles in hot water until pliable; they form the starchy, chewy base of the dish and absorb the sauce for authentic texture.
- 2 teaspoons extra virgin olive oil or canola oil Heat gently to cook and prevent sticking; oil provides a nonstick cooking surface and helps transfer heat for even searing of proteins and aromatics.
- 8 ounces medium or large shrimp peeled and deveined (you can use either fresh shrimp or thawed frozen shrimp—if using thawed, lightly pat the shrimp dry prior to cooking) Cook quickly over high heat for tender, juicy pieces; shrimp add sweet, briny flavor and protein while taking on sauce and char from the pan.
- 2 cloves garlic minced Mince finely and sauté briefly to release pungent aroma; garlic builds foundational savory flavor and complements the sweetness and acidity of the sauce.
- 3 large eggs Whisk and scramble into the pan until just set; eggs add richness, silkiness, and additional protein while binding components together.
- 1/2 cup bean sprouts * (see note) Rinse and drain before adding at the end for crunch and freshness; bean sprouts provide crisp, cool contrast to warm noodles and enrich mouthfeel.
- 1/2 cup freshly grated carrots Grate finely and toss in for mild sweetness and color; carrots contribute subtle earthiness, visual appeal, and a slight crunchy bite.
- 2 large green onions (or 3 small) finely chopped Chop thinly and sprinkle toward the end for a fresh, oniony bite; green onions add bright, sharp notes that lift the overall flavor profile.
- 1/4 cup peanuts finely chopped Roughly chop and toast briefly if desired to enhance nuttiness; peanuts bring crunchy texture and savory depth typical of Pad Thai toppings.
- 1/4 cup fresh cilantro chopped Chop coarsely and garnish liberally for herbal brightness; cilantro provides citrusy, fragrant herbal contrast to the savory-sweet sauce.
- Lime wedges for serving Serve on the side as wedges to squeeze over each plate; lime adds vibrant acidity that brightens and balances the rich, salty elements.
- 2 tablespoons fish sauce ** gluten free if needed (see note) Measure and stir into the sauce to provide concentrated umami and salty depth; fish sauce delivers an essential savory backbone to Pad Thai.
- 1 1/2 tablespoons rice vinegar (I used seasoned) Use to add mild acidity and subtle sweetness; rice vinegar balances richness and helps brighten the sauce without overpowering delicate flavors.
- 1 tablespoon low-sodium soy sauce or tamari for gluten free Use as the gluten-free salty component when needed; soy sauce or tamari provides savory, slightly sweet umami and deepens sauce complexity.
- 2 tablespoons water Add to the sauce to thin and help ingredients combine; water adjusts consistency so the sauce coats noodles without becoming sticky.
- 1 tablespoon honey plus additional 1-2 teaspoons to taste Dissolve into the sauce to add balanced sweetness and a slight glaze; honey tempers the salty and acidic components while enhancing caramel notes.
- 1 -3 teaspoons ground chile sauce (sambal oelek) or chili garlic sauce Stir in to control the heat level to preference; sambal oelek or chili garlic sauce contributes spicy, tangy kick and aromatic chili flavor to the dish.
Instructions
- Cook the rice noodles according to package instructions. They should be soft but not mushy. Drain and rinse under cool water.: The noodles should feel tender yet retain a faint bite when pressed between fingers, never mushy. As they simmer you'll notice the water cloud slightly, but when the noodles return to translucence they are near done. Drain them promptly and rinse under cool water to stop the cooking and remove excess starch, which prevents sticking. A common mistake is overcooking so they collapse into a paste, so test them early and often during the last minute. The sound is subtle, just a faint slip as you lift them, and visually they go from chalky to glossy. Let them sit in a colander so any residual water drains away, and toss them lightly with a teaspoon of oil if you are not using immediately to keep them from clumping.
- In a small bowl, whisk together the sauce ingredients: fish sauce, rice vinegar, soy sauce, water, 1 tablespoon honey, and 1 teaspoon chili garlic sauce. If you prefer a sweeter pad thai, add additional honey (or even a little brown sugar). For spicier, add additional chili paste.: The sauce blends fish sauce , rice vinegar , soy sauce , water , 1 tablespoon honey , and 1 teaspoon chili garlic sauce to create a balanced dressing that will cling to the noodles. Whisk until the honey dissolves and the mixture looks homogenous, a slightly glossy amber liquid. Taste and adjust now, because once it hits the hot pan the flavors concentrate. A common misstep is adding everything without tasting first, so I always sample and tweak the sweetness or heat. The aroma should be tangy and savory with a peppery lift from the chili, and the texture should be pourable, not syrupy.
- Heat the oil in a large non-stick skillet or wok over medium-high heat. Add the shrimp and saute just until the shrimp begins to turn pink, about 2 minutes. Add the garlic and noodles. Stir continuously to coat the noodles and shrimp with the garlic, then push the ingredients in the skillet over to one side of the pan.: You'll know the pan is ready when a drop of water dances on the surface and the oil shimmers. Add the shrimp and saute just until the shrimp begins to turn pink, about 2 minutes, so they stay juicy and slightly firm. Hear that quick sear and smell the immediate sweet marine scent of the shrimp . A frequent error is crowding the pan which steams instead of sears, so work in a single layer for even browning. When the edges become opaque and the raw center disappears, pull them slightly aside to avoid overcooking while you add the next ingredients.
- Crack the eggs into the empty side of the skillet. Break apart the yolk with the spatula and let cook for 30 seconds, until just beginning to set. Stir the egg in with the noodles. Stir in the sauce.: The moment you introduce minced garlic the pan will fill with a warm, pungent aroma, but be attentive because garlic burns quickly. Stir continuously to coat the noodles and shrimp with the fragrant oil, allowing the noodles to pick up a light sheen. Then push the combined ingredients to one side of the pan to create a small clear space. Visually you should see the noodles glisten and the garlic color slightly, not darken. Avoid the mistake of leaving garlic in contact with high heat too long, which brings bitterness instead of sweetness. Maintain an active stir so the noodles do not stick and the flavors distribute evenly.
- Add the bean sprouts, carrots, and chopped green onions and let cook until the bean sprouts are crisp-tender, about 1 minute. Sprinkle on the peanuts and cilantro. Serve immediately with lime wedges.: The eggs will sizzle softly when they hit the hot surface, releasing a rich, warm aroma. Break apart the yolk with your spatula and let cook for 30 seconds, until they just begin to set. The edges should look slightly puffed and glossy. Stir the egg in with the noodles, folding gently so you preserve tender curds rather than turning them into dry crumbs. This technique gives silkiness and body to the dish. One common pitfall is overcooking the eggs until they become rubbery, which happens quickly at high heat, so keep the motion steady and remove from heat if they start to tighten.
- Stir in the sauce: As you pour the sauce over the warm noodles, it will hiss gently and the pan will release a complex steam of tang, salt, and sweet. Toss quickly so the sauce clings to every strand, and watch the noodles take on a glossy light brown color. The sound is a soft sizzle, the visual cue is even coating without pooled liquid in the pan. If it seems dry, a splash more water will help distribute the sauce, but avoid making it soupy. A typical error is adding too much sauce at once, which dilutes the flavor profile, so incorporate gradually while tasting.
- Add the bean sprouts, carrots, and chopped green onions: These fresh elements should be added near the end so they remain crisp tender, contributing a bright snap against the soft noodles. Cook until the bean sprouts are just crisp tender, about 1 minute, watching the color shift to slightly translucent in the stems while the leaves stay lively. The sound is a faint crunch when you stir. Overcooking here will erase the contrast, so move quickly and rely on short, vigorous tosses. Visually, you want a mix of glossy noodles with specks of vivid orange and green throughout.
- Sprinkle on the peanuts and cilantro: The final touch of chopped peanuts and fresh cilantro transforms texture and aroma. The peanuts add a nutty crunch and a toasted note, while the cilantro offers an herbal lift that brightens the entire pan. Scatter them and give a final toss so they nestle into the noodles. A mistake I see often is adding cilantro too early which causes it to wilt, so hold it until the last moment to keep that fresh scent and green color.
- Serve immediately with lime wedges: Serve right away while the noodles are warm and the textures are at their peak. A squeeze of lime adds immediate acidity that ties everything together. If you let the dish sit, the noodles will absorb sauce and soften, so plating quickly preserves the intended contrast. Offer extra lime so each diner can adjust acidity to taste, and enjoy the warm aromatics as they release when the lime hits the hot pan.
Notes
- Swap proteins - Keep the same sauce and techniques but use tofu or extra vegetables if you prefer no seafood, ensuring you pat tofu dry and press it to get a firm sear.
- Adjust the sweetness - Add an extra teaspoon or two of honey for a sweeter profile, or reduce it if you prefer a more savory finish, tasting as you go.
- Control the heat - Start with one teaspoon of chili sauce and increase gradually, noting that the heat concentrates slightly as the sauce reduces in the pan.
- Use tamari for gluten free - Replace regular soy sauce with tamari and check your fish sauce label for gluten status if needed to keep the recipe gluten free friendly.
- Make it ahead - Prepare the sauce and chop vegetables in advance, but keep noodles separate until just before tossing to preserve ideal texture.