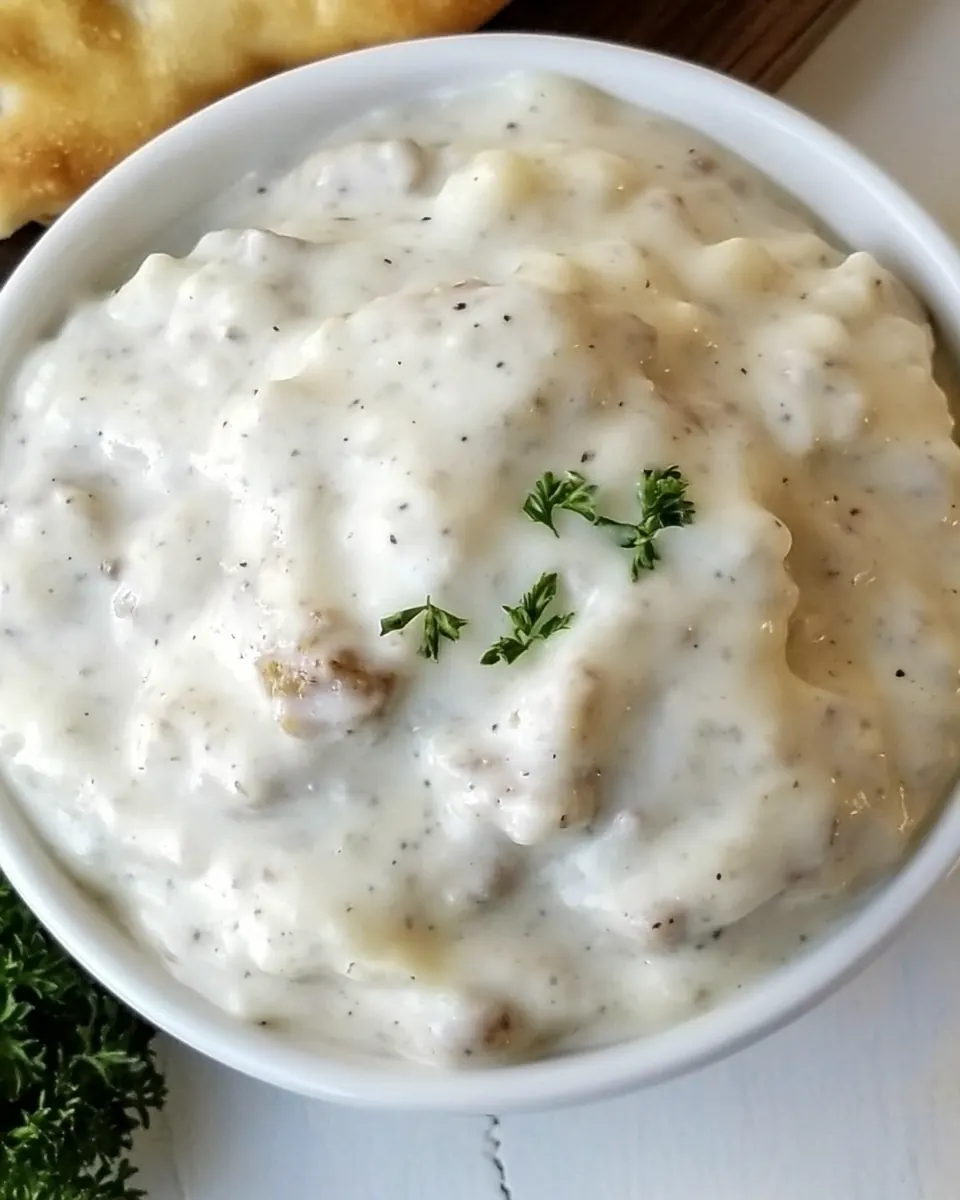
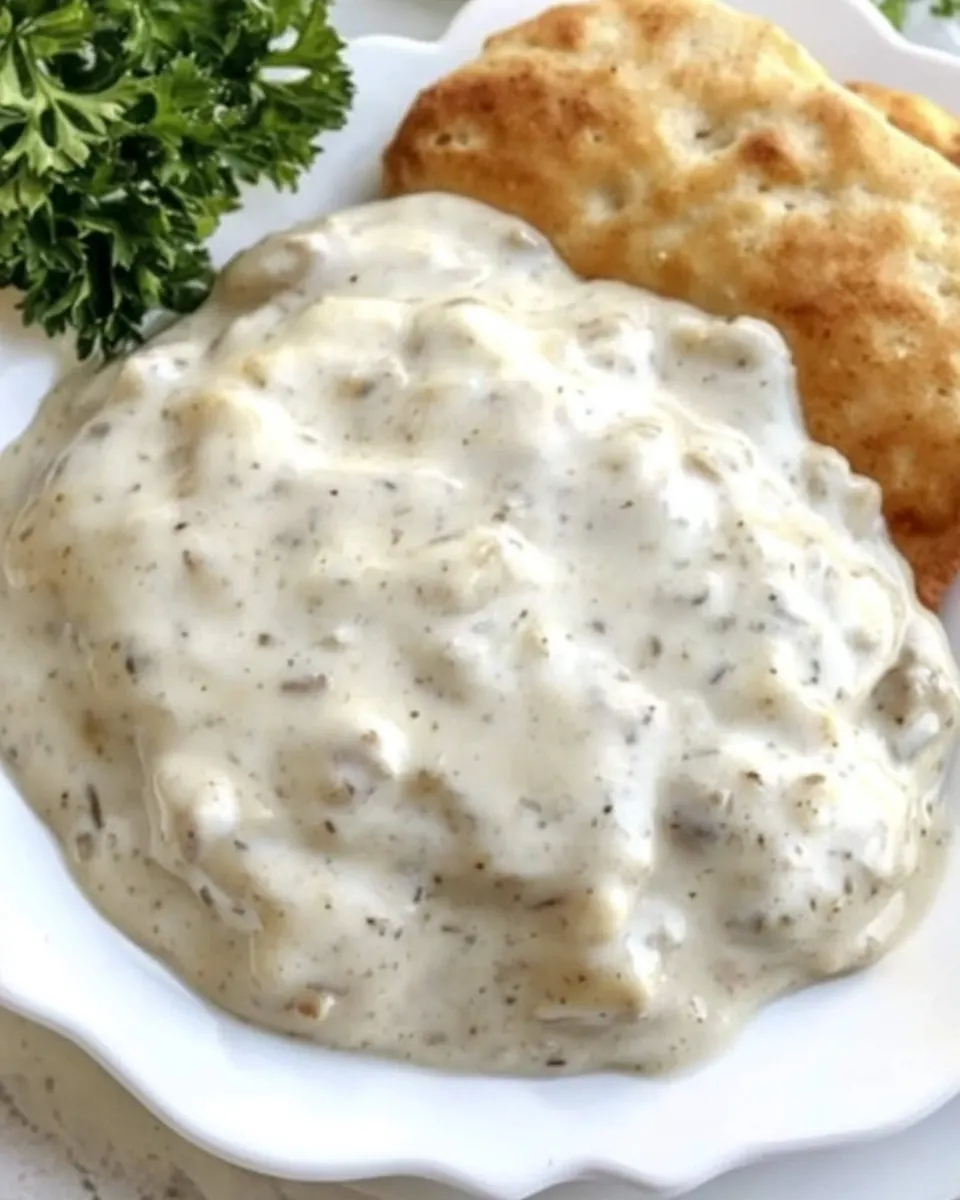
Sausage Gravy
Sausage Gravy has been my weekend comfort classic for years, the kind of recipe that turns a slow morning into something warm and reliably satisfying. I remember the first time I learned to make it I was nervous about working with hot milk and hot fat at the same time, but after a few stumbles I learned how rhythm and attention make a silky, peppery gravy that clings to biscuits and soaks into potatoes. That learning curve is part of the charm for me, it taught patience and turned a simple breakfast into a ritual.
There are mornings when I want to impress guests without fuss, and Sausage Gravy is my secret weapon. I like to tell the story of how a rushed Saturday turned into a leisurely brunch because the gravy smelled so good it slowed everyone down. The aroma of the browned breakfast sausage cooking away in the skillet, then the nutty scent as the all purpose flour toasts, is unforgettable. That sensory memory is why this dish is my go to when I want to create a cozy moment.
Over time I tuned small details, like how much fat to leave behind, and when to lower the heat after adding the whole milk. Those choices affect texture and taste more than you might think. I also love that this recipe scales, it makes a generous amount that feeds a crowd, yet reheats beautifully when you need a quick comfort meal later in the week. For anyone nervous about this technique, I promise it is approachable once you understand the cues: listen for a low sizzle, watch for tiny bubbles at the pan sides, and keep stirring.
Recipe Snapshot
25 mins
10 mins
15 mins
Medium
300 kcal
American
Gluten-Free, Low FODMAP
Breakfast
Large skillet, Wooden spoon
Why This Sausage Gravy Is So Good
Flavor That Feels Like Home
I adore Sausage Gravy because the flavor hits familiar notes that feel like a hug. The savory, spiced breakfast sausage provides a deeply seasoned base, while the creamy whole milk balances richness for a gravy that is both comforting and satisfying. I often find guests closing their eyes at first bite, and that reaction tells me this is doing something right.
Simple Ingredients, Big Impact
One reason I keep coming back to this recipe is how few ingredients are needed, yet every item plays a clear role. The all purpose flour thickens and adds a toasty note when cooked, while salt and pepper sharpen and personalize the final dish. You do not need a long shopping list to get excellent results, which makes this a practical choice for busy mornings.
Technique That Teaches You Cooking Basics
Making Sausage Gravy is a gentle way to learn heat control, roux building, and seasoning. I enjoy showing friends how adjusting cooking time after adding the flour changes color and depth of flavor. It is a compact lesson in stovetop cooking, and once you master it you can apply the same instincts to other sauces.
Scalable and Make Ahead Friendly
I love that this recipe yields a large batch and handles storage well. I often make a double batch and freeze single serving portions for quick breakfasts. Reheating is forgiving as long as you add a splash of milk and warm slowly, this flexibility makes it a practical option for both family gatherings and weekday mornings.
Perfect for Sharing
Finally, serving Sausage Gravy over biscuits or toast creates an easy communal dish. It invites conversation, and because it is so straightforward to keep warm on low heat, you can focus on people instead of precise timing. For me, that social ease is a key reason this recipe is a staple.
Ingredients for Sausage Gravy
These ingredients are uncomplicated, but they form a balanced system where each element supports the others. The breakfast sausage supplies fat and seasoning, the all purpose flour creates body and toasty notes when cooked, and the whole milk builds the creamy backbone that gives the gravy its comforting texture. Salt and pepper let you tailor the final seasoning, because different sausages carry different salt levels.
- 1/2 lb breakfast sausage: Brown thoroughly over medium heat to render fat and develop deep savory flavor; break into small crumbles for an even texture throughout the gravy and cook until no pink remains.
- 1/2 cup all purpose flour + more if needed – use your judgment: Whisk in gradually to absorb fat and form a roux; cook until lightly golden to thicken the mixture and eliminate raw flour taste, adding more if the gravy seems too thin.
- 1/2 gallon whole milk: Heat gently and stir constantly to create a creamy base that melds flavors; simmer until slightly reduced so it coats a spoon, using whole milk for richness and smooth mouthfeel.
- Salt and pepper to taste: Season incrementally to balance the richness and enhance savory notes; adjust at the end to taste, freshly ground black pepper adding warmth and salt highlighting other ingredients.
Putting Together Sausage Gravy
Bringing this gravy together is about rhythm, attention, and small sensory cues. I like to set up my spoon, skillet, and ingredients beforehand so I can follow the flow without scrambling. Below I expand each original direction into detailed, sensory rich guidance so you can nail the texture and flavor.
- Crumble and brown the sausage in a large skillet (9-10") over medium heat. A cast iron skillet is best.: The sizzling sound when the breakfast sausage hits the pan is the first hint you are on the right track, and a cast iron skillet will give you even browning and those dark fond bits that elevate flavor. As the meat renders fat you will see glossy pools around the pieces and smell the spices deepen into roasted notes. Use a sturdy spoon to break the sausage into small, even pieces so they cook uniformly. The main why here is flavor development, browned meat equals complexity. A frequent mistake is overcrowding the pan, which steams the meat and prevents the desirable browning.
- When the sausage is browned, pour off all but 1 Tbs of the fat.: Leaving about 1 Tbs of fat is crucial, it provides the medium to cook the all purpose flour and carry flavor into the sauce while avoiding excess greasiness. You should notice the pan surface slick but not flooded, and the remaining fat will shimmer softly. Pouring off too much removes flavor, while keeping too much makes the gravy greasy and loose. A common error is discarding all the fat and losing depth; keep that small amount for richness.
- With the heat off, add the flour to the skillet and mix it around so that the pieces of sausage become coated (they start to look like little white powdered donut holes). If the flour seems to disappear, add a little more (1/4 cup or so).: Turning the heat off prevents the flour from clumping or burning instantly, and coating the sausage ensures the flour absorbs fat evenly which helps with smooth thickening. You will see the pieces take on a dusty, pale coating; this is the visual cue that your roux base is forming. If the mixture looks patchy or too sticky, a small extra measure of all purpose flour can rescue the texture. The pitfall here is adding too much flour at once and creating dry pockets, so distribute it gradually and mix thoroughly.
- Place the skillet back on the burner and set to medium high. Stir and cook the sausage with the flour on it for at least 2 minutes. The longer you cook the sausage and flour the darker your gravy will be. Stop at 2 minutes for a light colored gravy. Cook longer for a darker gravy. Do not cook longer than 4 minutes.: Returning the pan to medium high unlocks the toasty, nutty aroma as the flour cooks, and you will notice the smell shift from raw starch to something pleasantly roasted. Stir frequently to ensure even color and to prevent scorching. The visual guide is subtle browning of the coated bits, and the sound may shift to a steadier sizzle. The reason this step matters is that properly cooked flour avoids a pasty taste and creates a glossy finish. Avoid the mistake of leaving it unattended, because flour can go from golden to burnt quickly.
- Add the milk all at once. FROM THIS POINT ON, DO NOT STOP STIRRING. You will likely hear the milk sizzle and that is OK. Use your wooden spoon to stir and scrape up the flavorful bits from the bottom of the pan. Keep stirring and scrape the bottom and the side often. When you begin to notice small bubbles forming at the side of the pan, quickly reduce the heat to medium low.: When the whole milk hits the hot pan you will hear an assertive sizzle, and that action helps integrate the roux into a smooth sauce. Continuous stirring is essential so the mixture emulsifies rather than separating, and scraping the brown bits lifts concentrated flavor into the gravy. Watch for tiny bubbles at the pan edges, that is the sign to lower the heat to avoid a violent boil. A typical mistake is stopping to do something else, which can let the milk scorch and ruin the sauce.
- Heat the gravy at medium low until it is the consistency that you want your gravy. Understand that if the gravy starts to bubble up, you may have to slide it off the burner suddenly. Do not stop stirring. You can place it back on the burner when it slows down.: As you maintain a medium low temperature the gravy will quiet down and thicken gradually, developing a satiny sheen and a slow ribbon when you lift the spoon. The smell will sweeten and the texture will change from runny to clingy, which is the cue for doneness. Being prepared to move the skillet off heat if it surges saves you from boil overs. People often set the heat too high and end up with a grainy texture from rapid boiling.
- When the gravy is near the consistency that you prefer, taste it and add salt and pepper to your desired amount. (This varies greatly depending on the sausage you chose and your own personal tastes). Once seasoned, allow to sit for about 5 minutes before serving and it will thicken more.: Tasting at the finish is essential because the saltiness of the breakfast sausage varies widely. Season in small increments, and use freshly ground pepper to add brightness and a mild heat. After seasoning, letting the gravy rest for about 5 minutes off the heat helps it thicken slightly and schools the flavors together. The why here is simple control, seasoning at the end prevents over salting. A common misstep is over seasoning before tasting, which can result in an overly salty result.
- Once seasoned, allow to sit for about 5 minutes before serving and it will thicken more.: The final rest gives the gravy a chance to settle and reach a serving texture, and the surface may quieten into a gently glossy finish. During this time the aroma will mellow and the fat will reintegrate for a cohesive mouthfeel. Serving immediately after resting yields the best cling to biscuits or toast. Reheating later will require a splash of milk and gentle warming to return to that silky consistency. A mistake to avoid is serving right away without the short rest, which can lead to a slightly looser pour than desired.
Ways to Adapt This Recipe
There are simple adjustments that let you adapt Sausage Gravy to different tastes and situations, without changing the method. Below I expand on practical variations that I use depending on what I have on hand and the audience I am feeding.
- Use lower fat milk cautiously. Substituting 2 percent or skim milk will produce a thinner gravy with less richness, which may be fine for lighter palates, but you will lose some mouthfeel. When I have used lower fat milk I compensate by cooking the gravy a touch longer or adding a small extra measure of flour to preserve body.
- Adjust flour volume for consistency. If the roux seems to disappear when mixed with the sausage, add additional all purpose flour in small increments to reach a proper coating and eventual thickness. I always add flour gradually to avoid a pasty texture and to maintain smoothness.
- Control color with cook time. Cooking the sausage and flour together for only about two minutes keeps the gravy light and creamy, while extending to four minutes deepens the toasted flavor. I pick the shorter time when serving delicate biscuits and the longer time when I want robust, caramelized notes.
- Rest before serving for perfect thickness. Allowing the gravy to sit off heat for about five minutes helps it thicken naturally so it clings better to bread. I remind guests to wait those few minutes because the texture improves significantly as it cools slightly.
- Freeze in portions for convenience. This gravy freezes very well. I divide it into single servings in freezer safe containers and label them, so I can reheat gently with a splash of milk for an instant comforting meal on busy mornings.
How to Serve Sausage Gravy
Serving Sausage Gravy is as much about presentation as pairing, because the right vehicle and accompaniments turn it into a memorable meal. Below are detailed serving ideas, appropriate occasions, and storage pointers to keep leftovers at their best.
- Classic biscuits. Serve the gravy over warm buttermilk biscuits for the iconic pairing that highlights the gravy’s creamy texture and savory depth. I split the biscuit and ladle the gravy so it soaks into the crumb, creating a hearty bite perfect for brunch.
- Toast or English muffins. For a quicker breakfast, spoon the gravy over toasted bread or English muffins, which provide structure and absorb the sauce nicely. This is my go to when I want individual portions that are easy to eat while entertaining a small group.
- Breakfast potatoes or hash. Pour the gravy over roasted or pan fried potatoes for a filling, textural contrast between crispy edges and silky sauce. I like this combination for weekend comfort meals when I want a more substantial plate.
- Family style on a buffet. Keep the gravy warm in a small slow cooker or on the lowest stove setting and provide biscuits on the side so guests can assemble their own plates. This approach is excellent for casual gatherings because it allows everyone to serve themselves and keeps the gravy at a safe temperature.
- Storage and reheating. Refrigerate cooled gravy in airtight containers for up to three days, or freeze single serving portions for up to three months. When reheating, warm slowly on the stovetop and whisk in a splash of whole milk to restore creaminess, stirring constantly to prevent separation and maintain a smooth texture.
- Occasions and pairings. This recipe works well for weekend brunches, holiday breakfasts, or simple family dinners. I often serve it during winter mornings when a warm, savory dish feels especially welcome. Pair with coffee and a green salad for balance when serving later in the day.
FAQ
Conclusion
Sausage Gravy stands out because it combines simple pantry ingredients into an intensely comforting sauce that clings to biscuits and turns an ordinary morning into a memorable meal. I encourage you to give it a try, following the sensory cues and small techniques described so you can feel confident with the process. Once you get the hang of controlling heat and watching for the visual signs of thickening, this becomes a go to recipe for weekends, gatherings, or anytime you want a warm, satisfying dish. Enjoy the ritual of stirring, tasting, and sharing.

Sausage Gravy
Equipment
- Large Skillet
- Wooden Spoon
Ingredients
- 1/2 lb breakfast sausage Brown thoroughly over medium heat to render fat and develop deep savory flavor; break into small crumbles for an even texture throughout the gravy and cook until no pink remains.
- 1/2 cup all purpose flour + more if needed – use your judgment Whisk in gradually to absorb fat and form a roux; cook until lightly golden to thicken the mixture and eliminate raw flour taste, adding more if the gravy seems too thin.
- 1/2 gallon whole milk Heat gently and stir constantly to create a creamy base that melds flavors; simmer until slightly reduced so it coats a spoon, using whole milk for richness and smooth mouthfeel.
- Salt and pepper to taste Season incrementally to balance the richness and enhance savory notes; adjust at the end to taste, freshly ground black pepper adding warmth and salt highlighting other ingredients.
Instructions
- Crumble and brown the sausage in a large skillet (9-10") over medium heat. A cast iron skillet is best.: The sizzling sound when the breakfast sausage hits the pan is the first hint you are on the right track, and a cast iron skillet will give you even browning and those dark fond bits that elevate flavor. As the meat renders fat you will see glossy pools around the pieces and smell the spices deepen into roasted notes. Use a sturdy spoon to break the sausage into small, even pieces so they cook uniformly. The main why here is flavor development, browned meat equals complexity. A frequent mistake is overcrowding the pan, which steams the meat and prevents the desirable browning.
- When the sausage is browned, pour off all but 1 Tbs of the fat.: Leaving about 1 Tbs of fat is crucial, it provides the medium to cook the all purpose flour and carry flavor into the sauce while avoiding excess greasiness. You should notice the pan surface slick but not flooded, and the remaining fat will shimmer softly. Pouring off too much removes flavor, while keeping too much makes the gravy greasy and loose. A common error is discarding all the fat and losing depth; keep that small amount for richness.
- With the heat off, add the flour to the skillet and mix it around so that the pieces of sausage become coated (they start to look like little white powdered donut holes). If the flour seems to disappear, add a little more (1/4 cup or so).: Turning the heat off prevents the flour from clumping or burning instantly, and coating the sausage ensures the flour absorbs fat evenly which helps with smooth thickening. You will see the pieces take on a dusty, pale coating; this is the visual cue that your roux base is forming. If the mixture looks patchy or too sticky, a small extra measure of all purpose flour can rescue the texture. The pitfall here is adding too much flour at once and creating dry pockets, so distribute it gradually and mix thoroughly.
- Place the skillet back on the burner and set to medium high. Stir and cook the sausage with the flour on it for at least 2 minutes. The longer you cook the sausage and flour the darker your gravy will be. Stop at 2 minutes for a light colored gravy. Cook longer for a darker gravy. Do not cook longer than 4 minutes.: Returning the pan to medium high unlocks the toasty, nutty aroma as the flour cooks, and you will notice the smell shift from raw starch to something pleasantly roasted. Stir frequently to ensure even color and to prevent scorching. The visual guide is subtle browning of the coated bits, and the sound may shift to a steadier sizzle. The reason this step matters is that properly cooked flour avoids a pasty taste and creates a glossy finish. Avoid the mistake of leaving it unattended, because flour can go from golden to burnt quickly.
- Add the milk all at once. FROM THIS POINT ON, DO NOT STOP STIRRING. You will likely hear the milk sizzle and that is OK. Use your wooden spoon to stir and scrape up the flavorful bits from the bottom of the pan. Keep stirring and scrape the bottom and the side often. When you begin to notice small bubbles forming at the side of the pan, quickly reduce the heat to medium low.: When the whole milk hits the hot pan you will hear an assertive sizzle, and that action helps integrate the roux into a smooth sauce. Continuous stirring is essential so the mixture emulsifies rather than separating, and scraping the brown bits lifts concentrated flavor into the gravy. Watch for tiny bubbles at the pan edges, that is the sign to lower the heat to avoid a violent boil. A typical mistake is stopping to do something else, which can let the milk scorch and ruin the sauce.
- Heat the gravy at medium low until it is the consistency that you want your gravy. Understand that if the gravy starts to bubble up, you may have to slide it off the burner suddenly. Do not stop stirring. You can place it back on the burner when it slows down.: As you maintain a medium low temperature the gravy will quiet down and thicken gradually, developing a satiny sheen and a slow ribbon when you lift the spoon. The smell will sweeten and the texture will change from runny to clingy, which is the cue for doneness. Being prepared to move the skillet off heat if it surges saves you from boil overs. People often set the heat too high and end up with a grainy texture from rapid boiling.
- When the gravy is near the consistency that you prefer, taste it and add salt and pepper to your desired amount. (This varies greatly depending on the sausage you chose and your own personal tastes). Once seasoned, allow to sit for about 5 minutes before serving and it will thicken more.: Tasting at the finish is essential because the saltiness of the breakfast sausage varies widely. Season in small increments, and use freshly ground pepper to add brightness and a mild heat. After seasoning, letting the gravy rest for about 5 minutes off the heat helps it thicken slightly and schools the flavors together. The why here is simple control, seasoning at the end prevents over salting. A common misstep is over seasoning before tasting, which can result in an overly salty result.
- Once seasoned, allow to sit for about 5 minutes before serving and it will thicken more.: The final rest gives the gravy a chance to settle and reach a serving texture, and the surface may quieten into a gently glossy finish. During this time the aroma will mellow and the fat will reintegrate for a cohesive mouthfeel. Serving immediately after resting yields the best cling to biscuits or toast. Reheating later will require a splash of milk and gentle warming to return to that silky consistency. A mistake to avoid is serving right away without the short rest, which can lead to a slightly looser pour than desired.
Notes
- Use lower fat milk cautiously. Substituting 2 percent or skim milk will produce a thinner gravy with less richness, which may be fine for lighter palates, but you will lose some mouthfeel. When I have used lower fat milk I compensate by cooking the gravy a touch longer or adding a small extra measure of flour to preserve body.
- Adjust flour volume for consistency. If the roux seems to disappear when mixed with the sausage, add additional all purpose flour in small increments to reach a proper coating and eventual thickness. I always add flour gradually to avoid a pasty texture and to maintain smoothness.
- Control color with cook time. Cooking the sausage and flour together for only about two minutes keeps the gravy light and creamy, while extending to four minutes deepens the toasted flavor. I pick the shorter time when serving delicate biscuits and the longer time when I want robust, caramelized notes.
- Rest before serving for perfect thickness. Allowing the gravy to sit off heat for about five minutes helps it thicken naturally so it clings better to bread. I remind guests to wait those few minutes because the texture improves significantly as it cools slightly.
- Freeze in portions for convenience. This gravy freezes very well. I divide it into single servings in freezer safe containers and label them, so I can reheat gently with a splash of milk for an instant comforting meal on busy mornings.