Pumpkin Roll Recipe
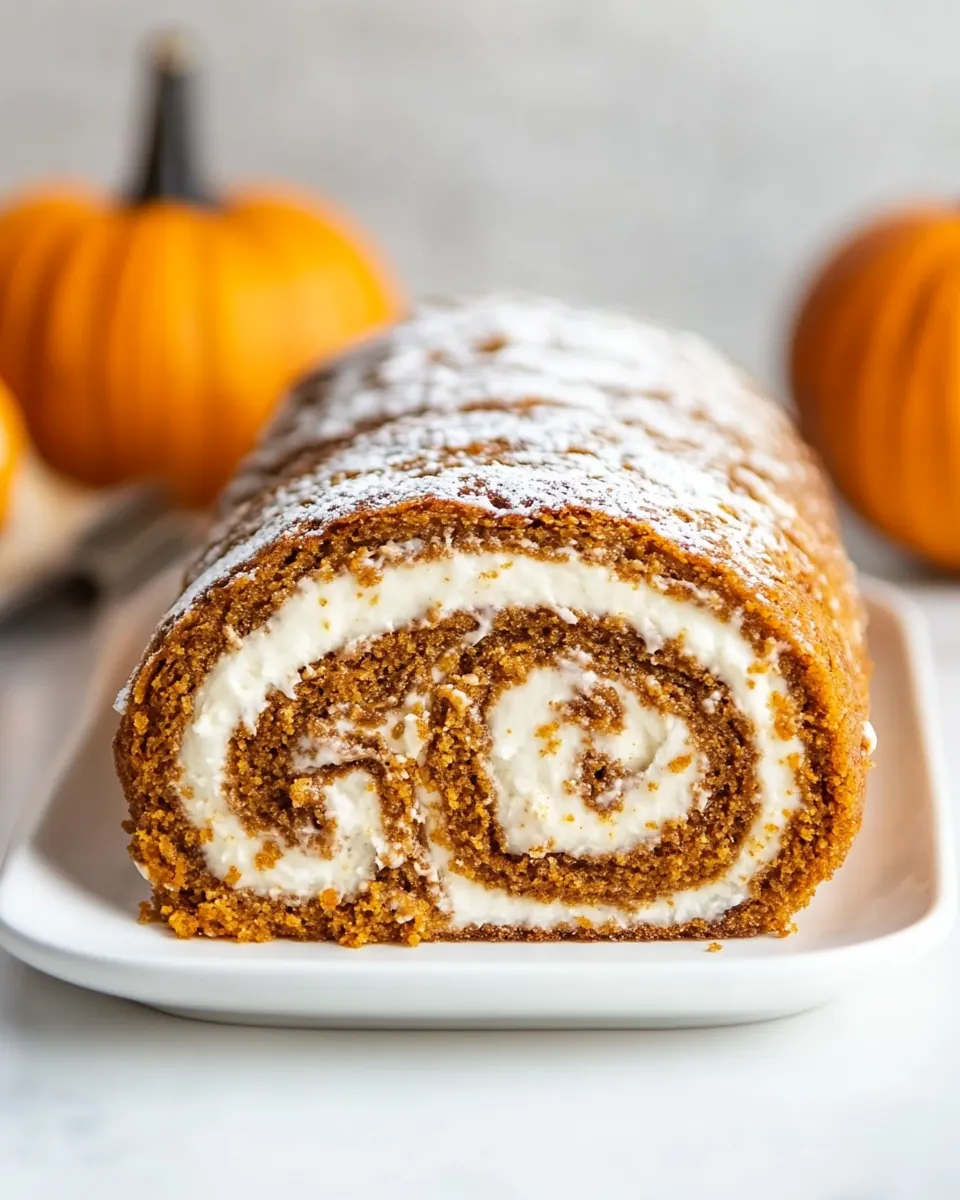
Pumpkin Roll Recipe is one of those treats I reach for when I want something both nostalgic and showy at the same time. The first time I made this, I was juggling a busy weekend and a house full of guests, but the way the spiced cake hugged the creamy filling felt like a small triumph, and it instantly became a holiday staple in my circle. From that day on, every autumn gathering seemed to call for that spiral of orange cake and silky frosting.
I remember the aroma filling my kitchen while the cake baked, warm cinnamon and ginger drifting through the air, and a friend peeking into the oven asking if it was ready yet. When I flipped the cake onto parchment and rolled it up, I felt a mix of excitement and nerves, because the first roll can be fragile, but the payoff is worth it. Over the years I learned little tricks that save stress and keep the cake tender, and those moments of trial and error taught me to be patient with the process.
Recipe Snapshot
35 mins
20 mins
15 mins
Medium
250 kcal
American
Gluten-Free, Low FODMAP
Desserts
Jelly roll pan, Mixing bowl, Electric mixer, Parchment paper, Rubber spatula, Plastic wrap
What We Adore About This Pumpkin Roll Recipe
Comforting seasonal flavor
I love that Pumpkin Roll Recipe captures the essence of fall with simple pantry staples. The combination of pumpkin puree, cinnamon, and nutmeg delivers that warm, familiar flavor without being overpowering. It tastes like a cozy afternoon wrapped up in a slice, and I find it perfect for sweater weather when you want something that feels seasonal and homey.
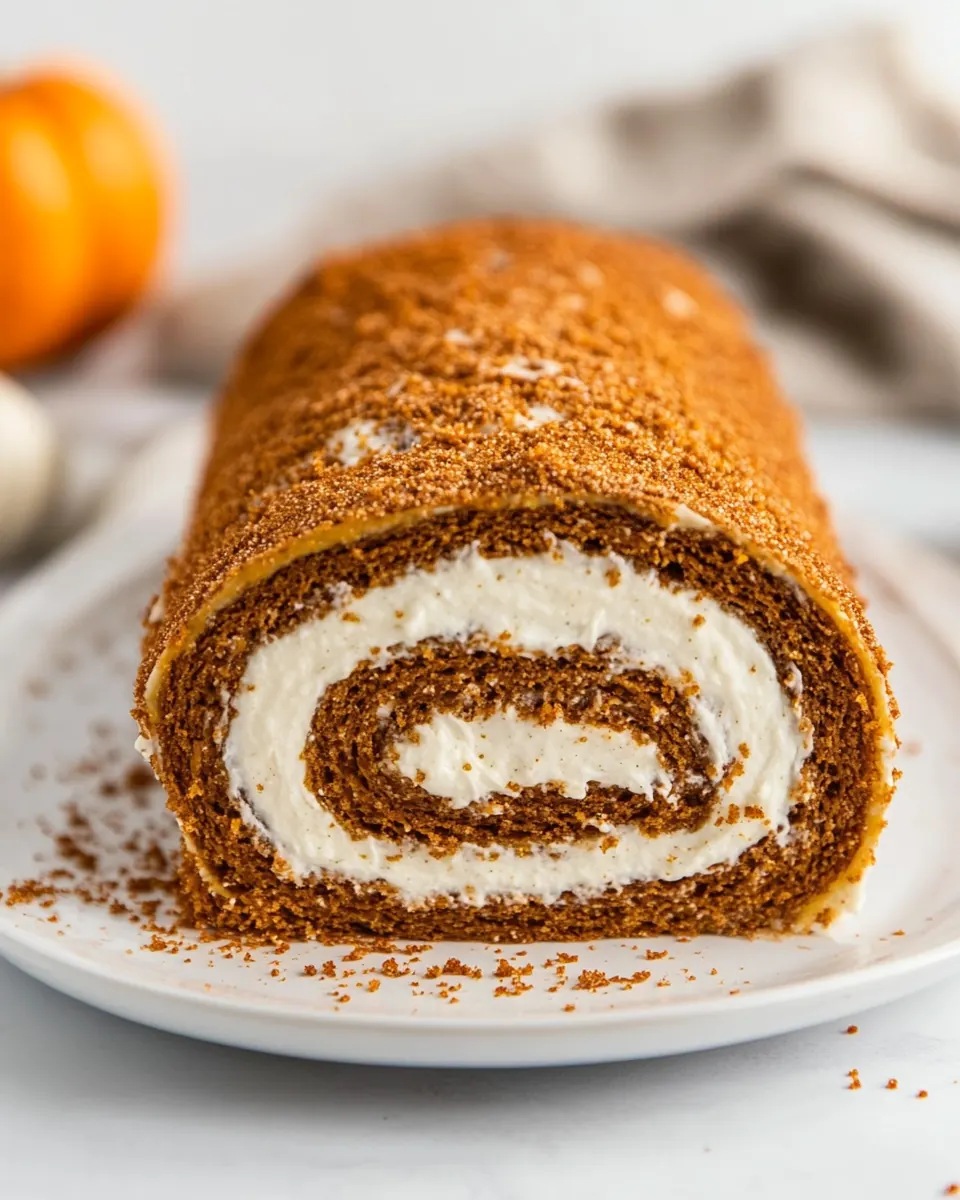
Showstopping presentation
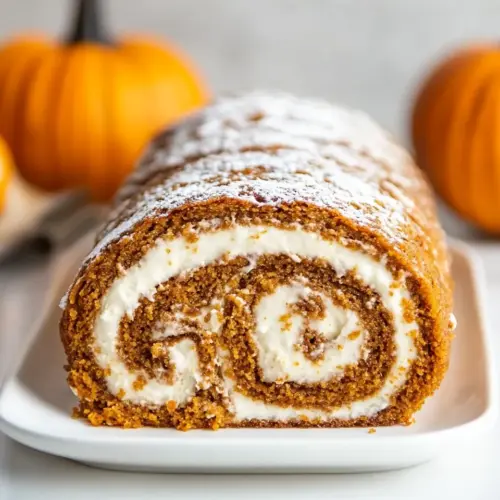
There is something undeniably impressive about slicing into a tight spiral of cake and filling. When I serve Pumpkin Roll Recipe, guests always lean in a little closer. The visual of the swirl makes it ideal for holidays, because it looks like you spent hours on technique even when the method is straightforward. I enjoy that moment when someone says, I want the slice with the perfect spiral.
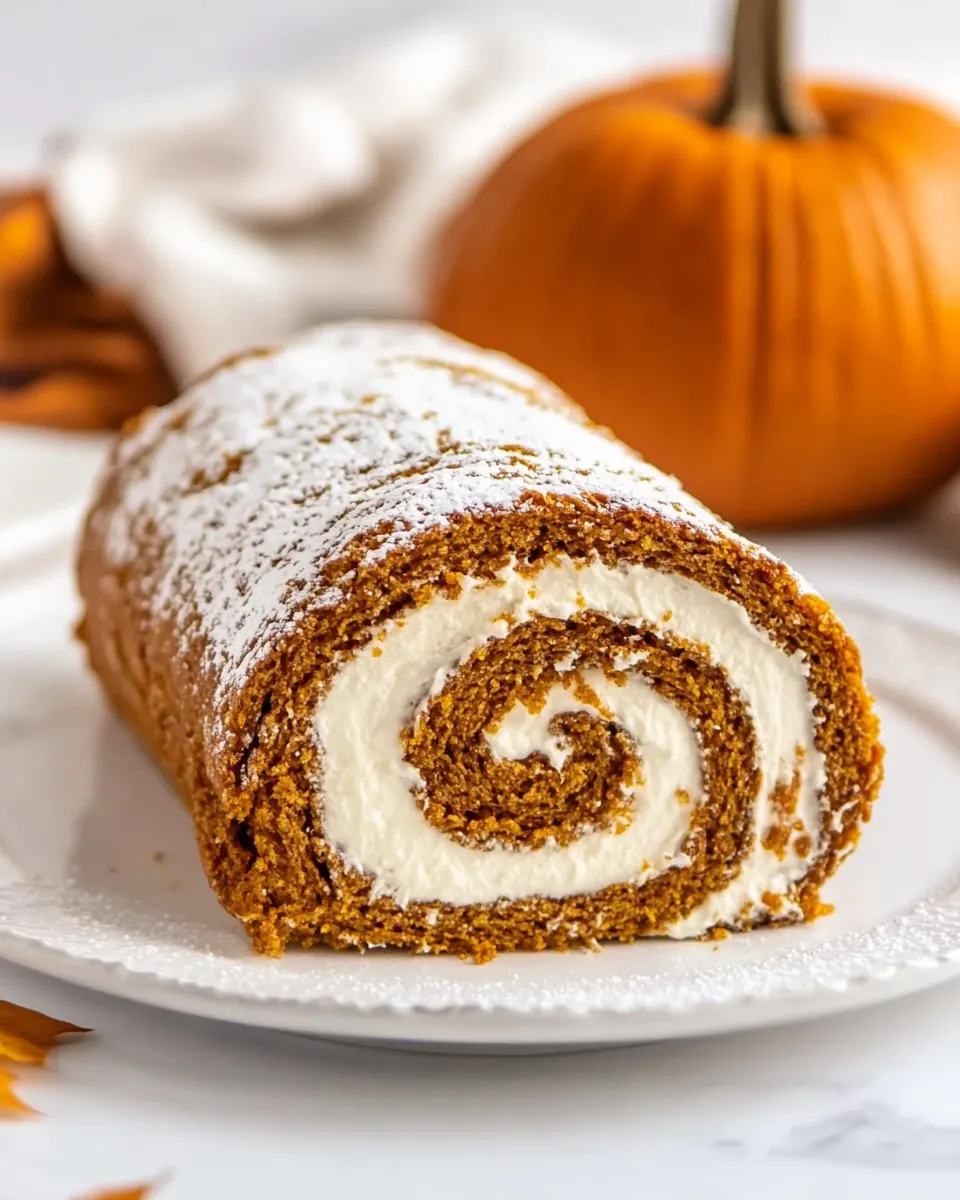
Balance of textures
The soft, tender all purpose flour cake contrasts with the creamy cream cheese filling in a satisfying way. I like that the cake is delicate enough to almost melt on the tongue, while the filling adds richness and a touch of tang. That contrast keeps each bite interesting and prevents the dessert from feeling one note.
Flexible and forgiving
One of the reasons I return to Pumpkin Roll Recipe often is how forgiving it is. If the cake cracks a bit, extra powdered sugar or an outer layer of frosting can hide imperfections. The recipe can be made as a single large roll or as three smaller ones, which is handy when you want to portion for different occasions. I appreciate recipes that let me adapt on the fly without losing quality.
Great make ahead potential
I frequently prepare the cake and filling in advance, then chill the wrapped roll until the day of serving. That hands off convenience means less stress when guests arrive. For me, recipes that allow for prepping earlier in the day or the day before are lifesavers, and this one keeps its texture and flavor beautifully after chilling.
Ingredient List for Pumpkin Roll Recipe
These ingredients are chosen to create a tender, spiced cake that rolls without breaking, and a smooth, slightly tangy filling that complements the pumpkin. The key players are the pumpkin puree which provides moisture and flavor, the eggs which give structure and lift, and the cream cheese in the filling which balances sweetness with a pleasant tang. Together they form a harmonious texture and flavor profile that makes every slice memorable.
- 3 large eggs: Whisk vigorously to incorporate air and provide structure and lift to the cake batter; eggs also help emulsify the wet and dry ingredients for a smooth texture.
- 1 cup (200 g) granulated sugar: Sweeten evenly to balance the pumpkin and spices while contributing to batter moisture and browning during baking; measure precisely for consistent sweetness and texture.
- 2/3 cup pumpkin puree: Add moistness and distinct pumpkin flavor while contributing to the cake's tender crumb and color; use pure pumpkin puree rather than pie filling for best results.
- 1 teaspoon lemon juice: Brighten flavor and balance sweetness with a subtle acidity that can enhance leavening reactions; a small amount helps preserve fresh taste in the batter.
- 1 teaspoon baking powder: React with acids to produce gentle rise, helping the cake become light and springy; ensure it is fresh for effective leavening and even texture.
- 2 teaspoons cinnamon: Impart warm, aromatic spice and classic pumpkin-pie flavor while complementing ginger and nutmeg; use ground cinnamon for a comforting, familiar profile.
- 1 teaspoon ginger: Provide a sharper, warming spice note that enhances complexity and pairs well with cinnamon and nutmeg; use ground ginger for consistent distribution in the batter.
- 1/2 teaspoon nutmeg: Offer a sweet, woody warmth in small amounts to round out the spice blend and deepen overall flavor without overpowering the cake.
- 1/2 teaspoon salt: Enhance and balance sweetness while strengthening gluten slightly and bringing out the other flavors; use fine salt for even distribution in the batter.
- 3/4 cup (93 g) all purpose flour: Bind the dry structure and create the cake's crumb while keeping the batter tender; sift or spoon flour into the cup for accurate measurement.
- 4 ounces (113 g) cream cheese room temperature: Soften and enrich the filling with tangy creaminess that contrasts the sweet cake; bring to room temperature to ensure a smooth, lump-free frosting.
- 4 tablespoons (57 g) unsalted butter softened: Cream until light to add richness and help create a smooth filling texture; softened unsalted butter lets you control the salt level in the frosting.
- 1 1/2 cups (170 g) powdered sugar: Sweeten and thicken the cream cheese filling to a spreadable consistency while providing stability; sift powdered sugar to avoid lumps and achieve silky frosting.
- 1 teaspoon vanilla: Add a warm, sweet floral note to the filling and enhance overall flavor; use pure vanilla extract for best, natural aromatic quality.
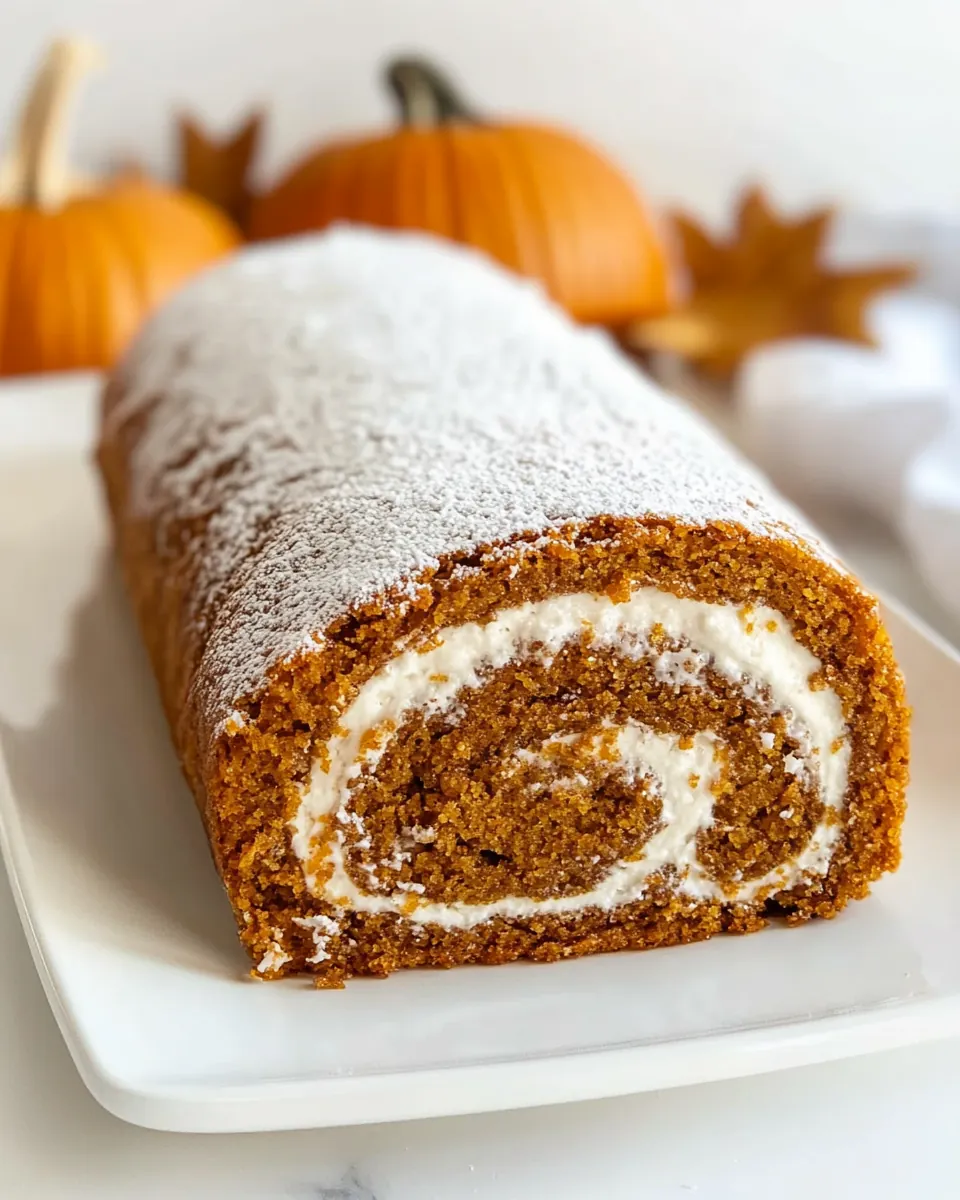
- Powdered sugar for dusting: Dust generously to add a delicate, snowy finish and a hint of extra sweetness; powdered sugar also visually accents the spiral when serving.
How to Make Pumpkin Roll Recipe
I like to approach the process with calm and focus so the cake has the best chance to roll beautifully. These steps take a bit of attention, especially when beating the eggs and handling the hot cake, but the payoff is a tender sponge and creamy filling that come together seamlessly.
- Preheat oven to 350°F. Line a 10×15-inch jelly roll pan with Reynold’s Wrap spray with nonstick cooking spray for easy removal.: As the oven warms, you will notice a faint hum and the interior light softening, which helps create consistent heat for the thin sponge. Properly preheating to 350°F ensures the cake rises evenly and sets quickly, preventing an overly dry texture. A common mistake is placing the pan in a cold oven, which yields uneven bake and a brittle cake that resists rolling.
- Beat eggs at high speed for 4 minutes, or until the eggs are thick and dark yellow and foamy. Mix in sugar until combined. Add pumpkin puree, lemon juice, baking powder, spices, and salt, mix until combined, then slowly mix in the flour, scraping the sides of the bowl as needed.: Lining and spraying the pan creates an even surface so the cake releases cleanly; you might smell the faint oiling scent as you prep. Using parchment or a nonstick spray prevents tearing when flipping the cake later. If the pan is not prepared well, the cake can stick and break when you try to remove it, so take a moment to secure the lining and coat it evenly.
- Place cake batter in prepared pan and spread into an even layer. Bake for 11-15 minutes or until it somewhat bounces back when you lightly press it (and the top of the cake doesn’t stick to your fingers). A toothpick will come out clean.: When you beat the eggs vigorously, listen for the change in sound as they aerate, and watch them transform into thick, pale, foamy ribbons. This aeration is why the cake is light yet sturdy enough to roll, because trapped air expands during baking. Underbeating will produce a dense cake that won’t have the right spring, so resist the urge to rush this step.
- While the cake is in the oven, lay out a sheet of parchment paper. Remove the hot cake from the oven and immediately flip it over (careful not to burn yourself) and remove the pan and foil.: As you add the granulated sugar , the mixture will become glossier and heavier, a sign that the sugar integrates with the aerated eggs . Proper incorporation helps with tenderness and crumb structure. Avoid overmixing here, because you want to retain as much air as possible; mix gently but thoroughly.
- Roll up the cake using the parchment paper. Let sit at room temperature to cool, about 2-3 hours.: The batter will shift to a warm orange hue and release a heady scent of cinnamon and ginger . The lemon juice brightens while the baking powder lends lift. Stir gently so you don’t deflate the whipped eggs . A common error is vigorous beating at this stage, which knocks out the air and yields a heavier sponge.
- Make the filling: beat cream cheese and butter until creamy, then mix in powdered sugar one cup at a time. Add the vanilla and mix until smooth and frosting is spreadable.: When you fold in the all purpose flour , do it in stages to preserve the batter’s airiness and avoid lumps. Use a rubber spatula and gentle folding motions until just combined, and note the batter becoming slightly thicker and velvety. Overworking causes gluten development, making the cake tough, so stop mixing once the streaks of flour disappear.
- Assemble the cake: carefully unroll the cake from the parchment paper. It may crack, but that’s okay, just be gentle.: Spread the batter with a spatula so the surface is smooth and uniform, which helps the sponge bake evenly and roll easily. The batter should reach all corners without being too thick in spots. Uneven spreading leads to thin or thick areas that bake differently, causing inconsistent texture and potential cracking while rolling.
- Add equal amounts of frosting to each section of cake. Roll up each cake roll. Wrap in plastic wrap and chill until ready to serve. For serving, dust with powdered sugar.: While baking, you will smell the spices intensify and the cake will gain a springy surface. Test by lightly pressing the center, it should bounce back, and a toothpick should come out clean. Avoid overbaking, which dries the cake and makes rolling difficult; if the top seems too firm early, check a minute or two sooner rather than later.
- You can make this as one large roll or three small ones. If you want to make three small cake rolls: slice the hot cake into three equal pieces. Leave it on the parchment paper or towel and roll it hot. Fill each separately and re-roll for 3 small cake rolls.: Preparing the parchment while the cake is hot ensures a clean surface to flip onto. The parchment absorbs slight steam and helps shape the roll, and the moment you flip the warm cake you may feel a rush of fragrant steam. If you skip prepping the parchment ahead of time, you risk leaving the cake to cool too long and lose pliability.
- Store in refrigerator for up to 3 days or wrap well in plastic wrap and freeze for up to one month.: When you flip the cake onto parchment, the surface will release with a soft sigh and you might see steam rising. Removing the pan and foil quickly prevents sticking and sets the right shape for rolling. Be careful to avoid burns, and don’t let the cake cool unrolled, or it may lose the memory to hold a tight spiral.
- Roll up the cake using the parchment paper: Rolling while hot trains the cake to hold its spiral, and you will feel the cake’s warmth through the parchment as it takes form. Allow it to cool rolled for the recommended time so it keeps the shape. A common mistake is attempting to unroll a cake that was never rolled hot, which often leads to cracks and awkward shapes.
- Let sit at room temperature to cool, about 2 to 3 hours: During this resting time, the cake firms slightly and the interior steam redistributes, making the final texture even. The scent mellows and stabilizes, which makes filling easier. If you rush to fill while the cake is still too warm, the filling can melt and leak, so patience here pays off.
- Make the filling: beat cream cheese and butter until creamy : As you beat the cream cheese and butter , they will soften into a pale, smooth base that smells creamy and slightly tangy. This step ensures a lump free filling when you add powdered sugar . If the cream cheese is cold, the mixture will be chunky, so bring it to room temperature first to achieve a velvety texture.
- Mix in powdered sugar one cup at a time: Adding powdered sugar gradually keeps the filling from puffing and prevents a gritty texture. The mixture becomes thicker and glossy as you integrate each cup. Overworking while adding sugar can incorporate too much air and make the filling unstable, so mix until smooth and just spreadable.
- Add the vanilla and mix until smooth and frosting is spreadable: The final mixing step smooths out any tiny lumps and introduces a warm aroma from the vanilla . Aim for a frosting that holds its shape but spreads easily. If the filling is too stiff, a teaspoon of milk could loosen it slightly, but avoid adding liquid unless needed.
- Carefully unroll the cake from the parchment paper: As you unroll, you may notice small cracks, which is normal and part of the cake’s rustic charm. Be gentle to avoid enlarging fissures, and leave any tiny tears as they are, since the filling will conceal them. Forcing the cake open aggressively can create large breaks that are hard to hide.
- Add equal amounts of frosting to each section of cake: Distribute the filling evenly so each bite has balance and the roll layers are uniform. Use an offset spatula to spread the filling smoothly and leave a small border to prevent overflow when rolling. If you pile on too much filling, the roll may bulge and lose its neat spiral.
- Roll up each cake roll: Rolling with steady, even pressure ensures a tight spiral and clean edges, and you will feel the cake compress slightly as the layers nest. Wrap the finished roll in plastic and chill to set the shape and make slicing easier. Rolling too loosely results in a loose spiral that can unravel when sliced.
- Wrap in plastic wrap and chill until ready to serve: Chilling firms the filling and helps the roll hold clean slices; you may detect a firmer, cooler texture when pressing the wrapped roll. For best slices, chill for at least an hour. If you skip chilling, slices may smear and look messy on the plate.
- For serving, dust with powdered sugar: A light dusting of powdered sugar gives the roll a pretty finish and a hint of extra sweetness. Apply shortly before plating to keep the dusting fresh and intact. If dusted too early and stored, the sugar can dissolve or clump.
- You can make this as one large roll or three small ones: Choosing three small rolls gives portion control and faster chilling, while a single large roll is dramatic for a centerpiece. If making three, slice the hot cake into thirds and roll each hot on the parchment. Trying to slice unevenly can lead to mismatched sizes that bake at different rates, so aim for equal thirds for best results.
- Store in refrigerator for up to 3 days or freeze for up to one month: Properly wrapped, the roll keeps its texture and flavor in the fridge, and freezing is handy for longer storage. Thaw in the fridge overnight before serving for best texture. If improperly wrapped, the cake can dry out or absorb fridge odors, so seal tightly.
Substitutions and Tips
I like to collect practical tips that make the process less stressful and more reliable. Below are detailed suggestions that cover technique, storage, and small swaps that keep the recipe consistent and delicious.
- Beat eggs properly: Ensure the eggs are beaten at high speed for the full four minutes until they are thick and pale. This step traps air, which gives the cake that springy texture needed to roll without cracking. If you underbeat, the sponge will be dense and more prone to breakage.
- Use room temperature dairy: Bring the cream cheese and butter to room temperature before making the filling so they blend into a smooth, lump free frosting. Cold dairy causes a curdled or grainy texture and requires more mixing, which can warm the filling too much.
- Prepare the pan carefully: Line the jelly roll pan with parchment and coat lightly with nonstick spray to ensure the cake releases cleanly. Secure the parchment so it doesn’t shift when transferring the batter. Sticking at this stage often leads to torn cake surfaces.
- Watch baking time closely: Because the cake is thin, it bakes quickly; start checking at the low end of the suggested time so you avoid overbaking. The top should spring back and a toothpick should come out clean. An overbaked cake will be dry and crack when rolled.
- Roll while warm: Immediately flip and roll the cake in parchment while it is hot to teach it to hold a spiral. This step is the single most important trick to prevent large cracks. If the cake cools unrolled, it becomes rigid and difficult to shape.
- Even filling distribution: Spread the filling in an even layer, leaving a small border to avoid overflow. Consistent filling ensures the spiral looks uniform and each slice has balanced flavor. Too much filling can cause the roll to bulge and splatter when sliced.
- Chill before slicing: Refrigerate the wrapped roll until firm so you can slice clean pieces. Chilling sets the filling and makes neat presentation simple. Cutting a warm roll often results in messy slices that fall apart.
- Hide minor cracks: If the cake cracks, use extra filling to patch or frost the outside for an attractive finish. The cracks add rustic character and are easy to disguise. Don’t stress about small imperfections, they rarely affect taste.
- Freeze for longer storage: Wrap the roll tightly in plastic and foil before freezing to protect it for up to one month. Thaw overnight in the refrigerator to preserve texture. Avoid refreezing once thawed to maintain quality.
- Measure flour accurately: Spoon the all purpose flour into your measuring cup and level it off, rather than scooping directly, to prevent packing which can make the cake too dry and dense. Accurate flour measurement keeps the sponge tender and pliable.
Great Combinations for Pumpkin Roll Recipe
Pumpkin Roll Recipe pairs wonderfully with light beverages and simple sides that let the dessert shine. For seasonal gatherings, I like to serve it after a comforting meal, and it works well for cozy afternoons, holiday dessert tables, or as a special treat during fall brunch. Below are ideas for serving, storage, and occasions.
- Serve sliced with coffee or tea: Thin slices go perfectly with a cup of dark roast coffee or a robust black tea. The warm spices in the cake contrast nicely with the bitter notes of the drink, making it a balanced finish to a brunch or afternoon snack.
- Holiday centerpiece: Place the roll on a decorative board and dust with powdered sugar right before presenting. Its spiral makes an attractive addition to a holiday dessert spread for occasions like Halloween and Thanksgiving, and it slices into attractive portions for guests.
- Portion for gatherings: Make three small rolls instead of one large to offer easy grab and go portions for parties. Smaller rolls chill faster and are handy for handing out slices or gifting to friends during fall celebrations.
- Storage tips: Store wrapped in plastic in the refrigerator for up to three days to maintain freshness. For longer storage, wrap tightly and freeze for up to one month, then thaw slowly in the fridge to retain texture and flavor.
- Seasonal pairing: This roll fits perfectly into autumn menus alongside roasted vegetables and lighter mains when you want a sweet finish without overwhelming richness. It’s also a pleasant choice for cozy weekend breakfasts when paired with yogurt and fruit.
- Occasion flexibility: Serve as a dessert after dinner, a sweet option at a fall brunch, or a festive offering during holiday gatherings. Its look and flavor make it suitable for intimate family meals or larger celebrations alike.
- Presentation tip: Slice with a sharp, serrated knife and wipe between cuts for clean edges. Arrange slices slightly overlapping on a platter for an inviting presentation that encourages guests to help themselves.
FAQ
Conclusion
This Pumpkin Roll Recipe stands out for its balance of tender spiced cake and creamy, tangy filling, along with its striking spiral presentation. It’s a reliable, make ahead dessert that feels festive without being fussy, and it’s perfect for fall celebrations or a cozy gathering. Try it when you want a dessert that looks special but is straightforward to prepare, and enjoy the warm aromas and satisfied smiles it brings.
Pumpkin Roll Recipe
Equipment
- Jelly Roll Pan
- Mixing Bowl
- Electric Mixer
- Parchment Paper
- Rubber spatula
- Plastic Wrap
Ingredients
- 3 large eggs Whisk vigorously to incorporate air and provide structure and lift to the cake batter; eggs also help emulsify the wet and dry ingredients for a smooth texture.
- 1 cup (200 g) granulated sugar Sweeten evenly to balance the pumpkin and spices while contributing to batter moisture and browning during baking; measure precisely for consistent sweetness and texture.
- 2/3 cup pumpkin puree Add moistness and distinct pumpkin flavor while contributing to the cake's tender crumb and color; use pure pumpkin puree rather than pie filling for best results.
- 1 teaspoon lemon juice Brighten flavor and balance sweetness with a subtle acidity that can enhance leavening reactions; a small amount helps preserve fresh taste in the batter.
- 1 teaspoon baking powder React with acids to produce gentle rise, helping the cake become light and springy; ensure it is fresh for effective leavening and even texture.
- 2 teaspoons cinnamon Impart warm, aromatic spice and classic pumpkin-pie flavor while complementing ginger and nutmeg; use ground cinnamon for a comforting, familiar profile.
- 1 teaspoon ginger Provide a sharper, warming spice note that enhances complexity and pairs well with cinnamon and nutmeg; use ground ginger for consistent distribution in the batter.
- 1/2 teaspoon nutmeg Offer a sweet, woody warmth in small amounts to round out the spice blend and deepen overall flavor without overpowering the cake.
- 1/2 teaspoon salt Enhance and balance sweetness while strengthening gluten slightly and bringing out the other flavors; use fine salt for even distribution in the batter.
- 3/4 cup (93 g) all purpose flour Bind the dry structure and create the cake's crumb while keeping the batter tender; sift or spoon flour into the cup for accurate measurement.
- 4 ounces (113 g) cream cheese room temperature Soften and enrich the filling with tangy creaminess that contrasts the sweet cake; bring to room temperature to ensure a smooth, lump-free frosting.
- 4 tablespoons (57 g) unsalted butter softened Cream until light to add richness and help create a smooth filling texture; softened unsalted butter lets you control the salt level in the frosting.
- 1 1/2 cups (170 g) powdered sugar Sweeten and thicken the cream cheese filling to a spreadable consistency while providing stability; sift powdered sugar to avoid lumps and achieve silky frosting.
- 1 teaspoon vanilla Add a warm, sweet floral note to the filling and enhance overall flavor; use pure vanilla extract for best, natural aromatic quality.
- Powdered sugar for dusting Dust generously to add a delicate, snowy finish and a hint of extra sweetness; powdered sugar also visually accents the spiral when serving.
Instructions
- Preheat oven to 350°F. Line a 10×15-inch jelly roll pan with Reynold’s Wrap spray with nonstick cooking spray for easy removal.: As the oven warms, you will notice a faint hum and the interior light softening, which helps create consistent heat for the thin sponge. Properly preheating to 350°F ensures the cake rises evenly and sets quickly, preventing an overly dry texture. A common mistake is placing the pan in a cold oven, which yields uneven bake and a brittle cake that resists rolling.
- Beat eggs at high speed for 4 minutes, or until the eggs are thick and dark yellow and foamy. Mix in sugar until combined. Add pumpkin puree, lemon juice, baking powder, spices, and salt, mix until combined, then slowly mix in the flour, scraping the sides of the bowl as needed.: Lining and spraying the pan creates an even surface so the cake releases cleanly; you might smell the faint oiling scent as you prep. Using parchment or a nonstick spray prevents tearing when flipping the cake later. If the pan is not prepared well, the cake can stick and break when you try to remove it, so take a moment to secure the lining and coat it evenly.
- Place cake batter in prepared pan and spread into an even layer. Bake for 11-15 minutes or until it somewhat bounces back when you lightly press it (and the top of the cake doesn’t stick to your fingers). A toothpick will come out clean.: When you beat the eggs vigorously, listen for the change in sound as they aerate, and watch them transform into thick, pale, foamy ribbons. This aeration is why the cake is light yet sturdy enough to roll, because trapped air expands during baking. Underbeating will produce a dense cake that won’t have the right spring, so resist the urge to rush this step.
- While the cake is in the oven, lay out a sheet of parchment paper. Remove the hot cake from the oven and immediately flip it over (careful not to burn yourself) and remove the pan and foil.: As you add the granulated sugar , the mixture will become glossier and heavier, a sign that the sugar integrates with the aerated eggs . Proper incorporation helps with tenderness and crumb structure. Avoid overmixing here, because you want to retain as much air as possible; mix gently but thoroughly.
- Roll up the cake using the parchment paper. Let sit at room temperature to cool, about 2-3 hours.: The batter will shift to a warm orange hue and release a heady scent of cinnamon and ginger . The lemon juice brightens while the baking powder lends lift. Stir gently so you don’t deflate the whipped eggs . A common error is vigorous beating at this stage, which knocks out the air and yields a heavier sponge.
- Make the filling: beat cream cheese and butter until creamy, then mix in powdered sugar one cup at a time. Add the vanilla and mix until smooth and frosting is spreadable.: When you fold in the all purpose flour , do it in stages to preserve the batter’s airiness and avoid lumps. Use a rubber spatula and gentle folding motions until just combined, and note the batter becoming slightly thicker and velvety. Overworking causes gluten development, making the cake tough, so stop mixing once the streaks of flour disappear.
- Assemble the cake: carefully unroll the cake from the parchment paper. It may crack, but that’s okay, just be gentle.: Spread the batter with a spatula so the surface is smooth and uniform, which helps the sponge bake evenly and roll easily. The batter should reach all corners without being too thick in spots. Uneven spreading leads to thin or thick areas that bake differently, causing inconsistent texture and potential cracking while rolling.
- Add equal amounts of frosting to each section of cake. Roll up each cake roll. Wrap in plastic wrap and chill until ready to serve. For serving, dust with powdered sugar.: While baking, you will smell the spices intensify and the cake will gain a springy surface. Test by lightly pressing the center, it should bounce back, and a toothpick should come out clean. Avoid overbaking, which dries the cake and makes rolling difficult; if the top seems too firm early, check a minute or two sooner rather than later.
- You can make this as one large roll or three small ones. If you want to make three small cake rolls: slice the hot cake into three equal pieces. Leave it on the parchment paper or towel and roll it hot. Fill each separately and re-roll for 3 small cake rolls.: Preparing the parchment while the cake is hot ensures a clean surface to flip onto. The parchment absorbs slight steam and helps shape the roll, and the moment you flip the warm cake you may feel a rush of fragrant steam. If you skip prepping the parchment ahead of time, you risk leaving the cake to cool too long and lose pliability.
- Store in refrigerator for up to 3 days or wrap well in plastic wrap and freeze for up to one month.: When you flip the cake onto parchment, the surface will release with a soft sigh and you might see steam rising. Removing the pan and foil quickly prevents sticking and sets the right shape for rolling. Be careful to avoid burns, and don’t let the cake cool unrolled, or it may lose the memory to hold a tight spiral.
- Roll up the cake using the parchment paper: Rolling while hot trains the cake to hold its spiral, and you will feel the cake’s warmth through the parchment as it takes form. Allow it to cool rolled for the recommended time so it keeps the shape. A common mistake is attempting to unroll a cake that was never rolled hot, which often leads to cracks and awkward shapes.
- Let sit at room temperature to cool, about 2 to 3 hours: During this resting time, the cake firms slightly and the interior steam redistributes, making the final texture even. The scent mellows and stabilizes, which makes filling easier. If you rush to fill while the cake is still too warm, the filling can melt and leak, so patience here pays off.
- Make the filling: beat cream cheese and butter until creamy : As you beat the cream cheese and butter , they will soften into a pale, smooth base that smells creamy and slightly tangy. This step ensures a lump free filling when you add powdered sugar . If the cream cheese is cold, the mixture will be chunky, so bring it to room temperature first to achieve a velvety texture.
- Mix in powdered sugar one cup at a time: Adding powdered sugar gradually keeps the filling from puffing and prevents a gritty texture. The mixture becomes thicker and glossy as you integrate each cup. Overworking while adding sugar can incorporate too much air and make the filling unstable, so mix until smooth and just spreadable.
- Add the vanilla and mix until smooth and frosting is spreadable: The final mixing step smooths out any tiny lumps and introduces a warm aroma from the vanilla . Aim for a frosting that holds its shape but spreads easily. If the filling is too stiff, a teaspoon of milk could loosen it slightly, but avoid adding liquid unless needed.
- Carefully unroll the cake from the parchment paper: As you unroll, you may notice small cracks, which is normal and part of the cake’s rustic charm. Be gentle to avoid enlarging fissures, and leave any tiny tears as they are, since the filling will conceal them. Forcing the cake open aggressively can create large breaks that are hard to hide.
- Add equal amounts of frosting to each section of cake: Distribute the filling evenly so each bite has balance and the roll layers are uniform. Use an offset spatula to spread the filling smoothly and leave a small border to prevent overflow when rolling. If you pile on too much filling, the roll may bulge and lose its neat spiral.
- Roll up each cake roll: Rolling with steady, even pressure ensures a tight spiral and clean edges, and you will feel the cake compress slightly as the layers nest. Wrap the finished roll in plastic and chill to set the shape and make slicing easier. Rolling too loosely results in a loose spiral that can unravel when sliced.
- Wrap in plastic wrap and chill until ready to serve: Chilling firms the filling and helps the roll hold clean slices; you may detect a firmer, cooler texture when pressing the wrapped roll. For best slices, chill for at least an hour. If you skip chilling, slices may smear and look messy on the plate.
- For serving, dust with powdered sugar: A light dusting of powdered sugar gives the roll a pretty finish and a hint of extra sweetness. Apply shortly before plating to keep the dusting fresh and intact. If dusted too early and stored, the sugar can dissolve or clump.
- You can make this as one large roll or three small ones: Choosing three small rolls gives portion control and faster chilling, while a single large roll is dramatic for a centerpiece. If making three, slice the hot cake into thirds and roll each hot on the parchment. Trying to slice unevenly can lead to mismatched sizes that bake at different rates, so aim for equal thirds for best results.
- Store in refrigerator for up to 3 days or freeze for up to one month: Properly wrapped, the roll keeps its texture and flavor in the fridge, and freezing is handy for longer storage. Thaw in the fridge overnight before serving for best texture. If improperly wrapped, the cake can dry out or absorb fridge odors, so seal tightly.
Notes
- Beat eggs properly: Ensure the eggs are beaten at high speed for the full four minutes until they are thick and pale. This step traps air, which gives the cake that springy texture needed to roll without cracking. If you underbeat, the sponge will be dense and more prone to breakage.
- Use room temperature dairy: Bring the cream cheese and butter to room temperature before making the filling so they blend into a smooth, lump free frosting. Cold dairy causes a curdled or grainy texture and requires more mixing, which can warm the filling too much.
- Prepare the pan carefully: Line the jelly roll pan with parchment and coat lightly with nonstick spray to ensure the cake releases cleanly. Secure the parchment so it doesn’t shift when transferring the batter. Sticking at this stage often leads to torn cake surfaces.
- Watch baking time closely: Because the cake is thin, it bakes quickly; start checking at the low end of the suggested time so you avoid overbaking. The top should spring back and a toothpick should come out clean. An overbaked cake will be dry and crack when rolled.
- Roll while warm: Immediately flip and roll the cake in parchment while it is hot to teach it to hold a spiral. This step is the single most important trick to prevent large cracks. If the cake cools unrolled, it becomes rigid and difficult to shape.
- Even filling distribution: Spread the filling in an even layer, leaving a small border to avoid overflow. Consistent filling ensures the spiral looks uniform and each slice has balanced flavor. Too much filling can cause the roll to bulge and splatter when sliced.
- Chill before slicing: Refrigerate the wrapped roll until firm so you can slice clean pieces. Chilling sets the filling and makes neat presentation simple. Cutting a warm roll often results in messy slices that fall apart.
- Hide minor cracks: If the cake cracks, use extra filling to patch or frost the outside for an attractive finish. The cracks add rustic character and are easy to disguise. Don’t stress about small imperfections, they rarely affect taste.
- Freeze for longer storage: Wrap the roll tightly in plastic and foil before freezing to protect it for up to one month. Thaw overnight in the refrigerator to preserve texture. Avoid refreezing once thawed to maintain quality.
- Measure flour accurately: Spoon the all purpose flour into your measuring cup and level it off, rather than scooping directly, to prevent packing which can make the cake too dry and dense. Accurate flour measurement keeps the sponge tender and pliable.