Apple Upside Down Cake
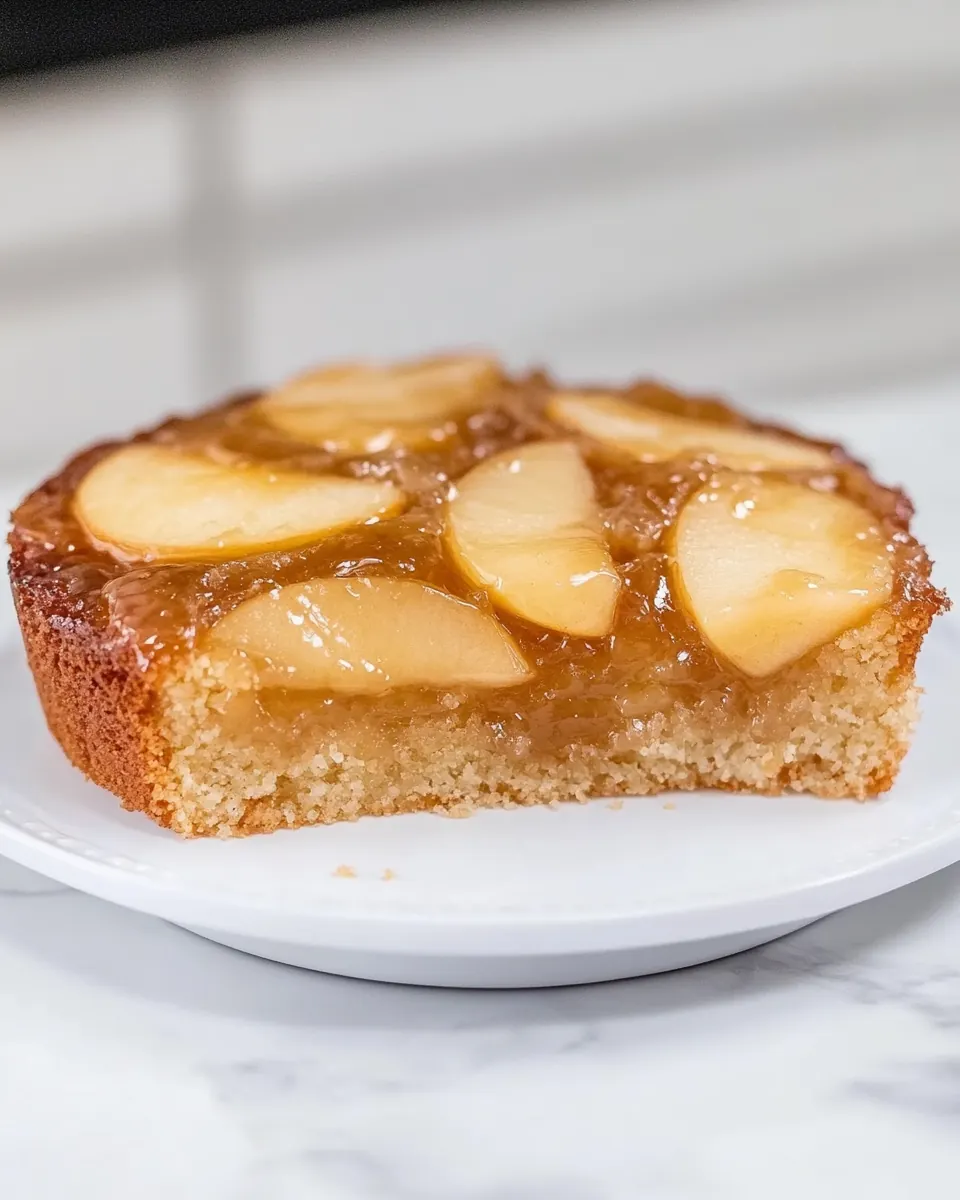
Apple Upside Down Cake is the kind of dessert that shows up at my table when I want something cozy and a little nostalgic. The first time I baked this, the house smelled like a warm bakery, and friends kept circling the kitchen until the platter was empty. I love how the caramelized top becomes the star once you flip the cake, and how simple pantry sugar and butter transform into that glossy, irresistible layer.
There’s something comforting about slicing into a cake where each wedge reveals tender rings of apples glazed in cinnamon kissed syrup. Over the years I’ve tweaked technique and timing so the fruit stays pleasantly textured while the cake bakes through evenly. I enjoy serving this after a relaxed dinner, because it feels special without demanding fuss, and the memories it creates tend to linger longer than the crumbs.
Recipe Snapshot
60 mins
20 mins
40 mins
Medium
300 kcal
American
Gluten-Free, Low FODMAP
Desserts
9-inch round cake pan, Mixing bowls, Hand mixer, Offset spatula, Parchment paper
Why This Apple Upside Down Cake Works
Caramelized apple top that steals the show
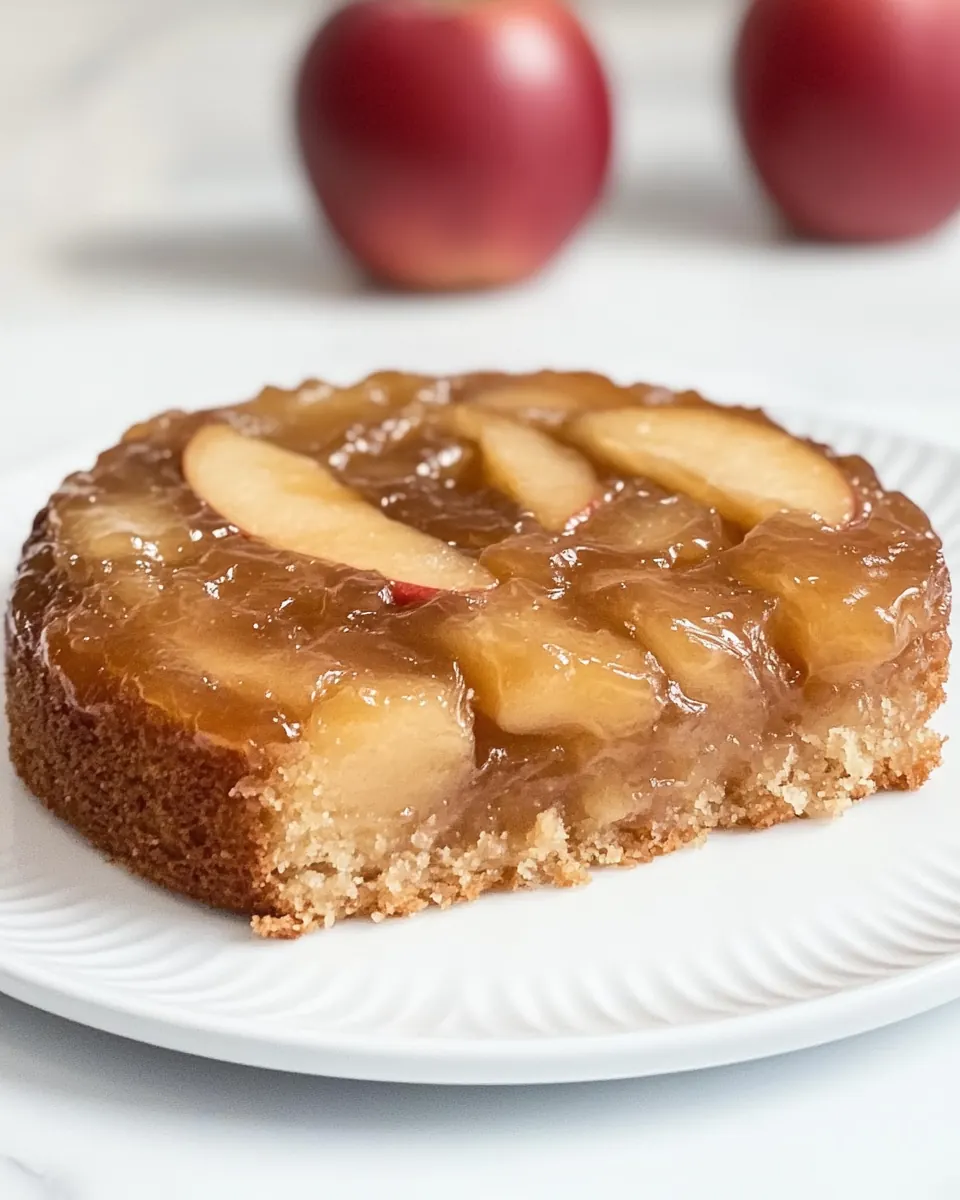
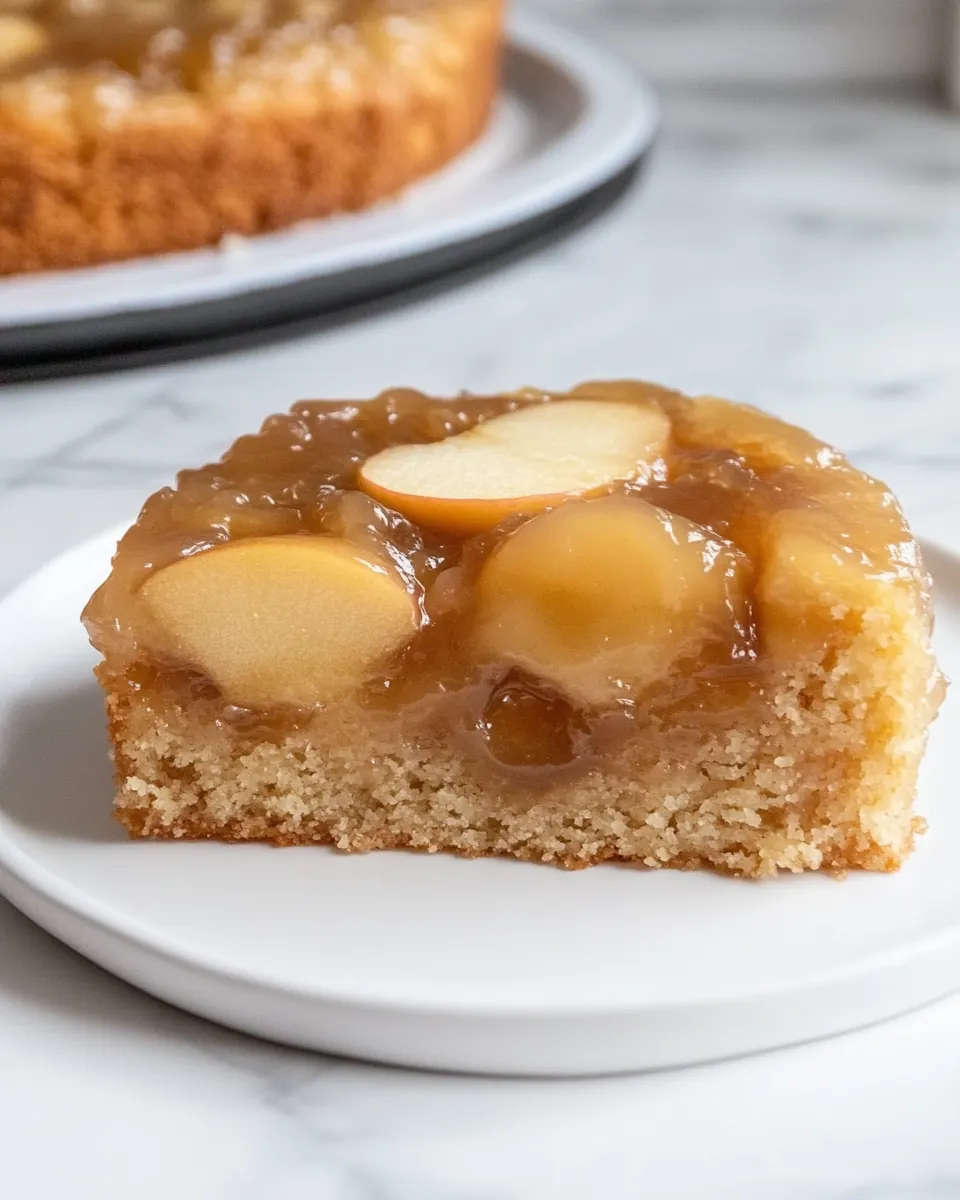
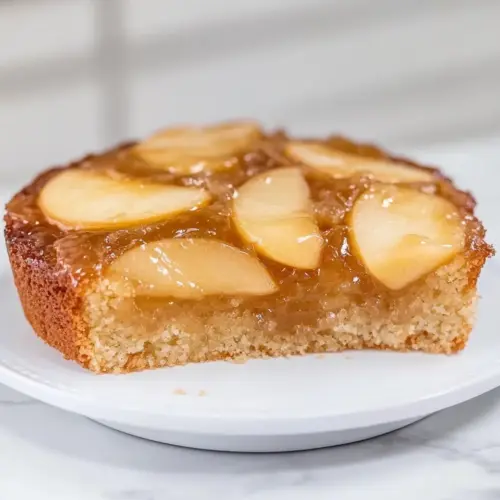
I have a soft spot for the glossy, browned apples that become the first thing people notice. When you melt butter and sugar together with a pinch of cinnamon, the aroma alone makes everyone pause. The technique of placing the fruit first creates that signature upside down finish, and I promise you the visual payoff is worth the simple step.
Textural balance of tender cake and slightly soft fruit
What I love is how the cake beneath is tender and buttery while the fruit keeps a hint of bite. The recipe’s ratio of flour, baking powder, and milk gives a crumb that soaks up just enough of the apple syrup without going soggy. Over time I learned that moderate mixing and correct oven heat preserve that pleasant contrast.
Minimal, reliable ingredients
I value recipes that don’t require a long shopping list. This one uses familiar pantry staples like sugar, butter, and egg, with the apples as the seasonal star. That simplicity makes it perfect for last minute desserts or when you want to highlight good fruit without complicated steps.
Great for fall gatherings and cozy moments
Because apples are at their peak in the cooler months, this cake often becomes my go to for weekend brunches and small holiday tables. It feels both homey and a little festive, and people appreciate a dessert that looks elaborate but comes together quickly.
Flexible and forgiving
I also appreciate that this cake forgives minor missteps. If you slice apples a little thicker or your oven runs a touch hot, the end result is still delicious. Small adjustments in baking time let you dial in the perfect texture for your oven, and that adaptability makes this a keeper in my rotation.
Everything You Need for Apple Upside Down Cake
These ingredients work together with clear roles, giving you a glossy, caramelized top and a tender, buttery cake beneath. The key players are the fruit for sweetness and texture, the sugars and butter for that caramel layer, and the flour, baking powder, and milk for structure. Together, they balance moisture, flavor, and rise so every bite feels complete.
- 1/3 cup white sugar: Sweetens the caramel layer and helps create a glossy, slightly crunchy topping when melted with butter; distributes evenly over the pan to coat apple slices. Enhances overall sweetness of the finished cake and balances tartness from the apples. Melts easily and caramelizes during baking to form the signature upside-down crust.
- 1/3 cup butter (melted): Provides a rich, buttery base for the caramelized topping when melted; blends with white sugar to create a smooth, spreadable syrup. Adds moisture and depth of flavor to the top layer while promoting even browning. Melting ensures uniform distribution and helps the apples adhere to the cake surface.
- 1/2 teaspoon cinnamon: Adds warm, aromatic spice to the apple topping and complements the fruit’s natural sweetness; a small amount prevents overpowering the other flavors. Enhances perceived complexity of the caramelized layer and pairs well with brown sugar and butter. Dissolves into the melted sugar to infuse the apples with subtle warmth.
- 2 to 3 Honeycrisp apples (peeled and cored, cut into 1/4-inch slices): Provides the main fruit component, offering fresh, crisp texture and natural sweetness; slicing uniformly ensures even cooking and caramelization. Contributes moisture and structural contrast to the soft cake beneath the topping. Selection of tart-sweet Honeycrisp balances sugar and offers pleasant apple flavor throughout.
- 1/2 cup softened butter (room temperature): Supplies creamed-fat richness and aeration when softened for the cake batter; contributes to tender crumb and improved mouthfeel. Room–temperature butter incorporates smoothly with sugar and egg, trapping air that helps the cake rise. Adds buttery flavor and moisture to the interior cake structure.
- 1/4 cup brown sugar: Imparts deep, molasses-like sweetness and contributes moisture and a caramel note to the batter; helps create a tender crumb. Dissolves into the butter and sugar mixture to enhance flavor complexity and color of the cake. Works with white sugar to balance sweetness and enrich overall taste.
- 1/2 cup white sugar: Sweetens and assists with creaming to incorporate air into the batter; balances brown sugar to control overall sweetness. Granulated sugar aids in tenderizing the cake by affecting gluten formation and moisture retention. Dissolves into the butter to create a smooth, aerated mixture for proper rise.
- 1 egg (room temperature): Binds ingredients and provides structure when beaten with sugar and butter; contributes to leavening support through protein setting during baking. Adds richness and contributes to a moist crumb and cohesive batter. Room temperature ensures even incorporation and prevents curdling.
- 2 teaspoons vanilla extract: Adds aromatic flavor and enhances the overall profile of the cake; complements vanilla notes in the apples and caramel. Provides subtle sweetness and depth while blending with egg and butter to round out the batter. Use of pure extract delivers a clean, consistent vanilla character.
- 1/2 cup milk: Contributes tenderness and moisture to the batter while thinning consistency for proper mixing; helps achieve a delicate crumb. Provides steam during baking that aids in leavening and texture. Selection of milk (rather than water) adds dairy richness and flavor.
- 1 cup flour: Forms the structure of the cake by supplying starch and gluten; combines with liquids and fats to create batter body. Absorbs moisture and interacts with leavening to determine crumb and texture. Using all-purpose or cake flour impacts final density and tenderness.
- 1 1/2 teaspoons baking powder: Provides chemical leavening to help the cake rise and become light and airy; reacts with liquid and heat to produce gas bubbles. Balances density from the flour and contributes to a fine, tender crumb. Proper measurement ensures even rise without metallic aftertaste.
- 1/4 teaspoon salt: Enhances overall flavor and balances sweetness by subtly accentuating other tastes; helps strengthen gluten slightly for structure. Small quantity prevents the cake from tasting flat and contributes to proper chemical interactions in the batter. Also preserves and stabilizes the dough’s flavor profile.
How to Cook Apple Upside Down Cake

This recipe is straightforward but benefits from careful staging and attention to sensory cues. As you move through each step, listen for subtle sounds and watch for color changes; those clues tell you when to move on. Keep ingredients near and at the stated temperatures to make transitions smooth and predictable.
- Prepare a 9-inch round cake pan by spraying the bottom with nonstick spray, then lining the bottom with a 9-inch circle of parchment paper and spraying again.: As you press the parchment into the pan, notice how the sprayed surface gleams slightly, which helps the caramelized layer release cleanly later. Ensuring even coverage prevents sticking, and the parchment protects the fragile bottom when you invert the cake. A common mistake is skipping the double spray, which can make unmolding tear the caramel layer. If your parchment shifts while pouring the sugar and butter mixture, pause and re-center it, because a displaced liner can cause uneven caramel pooling.
- Preheat the oven to 350°F.: When the oven reaches 350°F , you should feel steady warmth when you open it briefly, and the preheated air helps the cake rise evenly from the start. Preheating is essential so the leavening reacts at the right moment. If you put the batter into a cold oven, the rise will be sluggish and the crumb can be dense. A tip is to let the oven fully stabilize for at least five minutes after reaching temperature to avoid uneven baking.
- In a small bowl, stir together the sugar, butter, and cinnamon. Pour into the prepared pan.: As you stir, the melted butter will dissolve the sugar slightly and suspend the cinnamon , releasing a fragrant steam that hints at what is to come. Pour the mixture evenly so the caramel layer covers the pan base; any gaps can cause bare spots on the final top. Avoid letting the mixture cool too long before assembling, or the butter can begin to set and not spread smoothly.
- Layer sliced apples on top of the batter by starting with making a circle on the outside and working your way in.: Laying the sliced apples in concentric rings creates that classic pattern once flipped, and noticing a slight shine on the fruit means they will release juices into the caramel as they bake. Keep slices uniform so they cook and caramelize at the same rate. A common pitfall is overcrowding the pan, which can trap moisture and prevent proper caramelization; leave a little breathing room between slices.
- In a large bowl, using a hand mixer on medium-high speed, cream together the butter, brown sugar, and white sugar. Then beat in the egg.: When creaming, the mixture should lighten in color and gain a fluffy texture, indicating air has been incorporated for a tender crumb. Adding the egg after creaming helps emulsify the batter and stabilize the structure. If you overbeat at this stage, the batter can break down and become too thin, so stop once it looks pale and airy.
- Add vanilla extract and milk and mix until combined.: As you add the vanilla extract and milk , the batter will loosen and develop a glossy sheen, which helps it pour over the apple layer smoothly. The aroma of vanilla extract will elevate the perceived sweetness. Overmixing after adding liquids can tighten the gluten, so combine just until homogenous.
- In a medium bowl, whisk together the flour, baking powder, and salt.: Whisking the dry ingredients distributes the baking powder and salt so every spoonful of batter gets consistent lift and flavor. You may notice a fine, powdery texture after sifting or whisking, which ensures even rise. Forgetting to combine the dry ingredients can leave pockets of baking powder that create uneven holes in the cake.
- Add the dry ingredients to the wet ingredients and mix just until combined.: The batter will look slightly lumpy and thick after folding in the dry mix, a sign that you have the right tenderness developing. Mix until streaks of flour vanish; this prevents overdevelopment of gluten, which keeps the crumb soft. A mistake is vigorous mixing here, which yields a dense cake; fold gently to preserve air from the creamed butter.
- Pour the cake batter on top of the apple layer and spread it evenly.: Pouring reveals the contrast between the pale batter and the glossy apple top, and spreading with an offset spatula gives a smooth dome that bakes evenly. The batter should flow to fill gaps between slices but not flood them; if it is too thick, the cake may bake unevenly. If you see batter seeping under the parchment edges, stop and reposition so the caramel and fruit remain contained.
- Bake for 40 minutes or until a toothpick inserted in the center comes out clean. Remove from the oven and let sit for a few minutes. When you can touch the pan, run a knife along all the edges to help loosen the cake. Place your serving platter on top of the cake pan and flip it over onto the platter.: As it bakes, the kitchen will carry warm notes of browned sugar and cinnamon , and the top of the cake should become golden. Allowing the pan to rest briefly ensures the caramel sets enough to release cleanly but is still warm for flipping. If you flip too soon, the caramel can run; wait until it is warm but not piping hot. A common error is not checking with a toothpick; if wet batter sticks, give it additional five to ten minutes and monitor closely so the top does not overbrown.
Expert Tips about Apple Upside Down Cake
This cake responds well to small, intentional choices that improve texture and presentation. Below are hands on tips I use every time I make Apple Upside Down Cake, drawn from many warm kitchen trials and a few lessons learned the hard way.
- Choose firm, crisp apples: Using firm apples like Honeycrisp ensures slices keep their shape while developing a lovely caramel sheen rather than turning into a puree in the pan.
- Keep slices uniform: Cut apple slices to a consistent 1/4 inch thickness so they cook and caramelize at the same rate, giving a balanced texture across the cake.
- Room temperature ingredients: Bring butter, milk, and egg to room temperature to create a smoother batter and better rise when creamed and mixed.
- Even caramel layer: Spread the melted butter and sugar mixture evenly in the pan to avoid thin spots that can cause the fruit to stick on unmolding.
- Watch baking time closely: Ovens vary, so begin checking the cake five to ten minutes before the recommended bake time with a toothpick inserted into the center to ensure it comes out clean.
- Loose the edges: Run a thin knife carefully around the pan edges after cooling slightly to help the cake release evenly when flipped onto a platter.
Perfect Matches for Apple Upside Down Cake
This cake pairs beautifully with simple accompaniments that highlight its warm, spiced profile. Think about textures and temperatures when serving, and match the cake to the occasion to make the most of its comforting character.
- Light whipped cream: A dollop of lightly sweetened whipped cream complements the caramelized top without overpowering the natural apple flavors.
- Warm tea or coffee: Serve with a hot cup of tea or coffee for a cozy afternoon treat, the warm beverage cutting through the cake’s richness.
- Brunch centerpiece: This cake works well as a relaxed brunch centerpiece, paired with seasonal fruit and a simple yogurt dish.
- Holiday dessert: For fall gatherings or holiday tables, place the cake among small plates of nuts and dried fruit for an inviting spread.
- Storage tips: Keep leftovers covered at room temperature for one day, or refrigerate up to three days; rewarm gently before serving to refresh the caramel sheen.
- Seasonal pairing: Highlight the cake during autumn when apples are at their best, serving it after a hearty dinner or as the finale to a casual family meal.
FAQ
Conclusion
This Apple Upside Down Cake is special because it combines a glossy, caramelized fruit top with a tender, buttery cake underneath, creating a dessert that feels both elegant and homey. I encourage you to give it a try, whether for a cozy weekend treat or a small gathering, because it’s forgiving, flavorful, and always welcomed at the table. With a little attention to technique and the right apples, this cake will become a go to for seasonal desserts and warm memories.
Apple Upside Down Cake
Equipment
- 9-inch Round Cake Pan
- Mixing Bowls
- Hand Mixer
- Offset Spatula
- Parchment Paper
Ingredients
- 1/3 cup white sugar Sweetens the caramel layer and helps create a glossy, slightly crunchy topping when melted with butter; distributes evenly over the pan to coat apple slices. Enhances overall sweetness of the finished cake and balances tartness from the apples. Melts easily and caramelizes during baking to form the signature upside-down crust.
- 1/3 cup butter (melted) Provides a rich, buttery base for the caramelized topping when melted; blends with white sugar to create a smooth, spreadable syrup. Adds moisture and depth of flavor to the top layer while promoting even browning. Melting ensures uniform distribution and helps the apples adhere to the cake surface.
- 1/2 teaspoon cinnamon Adds warm, aromatic spice to the apple topping and complements the fruit’s natural sweetness; a small amount prevents overpowering the other flavors. Enhances perceived complexity of the caramelized layer and pairs well with brown sugar and butter. Dissolves into the melted sugar to infuse the apples with subtle warmth.
- 2 to 3 Honeycrisp apples (peeled and cored, cut into 1/4-inch slices) Provides the main fruit component, offering fresh, crisp texture and natural sweetness; slicing uniformly ensures even cooking and caramelization. Contributes moisture and structural contrast to the soft cake beneath the topping. Selection of tart-sweet Honeycrisp balances sugar and offers pleasant apple flavor throughout.
- 1/2 cup softened butter (room temperature) Supplies creamed-fat richness and aeration when softened for the cake batter; contributes to tender crumb and improved mouthfeel. Room-temperature butter incorporates smoothly with sugar and egg, trapping air that helps the cake rise. Adds buttery flavor and moisture to the interior cake structure.
- 1/4 cup brown sugar Imparts deep, molasses-like sweetness and contributes moisture and a caramel note to the batter; helps create a tender crumb. Dissolves into the butter and sugar mixture to enhance flavor complexity and color of the cake. Works with white sugar to balance sweetness and enrich overall taste.
- 1/2 cup white sugar Sweetens and assists with creaming to incorporate air into the batter; balances brown sugar to control overall sweetness. Granulated sugar aids in tenderizing the cake by affecting gluten formation and moisture retention. Dissolves into the butter to create a smooth, aerated mixture for proper rise.
- 1 egg (room temperature) Binds ingredients and provides structure when beaten with sugar and butter; contributes to leavening support through protein setting during baking. Adds richness and contributes to a moist crumb and cohesive batter. Room temperature ensures even incorporation and prevents curdling.
- 2 teaspoons vanilla extract Adds aromatic flavor and enhances the overall profile of the cake; complements vanilla notes in the apples and caramel. Provides subtle sweetness and depth while blending with egg and butter to round out the batter. Use of pure extract delivers a clean, consistent vanilla character.
- 1/2 cup milk Contributes tenderness and moisture to the batter while thinning consistency for proper mixing; helps achieve a delicate crumb. Provides steam during baking that aids in leavening and texture. Selection of milk (rather than water) adds dairy richness and flavor.
- 1 cup flour Forms the structure of the cake by supplying starch and gluten; combines with liquids and fats to create batter body. Absorbs moisture and interacts with leavening to determine crumb and texture. Using all-purpose or cake flour impacts final density and tenderness.
- 1 1/2 teaspoons baking powder Provides chemical leavening to help the cake rise and become light and airy; reacts with liquid and heat to produce gas bubbles. Balances density from the flour and contributes to a fine, tender crumb. Proper measurement ensures even rise without metallic aftertaste.
- 1/4 teaspoon salt Enhances overall flavor and balances sweetness by subtly accentuating other tastes; helps strengthen gluten slightly for structure. Small quantity prevents the cake from tasting flat and contributes to proper chemical interactions in the batter. Also preserves and stabilizes the dough’s flavor profile.
Instructions
- Prepare a 9-inch round cake pan by spraying the bottom with nonstick spray, then lining the bottom with a 9-inch circle of parchment paper and spraying again.: As you press the parchment into the pan, notice how the sprayed surface gleams slightly, which helps the caramelized layer release cleanly later. Ensuring even coverage prevents sticking, and the parchment protects the fragile bottom when you invert the cake. A common mistake is skipping the double spray, which can make unmolding tear the caramel layer. If your parchment shifts while pouring the sugar and butter mixture, pause and re-center it, because a displaced liner can cause uneven caramel pooling.
- Preheat the oven to 350°F.: When the oven reaches 350°F , you should feel steady warmth when you open it briefly, and the preheated air helps the cake rise evenly from the start. Preheating is essential so the leavening reacts at the right moment. If you put the batter into a cold oven, the rise will be sluggish and the crumb can be dense. A tip is to let the oven fully stabilize for at least five minutes after reaching temperature to avoid uneven baking.
- In a small bowl, stir together the sugar, butter, and cinnamon. Pour into the prepared pan.: As you stir, the melted butter will dissolve the sugar slightly and suspend the cinnamon , releasing a fragrant steam that hints at what is to come. Pour the mixture evenly so the caramel layer covers the pan base; any gaps can cause bare spots on the final top. Avoid letting the mixture cool too long before assembling, or the butter can begin to set and not spread smoothly.
- Layer sliced apples on top of the batter by starting with making a circle on the outside and working your way in.: Laying the sliced apples in concentric rings creates that classic pattern once flipped, and noticing a slight shine on the fruit means they will release juices into the caramel as they bake. Keep slices uniform so they cook and caramelize at the same rate. A common pitfall is overcrowding the pan, which can trap moisture and prevent proper caramelization; leave a little breathing room between slices.
- In a large bowl, using a hand mixer on medium-high speed, cream together the butter, brown sugar, and white sugar. Then beat in the egg.: When creaming, the mixture should lighten in color and gain a fluffy texture, indicating air has been incorporated for a tender crumb. Adding the egg after creaming helps emulsify the batter and stabilize the structure. If you overbeat at this stage, the batter can break down and become too thin, so stop once it looks pale and airy.
- Add vanilla extract and milk and mix until combined.: As you add the vanilla extract and milk , the batter will loosen and develop a glossy sheen, which helps it pour over the apple layer smoothly. The aroma of vanilla extract will elevate the perceived sweetness. Overmixing after adding liquids can tighten the gluten, so combine just until homogenous.
- In a medium bowl, whisk together the flour, baking powder, and salt.: Whisking the dry ingredients distributes the baking powder and salt so every spoonful of batter gets consistent lift and flavor. You may notice a fine, powdery texture after sifting or whisking, which ensures even rise. Forgetting to combine the dry ingredients can leave pockets of baking powder that create uneven holes in the cake.
- Add the dry ingredients to the wet ingredients and mix just until combined.: The batter will look slightly lumpy and thick after folding in the dry mix, a sign that you have the right tenderness developing. Mix until streaks of flour vanish; this prevents overdevelopment of gluten, which keeps the crumb soft. A mistake is vigorous mixing here, which yields a dense cake; fold gently to preserve air from the creamed butter.
- Pour the cake batter on top of the apple layer and spread it evenly.: Pouring reveals the contrast between the pale batter and the glossy apple top, and spreading with an offset spatula gives a smooth dome that bakes evenly. The batter should flow to fill gaps between slices but not flood them; if it is too thick, the cake may bake unevenly. If you see batter seeping under the parchment edges, stop and reposition so the caramel and fruit remain contained.
- Bake for 40 minutes or until a toothpick inserted in the center comes out clean. Remove from the oven and let sit for a few minutes. When you can touch the pan, run a knife along all the edges to help loosen the cake. Place your serving platter on top of the cake pan and flip it over onto the platter.: As it bakes, the kitchen will carry warm notes of browned sugar and cinnamon , and the top of the cake should become golden. Allowing the pan to rest briefly ensures the caramel sets enough to release cleanly but is still warm for flipping. If you flip too soon, the caramel can run; wait until it is warm but not piping hot. A common error is not checking with a toothpick; if wet batter sticks, give it additional five to ten minutes and monitor closely so the top does not overbrown.
Notes
- Choose firm, crisp apples: Using firm apples like Honeycrisp ensures slices keep their shape while developing a lovely caramel sheen rather than turning into a puree in the pan.
- Keep slices uniform: Cut apple slices to a consistent 1/4 inch thickness so they cook and caramelize at the same rate, giving a balanced texture across the cake.
- Room temperature ingredients: Bring butter, milk, and egg to room temperature to create a smoother batter and better rise when creamed and mixed.
- Even caramel layer: Spread the melted butter and sugar mixture evenly in the pan to avoid thin spots that can cause the fruit to stick on unmolding.
- Watch baking time closely: Ovens vary, so begin checking the cake five to ten minutes before the recommended bake time with a toothpick inserted into the center to ensure it comes out clean.
- Loose the edges: Run a thin knife carefully around the pan edges after cooling slightly to help the cake release evenly when flipped onto a platter.