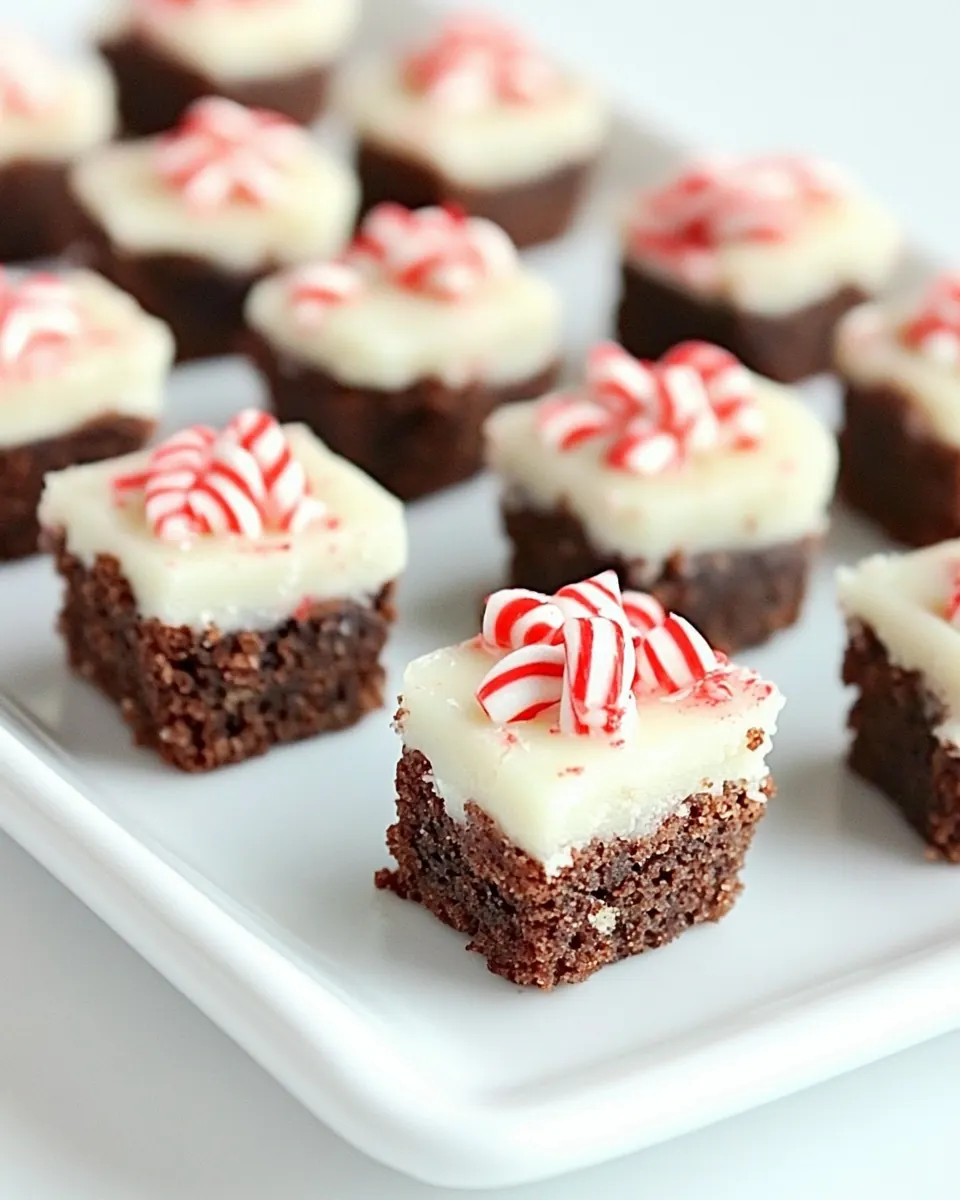
Peppermint Crunch Brownie Bites
Peppermint Crunch Brownie Bites began as a tiny experiment in my kitchen one snowy afternoon, when I wanted something festive, small, and intensely chocolatey to share with neighbors.
That first bite fused deep cocoa richness with a brisk whisper of mint, and the crunchy candy cane topping gave each morsel a holiday snap that made me grin. I remember dusting my sweater with powdered sugar as I transferred tray after tray to a cooling rack, feeling oddly triumphant over such a simple treat.
These little bites travelled well. I tucked a few into cellophane bags, tied them with ribbon, and delivered them to friends who later called to ask for the recipe. The ease of popping these into a mini muffin pan, and the quick bake time, meant I could churn out dozens in one afternoon while the kettle hummed in the background.
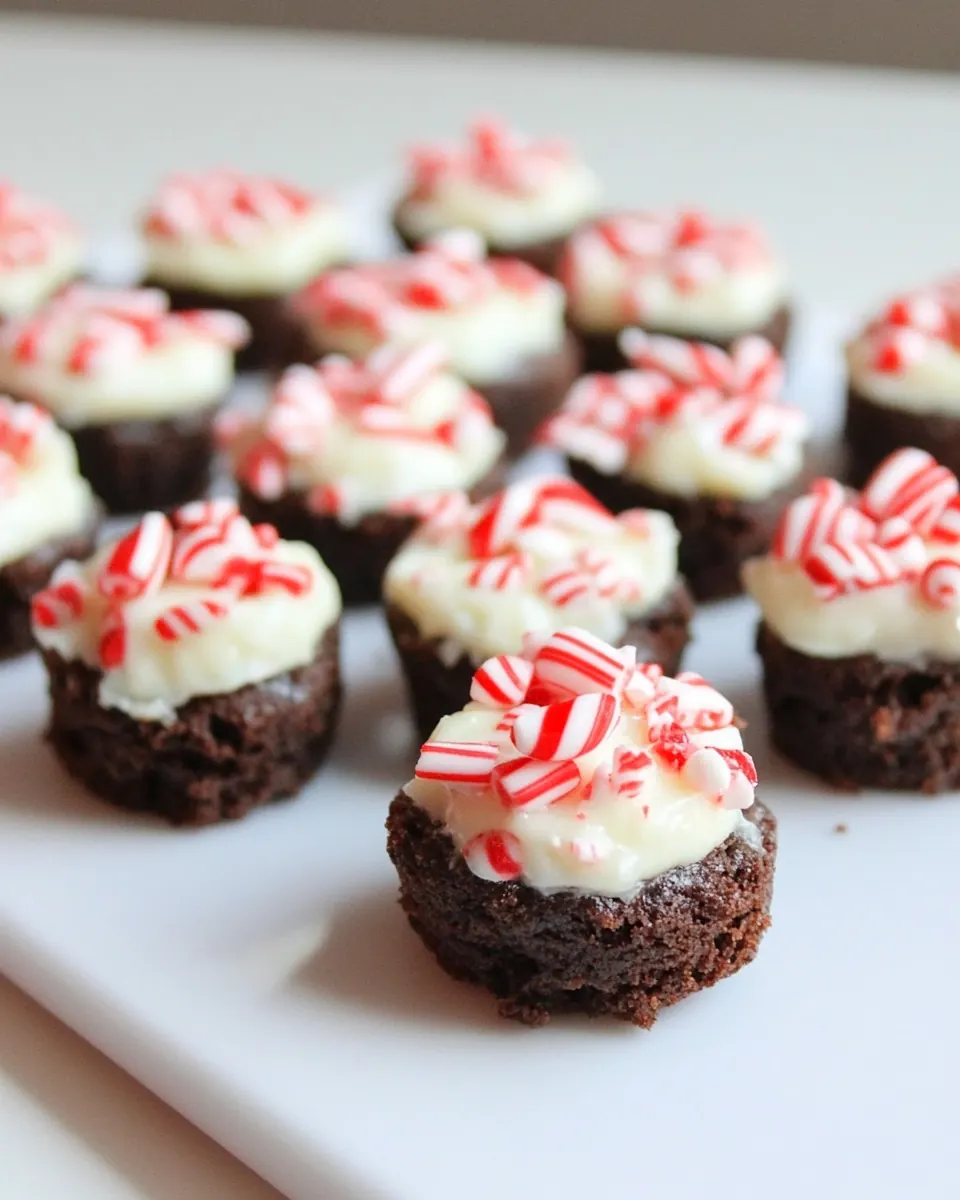
Over time I’ve adjusted tiny things, like melting the butter gently and stirring in eggs one at a time so the batter stays glossy. What I never change is the finishing touch, dipping each top in creamy white chocolate chips and scattering crushed candy canes for that perfect peppermint crunch. When holiday music plays in my kitchen these are the treats I reach for, because they feel celebratory without being fussy.
Recipe Snapshot
35 mins
20 mins
15 mins
Easy
150 kcal
American
Gluten-Free, Low FODMAP
Desserts
Mini muffin pan, Medium saucepan, Wire cooling rack, Microwave safe bowl
Why This Peppermint Crunch Brownie Bites Is a Winner
Comforting familiar flavors with a festive twist
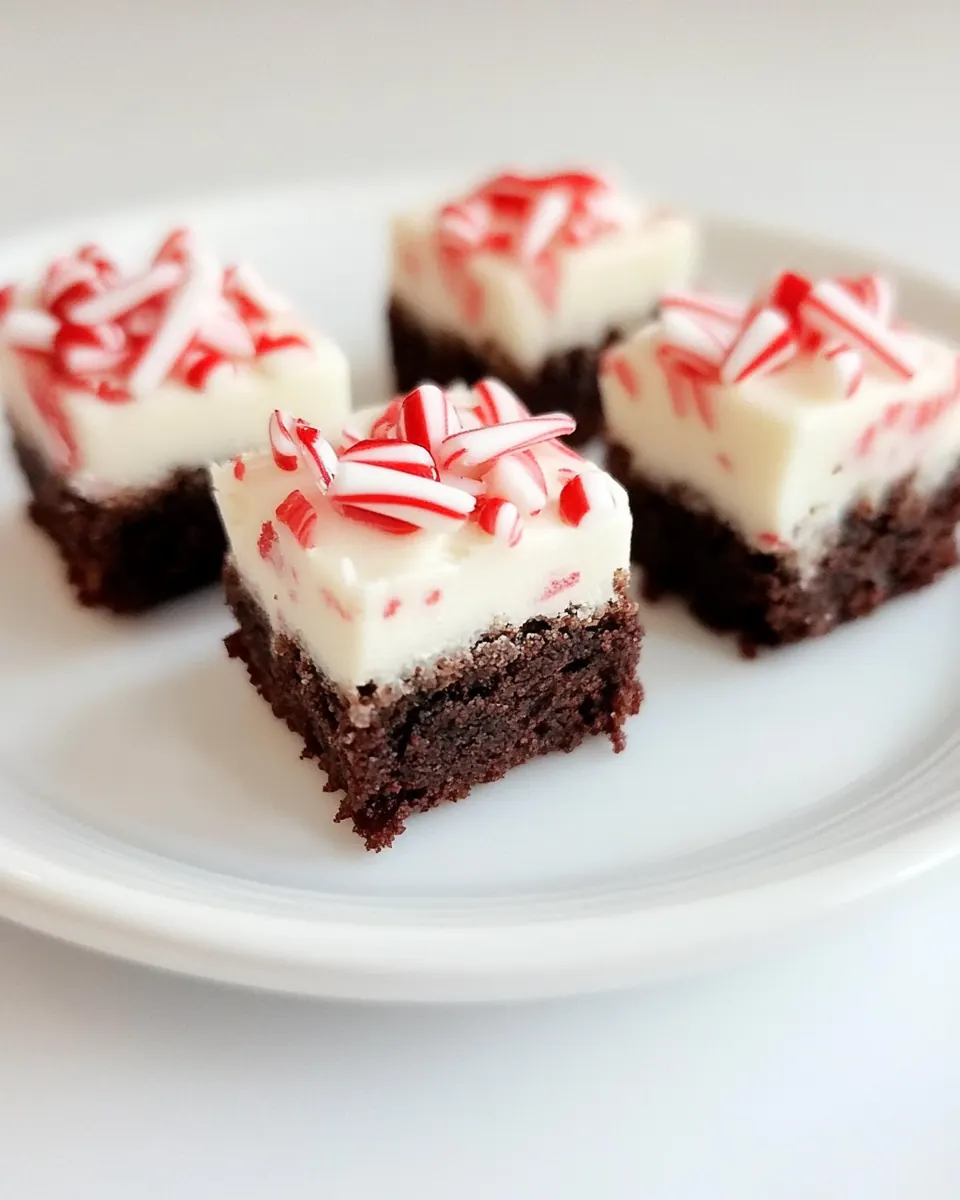
I adore how Peppermint Crunch Brownie Bites pair classic brownie depth with a bright peppermint note, so every bite feels both cozy and celebratory. The cocoa anchors the flavor, giving a dense, slightly fudgy base that contrasts beautifully with the cool, crisp candy cane topping.
Perfect for gifting and gatherings
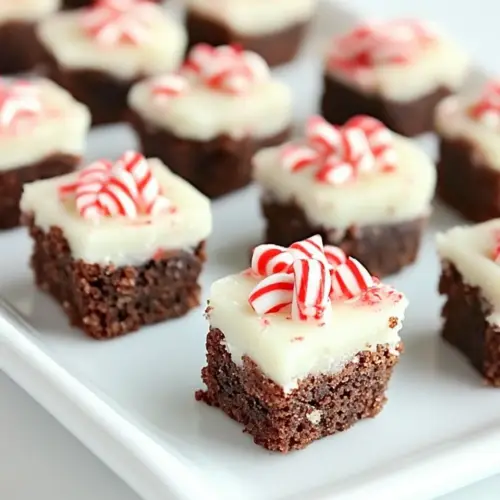
These bite sized treats are ideal when I need something portable and pretty. They stack neatly in boxes, and because each piece is individually topped, they look impressive without a lot of fuss. I find that people often comment first on the look, then on the surprising combination of textures.
Quick and approachable process
I love recipes that respect a busy schedule, and these are fast to mix and faster to bake. The method is forgiving when you follow a few simple cues, and the few minutes spent dipping in white chocolate move the recipe from good to memorable. For novice bakers this is a confidence booster, and for experienced cooks it is a reliable crowd pleaser.
Customizable and festive
While the core idea is consistent, I enjoy small variations, like using dutch processed cocoa for more rounded chocolate notes or adjusting the peppermint intensity. The topping elevates the whole thing, and swapping candy cane sizes or crush textures changes the crunch and appearance.
Textural contrast that keeps you coming back
What sells this for me is texture. The tender, slightly fudgy center of the brownie bite set against the crisp, cold shards of crushed candy cane and the snap of hardened white chocolate chips creates a dynamic mouthfeel that makes each piece feel complete. It is why these keep disappearing at every gathering I bring them to.
Peppermint Crunch Brownie Bites Ingredients
I choose ingredients that play distinct roles and harmonize simply. The butter and white chocolate chips lend richness, while the cocoa and all purpose flour form the structure and chocolate backbone. The peppermint extract and crushed candy canes provide the bright, festive lift that defines this recipe.
- 1 cup 2 sticks butter: Melted and creamed to provide rich fat and structure for the batter; contributes flavor, moisture, and a fudgy texture in brownie bites. Incorporate at room temperature or melted to evenly distribute fat and help dissolve sugar for a smooth batter.
- 2 cups granulated sugar: Granulated sugar used to sweeten and create tender crumb through creaming and moisture retention; helps with browning and contributes to the chewy texture. Measure accurately to balance sweetness and structure so brownies remain rich but not overly dense.
- 2 teaspoons vanilla extract: Vanilla extract added to enhance and round out chocolate and peppermint flavors; provides aromatic depth and sweetness perception. Stir in with the wet ingredients to disperse evenly and lift the overall flavor profile.
- 1/2 teaspoon peppermint extract: Peppermint extract included to deliver the primary minty flavor and aroma that defines the peppermint crunch element; a little goes a long way. Add carefully to avoid overpowering chocolate notes and mix thoroughly with the eggs and butter.
- 4 large eggs: Large eggs supply structure, leavening, and moisture while binding ingredients together; they contribute to the brownie’s set and tender crumb. Beat into the batter one at a time or as directed to incorporate air and ensure uniform texture.
- 3/4 cup cocoa I used dutch processed: Cocoa (Dutch–processed) provides intense chocolate flavor and darker color while interacting differently with leaveners due to its neutral pH; it contributes to rich chocolate notes. Sift or whisk into the dry ingredients to prevent lumps and ensure even color and flavor distribution.
- 1 cup all-purpose flour: All-purpose flour supplies the necessary gluten and dry structure that gives the brownie bites form and chew; it balances the fat and moisture from butter and eggs. Measure and fold gently to avoid overworking the batter, which can produce a tougher texture.
- 1/2 teaspoon baking powder: Baking powder used as a leavening agent to provide slight lift and lightness to the bites; it helps produce a tender, slightly risen brownie rather than a dense, flat bar. Ensure it is fresh and mixed into dry ingredients for consistent rise.
- 1/4 teaspoons salt: Salt enhances and balances sweetness while amplifying chocolate and peppermint flavors; it rounds out the overall taste profile. Dissolve into the dry mix so it distributes evenly and elevates other ingredient flavors.
- 2 cups white chocolate chips: White chocolate chips add creamy sweetness, pockets of melt-in-your-mouth texture, and contrast to dark cocoa; they contribute richness and visual interest. Fold in toward the end of mixing to keep chips intact and evenly dispersed throughout the batter.
- 10 large candy canes crushed: Crushed candy canes provide crunchy peppermint texture, decorative sparkle, and concentrated mint flavor; they create the signature peppermint crunch topping and mix-ins. Sprinkle on top before baking or fold in carefully to retain crunch and avoid bleeding color into the batter.
Making This Peppermint Crunch Brownie Bites

These steps take you from melted butter to perfectly dipped brownie bites. Work methodically, and pay attention to sensory cues for the best results. I will walk you through each stage and share what to watch for so your batch turns out evenly and delicious.
- Preheat oven to 350 degrees F. Spray mini muffin pan with non stick cooking spray or line with paper cups. Set aside.: As the kitchen warms, you should smell a faint warmth in the air that readies your pans and ingredients. A fully preheated oven gives consistent rise and texture, so wait until it reaches temperature before inserting the pan. A common mistake is placing the pan in a not fully preheated oven, which can alter baking time and lead to underbaked centers. Check oven accuracy with an oven thermometer if you suspect temperature variance.
- Place butter in medium saucepan on the stove. Heat over medium heat until butter is melted. Remove from heat and stir in sugar, vanilla, and peppermint extract. Add eggs, one at a time, beating well with spoon after each addition. Add cocoa; stir until well blended. Add flour, baking powder and salt; stir until combined.: Preparing the pan prevents sticking and makes removal clean and simple, which preserves the crisp edges and neat bottoms. I like the thin paper cups because they help lift the bites out without compressing them, yet spray works fine for sharper edges. If you skip this, the brownie bites can cling and crumble when removed, so take the few extra moments to prep the pan.
- Fill each muffin cup slightly more than halfway full. Bake in preheated oven for 12-15 minutes or until a toothpick comes out clean when inserted in the center of a brownie bite. Allow the brownie bites to cool for 5 minutes before removing from the muffin tin.: As the butter melts, it should lose its solid shape and begin to shimmer, producing a gentle nutty aroma if warmed long enough. Melting gently over medium heat prevents browning, keeping the flavor neutral and allowing other ingredients to shine. Overheating might brown the butter, changing the intended flavor profile and texture.
- While the brownie bites are cooling, melt white chocolate in the microwave, in a microwave safe bowl, or by using a double-boiler. Dip the tops of the brownie bites in the white chocolate. Set on a wire cooling wrack and sprinkle with crushed candy canes. Continue until all of the brownie bites are dipped and sprinkled. Let white chocolate harden before serving.: The sound at this stage is quiet, maybe a subtle hiss; do not let it bubble vigorously. Once fully liquid, remove from heat promptly to prevent overheating. If the butter becomes too hot it can cook the eggs upon contact, so allow it to cool briefly before adding the eggs to avoid curdling.
- Remove from heat and stir in sugar, vanilla, and peppermint extract: When sugars meet warm butter, the mixture slightly dissolves and becomes glossy, signaling good incorporation. Stir until the sugar feels evenly distributed, and the extracts should perfume the batter with warmth and mint. Adding extracts too early into extremely hot butter can dissipate some aromatic intensity, so moderate temperature is key.
- Add eggs, one at a time, beating well with spoon after each addition: As each egg folds in, the batter becomes smoother and slightly thicker, and a sheen should develop where the batter reflects light. This technique ensures even structure and prevents lumps. A common error is dumping all eggs in at once, which can cause incorrect emulsion and a less cohesive batter.
- Add cocoa; stir until well blended: When you add the cocoa , the batter will darken and smell richly of chocolate. Stir until no streaks remain and the color is uniform, scraping the pan sides to capture every bit of flavor. If lumps persist, sift the cocoa before adding next time to avoid dry pockets in the finished brownie.
- Add flour, baking powder and salt; stir until combined: The mixture will gain body and become noticeably thicker, moving from glossy to a more matte finish. Fold gently until just combined to avoid developing excess gluten, which keeps the texture tender and fudgy. Overmixing here is the most common mistake and results in chewier, less desirable bites.
- Fill each muffin cup slightly more than halfway full: The batter should have a thick spoonable consistency, and filling slightly above halfway ensures a properly domed top without overflow. You should see a sheen and a dense texture when scooping. If you overfill, the centers may not set properly and can spill over during baking.
- Bake in preheated oven for 12 to 15 minutes or until a toothpick comes out clean when inserted in the center of a brownie bite: The kitchen will fill with a rich chocolate scent as edges set and the centers remain fudgy. Look for a slightly set top with a tender spring and a few moist crumbs on the toothpick rather than wet batter. Overbaking dries them out, while underbaking leaves a raw center, so aim for that balance of set edges and just cooked middle.
- Allow the brownie bites to cool for 5 minutes before removing from the muffin tin: Cooling lets the structure firm slightly, so the bites release cleanly and hold their shape. You will notice steam rising briefly, and the edges relax away from the tin as they cool. Removing them too soon can lead to breakage, while leaving them too long in the pan can trap moisture and soften the bottoms.
- While the brownie bites are cooling, melt white chocolate in the microwave, in a microwave safe bowl, or by using a double-boiler: Melt until smooth and glossy, stirring frequently to create a uniform texture. Use low power bursts in the microwave and stir between intervals, or gently heat over simmering water in a double-boiler to avoid seizing. If white chocolate overheats it can become grainy, so remove from heat while still slightly glossy and stir to finish melting.
- Dip the tops of the brownie bites in the white chocolate: The white chocolate should coat the top and set with a pleasing sheen. As you dip, the cooled brownie will provide a satisfying contrast between tender interior and firm topping. Work quickly so the chocolate does not thicken, and if it does, warm it briefly; hardened chocolate can crack when applied.
- Set on a wire cooling wrack and sprinkle with crushed candy canes: The crushed pieces should adhere to the warm white chocolate, creating visual sparkle and crunchy texture. Press lightly so pieces stick, and vary the sprinkle so some bites have larger shards for a dramatic crunch. If you wait until the chocolate hardens before sprinkling, the pieces will not adhere properly.
- Continue until all of the brownie bites are dipped and sprinkled: Work in batches that fit your workspace to keep the chocolate at the right consistency, and rotate pieces to ensure even coverage and cooling. A steady rhythm helps maintain warmth in the chocolate without overheating. Trying to do too many at once can cause chocolate to thicken prematurely, which makes dipping messy.
- Let white chocolate harden before serving: Allow the bites to rest until the coating is firm to the touch and no longer tacky, about several minutes at room temperature. You will notice a crisp snap when biting into the hardened chocolate, and the peppermint shards will remain crunchy. Serving before fully set can smear the topping and lose the signature texture contrast.
Variations to Try
These variations let you tweak texture, intensity, and presentation while staying true to the spirit of the recipe. Each tip highlights a simple swap or small technique change that delivers a noticeable result.
- Double the peppermint punch by adding a tiny additional 1/4 teaspoon of peppermint extract for a more pronounced cool finish, but avoid overdoing it to prevent a medicinal taste.
- Use dutch processed cocoa for a rounder, less acidic chocolate note, which pairs beautifully with the bright peppermint contrast.
- Mix in coarse candy cane pieces into the batter sparingly to add pockets of peppermint crunch inside the brownie bites as well as on top.
- Alternate topping with finely grated dark chocolate over the white chocolate while it is still warm for a two tone, elegant finish.
- Serve chilled for a firmer, candy like texture in the white chocolate and a slightly more compact brownie center, which some guests prefer.
- Gift presentation idea, layer in parchment between rows and seal in a clear box tied with seasonal ribbon for a festive neighborly offering.
Great Combinations for Peppermint Crunch Brownie Bites
These serving ideas focus on pairing, timing, and storage to make the most of your batch. You can adapt the list to holiday gatherings, after dinner treats, or packaged gifts.
- Holiday dessert platter: Arrange the brownie bites alongside shortbread cookies and chocolate truffles for a festive assorted plate perfect for parties.
- After dinner treat: Offer a single chilled bite with coffee or tea to balance sweetness and refresh the palate after a hearty meal.
- Gift boxes: Stack in small bakery boxes with parchment, adding a sprig of evergreen for a seasonal touch that makes a thoughtful homemade gift.
- Make ahead and store: Keep in an airtight container at room temperature for up to three days, or refrigerate for up to a week to preserve the white chocolate coating and peppermint crunch.
- Occasions: Ideal for holiday parties, cookie exchanges, classroom treats, and any winter gathering where portable, no fork desserts are appreciated.
- Seasonal pairing: These shine during winter and holiday months, served alongside warm beverages or right after a festive meal as a sweet finish.
FAQ
Conclusion
These Peppermint Crunch Brownie Bites stand out because they combine a fudgy chocolate base with a crisp peppermint finish, offering a delightful texture contrast in every bite. Give them a try this season, whether you are assembling a holiday platter or making thoughtful edible gifts, because they are both approachable and impressive. I hope you enjoy the ritual of making them as much as I do, from melting the butter to the satisfying final sprinkle of crushed candy canes.
Peppermint Crunch Brownie Bites
Equipment
- Mini Muffin Pan
- Medium Saucepan
- wire cooling rack
- Microwave-safe Bowl
Ingredients
- 1 cup 2 sticks butter Melted and creamed to provide rich fat and structure for the batter; contributes flavor, moisture, and a fudgy texture in brownie bites. Incorporate at room temperature or melted to evenly distribute fat and help dissolve sugar for a smooth batter.
- 2 cups granulated sugar Granulated sugar used to sweeten and create tender crumb through creaming and moisture retention; helps with browning and contributes to the chewy texture. Measure accurately to balance sweetness and structure so brownies remain rich but not overly dense.
- 2 teaspoons vanilla extract Vanilla extract added to enhance and round out chocolate and peppermint flavors; provides aromatic depth and sweetness perception. Stir in with the wet ingredients to disperse evenly and lift the overall flavor profile.
- 1/2 teaspoon peppermint extract Peppermint extract included to deliver the primary minty flavor and aroma that defines the peppermint crunch element; a little goes a long way. Add carefully to avoid overpowering chocolate notes and mix thoroughly with the eggs and butter.
- 4 large eggs Large eggs supply structure, leavening, and moisture while binding ingredients together; they contribute to the brownie’s set and tender crumb. Beat into the batter one at a time or as directed to incorporate air and ensure uniform texture.
- 3/4 cup cocoa I used dutch processed Cocoa (Dutch-processed) provides intense chocolate flavor and darker color while interacting differently with leaveners due to its neutral pH; it contributes to rich chocolate notes. Sift or whisk into the dry ingredients to prevent lumps and ensure even color and flavor distribution.
- 1 cup all-purpose flour All-purpose flour supplies the necessary gluten and dry structure that gives the brownie bites form and chew; it balances the fat and moisture from butter and eggs. Measure and fold gently to avoid overworking the batter, which can produce a tougher texture.
- 1/2 teaspoon baking powder Baking powder used as a leavening agent to provide slight lift and lightness to the bites; it helps produce a tender, slightly risen brownie rather than a dense, flat bar. Ensure it is fresh and mixed into dry ingredients for consistent rise.
- 1/4 teaspoons salt Salt enhances and balances sweetness while amplifying chocolate and peppermint flavors; it rounds out the overall taste profile. Dissolve into the dry mix so it distributes evenly and elevates other ingredient flavors.
- 2 cups white chocolate chips White chocolate chips add creamy sweetness, pockets of melt-in-your-mouth texture, and contrast to dark cocoa; they contribute richness and visual interest. Fold in toward the end of mixing to keep chips intact and evenly dispersed throughout the batter.
- 10 large candy canes crushed Crushed candy canes provide crunchy peppermint texture, decorative sparkle, and concentrated mint flavor; they create the signature peppermint crunch topping and mix-ins. Sprinkle on top before baking or fold in carefully to retain crunch and avoid bleeding color into the batter.
Instructions
- Preheat oven to 350 degrees F. Spray mini muffin pan with non stick cooking spray or line with paper cups. Set aside.: As the kitchen warms, you should smell a faint warmth in the air that readies your pans and ingredients. A fully preheated oven gives consistent rise and texture, so wait until it reaches temperature before inserting the pan. A common mistake is placing the pan in a not fully preheated oven, which can alter baking time and lead to underbaked centers. Check oven accuracy with an oven thermometer if you suspect temperature variance.
- Place butter in medium saucepan on the stove. Heat over medium heat until butter is melted. Remove from heat and stir in sugar, vanilla, and peppermint extract. Add eggs, one at a time, beating well with spoon after each addition. Add cocoa; stir until well blended. Add flour, baking powder and salt; stir until combined.: Preparing the pan prevents sticking and makes removal clean and simple, which preserves the crisp edges and neat bottoms. I like the thin paper cups because they help lift the bites out without compressing them, yet spray works fine for sharper edges. If you skip this, the brownie bites can cling and crumble when removed, so take the few extra moments to prep the pan.
- Fill each muffin cup slightly more than halfway full. Bake in preheated oven for 12-15 minutes or until a toothpick comes out clean when inserted in the center of a brownie bite. Allow the brownie bites to cool for 5 minutes before removing from the muffin tin.: As the butter melts, it should lose its solid shape and begin to shimmer, producing a gentle nutty aroma if warmed long enough. Melting gently over medium heat prevents browning, keeping the flavor neutral and allowing other ingredients to shine. Overheating might brown the butter, changing the intended flavor profile and texture.
- While the brownie bites are cooling, melt white chocolate in the microwave, in a microwave safe bowl, or by using a double-boiler. Dip the tops of the brownie bites in the white chocolate. Set on a wire cooling wrack and sprinkle with crushed candy canes. Continue until all of the brownie bites are dipped and sprinkled. Let white chocolate harden before serving.: The sound at this stage is quiet, maybe a subtle hiss; do not let it bubble vigorously. Once fully liquid, remove from heat promptly to prevent overheating. If the butter becomes too hot it can cook the eggs upon contact, so allow it to cool briefly before adding the eggs to avoid curdling.
- Remove from heat and stir in sugar, vanilla, and peppermint extract: When sugars meet warm butter, the mixture slightly dissolves and becomes glossy, signaling good incorporation. Stir until the sugar feels evenly distributed, and the extracts should perfume the batter with warmth and mint. Adding extracts too early into extremely hot butter can dissipate some aromatic intensity, so moderate temperature is key.
- Add eggs, one at a time, beating well with spoon after each addition: As each egg folds in, the batter becomes smoother and slightly thicker, and a sheen should develop where the batter reflects light. This technique ensures even structure and prevents lumps. A common error is dumping all eggs in at once, which can cause incorrect emulsion and a less cohesive batter.
- Add cocoa; stir until well blended: When you add the cocoa , the batter will darken and smell richly of chocolate. Stir until no streaks remain and the color is uniform, scraping the pan sides to capture every bit of flavor. If lumps persist, sift the cocoa before adding next time to avoid dry pockets in the finished brownie.
- Add flour, baking powder and salt; stir until combined: The mixture will gain body and become noticeably thicker, moving from glossy to a more matte finish. Fold gently until just combined to avoid developing excess gluten, which keeps the texture tender and fudgy. Overmixing here is the most common mistake and results in chewier, less desirable bites.
- Fill each muffin cup slightly more than halfway full: The batter should have a thick spoonable consistency, and filling slightly above halfway ensures a properly domed top without overflow. You should see a sheen and a dense texture when scooping. If you overfill, the centers may not set properly and can spill over during baking.
- Bake in preheated oven for 12 to 15 minutes or until a toothpick comes out clean when inserted in the center of a brownie bite: The kitchen will fill with a rich chocolate scent as edges set and the centers remain fudgy. Look for a slightly set top with a tender spring and a few moist crumbs on the toothpick rather than wet batter. Overbaking dries them out, while underbaking leaves a raw center, so aim for that balance of set edges and just cooked middle.
- Allow the brownie bites to cool for 5 minutes before removing from the muffin tin: Cooling lets the structure firm slightly, so the bites release cleanly and hold their shape. You will notice steam rising briefly, and the edges relax away from the tin as they cool. Removing them too soon can lead to breakage, while leaving them too long in the pan can trap moisture and soften the bottoms.
- While the brownie bites are cooling, melt white chocolate in the microwave, in a microwave safe bowl, or by using a double-boiler: Melt until smooth and glossy, stirring frequently to create a uniform texture. Use low power bursts in the microwave and stir between intervals, or gently heat over simmering water in a double-boiler to avoid seizing. If white chocolate overheats it can become grainy, so remove from heat while still slightly glossy and stir to finish melting.
- Dip the tops of the brownie bites in the white chocolate: The white chocolate should coat the top and set with a pleasing sheen. As you dip, the cooled brownie will provide a satisfying contrast between tender interior and firm topping. Work quickly so the chocolate does not thicken, and if it does, warm it briefly; hardened chocolate can crack when applied.
- Set on a wire cooling wrack and sprinkle with crushed candy canes: The crushed pieces should adhere to the warm white chocolate, creating visual sparkle and crunchy texture. Press lightly so pieces stick, and vary the sprinkle so some bites have larger shards for a dramatic crunch. If you wait until the chocolate hardens before sprinkling, the pieces will not adhere properly.
- Continue until all of the brownie bites are dipped and sprinkled: Work in batches that fit your workspace to keep the chocolate at the right consistency, and rotate pieces to ensure even coverage and cooling. A steady rhythm helps maintain warmth in the chocolate without overheating. Trying to do too many at once can cause chocolate to thicken prematurely, which makes dipping messy.
- Let white chocolate harden before serving: Allow the bites to rest until the coating is firm to the touch and no longer tacky, about several minutes at room temperature. You will notice a crisp snap when biting into the hardened chocolate, and the peppermint shards will remain crunchy. Serving before fully set can smear the topping and lose the signature texture contrast.
Notes
- Double the peppermint punch by adding a tiny additional 1/4 teaspoon of peppermint extract for a more pronounced cool finish, but avoid overdoing it to prevent a medicinal taste.
- Use dutch processed cocoa for a rounder, less acidic chocolate note, which pairs beautifully with the bright peppermint contrast.
- Mix in coarse candy cane pieces into the batter sparingly to add pockets of peppermint crunch inside the brownie bites as well as on top.
- Alternate topping with finely grated dark chocolate over the white chocolate while it is still warm for a two tone, elegant finish.
- Serve chilled for a firmer, candy like texture in the white chocolate and a slightly more compact brownie center, which some guests prefer.
- Gift presentation idea, layer in parchment between rows and seal in a clear box tied with seasonal ribbon for a festive neighborly offering.