
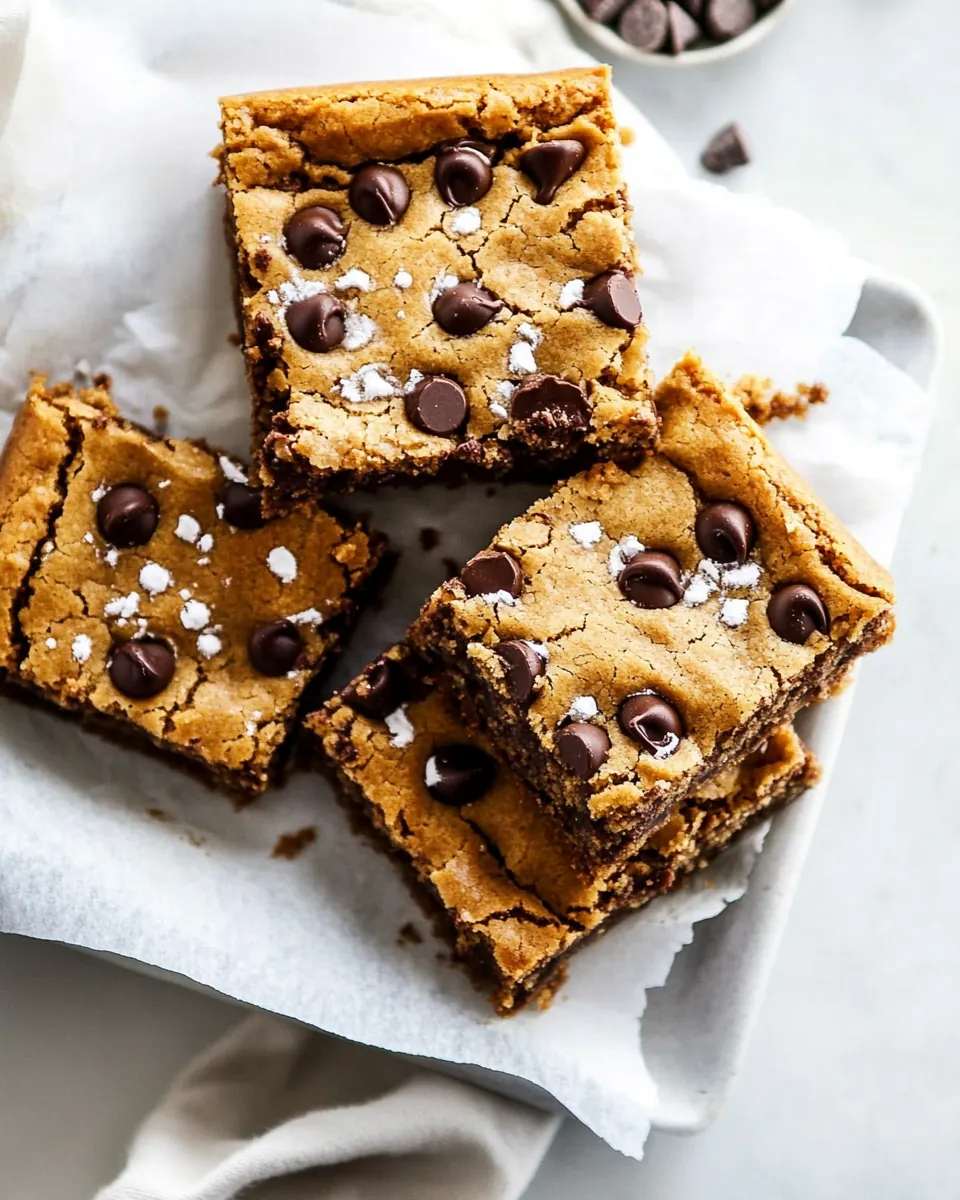
Brown Butter Chocolate Chip Cookie Bars
Brown Butter Chocolate Chip Cookie Bars came into my life on a rainy Saturday when I needed something warm, buttery, and a little bit nostalgic. I was folding laundry and scrolling through recipe ideas when the memory of my grandmother’s crisp yet chewy tray cookies pulled me toward the kitchen. I wanted something that felt familiar, but with a grown up twist, so I browned a stick of butter on the stove and let the aroma take over the house. The result felt like a hug, rich and nutty, with pockets of molten chocolate that made everyone pause what they were doing.
There is a particular comfort in stirring a bowl together and knowing the payoff will be golden squares to share. I remember tasting one straight from the pan, the edges slightly crisp and the center tender, and deciding that this would be my new go to whenever I needed a reliable crowd pleaser. These bars travel well to potlucks, vanish at school bake sales, and have saved more than one last minute dessert emergency for me. They are unfussy enough for a weeknight treat, yet impressive if company drops by unannounced.
Recipe Snapshot
30 mins
10 mins
20 mins
Medium
200 kcal
American
Gluten-Free, Low FODMAP
Desserts
Saucepan, Mixing bowl, Spatula, 9×13-inch baking pan, Oven
Why We Love This Brown Butter Chocolate Chip Cookie Bars
Buttery Depth Thanks to Browning
I love how browning the butter transforms the whole recipe. The process concentrates nutty, caramel like flavors that a regular melted butter can never match, and it gives the bars a layered richness that keeps you coming back for another square. When I swirl the browned butter into the sugars I can already tell the final bars will have that complex, toasty backbone every decadent cookie bar needs.
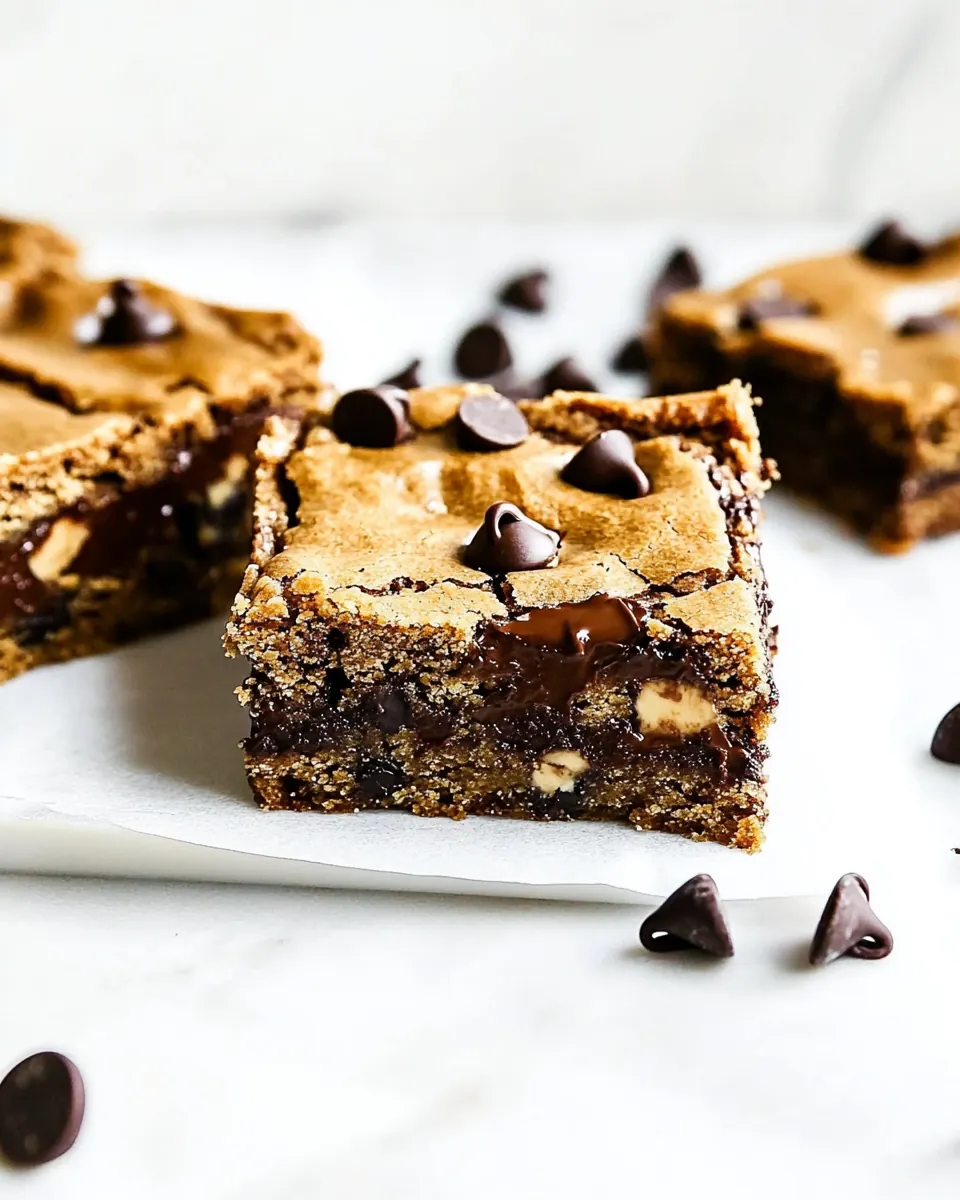
Textural Contrast
The texture here is what makes these bars stand out. The edges crisp up just enough while the center remains tender and slightly gooey, creating a contrast that feels deliberate but simple. I deliberately use a mix of chocolate chunks and chocolate chips so there are pockets of melty chocolate and little bursts of chocolatey structure. Each bite gives you both chew and snap, a combination I find irresistible.
Approachable Technique
Even though browning butter sounds fancy, it is surprisingly straightforward and forgiving. I like that this recipe is achievable for bakers at any level. You do not need special equipment or years of experience, just attention during that short, fragrant moment when the butter foams and turns amber. That simplicity makes these bars my go to when I want an impressive dessert without drama.
Flexible and Crowd Friendly
These bars feed a crowd easily, and they store well for several days, which is perfect for meal prep or parties. I often make a pan the night before, let it rest, and the flavors mellow beautifully. The flaky sea salt on top brightens the sweetness and turns each square into a more complex bite, making it great for sharing or for savoring slowly with coffee.
Kid Approved, Adult Approved
Families tend to reach for these first, and yet adults appreciate the nuanced browned butter flavor. I find they work across ages and occasions, from casual playdates to holiday dessert tables. The balance of brown sugar sweetness and deep butter nuttiness feels nostalgic while still being just a little grown up, which is a rare win in my kitchen.
Ingredients You’ll Need for Brown Butter Chocolate Chip Cookie Bars
These ingredients are straightforward and purposeful. They work together to create a bar with a toasty backbone from the browned butter, tender crumb from the all purpose flour, and melty pockets from both chocolate chunks and chocolate chips. The sugars give chew and depth, while the leaveners and salt ensure the texture and flavor are balanced.
- 1 cup unsalted butter, cut into tablespoon pieces: Melted and browned to develop a nutty, caramelized flavor that deepens the cookie bars; provides rich fat for tenderizing the crumb and improving mouthfeel. Cut into tablespoon pieces to ensure even browning and easier melting during stovetop preparation. Contributes moisture and helps dissolve sugars for a glossy, cohesive batter.
- 1 1/4 cups packed dark brown sugar, can use light: Packed tightly to supply concentrated molasses flavor and extra moisture, enhancing chewiness and a deep caramel note in the bars. Balances sweetness while aiding texture by holding onto moisture during baking. Can be swapped between dark and light without drastically altering structure, though flavor intensity will vary.
- 1/4 cup granulated sugar: Granulated sugar used to add sweetness and to promote spreading and crisp edges through caramelization. Works with brown sugar to balance moisture levels and contribute to the cookie bars' texture. Helps create small air pockets when creamed with butter and eggs for slight lift.
- 2 large eggs: Beaten to incorporate structure, moisture, and richness; eggs provide binding and help leaven the bars by trapping air during mixing. Large eggs contribute additional fat from yolks, improving tenderness and color. Also aids in emulsifying fats and dry ingredients for a smooth batter.
- 1 tablespoon pure vanilla extract: Added for aromatic sweetness and to round out flavor; vanilla enhances and amplifies the chocolate and brown butter notes. Pure extract imparts a clean, natural vanilla character that elevates the overall taste. Stirred into batter to distribute flavor evenly.
- 2 cups all-purpose flour: Provides bulk, structure, and chewiness through gluten development when mixed; all-purpose flour balances tenderness and strength for hold in bar form. Measured to create the desired density without becoming cakey, contributing to overall crumb. Sifted or stirred in to absorb moisture and form the dough.
- 3/4 teaspoon kosher salt: Enhances overall flavor by balancing sweetness and intensifying other ingredients; kosher salt also strengthens gluten slightly and controls yeast or leavening reactions. Measured to avoid over-salting while providing necessary savory contrast. Sprinkled in during mixing to ensure even distribution.
- 1/2 teaspoon baking soda: Acts as a chemical leavener to produce carbon dioxide for lift and slight spread, contributing to an open, tender crumb. Works with baking powder to fine-tune rise and texture, activated by dough moisture and heat. Measured precisely to avoid metallic aftertaste or excessive browning.
- 1/2 teaspoon baking powder: Provides additional leavening and stability for a balanced rise, helping to create a lighter, more tender bar without becoming cake-like. Reacts with acids in other ingredients to produce lift and improve texture. Paired with baking soda to regulate rise and final crumb structure.
- 1 cup chocolate chunks: Adds pockets of melted chocolate with a chunkier, more rustic texture, delivering intense chocolate flavor and varied melt. Chunks create larger, gooey moments and contrast against the chewier bar matrix. Folded in near the end to prevent sinking and preserve shape.
- 1 cup chocolate chips: Supplies consistent, smaller pockets of chocolate for even distribution and classic chip texture throughout the bars. Chocolate chips help maintain defined pockets of chocolate after baking and contribute sweetness and texture. Combined with chocolate chunks for both uniformity and bold bites.
- Flaky sea salt, for sprinkling on bars: Sprinkled on top for finishing touch that enhances texture and flavor by providing a bright, briny contrast to the sweet, buttery bars. Flaky variety adds visual appeal and a delicate crunch without dissolving into the surface. Applied after baking to retain flakiness and maximize impact.
Cooking Instructions for Brown Butter Chocolate Chip Cookie Bars
These steps are simple but deserve attention. I like to move deliberately, especially while browning the butter, since that moment defines the flavor. Below I expand each step so you can rely on sensory cues and avoid common pitfalls.
- Preheat oven to 350 degrees F. Grease a 9×13-inch metal baking pan with nonstick cooking spray. You can line the pan with parchment paper, if desired. Set aside.: The kitchen should smell neutral, with the oven warming evenly and the pan ready to accept batter. Make sure the oven reaches a steady heat before baking, since inconsistent temperature can cause uneven coloring and set. A metal pan promotes crisp edges; lining with parchment helps you lift the bars out for neat slicing. A common mistake is not preheating long enough, which leads to underdone centers while the edges overbake. Check that your oven reads correctly by confirming the temperature if you notice unusual browning patterns.
- Place the butter in a medium saucepan and melt over medium heat, stirring often, until it foams, smells nutty, and browns. This will take about 5 minutes. Scrape the browned butter into a large mixing bowl and let cool for 5 minutes.: Listen for a gentle sizzling that turns into tiny popping as moisture leaves the butter . Visually, the butter will foam, then the foam subsides and amber flecks form at the bottom. The aroma shifts from creamy to toasty and almost hazelnut like. Scrape it promptly to stop browning; residual heat can quickly change to burnt. Letting it cool a touch prevents scrambling the eggs in the next step. If you skip constant stirring, you risk burning the milk solids, producing a bitter flavor that ruins the whole batch.
- Add the brown sugar and granulated sugar to the brown butter and stir with a wooden spoon or spatula until smooth. Add the eggs and vanilla. Stir until combined.: When you mix the sugars into the warm butter , you should feel a silky, slightly thickened paste that glistens under the light. Adding the eggs and vanilla creates a glossy, cohesive batter that carries a deep, caramel like scent. The mixture should be smooth and homogenous, without streaks of dry sugar. Work gently to avoid whipping in air that could alter the texture. If you pour still very hot butter over the eggs , they can scramble, creating lumps and an off texture.
- Add the flour, salt, baking soda, and baking powder. Stir until just combined, don’t over mix.: At this stage, the batter will thicken into a dense, spreadable dough with a matte finish as the flour is incorporated. Fold carefully until you no longer see pockets of dry flour , stopping before it becomes elastic. Overmixing develops gluten, which can produce tough, cake like bars rather than tender ones. You should be able to press a finger gently on the dough and see it hold shape without springing back too much. If you find visible streaks of flour after several folds, mix slowly until they disappear, but refrain from vigorous stirring.
- Stir in the chocolate chunks and chocolate chips.: When the chocolate chunks and chocolate chips hit the dough, you will notice the texture become studded and inviting, with dark specks throughout. The dough should be evenly distributed with chocolate so each bite has both gooey and structured chocolate. Use a gentle folding motion to keep the dough tender while ensuring even distribution. A common error is adding too many mix ins which can prevent the bars from setting uniformly in the center; keep the ratio balanced as stated.
- Spread the dough evenly in the prepared pan with a spatula. Bake for 18 to 24 minutes or until the bars are set and golden brown. Don’t over bake the bars will continue setting up as they cool.: As the pan goes into the oven the kitchen fills with toasted sugar and butter aromas. Watch the edges as the best visual cue, they should turn a warm golden brown while the center appears set yet slightly shiny. A toothpick inserted near the center should come out with a few moist crumbs but not raw dough. Remove when edges are golden and the center no longer wobbles significantly. Overbaking leads to dry, crumbly bars, so err on the earlier side if unsure; carryover heat will finish the set.
- Remove from the oven and sprinkle with flaky sea salt. Let the bars cool before cutting into squares.: Once out of the oven, the surface will settle and emit a deep, caramelized scent. The flaky sea salt will add delicate shards of crunch and bright bursts that contrast with the sweet, nutty base. Cooling is essential to achieve clean slices, as the center firms up and chocolate pockets set. Cutting too soon results in messy squares that do not hold their shape. If you find the bars still too soft after cooling, chill briefly to help with clean slicing.
Ways to Customize
These customization ideas help you make the bars your own while keeping the core technique intact. Below are practical, detailed tips to tweak texture, chocolate intensity, and finishing touches.
- Swap chocolate ratios: Try increasing the amount of chocolate chunks if you want bigger molten pockets, or add more chocolate chips for uniform chocolate distribution across the squares.
- Adjust sweetness: If you prefer less sweetness, reduce the granulated sugar by a tablespoon or swap part of the dark brown sugar for light brown sugar to soften the molasses note.
- Pan options: Use a glass 9×13 inch pan for slightly slower browning and a tenderer edge, or a metal pan for crispier borders and quicker bake time.
- Salt finish: Sprinkle flaky sea salt lightly for contrast, or omit if you prefer an uninterrupted sweet profile, keeping in mind that the salt elevates flavors.
- Chocolate quality: Choose a higher percentage chocolate for deeper cocoa notes, or milk chocolate for a sweeter, creamier result. The choice affects intensity and mouthfeel.
How to Serve Brown Butter Chocolate Chip Cookie Bars
These bars are versatile and easy to serve for many occasions. Whether you are hosting a casual gathering or need a make ahead dessert, these servings ideas will help you present them beautifully.
- Casual dessert: Serve warm squares on a simple plate with a napkin for quick grabbing at coffee gatherings or after school snacks.
- Party platter: Arrange cooled squares on a large platter with a light dusting of cocoa or extra flaky sea salt for visual appeal at potlucks and holiday spreads.
- Gift giving: Stack cooled bars in parchment lined boxes and tie with twine for homemade edible gifts that travel well and stay moist for days.
- Pairings: Offer with a side of brewed coffee or a sturdy black tea to balance the sugar and highlight the nutty butter notes.
- Storage: Store cooled bars in an airtight container at room temperature for up to three days, or freeze for up to one month for longer keeping. Thaw gently before serving.
- Occasions: Perfect for bake sales, school events, casual dinners, Ramadan if served after iftar as a sweet treat, or anytime you want a comforting, sharable dessert.
FAQ
Conclusion
These Brown Butter Chocolate Chip Cookie Bars stand out because the browned butter gives them a toasted, caramel like depth that turns a simple tray bake into something memorable. Give them a try when you want an easy dessert that still feels special, whether for a casual afternoon treat or a party centerpiece. I encourage you to follow the sensory cues while browning the butter and to resist overbaking so the centers remain tender and the edges crisp. Share a pan with friends, and notice how the salty finishing touch makes each bite sing. Enjoy the process as much as the results, and let this recipe become one of your dependable favorites.
Brown Butter Chocolate Chip Cookie Bars
Equipment
- Saucepan
- Mixing Bowl
- Spatula
- 9x13-inch Baking Pan
- Oven
Ingredients
- 1 cup unsalted butter, cut into tablespoon pieces Melted and browned to develop a nutty, caramelized flavor that deepens the cookie bars; provides rich fat for tenderizing the crumb and improving mouthfeel. Cut into tablespoon pieces to ensure even browning and easier melting during stovetop preparation. Contributes moisture and helps dissolve sugars for a glossy, cohesive batter.
- 1 1/4 cups packed dark brown sugar, can use light Packed tightly to supply concentrated molasses flavor and extra moisture, enhancing chewiness and a deep caramel note in the bars. Balances sweetness while aiding texture by holding onto moisture during baking. Can be swapped between dark and light without drastically altering structure, though flavor intensity will vary.
- 1/4 cup granulated sugar Granulated sugar used to add sweetness and to promote spreading and crisp edges through caramelization. Works with brown sugar to balance moisture levels and contribute to the cookie bars' texture. Helps create small air pockets when creamed with butter and eggs for slight lift.
- 2 large eggs Beaten to incorporate structure, moisture, and richness; eggs provide binding and help leaven the bars by trapping air during mixing. Large eggs contribute additional fat from yolks, improving tenderness and color. Also aids in emulsifying fats and dry ingredients for a smooth batter.
- 1 tablespoon pure vanilla extract Added for aromatic sweetness and to round out flavor; vanilla enhances and amplifies the chocolate and brown butter notes. Pure extract imparts a clean, natural vanilla character that elevates the overall taste. Stirred into batter to distribute flavor evenly.
- 2 cups all-purpose flour Provides bulk, structure, and chewiness through gluten development when mixed; all-purpose flour balances tenderness and strength for hold in bar form. Measured to create the desired density without becoming cakey, contributing to overall crumb. Sifted or stirred in to absorb moisture and form the dough.
- 3/4 teaspoon kosher salt Enhances overall flavor by balancing sweetness and intensifying other ingredients; kosher salt also strengthens gluten slightly and controls yeast or leavening reactions. Measured to avoid over-salting while providing necessary savory contrast. Sprinkled in during mixing to ensure even distribution.
- 1/2 teaspoon baking soda Acts as a chemical leavener to produce carbon dioxide for lift and slight spread, contributing to an open, tender crumb. Works with baking powder to fine-tune rise and texture, activated by dough moisture and heat. Measured precisely to avoid metallic aftertaste or excessive browning.
- 1/2 teaspoon baking powder Provides additional leavening and stability for a balanced rise, helping to create a lighter, more tender bar without becoming cake-like. Reacts with acids in other ingredients to produce lift and improve texture. Paired with baking soda to regulate rise and final crumb structure.
- 1 cup chocolate chunks Adds pockets of melted chocolate with a chunkier, more rustic texture, delivering intense chocolate flavor and varied melt. Chunks create larger, gooey moments and contrast against the chewier bar matrix. Folded in near the end to prevent sinking and preserve shape.
- 1 cup chocolate chips Supplies consistent, smaller pockets of chocolate for even distribution and classic chip texture throughout the bars. Chocolate chips help maintain defined pockets of chocolate after baking and contribute sweetness and texture. Combined with chocolate chunks for both uniformity and bold bites.
- Flaky sea salt, for sprinkling on bars Sprinkled on top for finishing touch that enhances texture and flavor by providing a bright, briny contrast to the sweet, buttery bars. Flaky variety adds visual appeal and a delicate crunch without dissolving into the surface. Applied after baking to retain flakiness and maximize impact.
Instructions
- Preheat oven to 350 degrees F. Grease a 9×13-inch metal baking pan with nonstick cooking spray. You can line the pan with parchment paper, if desired. Set aside.: The kitchen should smell neutral, with the oven warming evenly and the pan ready to accept batter. Make sure the oven reaches a steady heat before baking, since inconsistent temperature can cause uneven coloring and set. A metal pan promotes crisp edges; lining with parchment helps you lift the bars out for neat slicing. A common mistake is not preheating long enough, which leads to underdone centers while the edges overbake. Check that your oven reads correctly by confirming the temperature if you notice unusual browning patterns.
- Place the butter in a medium saucepan and melt over medium heat, stirring often, until it foams, smells nutty, and browns. This will take about 5 minutes. Scrape the browned butter into a large mixing bowl and let cool for 5 minutes.: Listen for a gentle sizzling that turns into tiny popping as moisture leaves the butter . Visually, the butter will foam, then the foam subsides and amber flecks form at the bottom. The aroma shifts from creamy to toasty and almost hazelnut like. Scrape it promptly to stop browning; residual heat can quickly change to burnt. Letting it cool a touch prevents scrambling the eggs in the next step. If you skip constant stirring, you risk burning the milk solids, producing a bitter flavor that ruins the whole batch.
- Add the brown sugar and granulated sugar to the brown butter and stir with a wooden spoon or spatula until smooth. Add the eggs and vanilla. Stir until combined.: When you mix the sugars into the warm butter , you should feel a silky, slightly thickened paste that glistens under the light. Adding the eggs and vanilla creates a glossy, cohesive batter that carries a deep, caramel like scent. The mixture should be smooth and homogenous, without streaks of dry sugar. Work gently to avoid whipping in air that could alter the texture. If you pour still very hot butter over the eggs , they can scramble, creating lumps and an off texture.
- Add the flour, salt, baking soda, and baking powder. Stir until just combined, don’t over mix.: At this stage, the batter will thicken into a dense, spreadable dough with a matte finish as the flour is incorporated. Fold carefully until you no longer see pockets of dry flour , stopping before it becomes elastic. Overmixing develops gluten, which can produce tough, cake like bars rather than tender ones. You should be able to press a finger gently on the dough and see it hold shape without springing back too much. If you find visible streaks of flour after several folds, mix slowly until they disappear, but refrain from vigorous stirring.
- Stir in the chocolate chunks and chocolate chips.: When the chocolate chunks and chocolate chips hit the dough, you will notice the texture become studded and inviting, with dark specks throughout. The dough should be evenly distributed with chocolate so each bite has both gooey and structured chocolate. Use a gentle folding motion to keep the dough tender while ensuring even distribution. A common error is adding too many mix ins which can prevent the bars from setting uniformly in the center; keep the ratio balanced as stated.
- Spread the dough evenly in the prepared pan with a spatula. Bake for 18 to 24 minutes or until the bars are set and golden brown. Don’t over bake the bars will continue setting up as they cool.: As the pan goes into the oven the kitchen fills with toasted sugar and butter aromas. Watch the edges as the best visual cue, they should turn a warm golden brown while the center appears set yet slightly shiny. A toothpick inserted near the center should come out with a few moist crumbs but not raw dough. Remove when edges are golden and the center no longer wobbles significantly. Overbaking leads to dry, crumbly bars, so err on the earlier side if unsure; carryover heat will finish the set.
- Remove from the oven and sprinkle with flaky sea salt. Let the bars cool before cutting into squares.: Once out of the oven, the surface will settle and emit a deep, caramelized scent. The flaky sea salt will add delicate shards of crunch and bright bursts that contrast with the sweet, nutty base. Cooling is essential to achieve clean slices, as the center firms up and chocolate pockets set. Cutting too soon results in messy squares that do not hold their shape. If you find the bars still too soft after cooling, chill briefly to help with clean slicing.
Notes
- Swap chocolate ratios: Try increasing the amount of chocolate chunks if you want bigger molten pockets, or add more chocolate chips for uniform chocolate distribution across the squares.
- Adjust sweetness: If you prefer less sweetness, reduce the granulated sugar by a tablespoon or swap part of the dark brown sugar for light brown sugar to soften the molasses note.
- Pan options: Use a glass 9×13 inch pan for slightly slower browning and a tenderer edge, or a metal pan for crispier borders and quicker bake time.
- Salt finish: Sprinkle flaky sea salt lightly for contrast, or omit if you prefer an uninterrupted sweet profile, keeping in mind that the salt elevates flavors.
- Chocolate quality: Choose a higher percentage chocolate for deeper cocoa notes, or milk chocolate for a sweeter, creamier result. The choice affects intensity and mouthfeel.