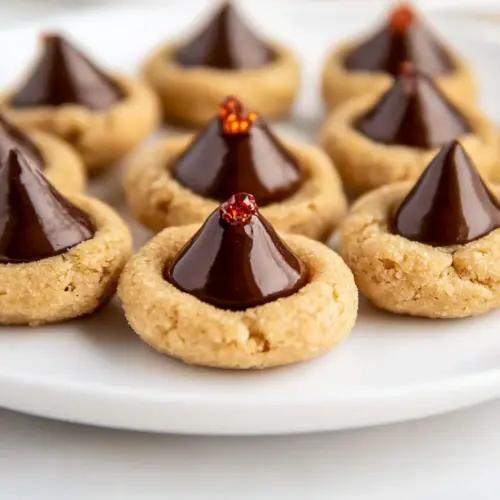
Peanut Butter Blossoms
Peanut Butter Blossoms have been my comfort-cookie of choice since I first tasted one at a neighborhood bake sale, a tiny bundle of nostalgia wrapped in shiny foil. The first sentence you read about these cookies is true for me, they are equal parts childhood memory and simple weekday joy. I still remember standing on tiptoe at the table, fingers dusted with sugar, and that satisfying little crack as a warm chocolate kissed the soft cookie top. Over the years I tweaked measurements and techniques until the balance of tender cookie and melty chocolate felt effortless.
When I bake Peanut Butter Blossoms for friends, the room changes subtly, conversations slow, and people reach instinctively for seconds. I love that they travel well, whether on a holiday platter or tucked into a lunchbox. Baking them has become my ritual for wrapping up busy weeks, a small way to celebrate the ordinary. I enjoy the tactile rhythm of rolling dough into balls, the way the sugar coating catches the light, and the final, theatrical moment of pressing the unwrapped chocolate into warm dough.
Recipe Snapshot
45 mins
20 mins
25 mins
Medium
120 kcal
American
Gluten-Free, Low FODMAP
Desserts
Stand mixer, Paddle attachment, Mixing bowls, Baking sheets, Parchment paper or silicone baking mats, Wire rack
The Appeal of This Peanut Butter Blossoms
A timeless flavor combo
I adore how Peanut Butter Blossoms pair creamy peanut butter with a glossy chocolate top, creating that classic contrast I crave. The cookie itself is tender with a slightly chewy center, while the chocolate provides a snap and a richer note. I find this interplay keeps every bite interesting, so you never get bored.
Perfect for gifting and gatherings
I’ve brought these cookies to countless events, and they vanish first. They’re portable, hold up at room temperature, and look festive with the wrapped chocolates. When I’m assembling a holiday box, I always include a few of these because they signal care without fuss.
Simple technique, big payoff
What I appreciate most is how approachable the method is. With basic tools and straightforward steps, you can produce bakery quality cookies. I often tell friends that a small detail, like chilling dough briefly if it feels sticky, elevates the texture dramatically.
Flexible but reliable
Over time, I learned small tweaks matter. Rolling the dough in sugar creates a pretty exterior and a tiny crunch that contrasts the soft crumb. Unwrapping chocolates right as the cookies come out traps warmth and melts them just enough to set with a glossy finish.
Everyday nostalgia
To me, these treats are comfort food that doesn’t require special occasion timing. I make them when I need a pick me up, and they always feel like a tiny celebration. They’re proof that familiar ingredients can create something memorable.
Everything You Need for Peanut Butter Blossoms
These ingredients combine for a cookie that is tender yet slightly chewy, sweet but nutty, and perfectly balanced with a chocolate accent. The key players are the all purpose flour for structure, peanut butter for flavor and fat, and granulated sugar for sweetness and texture. Each item plays a role in the cookie chemistry, so I stick to them and respect small technique points.
- 1 1/2 cup (212 g) all-purpose flour: Provides structure and body to the cookies by forming the gluten network when mixed with liquids; sift or whisk before measuring for even texture and to prevent lumps. Adds tenderness when combined with fats and sugars, and balances moisture for a soft, cakey crumb typical of classic blossoms.
- 3/4 tsp baking soda: Leavens the dough by producing carbon dioxide when reacting with acidic components and heat, helping cookies spread and puff slightly; measure precisely to avoid off flavors. Promotes lightness and a delicate texture without making the cookies cakey when used in the small amount specified.
- 1/4 tsp salt: Balances and enhances overall flavor while controlling fermentation and chemical reactions; contributes to seasoning that heightens sweetness and cuts richness. Helps regulate the browning process so the cookies develop an appealing color without becoming overly sweet.
- 1/2 cup (113 g) unsalted butter, softened but still slightly firm: Adds rich flavor, moisture, and tenderness while coating flour proteins to limit gluten formation for a soft cookie; ensure butter is softened but slightly firm for proper creaming with sugars. Contributes to mouthfeel and helps distribute fat-soluble flavor compounds like vanilla and peanut butter evenly throughout the dough.
- 1/2 cup granulated sugar: Provides bulk sweetness and contributes to cookie spread and caramelization through simple sugars; granulated sugar also helps create a slightly crisper exterior. Helps with creaming to incorporate air when beaten with butter, improving texture and lift in the finished cookie.
- 1/2 cup packed light-brown sugar: Supplies deep, caramel-like sweetness and moisture due to molasses content, enhancing chewiness and richer flavor complexity; pack firmly when measuring for accuracy. Interacts with granulated sugar in the creaming process to yield a tender, slightly chewy cookie with a hint of toffee.
- 2/3 cup (165 g) creamy peanut butter: Delivers the primary nutty flavor and creamy texture central to the cookie concept while adding fat and moisture; use smooth peanut butter for consistent distribution. Binds ingredients, contributes to richness, and reinforces the classic peanut-chocolate pairing when topped with kisses.
- 1 large egg: Provides structure, moisture, and richness while acting as a binder to hold the dough together; beat until just combined to avoid overworking the gluten. Adds lift from the trapped air when whipped, and helps create a tender interior with a pleasing chew.
- 1 tsp vanilla extract: Adds aromatic sweetness and depth, complementing both peanut butter and chocolate; use pure vanilla extract for the best flavor clarity. Enhances overall flavor complexity by rounding out sharp sugar notes and supporting the cookie's buttery and nutty characteristics.
- 1/3 cup (70 g) granulated sugar or cane sugar: Creates an outer coating that gives added crunch and sparkle to the cookie exterior and contrasts with the soft interior; use for rolling dough balls prior to baking. Helps control spreading slightly by providing a sugar barrier, and produces a visually attractive finish for the classic blossom look.
- 36 Hershey's Kisses milk chocolates: Provides the chocolate centerpiece that melts slightly when placed on hot cookies, offering a rich milk chocolate finish and classic appearance; unwrap individually before using. Acts as a contrasting flavor and texture element, sealing with the warm cookie to form the signature blossom top.
Cooking Instructions for Peanut Butter Blossoms
Baking these cookies is a comforting routine I turn to whenever I want a reliable treat. The steps are straightforward, but attention to small details makes a big difference in texture and appearance. Below, I expand each direction with sensory cues, reasoning, and troubleshooting so your cookies come out beautifully every time.
- Preheat oven to 375 degrees. Line baking sheets with parchment paper or silicone baking mats.: You will notice a warm oven smell as it comes to temperature, a small sign that the kitchen is ready. Preheating ensures the cookies begin baking immediately, helping edges set while centers remain soft. Lining the sheets prevents sticking and promotes even browning, and the mats or paper make clean up easier. A common mistake is skipping preheating, which causes uneven spread and denser centers, so give the oven time to reach the right heat before you slide trays in.
- In a small mixing bowl whisk together flour, baking soda and salt for 20 seconds, set aside.: As you whisk, the dry mix takes on a uniform, pale tone and a faint flour dust aroma. Sifting or whisking distributes the baking soda so every bite rises consistently. This step prevents clumps that can create uneven texture. Watch out for over mixing later on, but for now focus on an even blend; skipping this can leave pockets of leavening that create small tunnels in the crumb.
- In the bowl of an electric stand mixer fitted with the paddle attachment cream together butter, 1/2 cup granulated sugar and brown sugar until combined.: The creaming stage should smell slightly sweet and buttery, and the mixture will lighten in color and become fluffy, which traps air for tenderness. Cream on medium speed until you see a pale, airy texture, scraping the bowl once so everything blends. If you under cream, the cookies may be dense; over creaming can introduce too much air, making them spread oddly, so stop when fluffy and homogeneous.
- Mix in peanut butter then blend in egg and vanilla. Add in flour mixture and mix until combined. If dough seems too wet you can chill for a bit if needed – though I never need to.: When you add the peanut butter , the mix turns glossy and fragrant, a deep nutty aroma filling the bowl. The egg and vanilla smooth the dough, giving it elasticity. Incorporating the dry mix should yield a cohesive dough that holds shape. If it feels tacky, a short chill firms it and makes rolling easier, but avoid over chilling which can stiffen fats and reduce spread. A common misstep is adding extra flour if sticky, which dries the cookies out; prefer chilling instead.
- Scoop dough out 1 even tablespoon at a time and shape into balls. Place 1/3 cup sugar in a bowl then roll balls into sugar to coat.: Rolling the dough by hand warms it slightly, creating a soft surface that the sugar clings to, creating a pretty shimmer. The tactile feel should be smooth and slightly tacky. The sugar coating gives a subtle crunch and gleam after baking. If your dough sticks to your fingers, lightly wet them or chill the dough briefly; forcing oily dough into tight balls can compress air pockets and yield denser cookies.
- Transfer to baking sheets spacing cookies 1 1/2-inches apart. Bake one sheet at a time in preheated oven 7 – 9 minutes until nearly set.: Arrange the cookies with space to spread and watch for visual cues, the edges should start to set while the centers remain slightly soft and matte. The oven noise is minimal, but you may hear a faint pop as moisture escapes. Baking one sheet at a time ensures consistent heat and even results, since crowded racks affect airflow. A frequent error is overbaking; remove when centers are just set so the cookies stay tender once cooled.
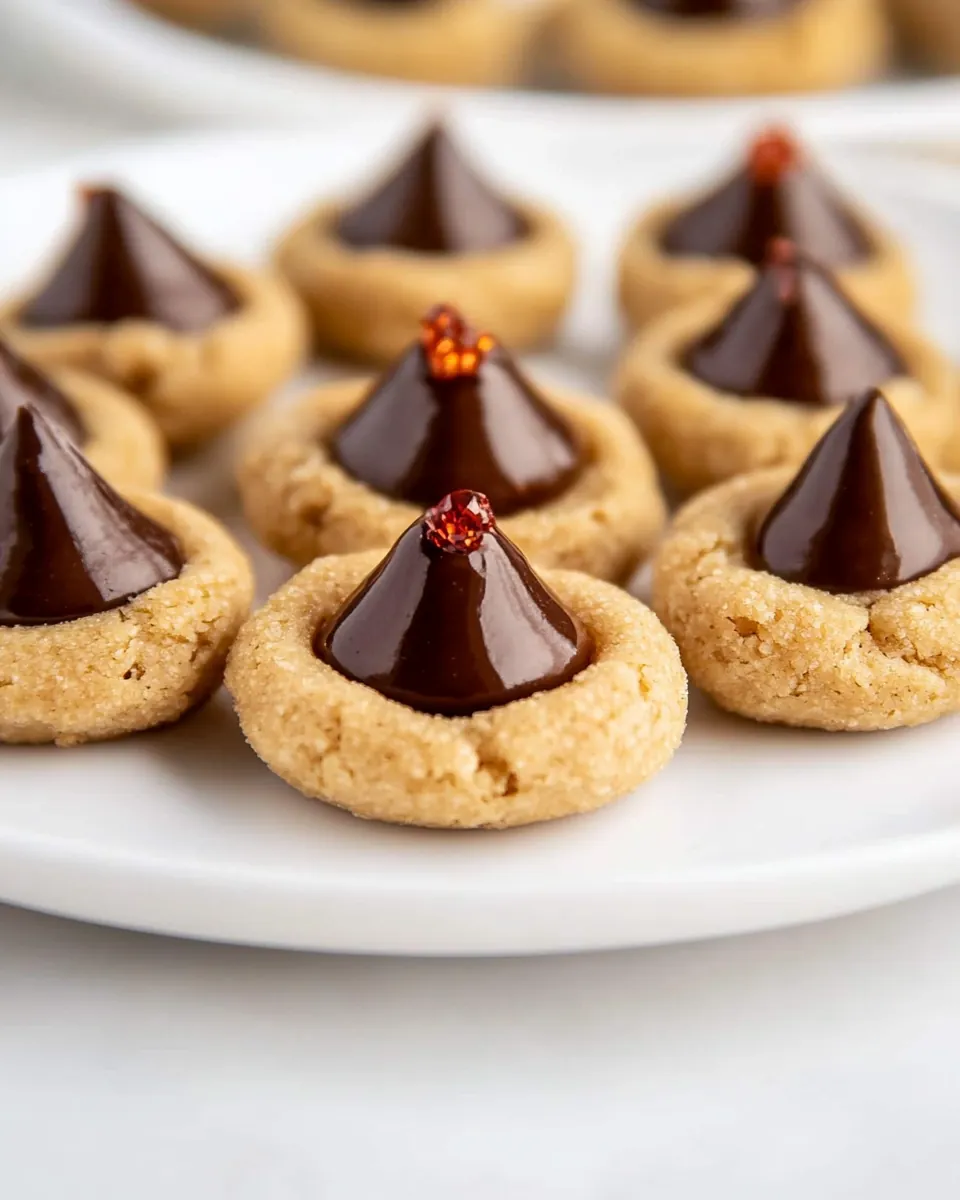
- Meanwhile unwrap chocolates. Immediately after removing cookies from oven gently press one chocolate into each cookie.: The moment you press a chocolate into a hot cookie the aroma of warm sugar and chocolate lifts, and the chocolate sinks slightly into the warm surface. Press gently until it rests in the slight depression, creating a neat blossom top. Pressing too hard can flatten the cookie or cause the chocolate to sink through, so be gentle. If the chocolate resists melting, return cookies to the warm oven for a few seconds, but watch closely.
- Transfer to a wire rack and transfer to fridge or freezer for a 5 – 10 minutes to let the chocolate set. Store cookies in an airtight container at room temperature.: Cooling on a wire rack allows air to circulate, avoiding soggy bottoms, while the cold sets the chocolate quickly, producing a glossy finish. The set chocolate should hold shape but remain slightly soft when bitten. Leaving them too long in the fridge can dull flavors, so the short chill is ideal. For storage, a sealed container preserves texture, but stacking while warm can cause sticking, so cool fully first.
- Random side note, if you've had an issue with the Kiss coming off you can add a small dab of peanut butter to the Kiss before pressing them on.: This little trick creates an adhesive layer that helps the chocolate adhere, and it deepens the nutty note as well. The dab should be small so it does not ooze out, but enough to tack the chocolate in place. If you skip it and find chocolates sliding off, the dab can rescue presentation and function. Be careful not to add too much, which may create greasy spots that affect texture.
- Recipe source: inspired by NYT and others: inspired by NYT and others : A quick note on provenance gives context to the technique and flavor choices, showing this version draws from trusted recipes and personal tweaks. Knowing the inspiration reassures you this method has history and reliability. When adapting, retain the core proportions that yield texture you like. Avoid changing multiple components at once, which makes troubleshooting difficult.
How to Switch It Up
I like to offer small variations that keep the spirit of Peanut Butter Blossoms while letting you personalize them. Below are practical tips and ideas, each starting with a bold lead and expanded so you can adapt confidently.
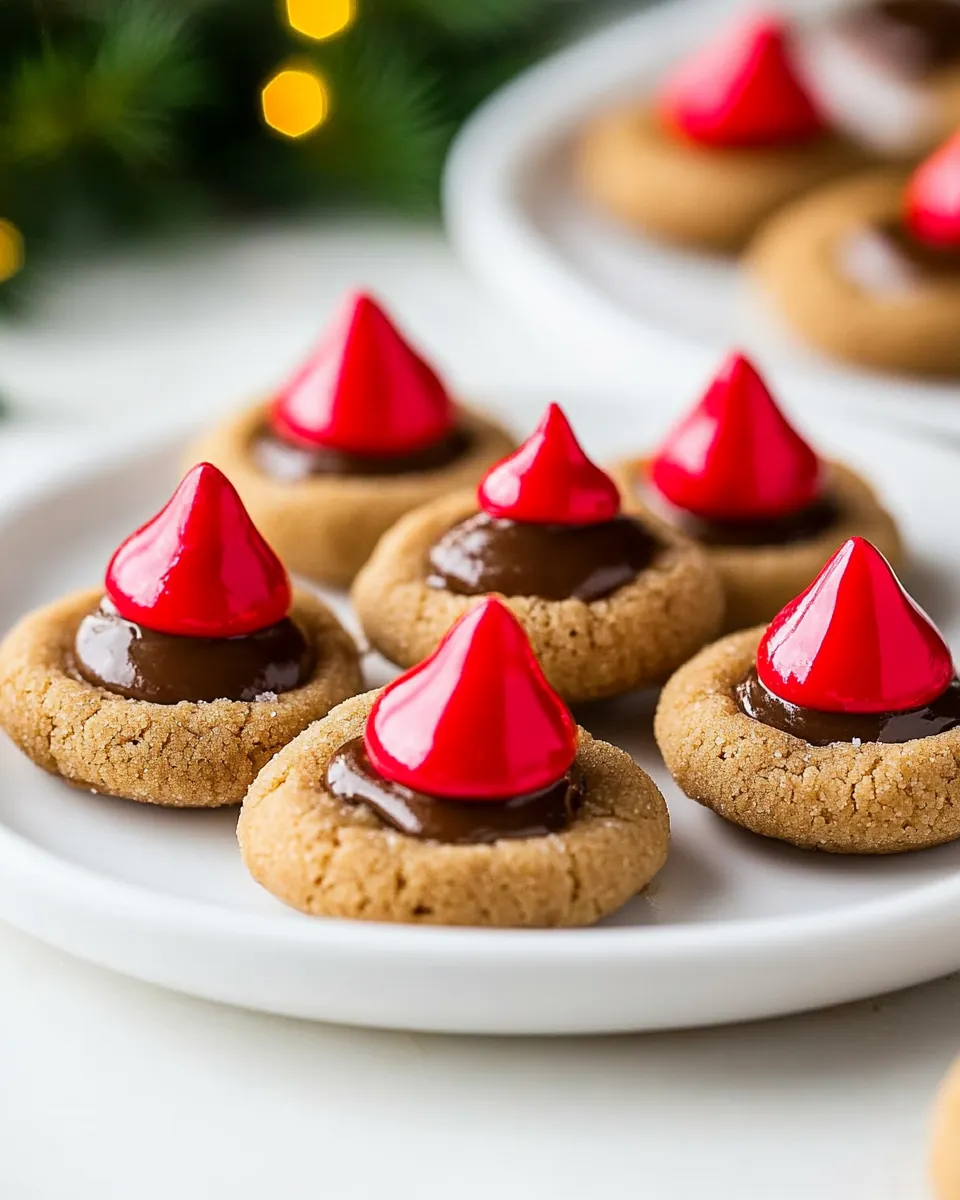
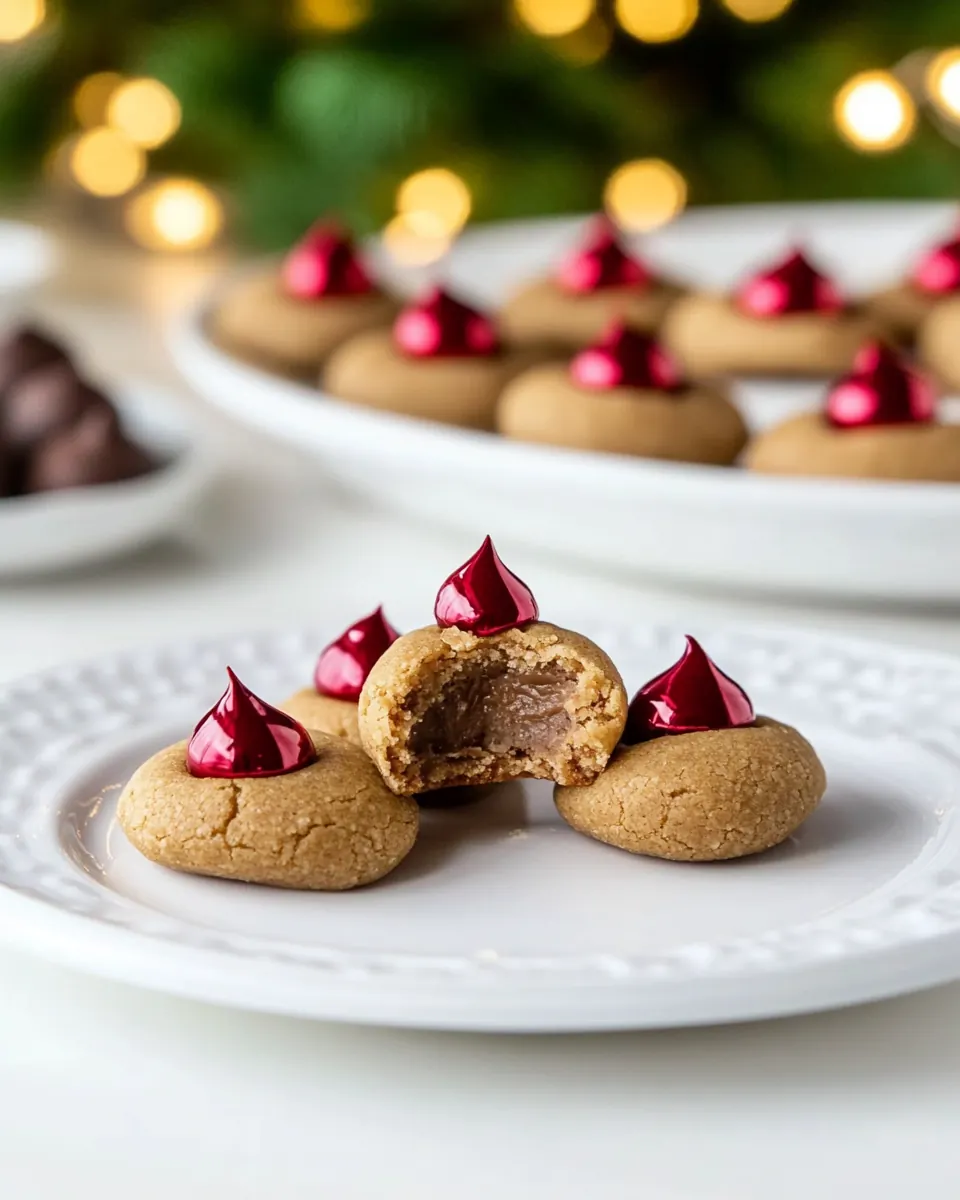
- Change the chocolate Swap Hershey‘s Kisses for a darker or flavored chocolate to deepen the flavor. Try a dark chocolate kiss for more bittersweet contrast or a filled chocolate for a surprise center. Keep the pressing timing the same so the chocolate softens but does not fully melt through.
- Adjust sugar coating Use cane sugar or coarse sugar for larger crystals that catch the light. The texture becomes more pronounced and the surface looks more decorative. Be mindful that larger crystals create a crunchier exterior.
- Control chewiness Increase brown sugar slightly for a chewier center, as brown sugar retains more moisture. This small swap affects texture significantly so adjust in small increments and note results for future batches.
- Chill for neater shapes Refrigerate dough for 20 to 30 minutes if the dough is too soft to roll cleanly. Chilling firms fats and prevents excessive spread so the cookies keep a round silhouette.
- Make them ahead Freeze shaped dough balls on a tray, then transfer to a bag. Bake from frozen, adding a minute or two to the bake time, for fresh cookies on demand without extra prep time.
Side Dish Ideas for Peanut Butter Blossoms
These cookies pair well with casual gatherings and festive occasions. Below I outline serving suggestions, pairing ideas, and storage tips so you can present them beautifully and keep them tasting fresh. Use the bolded phrases for quick guidance at a glance.
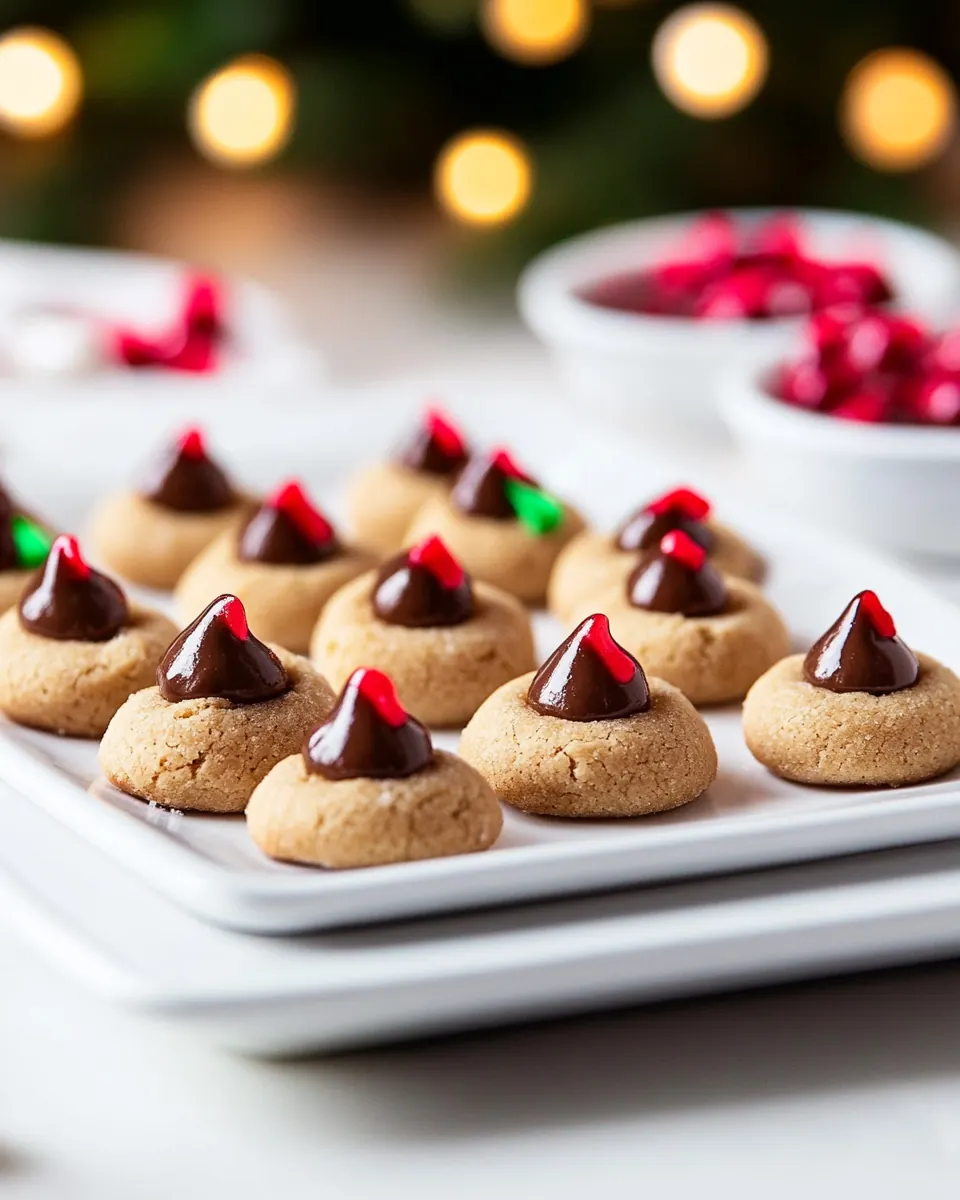
- Holiday cookie platters Arrange Peanut Butter Blossoms with other small cookies for a colorful platter. They provide a sweet, nutty counterpoint to spiced cookies and citrusy confections, making the selection more balanced and appealing for parties.
- Lunchbox treats Pack one or two in a small container for a special lunch surprise. Their sturdy texture travels well and they remain enjoyable without refrigeration for a day when stored in an airtight container.
- After dinner sweet Serve a plate of warm Peanut Butter Blossoms with a simple coffee or tea. The warm chocolate pairs nicely with a hot beverage, creating a cozy end to an evening meal.
- Storage guidance Keep cookies in an airtight container at room temperature for up to four days. For longer keeping, freeze in a single layer, then stack with parchment between layers to prevent sticking.
- Seasonal gifting Package in small tins with parchment for holiday gifting. The wrapped chocolates make them instantly festive and the cookies hold their shape well for transport and presentation.
FAQ
Conclusion
These cookies shine because they combine a tender, nut forward cookie with a glossy chocolate crown, resulting in unmistakable nostalgia and dependable crowd appeal. Give Peanut Butter Blossoms a try to enjoy an easy, satisfying bake that comes together with simple ingredients and small techniques that yield big flavor. Once you make them, you’ll likely find yourself reaching for this recipe whenever you want a sweet treat that looks festive and tastes like a warm memory.
Peanut Butter Blossoms
Equipment
- Stand mixer
- Paddle attachment
- Mixing Bowls
- Baking Sheets
- Parchment paper or silicone baking mats
- Wire Rack
Ingredients
- 1 1/2 cup (212 g) all-purpose flour Provides structure and body to the cookies by forming the gluten network when mixed with liquids; sift or whisk before measuring for even texture and to prevent lumps. Adds tenderness when combined with fats and sugars, and balances moisture for a soft, cakey crumb typical of classic blossoms.
- 3/4 tsp baking soda Leavens the dough by producing carbon dioxide when reacting with acidic components and heat, helping cookies spread and puff slightly; measure precisely to avoid off flavors. Promotes lightness and a delicate texture without making the cookies cakey when used in the small amount specified.
- 1/4 tsp salt Balances and enhances overall flavor while controlling fermentation and chemical reactions; contributes to seasoning that heightens sweetness and cuts richness. Helps regulate the browning process so the cookies develop an appealing color without becoming overly sweet.
- 1/2 cup (113 g) unsalted butter, softened but still slightly firm Adds rich flavor, moisture, and tenderness while coating flour proteins to limit gluten formation for a soft cookie; ensure butter is softened but slightly firm for proper creaming with sugars. Contributes to mouthfeel and helps distribute fat-soluble flavor compounds like vanilla and peanut butter evenly throughout the dough.
- 1/2 cup granulated sugar Provides bulk sweetness and contributes to cookie spread and caramelization through simple sugars; granulated sugar also helps create a slightly crisper exterior. Helps with creaming to incorporate air when beaten with butter, improving texture and lift in the finished cookie.
- 1/2 cup packed light-brown sugar Supplies deep, caramel-like sweetness and moisture due to molasses content, enhancing chewiness and richer flavor complexity; pack firmly when measuring for accuracy. Interacts with granulated sugar in the creaming process to yield a tender, slightly chewy cookie with a hint of toffee.
- 2/3 cup (165 g) creamy peanut butter Delivers the primary nutty flavor and creamy texture central to the cookie concept while adding fat and moisture; use smooth peanut butter for consistent distribution. Binds ingredients, contributes to richness, and reinforces the classic peanut-chocolate pairing when topped with kisses.
- 1 large egg Provides structure, moisture, and richness while acting as a binder to hold the dough together; beat until just combined to avoid overworking the gluten. Adds lift from the trapped air when whipped, and helps create a tender interior with a pleasing chew.
- 1 tsp vanilla extract Adds aromatic sweetness and depth, complementing both peanut butter and chocolate; use pure vanilla extract for the best flavor clarity. Enhances overall flavor complexity by rounding out sharp sugar notes and supporting the cookie's buttery and nutty characteristics.
- 1/3 cup (70 g) granulated sugar or cane sugar Creates an outer coating that gives added crunch and sparkle to the cookie exterior and contrasts with the soft interior; use for rolling dough balls prior to baking. Helps control spreading slightly by providing a sugar barrier, and produces a visually attractive finish for the classic blossom look.
- 36 Hershey's Kisses milk chocolates Provides the chocolate centerpiece that melts slightly when placed on hot cookies, offering a rich milk chocolate finish and classic appearance; unwrap individually before using. Acts as a contrasting flavor and texture element, sealing with the warm cookie to form the signature blossom top.
Instructions
- Preheat oven to 375 degrees. Line baking sheets with parchment paper or silicone baking mats.: You will notice a warm oven smell as it comes to temperature, a small sign that the kitchen is ready. Preheating ensures the cookies begin baking immediately, helping edges set while centers remain soft. Lining the sheets prevents sticking and promotes even browning, and the mats or paper make clean up easier. A common mistake is skipping preheating, which causes uneven spread and denser centers, so give the oven time to reach the right heat before you slide trays in.
- In a small mixing bowl whisk together flour, baking soda and salt for 20 seconds, set aside.: As you whisk, the dry mix takes on a uniform, pale tone and a faint flour dust aroma. Sifting or whisking distributes the baking soda so every bite rises consistently. This step prevents clumps that can create uneven texture. Watch out for over mixing later on, but for now focus on an even blend; skipping this can leave pockets of leavening that create small tunnels in the crumb.
- In the bowl of an electric stand mixer fitted with the paddle attachment cream together butter, 1/2 cup granulated sugar and brown sugar until combined.: The creaming stage should smell slightly sweet and buttery, and the mixture will lighten in color and become fluffy, which traps air for tenderness. Cream on medium speed until you see a pale, airy texture, scraping the bowl once so everything blends. If you under cream, the cookies may be dense; over creaming can introduce too much air, making them spread oddly, so stop when fluffy and homogeneous.
- Mix in peanut butter then blend in egg and vanilla. Add in flour mixture and mix until combined. If dough seems too wet you can chill for a bit if needed - though I never need to.: When you add the peanut butter , the mix turns glossy and fragrant, a deep nutty aroma filling the bowl. The egg and vanilla smooth the dough, giving it elasticity. Incorporating the dry mix should yield a cohesive dough that holds shape. If it feels tacky, a short chill firms it and makes rolling easier, but avoid over chilling which can stiffen fats and reduce spread. A common misstep is adding extra flour if sticky, which dries the cookies out; prefer chilling instead.
- Scoop dough out 1 even tablespoon at a time and shape into balls. Place 1/3 cup sugar in a bowl then roll balls into sugar to coat.: Rolling the dough by hand warms it slightly, creating a soft surface that the sugar clings to, creating a pretty shimmer. The tactile feel should be smooth and slightly tacky. The sugar coating gives a subtle crunch and gleam after baking. If your dough sticks to your fingers, lightly wet them or chill the dough briefly; forcing oily dough into tight balls can compress air pockets and yield denser cookies.
- Transfer to baking sheets spacing cookies 1 1/2-inches apart. Bake one sheet at a time in preheated oven 7 - 9 minutes until nearly set.: Arrange the cookies with space to spread and watch for visual cues, the edges should start to set while the centers remain slightly soft and matte. The oven noise is minimal, but you may hear a faint pop as moisture escapes. Baking one sheet at a time ensures consistent heat and even results, since crowded racks affect airflow. A frequent error is overbaking; remove when centers are just set so the cookies stay tender once cooled.
- Meanwhile unwrap chocolates. Immediately after removing cookies from oven gently press one chocolate into each cookie.: The moment you press a chocolate into a hot cookie the aroma of warm sugar and chocolate lifts, and the chocolate sinks slightly into the warm surface. Press gently until it rests in the slight depression, creating a neat blossom top. Pressing too hard can flatten the cookie or cause the chocolate to sink through, so be gentle. If the chocolate resists melting, return cookies to the warm oven for a few seconds, but watch closely.
- Transfer to a wire rack and transfer to fridge or freezer for a 5 - 10 minutes to let the chocolate set. Store cookies in an airtight container at room temperature.: Cooling on a wire rack allows air to circulate, avoiding soggy bottoms, while the cold sets the chocolate quickly, producing a glossy finish. The set chocolate should hold shape but remain slightly soft when bitten. Leaving them too long in the fridge can dull flavors, so the short chill is ideal. For storage, a sealed container preserves texture, but stacking while warm can cause sticking, so cool fully first.
- Random side note, if you've had an issue with the Kiss coming off you can add a small dab of peanut butter to the Kiss before pressing them on.: This little trick creates an adhesive layer that helps the chocolate adhere, and it deepens the nutty note as well. The dab should be small so it does not ooze out, but enough to tack the chocolate in place. If you skip it and find chocolates sliding off, the dab can rescue presentation and function. Be careful not to add too much, which may create greasy spots that affect texture.
- Recipe source: inspired by NYT and others: inspired by NYT and others : A quick note on provenance gives context to the technique and flavor choices, showing this version draws from trusted recipes and personal tweaks. Knowing the inspiration reassures you this method has history and reliability. When adapting, retain the core proportions that yield texture you like. Avoid changing multiple components at once, which makes troubleshooting difficult.
Notes
- Change the chocolate Swap Hershey's Kisses for a darker or flavored chocolate to deepen the flavor. Try a dark chocolate kiss for more bittersweet contrast or a filled chocolate for a surprise center. Keep the pressing timing the same so the chocolate softens but does not fully melt through.
- Adjust sugar coating Use cane sugar or coarse sugar for larger crystals that catch the light. The texture becomes more pronounced and the surface looks more decorative. Be mindful that larger crystals create a crunchier exterior.
- Control chewiness Increase brown sugar slightly for a chewier center, as brown sugar retains more moisture. This small swap affects texture significantly so adjust in small increments and note results for future batches.
- Chill for neater shapes Refrigerate dough for 20 to 30 minutes if the dough is too soft to roll cleanly. Chilling firms fats and prevents excessive spread so the cookies keep a round silhouette.
- Make them ahead Freeze shaped dough balls on a tray, then transfer to a bag. Bake from frozen, adding a minute or two to the bake time, for fresh cookies on demand without extra prep time.