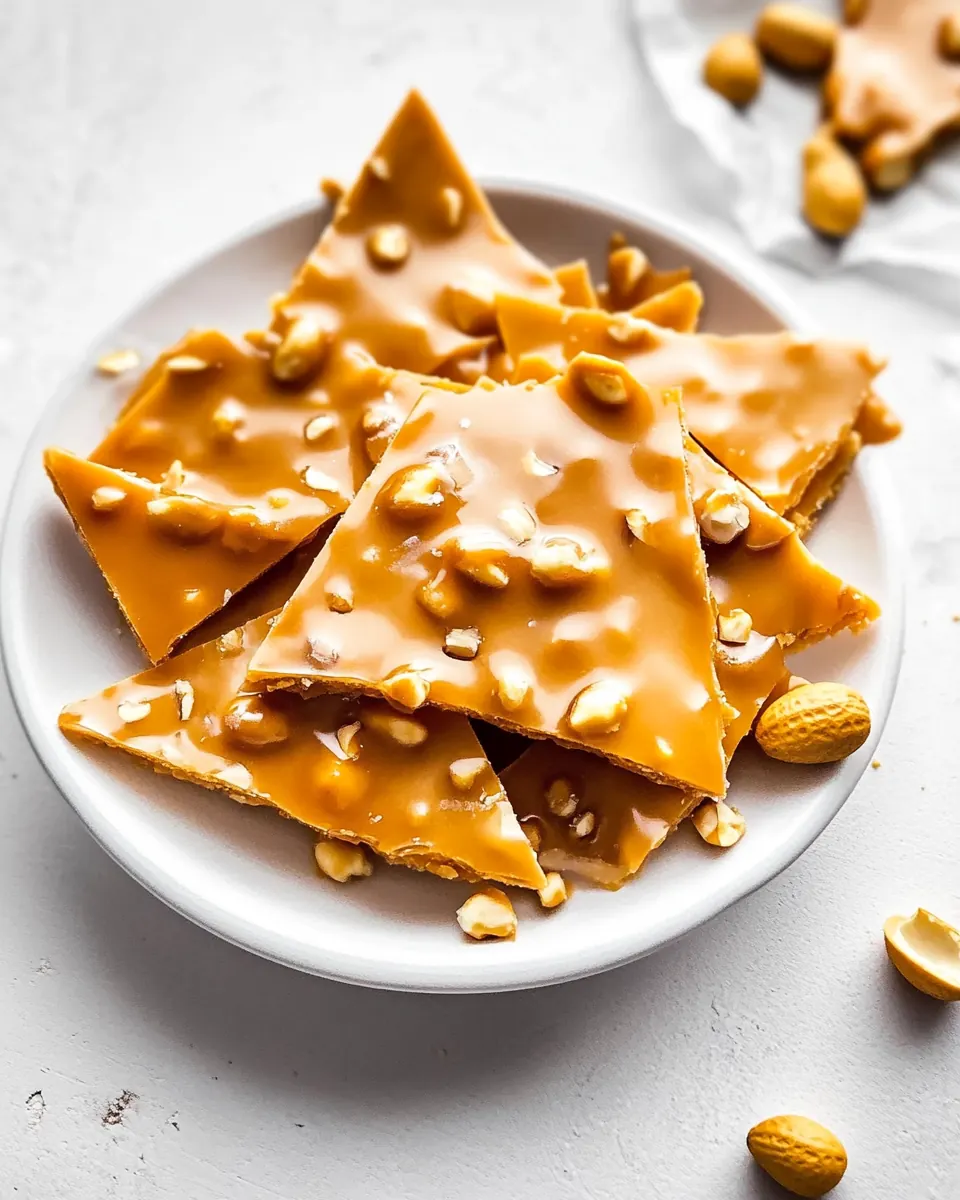
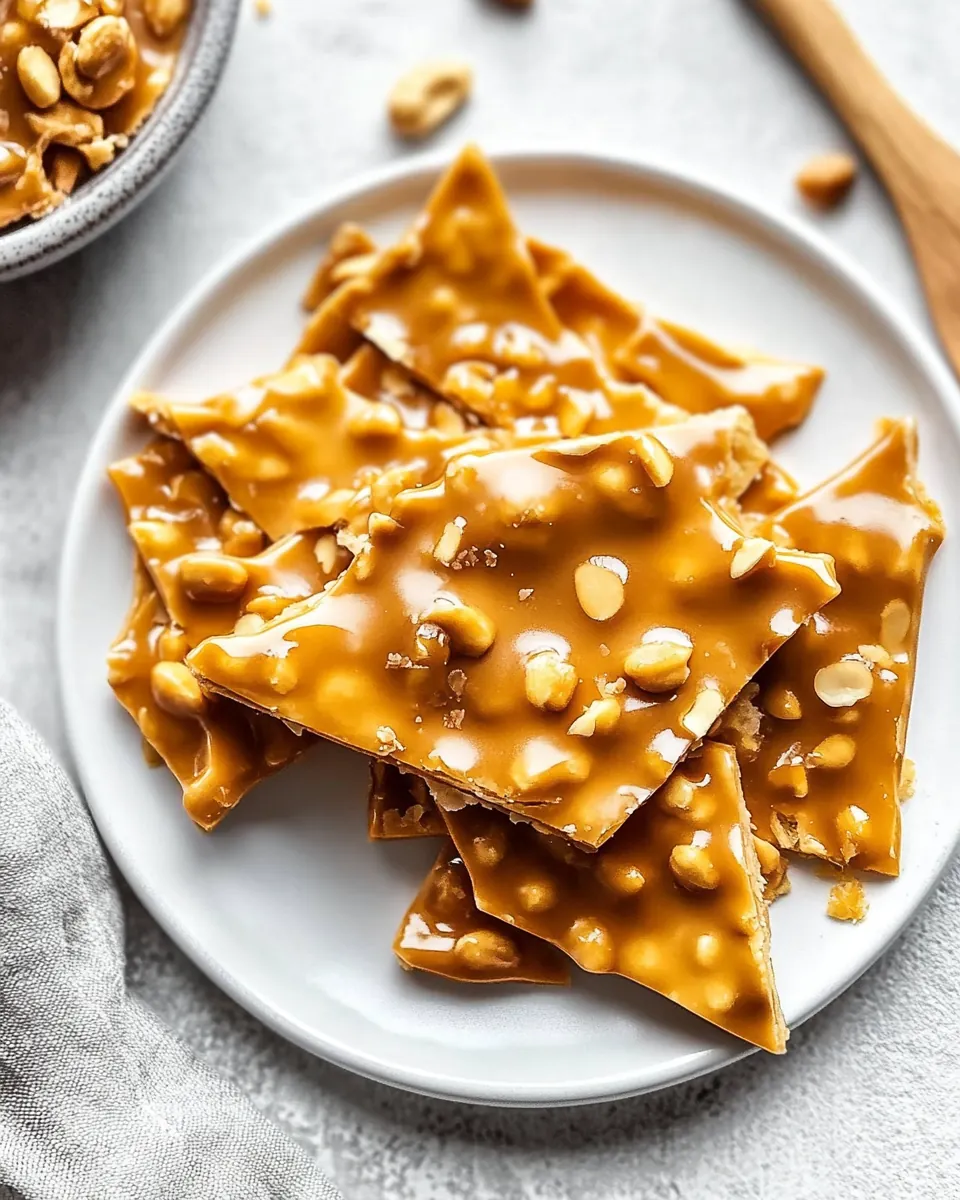
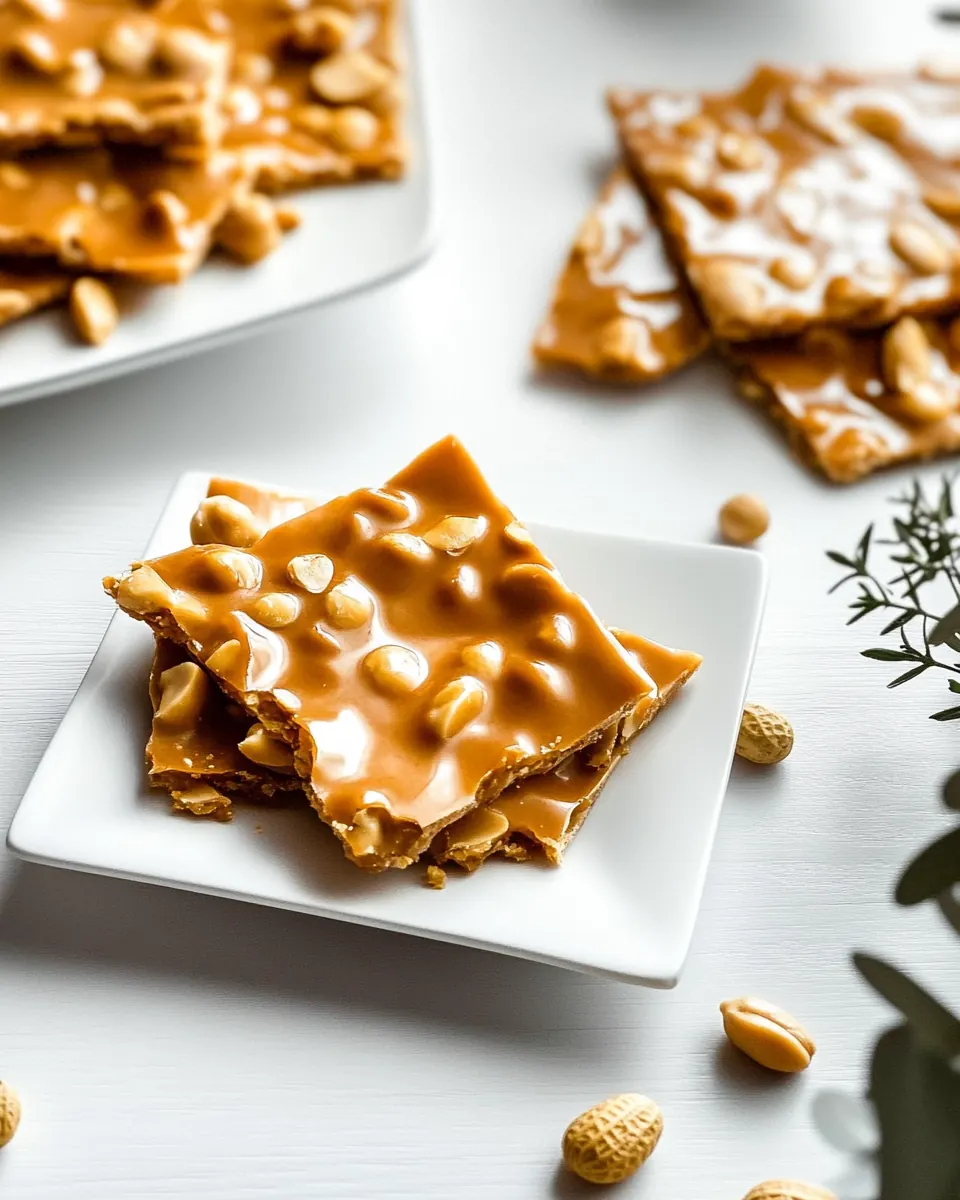
Peanut Brittle
Peanut Brittle has been my go to candy for holiday gatherings ever since I watched my grandmother tap the bubbling pot and grin as the kitchen filled with caramelized sugar scent. The very first time I made this, I remember juggling a candy thermometer and two curious kids underfoot, and how the sound of the mixture reaching the right temperature felt like a small victory. Over the years I learned to trust the visual cues and the way the bubbles change, and that confidence made the whole process less intimidating and more joyful. I still get the same thrill now when I pour the glossy, amber mixture onto parchment and watch it fizzle as the baking soda creates those little clouds that make the brittle light and crisp.
When I share Peanut Brittle with friends, I like to tell the story of how a simple handful of pantry staples becomes something celebratory. The contrast of crunchy peanuts and glassy brittle is timeless, and it travels well when I bring jars to neighbors or wrap pieces in wax paper for teachers. Making this candy invites small rituals, like prepping your sheet pan and measuring everything in advance, that help you stay calm when the sugar is hot and fast. Each time I make it, I tweak a tiny detail, maybe the chop size of the peanuts or the speed of stirring, and it reminds me that candy making is part technique, part feel.
Recipe Snapshot
20 mins
5 mins
15 mins
Medium
200 kcal
American
Gluten-Free, Low FODMAP
Desserts
Pre Cut Parchment Paper Baking Sheets, Nordic Ware Aluminum Half Sheet Pans
What Makes This Peanut Brittle Special
I love the texture contrast
One of the first reasons I reach for this recipe is the irresistible texture. The glossy, glass like brittle gives way with a satisfying snap, while the coarsely chopped peanuts add a roasted, slightly oily counterpoint. I adore how every bite combines crunch and savor, and I often find myself closing my eyes to savor the moment.
The recipe is foolproof once you know the cues
I’ve learned that sugar work is more about visual and audio signals than perfect timing. I appreciate that this version uses a clear temperature target and practical steps, which makes it reliable. When you watch the mixture change from syrupy to deep amber and hear the more aggressive bubbling, you’ll know it’s close, and that gives you confidence to act quickly.
It uses pantry friendly ingredients
There’s something comforting about a recipe that calls for familiar items. Granulated sugar, light corn syrup, salt, water, peanuts, butter, pure vanilla extract, and baking soda are things I usually have on hand. That accessibility makes it a go to for last minute gifts or a weekend kitchen project.
Great for sharing and gifting
I love how well Peanut Brittle travels. Once cooled, it stores at room temperature and keeps its snap, so it makes a lovely homemade gift. I often pack pieces in jars or wrap them in wax paper, and the simple presentation feels nostalgic and special.
Quick and satisfying
This recipe moves briskly, yet it delivers a big payoff. From start to finish you can have crunchy candy in under an hour, which is perfect when you want an indulgent treat without an all day commitment. That balance of speed and impact keeps me coming back to this classic.
Ingredients You’ll Need for Peanut Brittle
These ingredients form a simple, well balanced candy base. The role of each is clear: the granulated sugar and light corn syrup create the caramel matrix that turns glassy when cooked to the right temperature. A splash of water helps dissolve the sugar initially, while a pinch of salt brightens the final flavor. The peanuts provide texture and a toasty note, and finishing with butter, pure vanilla extract, and baking soda rounds out the mouthfeel and aroma, the soda creating tiny bubbles that make the brittle lighter.
- 1 cup granulated sugar: Provides primary sweetness and structure during caramelization; melts and browns to form the brittle matrix. Helps stabilize the candy as it reaches hard-crack stage, so precise temperature control is important.
- 1/2 cup light corn syrup: Prevents crystallization and promotes smooth texture by inhibiting sugar recrystallization; adds sweetness without changing flavor. Contributes to chewiness and helps achieve a glassy, glossy finish in the final brittle.
- 1/4 teaspoons salt: Enhances flavor balance by adding a touch of savory contrast; helps emphasize the sweetness and nuttiness. Also slightly lowers the boiling point of the syrup, subtly affecting texture development.
- 1/4 cup water: Facilitates even dissolution of sugar and controls the syrup concentration during cooking; provides necessary liquid for initial sugar melting. Assists in achieving a uniform caramelization and prevents localized burning.
- 1 cup salted peanuts coarsely chopped: Contributes crunch, flavor, and saltiness; provides nutty texture throughout the brittle when coarsely chopped. Offers contrast to the sweet caramel and adds visual interest to the finished candy.
- 2 tablespoons salted butter room temperature: Adds richness and mouthfeel while helping to halt the cooking process when stirred in; contributes a subtle buttery flavor. Softens the brittle slightly at the surface and improves overall flavor complexity.
- 1 teaspoon pure vanilla extract: Adds aromatic depth and rounds out caramel flavors with a warm, sweet note; enhances overall taste perception. Should be stirred in after cooking to preserve its volatile flavor compounds.
- 1 teaspoon baking soda: Introduces tiny bubbles and lightens the texture by creating air pockets when mixed into the hot syrup. Reacts with the acidic components to produce a slightly aerated, brittle structure that is easier to bite.
How to Make Peanut Brittle
Making candy can feel cinematic, and with a little organization you can enjoy each step. Below I expand the original directions into vivid, sensory rich guidance so you can follow along confidently and know what to look, hear, and smell for at every stage.
- Line a large baking sheet with a silicone baking mat or parchment paper. Set aside.: The prepared surface is crucial because the hot brittle needs someplace to cool immediately, and a silicone mat or parchment prevents sticking. As you prepare the pan, notice the slight crinkle of parchment or the smooth matte finish of the silicone, which will allow you to spread the candy without it bonding to the sheet. A common mistake is skipping this step, which can make the candy impossible to remove without breaking into crumbs. Prepare it early so you can move quickly when the mixture is ready.
- Since this recipe moves quickly, I recommend you measure out and organize your ingredients before you start the cooking process.: Mise en place keeps the frantic moments from ruining the texture. Lay out the measured peanuts , butter , vanilla , and baking soda near the stove so you can reach them without hesitation. You will appreciate being able to add items immediately when the heat is off, because candy sets fast. A frequent error is hunting for a spoon while the sugar cools, which leads to hardened lumps and lost time.
- In a heavy 2-quart saucepan, over medium heat, bring to a boil sugar, corn syrup, salt, and water. Stir until sugar is dissolved.: As the mixture warms, the sugar crystals dissolve into a clear, viscous syrup. Watch for the sheen to become uniform and listen for a steady, soft bubbling as the water evaporates. Stirring early ensures even heat distribution, preventing local hot spots that cause premature scorching. Avoid high heat at this stage, which can cause the sugars to burn before they are ready.
- Add in peanuts and stir until combined.: When you fold in the peanuts , they should be evenly coated and begin to steam slightly as the syrup returns to a boil. The aroma will shift, with nutty, toasty notes emerging. Make sure your peanuts are coarsely chopped as indicated, so the final texture has varied pockets of crunch. A common slip up is adding whole nuts that sink and create uneven distribution in the finished candy.
- Place a candy thermometer into the mixture and continue cooking, stirring frequently until temperature reaches 300°F.: This is the decisive stage where the syrup transforms to brittle. You want a steady, vigorous boil and frequent stirring to prevent scorching. Listen for a change in the boil pattern, and watch the color deepen to a rich amber. When the thermometer hits 300°F, you will smell a robust caramel note, and the bubbles will become larger and more energetic. Be careful not to overshoot the temperature, as that will darken the flavor and risk a burnt note.
- Immediately remove saucepan from heat and quickly stir in butter, vanilla, and baking soda.: Off the heat, the mixture is extremely hot yet receptive to additives. When you stir in room temperature butter , it melts and adds shine, while the vanilla lifts the aroma. The moment you add the baking soda , it will foam and expand as carbon dioxide forms little pockets, creating the brittle's signature lightness. Stir briskly and confidently, because hesitation will let the reaction subside, reducing the airy texture. One mistake is waiting too long, which results in denser candy.
- Immediately pour the mixture onto the prepared baking sheet. Using a rubber spatula, spread the mixture into a rectangle about 14×12 inches.: Pouring needs to be swift and deliberate; the mixture will be glossy and fluid, and the baking soda foam will rise. Use a rubber spatula to nudge the candy into an even rectangle, working quickly while the sugar is still pliable. Visually aim for uniform thickness so pieces break consistently. If you take too long, the candy firms and becomes difficult to shape evenly.
- Cool completely at room temperature.: Allowing the candy to cool undisturbed ensures it sets with a clear, glassy surface and that the texture becomes crisp. During cooling you will notice the sound change from a faint hiss to silence as moisture stabilizes, and the color will deepen slightly. Resist the urge to refrigerate, which can introduce moisture and make the brittle sticky. A typical error is moving or cutting the candy while it is still warm, which causes misshapen breakage.
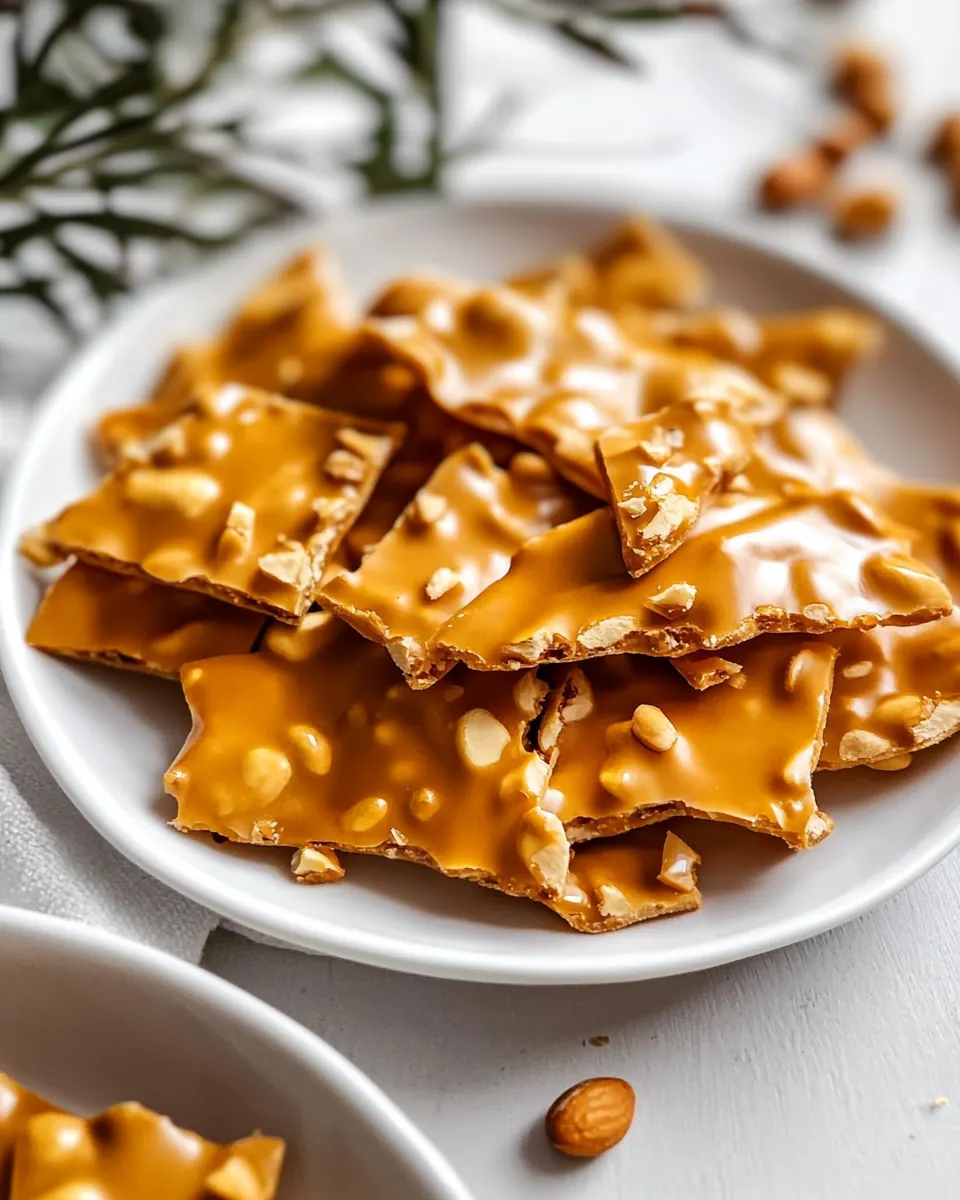
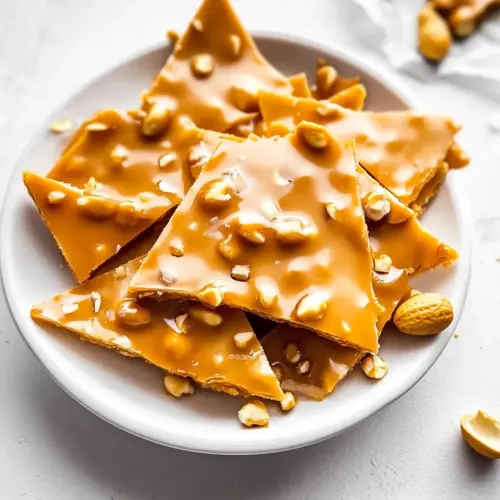
- Snap candy into pieces and store in an airtight container at room temperature.: Once fully cooled, the brittle should crack with a clean snap when broken. Use a gentle pressure with your hands or the back of a knife to create varied piece sizes. Store in an airtight container to protect the crispness and prevent humidity from softening the candy. If you notice any chewy spots the next day, it usually means it was exposed to moisture, so ensure your container is sealed well.
Make It Your Own
This section offers practical ways to personalize your brittle while keeping the technique intact. Small adjustments in chop size, presentation, or timing can make the recipe feel like your own signature treat.
- Adjust the nut size. Coarsely chopping the peanuts gives big pockets of crunch, while finer chopping disperses the nutty texture evenly throughout each bite. Choose the size that matches how you like your snack to feel.
- Toast the peanuts first. For a deeper roasted note, lightly toast the peanuts in a dry skillet until fragrant before adding them. This enhances aroma, but watch closely to avoid burning, which will add bitter notes.
- Spread thickness matters. A thinner layer yields crispier, more fragile pieces, while a slightly thicker layer produces chunkier bites. Use your spatula pressure to control the final texture during spreading.
- Package for gifting. Break into varied sizes and nestle pieces in parchment inside a jar or tin. A tight seal keeps them crunchy and makes a lovely homemade present without extra fuss.
- Timing the additions. Have the butter, vanilla, and baking soda ready in a small bowl so you can stir them in immediately once the pot comes off the heat, ensuring the chemical reaction is at its peak.
How to Serve Peanut Brittle
Serving this candy can be as simple or as celebratory as you like. Because it stores well and travels easily, I often keep a stash for spontaneous gifts, party favors, or a crunchy finish to a meal. Below are ideas and pairings to help you present it beautifully and practically.
- Casual snack bowls. Fill a small bowl with broken pieces for guests to graze on during a movie night or coffee break. The mix of textures invites communal nibbling and makes an easy communal snack.
- Gift jars. Layer pieces in a glass jar with parchment and tie a ribbon for a thoughtful homemade gift. This presentation is perfect for holidays, teacher gifts, or host thank yous, and the airtight jar helps maintain crispness.
- Party favors. Wrap small clusters in wax paper and tie with twine. These portable portions are ideal for weddings, showers, or festive gatherings, and they put a handcrafted touch on favors without elaborate packaging.
- After dinner treat. Offer a small piece as a sweet finish to a cozy dinner, paired with coffee or tea. The crunchy texture provides a satisfying contrast to warm beverages and makes for a nostalgic dessert option.
- Storage advice. Keep in an airtight container at room temperature away from humidity. For best results, line the container with parchment and separate layers with wax paper to prevent sticking and preserve the brittle’s signature snap.
- Seasonal gifting. During fall and winter gatherings, include a small tag describing the ingredients and a short serving suggestion. This adds a personal touch and helps recipients know the snack will stay crisp if stored properly.
FAQ
Conclusion
Peanut Brittle stands out because it transforms a few pantry staples into a crunchy, nostalgic treat with glossy caramel and roasted nut depth. I encourage you to give it a try, because the process is fast, rewarding, and yields candy that travels and stores beautifully. Whether you make a batch for holiday gifting or a spontaneous weekend project, the simple steps and satisfying results make this recipe a keeper in my kitchen rotation.
Peanut Brittle
Equipment
- Pre-Cut Parchment Paper Baking Sheets
- Nordic Ware Aluminum Half Sheet Pans
Ingredients
- 1 cup granulated sugar Provides primary sweetness and structure during caramelization; melts and browns to form the brittle matrix. Helps stabilize the candy as it reaches hard-crack stage, so precise temperature control is important.
- 1/2 cup light corn syrup Prevents crystallization and promotes smooth texture by inhibiting sugar recrystallization; adds sweetness without changing flavor. Contributes to chewiness and helps achieve a glassy, glossy finish in the final brittle.
- 1/4 teaspoons salt Enhances flavor balance by adding a touch of savory contrast; helps emphasize the sweetness and nuttiness. Also slightly lowers the boiling point of the syrup, subtly affecting texture development.
- 1/4 cup water Facilitates even dissolution of sugar and controls the syrup concentration during cooking; provides necessary liquid for initial sugar melting. Assists in achieving a uniform caramelization and prevents localized burning.
- 1 cup salted peanuts coarsely chopped Contributes crunch, flavor, and saltiness; provides nutty texture throughout the brittle when coarsely chopped. Offers contrast to the sweet caramel and adds visual interest to the finished candy.
- 2 tablespoons salted butter room temperature Adds richness and mouthfeel while helping to halt the cooking process when stirred in; contributes a subtle buttery flavor. Softens the brittle slightly at the surface and improves overall flavor complexity.
- 1 teaspoon pure vanilla extract Adds aromatic depth and rounds out caramel flavors with a warm, sweet note; enhances overall taste perception. Should be stirred in after cooking to preserve its volatile flavor compounds.
- 1 teaspoon baking soda Introduces tiny bubbles and lightens the texture by creating air pockets when mixed into the hot syrup. Reacts with the acidic components to produce a slightly aerated, brittle structure that is easier to bite.
Instructions
- Line a large baking sheet with a silicone baking mat or parchment paper. Set aside.: The prepared surface is crucial because the hot brittle needs someplace to cool immediately, and a silicone mat or parchment prevents sticking. As you prepare the pan, notice the slight crinkle of parchment or the smooth matte finish of the silicone, which will allow you to spread the candy without it bonding to the sheet. A common mistake is skipping this step, which can make the candy impossible to remove without breaking into crumbs. Prepare it early so you can move quickly when the mixture is ready.
- Since this recipe moves quickly, I recommend you measure out and organize your ingredients before you start the cooking process.: Mise en place keeps the frantic moments from ruining the texture. Lay out the measured peanuts , butter , vanilla , and baking soda near the stove so you can reach them without hesitation. You will appreciate being able to add items immediately when the heat is off, because candy sets fast. A frequent error is hunting for a spoon while the sugar cools, which leads to hardened lumps and lost time.
- In a heavy 2-quart saucepan, over medium heat, bring to a boil sugar, corn syrup, salt, and water. Stir until sugar is dissolved.: As the mixture warms, the sugar crystals dissolve into a clear, viscous syrup. Watch for the sheen to become uniform and listen for a steady, soft bubbling as the water evaporates. Stirring early ensures even heat distribution, preventing local hot spots that cause premature scorching. Avoid high heat at this stage, which can cause the sugars to burn before they are ready.
- Add in peanuts and stir until combined.: When you fold in the peanuts , they should be evenly coated and begin to steam slightly as the syrup returns to a boil. The aroma will shift, with nutty, toasty notes emerging. Make sure your peanuts are coarsely chopped as indicated, so the final texture has varied pockets of crunch. A common slip up is adding whole nuts that sink and create uneven distribution in the finished candy.
- Place a candy thermometer into the mixture and continue cooking, stirring frequently until temperature reaches 300°F.: This is the decisive stage where the syrup transforms to brittle. You want a steady, vigorous boil and frequent stirring to prevent scorching. Listen for a change in the boil pattern, and watch the color deepen to a rich amber. When the thermometer hits 300°F, you will smell a robust caramel note, and the bubbles will become larger and more energetic. Be careful not to overshoot the temperature, as that will darken the flavor and risk a burnt note.
- Immediately remove saucepan from heat and quickly stir in butter, vanilla, and baking soda.: Off the heat, the mixture is extremely hot yet receptive to additives. When you stir in room temperature butter , it melts and adds shine, while the vanilla lifts the aroma. The moment you add the baking soda , it will foam and expand as carbon dioxide forms little pockets, creating the brittle's signature lightness. Stir briskly and confidently, because hesitation will let the reaction subside, reducing the airy texture. One mistake is waiting too long, which results in denser candy.
- Immediately pour the mixture onto the prepared baking sheet. Using a rubber spatula, spread the mixture into a rectangle about 14×12 inches.: Pouring needs to be swift and deliberate; the mixture will be glossy and fluid, and the baking soda foam will rise. Use a rubber spatula to nudge the candy into an even rectangle, working quickly while the sugar is still pliable. Visually aim for uniform thickness so pieces break consistently. If you take too long, the candy firms and becomes difficult to shape evenly.
- Cool completely at room temperature.: Allowing the candy to cool undisturbed ensures it sets with a clear, glassy surface and that the texture becomes crisp. During cooling you will notice the sound change from a faint hiss to silence as moisture stabilizes, and the color will deepen slightly. Resist the urge to refrigerate, which can introduce moisture and make the brittle sticky. A typical error is moving or cutting the candy while it is still warm, which causes misshapen breakage.
- Snap candy into pieces and store in an airtight container at room temperature.: Once fully cooled, the brittle should crack with a clean snap when broken. Use a gentle pressure with your hands or the back of a knife to create varied piece sizes. Store in an airtight container to protect the crispness and prevent humidity from softening the candy. If you notice any chewy spots the next day, it usually means it was exposed to moisture, so ensure your container is sealed well.
Notes
- Adjust the nut size. Coarsely chopping the peanuts gives big pockets of crunch, while finer chopping disperses the nutty texture evenly throughout each bite. Choose the size that matches how you like your snack to feel.
- Toast the peanuts first. For a deeper roasted note, lightly toast the peanuts in a dry skillet until fragrant before adding them. This enhances aroma, but watch closely to avoid burning, which will add bitter notes.
- Spread thickness matters. A thinner layer yields crispier, more fragile pieces, while a slightly thicker layer produces chunkier bites. Use your spatula pressure to control the final texture during spreading.
- Package for gifting. Break into varied sizes and nestle pieces in parchment inside a jar or tin. A tight seal keeps them crunchy and makes a lovely homemade present without extra fuss.
- Timing the additions. Have the butter, vanilla, and baking soda ready in a small bowl so you can stir them in immediately once the pot comes off the heat, ensuring the chemical reaction is at its peak.