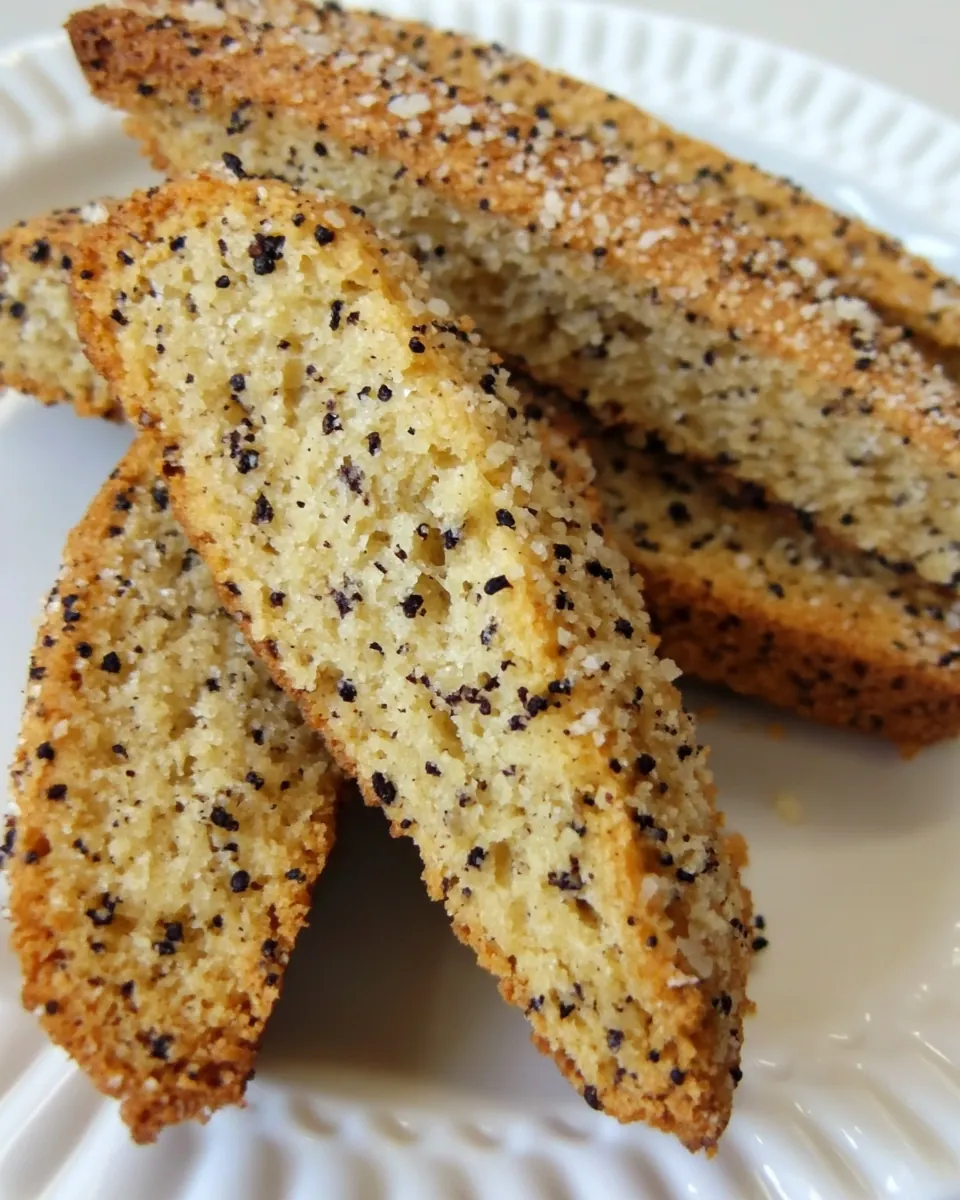
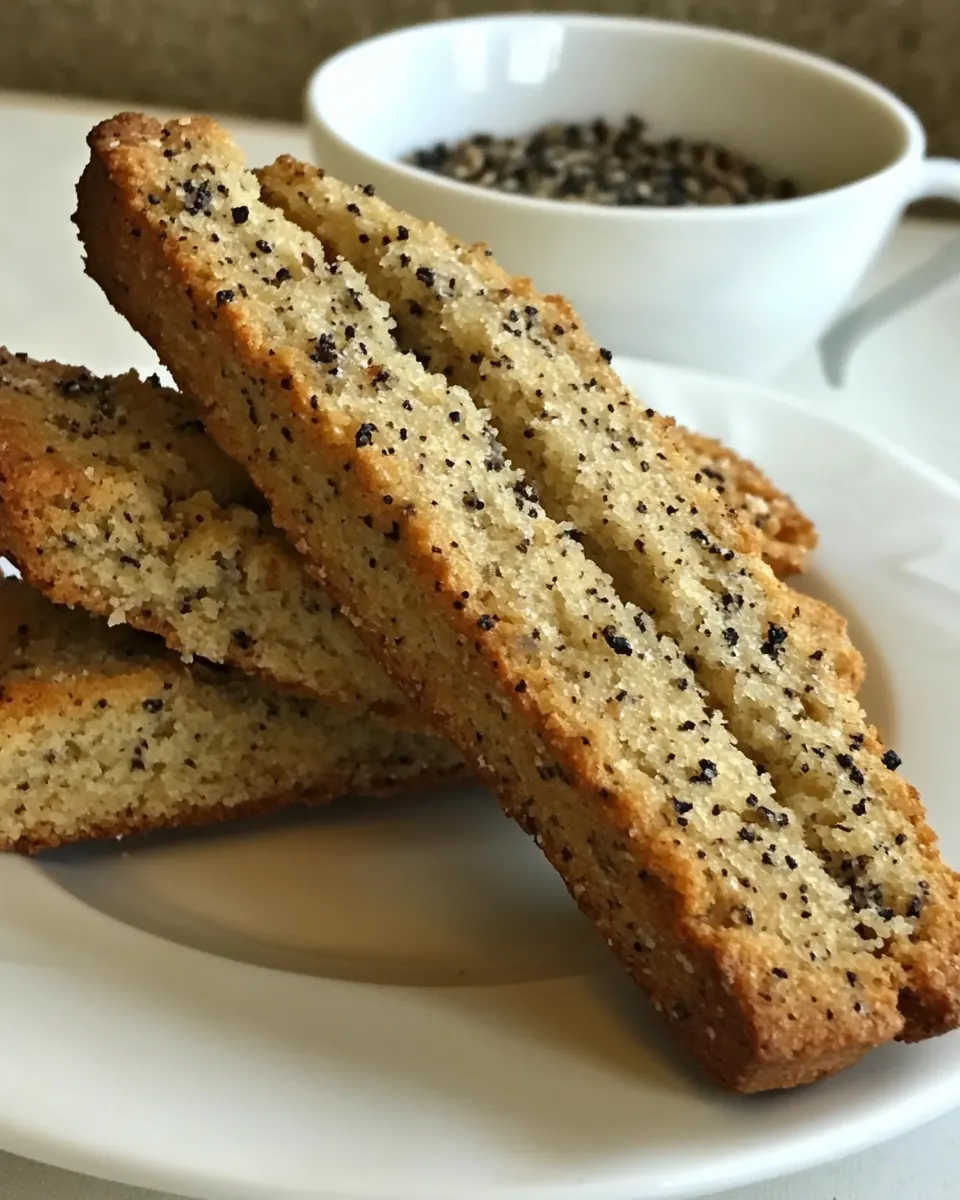
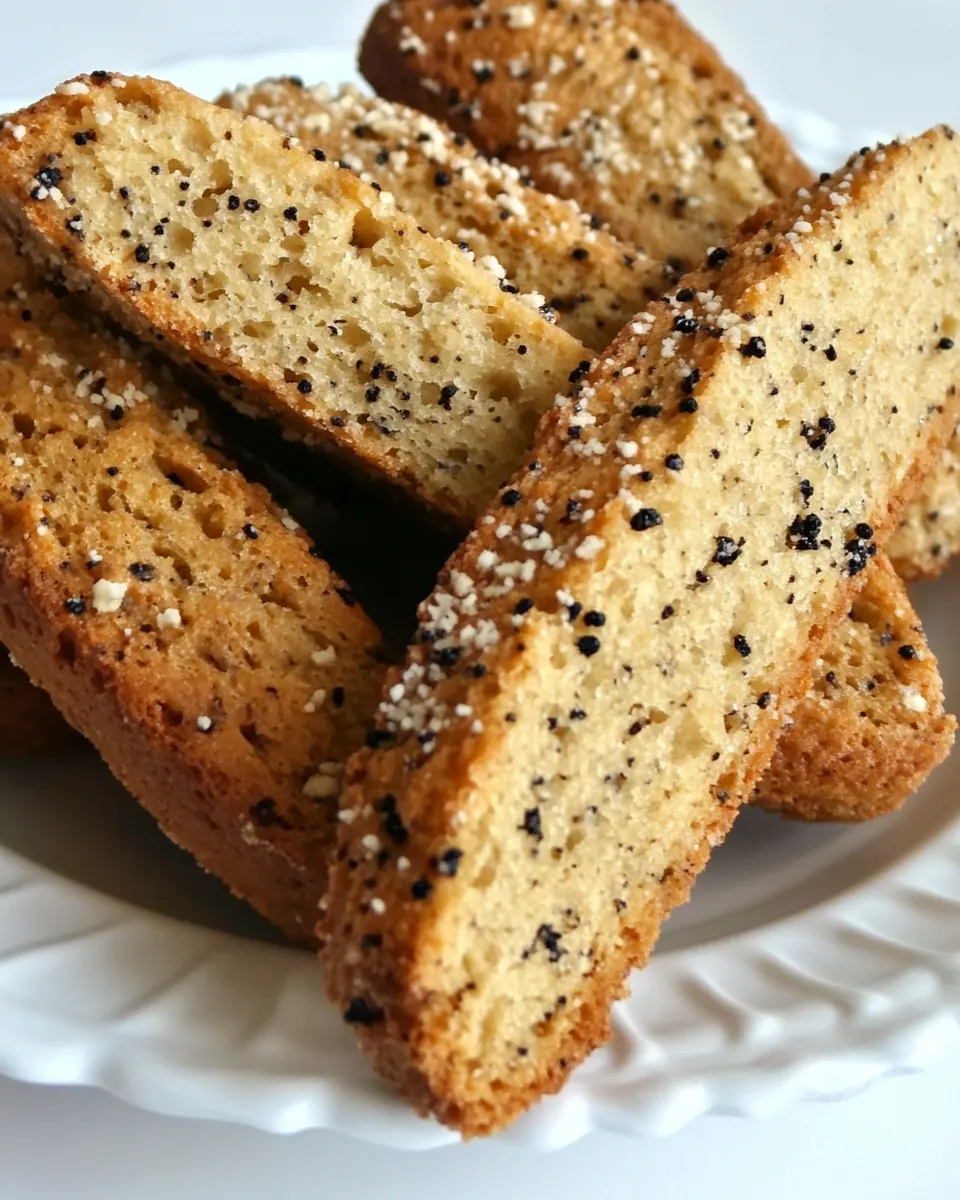
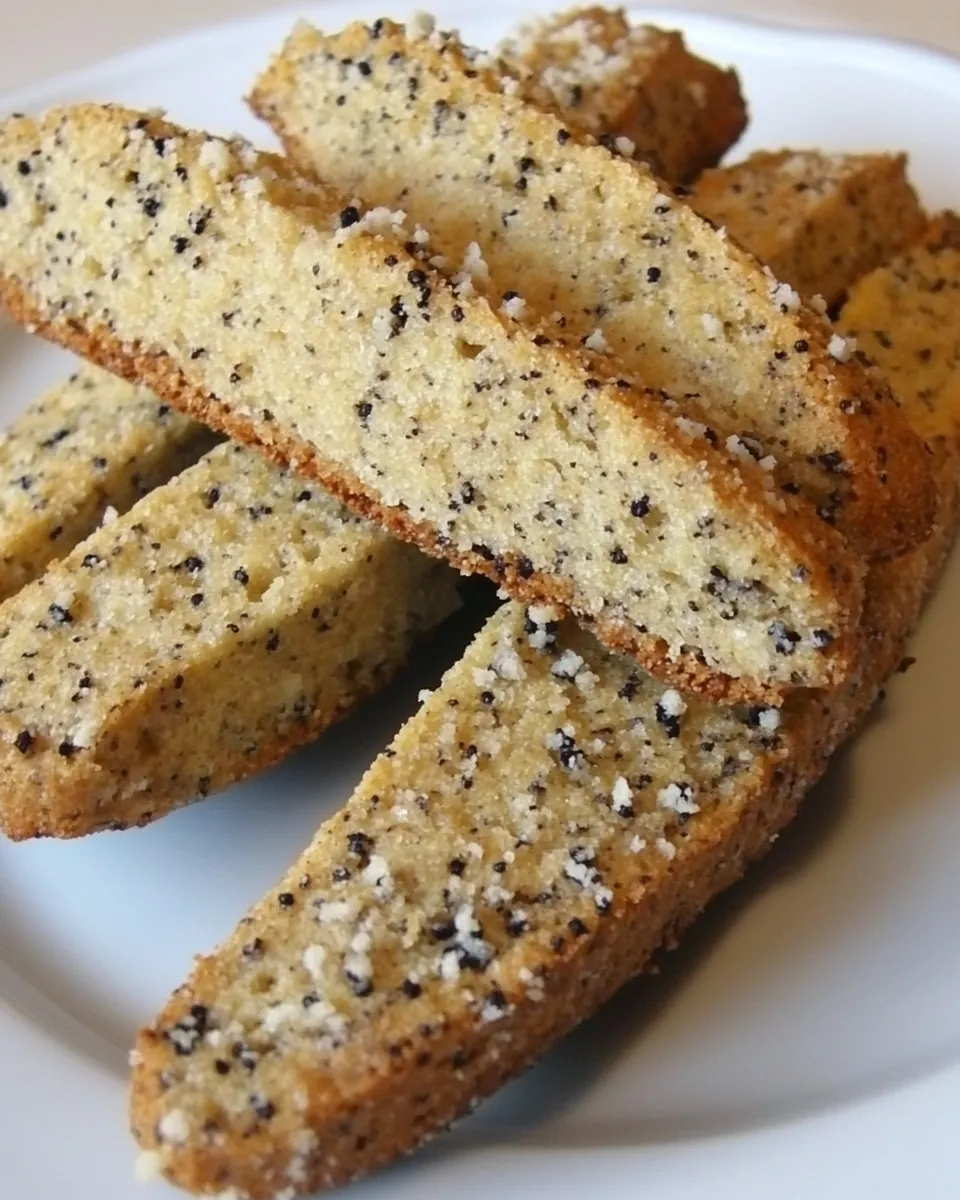
Parmesan Black Pepper Biscotti
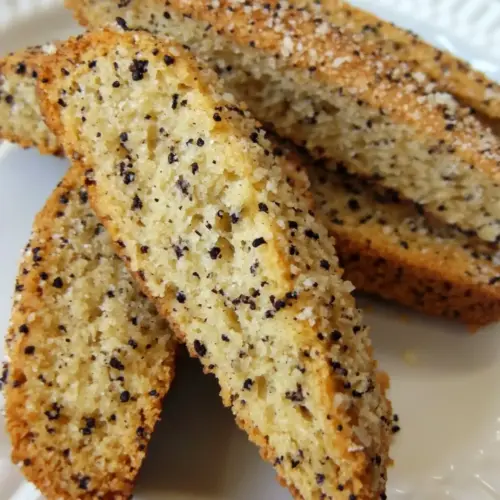
Parmesan Black Pepper Biscotti first won me over the afternoon I needed something savory to nibble with a late cup of tea, and the sharp bite of cracked pepper and the nutty tang of Parmigiano Reggiano changed how I think about biscotti forever. The first sentence I said aloud was that this is not your grandmother’s sweet cookie, and I meant it. I like how the crunchy texture holds up to dunking while still offering a surprising savory depth that keeps you reaching for one more piece.
That first batch came together on a rainy day when I had guests dropping by unexpectedly. I pulsed black peppercorns, grated a mound of Parmigiano Reggiano, and felt the dough take shape under my hands. The ritual of forming logs, the little brush of an egg wash, and the second slow bake that transforms the slices into crisp, golden crescents felt almost ceremonial. Friends lingered in the kitchen, and the scent of warm butter and toasted cheese filled the room.
Recipe Snapshot
2 hr
40 mins
80 mins
Medium
150 kcal
Italian
Gluten-Free, Low FODMAP
Desserts
Oven, Mixing bowl, Pastry blender, Serrated knife, Baking sheet, Wire rack, Pepper grinder
Why This Parmesan Black Pepper Biscotti Works
Bold savory profile
I love that Parmesan Black Pepper Biscotti flips the script on what biscotti can be. Instead of sweet spices, you get the assertive heat from freshly ground black peppercorns and the umami richness of freshly grated Parmigiano Reggiano. That contrast keeps the snack interesting, and I find it perfect for pairing with soups or a simple cheese board.
Reliable crunch that lasts
The twice baking method yields a texture that is satisfyingly crisp without being brittle. When I bite into one, there is a clear audible snap followed by a long, toasted finish. That sturdy crunch also makes these biscotti excellent for storing, they stay enjoyable for days, which I appreciate when planning ahead for gatherings.
Elegant but easy to make
Despite tasting sophisticated, the technique is approachable. The dough comes together quickly, and forming the logs is forgiving. I often make the dough in the morning and finish the second bake later in the day. The recipe scales well, and the little hands-on moments feel leisurely instead of stressful.
Versatile serving options
We serve these at cocktail hours, with salads, or alongside a mellow soup. The peppery kick brightens creamy dishes, and the cheesy backbone complements both light and hearty fare. I love offering them as an unexpected savory nibble at holiday gatherings or casual weeknight dinners.
Great for gifting and entertaining
They pack and travel beautifully. I’ll often tuck a few into a small box for friends, and they always comment on the balanced seasoning. The rustic look of the slices makes them feel homemade and thoughtful, and that never fails to win compliments.
What You Need for Parmesan Black Pepper Biscotti
These ingredients work together to create a savory, crunchy cookie that celebrates texture and seasoning. The key players are the Parmigiano Reggiano for umami depth, the black peppercorns for a bright spicy note, and the cold butter to give that tender crumb before the long crisping bake. Each element has a clear role, and the simplicity lets high quality ingredients shine.
- 1 1/2 tablespoons whole black peppercorns: Crush and toast to release intense, aromatic heat; cracked peppercorns provide bold, floral spice and crunch that contrasts the biscotti's crumb and highlights the savory Parmesan.
- 4 cups all-purpose flour, plus more for dusting: Sift and combine as the primary dry structure; all-purpose flour gives the biscotti its tender yet firm crumb and absorbs moisture from butter, eggs, and milk to form the dough.
- 2 teaspoons baking powder: Leaven gently to promote subtle rise and lightness; baking powder creates small air pockets during baking so the biscotti is crisp without being overly dense.
- 2 teaspoons salt: Season and balance flavors for savory depth; salt enhances the cheese and pepper while strengthening the dough’s gluten network for improved texture.
- 4 1/2 ounces Parmigiano-Reggiano, finely grated (2 1/4 cups): Grate finely to distribute rich, umami-packed cheese evenly; Parmigiano–Reggiano contributes nutty, salty complexity and a dry, granular quality that helps create a crisp crust.
- 1 1/2 sticks cold unsalted butter, cut into 1/2-inch cubes (3/4 cup): Cube and keep cold to create layered flakiness; cold unsalted butter, when cut into the flour, yields tender pockets and controls richness without adding excess salt.
- 4 large eggs: Whisk and bind wet ingredients while adding richness; large eggs provide structure, moisture, and help emulsify fats for a cohesive, sliceable biscotti dough.
- 1 cup whole milk: Warm slightly and adjust hydration for workable dough; whole milk adds tenderness, helps dissolve dry components, and contributes to a richer mouthfeel in the finished biscotti.
How to Assemble Parmesan Black Pepper Biscotti
These directions guide you from raw ingredients to crisp, peppered biscotti. I find the process rhythmic, and it rewards patience during the two bakes. Keep your oven temperature steady and watch for visual cues I describe below to know when to move to the next step.
- Put oven racks in upper and lower thirds of oven and preheat oven to 350°F.: The moment your oven warms you will start to notice a faint, clean heat, which helps the logs set uniformly during the first bake. Positioning racks in the upper and lower thirds creates even airflow and prevents one sheet from browning too quickly. A common mistake is opening the oven door repeatedly, which drops the temperature and can yield uneven baking, so try to minimize peeks.
- Pulse peppercorns in grinder until coarsely ground.: Pulsing releases aromatic oils so the pepper tastes lively, and leaving some coarse bits provides texture against the crumb of the biscotti. You should smell sharp, citrus like notes as the pepper opens up. Avoid grinding to a powder, which will smear into the dough and mute the pleasant crunchy pockets you want.
- Whisk together flour, baking powder, salt, 2 cups of the cheese, and 1 tablespoon ground black pepper in a large bowl. Blend in butter with a pastry blender or your fingertips until mixture resembles coarse meal. Whisk 3 eggs with milk and add to flour mixture, stirring with a fork until a soft dough forms.: At this stage the dry mixture should look uniform, with flecks of grated Parmigiano Reggiano distributed through the pale flour. Whisking ensures even leavening and seasoning, so every bite tastes balanced. A pitfall is dumping cheese in clumps, which creates salty pockets; take time to break any clumps apart.
- Turn dough onto a lightly floured surface and quarter dough. Using well-floured hands, form each piece into a slightly flattened 12-inch-long log (about 2 inches wide and 3/4-inch high). Transfer logs to 2 ungreased large baking sheets, arranging logs about 3 inches apart.: Work quickly so the butter stays cold and forms small pea sized pieces. The texture should resemble coarse crumbs with tiny butter bits visible, which creates pockets that contribute to a tender interior before the biscotti crisp. If you overwork and the butter becomes greasy, the dough will be heavy, so stop as soon as the coarse meal texture appears.
- Whisk remaining egg and brush some over logs, then sprinkle tops of logs evenly with remaining 1/4 cup cheese and 1/2 tablespoon ground pepper. Bake, rotating sheets 180 degrees and switching position of sheets halfway through baking, until logs are pale golden and firm, about 30 minutes total. Cool logs to warm on sheets on a rack, about 10 minutes.: The wet mix should create a soft, slightly tacky dough that holds together without being sticky. Stirring gently prevents overdeveloping the gluten, which keeps the final biscotti from becoming tough. If the dough appears dry, add a tiny splash of milk; if too sticky, dust a bit more flour, but be careful not to alter the balance drastically.
- Reduce oven temperature to 300°F.: The dough will feel cool and slightly dense, but it should be pliable. Quartering makes uniform logs easier to shape and bake evenly. A frequent error is forming unequal pieces, which leads to different baking times, so aim for equal portions by eye or weigh them if precision matters.
- Carefully transfer one warm log to a cutting board and cut diagonally into 1/2-inch-thick slices with a serrated knife. Arrange slices, cut sides down, in 1 layer on a baking sheet. Repeat with remaining logs, transferring slices to sheets. Bake, turning over once, until golden and crisp, 35 to 45 minutes total. Cool biscotti on baking sheets on racks, about 15 minutes.: Shape each quarter into a smooth, even log about 12 inches long, with a thickness close to 2 inches. The surface should be tidy, with no glaring cracks. If cracks appear, press them gently and smooth; large fissures can widen during baking, causing uneven slices later.
- Transfer logs to 2 ungreased large baking sheets, arranging logs about 3 inches apart: Leave ample space because the logs will spread slightly as they bake. Ungreased sheets encourage the bottoms to firm up properly. Crowding the logs traps steam and prevents proper browning, so keep that 3 inch gap as suggested.
- Whisk remaining egg and brush some over logs, then sprinkle tops of logs evenly with remaining 1/4 cup cheese and 1/2 tablespoon ground pepper: Brushing with egg gives a glossy finish and helps the extra Parmigiano Reggiano adhere, creating a golden, savory crust. The topping will toast in the oven and add a beautiful flecked appearance. Over brushing floods the surface and can cause uneven browning, so use a light hand.
- Bake, rotating sheets 180 degrees and switching position of sheets halfway through baking, until logs are pale golden and firm, about 30 minutes total: You should smell toasty dairy notes and see the logs take on a pale gold hue, with edges that feel set to the touch. Rotating and switching ensures both pans bake evenly; failing to rotate can produce one pan darker than the other. If the logs feel soft in the center after 30 minutes, give them a bit more time but watch carefully so they do not overbrown.
- Cool logs to warm on sheets on a rack, about 10 minutes: Cooling a bit makes slicing easier and prevents the dough from crumbling. The logs will still be warm to the touch and slightly pliable, which helps when transferring to the cutting board. Cutting while piping hot leads to smearing, and cutting fully cold can cause brittle crumbs, so aim for warm.
- Reduce oven temperature to 300 F: Lowering the temperature prepares for the slow second bake that dries the slices without burning them. You will notice a calmer, steadier heat at this setting which crisps rather than aggressively browns. Skipping the reduction risks overbrowning the thin slices during the second bake.
- Carefully transfer one warm log to a cutting board and cut diagonally into 1/2-inch-thick slices with a serrated knife: The diagonal cut creates an appealing elongated shape and increases surface area for crisping. Use a gentle sawing motion so the slices stay intact and clean. Pressing too hard can crush the log, producing uneven thickness, so let the serrated blade do the work.
- Arrange slices, cut sides down, in 1 layer on a baking sheet: Placing slices cut side down gives the exposed interior direct contact with the sheet for even toasting. Leave space so air circulates around each piece. Overlapping slices traps moisture and prevents the biscotti from becoming uniformly crisp.
- Repeat with remaining logs, transferring slices to sheets: Keep a steady rhythm and organize sheets so you can slide them into the oven promptly. Consistency in slice size and spacing ensures even baking across batches. If slices from different logs vary in thickness, try to group similar sized pieces on the same sheet to avoid timing mismatches.
- Bake, turning over once, until golden and crisp, 35 to 45 minutes total: During this stage you will hear a faint crackle as moisture leaves the biscotti and smell a deepened, toasted cheese aroma. Turn the slices partway through so both sides become evenly golden and crisp. A common misstep is removing them too early; they will feel slightly softer when hot but firm up as they cool, so err on the side of a few extra minutes if unsure.
- Cool biscotti on baking sheets on racks, about 15 minutes: Cooling fully on the sheet allows residual heat to finish the crisping process. The biscotti will snap with a clean break when completely cooled and will store well in an airtight container. Storing while warm can trap steam and soften them, so wait until they are room temperature before packaging.
Substitutions and Tips
I like to keep tips practical and focused, so here are helpful notes that make this recipe more reliable in a home kitchen. Each item highlights a small adjustment or reminder that improves texture, flavor, or workflow.
- Cheese selection: Stick with fresh, high quality Parmigiano Reggiano for a nutty, savory backbone, as pregrated cheese can be dry and less flavorful.
- Butter handling: Keep the butter cold and work quickly; the little bits of cold fat create a tender crumb before the biscotti crisp during the final bake.
- Pepper grinding: Pulse the black peppercorns to a coarse grind so you get bursts of heat, not a flat, powdery taste dispersed through the dough.
- Slicing technique: Use a serrated knife and a gentle sawing motion to cut 1/2 inch slices while the logs are warm, this prevents crushing and yields even pieces.
- Baking patience: Do the second bake at a lower temperature to dry the slices slowly, rushing this step can brown the exterior before the inside crisps.
- Storage: Store cooled biscotti in an airtight container at room temperature; they will keep their crunch for up to a week.
Perfect Matches for Parmesan Black Pepper Biscotti
These biscotti are versatile and pair beautifully with many dishes. Below I outline serving ideas, occasions, and storage tips so you can present them with confidence whether for a casual snack or a special gathering.
- Cheese boards: Serve alongside soft cheeses and cured olives, the crunchy texture and peppery kick complement creamy spreads wonderfully.
- Soup accompaniment: Present with a warm bowl of vegetable or tomato based soup, the biscotti add a crunchy contrast that makes each bite more satisfying.
- Appetizer for gatherings: Offer them at cocktail hour with marinated vegetables or a simple herb dip, their savory profile fits well with light bites.
- Lunch side: Pair with a salad or a bowl of minestrone for a textural counterpoint that makes a simple lunch feel elevated.
- Storage and gifting: Pack fully cooled biscotti in airtight tins or cellophane for gifting, they travel well and hold their crispness for several days.
- Seasonal pairing: I love these in the fall with roasted squash dishes, the pepper lifts richer seasonal flavors and the crunchy texture adds interest.
FAQ
Conclusion
What makes this recipe special is the confident marriage of sharp black pepper and nutty Parmigiano Reggiano, baked into a twice toasted, crisply textured biscotti that holds up to dunking and sharing. Give these a try when you want an elegant, savory nibble that is easy to make and stores beautifully, perfect for gifting or entertaining. I hope the peppery lift and toasty cheese become a staple in your kitchen rotation, bringing a little savory brightness to many meals and gatherings.
Parmesan Black Pepper Biscotti
Equipment
- Oven
- Mixing Bowl
- Pastry blender
- Serrated Knife
- Baking Sheet
- Wire Rack
- Pepper grinder
Ingredients
- 1 1/2 tablespoons whole black peppercorns Crush and toast to release intense, aromatic heat; cracked peppercorns provide bold, floral spice and crunch that contrasts the biscotti's crumb and highlights the savory Parmesan.
- 4 cups all-purpose flour, plus more for dusting Sift and combine as the primary dry structure; all-purpose flour gives the biscotti its tender yet firm crumb and absorbs moisture from butter, eggs, and milk to form the dough.
- 2 teaspoons baking powder Leaven gently to promote subtle rise and lightness; baking powder creates small air pockets during baking so the biscotti is crisp without being overly dense.
- 2 teaspoons salt Season and balance flavors for savory depth; salt enhances the cheese and pepper while strengthening the dough’s gluten network for improved texture.
- 4 1/2 ounces Parmigiano-Reggiano, finely grated (2 1/4 cups) Grate finely to distribute rich, umami-packed cheese evenly; Parmigiano-Reggiano contributes nutty, salty complexity and a dry, granular quality that helps create a crisp crust.
- 1 1/2 sticks cold unsalted butter, cut into 1/2-inch cubes (3/4 cup) Cube and keep cold to create layered flakiness; cold unsalted butter, when cut into the flour, yields tender pockets and controls richness without adding excess salt.
- 4 large eggs Whisk and bind wet ingredients while adding richness; large eggs provide structure, moisture, and help emulsify fats for a cohesive, sliceable biscotti dough.
- 1 cup whole milk Warm slightly and adjust hydration for workable dough; whole milk adds tenderness, helps dissolve dry components, and contributes to a richer mouthfeel in the finished biscotti.
Instructions
- Put oven racks in upper and lower thirds of oven and preheat oven to 350°F.: The moment your oven warms you will start to notice a faint, clean heat, which helps the logs set uniformly during the first bake. Positioning racks in the upper and lower thirds creates even airflow and prevents one sheet from browning too quickly. A common mistake is opening the oven door repeatedly, which drops the temperature and can yield uneven baking, so try to minimize peeks.
- Pulse peppercorns in grinder until coarsely ground.: Pulsing releases aromatic oils so the pepper tastes lively, and leaving some coarse bits provides texture against the crumb of the biscotti. You should smell sharp, citrus like notes as the pepper opens up. Avoid grinding to a powder, which will smear into the dough and mute the pleasant crunchy pockets you want.
- Whisk together flour, baking powder, salt, 2 cups of the cheese, and 1 tablespoon ground black pepper in a large bowl. Blend in butter with a pastry blender or your fingertips until mixture resembles coarse meal. Whisk 3 eggs with milk and add to flour mixture, stirring with a fork until a soft dough forms.: At this stage the dry mixture should look uniform, with flecks of grated Parmigiano Reggiano distributed through the pale flour. Whisking ensures even leavening and seasoning, so every bite tastes balanced. A pitfall is dumping cheese in clumps, which creates salty pockets; take time to break any clumps apart.
- Turn dough onto a lightly floured surface and quarter dough. Using well-floured hands, form each piece into a slightly flattened 12-inch-long log (about 2 inches wide and 3/4-inch high). Transfer logs to 2 ungreased large baking sheets, arranging logs about 3 inches apart.: Work quickly so the butter stays cold and forms small pea sized pieces. The texture should resemble coarse crumbs with tiny butter bits visible, which creates pockets that contribute to a tender interior before the biscotti crisp. If you overwork and the butter becomes greasy, the dough will be heavy, so stop as soon as the coarse meal texture appears.
- Whisk remaining egg and brush some over logs, then sprinkle tops of logs evenly with remaining 1/4 cup cheese and 1/2 tablespoon ground pepper. Bake, rotating sheets 180 degrees and switching position of sheets halfway through baking, until logs are pale golden and firm, about 30 minutes total. Cool logs to warm on sheets on a rack, about 10 minutes.: The wet mix should create a soft, slightly tacky dough that holds together without being sticky. Stirring gently prevents overdeveloping the gluten, which keeps the final biscotti from becoming tough. If the dough appears dry, add a tiny splash of milk; if too sticky, dust a bit more flour, but be careful not to alter the balance drastically.
- Reduce oven temperature to 300°F.: The dough will feel cool and slightly dense, but it should be pliable. Quartering makes uniform logs easier to shape and bake evenly. A frequent error is forming unequal pieces, which leads to different baking times, so aim for equal portions by eye or weigh them if precision matters.
- Carefully transfer one warm log to a cutting board and cut diagonally into 1/2-inch-thick slices with a serrated knife. Arrange slices, cut sides down, in 1 layer on a baking sheet. Repeat with remaining logs, transferring slices to sheets. Bake, turning over once, until golden and crisp, 35 to 45 minutes total. Cool biscotti on baking sheets on racks, about 15 minutes.: Shape each quarter into a smooth, even log about 12 inches long, with a thickness close to 2 inches. The surface should be tidy, with no glaring cracks. If cracks appear, press them gently and smooth; large fissures can widen during baking, causing uneven slices later.
- Transfer logs to 2 ungreased large baking sheets, arranging logs about 3 inches apart: Leave ample space because the logs will spread slightly as they bake. Ungreased sheets encourage the bottoms to firm up properly. Crowding the logs traps steam and prevents proper browning, so keep that 3 inch gap as suggested.
- Whisk remaining egg and brush some over logs, then sprinkle tops of logs evenly with remaining 1/4 cup cheese and 1/2 tablespoon ground pepper: Brushing with egg gives a glossy finish and helps the extra Parmigiano Reggiano adhere, creating a golden, savory crust. The topping will toast in the oven and add a beautiful flecked appearance. Over brushing floods the surface and can cause uneven browning, so use a light hand.
- Bake, rotating sheets 180 degrees and switching position of sheets halfway through baking, until logs are pale golden and firm, about 30 minutes total: You should smell toasty dairy notes and see the logs take on a pale gold hue, with edges that feel set to the touch. Rotating and switching ensures both pans bake evenly; failing to rotate can produce one pan darker than the other. If the logs feel soft in the center after 30 minutes, give them a bit more time but watch carefully so they do not overbrown.
- Cool logs to warm on sheets on a rack, about 10 minutes: Cooling a bit makes slicing easier and prevents the dough from crumbling. The logs will still be warm to the touch and slightly pliable, which helps when transferring to the cutting board. Cutting while piping hot leads to smearing, and cutting fully cold can cause brittle crumbs, so aim for warm.
- Reduce oven temperature to 300 F: Lowering the temperature prepares for the slow second bake that dries the slices without burning them. You will notice a calmer, steadier heat at this setting which crisps rather than aggressively browns. Skipping the reduction risks overbrowning the thin slices during the second bake.
- Carefully transfer one warm log to a cutting board and cut diagonally into 1/2-inch-thick slices with a serrated knife: The diagonal cut creates an appealing elongated shape and increases surface area for crisping. Use a gentle sawing motion so the slices stay intact and clean. Pressing too hard can crush the log, producing uneven thickness, so let the serrated blade do the work.
- Arrange slices, cut sides down, in 1 layer on a baking sheet: Placing slices cut side down gives the exposed interior direct contact with the sheet for even toasting. Leave space so air circulates around each piece. Overlapping slices traps moisture and prevents the biscotti from becoming uniformly crisp.
- Repeat with remaining logs, transferring slices to sheets: Keep a steady rhythm and organize sheets so you can slide them into the oven promptly. Consistency in slice size and spacing ensures even baking across batches. If slices from different logs vary in thickness, try to group similar sized pieces on the same sheet to avoid timing mismatches.
- Bake, turning over once, until golden and crisp, 35 to 45 minutes total: During this stage you will hear a faint crackle as moisture leaves the biscotti and smell a deepened, toasted cheese aroma. Turn the slices partway through so both sides become evenly golden and crisp. A common misstep is removing them too early; they will feel slightly softer when hot but firm up as they cool, so err on the side of a few extra minutes if unsure.
- Cool biscotti on baking sheets on racks, about 15 minutes: Cooling fully on the sheet allows residual heat to finish the crisping process. The biscotti will snap with a clean break when completely cooled and will store well in an airtight container. Storing while warm can trap steam and soften them, so wait until they are room temperature before packaging.
Notes
- Cheese selection: Stick with fresh, high quality Parmigiano Reggiano for a nutty, savory backbone, as pregrated cheese can be dry and less flavorful.
- Butter handling: Keep the butter cold and work quickly; the little bits of cold fat create a tender crumb before the biscotti crisp during the final bake.
- Pepper grinding: Pulse the black peppercorns to a coarse grind so you get bursts of heat, not a flat, powdery taste dispersed through the dough.
- Slicing technique: Use a serrated knife and a gentle sawing motion to cut 1/2 inch slices while the logs are warm, this prevents crushing and yields even pieces.
- Baking patience: Do the second bake at a lower temperature to dry the slices slowly, rushing this step can brown the exterior before the inside crisps.
- Storage: Store cooled biscotti in an airtight container at room temperature; they will keep their crunch for up to a week.