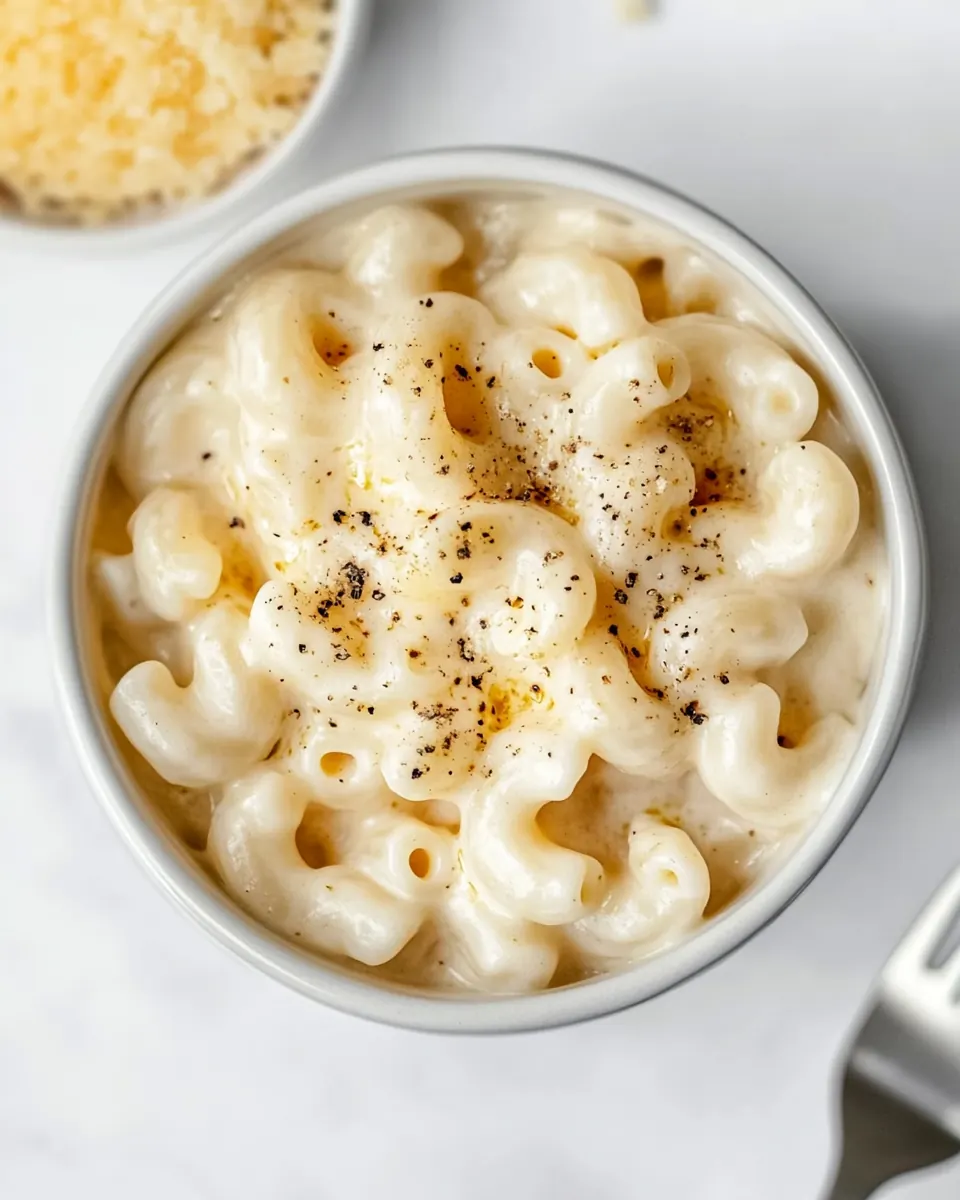
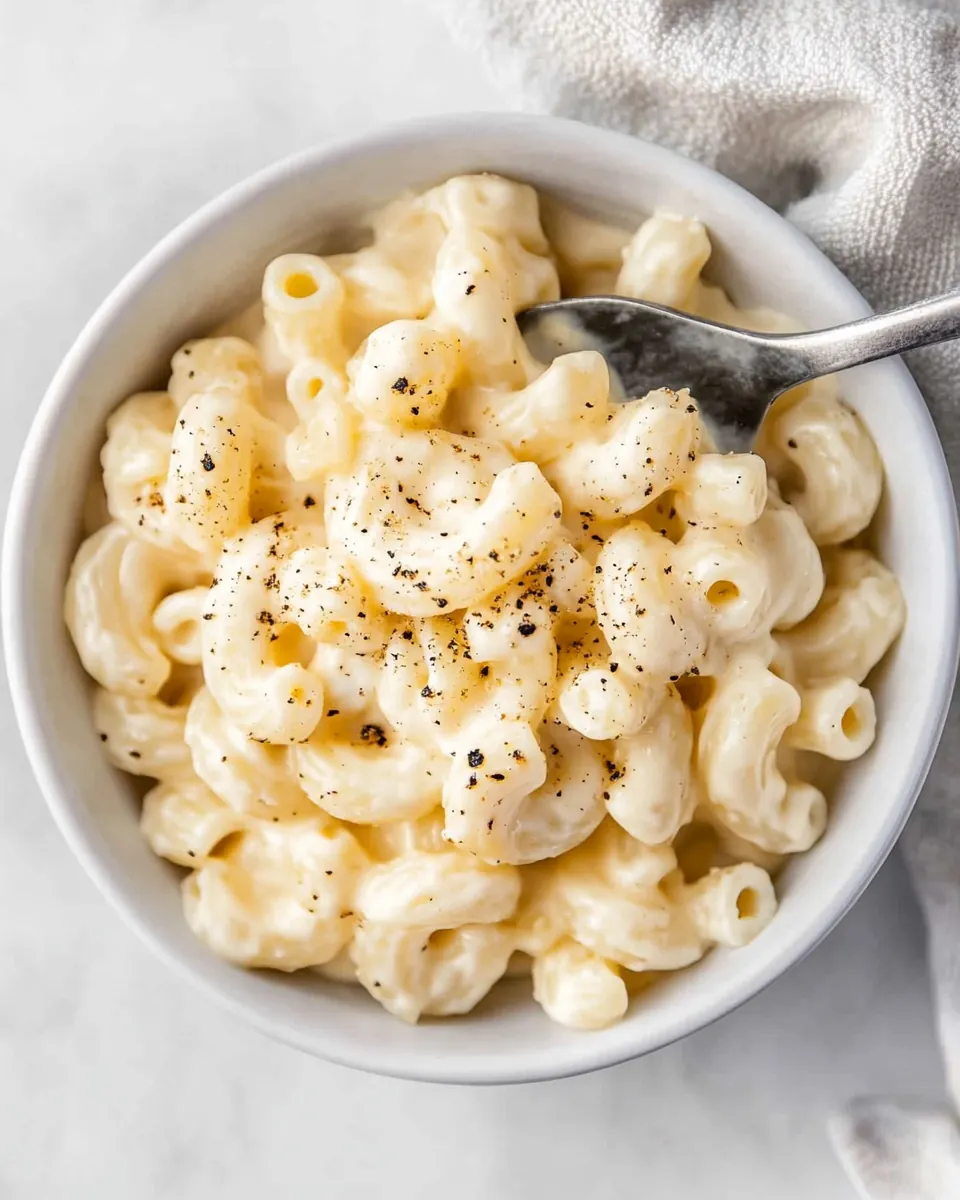
Panera Mac and Cheese
Panera Mac and Cheese was one of those comfort-food discoveries that felt like a warm hug on a hectic weeknight, and the first time I recreated it at home I remember the kitchen filling with a toasty, cheesy aroma that made everyone wander in for a taste. Right away I knew I wanted to capture that creamy texture and familiar sharp cheddar bite without turning it into something fussy. I used simple pantry staples and leaned into technique so the sauce would be velvety, not grainy.
Over the years I have tweaked the ratios and timing so the pasta stays perfectly tender while the sauce clings to every nook of the shells. I like to keep the approach relaxed, but precise, because small choices matter, for example the temperature of the dairy and the order you add liquids. When I serve Panera Mac and Cheese at home it usually becomes the centerpiece of a casual meal, and people ask for seconds more often than not. I enjoy those moments when a familiar recipe brings smiles and quiet satisfaction.
Recipe Snapshot
35 mins
15 mins
20 mins
Easy
600 kcal
American
Gluten-Free, Low FODMAP
Dinner
Large pot, Colander, Whisk
What Makes This Panera Mac and Cheese Special
Creamy, not gluey
One reason I keep coming back to Panera Mac and Cheese is the way the sauce stays silky and pours over the pasta, rather than clumping up. I learned that tempering the dairy and whisking steadily are the small rituals that prevent grainy texture, and they really pay off. The mouthfeel should be lush and smooth, the kind that coats your spoon and lingers pleasantly on the palate.
Cheddar forward flavor
The recipe celebrates cheese, especially a sharp, well aged Vermont style cheddar, which gives the dish its signature tang. I like the honest, cheddar driven personality; it keeps the flavors straightforward but satisfying. Choosing the right shredded cheese and shredding it yourself makes the melt much more consistent, and it dramatically improves the final taste.
Comfort that scales
This version scales well for a family dinner or a small gathering. The technique remains the same whether you are cooking for two or six, and the results are reliably warming and familiar. I often double the sauce for leftovers, because it reheats beautifully when you add a splash of milk and stir gently on low heat.
Simple ingredients, big payoff
The ingredient list is uncomplicated, which I find liberating. With staples like butter, flour, milk, cream, and cheese, you can build a complex mouthfeel and layered flavor without exotic items. That makes this dish accessible, and you can rely on technique to elevate it instead of relying on bells and whistles.
Weeknight friendly
I reach for Panera Mac and Cheese when I want something that feels indulgent but still practical. The actual hands on time is reasonable, and the steps are forgiving. If you follow the key cues like the sauce thickening and the cheese melting completely, you will be rewarded with a creamy bowl that comforts and satisfies.
Ingredients Required for Panera Mac and Cheese
These ingredients are intentionally straightforward, designed to create a balanced, creamy mac and cheese that clings to the pasta. The key players are the starch from the flour to thicken the sauce, the dairy trio of milk, cream, and butter for richness, and the shredded cheese for flavor and melt. Each element has a role, from texture to taste, and they work together to deliver the classic Panera feel.
- 1 pound dry medium shell pasta (1 box), or any short pasta will work: Provide structure and bulk to the dish by forming the tender, hollow shells that hold the cheese sauce; cook until al dente to avoid becoming mushy when mixed with the sauce.
- 6 tablespoons unsalted butter (3/4 stick): Contribute rich flavor and silky mouthfeel while helping to create the roux base; melt gently to combine with flour and coat the pasta for a creamy finish.
- 1/4 cup all-purpose flour: Thicken the sauce by forming a roux when combined with melted butter; whisk thoroughly to eliminate lumps and create a smooth béchamel for the cheese to melt into.
- 2 cups whole milk room temperature: Lighten and thin the cheese sauce while adding a subtle dairy sweetness; warm before adding to prevent shocking the roux and help achieve a uniform consistency.
- 1 cup heavy cream room temperature: Enhance richness and creaminess, increasing the sauce's body and velvety texture; add at room temperature so it integrates smoothly into the béchamel.
- 1 1/4 teaspoons kosher salt: Season the sauce to bring out the cheddar flavor and balance the richness; adjust the amount carefully to suit taste and the saltiness of the cheese used.
- 1/2 teaspoon dry mustard powder: Impart a tangy, savory note that brightens the cheesy richness and rounds out flavors; whisk into the sauce to dissolve evenly and avoid clumping.
- freshly ground black pepper to taste: Add sharp, aromatic heat in small amounts to taste, cutting through the richness and enhancing overall flavor complexity; freshly grind as needed for the best aroma.
- 4 cups freshly shredded Vermont Cheddar cheese I used Cracker Barrel but you can use any brand: Provide the primary cheesy flavor and melt into a smooth, cohesive sauce; shred fresh for optimal melting and creaminess, choosing a sharpness level that suits preference.
Making This Panera Mac and Cheese
This version of Panera Mac and Cheese is straightforward but benefits from attentive, calm pacing. The goal is to build a silky sauce and then fold in pasta so each shell holds flavor. Below you will find step by step guidance that explains sensory cues and troubleshooting notes to ensure success.
- Boil the pasta to al dente according to package directions. Drain over a colander and let cool slightly while you make the sauce.: The pot of boiling water should be lively and aromatic, with steam carrying a faint wheaty scent as you add the pasta . You want the shells to have a slight bite, not limp, so taste one a minute or two before the lower bound of the time on the box. The sound of rolling bubbles will ease as the water returns to a boil after adding the pasta, and you will notice the surface moving with steady motion. Draining promptly prevents the pasta from continuing to absorb water and becoming mushy once mixed with the sauce. A common mistake is overcooking; if shells are soft and collapsing, they will become gummy when combined. After draining, let the pasta sit briefly so it is warm but not steaming hot, which helps the sauce cling without causing separation.
- Melt the butter in a large pot over medium heat. Whisk in the flour and cook until slightly golden and no longer floury-smelling.: When the butter melts it will foam gently, and you should smell a warm, buttery note without any brown or nutty aroma yet. Add the flour and whisk constantly; the mixture will become a pale paste that loosens as water from the butter and flour combine. After a minute or two a subtle change in color and the disappearance of raw flour aroma indicates the roux is ready. This step builds the sauce body, so patience matters. If the roux browns too much you will introduce an unintended toasty bitterness, so keep the heat steady. A common error is leaving lumps of uncooked flour ; vigorous whisking prevents that and creates a uniformly smooth foundation.
- Gradually pour in the milk first, then cream, while whisking continuously.: As you add the room temperature milk , you will hear soft, steady whisking and the roux will loosen into a smooth, pale sauce. The liquid will steam softly but should not boil. Pouring slowly and whisking continuously creates a stable emulsion and prevents lumps from forming. When the cream goes in, the sauce will take on a richer sheen and thicker mouthfeel. The texture should be glossy and slightly thick on the whisk; if you see streaks of floury paste, continue whisking until fully smooth. A frequent mistake is dumping the dairy too fast, which yields a lumpy, uneven sauce that is harder to fix.
- Once the mixture starts to bubble and thicken, stir in the salt, dried mustard, and pepper.: The sauce will evolve from thin to a coating consistency, and you will notice it cling to the back of a spoon in a slow sheet. Gentle bubbling indicates the starch has activated, thickening the base. Adding the kosher salt , dry mustard powder , and black pepper at this point ensures the flavors bloom into the heated sauce. Stirring distributes the seasonings and allows you to taste and correct balance. Avoid boiling vigorously, which can break the emulsion; if it begins to separate, lower heat and whisk steadily. Under seasoning is common, so taste carefully after the cheese is folded in, since the cheese adds saltiness.
- Take the skillet off the heat. Then, add in the cheese and stir until completely melted and incorporated.: Removing the pot from direct heat ensures the cheese melts smoothly into the warm sauce without becoming grainy. As you add the freshly shredded cheese , the sauce will release a rich, tangy aroma and gradually thicken further while maintaining silkiness. Stirring patiently will help the cheese melt uniformly and create a glossy, cohesive sauce. If you try to force melting over high heat, the cheese can seize and become stringy or gritty; a gentle approach preserves the velvety texture. If small clumps form, remove a bit of sauce into a separate bowl and whisk vigorously, then fold it back in to smooth the texture.
- Add the pasta to the skillet and stir to coat. Taste, and add more salt if needed.: When you fold the warm pasta into the sauce, you should hear a soft, satisfying swish as shells get enveloped in glossy, cheesy coating. Visually, each shell will appear slick and well dressed, with pockets filled with sauce. This is when the dish comes together, so adjust seasoning carefully because the cheese may already contribute salt. If the sauce seems too thick, stir in a splash of room temperature milk to loosen it. A common oversight is not tasting at this stage, which can leave the final dish under seasoned, so sample and tweak before serving.
Ways to Adapt This Recipe
This recipe adapts nicely to small changes while keeping the core technique the same. Below are practical, tested suggestions that preserve the creamy texture and cheddar forward flavor. Each tip highlights a single choice and how to implement it confidently.
- Use different short pasta shapes Choose shells, elbow, cavatappi, or small penne, because the sauce clings to curves and pockets. Cook to al dente as recommended on the package, and drain promptly so the pasta does not absorb too much sauce. Different shapes change mouthfeel but not the core flavor.
- Adjust creaminess with milk to cream ratio If you want a lighter sauce, reduce the cream slightly and increase milk, but beware that reducing fat too much can lead to a thinner, less luxurious texture. Balance is key to maintain that rich mouthfeel.
- Swap cheddar variety for intensity Use mild, sharp, or extra sharp Vermont style cheddar depending on desired tang. Stronger cheddars provide more pronounced flavor and may require slightly less added salt. Always shred cheese fresh for best melt.
- Make a make ahead bechamel Prepare the sauce up to the point before adding cheese, cool, and refrigerate. Rewarm gently and add shredded cheese when ready to serve, this saves time on busy days and keeps texture consistent.
- Reheat gently to preserve texture Warm leftovers on low heat with a splash of milk while stirring, avoiding high heat which can separate the sauce. Reheating slowly brings the sauce back to life without becoming grainy.
What Complements This Panera Mac and Cheese
Panera Mac and Cheese pairs well with simple sides and cozy occasions, and it is versatile across meals. Below are serving ideas, storage notes, and pairing suggestions to help you plan a complete plate. Each list item explains how to combine textures and flavors for satisfying results.
- Serve with crisp green salad A lightly dressed mixed greens salad adds freshness and contrasts the creamy cheese sauce, cutting richness and brightening each bite. Try a vinaigrette with lemon or mustard to complement the cheddar.
- Offer roasted vegetables Oven roasted seasonal vegetables like broccoli or cauliflower provide a nutty, caramelized counterpoint, bringing texture and earthiness when served alongside the mac and cheese.
- Family weeknight dinner This dish works as a main for an easy weeknight meal, paired with a simple salad and crusty bread to soak up extra sauce, making dinner feel complete without fuss.
- Meal prep and storage Store leftovers in an airtight container for up to three days in the refrigerator. Reheat gently on the stovetop with a splash of room temperature milk to revive creaminess, stirring until smooth.
- Casual gatherings For a potluck or informal get together, keep the sauce slightly thicker and offer extra warmed milk in a pitcher so guests can loosen their portions to preference, ensuring no one ends up with dry pasta.
- Seasonal pairing In winter months this dish feels particularly comforting and pairs well with roasted root vegetables and warm, spiced sides, creating a hearty seasonal spread.
FAQ
Conclusion
Panera Mac and Cheese stands out for its creamy texture and cheddar forward flavor, built from simple, well executed steps. Give it a try when you want a comforting, reliable dish that feeds a crowd or elevates a quiet weeknight. With attention to technique, especially for the sauce and the cheese, this recipe rewards patience with a lush, satisfying bowl that becomes a favorite at the table.
Panera Mac and Cheese
Equipment
- Large Pot
- Colander
- Whisk
Ingredients
- 1 pound dry medium shell pasta (1 box), or any short pasta will work Provide structure and bulk to the dish by forming the tender, hollow shells that hold the cheese sauce; cook until al dente to avoid becoming mushy when mixed with the sauce.
- 6 tablespoons unsalted butter (3/4 stick) Contribute rich flavor and silky mouthfeel while helping to create the roux base; melt gently to combine with flour and coat the pasta for a creamy finish.
- 1/4 cup all-purpose flour Thicken the sauce by forming a roux when combined with melted butter; whisk thoroughly to eliminate lumps and create a smooth béchamel for the cheese to melt into.
- 2 cups whole milk room temperature Lighten and thin the cheese sauce while adding a subtle dairy sweetness; warm before adding to prevent shocking the roux and help achieve a uniform consistency.
- 1 cup heavy cream room temperature Enhance richness and creaminess, increasing the sauce's body and velvety texture; add at room temperature so it integrates smoothly into the béchamel.
- 1 1/4 teaspoons kosher salt Season the sauce to bring out the cheddar flavor and balance the richness; adjust the amount carefully to suit taste and the saltiness of the cheese used.
- 1/2 teaspoon dry mustard powder Impart a tangy, savory note that brightens the cheesy richness and rounds out flavors; whisk into the sauce to dissolve evenly and avoid clumping.
- freshly ground black pepper to taste Add sharp, aromatic heat in small amounts to taste, cutting through the richness and enhancing overall flavor complexity; freshly grind as needed for the best aroma.
- 4 cups freshly shredded Vermont Cheddar cheese I used Cracker Barrel but you can use any brand Provide the primary cheesy flavor and melt into a smooth, cohesive sauce; shred fresh for optimal melting and creaminess, choosing a sharpness level that suits preference.
Instructions
- Boil the pasta to al dente according to package directions. Drain over a colander and let cool slightly while you make the sauce.: The pot of boiling water should be lively and aromatic, with steam carrying a faint wheaty scent as you add the pasta . You want the shells to have a slight bite, not limp, so taste one a minute or two before the lower bound of the time on the box. The sound of rolling bubbles will ease as the water returns to a boil after adding the pasta, and you will notice the surface moving with steady motion. Draining promptly prevents the pasta from continuing to absorb water and becoming mushy once mixed with the sauce. A common mistake is overcooking; if shells are soft and collapsing, they will become gummy when combined. After draining, let the pasta sit briefly so it is warm but not steaming hot, which helps the sauce cling without causing separation.
- Melt the butter in a large pot over medium heat. Whisk in the flour and cook until slightly golden and no longer floury-smelling.: When the butter melts it will foam gently, and you should smell a warm, buttery note without any brown or nutty aroma yet. Add the flour and whisk constantly; the mixture will become a pale paste that loosens as water from the butter and flour combine. After a minute or two a subtle change in color and the disappearance of raw flour aroma indicates the roux is ready. This step builds the sauce body, so patience matters. If the roux browns too much you will introduce an unintended toasty bitterness, so keep the heat steady. A common error is leaving lumps of uncooked flour ; vigorous whisking prevents that and creates a uniformly smooth foundation.
- Gradually pour in the milk first, then cream, while whisking continuously.: As you add the room temperature milk , you will hear soft, steady whisking and the roux will loosen into a smooth, pale sauce. The liquid will steam softly but should not boil. Pouring slowly and whisking continuously creates a stable emulsion and prevents lumps from forming. When the cream goes in, the sauce will take on a richer sheen and thicker mouthfeel. The texture should be glossy and slightly thick on the whisk; if you see streaks of floury paste, continue whisking until fully smooth. A frequent mistake is dumping the dairy too fast, which yields a lumpy, uneven sauce that is harder to fix.
- Once the mixture starts to bubble and thicken, stir in the salt, dried mustard, and pepper.: The sauce will evolve from thin to a coating consistency, and you will notice it cling to the back of a spoon in a slow sheet. Gentle bubbling indicates the starch has activated, thickening the base. Adding the kosher salt , dry mustard powder , and black pepper at this point ensures the flavors bloom into the heated sauce. Stirring distributes the seasonings and allows you to taste and correct balance. Avoid boiling vigorously, which can break the emulsion; if it begins to separate, lower heat and whisk steadily. Under seasoning is common, so taste carefully after the cheese is folded in, since the cheese adds saltiness.
- Take the skillet off the heat. Then, add in the cheese and stir until completely melted and incorporated.: Removing the pot from direct heat ensures the cheese melts smoothly into the warm sauce without becoming grainy. As you add the freshly shredded cheese , the sauce will release a rich, tangy aroma and gradually thicken further while maintaining silkiness. Stirring patiently will help the cheese melt uniformly and create a glossy, cohesive sauce. If you try to force melting over high heat, the cheese can seize and become stringy or gritty; a gentle approach preserves the velvety texture. If small clumps form, remove a bit of sauce into a separate bowl and whisk vigorously, then fold it back in to smooth the texture.
- Add the pasta to the skillet and stir to coat. Taste, and add more salt if needed.: When you fold the warm pasta into the sauce, you should hear a soft, satisfying swish as shells get enveloped in glossy, cheesy coating. Visually, each shell will appear slick and well dressed, with pockets filled with sauce. This is when the dish comes together, so adjust seasoning carefully because the cheese may already contribute salt. If the sauce seems too thick, stir in a splash of room temperature milk to loosen it. A common oversight is not tasting at this stage, which can leave the final dish under seasoned, so sample and tweak before serving.
Notes
- Use different short pasta shapes Choose shells, elbow, cavatappi, or small penne, because the sauce clings to curves and pockets. Cook to al dente as recommended on the package, and drain promptly so the pasta does not absorb too much sauce. Different shapes change mouthfeel but not the core flavor.
- Adjust creaminess with milk to cream ratio If you want a lighter sauce, reduce the cream slightly and increase milk, but beware that reducing fat too much can lead to a thinner, less luxurious texture. Balance is key to maintain that rich mouthfeel.
- Swap cheddar variety for intensity Use mild, sharp, or extra sharp Vermont style cheddar depending on desired tang. Stronger cheddars provide more pronounced flavor and may require slightly less added salt. Always shred cheese fresh for best melt.
- Make a make ahead bechamel Prepare the sauce up to the point before adding cheese, cool, and refrigerate. Rewarm gently and add shredded cheese when ready to serve, this saves time on busy days and keeps texture consistent.
- Reheat gently to preserve texture Warm leftovers on low heat with a splash of milk while stirring, avoiding high heat which can separate the sauce. Reheating slowly brings the sauce back to life without becoming grainy.