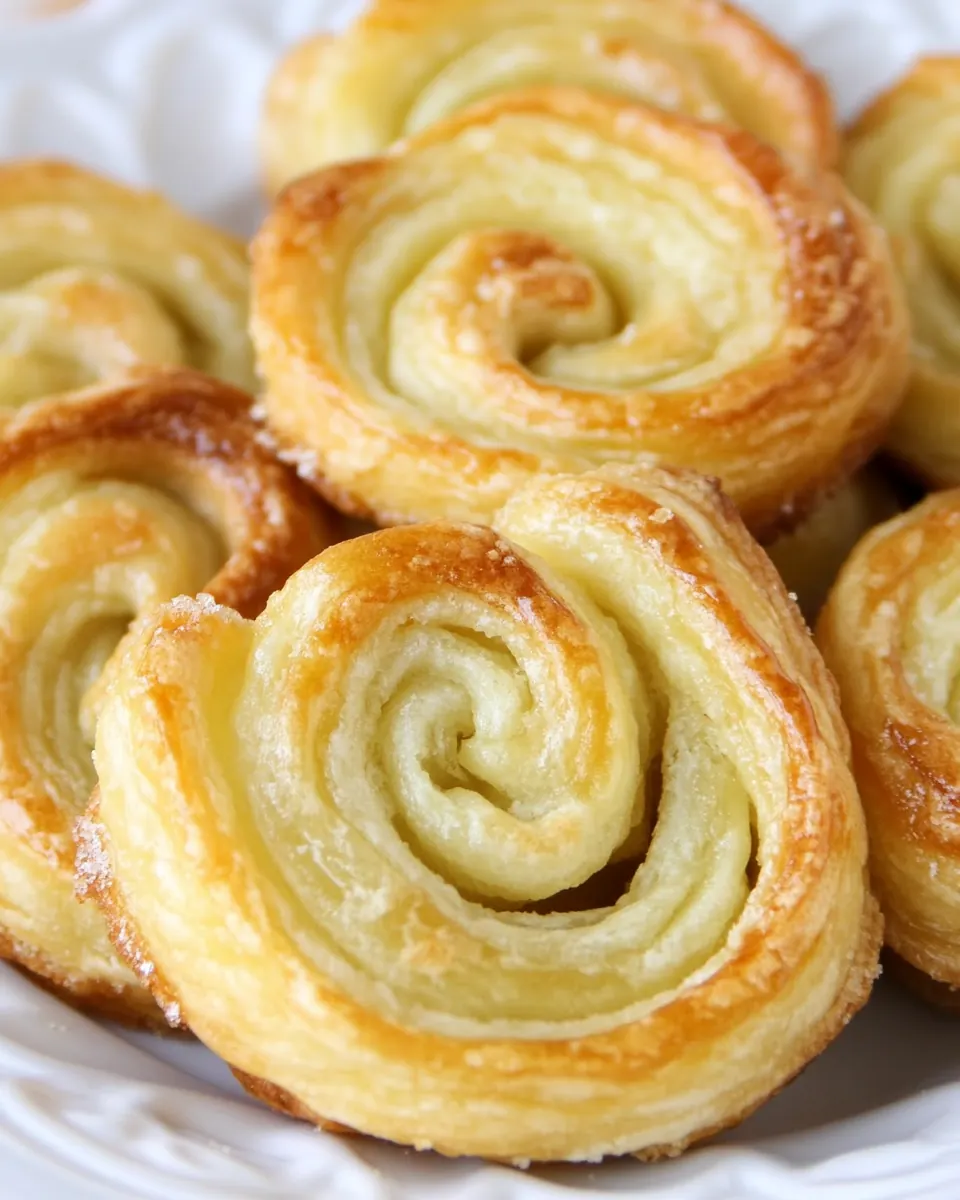
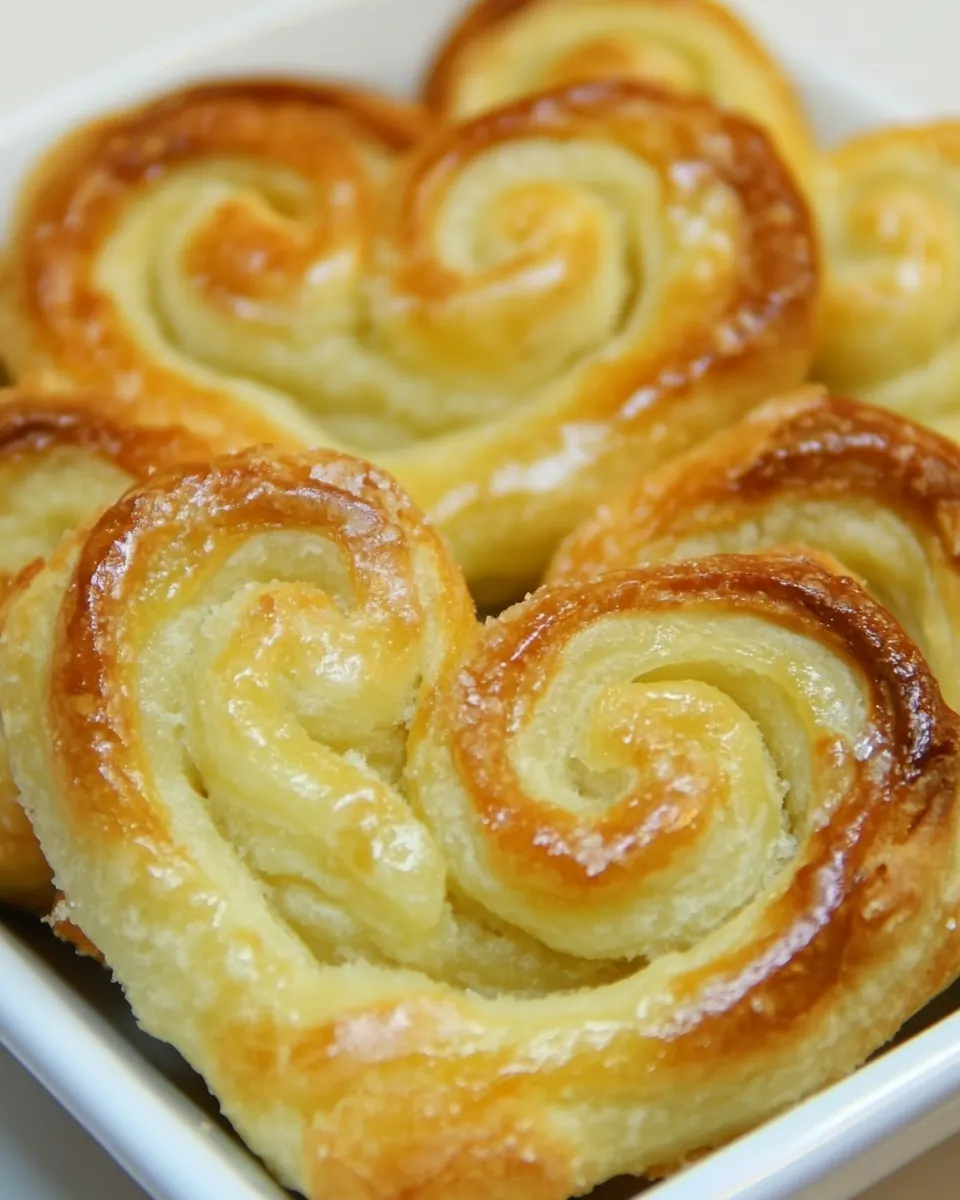
Palmiers a.k.a. Elephant Ears
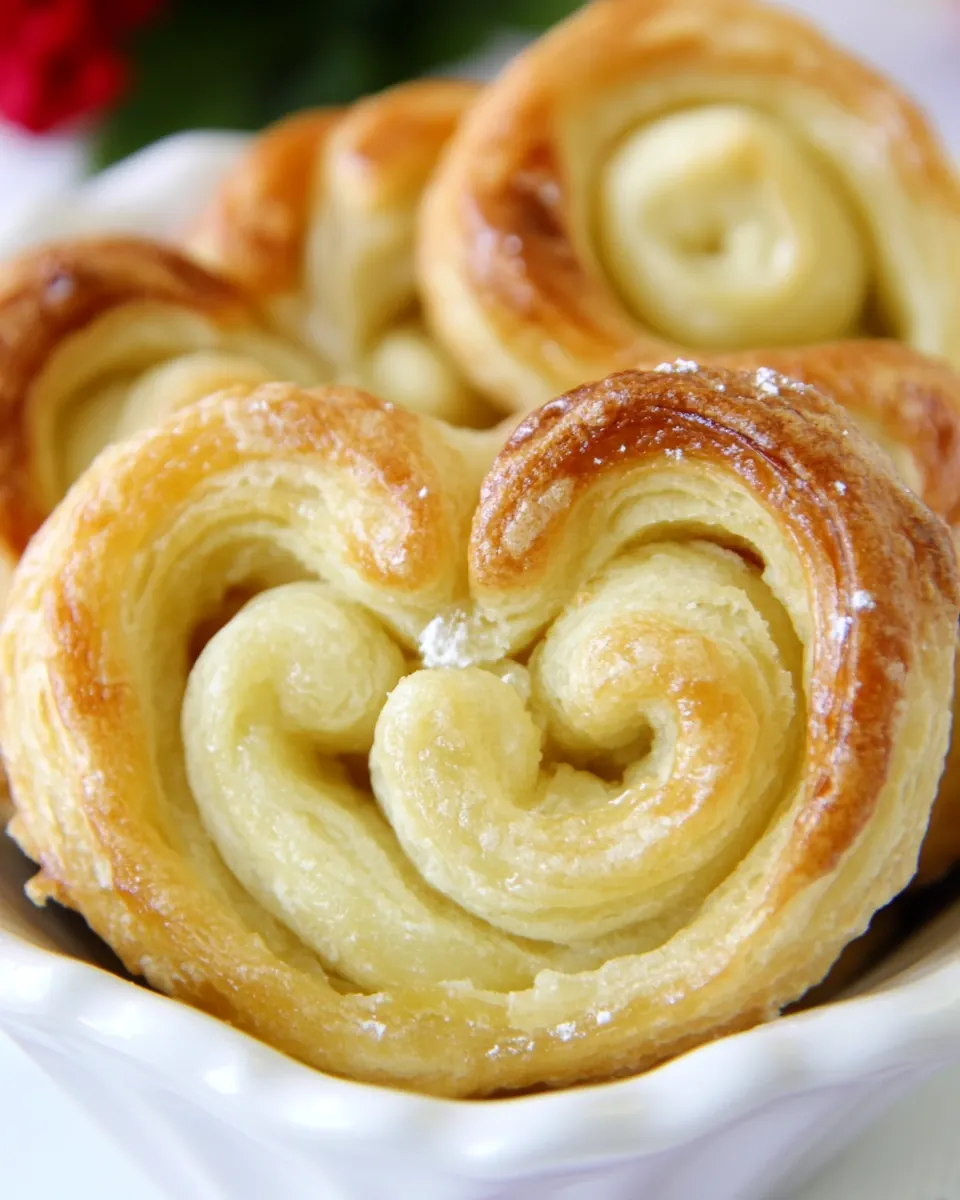
Palmiers a.k.a. Elephant Ears are one of those simple pastries that somehow feel fancy, and the first time I made them I was hooked by the crackly caramelized sugar and the way the puff pastry folded into little crunchy scrolls. I remember pulling the warm cookies from the oven and watching the sugar shimmer as it cooled, a humble kitchen triumph that made a rainy afternoon feel celebratory.
My earliest memory with Palmiers a.k.a. Elephant Ears involves a rustic tea I hosted when friends stopped by unannounced. I had two sheets of thawed puff pastry and a mound of sugar, and with almost no fuss I produced a tray of flaky, crisp cookies that vanished within an hour. That moment taught me how a few pantry staples and a small amount of technique can yield something everyone remembers.
Recipe Snapshot
25 mins
15 mins
10 mins
Easy
150 kcal
American
Vegan, Gluten-Free
Desserts
Rolling pin, Baking sheet, Parchment paper, Sharp knife
The Appeal of This Palmiers a.k.a. Elephant Ears
1. Ridiculously simple ingredients
I love that Palmiers a.k.a. Elephant Ears rely on just a few items you likely already have. With sugar and store bought puff pastry you unlock layers of buttery, flaky texture without complex mixing. I often tell people the fewer the ingredients, the more each one needs to shine, and these cookies prove that point perfectly.
2. Contrast of textures
What keeps me coming back is the crunchy, caramelized exterior against tender, airy layers inside. When you bite one of these cookies you get a satisfying crackle, a touch of chew, and a buttery mouthfeel. I like to listen for that snap as a quick signal that they are done, and it never disappoints.
3. Quick to make, big payoff
You can turn these out in under half an hour from start to finish. I appreciate recipes that respect time without sacrificing quality. For last minute guests or a sweet end to a weekday meal, Palmiers a.k.a. Elephant Ears deliver elegance with very little hands on work.
4. Versatile presentation
These cookies adapt to many occasions, from a casual coffee break to a holiday platter. I enjoy arranging them on a tiered tray, or tucking a few into a gift box. They look special, yet they are forgiving to make, which is a rare and welcome combination.
5. Little room for error
Finally, they are a wonderful place to practice basic pastry skills like rolling and folding without intimidating steps. Even if your folds are not perfect, the final result is still delicious. I like teaching friends to make palmiers first because success is almost guaranteed, and that builds confidence for more adventurous baking.
What to Gather for Palmiers a.k.a. Elephant Ears
These ingredients embody a minimalist pastry philosophy. Each item plays a clear role: puff pastry provides the laminated layers, sugar caramelizes to form crisp, shiny exteriors, and a pinch of kosher salt balances sweetness. The parchment paper is a practical player, preventing sticking and helping the bottoms brown evenly. Together they create a simple chemistry that yields impressive texture and flavor.
- 1 cup granulated sugar: Provides sweetness and helps create a crisp caramelized exterior when sprinkled onto puff pastry before baking; can be used to coat the dough surface evenly for a glossy finish. Dissolves and browns under heat to contribute both flavor and attractive color to the finished palmiers.
- 2 sheets, 1 package Pepperidge Farm puff pastry, thawed: Supplies the flaky, layered structure essential for palmiers; thawed sheets of puff pastry allow for easy rolling and shaping without tearing. Delivers buttery flavor and steam-driven lift during baking to produce delicate, crisp layers and golden puffed edges.
- 1 pinch of kosher salt (optional): Adds a subtle savory balance that enhances the pastry’s sweetness; a tiny pinch can elevate overall flavor without making the treat salty. Optional usage gives control over seasoning for those who prefer contrast with the caramelized sugar.
- Parchment paper to line the cookie sheet.: Provides a nonstick surface for baking to prevent sticking and ensure easy removal of finished palmiers; lines the cookie sheet to protect both pastry and pan. Also aids cleanup by catching any melted sugar or butter that may leak during baking.
How to Cook Palmiers a.k.a. Elephant Ears
These directions take the concise steps from the recipe and expand them into a sensory experience. I walk you through each moment so you can feel confident about texture, timing, and small cues like color and sound. With a little attention, the process is relaxing and reliably rewarding.
- Mix together sugar (and kosher salt). Pour 1/2 cup of sugar mixture on a flat surface such as a large wooden board.: As you combine the sugar and optional kosher salt , inhale the faint dry sweetness, a scent that promises caramel soon to come. The salt will dissolve into the sugar crystals slightly if mixed well, which helps distribute savory notes across every cookie. I tip a half cup of the mixture onto a flat, clean board and spread it to form a coarsebed, the crystals glinting under light. A common mistake here is skimping on the salt, which can leave the cookies cloying, so measure carefully. Be mindful that too large sugar mounds make it hard to lay pastry flat, so keep the bed even and thin.
- Unfold one Puff pastry sheet onto the sugared surface and spread 1/4 cup sugar over the top.: The sugar bed should feel gritty under your fingers; this texture will press into the dough and begin the caramelization process during baking. Lay the sugar flat enough so the pastry will make full contact, but not so thick that it blocks proper folding. If the sugar is uneven, parts of the pastry can toast differently, so smooth it with the back of a spoon. Avoid pouring more than the recipe calls for as excess sugar can burn at high oven temperatures.
- With a rolling pin, roll the pastry sheet to about a 13" square, pressing the sugar into the dough.: When you place the thawed puff pastry onto the sugar, you will feel the dough relax and slightly cool the board. Sprinkle another quarter cup of the sugar mixture across the top, watching how the crystals cling to the surface. Use gentle pressure so the sugar adheres without tearing the dough. If the pastry resists lying flat, give it a few minutes to warm in short bursts and then chill briefly; overly warm dough becomes sticky and loses layer definition.
- Fold 2 opposite sides into the center. Fold again and close like a book (you should have 8 layers total).: As you roll, listen for a faint rustle, the sound of the sugar and dough meeting. Rolling to approximately a 13 inch square evens thickness and embeds sugar into the surface so it caramelizes uniformly. Press consistently from center out to avoid thin edges. If you roll too thin, the layers will be fragile and may leak sugar while baking; too thick, and the internal layers will not crisp through. Keep the pressure steady and rotate the sheet as needed for an even square.
- Cut the pastry log into just under 1/2" pieces and arrange on a cookie sheet lined with parchment paper. Repeat with the second puff pastry sheet.: Folding the opposite edges inward creates the classic palmier spiral structure. As you fold, the pastry will show visible layered edges, an encouraging visual cue. Align the two sides so the dough sits neatly, then fold again to form a tighter book style. This double folding traps sugar between layers, which caramelizes and creates the signature crunch. A typical error is misaligning layers, producing uneven spirals, so take a moment to square the edges before the final fold.
- Bake for 6 minutes until the bottoms of the cookies are golden brown and caramelized. Flip the cookies over and return to the oven for another 4 to 5 minutes until golden brown on the other side. Remove from the baking sheet to cool.: Closing the pastry like a book compacts the layers and concentrates sugar into ribbons between the lamination. The dough will feel firmer after this step, and you can see the stacked layers at the ends. Keep the roll chilled if it becomes soft, because warmer dough will be harder to slice neatly. If you try cutting a too warm log, it will squish and lose its shape, so pop it briefly in the refrigerator if needed to firm up.
- Cut the pastry log into just under 1/2" pieces and arrange on a cookie sheet lined with parchment paper: As you slice, notice the clean, layered cross sections. Aim for just under one half inch thickness for the ideal balance of caramel to flaky interior. Arrange the pieces with space between them because they will expand and flatten into their palm shape while baking. If slices are uneven, some will brown faster than others, so use a sharp, nonserrated knife for clean cuts. Pressing the knife through slowly can compress the layers, so a smooth decisive motion works best.
- Repeat with the second puff pastry sheet: Repeating the exact process with the second sheet maintains consistency across all cookies, so treat each sheet with the same attention. Keep the remaining sugar and board ready, and try to maintain similar rolling, folding, and cutting techniques so they bake uniformly. If one sheet is handled differently, you may notice variations in size and browning, which is avoidable with consistent method. If your oven has hot spots, rotate the tray between batches to even out baking.
- Bake for 6 minutes until the bottoms of the cookies are golden brown and caramelized: During the first bake, watch the tray closely through the oven window. You will likely see bubbling sugar at the edges and a warm golden hue developing on the bottoms. This first stage sets the caramel base, so don’t be tempted to skip checking. A common pitfall is overbaking in this step which causes excessive darkening, so trust the visual cue of a golden, caramelized bottom rather than the clock alone. If you see smoke or very dark spots, your oven may be running hot and should be adjusted.
- Flip the cookies over and return to the oven for another 4 to 5 minutes until golden brown on the other side: Turning the cookies exposes the top layers to direct heat, allowing them to crisp and take on an even color. You should hear faint crackles as sugar continues to caramelize, and the entire cookie will develop an amber tone. Check for uniformity, and remove any cookie that reaches the desired color early to prevent burning. Overbaking here leads to bitterness in the caramel, so err on the slightly lighter golden side if unsure.
- Remove from the baking sheet to cool: Once out of the oven, transfer the cookies off the hot sheet to cool on a wire rack or clean surface. The caramel will set as they cool, changing from glossy to firm and crackly under gentle pressure. Cooling also prevents residual heat from continuing to darken the bottoms. A usual mistake is leaving them on the hot pan which can cause the bottoms to overcook and stick, so move them while warm but not scalding. Let them reach room temperature before storing.
Ways to Customize for Palmiers a.k.a. Elephant Ears
These simple cookies welcome small, careful tweaks that personalize flavor and presentation. Below are notes and practical approaches I use when I want to vary texture or sweet intensity while keeping the method the same.
- Follow the note about thawing: You can thaw puff pastry on the counter according to the package instructions and then stick it in the fridge until ready to use, or thaw in the refrigerator overnight; both methods preserve layers while giving you workable dough.
- Timing for caramel visibility: You may not be able to see if the bottom is caramelized until you flip one over, so check the underside after the initial bake to confirm an even golden brown before returning to the oven.
- Storage advice: Once cooled to room temperature, these cookies keep well in an airtight container or zipped bag; stacking them with parchment sheets helps maintain crispness and prevents sticking.
- Control sugar distribution: Press the sugar gently into the pastry when rolling; uneven pressing leads to pockets of burnt sugar or undercaramelized areas, so strive for consistent contact.
- Batch consistency: Repeat the same motions and measurements for both sheets to ensure the cookies bake at the same rate; if your second tray looks different, compare rolling thickness and slice size to spot deviations.
- Tray rotation: If your oven has hot spots, rotate the tray halfway through each bake to promote even browning, especially when working with multiple sheets.
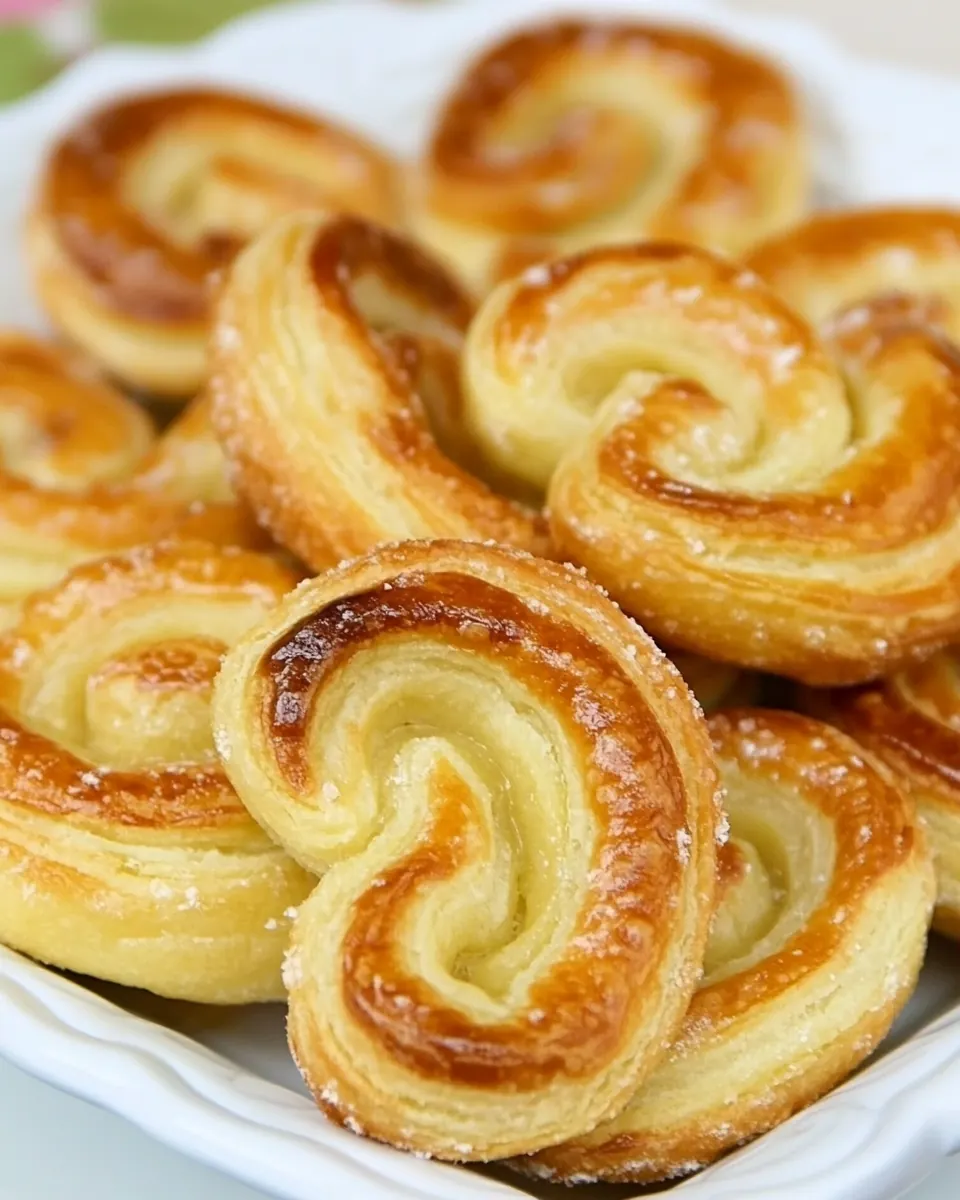
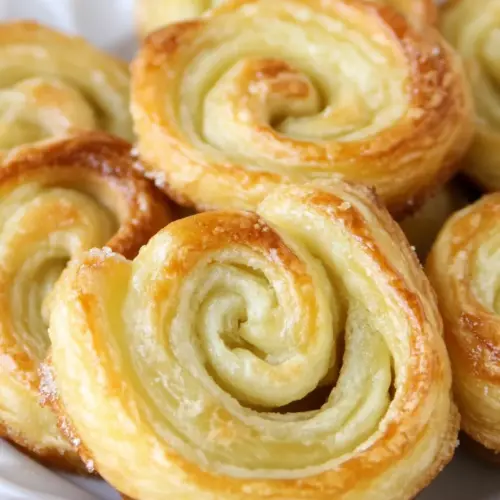
Serving Ideas for Palmiers a.k.a. Elephant Ears
These crunchy, caramel cookies are very adaptable. Below are ways I serve them across different settings, including storage tips and pairing ideas to elevate the experience.
- Tea time pairing: Serve a stack of Palmiers a.k.a. Elephant Ears with a light black tea or herbal infusion for a refined afternoon break.
- Casual coffee snack: Arrange them alongside a morning coffee for a simple treat that feels bakery made, ideal for informal gatherings or a weekend brunch.
- Party platter: Mix palmiers into a cookie tray for celebrations; their crisp texture contrasts nicely with softer cookies and pastries.
- Gift boxes: Layer cooled palmiers in a small box with parchment paper for a thoughtful homemade gift that travels well when kept airtight.
- Storage tips: Store at room temperature in an airtight container up to several days; if you need longer storage, freeze in a sealed bag and thaw at room temperature before serving.
- Seasonal occasions: These cookies work well year round, fitting into holiday cookie exchanges, casual picnics, or as a light dessert after family dinners.
FAQ
Conclusion
Palmiers a.k.a. Elephant Ears are special because they turn just a few pantry ingredients into crisp, caramelized bites that feel elegant and effortless. Give them a try when you want a quick, impressive sweet that requires minimal hands on time and still delights a crowd. I hope this guide makes you confident enough to fold, roll, and bake a tray, then share them with friends who will ask for your secret.
Palmiers a.k.a. Elephant Ears
Equipment
- Rolling Pin
- Baking Sheet
- Parchment Paper
- Sharp Knife
Ingredients
- 1 cup granulated sugar Provides sweetness and helps create a crisp caramelized exterior when sprinkled onto puff pastry before baking; can be used to coat the dough surface evenly for a glossy finish. Dissolves and browns under heat to contribute both flavor and attractive color to the finished palmiers.
- 2 sheets, 1 package Pepperidge Farm puff pastry, thawed Supplies the flaky, layered structure essential for palmiers; thawed sheets of puff pastry allow for easy rolling and shaping without tearing. Delivers buttery flavor and steam-driven lift during baking to produce delicate, crisp layers and golden puffed edges.
- 1 pinch of kosher salt, optional Adds a subtle savory balance that enhances the pastry’s sweetness; a tiny pinch can elevate overall flavor without making the treat salty. Optional usage gives control over seasoning for those who prefer contrast with the caramelized sugar.
- Parchment paper to line the cookie sheet. Provides a nonstick surface for baking to prevent sticking and ensure easy removal of finished palmiers; lines the cookie sheet to protect both pastry and pan. Also aids cleanup by catching any melted sugar or butter that may leak during baking.
Instructions
- Mix together sugar (and kosher salt). Pour 1/2 cup of sugar mixture on a flat surface such as a large wooden board.: As you combine the sugar and optional kosher salt , inhale the faint dry sweetness, a scent that promises caramel soon to come. The salt will dissolve into the sugar crystals slightly if mixed well, which helps distribute savory notes across every cookie. I tip a half cup of the mixture onto a flat, clean board and spread it to form a coarsebed, the crystals glinting under light. A common mistake here is skimping on the salt, which can leave the cookies cloying, so measure carefully. Be mindful that too large sugar mounds make it hard to lay pastry flat, so keep the bed even and thin.
- Unfold one Puff pastry sheet onto the sugared surface and spread 1/4 cup sugar over the top.: The sugar bed should feel gritty under your fingers; this texture will press into the dough and begin the caramelization process during baking. Lay the sugar flat enough so the pastry will make full contact, but not so thick that it blocks proper folding. If the sugar is uneven, parts of the pastry can toast differently, so smooth it with the back of a spoon. Avoid pouring more than the recipe calls for as excess sugar can burn at high oven temperatures.
- With a rolling pin, roll the pastry sheet to about a 13" square, pressing the sugar into the dough.: When you place the thawed puff pastry onto the sugar, you will feel the dough relax and slightly cool the board. Sprinkle another quarter cup of the sugar mixture across the top, watching how the crystals cling to the surface. Use gentle pressure so the sugar adheres without tearing the dough. If the pastry resists lying flat, give it a few minutes to warm in short bursts and then chill briefly; overly warm dough becomes sticky and loses layer definition.
- Fold 2 opposite sides into the center. Fold again and close like a book (you should have 8 layers total).: As you roll, listen for a faint rustle, the sound of the sugar and dough meeting. Rolling to approximately a 13 inch square evens thickness and embeds sugar into the surface so it caramelizes uniformly. Press consistently from center out to avoid thin edges. If you roll too thin, the layers will be fragile and may leak sugar while baking; too thick, and the internal layers will not crisp through. Keep the pressure steady and rotate the sheet as needed for an even square.
- Cut the pastry log into just under 1/2" pieces and arrange on a cookie sheet lined with parchment paper. Repeat with the second puff pastry sheet.: Folding the opposite edges inward creates the classic palmier spiral structure. As you fold, the pastry will show visible layered edges, an encouraging visual cue. Align the two sides so the dough sits neatly, then fold again to form a tighter book style. This double folding traps sugar between layers, which caramelizes and creates the signature crunch. A typical error is misaligning layers, producing uneven spirals, so take a moment to square the edges before the final fold.
- Bake for 6 minutes until the bottoms of the cookies are golden brown and caramelized. Flip the cookies over and return to the oven for another 4 to 5 minutes until golden brown on the other side. Remove from the baking sheet to cool.: Closing the pastry like a book compacts the layers and concentrates sugar into ribbons between the lamination. The dough will feel firmer after this step, and you can see the stacked layers at the ends. Keep the roll chilled if it becomes soft, because warmer dough will be harder to slice neatly. If you try cutting a too warm log, it will squish and lose its shape, so pop it briefly in the refrigerator if needed to firm up.
- Cut the pastry log into just under 1/2" pieces and arrange on a cookie sheet lined with parchment paper: As you slice, notice the clean, layered cross sections. Aim for just under one half inch thickness for the ideal balance of caramel to flaky interior. Arrange the pieces with space between them because they will expand and flatten into their palm shape while baking. If slices are uneven, some will brown faster than others, so use a sharp, nonserrated knife for clean cuts. Pressing the knife through slowly can compress the layers, so a smooth decisive motion works best.
- Repeat with the second puff pastry sheet: Repeating the exact process with the second sheet maintains consistency across all cookies, so treat each sheet with the same attention. Keep the remaining sugar and board ready, and try to maintain similar rolling, folding, and cutting techniques so they bake uniformly. If one sheet is handled differently, you may notice variations in size and browning, which is avoidable with consistent method. If your oven has hot spots, rotate the tray between batches to even out baking.
- Bake for 6 minutes until the bottoms of the cookies are golden brown and caramelized: During the first bake, watch the tray closely through the oven window. You will likely see bubbling sugar at the edges and a warm golden hue developing on the bottoms. This first stage sets the caramel base, so don’t be tempted to skip checking. A common pitfall is overbaking in this step which causes excessive darkening, so trust the visual cue of a golden, caramelized bottom rather than the clock alone. If you see smoke or very dark spots, your oven may be running hot and should be adjusted.
- Flip the cookies over and return to the oven for another 4 to 5 minutes until golden brown on the other side: Turning the cookies exposes the top layers to direct heat, allowing them to crisp and take on an even color. You should hear faint crackles as sugar continues to caramelize, and the entire cookie will develop an amber tone. Check for uniformity, and remove any cookie that reaches the desired color early to prevent burning. Overbaking here leads to bitterness in the caramel, so err on the slightly lighter golden side if unsure.
- Remove from the baking sheet to cool: Once out of the oven, transfer the cookies off the hot sheet to cool on a wire rack or clean surface. The caramel will set as they cool, changing from glossy to firm and crackly under gentle pressure. Cooling also prevents residual heat from continuing to darken the bottoms. A usual mistake is leaving them on the hot pan which can cause the bottoms to overcook and stick, so move them while warm but not scalding. Let them reach room temperature before storing.
Notes
- Follow the note about thawing: You can thaw puff pastry on the counter according to the package instructions and then stick it in the fridge until ready to use, or thaw in the refrigerator overnight; both methods preserve layers while giving you workable dough.
- Timing for caramel visibility: You may not be able to see if the bottom is caramelized until you flip one over, so check the underside after the initial bake to confirm an even golden brown before returning to the oven.
- Storage advice: Once cooled to room temperature, these cookies keep well in an airtight container or zipped bag; stacking them with parchment sheets helps maintain crispness and prevents sticking.
- Control sugar distribution: Press the sugar gently into the pastry when rolling; uneven pressing leads to pockets of burnt sugar or undercaramelized areas, so strive for consistent contact.
- Batch consistency: Repeat the same motions and measurements for both sheets to ensure the cookies bake at the same rate; if your second tray looks different, compare rolling thickness and slice size to spot deviations.
- Tray rotation: If your oven has hot spots, rotate the tray halfway through each bake to promote even browning, especially when working with multiple sheets.