Nilla Wafers Banana Cream Dessert
Nilla Wafers Banana Cream Dessert is the kind of recipe I reach for whenever I need a no fuss, crowd pleasing treat that feels like a hug from childhood. The first time I made this I was racing the clock between errands and an impromptu family visit, and this dessert arrived on the table looking effortless but tasting like it had hours of love behind it. I love how the simple layers let each element shine, and how a handful of pantry staples can transform into something everyone asks about. I still remember the whispered compliments and how quickly the last spoonful disappeared.
Over the years I’ve adapted tiny details, learning how to coax the best texture from the crust and how to time chilling so the pudding sets just right without soggy bananas. My neighbors will tell you I am predictable with desserts, but this one gets me invited back. There is comfort in the crunch of the cookie base, the mellow sweetness of sliced bananas, and the cloud like finish of cool whip, all nested in a silky Banana Cream Pudding layer. If you want a dessert that travels well to potlucks, or that you can assemble between errands, this is it.
Recipe Snapshot
26 mins
25 mins
1 mins
Easy
250 kcal
American
Gluten-Free, Low FODMAP
Desserts
Food chopper, Measuring cup, Mixing bowl, Spatula, Refrigerator
What We Adore About This Nilla Wafers Banana Cream Dessert
Familiar flavors with minimal effort
I adore how Nilla Wafers Banana Cream Dessert brings nostalgia without complicated technique. You are not wrestling with tempering, or long bakes, you are assembling textures, and that makes it approachable for anyone. I find this comforting after a busy week when I still want something special.
Crisp, creamy, and tender contrast
The crispness from the Nilla Wafers crust contrasts with the silky Banana Cream Pudding and pillowy cool whip. That interplay keeps every bite interesting, and I often watch guests pause to savor those layered sensations. I believe texture is the unsung hero of simple desserts.
Adaptable and forgiving
I like recipes that forgive the occasional misstep, and this one does. If your crust is a touch crumbly it firms up in the fridge, and slightly underripe bananas still add structure. That makes this dessert ideal when you are cooking with what you already have on hand.
Perfect for gatherings
I often make this for casual get togethers because it scales easily and travels well. You can prepare it ahead, chill it, and add the final cool whip layer just before serving, which saves time on the day of your event. People appreciate treats that arrive ready to enjoy.
Simple ingredient spotlight
There is a gentle elegance to relying on a few quality ingredients. The buttery crumbs, ripe bananas, and creamy pudding combine into something more than the sum of its parts. When I want a quick win that still feels homemade, this dish answers the call.
Ingredients Required for Nilla Wafers Banana Cream Dessert
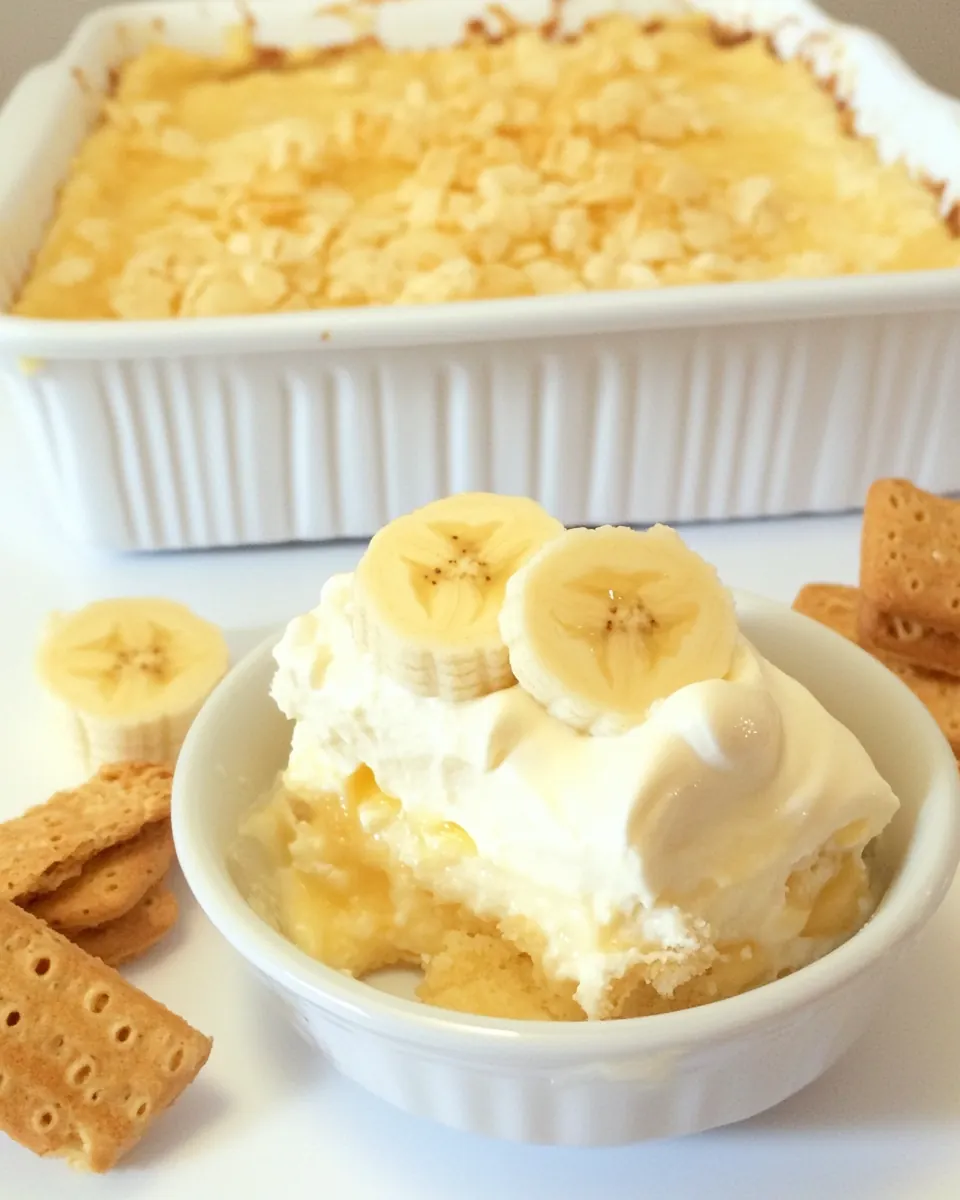
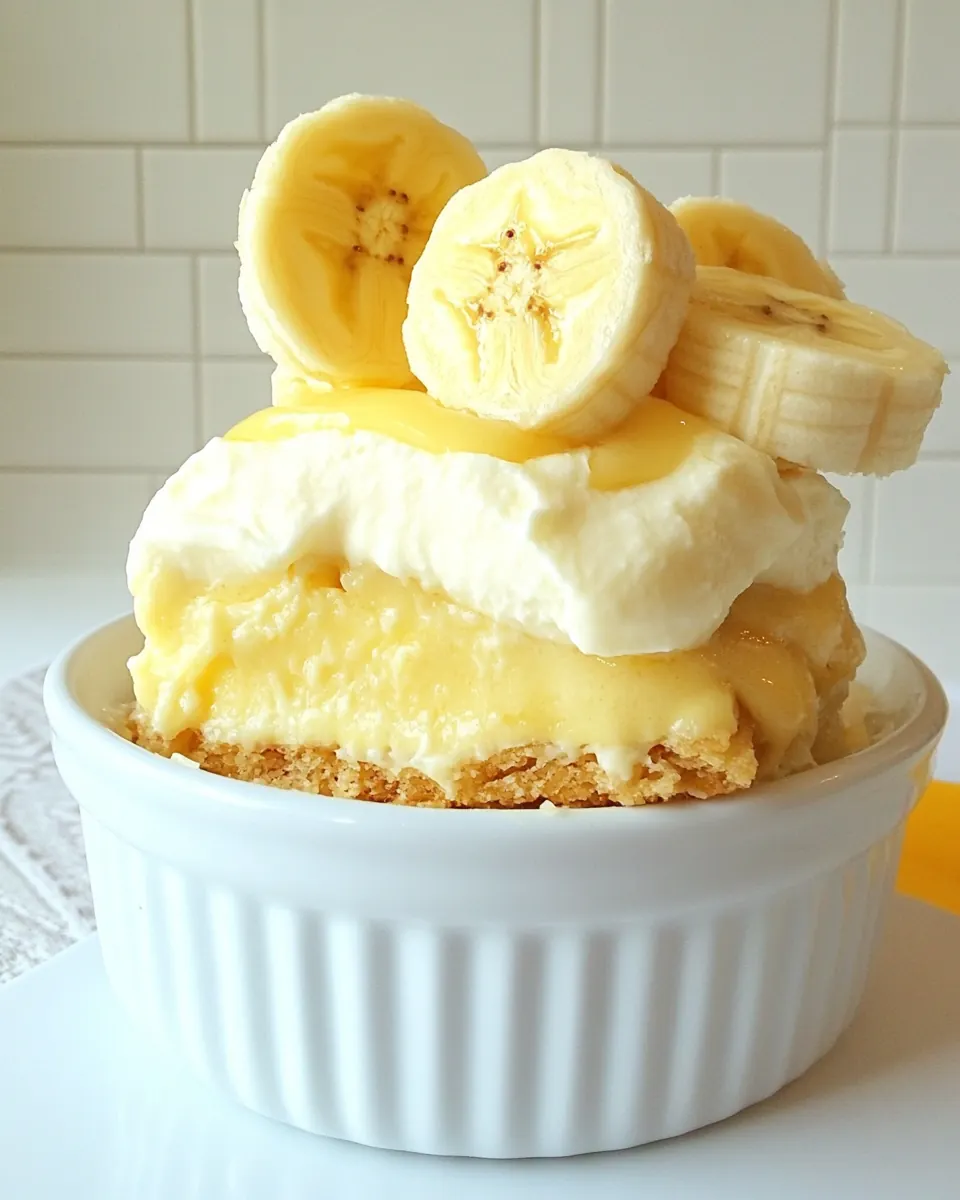
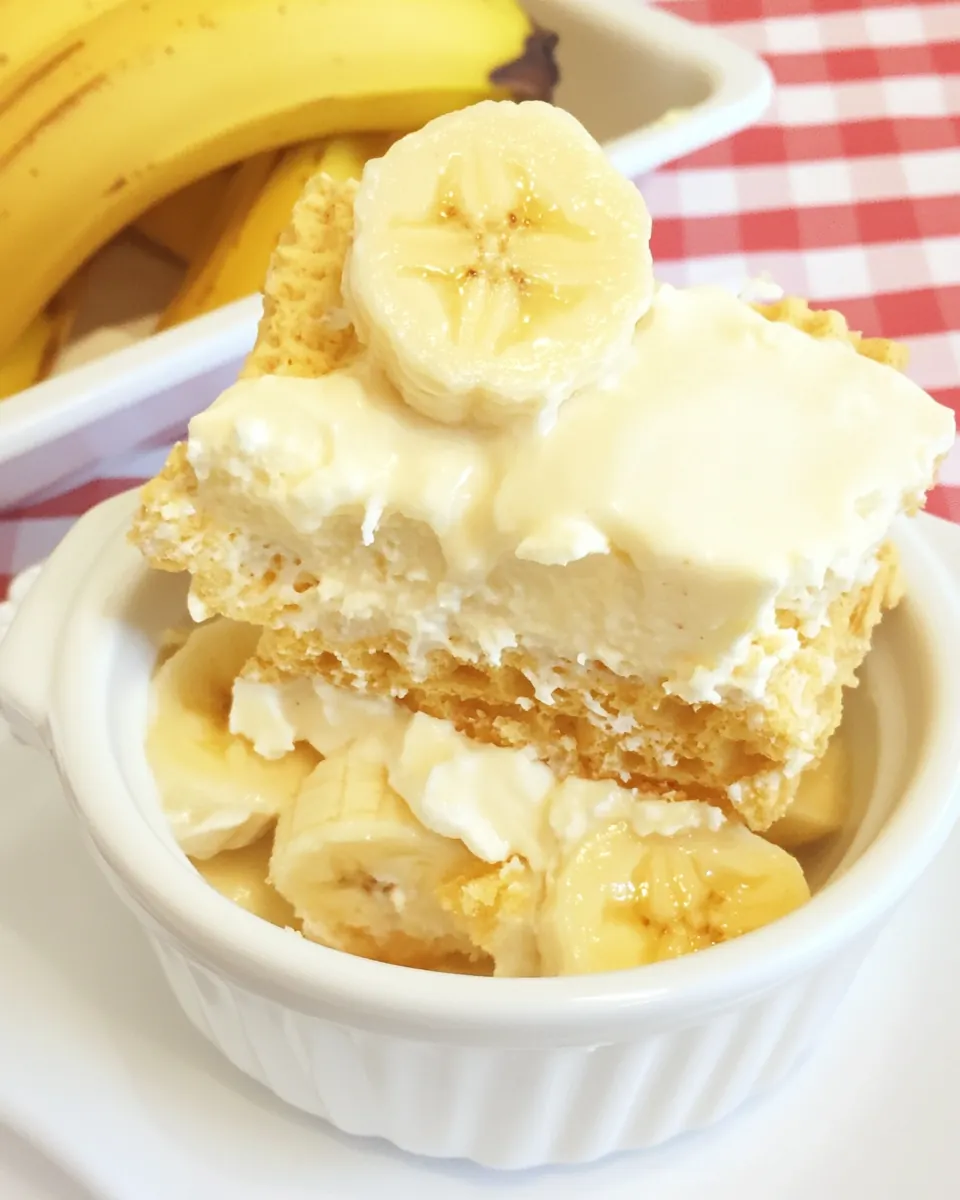
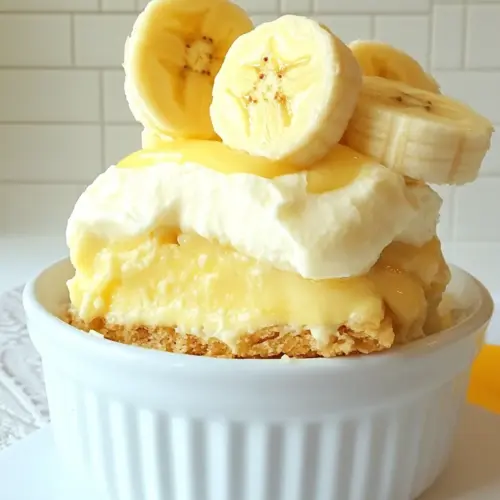
These ingredients are intentionally straightforward. I think of the list as three roles: the foundation, the filling, and the finish. Each plays a clear part in texture and flavor. The key players are the Nilla Wafers which provide a crisp, buttery base, the Banana Cream Pudding for silky structure, and the cool whip for a light, creamy top note that keeps the whole dessert bright.
- 45 Nilla Wafers About 2 cups crushed: Crushed to create a buttery, crunchy base that provides texture and structure for the dessert; combine with melted butter and press into a pan to form an even crust. Offers a sweet, slightly vanilla flavor that complements the banana and creamy layers, and helps absorb moisture to keep layers distinct.
- 6 Tbs butter melted: Melted to bind the crushed wafers together into a cohesive crust and add a rich, buttery flavor; stir evenly into the crumbs before pressing firmly into the dish. Also helps the crust set as it cools, creating a stable foundation for the pudding and whipped topping.
- 1 box Banana Cream Pudding large: Prepared according to package directions to produce a silky, banana-flavored custard layer that delivers the main flavor and creamy body of the dessert. Thickens as it chills, providing stability between the crust and whipped cream while reinforcing the banana theme.
- 8 oz cool whip thawed: Thawed to fold into or spread atop the pudding layer, adding lightness and creamy volume while balancing the denser custard. Provides a smooth, airy texture that enhances mouthfeel and helps create a fluffy, sliceable dessert when chilled.
- 2 Bananas: Sliced and layered to add fresh fruit flavor, natural sweetness, and a soft, tender texture that complements the creamy pudding and crunchy crust. Also used as a garnish to reinforce the banana flavor and provide visual appeal and freshness to each serving.
Directions for Nilla Wafers Banana Cream Dessert
This recipe is an assembly of confident steps, and it rewards attention to small cues. Below I walk through each direction with sensory notes, reasons behind the technique, and common pitfalls so you can achieve a reliably delicious result.
- Crush the Nilla Wafers. I put mine into a food chopper and that did the job great. You want the consistency to be pretty fine.: The aroma of crushed Nilla Wafers is lightly sweet and toasty, and you want the texture to resemble fine sand rather than large chunks. Using a food chopper delivers uniformity, and the sound changes from crunchy clacks to a subtle whisper as the pieces break down. This matters because a finely crushed base packs better when mixed with the butter , creating a firmer crust after chilling. Watch out for over processing which can lead to a paste like texture, and under processing which leaves gaps that do not hold together when sliced.
- Spray bottom of pan with cooking spray for easy removal. Add the melted butter to the crushed Nilla Wafers and press down into pan. It may be a little crumbly but that's ok because when chilled the crust becomes firm.: When you prepare the pan, the slight sheen from the spray prevents sticking and helps you unmold clean slices. Pressing the crumb and melted butter mixture into the pan should feel firm under your fingers, and it will emit a faint buttery aroma as it settles. This step is important so the crust does not cling to the pan walls, and if you skip the spray you risk losing neat edges when serving. A frequent error is not pressing evenly which causes thin spots that crumble when cut.
- Chop up banana and make a layer on the bottom. Mix jello pudding according to directions and pour on the top. Let chill in fridge for about an hour.: As you incorporate the warm butter the crumbs darken slightly and give off a rich scent, signaling that the fats are coating the crumbs properly. Pressing with the bottom of a measuring cup ensures a compact, cohesive foundation. The reason this technique matters is it reduces air pockets, so when chilled the crust sets firm rather than falling apart. Avoid using too much butter, otherwise the crust becomes greasy and may separate from the filling.
- Put cool whip on top and ENJOY!: Chilling transforms the texture as the butter solidifies and binds the crumbs, bringing a solid snap to the base. You might notice a softer mouthfeel before refrigeration, but patience here pays off because the cold helps everything settle. If you try to cut it too soon the slices will not hold well, and a common misstep is serving before the crust fully firms which results in a messy presentation.
- Chop up banana and make a layer on the bottom: Fresh bananas have a sweet, perfume like scent and a creamy texture when sliced, and placing them directly on the crust creates a fresh counterpoint to the sweet cookie. Arrange the slices close together so the pudding has a stable base to rest on, and use slightly ripe fruit for the best balance of sweetness and texture. One thing to avoid is using overripe bananas which can leak juices and make the layers soggy.
- Mix jello pudding according to directions and pour on the top: As you whisk the Banana Cream Pudding mix with milk or the specified liquid, you will see it thicken into a glossy custard like texture. The sheen indicates it is properly hydrated and stable enough to support the next layers. Pour gently to avoid displacing the banana slices, and smooth the surface with a spatula. If the pudding seems thin, give it a few more minutes to set; pouring too early risks a runny dessert that does not hold shape.
- Let chill in fridge for about an hour: Cooling is when everything comes together, you will notice the pudding firming and the crust solidifying, and the dessert will lose any warm, damp feel. Chilling concentrates flavors slightly and gives the cool whip something stable to rest upon. If you are in a hurry you can chill a bit longer for cleaner slices. Avoid moving the pan while it is still soft, as wobbling can create fissures between layers.
- Put cool whip on top and ENJOY: The final layer of thawed cool whip brings an airy finish and a whisper of sweetness, and spreading it creates a cloud like cap that contrasts with the denser pudding below. The texture should be light and billowy, and you will hear a soft, muffled spreading sound rather than any resistance. This layer keeps the dessert feeling fresh and light. The common pitfall is over spreading which can compress the pudding underneath and make the surface uneven.
Helpful Hints

This dessert is forgiving, but a few focused hints will help you get perfect results every time. Below are practical tips I use, expanded into detailed notes to help with timing, texture, and presentation. Follow these and you will streamline assembly and produce consistent slices.
- Prep the crust properly, crush the Nilla Wafers to a fine, sandy texture so they bind well with the melted butter, ensuring a stable base that will hold up when sliced.
- Cool the pudding slightly, let the prepared Banana Cream Pudding sit until it is warm to the touch rather than hot before pouring, this prevents the crust from softening and keeps layers distinct.
- Slice bananas uniformly, cut your bananas into even rounds so each serving has consistent fruit distribution and the finished slices look tidy and balanced.
- Press crust evenly, use the bottom of a measuring cup to compact the crumb and butter mixture, this gives a firm, uniform base for clean cutting and a pleasant mouthfeel.
- Chill thoroughly, allow at least an hour in the refrigerator so the pudding firms and the crust sets, longer chilling yields cleaner slices and a more cohesive texture.
Perfect Matches for Nilla Wafers Banana Cream Dessert
This dessert pairs beautifully with simple accompaniments and suits many occasions. Below I outline ideal serving suggestions, seasonal touches, storage advice, and occasions where this will shine. Think of this as your roadmap for presenting and preserving the dessert.
- Serve chilled on a warm day, the cool, creamy layers are refreshing and make a lovely end to a light lunch or casual picnic when kept in a cooler until serving.
- Potluck friendly, bring the dessert in a covered dish and chill well before transporting to maintain structure, it is popular for family gatherings and community events.
- Make ahead for ease, assemble a few hours or the night before and add any decorative cool whip swirls just before serving to keep the surface pristine.
- Storage tips, cover tightly and refrigerate for up to two days for best texture, after that the bananas may start to brown and soften more noticeably.
- Occasions, this dessert is excellent for casual dinners, school events, and holiday potlucks where a simple, nostalgic sweet is appreciated.
- Presentation idea, serve in a clear dish so the layered effect is visible, it makes an inviting centerpiece and highlights the contrast between crumb, fruit, and cream.
FAQ
Conclusion
This recipe stands out for its effortless layering of crunchy cookie crumbs, fresh bananas, and silky banana pudding topped with airy cool whip. Try assembling it when you need a reliable dessert that travels well to gatherings or finishes a weeknight meal on a sweet note. It is approachable, nostalgic, and forgiving, so give it a shot the next time you want something comforting and instantly shareable.
Nilla Wafers Banana Cream Dessert
Equipment
- Food chopper
- Measuring Cup
- Mixing Bowl
- Spatula
- Refrigerator
Ingredients
- 45 Nilla Wafers About 2 cups crushed Crushed to create a buttery, crunchy base that provides texture and structure for the dessert; combine with melted butter and press into a pan to form an even crust. Offers a sweet, slightly vanilla flavor that complements the banana and creamy layers, and helps absorb moisture to keep layers distinct.
- 6 Tbs butter melted Melted to bind the crushed wafers together into a cohesive crust and add a rich, buttery flavor; stir evenly into the crumbs before pressing firmly into the dish. Also helps the crust set as it cools, creating a stable foundation for the pudding and whipped topping.
- 1 box Banana Cream Pudding large Prepared according to package directions to produce a silky, banana-flavored custard layer that delivers the main flavor and creamy body of the dessert. Thickens as it chills, providing stability between the crust and whipped cream while reinforcing the banana theme.
- 8 oz cool whip thawed Thawed to fold into or spread atop the pudding layer, adding lightness and creamy volume while balancing the denser custard. Provides a smooth, airy texture that enhances mouthfeel and helps create a fluffy, sliceable dessert when chilled.
- 2 Bananas Sliced and layered to add fresh fruit flavor, natural sweetness, and a soft, tender texture that complements the creamy pudding and crunchy crust. Also used as a garnish to reinforce the banana flavor and provide visual appeal and freshness to each serving.
Instructions
- Crush the Nilla Wafers. I put mine into a food chopper and that did the job great. You want the consistency to be pretty fine.: The aroma of crushed Nilla Wafers is lightly sweet and toasty, and you want the texture to resemble fine sand rather than large chunks. Using a food chopper delivers uniformity, and the sound changes from crunchy clacks to a subtle whisper as the pieces break down. This matters because a finely crushed base packs better when mixed with the butter , creating a firmer crust after chilling. Watch out for over processing which can lead to a paste like texture, and under processing which leaves gaps that do not hold together when sliced.
- Spray bottom of pan with cooking spray for easy removal. Add the melted butter to the crushed Nilla Wafers and press down into pan. It may be a little crumbly but that's ok because when chilled the crust becomes firm.: When you prepare the pan, the slight sheen from the spray prevents sticking and helps you unmold clean slices. Pressing the crumb and melted butter mixture into the pan should feel firm under your fingers, and it will emit a faint buttery aroma as it settles. This step is important so the crust does not cling to the pan walls, and if you skip the spray you risk losing neat edges when serving. A frequent error is not pressing evenly which causes thin spots that crumble when cut.
- Chop up banana and make a layer on the bottom. Mix jello pudding according to directions and pour on the top. Let chill in fridge for about an hour.: As you incorporate the warm butter the crumbs darken slightly and give off a rich scent, signaling that the fats are coating the crumbs properly. Pressing with the bottom of a measuring cup ensures a compact, cohesive foundation. The reason this technique matters is it reduces air pockets, so when chilled the crust sets firm rather than falling apart. Avoid using too much butter, otherwise the crust becomes greasy and may separate from the filling.
- Put cool whip on top and ENJOY!: Chilling transforms the texture as the butter solidifies and binds the crumbs, bringing a solid snap to the base. You might notice a softer mouthfeel before refrigeration, but patience here pays off because the cold helps everything settle. If you try to cut it too soon the slices will not hold well, and a common misstep is serving before the crust fully firms which results in a messy presentation.
- Chop up banana and make a layer on the bottom: Fresh bananas have a sweet, perfume like scent and a creamy texture when sliced, and placing them directly on the crust creates a fresh counterpoint to the sweet cookie. Arrange the slices close together so the pudding has a stable base to rest on, and use slightly ripe fruit for the best balance of sweetness and texture. One thing to avoid is using overripe bananas which can leak juices and make the layers soggy.
- Mix jello pudding according to directions and pour on the top: As you whisk the Banana Cream Pudding mix with milk or the specified liquid, you will see it thicken into a glossy custard like texture. The sheen indicates it is properly hydrated and stable enough to support the next layers. Pour gently to avoid displacing the banana slices, and smooth the surface with a spatula. If the pudding seems thin, give it a few more minutes to set; pouring too early risks a runny dessert that does not hold shape.
- Let chill in fridge for about an hour: Cooling is when everything comes together, you will notice the pudding firming and the crust solidifying, and the dessert will lose any warm, damp feel. Chilling concentrates flavors slightly and gives the cool whip something stable to rest upon. If you are in a hurry you can chill a bit longer for cleaner slices. Avoid moving the pan while it is still soft, as wobbling can create fissures between layers.
- Put cool whip on top and ENJOY: The final layer of thawed cool whip brings an airy finish and a whisper of sweetness, and spreading it creates a cloud like cap that contrasts with the denser pudding below. The texture should be light and billowy, and you will hear a soft, muffled spreading sound rather than any resistance. This layer keeps the dessert feeling fresh and light. The common pitfall is over spreading which can compress the pudding underneath and make the surface uneven.
Notes
- Prep the crust properly, crush the Nilla Wafers to a fine, sandy texture so they bind well with the melted butter, ensuring a stable base that will hold up when sliced.
- Cool the pudding slightly, let the prepared Banana Cream Pudding sit until it is warm to the touch rather than hot before pouring, this prevents the crust from softening and keeps layers distinct.
- Slice bananas uniformly, cut your bananas into even rounds so each serving has consistent fruit distribution and the finished slices look tidy and balanced.
- Press crust evenly, use the bottom of a measuring cup to compact the crumb and butter mixture, this gives a firm, uniform base for clean cutting and a pleasant mouthfeel.
- Chill thoroughly, allow at least an hour in the refrigerator so the pudding firms and the crust sets, longer chilling yields cleaner slices and a more cohesive texture.