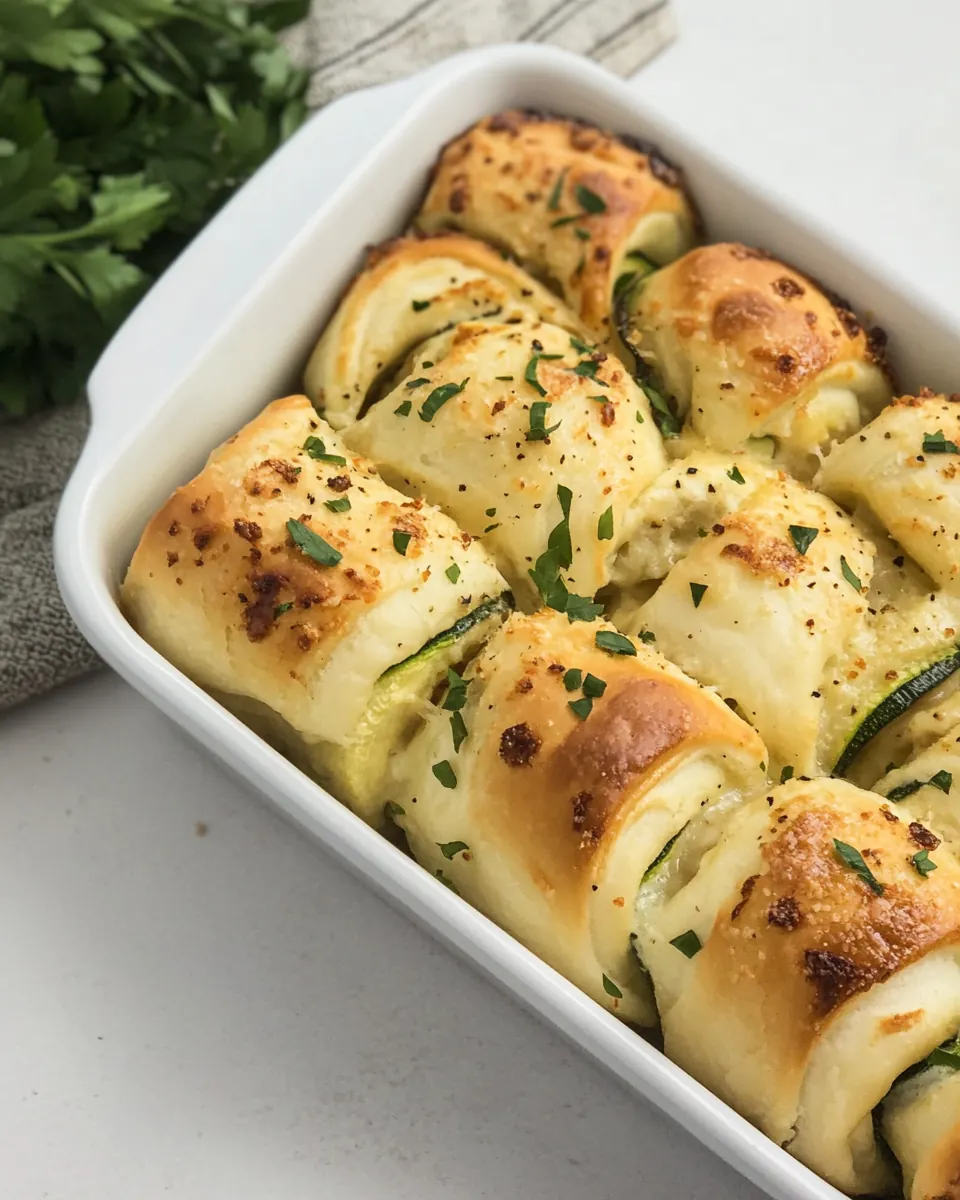
Zucchini Cheese Rolls
Zucchini Cheese Rolls came into my kitchen on a humid summer afternoon when I needed something comforting, simple, and a little playful to serve with soup. I remember the first time I rolled that tender, cheesy dough and how the aroma of baking zucchini and melted Parmesan cheese filled the house, making everyone wander into the kitchen to see what was happening.
That day I was juggling a stack of errands and a picky eater who insisted dinner be both soft and flavorful. I opted for small, hand sized rolls so everyone could grab one, and the result felt like a cozy, handheld hug. The combination of warm, buttery crust and the subtle, earthy brightness of the shredded zucchini turned a humble bread into something memorable.
Recipe Snapshot
60 mins
30 mins
30 mins
Medium
180 kcal
American
Gluten-Free, Low FODMAP
Appetizers
Stand mixer, Paddle attachment, Dough hook, 9 inch springform pan, Instant read thermometer
The Best Thing About This Zucchini Cheese Rolls
Comforting yet light
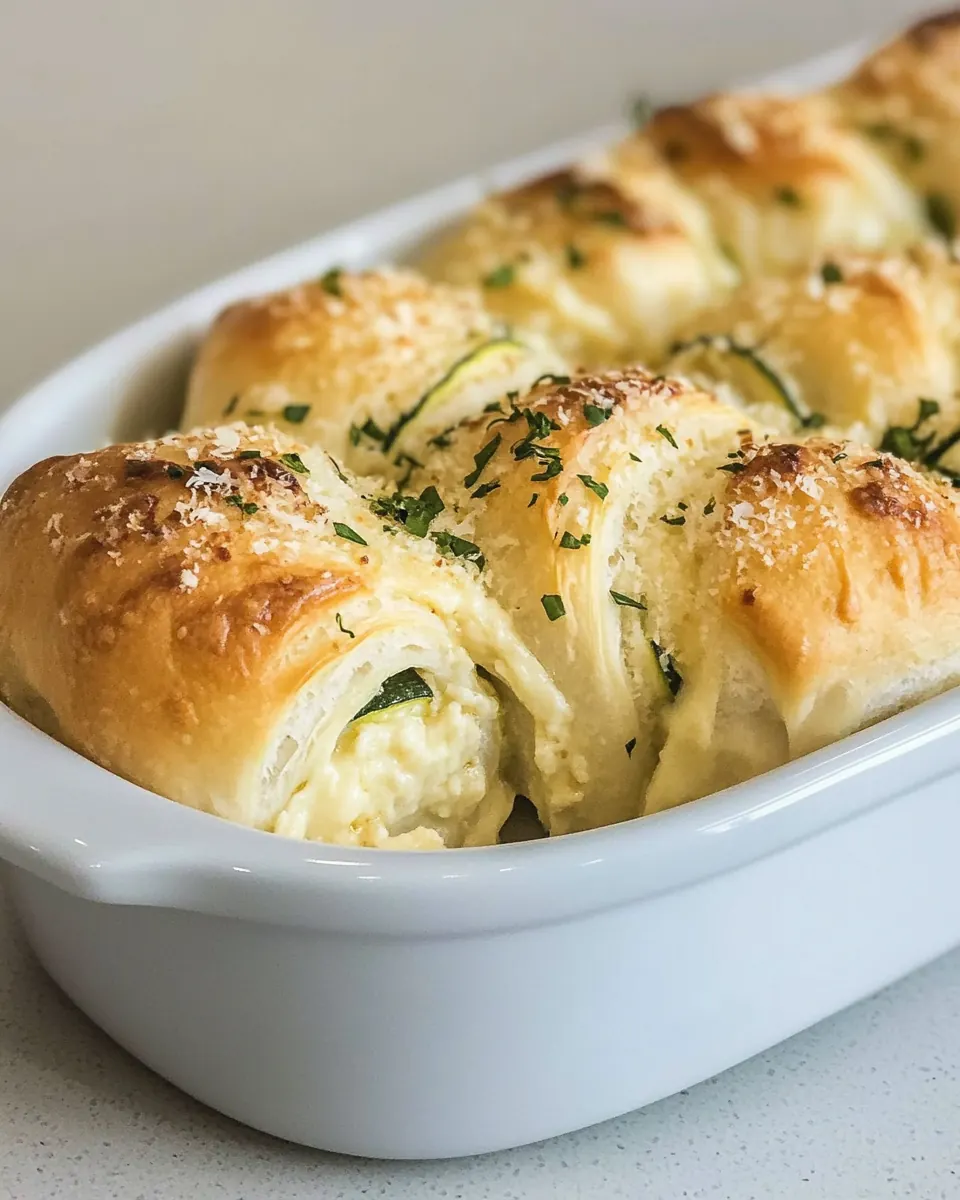
One reason I adore these rolls is how they balance richness and freshness. The melted Parmesan cheese gives a savory backbone while the zucchini keeps each bite unexpectedly light. I often reach for these when I want something satisfying but not heavy, they pair beautifully with brothy soups or simple salads.
Perfect for sharing
These rolls are designed to be portion friendly. Dividing the dough into small balls means everyone can grab a single serving, and they look beautiful arranged in a pan. When company comes over, I love the casual, communal vibe these create, and they disappear fast.
Beginner friendly techniques
I like how forgiving the dough is. With simple steps like a short rise and a gentle hand when shaping, bakers who are new to yeast can still succeed. I emphasize feeling the dough more than timing alone, and that tactile feedback builds confidence quickly.
Versatile flavor profile
The flavor options here keep me experimenting. The garlic powder and fresh thyme in this version add a warm herbal note, but you could imagine swapping the herbs for other favorites, or adding a little extra cheese on top before baking for crisp, golden tops. I appreciate recipes that invite small, safe swaps.
Make ahead and store easily
I often prepare the dough a bit ahead, refrigerating if needed, or baking and storing the rolls for up to a few days. They reheat beautifully with a quick warm up so they still taste freshly baked. That flexibility makes them a weekday hero for busy kitchens.
What to Gather for Zucchini Cheese Rolls
The ingredient list here feels purposeful and approachable. Each item plays a clear role: the liquids and yeast build structure and lift, the bread flour and eggs create a tender crumb, while the shredded zucchini and grated Parmesan cheese add moisture and savory complexity. Together they produce rolls that are soft, aromatic, and rich without being overly heavy.
- 1/2 cup (120 grams) warm water (105°F/41°C to 110°F/43°C): Hydrate and activate yeast by providing a warm medium for proofing; helps dissolve sugar and salt while bringing the dough together. Maintain specified temperature to avoid killing yeast and ensure proper fermentation for airy rolls.
- 1/2 cup (120 grams) warm whole milk (105°F/41°C to 110°F/43°C): Contribute richness and tender crumb by adding fat and moisture; warm milk helps dissolve ingredients and keeps dough temperature consistent for yeast activity. Use whole milk for flavor and a slightly softer texture in the finished rolls.
- 4 tablespoons (56 grams) unsalted butter, melted and divided: Melt and separate to incorporate fat into dough and for brushing; melted butter adds flavor, tenderness, and browning. Reserve some for finishing to create a glossy, flavorful crust on the rolls.
- 1 (0.25-ounce) package (7 grams) Platinum Yeast: Leaven the dough by producing carbon dioxide during fermentation; Platinum Yeast provides a reliable rise and consistent texture. Sprinkle into warm liquid to bloom and ensure active fermentation before mixing.
- 3 1/2 cups (445 grams) bread flour: Build structure and provide necessary gluten for chew and elasticity; bread flour’s higher protein content yields a sturdy, airy roll. Measure accurately to balance hydration and achieve the intended dough consistency.
- 2 tablespoons (24 grams) granulated sugar: Feed the yeast and balance flavor by adding fermentable sugars; sugar also helps with browning of the crust during baking. Keep quantity moderate to avoid overly sweet rolls while supporting yeast activity.
- 2 teaspoons (6 grams) kosher salt: Enhance overall flavor and control fermentation rate by seasoning the dough; kosher salt strengthens gluten and contributes to structure. Dissolve evenly to prevent localized salt pockets that can inhibit yeast.
- 2 large eggs (100 grams), room temperature and divided: Enrich the dough with fat, flavor, and color; eggs add protein for structure and help bind ingredients while improving texture. Separate and use as directed to incorporate into dough and for an egg wash if specified.
- 3/4 cup (120 grams) packed shredded zucchini: Add moisture and subtle vegetable flavor while contributing to texture; shredded zucchini introduces delicate freshness and keeps rolls tender. Squeeze lightly if necessary to remove excess water to avoid overly wet dough.
- 3/4 cup (85 grams) shredded Parmesan cheese: Provide savory umami and salty depth to the filling or dough; Parmesan brings nuttiness and enhances overall flavor profile. Use freshly shredded cheese for best melting and distribution throughout the rolls.
- 1 teaspoon (3 grams) garlic powder: Impart concentrated savory garlic flavor without added moisture; garlic powder blends uniformly and seasons the dough or filling evenly. Use measured amount to avoid overpowering the delicate zucchini and cheese.
- 1 teaspoon fresh thyme leaves: Contribute bright herbal notes and aromatic complexity; fresh thyme leaves lift savory flavors and pair well with zucchini and Parmesan. Sprinkle in measured quantity to maintain a balanced herb presence without dominating.
Step by Step Guide for Zucchini Cheese Rolls
These directions are written so you can move through the process confidently. I walk you through each stage, from activating the yeast to brushing the finished rolls, so you understand the sensory cues and why every technique matters. Take your time with the dough, and listen to what it tells you as it develops.
- In a medium bowl, whisk together 1/2 cup (120 grams) warm water, warm milk, 2 tablespoons (28 grams) melted butter, and yeast. Let stand until foamy, 5 to 10 minutes.: As you mix, notice the slightly steamy warmth and that the liquid feels just tepid to the touch, which is perfect for yeast activation. After a few minutes you should see small bubbles and a foamy layer, an audible faint hiss or tiny fizz that signals live yeast. This step is crucial because without an active foam the dough will remain dense. A common mistake is using water that is too hot, which kills the yeast, or too cold, which delays proofing. If you don't see foam after ten minutes, discard and try with fresh yeast and properly warmed liquids.
- In the bowl of a stand mixer fitted with the paddle attachment, beat flour, sugar, and salt at low speed until combined. Add yeast mixture and 1 egg (50 grams), and beat at medium-low speed for 2 minutes. Add zucchini, cheese, garlic powder, and thyme, and beat until well combined, about 1 minute, stopping to scrape sides of bowl.: The dry ingredients will mingle into a uniform pale mix, and you'll hear a soft, settling thud as the paddle moves through. This even distribution ensures the yeast and liquids meet a balanced matrix of flour and seasoning. Avoid over mixing here; forming the initial uniform mix prevents pockets of salt or sugar that could unevenly affect the dough.
- Switch to the dough hook attachment. Beat at low speed until a soft, somewhat sticky dough forms, stopping to scrape sides of bowl, 6 to 8 minutes. (Dough should pass the windowpane test; see Note.) Turn out dough onto a very lightly floured surface, and gently shape into a ball.: As the wet and dry components merge, the batter will look shaggy and slightly tacky; you might smell a faint dairy sweetness from the milk and butter. This early mixing hydrates the flour and begins gluten alignment. The error to avoid is rushing to high speed which can overwork the dough prematurely, leading to tough texture.
- Spray a large bowl with cooking spray. Place dough in bowl, turning to grease top. Cover and let rise in a warm, draft-free place (75°F/24°C) until doubled in size, 30 to 45 minutes.: The shredded zucchini will introduce moist flecks and the grated Parmesan cheese will sprinkle throughout, creating a speckled dough. You should catch the aromatic lift from the thyme and garlic, which hints at the finished flavor. Scrape the bowl so nothing clings to the sides; otherwise those bits will remain dry and unevenly distributed.
- Spray a 9-inch springform pan with cooking spray.: When you change attachments, the machine will shift from a batter rhythm to a kneading cadence, a slower, rhythmic tug as the hook folds the dough. This sets up the gluten network. It's important to change tools rather than attempt long paddle kneading, because the hook better develops the chewy structure needed for rolls.
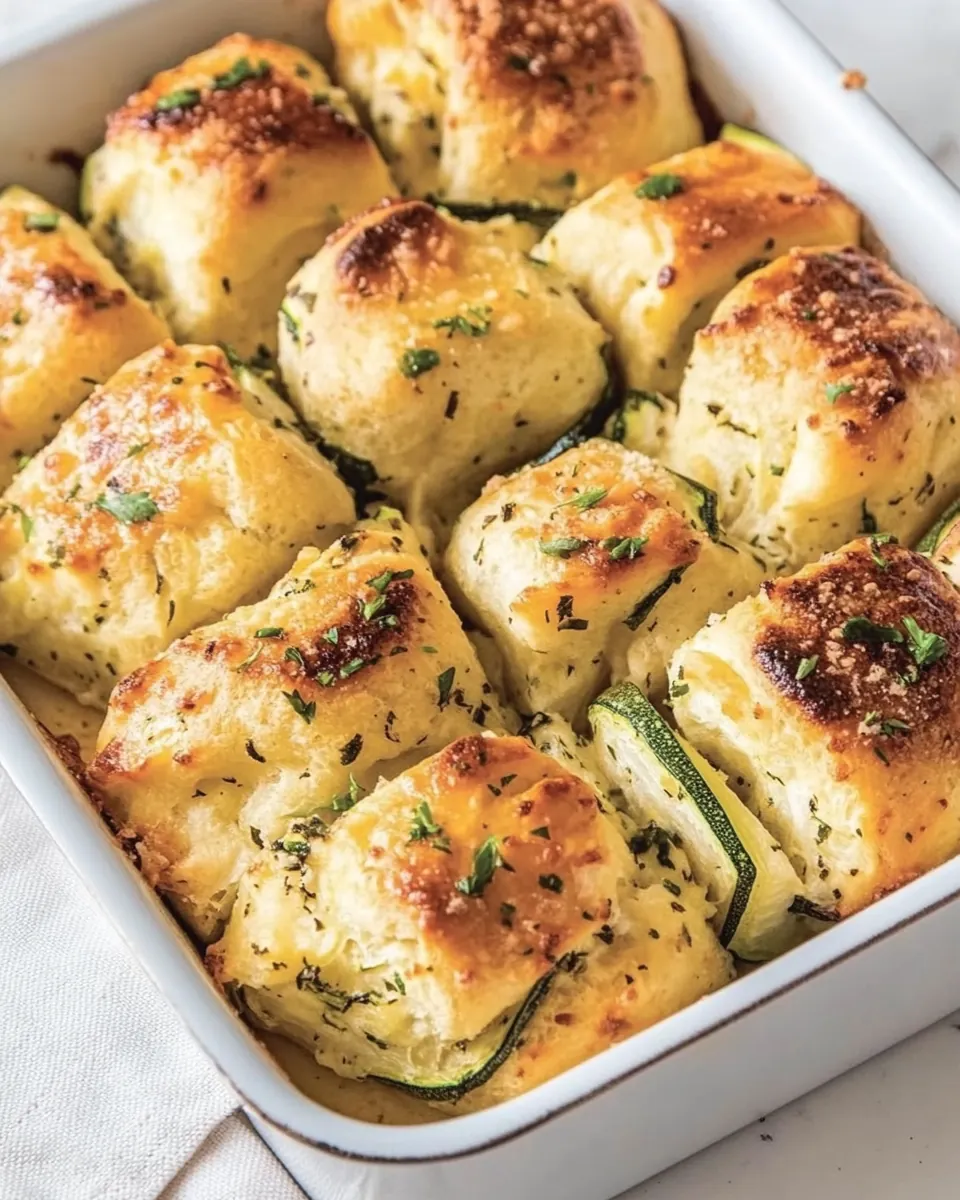
- Divide dough into 14 portions (about 70 grams each). Using lightly floured hands, gently shape each portion into a smooth ball, and place in prepared pan. (Dough will fill pan.) Cover and let rise in a warm, draft-free place (75°F/24°C) until doubled in size, 30 to 45 minutes.: Expect a transition where the dough gathers into a cohesive mass, slightly tacky but holding shape, and you'll hear a deeper, hollow sound as it pulls away from the bowl. This is where gluten forms, giving chew and structure. A useful check is the windowpane test; if the dough tears immediately, it needs more time. Avoid adding too much flour to dry it out, that will yield dense rolls instead of tender ones.
- Preheat oven to 375°F (190°C).: The dough should feel springy and slightly warm from the friction of mixing, with a silky sheen from the butter. Shape it gently rather than punching, preserving the internal air pockets. Over handling here can deflate the dough, so be tender and patient.
- In a small bowl, whisk remaining 1 egg (50 grams). Brush rolls with egg wash.: The greased bowl keeps the dough from sticking as it rises and helps you turn it easily to coat the dough surface. The scent of neutral spray is subtle but practical. If you skip greasing, dough can cling and tear when you try to turn it, which may damage the rise.
- Bake until golden brown and an instant-read thermometer inserted in center registers 190°F (88°C), 25 to 30 minutes, rotating pan halfway through baking and covering with foil to prevent excess browning, if necessary. Immediately brush with remaining 2 tablespoons (28 grams) melted butter. Serve warm. Store in an airtight container for up to 4 days.: As you turn the dough, you should feel the soft surface pick up a thin sheen of butter from the bowl, sealing it and preventing a dry crust from forming. This helps the dough expand smoothly. If a skin forms, you can lightly mist with water to prevent drying, but avoid constant poking which can collapse the dough.
- Cover and let rise in a warm, draft-free place (75°F/24°C) until doubled in size, 30 to 45 minutes: During the rise you'll notice the dough expand visibly, the surface smoothing and the aroma becoming slightly yeasty and sweet. The room should be free of drafts to keep the temperature steady; even small cool breezes will slow the rise. Over proofing is a common error, which causes deflated rolls with poor oven spring, so check the doubling rather than only the clock.
- Spray a 9-inch springform pan with cooking spray: A lightly greased pan ensures the rolls release cleanly after baking, the metal will conduct heat evenly creating even browning. If you skip this step, rolls can stick and tear when removed, so take the extra minute to prepare the pan properly.
- Divide dough into 14 portions (about 70 grams each): As you portion, enjoy the soft, pillowy consistency; each piece should feel uniform in weight for even baking. Rolling into smooth balls creates tension on the surface that promotes a fine crumb and attractive rise. A frequent mistake is creating uneven sizes, which bakes unevenly; use a scale if possible for consistency.
- Using lightly floured hands, gently shape each portion into a smooth ball, and place in prepared pan: The light flouring prevents sticking while you coax a glossy, taut ball that will rise upward. Placing them snugly in the pan helps them support one another for a soft pull apart texture. Pressing too hard flattens the tension and results in flat tops, so be gentle.
- Cover and let rise in a warm, draft-free place (75°F/24°C) until doubled in size, 30 to 45 minutes: The second rise develops the final airy pockets and adds volume; you'll see the rolls push against each other and the dough surface become pillowy. Keep the environment stable and check visually for doubling, as over rising will cause poor structure and collapse during baking.
- Preheat oven to 375°F (190°C): The oven should reach temperature so the rolls get immediate oven spring, creating a tender interior and golden crust. You might hear faint pops from heating elements and smell a neutral warm air before baking. Baking in an under heated oven will make the rolls dense and pale, lacking proper rise and color.
- In a small bowl, whisk remaining 1 egg (50 grams): The egg wash will create that glossy, golden finish; whisk until uniform and slightly frothy. Brush evenly to avoid mottled browning. If you forget the egg wash, the rolls will still bake but the tops will be matte and less visually inviting.
- Brush rolls with egg wash: As you paint each roll, note how the surface accepts the wash and begins to gleam. The egg promotes browning and helps any topping adhere. Be careful not to pool the wash between rolls, which can create uneven coloring or gummy patches.
- Bake until golden brown and an instant-read thermometer inserted in center registers 190°F (88°C), 25 to 30 minutes, rotating pan halfway through baking and covering with foil to prevent excess browning, if necessary: During baking you'll smell rich butter and roasted cheese, and see the tops turn a warm golden brown. Rotate the pan for even color and watch for rapid darkening at the edges. If the rolls brown too quickly, tent with foil to finish cooking without burning. A common misstep is underbaking, leaving a gummy center, so use the thermometer rather than relying solely on color.
- Immediately brush with remaining 2 tablespoons (28 grams) melted butter: Brushing adds a final layer of shine and a buttery aroma that invites tasting. The extra butter also softens the crust slightly for an irresistible tender bite. If you skip this, the crust will be less rich and slightly drier to the touch.
- Serve warm: Warm rolls showcase the melty cheese pockets and tender crumb best; you'll hear soft tearing sounds when pulled apart and taste the fresh herb notes. If you plan to store them, allow to cool slightly before sealing to avoid condensation, which can make them soggy.
- Store in an airtight container for up to 4 days: Stored properly, these retain moisture and flavor, and reheating briefly restores that just baked sensation. Refrigeration can dry them, so I prefer airtight at room temperature for short term, or freezing for longer storage. Avoid leaving them uncovered which dries the crust and dulls the flavors.
Tips and Tricks about Zucchini Cheese Rolls
I like to collect quick tips that make baking more relaxed and reliable. These pointers are things I learned by trial and error, each one saving me time or preventing a flat roll. Read them once and you will bake with fewer surprises.
- Pat the zucchini dry, pressing shredded zucchini in a towel removes excess moisture so the dough stays the proper consistency and does not become gummy, this is especially important when measuring by packed volume.
- Check yeast by proofing, if the yeast mixture does not foam within ten minutes replace it, as inactive yeast yields dense dough, and always use comfortably warm liquids to encourage activity.
- Use bread flour for better structure, its higher protein helps develop gluten for a chew that contrasts nicely with a soft interior, but if you must swap to all purpose expect a slightly more tender but less chewy crumb.
- Weigh dough portions, dividing into 14 equal pieces with a scale ensures uniform baking and consistent appearance, avoiding under or overbaked pieces in the same pan.
- Brush with butter after baking, this adds shine and keeps the crust tender while amplifying the buttery aroma that makes the rolls irresistible.
What Complements This Zucchini Cheese Rolls
These rolls are adaptable for many meals and occasions. They pair well with light soups, make great additions to a weekend brunch spread, and work as a side for a relaxed dinner. I often bring them to potlucks because they travel well and please varied tastes. For storage, keep them airtight at room temperature for short term and freeze for longer keeping. Seasonally, their gentle herb profile works well in summer when fresh thyme and zucchini are at their best.
- Serve with brothy soups, the rolls are perfect for dipping into a warm bowl as they soak up flavors without falling apart, ideal for lunch or a cozy dinner.
- Include on a brunch board, arrange with cheeses and fresh fruit for a casual weekend gathering where guests can pull rolls apart and nibble between bites.
- Pack for picnics, these hold up well at room temperature for a few hours, making them a convenient savory finger food for outdoor meals.
- Storage suggestion, place cooled rolls in an airtight container to keep them soft for up to four days, or freeze for longer, reheating briefly to restore that just baked texture.
- Seasonal pairing, highlight summer zucchini and fresh herbs to match the lightness of warm weather menus and patio dinners.
FAQ
Conclusion
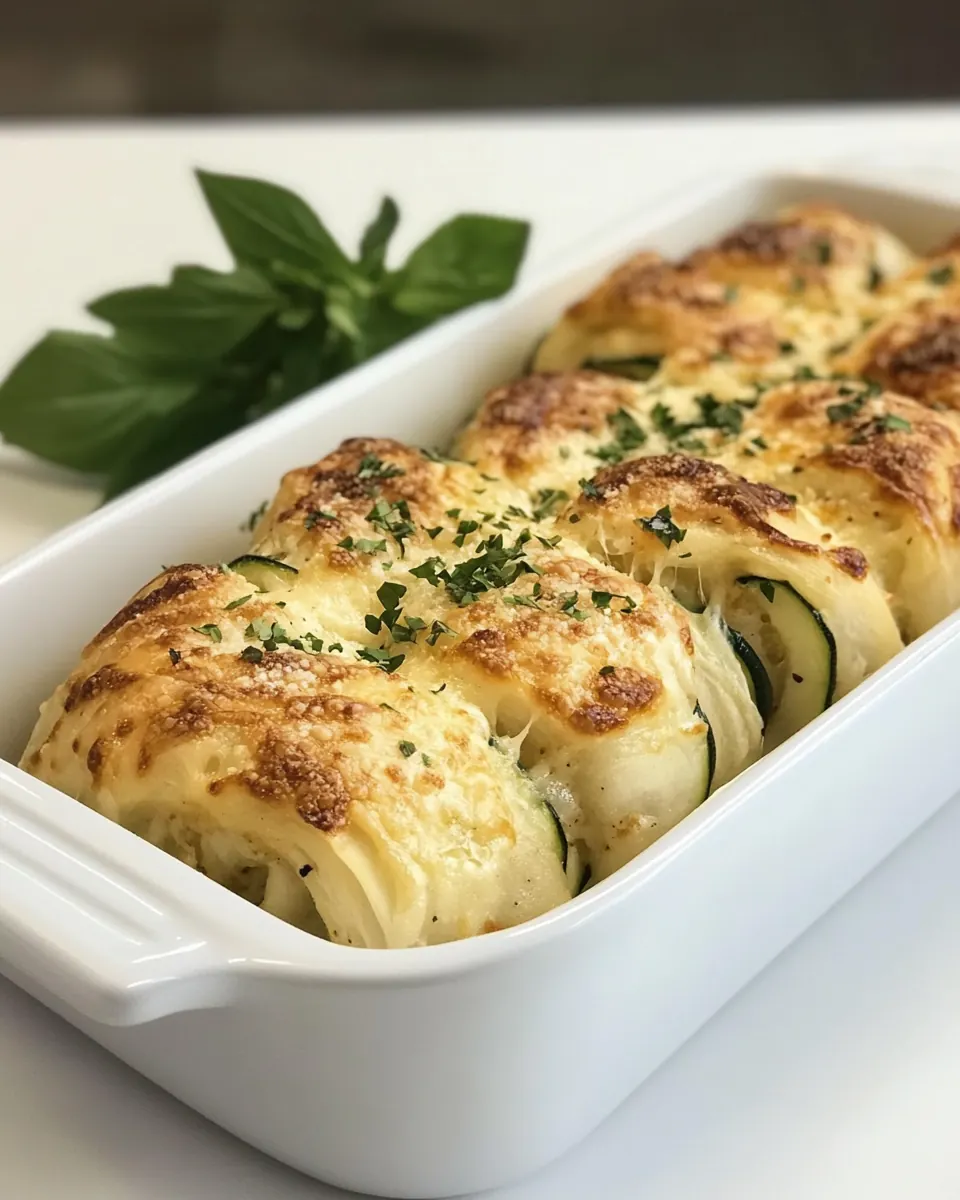
These Zucchini Cheese Rolls are special because they marry tender, buttery bread with the fresh brightness of shredded zucchini and the savory punch of Parmesan. Give them a try and you may find they become a staple for casual dinners, brunch spreads, or potluck contributions. They are approachable, comforting, and forgiving, offering lovely results whether you are a new baker or someone who enjoys hands on kitchen moments. Share them warm for best enjoyment, and don’t be surprised when everyone asks for seconds.

Zucchini Cheese Rolls
Equipment
- Stand mixer
- Paddle attachment
- Dough Hook
- 9-inch Springform Pan
- Instant read thermometer
Ingredients
- 1/2 cup (120 grams) warm water (105°F/41°C to 110°F/43°C) Hydrate and activate yeast by providing a warm medium for proofing; helps dissolve sugar and salt while bringing the dough together. Maintain specified temperature to avoid killing yeast and ensure proper fermentation for airy rolls.
- 1/2 cup (120 grams) warm whole milk (105°F/41°C to 110°F/43°C) Contribute richness and tender crumb by adding fat and moisture; warm milk helps dissolve ingredients and keeps dough temperature consistent for yeast activity. Use whole milk for flavor and a slightly softer texture in the finished rolls.
- 4 tablespoons (56 grams) unsalted butter, melted and divided Melt and separate to incorporate fat into dough and for brushing; melted butter adds flavor, tenderness, and browning. Reserve some for finishing to create a glossy, flavorful crust on the rolls.
- 1 (0.25-ounce) package (7 grams) Platinum Yeast Leaven the dough by producing carbon dioxide during fermentation; Platinum Yeast provides a reliable rise and consistent texture. Sprinkle into warm liquid to bloom and ensure active fermentation before mixing.
- 3 1/2 cups (445 grams) bread flour Build structure and provide necessary gluten for chew and elasticity; bread flour’s higher protein content yields a sturdy, airy roll. Measure accurately to balance hydration and achieve the intended dough consistency.
- 2 tablespoons (24 grams) granulated sugar Feed the yeast and balance flavor by adding fermentable sugars; sugar also helps with browning of the crust during baking. Keep quantity moderate to avoid overly sweet rolls while supporting yeast activity.
- 2 teaspoons (6 grams) kosher salt Enhance overall flavor and control fermentation rate by seasoning the dough; kosher salt strengthens gluten and contributes to structure. Dissolve evenly to prevent localized salt pockets that can inhibit yeast.
- 2 large eggs (100 grams), room temperature and divided Enrich the dough with fat, flavor, and color; eggs add protein for structure and help bind ingredients while improving texture. Separate and use as directed to incorporate into dough and for an egg wash if specified.
- 3/4 cup (120 grams) packed shredded zucchini Add moisture and subtle vegetable flavor while contributing to texture; shredded zucchini introduces delicate freshness and keeps rolls tender. Squeeze lightly if necessary to remove excess water to avoid overly wet dough.
- 3/4 cup (85 grams) shredded Parmesan cheese Provide savory umami and salty depth to the filling or dough; Parmesan brings nuttiness and enhances overall flavor profile. Use freshly shredded cheese for best melting and distribution throughout the rolls.
- 1 teaspoon (3 grams) garlic powder Impart concentrated savory garlic flavor without added moisture; garlic powder blends uniformly and seasons the dough or filling evenly. Use measured amount to avoid overpowering the delicate zucchini and cheese.
- 1 teaspoon fresh thyme leaves Contribute bright herbal notes and aromatic complexity; fresh thyme leaves lift savory flavors and pair well with zucchini and Parmesan. Sprinkle in measured quantity to maintain a balanced herb presence without dominating.
Instructions
- In a medium bowl, whisk together 1/2 cup (120 grams) warm water, warm milk, 2 tablespoons (28 grams) melted butter, and yeast. Let stand until foamy, 5 to 10 minutes.: As you mix, notice the slightly steamy warmth and that the liquid feels just tepid to the touch, which is perfect for yeast activation. After a few minutes you should see small bubbles and a foamy layer, an audible faint hiss or tiny fizz that signals live yeast. This step is crucial because without an active foam the dough will remain dense. A common mistake is using water that is too hot, which kills the yeast, or too cold, which delays proofing. If you don't see foam after ten minutes, discard and try with fresh yeast and properly warmed liquids.
- In the bowl of a stand mixer fitted with the paddle attachment, beat flour, sugar, and salt at low speed until combined. Add yeast mixture and 1 egg (50 grams), and beat at medium-low speed for 2 minutes. Add zucchini, cheese, garlic powder, and thyme, and beat until well combined, about 1 minute, stopping to scrape sides of bowl.: The dry ingredients will mingle into a uniform pale mix, and you'll hear a soft, settling thud as the paddle moves through. This even distribution ensures the yeast and liquids meet a balanced matrix of flour and seasoning. Avoid over mixing here; forming the initial uniform mix prevents pockets of salt or sugar that could unevenly affect the dough.
- Switch to the dough hook attachment. Beat at low speed until a soft, somewhat sticky dough forms, stopping to scrape sides of bowl, 6 to 8 minutes. (Dough should pass the windowpane test; see Note.) Turn out dough onto a very lightly floured surface, and gently shape into a ball.: As the wet and dry components merge, the batter will look shaggy and slightly tacky; you might smell a faint dairy sweetness from the milk and butter. This early mixing hydrates the flour and begins gluten alignment. The error to avoid is rushing to high speed which can overwork the dough prematurely, leading to tough texture.
- Spray a large bowl with cooking spray. Place dough in bowl, turning to grease top. Cover and let rise in a warm, draft-free place (75°F/24°C) until doubled in size, 30 to 45 minutes.: The shredded zucchini will introduce moist flecks and the grated Parmesan cheese will sprinkle throughout, creating a speckled dough. You should catch the aromatic lift from the thyme and garlic, which hints at the finished flavor. Scrape the bowl so nothing clings to the sides; otherwise those bits will remain dry and unevenly distributed.
- Spray a 9-inch springform pan with cooking spray.: When you change attachments, the machine will shift from a batter rhythm to a kneading cadence, a slower, rhythmic tug as the hook folds the dough. This sets up the gluten network. It's important to change tools rather than attempt long paddle kneading, because the hook better develops the chewy structure needed for rolls.
- Divide dough into 14 portions (about 70 grams each). Using lightly floured hands, gently shape each portion into a smooth ball, and place in prepared pan. (Dough will fill pan.) Cover and let rise in a warm, draft-free place (75°F/24°C) until doubled in size, 30 to 45 minutes.: Expect a transition where the dough gathers into a cohesive mass, slightly tacky but holding shape, and you'll hear a deeper, hollow sound as it pulls away from the bowl. This is where gluten forms, giving chew and structure. A useful check is the windowpane test; if the dough tears immediately, it needs more time. Avoid adding too much flour to dry it out, that will yield dense rolls instead of tender ones.
- Preheat oven to 375°F (190°C).: The dough should feel springy and slightly warm from the friction of mixing, with a silky sheen from the butter. Shape it gently rather than punching, preserving the internal air pockets. Over handling here can deflate the dough, so be tender and patient.
- In a small bowl, whisk remaining 1 egg (50 grams). Brush rolls with egg wash.: The greased bowl keeps the dough from sticking as it rises and helps you turn it easily to coat the dough surface. The scent of neutral spray is subtle but practical. If you skip greasing, dough can cling and tear when you try to turn it, which may damage the rise.
- Bake until golden brown and an instant-read thermometer inserted in center registers 190°F (88°C), 25 to 30 minutes, rotating pan halfway through baking and covering with foil to prevent excess browning, if necessary. Immediately brush with remaining 2 tablespoons (28 grams) melted butter. Serve warm. Store in an airtight container for up to 4 days.: As you turn the dough, you should feel the soft surface pick up a thin sheen of butter from the bowl, sealing it and preventing a dry crust from forming. This helps the dough expand smoothly. If a skin forms, you can lightly mist with water to prevent drying, but avoid constant poking which can collapse the dough.
- Cover and let rise in a warm, draft-free place (75°F/24°C) until doubled in size, 30 to 45 minutes: During the rise you'll notice the dough expand visibly, the surface smoothing and the aroma becoming slightly yeasty and sweet. The room should be free of drafts to keep the temperature steady; even small cool breezes will slow the rise. Over proofing is a common error, which causes deflated rolls with poor oven spring, so check the doubling rather than only the clock.
- Spray a 9-inch springform pan with cooking spray: A lightly greased pan ensures the rolls release cleanly after baking, the metal will conduct heat evenly creating even browning. If you skip this step, rolls can stick and tear when removed, so take the extra minute to prepare the pan properly.
- Divide dough into 14 portions (about 70 grams each): As you portion, enjoy the soft, pillowy consistency; each piece should feel uniform in weight for even baking. Rolling into smooth balls creates tension on the surface that promotes a fine crumb and attractive rise. A frequent mistake is creating uneven sizes, which bakes unevenly; use a scale if possible for consistency.
- Using lightly floured hands, gently shape each portion into a smooth ball, and place in prepared pan: The light flouring prevents sticking while you coax a glossy, taut ball that will rise upward. Placing them snugly in the pan helps them support one another for a soft pull apart texture. Pressing too hard flattens the tension and results in flat tops, so be gentle.
- Cover and let rise in a warm, draft-free place (75°F/24°C) until doubled in size, 30 to 45 minutes: The second rise develops the final airy pockets and adds volume; you'll see the rolls push against each other and the dough surface become pillowy. Keep the environment stable and check visually for doubling, as over rising will cause poor structure and collapse during baking.
- Preheat oven to 375°F (190°C): The oven should reach temperature so the rolls get immediate oven spring, creating a tender interior and golden crust. You might hear faint pops from heating elements and smell a neutral warm air before baking. Baking in an under heated oven will make the rolls dense and pale, lacking proper rise and color.
- In a small bowl, whisk remaining 1 egg (50 grams): The egg wash will create that glossy, golden finish; whisk until uniform and slightly frothy. Brush evenly to avoid mottled browning. If you forget the egg wash, the rolls will still bake but the tops will be matte and less visually inviting.
- Brush rolls with egg wash: As you paint each roll, note how the surface accepts the wash and begins to gleam. The egg promotes browning and helps any topping adhere. Be careful not to pool the wash between rolls, which can create uneven coloring or gummy patches.
- Bake until golden brown and an instant-read thermometer inserted in center registers 190°F (88°C), 25 to 30 minutes, rotating pan halfway through baking and covering with foil to prevent excess browning, if necessary: During baking you'll smell rich butter and roasted cheese, and see the tops turn a warm golden brown. Rotate the pan for even color and watch for rapid darkening at the edges. If the rolls brown too quickly, tent with foil to finish cooking without burning. A common misstep is underbaking, leaving a gummy center, so use the thermometer rather than relying solely on color.
- Immediately brush with remaining 2 tablespoons (28 grams) melted butter: Brushing adds a final layer of shine and a buttery aroma that invites tasting. The extra butter also softens the crust slightly for an irresistible tender bite. If you skip this, the crust will be less rich and slightly drier to the touch.
- Serve warm: Warm rolls showcase the melty cheese pockets and tender crumb best; you'll hear soft tearing sounds when pulled apart and taste the fresh herb notes. If you plan to store them, allow to cool slightly before sealing to avoid condensation, which can make them soggy.
- Store in an airtight container for up to 4 days: Stored properly, these retain moisture and flavor, and reheating briefly restores that just baked sensation. Refrigeration can dry them, so I prefer airtight at room temperature for short term, or freezing for longer storage. Avoid leaving them uncovered which dries the crust and dulls the flavors.
Notes
- Pat the zucchini dry, pressing shredded zucchini in a towel removes excess moisture so the dough stays the proper consistency and does not become gummy, this is especially important when measuring by packed volume.
- Check yeast by proofing, if the yeast mixture does not foam within ten minutes replace it, as inactive yeast yields dense dough, and always use comfortably warm liquids to encourage activity.
- Use bread flour for better structure, its higher protein helps develop gluten for a chew that contrasts nicely with a soft interior, but if you must swap to all purpose expect a slightly more tender but less chewy crumb.
- Weigh dough portions, dividing into 14 equal pieces with a scale ensures uniform baking and consistent appearance, avoiding under or overbaked pieces in the same pan.
- Brush with butter after baking, this adds shine and keeps the crust tender while amplifying the buttery aroma that makes the rolls irresistible.