Mini Fruit Pizzas
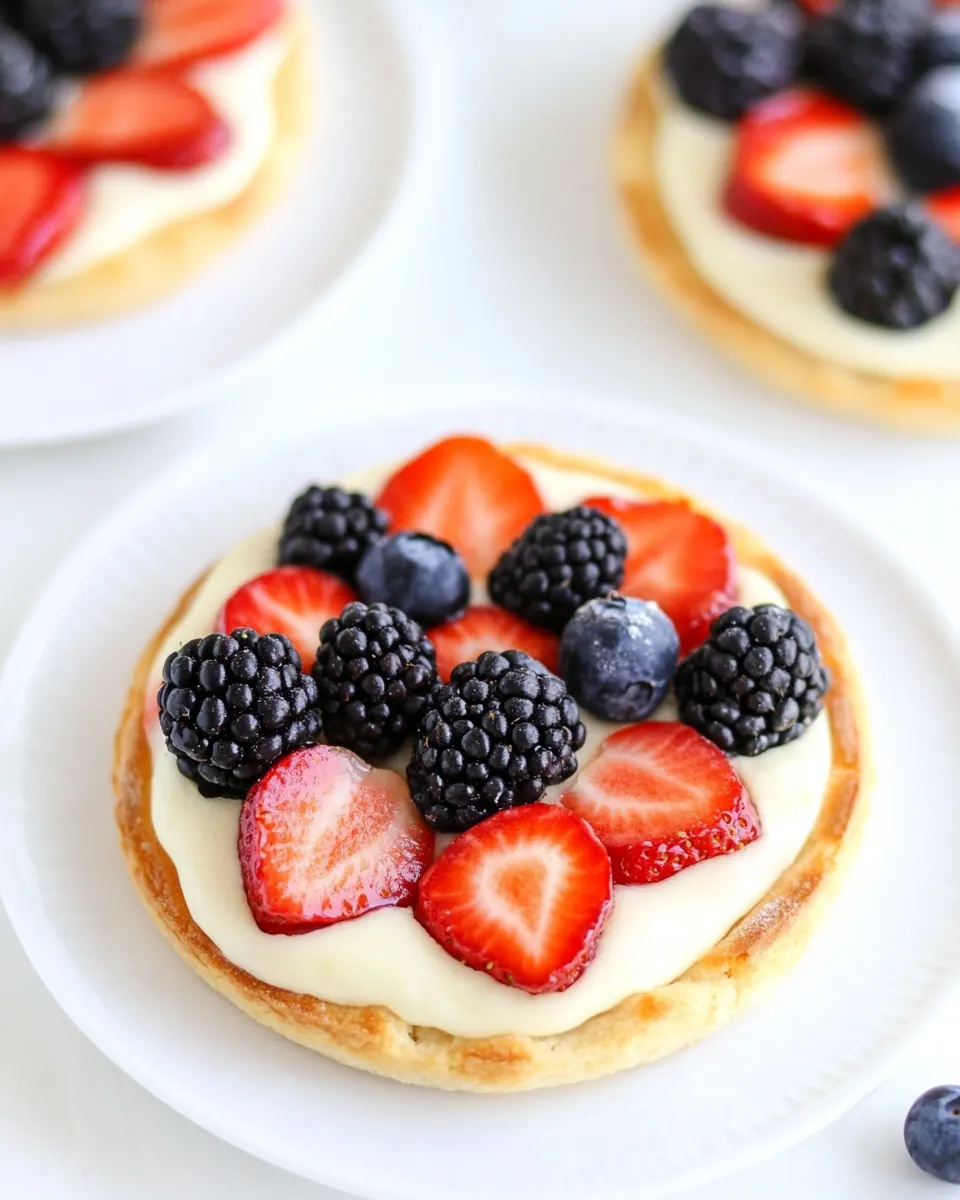
Mini Fruit Pizzas are one of those treats I reach for when I want something that feels festive but is still easy enough for a busy weekday. I first made these on a sticky summer afternoon when a neighbor knocked on my door with a basket of ripe berries, and I wanted a way to showcase them without a fuss. The moment the cream cheese frosting met a buttery cookie base and cool, bright strawberries and blueberries, I knew I had a keeper.
Over the years I have made Mini Fruit Pizzas for brunches, last minute potlucks, and for when the kids want to help in the kitchen. Each time, the ritual slightly changes depending on the fruit available, but the heart of the recipe stays the same: a soft, slightly crisp cookie, a tangy, silky frosting, and fresh fruit for contrast. I love how the colors pop and how the textures play together, and I always end up arranging the fruit differently, like composing a tiny edible artwork.
Recipe Snapshot
25 mins
15 mins
10 mins
Medium
150 kcal
American
Gluten-Free, Low FODMAP
Desserts
Mixer, Muffin top pan, Wire cooling rack, Offset spatula
Why You Need This Mini Fruit Pizzas
Bright, Seasonal Flavor
I adore how Mini Fruit Pizzas let the fruit shine. In summer, berries are at their peak, and when you bite into one of these little pizzas you get that sun warmed sweetness up front, balanced by the cool, tangy cream cheese frosting. The contrast makes every bite feel lively and fresh.
Textural Harmony
The cookie base provides a tender chew and a lightly crisp edge that holds up under the frosting, while the fruit adds juiciness and a slight pop. I love the way the crumb gives a satisfying bite without being heavy, and how the frosting creates a creamy bridge between the base and toppings.
Simple Enough for Helpers
These are a fantastic project when you want to cook with company. Kids can arrange sliced strawberries, scatter blueberries, or place blackberries on top, and the results always look museum worthy. I find it so rewarding to hand these out at a backyard gathering, because everyone can see the effort without you having to fuss over complicated technique.
Versatility
One of my favorite things about Mini Fruit Pizzas is how adaptable they are. Use seasonal fruit, tweak the lemon zest for brightness, or switch the frosting sweetness for a lighter finish. When I want a showy dessert I pile on fruit, and when I need something simpler I keep the decoration minimal. The recipe is forgiving and forgiving is a word I appreciate in any kitchen creation.
Make Ahead Friendly
I often prepare the cookie bases and the frosting a few hours ahead. They keep beautifully and this is a game changer when hosting. You can assemble shortly before serving for the best texture, or assemble and chill for a short period, and still have cheerful little desserts that travel well to picnics or potlucks.
What to Buy for Mini Fruit Pizzas
These ingredients are straightforward and work together to create a balance of buttery cookie, tangy frosting, and juicy fruit. The key players are the base, which needs to be tender but sturdy, the cream cheese frosting that brings tang and silkiness, and the fresh fruit which provides brightness and color. Together they make a dessert that is visually appealing and texturally satisfying.
- 1/2 cup unsalted butter room temperature: Creamy and softened to room temperature to ensure even creaming with sugar, contributing to a tender, rich cookie base. Helps incorporate air for a light texture and provides flavor and moisture to the dough.
- 2/3 cup granulated sugar: Granulated sugar for sweetness and structure, creamed with butter to help leaven and create a delicate crumb. Balances flavors in the cookie base and promotes light browning during baking.
- 1 large egg: Beaten and added to bind the dough while enriching flavor and color; eggs provide structure through protein coagulation. Helps create a tender crumb and aids in emulsifying fats and liquids for a uniform dough.
- 1 teaspoon lemon zest: Finely grated to release bright citrus oils that lift the dough's flavor and complement the cream cheese frosting. Adds a fresh, zesty note without extra liquid to preserve dough texture.
- 1 teaspoon vanilla extract: Added for aromatic warmth and depth, enhancing the overall sweetness with familiar vanilla notes. Helps round out flavors in both the cookie base and frosting when combined with citrus notes.
- 1 1/4 cups all-purpose flour: Measured and sifted or whisked to form the bulk of the dough, providing gluten for structure when mixed. Ensures the cookies hold shape as mini pizza bases while remaining tender when not overworked.
- 1/2 teaspoon baking soda: Included in a small amount to tenderize and mildly leaven the dough, helping cookies spread and rise slightly. Works with cream of tartar to create a balanced, soft texture in the finished bases.
- 1/2 teaspoon cream of tartar: Used as an acid to stabilize whipped textures and provide mild lift when combined with baking soda; also contributes a subtle tang. Helps create a softer, slightly airy cookie while complementing the lemon zest.
- 1/4 teaspoons salt: Added sparingly to enhance and balance sweetness while strengthening dough proteins; keeps flavors bright and prevents flatness. Ensures overall seasoning without altering the dough's moisture.
- For the Cream Cheese Frosting: Heading indicating the next section of the recipe, signaling a shift from the cookie bases to the creamy topping. Helps organize the recipe and clarifies that following ingredients belong to the frosting.
- 18 ounce package of cream cheese: Softened and blended into frosting for a rich, tangy base that adds creaminess and stability. Provides the primary body and tart flavor that pairs well with sweet fruits and cookie bases.
- 2 tablespoons granulated sugar: Added in a small amount to slightly sweeten and control the frosting's taste without making it overly sugary. Helps adjust sweetness precisely for balance with cream cheese and lemon.
- 1/2 cup powdered sugar: Sifted into the frosting for smooth, stable sweetness and to help achieve pipeable consistency. Provides bulk and a clean sweetness that masks tang without graininess.
- 1 tablespoon fresh lemon juice: Freshly squeezed to add bright acidity that cuts through the richness of cream cheese, enhancing overall flavor. Helps thin the frosting slightly for spreading and adds a clean citrus note.
- 1 teaspoon lemon zest: Zested to intensify lemon flavor and add aromatic brightness to the frosting without extra acidity. Complements the cream cheese tang and ties the topping to the lemon notes in the dough.
- 1/2 teaspoon vanilla extract: Added in a small quantity to round out the frosting's aromatic profile and enhance sweetness perception. Provides balance to the lemon and cream cheese while contributing a familiar bakery scent.
- Fruit for Decorating: Section header indicating the final component of the recipe, introducing fresh fruit used for decorating the mini pizzas. Guides assembly by separating decorative ingredients from baking and frosting steps.
- Strawberries sliced: Sliced and arranged attractively on top to provide color, sweetness, and a fresh, slightly tart bite. Adds textural contrast and visual appeal while complementing the creamy frosting and buttery base.
- Blueberries: Used whole to add small bursts of sweet-tart flavor and a pop of color, ideal for filling gaps between larger fruit slices. Offers antioxidant-rich juiciness and pairs well with the creamy frosting.
- Blackberries: Placed as scattered jewels for deep flavor contrast and visual interest, contributing earthy-sweet notes and a jewel-like look. Adds size variety and a small tang that balances the overall sweetness.
Cooking Method for Mini Fruit Pizzas

These steps will walk you through creating the cookie bases, the frosting, and the assembly. I like to move at a relaxed pace so I can notice sensory cues like aroma and color, which tell me the bake is right. Ready your tools and ingredients, and plan your fruit layout so assembly goes smoothly.
- Preheat the oven to 350 degrees F. Spray a muffin top pan with cooking spray and set aside.: The smell of warm air filling the kitchen is the first hint that the baking process is starting, and the oven at 350 degrees F gives the cookie bases a gentle, even heat so they bake through without burning at the edges. When you preheat fully, the cookie bottoms set as they hit the hot pan, creating a slight crisp exterior while the center stays tender. A common mistake is putting the pan into an oven that is not at temperature, which leads to uneven rise and greasier texture, so always wait for the oven to reach 350 before inserting your pan.
- With a mixer, cream the butter and sugar together. Add the egg, lemon zest, and vanilla. Mix until well combined.: As you cream softened unsalted butter and granulated sugar , listen for the change to a lighter, almost fluffy sound and watch the mixture become paler, which indicates air incorporation that will give the cookies lift. When you add the egg , lemon zest , and vanilla , fold them in until homogenous, taking care not to overmix which can toughen the dough. If the mixture looks curdled after the egg, keep mixing briefly until smooth; if you overbeat, the texture may become dense, so stop once combined.
- In a medium bowl, whisk together flour, baking soda, cream of tartar, and salt.: Whisking the dry ingredients ensures even distribution of all-purpose flour , baking soda , cream of tartar , and salt , which prevents pockets of leavening that could cause uneven rise. You should see a uniform pale mixture with no streaks of leavening. A miss here can create spots that puff more than others; if you skip whisking, the cookies may bake irregularly.
- Add flour mixture to the butter mixture and mix until just combined.: At this point the dough should come together without streaks of flour, and you will notice a slightly tacky but workable texture. Mixing until just combined preserves tenderness by avoiding gluten development. For troubleshooting, if the dough feels too dry, gently press a bit to see if it holds; if it crumbles, it may need a touch more moisture, but resist adding liquid as it will change the bake.
- Press about 1/4 cup of cookie dough into muffin top pan. Bake for 8-10 minutes, or until pizzas are slightly golden brown. Let the pizzas cool for 2-3 minutes in the pan. Remove to a wire cooling rack and cool completely.: When you press roughly 1/4 cup of dough into the prepared pan, you will form an even disk that spreads slightly as it bakes; this size helps create a thin, tender base. In the oven, watch the edges for a faint golden tint and a firm top, which happens around 8 to 10 minutes at 350, and releases a warm, buttery aroma. After removing, allow them to cool briefly in the pan so the bottoms firm up, then transfer to a wire cooling rack to cool fully; if you cut hot, the frosting will melt and the fruit will sink. A common error is underbaking, leaving the centers too soft, so wait until the surfaces are set.
- While the cookies are cooling, make the frosting. Using a mixer, beat the cream cheese, sugars, lemon juice, and lemon zest together until smooth. Spread frosting over mini fruit pizzas.: The cream cheese frosting should be glossy and silky, with the aroma of citrus lifting the tang. Beat the cream cheese first to remove lumps, then add granulated sugar , powdered sugar , lemon juice , and lemon zest , and finish with vanilla . The sound shifts to a smooth whipping and the texture becomes spreadable. If you overbeat, air bubbles can make the frosting looser; if it seems too thin, chill briefly to firm up before spreading.
- Arrange fruit on each mini fruit pizza. Chill until ready to serve.: Use an offset spatula or a butter knife to apply a thin, even layer while paying attention to the way the frosting holds shape; it should be thick enough to support fruit without sliding. The cool, creamy mouthfeel of the frosting contrasts with the cookie, and spreading while the cookie is fully cooled prevents melting. A typical problem is applying frosting to warm cookies which causes it to weep, so ensure complete cooling first.
- Note – if you don't have a muffin top pan, you can make a large pizza by using a pizza pan. Feel free to use your favorite fruits – kiwi, mango, raspberries, mandarin oranges, peaches, and bananas are also great toppings!: When you place strawberries , blueberries , and blackberries , aim for visual balance and bite sized pieces so every forkful has variety. The fruit should be dry to the touch to avoid soggy frosting. Chilling firms the frosting and helps flavors meld, producing a refreshing contrast between chilled topping and room temperature cookie. Avoid assembling too far ahead if fruit juice might wet the surface, which can soften the crust.
- Note – if you don't have a muffin top pan, you can make a large pizza by using a pizza pan. Feel free to use your favorite fruits – kiwi, mango, raspberries, mandarin oranges, peaches, and bananas are also great toppings!: This note invites adaptation and expands possibilities, encouraging you to scale to a single larger dessert if needed. Choosing a pizza pan will change bake time, so look for similar visual cues of doneness and adjust carefully. A common misstep is assuming the same bake time applies to a larger format, which often underbakes the center, so watch closely.
Ways to Adapt This Recipe
I like keeping a handful of easy variations in mind so you can tailor Mini Fruit Pizzas to what you have on hand and the occasion. Below are practical adaptations that preserve the spirit of the recipe while offering new flavors, textures, and presentation ideas.
- Make a large fruit pizza: If you do not own a muffin top pan, press the dough into a greased pizza pan to form one larger base, and watch for a slightly longer bake time until the surface is lightly golden.
- Use different fruits for contrast: Swap or add fruits like strawberries, blueberries, or blackberries according to season, keeping textures varied so each bite has both tender and juicy components.
- Prepare ahead: Bake the cookie bases and make the frosting earlier in the day, store separately, and assemble just before serving to maintain a crisp base and fresh fruit appearance.
- Adjust sweetness: Tweak the amount of powdered sugar in the frosting to suit your taste or to balance sweeter fruit, adding less if your fruit is particularly ripe and sugary.
- Decorate creatively: Arrange fruit in concentric circles, stripes, or playful shapes to match themes for parties or holidays, making each mini pizza feel custom and celebratory.
Serving Ideas for Mini Fruit Pizzas
These little desserts are perfect for many occasions, and how you serve them can change the whole experience. Below are ideas for pairings, occasions, storage guidance, and seasonal notes to help you present Mini Fruit Pizzas with confidence.
- Brunch centerpiece: Serve a platter of Mini Fruit Pizzas alongside coffee and light savory options for a bright brunch offering that doubles as a dessert.
- Picnic or potluck treat: Chill assembled pizzas and transport them in a single layer container; they travel well for outdoor gatherings when kept cool until serving.
- Summer parties: Lean into seasonal fruit like berries for a refreshing dessert that complements grilled mains and salads during warm weather events.
- Makeahead tips: Store cookie bases in an airtight container at room temperature for up to two days, and keep the frosting refrigerated; assemble within a few hours of serving to avoid sogginess.
- Presentation: Arrange on a large platter with contrasting fruit colors, and add a light dusting of powdered sugar just before serving for a polished look.
- Occasions: These are ideal for birthdays, baby showers, or casual get togethers where a bite sized, pretty dessert is appreciated.
- Seasonal pairing: In summer, pick sweet berries; in late summer and early fall, consider stone fruits for a juicier bite, remembering to slice thinly to fit on each mini pizza.
- Storage after serving: Keep leftovers refrigerated in a single layer and consume within two days for best texture; note the cookie base will soften over time as fruit releases moisture.
- Serving temperature: Serve chilled from the fridge for a refreshing contrast between cool frosting and room temperature cookie, or let sit five to ten minutes for a softer bite.
- Kid friendly presentation: Let children make faces or patterns with strawberries and blueberries to make dessert interactive and fun.
FAQ
Conclusion
Mini Fruit Pizzas stand out because they combine a tender buttery base, a silky tangy frosting, and bright fresh fruit into a bite sized, festive dessert. They are crowd pleasing, visually appealing, and flexible enough for many occasions, from casual picnics to celebratory brunches. Try making them soon, perhaps with seasonal berries, and enjoy how simple swaps and small decorations can turn an everyday dessert into something special. Share them with friends, let helpers arrange the fruit, and savor the colors, textures, and the ease of putting together a pretty treat.
Mini Fruit Pizzas
Equipment
- Mixer
- Muffin top pan
- wire cooling rack
- Offset Spatula
Ingredients
- 1/2 cup unsalted butter room temperature Creamy and softened to room temperature to ensure even creaming with sugar, contributing to a tender, rich cookie base. Helps incorporate air for a light texture and provides flavor and moisture to the dough.
- 2/3 cup granulated sugar Granulated sugar for sweetness and structure, creamed with butter to help leaven and create a delicate crumb. Balances flavors in the cookie base and promotes light browning during baking.
- 1 large egg Beaten and added to bind the dough while enriching flavor and color; eggs provide structure through protein coagulation. Helps create a tender crumb and aids in emulsifying fats and liquids for a uniform dough.
- 1 teaspoon lemon zest Finely grated to release bright citrus oils that lift the dough's flavor and complement the cream cheese frosting. Adds a fresh, zesty note without extra liquid to preserve dough texture.
- 1 teaspoon vanilla extract Added for aromatic warmth and depth, enhancing the overall sweetness with familiar vanilla notes. Helps round out flavors in both the cookie base and frosting when combined with citrus notes.
- 1 1/4 cups all-purpose flour Measured and sifted or whisked to form the bulk of the dough, providing gluten for structure when mixed. Ensures the cookies hold shape as mini pizza bases while remaining tender when not overworked.
- 1/2 teaspoon baking soda Included in a small amount to tenderize and mildly leaven the dough, helping cookies spread and rise slightly. Works with cream of tartar to create a balanced, soft texture in the finished bases.
- 1/2 teaspoon cream of tartar Used as an acid to stabilize whipped textures and provide mild lift when combined with baking soda; also contributes a subtle tang. Helps create a softer, slightly airy cookie while complementing the lemon zest.
- 1/4 teaspoons salt Added sparingly to enhance and balance sweetness while strengthening dough proteins; keeps flavors bright and prevents flatness. Ensures overall seasoning without altering the dough's moisture.
- For the Cream Cheese Frosting: Heading indicating the next section of the recipe, signaling a shift from the cookie bases to the creamy topping. Helps organize the recipe and clarifies that following ingredients belong to the frosting.
- 18 ounce package of cream cheese Softened and blended into frosting for a rich, tangy base that adds creaminess and stability. Provides the primary body and tart flavor that pairs well with sweet fruits and cookie bases.
- 2 tablespoons granulated sugar Added in a small amount to slightly sweeten and control the frosting's taste without making it overly sugary. Helps adjust sweetness precisely for balance with cream cheese and lemon.
- 1/2 cup powdered sugar Sifted into the frosting for smooth, stable sweetness and to help achieve pipeable consistency. Provides bulk and a clean sweetness that masks tang without graininess.
- 1 tablespoon fresh lemon juice Freshly squeezed to add bright acidity that cuts through the richness of cream cheese, enhancing overall flavor. Helps thin the frosting slightly for spreading and adds a clean citrus note.
- 1 teaspoon lemon zest Zested to intensify lemon flavor and add aromatic brightness to the frosting without extra acidity. Complements the cream cheese tang and ties the topping to the lemon notes in the dough.
- 1/2 teaspoon vanilla extract Added in a small quantity to round out the frosting's aromatic profile and enhance sweetness perception. Provides balance to the lemon and cream cheese while contributing a familiar bakery scent.
- Fruit for Decorating: Section header indicating the final component of the recipe, introducing fresh fruit used for decorating the mini pizzas. Guides assembly by separating decorative ingredients from baking and frosting steps.
- Strawberries sliced Sliced and arranged attractively on top to provide color, sweetness, and a fresh, slightly tart bite. Adds textural contrast and visual appeal while complementing the creamy frosting and buttery base.
- Blueberries Used whole to add small bursts of sweet-tart flavor and a pop of color, ideal for filling gaps between larger fruit slices. Offers antioxidant-rich juiciness and pairs well with the creamy frosting.
- Blackberries Placed as scattered jewels for deep flavor contrast and visual interest, contributing earthy-sweet notes and a jewel-like look. Adds size variety and a small tang that balances the overall sweetness.
Instructions
- Preheat the oven to 350 degrees F. Spray a muffin top pan with cooking spray and set aside.: The smell of warm air filling the kitchen is the first hint that the baking process is starting, and the oven at 350 degrees F gives the cookie bases a gentle, even heat so they bake through without burning at the edges. When you preheat fully, the cookie bottoms set as they hit the hot pan, creating a slight crisp exterior while the center stays tender. A common mistake is putting the pan into an oven that is not at temperature, which leads to uneven rise and greasier texture, so always wait for the oven to reach 350 before inserting your pan.
- With a mixer, cream the butter and sugar together. Add the egg, lemon zest, and vanilla. Mix until well combined.: As you cream softened unsalted butter and granulated sugar , listen for the change to a lighter, almost fluffy sound and watch the mixture become paler, which indicates air incorporation that will give the cookies lift. When you add the egg , lemon zest , and vanilla , fold them in until homogenous, taking care not to overmix which can toughen the dough. If the mixture looks curdled after the egg, keep mixing briefly until smooth; if you overbeat, the texture may become dense, so stop once combined.
- In a medium bowl, whisk together flour, baking soda, cream of tartar, and salt.: Whisking the dry ingredients ensures even distribution of all-purpose flour , baking soda , cream of tartar , and salt , which prevents pockets of leavening that could cause uneven rise. You should see a uniform pale mixture with no streaks of leavening. A miss here can create spots that puff more than others; if you skip whisking, the cookies may bake irregularly.
- Add flour mixture to the butter mixture and mix until just combined.: At this point the dough should come together without streaks of flour, and you will notice a slightly tacky but workable texture. Mixing until just combined preserves tenderness by avoiding gluten development. For troubleshooting, if the dough feels too dry, gently press a bit to see if it holds; if it crumbles, it may need a touch more moisture, but resist adding liquid as it will change the bake.
- Press about 1/4 cup of cookie dough into muffin top pan. Bake for 8-10 minutes, or until pizzas are slightly golden brown. Let the pizzas cool for 2-3 minutes in the pan. Remove to a wire cooling rack and cool completely.: When you press roughly 1/4 cup of dough into the prepared pan, you will form an even disk that spreads slightly as it bakes; this size helps create a thin, tender base. In the oven, watch the edges for a faint golden tint and a firm top, which happens around 8 to 10 minutes at 350, and releases a warm, buttery aroma. After removing, allow them to cool briefly in the pan so the bottoms firm up, then transfer to a wire cooling rack to cool fully; if you cut hot, the frosting will melt and the fruit will sink. A common error is underbaking, leaving the centers too soft, so wait until the surfaces are set.
- While the cookies are cooling, make the frosting. Using a mixer, beat the cream cheese, sugars, lemon juice, and lemon zest together until smooth. Spread frosting over mini fruit pizzas.: The cream cheese frosting should be glossy and silky, with the aroma of citrus lifting the tang. Beat the cream cheese first to remove lumps, then add granulated sugar , powdered sugar , lemon juice , and lemon zest , and finish with vanilla . The sound shifts to a smooth whipping and the texture becomes spreadable. If you overbeat, air bubbles can make the frosting looser; if it seems too thin, chill briefly to firm up before spreading.
- Arrange fruit on each mini fruit pizza. Chill until ready to serve.: Use an offset spatula or a butter knife to apply a thin, even layer while paying attention to the way the frosting holds shape; it should be thick enough to support fruit without sliding. The cool, creamy mouthfeel of the frosting contrasts with the cookie, and spreading while the cookie is fully cooled prevents melting. A typical problem is applying frosting to warm cookies which causes it to weep, so ensure complete cooling first.
- Note - if you don't have a muffin top pan, you can make a large pizza by using a pizza pan. Feel free to use your favorite fruits - kiwi, mango, raspberries, mandarin oranges, peaches, and bananas are also great toppings!: When you place strawberries , blueberries , and blackberries , aim for visual balance and bite sized pieces so every forkful has variety. The fruit should be dry to the touch to avoid soggy frosting. Chilling firms the frosting and helps flavors meld, producing a refreshing contrast between chilled topping and room temperature cookie. Avoid assembling too far ahead if fruit juice might wet the surface, which can soften the crust.
- Note - if you don't have a muffin top pan, you can make a large pizza by using a pizza pan. Feel free to use your favorite fruits - kiwi, mango, raspberries, mandarin oranges, peaches, and bananas are also great toppings!: This note invites adaptation and expands possibilities, encouraging you to scale to a single larger dessert if needed. Choosing a pizza pan will change bake time, so look for similar visual cues of doneness and adjust carefully. A common misstep is assuming the same bake time applies to a larger format, which often underbakes the center, so watch closely.
Notes
- Make a large fruit pizza: If you do not own a muffin top pan, press the dough into a greased pizza pan to form one larger base, and watch for a slightly longer bake time until the surface is lightly golden.
- Use different fruits for contrast: Swap or add fruits like strawberries, blueberries, or blackberries according to season, keeping textures varied so each bite has both tender and juicy components.
- Prepare ahead: Bake the cookie bases and make the frosting earlier in the day, store separately, and assemble just before serving to maintain a crisp base and fresh fruit appearance.
- Adjust sweetness: Tweak the amount of powdered sugar in the frosting to suit your taste or to balance sweeter fruit, adding less if your fruit is particularly ripe and sugary.
- Decorate creatively: Arrange fruit in concentric circles, stripes, or playful shapes to match themes for parties or holidays, making each mini pizza feel custom and celebratory.