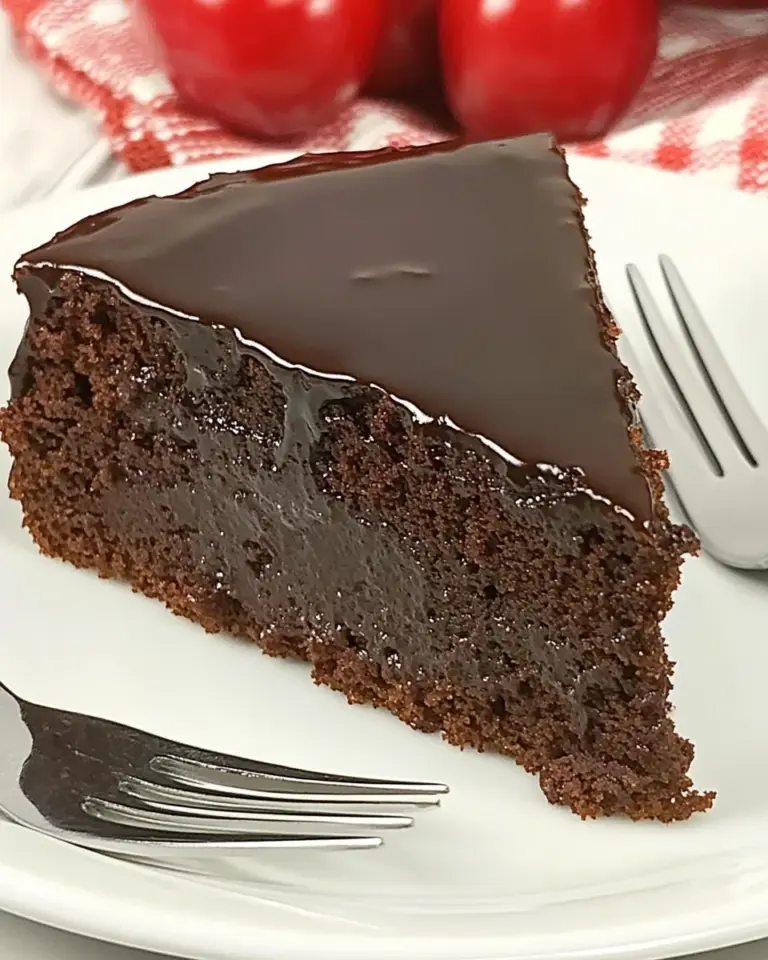
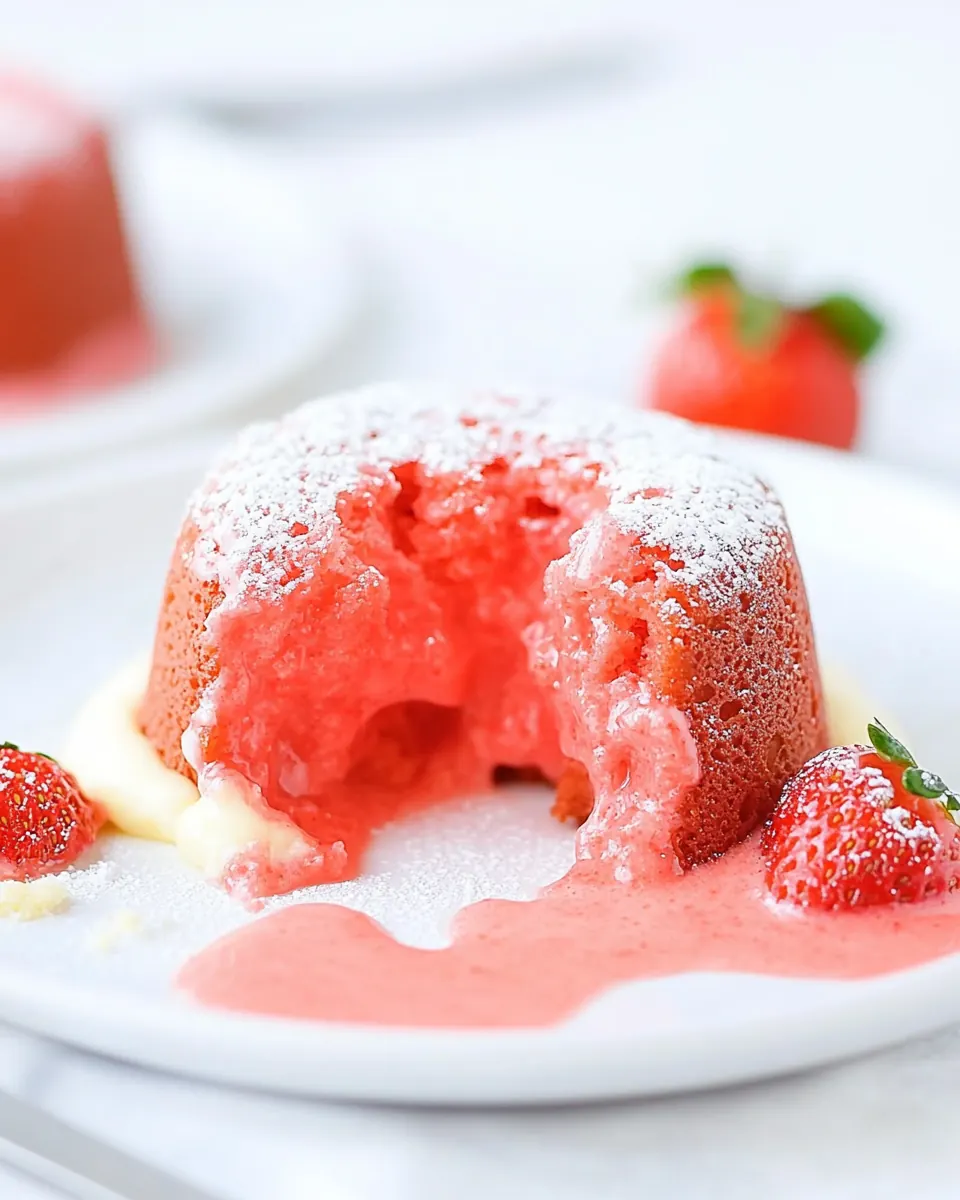
Strawberry Lava Cakes
Strawberry Lava Cakes are one of those desserts that make any ordinary evening feel celebratory, and I still remember the first time I coaxed molten strawberry into a warm cake for friends who had come by on a rainy night.
That night I was a little nervous, juggling a bowl of melted white chocolate and a jar of homemade strawberry curd, but the moment we tapped the ramekins and the glossy center spilled out, everyone went quiet in the best possible way. I love how the bright fruitiness contrasts with the creamy white chocolate, and how a hint of lemon zest lifts the whole thing. Over the years I have adjusted textures, timing, and tiny techniques so the center stays perfectly molten while the edges bake to a tender, slightly set cake.
I’ll confess I have a fondness for small rituals: greasing ramekins, lining them on a baking sheet, and watching the oven work its magic. These little rituals turn a recipe into a moment, and Strawberry Lava Cakes are perfect for those nights when you want to create a touch of theater without making a show of it. Whether you’re serving them for a cozy date night or a special family dessert, the balance of strawberry curd and white chocolate always feels both elegant and comforting.
Recipe Snapshot
30 mins
15 mins
15 mins
Medium
290 kcal
American
Gluten-Free, Low FODMAP
Desserts
Oven, Ramekins, Mixing bowl, Whisk, Baking sheet, Microwave or saucepan
The Magic of This Strawberry Lava Cakes
Velvety molten center
I adore how the molten core delivers an immediate hit of strawberry curd that is both tart and silky. When you pierce the cake, the flow of jammy, warm filling is a sensory payoff that few desserts offer. I appreciate recipes that reward a small bit of precision with big results, and this one does exactly that.
Bright, balanced flavors
This recipe pairs the sweetness of white chocolate with a hint of lemon juice and lemon zest, which keeps the finish from becoming cloying. I find that the citrus notes sharpen the strawberry while the chocolate smooths everything out, making each bite sing in a way that pleases a crowd and still feels intimate.
Quick but impressive
We’re talking about a dessert that takes under an hour from start to finish, yet looks like you spent much longer. I like serving this when I want to impress without a lengthy prep, because the steps are straightforward and the oven does most of the work. It’s perfect for last minute celebrations.
Flexible and forgiving
I love how adaptable the method is. You can skip the food color if you prefer a paler interior, or spoon in extra strawberry curd for a more pronounced center. I’ve swapped greasing methods and heating techniques with reliable results, so there is room to personalize without derailing the outcome.
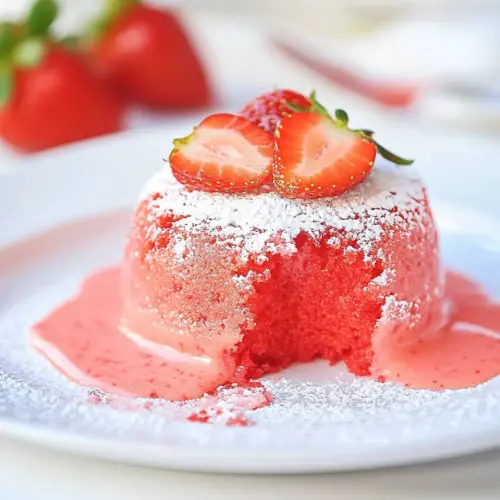
Looks special, feels personal
There is something charming about serving individual ramekins. They feel like tiny gifts, and the ritual of inverting each one at the table is a small flourish that never fails to draw smiles. I always recommend plating simply, so the vivid interior is the star.
Ingredients You’ll Need for Strawberry Lava Cakes
These ingredients come together to produce a delicate cake shell and a molten, fruity center. The key players are the rich white chocolate and unsalted butter which form a creamy base, the strawberry curd that gives the lava its vibrant flavor, and the eggs which add structure while keeping the center soft. Simple pantry items like all-purpose flour and powdered sugar balance texture and sweetness.
- 2/3 cup white chocolate: Melted and smooth to provide a rich, sweet core and contribute to the lava-like center while blending seamlessly with butter for a silky batter; choose high-quality white chocolate for best flavor and texture.
- 1/2 cup unsalted butter chopped: Softened and chopped to combine with white chocolate, adding creamy mouthfeel and structure to the batter; unsalted butter allows precise control of overall salt level in the cakes.
- 2/3 cup all-purpose flour: Sifted and measured to furnish structure and body to the cakes, creating a tender crumb that holds the molten center; all-purpose flour balances protein for suitable rise without toughness.
- 1/2 cup powdered sugar: Lightly aerated and added to sweeten the batter and help tenderize the crumb, dissolving to contribute a smooth texture; powdered sugar also helps achieve a glossy, fine batter consistency.
- 1/2 cup of strawberry curd: Silky and fruity to act as the molten filling that provides bright strawberry flavor and moisture, complementing the white chocolate center; use a thick curd for a clean, gooey release when cakes are served.
- 1 teaspoon lemon zest: Zest-added to impart bright citrus aroma and enhance overall flavor complexity, cutting through the sweetness with fresh lemon oils; finely grated lemon zest disperses evenly through the batter.
- 1 tablespoon lemon juice: Freshly squeezed to bring acidity that balances sweetness and lifts the strawberry and white chocolate flavors, also contributing slight liquid to adjust batter consistency; use immediately for best aromatic impact.
- 3 vanilla beans seeds only or 1 tsp vanilla extract: Scraped or measured to deliver deep fragrant vanilla notes that round out the dessert, with seeds offering visual specks and richer flavor or extract providing convenience and balance.
- 4 large eggs room temperature: Temperate and whole to build volume, stability, and richness in the batter while contributing to the custardy texture of the lava interior; room temperature eggs incorporate more evenly when beaten.
- 4 large egg yolks room temperature: Extra yolks added to enrich the batter with fat and emulsifiers, resulting in a silkier, more custard-like center and enhanced mouthfeel; room temperature yolks blend smoothly for consistent texture.
- 4 5 drops pink gel food color (optional): Sparingly added to tint and visually enhance the cakes with a soft pink hue, optional for presentation and to accentuate the strawberry theme; gel food coloring provides concentrated color without thinning the batter.
Recipe Steps for Strawberry Lava Cakes
I like to walk you through these steps as if we were cooking side by side. You will see why timing and gentle handling matter, and how little sensory cues can guide you to perfect molten centers every time.
- Preheat oven to 425 F.: As the oven warms, you will hear faint clicks and feel a gentle rush of heat when you open it, which signals readiness. A properly preheated oven ensures the outer cake sets quickly while the center remains fluid, producing that signature lava contrast. If the oven is even slightly underheated the cakes may not rise or set correctly, so use an oven thermometer if yours runs hot or cold. One common mistake is placing the ramekins in before the oven reaches temperature, which can lead to underbaked centers and dense edges.
- Butter six 6 oz ramekins and place them on a baking sheet. Set aside.: When you grease the ramekins, the surface should look glossy and slick, which prevents sticking and helps the cakes release cleanly. Lining them evenly on a baking sheet makes it easy to move them in and out of the oven together. I prefer to feel the ramekin interior to confirm it is evenly coated. Skipping thorough greasing can cause tearing when unmolding, so take a moment to coat every nook.
- Add white chocolate and butter to a large microwave-safe bowl and microwave for 1 minute. Stir and continue microwaving in 15 seconds intervals until all melted and smooth. Make sure to stir well after each interval.: As the chocolate and butter warm, you will notice them soften and begin to melt around the edges. After the initial minute stir thoroughly so residual heat finishes the melt. Microwave melting in short bursts preserves a glossy texture. Overheating at once can scorched chocolate and create grainy clumps, so always proceed with caution and short intervals.
- Once the mixture has melted, whisk in flour, powdered sugar, strawberry curd, lemon juice, lemon zest, pink gel food color (if using), and vanilla bean seeds or vanilla extract.: Each stir will transform lukewarm chunks into a shiny, velvety pool. Stirring evenly distributes heat and prevents hot spots, and the finished mixture should look glossy, not oily. If you see a few unmelted pieces, continue 15 second bursts; rushing this step can cause frosting like lumps instead of a smooth base.
- Whisk in the eggs and egg yolks until well combined and the mixture is smooth and shiny.: At this point the batter will thicken and take on a fragrant, tangy aroma from the strawberry curd and lemon . Whisking in dry ingredients should produce a cohesive texture, free of streaks. The moment you add liquids and curd, the mixture may steam slightly and release a burst of sweet, bright scent. A lump-free batter makes for even baking; if lumps remain, sift the flour first next time.
- Divide the batter evenly among prepared ramekins and bake for 14-15 minutes, or until the edges are set. Remove from oven and let stand for 5 minutes before serving.: The batter will turn glossy and slightly aerated as the eggs are incorporated, and you may hear a light swoosh while whisking. This is where structure forms, so thorough incorporation matters, but do not overbeat or introduce so much air the cakes rise and collapse. If the eggs are too cold the batter can seize into a curdled texture, so use room temperature eggs to avoid that common pitfall.
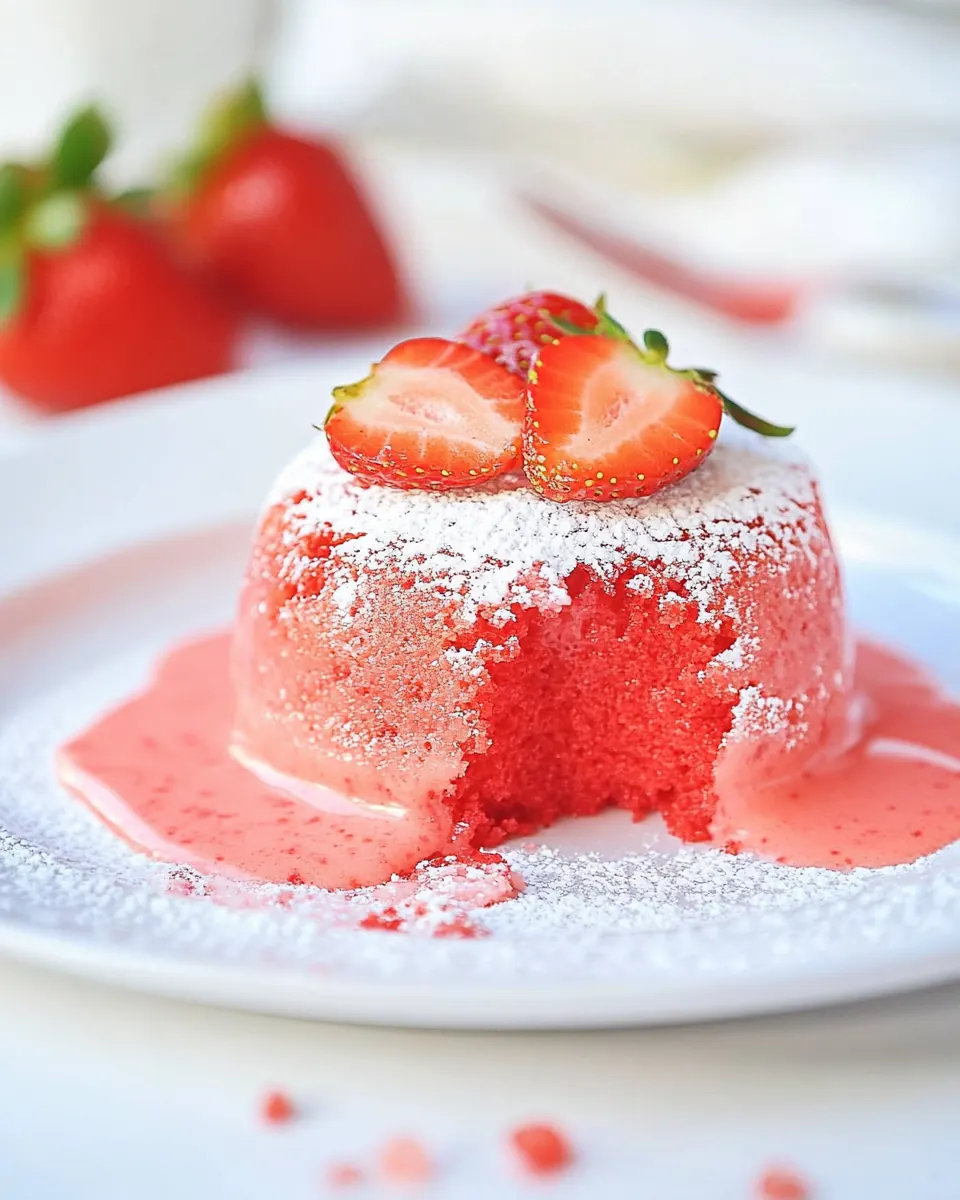
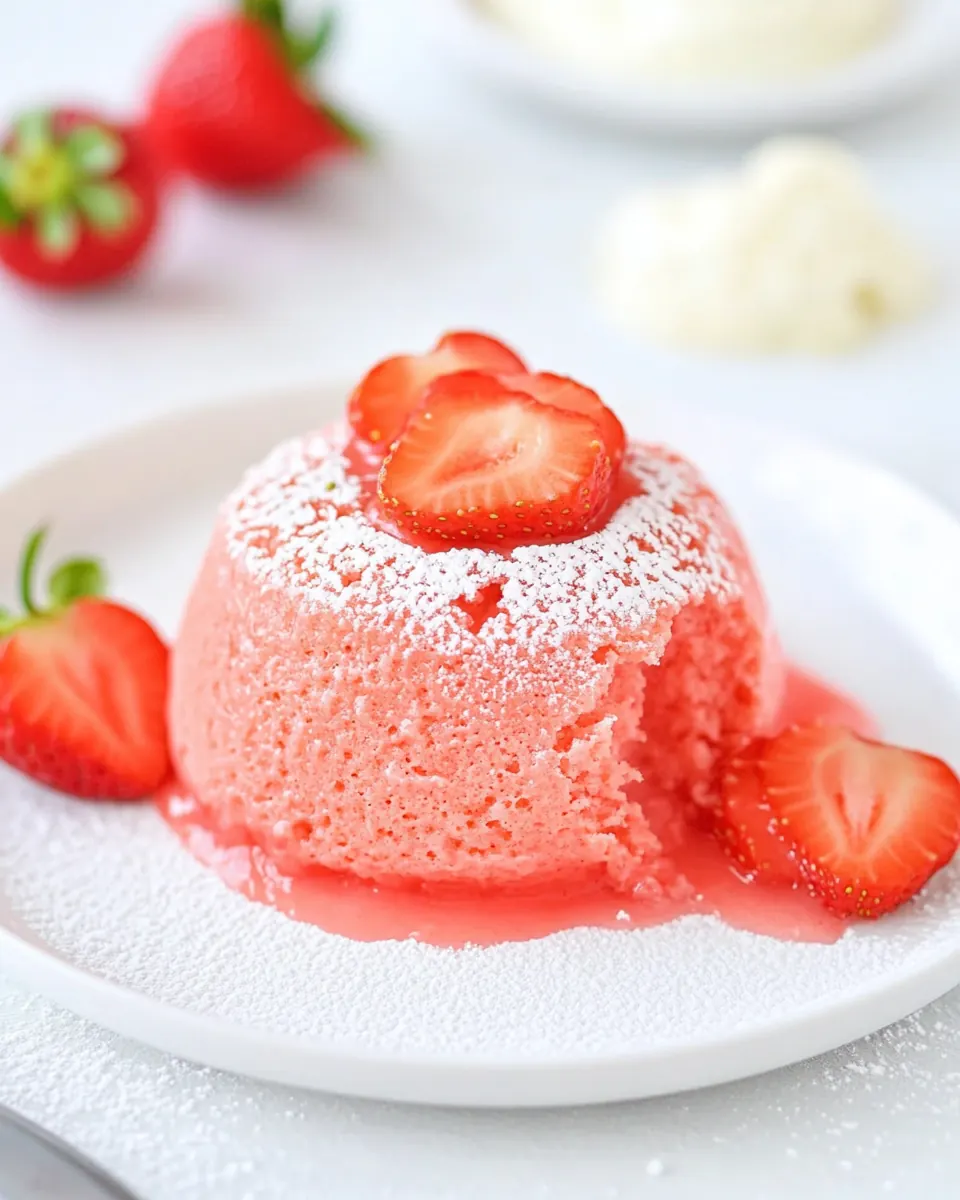
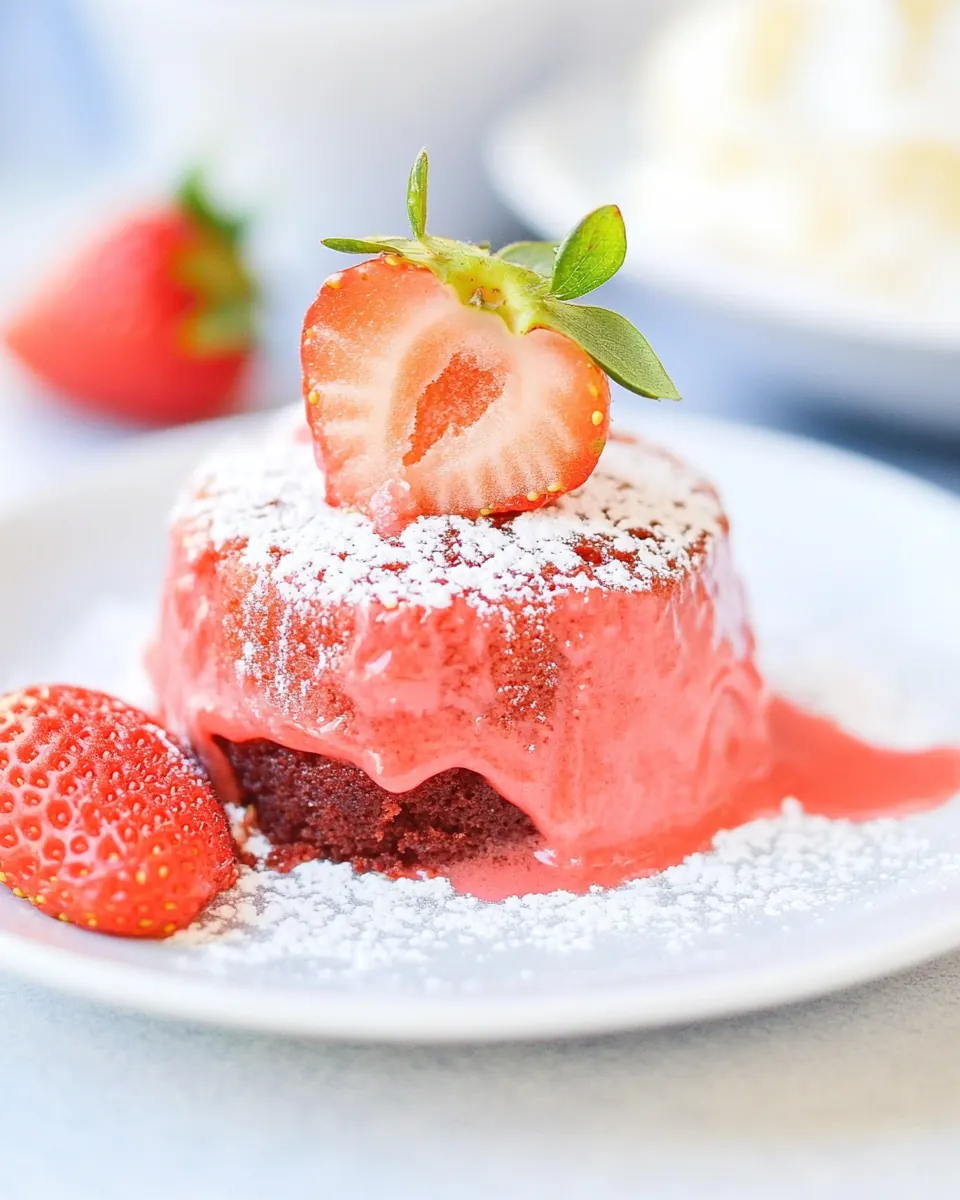
- To remove the cakes from the ramekins, run a butter knife around the edges of the cake to loosen it and invert it onto a serving plate.: As they bake, the kitchen fills with a gentle sweet aroma and the edges will firm to a matt finish while the center remains glossy. Visual cues are crucial: the rims should look slightly pulled away and the centers will still wobble like soft pudding. Overbaking will result in fully set centers, so start checking at 14 minutes. A frequent mistake is relying only on time without watching the texture cues.
- Top with powdered sugar or more strawberry curd and serve.: Resting allows the cakes to settle, and the contrast between warm centers and slightly cooled edges becomes perfect. You will feel a gentle steam rise when you lift the tray, and the aroma deepens as sugars relax. Cutting into them too soon can cause the filling to run out and create a mess, so patience here pays off for a neat unmold.
- To remove the cakes from the ramekins, run a butter knife around the edges of the cake to loosen it and invert it onto a serving plate.: When you run the knife, you may hear a soft slide as the cake detaches, and the surface should release smoothly if properly greased. Inverting with a confident flip yields a clean top and reveals the molten center immediately. If a cake sticks, gently warming the ramekin for a few seconds can help, but avoid forcing it which can break the presentation.
- Top with powdered sugar or more strawberry curd and serve.: The final touch adds a contrast of powder to glossy filling, and spooning extra strawberry curd around the plate intensifies flavor. The first spoonful will combine warm, silky center with the tender cake edges, creating a layered experience of texture and taste. Avoid heavy garnishes that mask the delicate balance; simple presentations let the flavors shine.
Variations to Try
These variations let you tailor Strawberry Lava Cakes to taste preferences and occasions. I like offering a few options when I serve these, because small swaps can dramatically shift texture and flavor while keeping the core technique intact.
- Double the curd: For a more pronounced fruit center, add an extra spoonful of strawberry curd in the middle of each ramekin before baking.
- Skip the color: If you prefer a natural look, omit the pink gel food color and rely on the curd for hue.
- Try bean seeds: Use the seeds from vanilla beans for a speckled, aromatic batter instead of the extract for deeper flavor.
- Coconut oil grease: Replace butter with coconut oil when greasing ramekins for a neutral release and a subtler finish.
- Microwave melting: Melt the white chocolate and butter in a small saucepan over low heat if you prefer stovetop control rather than the microwave.
What to Serve Alongside Strawberry Lava Cakes
I like serving these individual cakes with simple accompaniments that emphasize contrast in temperature and texture. A light accompaniment balances the richness while a small decorative flourish can make the plate feel special. Below are ideas for pairings, suitable occasions, and storage tips to help you present them beautifully.
- Light dollop of cream: A small spoon of softly whipped cream provides a cool, airy contrast to the warm, molten center.
- Fresh berries: A scattering of fresh strawberries or raspberries adds bright acidity and a refreshing bite alongside the rich cake.
- Simple powdered sugar dust: Dusting the tops just before serving gives an elegant finish and a slight textural contrast to the glossy filling.
- Serve for special occasions: These cakes are ideal for intimate dinners, date nights, or celebration desserts where individual portions create a sense of ceremony.
- Storage tips: Baked cakes are best served the same day, but batter can be refrigerated for up to 24 hours; bring to room temperature before baking. Avoid freezing already baked lava cakes because the texture will change drastically.
- Seasonal pairing: They are especially lovely in spring when berries are bright and available, and they fit well into menus for brunch or light dinner finales.
FAQ
Conclusion
Strawberry Lava Cakes stand out because they deliver a dramatic molten center with minimal fuss. The interplay of creamy white chocolate and bright strawberry curd creates a sophisticated flavor that still feels comforting and familiar. Give them a try on a night when you want a dessert that’s both effortless and show stopping, and enjoy the pleasure of watching each ramekin reveal its glossy heart. They are a small indulgence that reliably brings smiles and a little culinary theatre to the table.
Strawberry Lava Cakes
Equipment
- Oven
- Ramekins
- Mixing Bowl
- Whisk
- Baking Sheet
- Microwave or saucepan
Ingredients
- 2/3 cup white chocolate Melted and smooth to provide a rich, sweet core and contribute to the lava-like center while blending seamlessly with butter for a silky batter; choose high-quality white chocolate for best flavor and texture.
- 1/2 cup unsalted butter chopped Softened and chopped to combine with white chocolate, adding creamy mouthfeel and structure to the batter; unsalted butter allows precise control of overall salt level in the cakes.
- 2/3 cup all-purpose flour Sifted and measured to furnish structure and body to the cakes, creating a tender crumb that holds the molten center; all-purpose flour balances protein for suitable rise without toughness.
- 1/2 cup powdered sugar Lightly aerated and added to sweeten the batter and help tenderize the crumb, dissolving to contribute a smooth texture; powdered sugar also helps achieve a glossy, fine batter consistency.
- 1/2 cup of strawberry curd Silky and fruity to act as the molten filling that provides bright strawberry flavor and moisture, complementing the white chocolate center; use a thick curd for a clean, gooey release when cakes are served.
- 1 teaspoon lemon zest Zest-added to impart bright citrus aroma and enhance overall flavor complexity, cutting through the sweetness with fresh lemon oils; finely grated lemon zest disperses evenly through the batter.
- 1 tablespoon lemon juice Freshly squeezed to bring acidity that balances sweetness and lifts the strawberry and white chocolate flavors, also contributing slight liquid to adjust batter consistency; use immediately for best aromatic impact.
- 3 vanilla beans seeds only or 1 tsp vanilla extract Scraped or measured to deliver deep fragrant vanilla notes that round out the dessert, with seeds offering visual specks and richer flavor or extract providing convenience and balance.
- 4 large eggs room temperature Temperate and whole to build volume, stability, and richness in the batter while contributing to the custardy texture of the lava interior; room temperature eggs incorporate more evenly when beaten.
- 4 large egg yolks room temperature Extra yolks added to enrich the batter with fat and emulsifiers, resulting in a silkier, more custard-like center and enhanced mouthfeel; room temperature yolks blend smoothly for consistent texture.
- 4 -5 drops pink gel food color optional Sparingly added to tint and visually enhance the cakes with a soft pink hue, optional for presentation and to accentuate the strawberry theme; gel food coloring provides concentrated color without thinning the batter.
Instructions
- Preheat oven to 425 F.: As the oven warms, you will hear faint clicks and feel a gentle rush of heat when you open it, which signals readiness. A properly preheated oven ensures the outer cake sets quickly while the center remains fluid, producing that signature lava contrast. If the oven is even slightly underheated the cakes may not rise or set correctly, so use an oven thermometer if yours runs hot or cold. One common mistake is placing the ramekins in before the oven reaches temperature, which can lead to underbaked centers and dense edges.
- Butter six 6 oz ramekins and place them on a baking sheet. Set aside.: When you grease the ramekins, the surface should look glossy and slick, which prevents sticking and helps the cakes release cleanly. Lining them evenly on a baking sheet makes it easy to move them in and out of the oven together. I prefer to feel the ramekin interior to confirm it is evenly coated. Skipping thorough greasing can cause tearing when unmolding, so take a moment to coat every nook.
- Add white chocolate and butter to a large microwave-safe bowl and microwave for 1 minute. Stir and continue microwaving in 15 seconds intervals until all melted and smooth. Make sure to stir well after each interval.: As the chocolate and butter warm, you will notice them soften and begin to melt around the edges. After the initial minute stir thoroughly so residual heat finishes the melt. Microwave melting in short bursts preserves a glossy texture. Overheating at once can scorched chocolate and create grainy clumps, so always proceed with caution and short intervals.
- Once the mixture has melted, whisk in flour, powdered sugar, strawberry curd, lemon juice, lemon zest, pink gel food color (if using), and vanilla bean seeds or vanilla extract.: Each stir will transform lukewarm chunks into a shiny, velvety pool. Stirring evenly distributes heat and prevents hot spots, and the finished mixture should look glossy, not oily. If you see a few unmelted pieces, continue 15 second bursts; rushing this step can cause frosting like lumps instead of a smooth base.
- Whisk in the eggs and egg yolks until well combined and the mixture is smooth and shiny.: At this point the batter will thicken and take on a fragrant, tangy aroma from the strawberry curd and lemon . Whisking in dry ingredients should produce a cohesive texture, free of streaks. The moment you add liquids and curd, the mixture may steam slightly and release a burst of sweet, bright scent. A lump-free batter makes for even baking; if lumps remain, sift the flour first next time.
- Divide the batter evenly among prepared ramekins and bake for 14-15 minutes, or until the edges are set. Remove from oven and let stand for 5 minutes before serving.: The batter will turn glossy and slightly aerated as the eggs are incorporated, and you may hear a light swoosh while whisking. This is where structure forms, so thorough incorporation matters, but do not overbeat or introduce so much air the cakes rise and collapse. If the eggs are too cold the batter can seize into a curdled texture, so use room temperature eggs to avoid that common pitfall.
- To remove the cakes from the ramekins, run a butter knife around the edges of the cake to loosen it and invert it onto a serving plate.: As they bake, the kitchen fills with a gentle sweet aroma and the edges will firm to a matt finish while the center remains glossy. Visual cues are crucial: the rims should look slightly pulled away and the centers will still wobble like soft pudding. Overbaking will result in fully set centers, so start checking at 14 minutes. A frequent mistake is relying only on time without watching the texture cues.
- Top with powdered sugar or more strawberry curd and serve.: Resting allows the cakes to settle, and the contrast between warm centers and slightly cooled edges becomes perfect. You will feel a gentle steam rise when you lift the tray, and the aroma deepens as sugars relax. Cutting into them too soon can cause the filling to run out and create a mess, so patience here pays off for a neat unmold.
- To remove the cakes from the ramekins, run a butter knife around the edges of the cake to loosen it and invert it onto a serving plate.: When you run the knife, you may hear a soft slide as the cake detaches, and the surface should release smoothly if properly greased. Inverting with a confident flip yields a clean top and reveals the molten center immediately. If a cake sticks, gently warming the ramekin for a few seconds can help, but avoid forcing it which can break the presentation.
- Top with powdered sugar or more strawberry curd and serve.: The final touch adds a contrast of powder to glossy filling, and spooning extra strawberry curd around the plate intensifies flavor. The first spoonful will combine warm, silky center with the tender cake edges, creating a layered experience of texture and taste. Avoid heavy garnishes that mask the delicate balance; simple presentations let the flavors shine.
Notes
- Double the curd: For a more pronounced fruit center, add an extra spoonful of strawberry curd in the middle of each ramekin before baking.
- Skip the color: If you prefer a natural look, omit the pink gel food color and rely on the curd for hue.
- Try bean seeds: Use the seeds from vanilla beans for a speckled, aromatic batter instead of the extract for deeper flavor.
- Coconut oil grease: Replace butter with coconut oil when greasing ramekins for a neutral release and a subtler finish.
- Microwave melting: Melt the white chocolate and butter in a small saucepan over low heat if you prefer stovetop control rather than the microwave.