Korean BBQ Chicken Skewers
Korean BBQ Chicken Skewers have been my go to for backyard gatherings when I want bold flavor without fuss. The first time I made these I was juggling a salty sweet marinade and a slightly impatient group of friends, and the way those charred, sticky pieces of chicken disappeared convinced me this would be a summer staple. I remember pulling skewers straight from the grill, the glaze bubbling and catching the light, and everyone leaning in to snag one before I could plate them.
That meal taught me to respect small details, like letting the marinade sit just long enough and keeping a reserved portion to reduce into a sticky baste. I enjoy how the toasted sesame aroma weaves with the spicy kick of gochujang, and how the quick cooking leaves the chicken juicy and tender. Over time I learned little tricks, such as spacing pieces on the skewer so heat moves around each chunk and using a thermometer so no one worries about safety.
Recipe Snapshot
30 mins
15 mins
15 mins
Medium
350 kcal
Korean
Gluten-Free, Paleo
Dinner
outdoor (gas) grillOR, large baking sheet with rack, pastry brush, digital thermometer
The Magic of This Korean BBQ Chicken Skewers
Big, balanced flavor without hours of work
I love that these Korean BBQ Chicken Skewers deliver vivid flavor in under an hour. The combo of gochujang paste, soy sauce, and rice vinegar creates a layered taste profile that hits sweet, salty, and tangy notes, so you get complexity without complicated steps.
Fast for weeknights, festive for company
We often make these on a weekday because the marinade needs only fifteen to thirty minutes. They also shine at gatherings, because skewers are inherently social food, easy to pass around and eat standing up. I like recipes that pivot from casual to celebratory with barely any extra effort.
Flexible cooking methods
Whether I am outside grilling on a gas grill, using a grill pan on the stove, or popping the skewers in the oven, these skewers adapt. Each technique gives a slightly different finish, and I’ll choose based on weather and timing, which is why I appreciate the recipe’s options.
Textural contrast and visual appeal
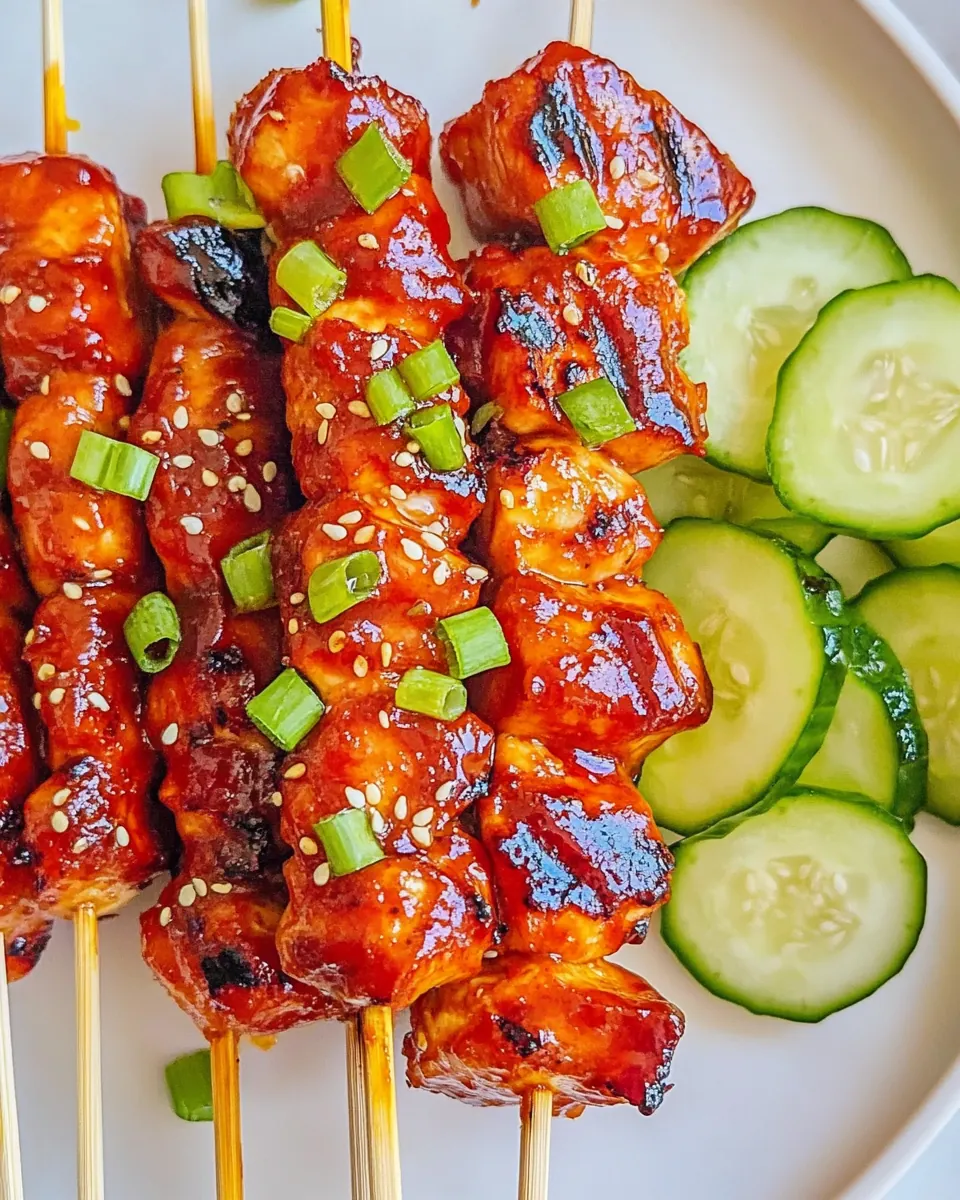
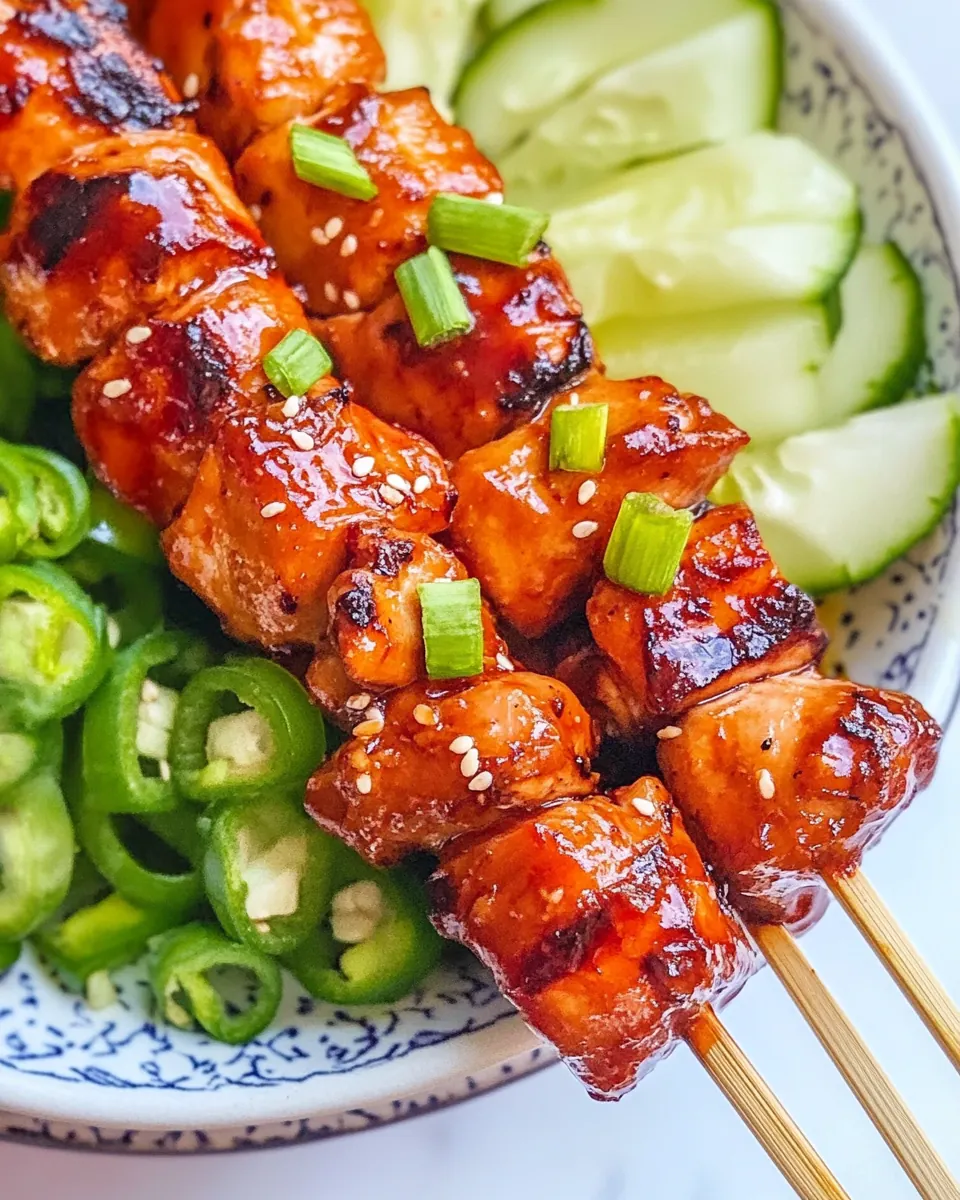
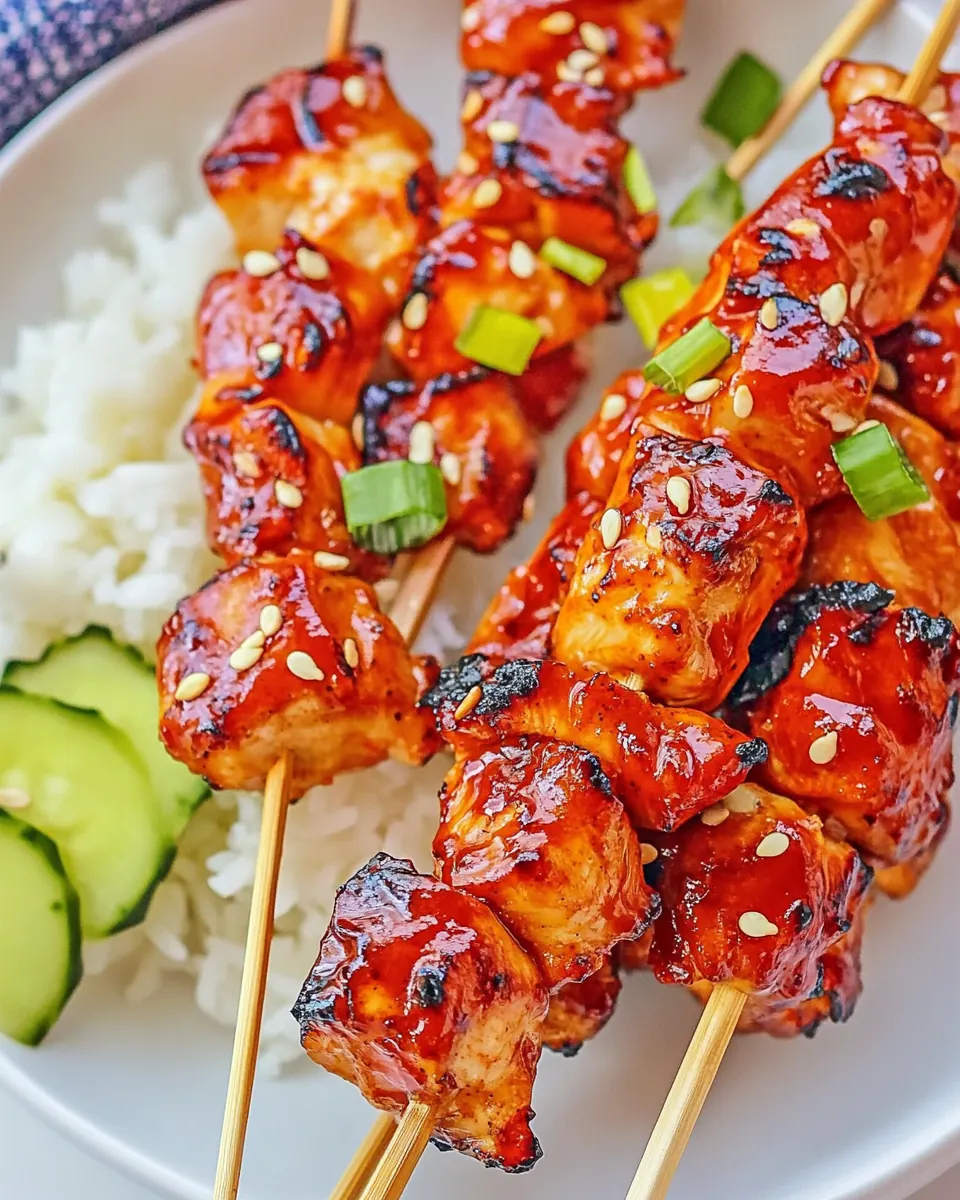
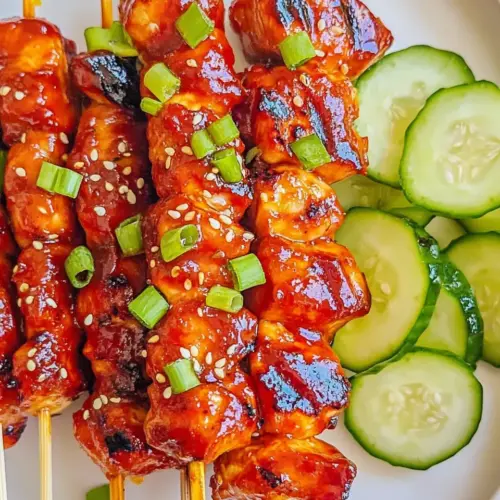
The quick sear creates caramelized edges while the interior stays tender, and finishing with a reduced glaze adds gloss and sticky texture. I love that sprinkling sliced green onion and sesame seeds turns the dish into something that looks as good as it tastes.
Kid friendly but grown up too
My family appreciates that you can easily dial the spice up or down by adjusting the gochujang paste. It’s sweet enough to please younger palates when toned down, yet still packs depth for those who enjoy bold flavors. That versatility keeps this recipe in our rotation year after year.
What to Gather for Korean BBQ Chicken Skewers
These ingredients are chosen to work together precisely: the umami of soy sauce anchors the marinade, gochujang paste brings heat and fermented depth, while rice vinegar lifts the mix with acidity. Small amounts of brown sugar and sesame oil round the edges, creating balance and a glossy finish after reduction. The chicken is the canvas that soaks up those flavors, and the optional garnishes brighten and add crunch.
- 2 to 4 tablespoons Gochujang paste, or to taste: Adds a spicy, savory backbone and deep umami flavor; use 2 to 4 tablespoons to adjust heat level and balance the marinade for authentic Korean taste.
- 1/4 cups soy sauce, I use reduced sodium: Provides salty, savory depth and helps tenderize the chicken; use 1/4 cup reduced–sodium soy sauce to control overall saltiness while contributing color and umami.
- 3 tablespoons rice vinegar: Brightens and balances the marinade with mild acidity; 3 tablespoons rice vinegar cut through sweetness and enrich the overall flavor profile.
- 2 tablespoons light brown sugar, packed: Contributes caramelized sweetness and a hint of molasses; 2 tablespoons packed light brown sugar help balance heat and acidity while promoting a glossy finish during grilling.
- 1 tablespoon toasted sesame oil: Imparts a nutty, aromatic finish to the marinade and finished skewers; 1 tablespoon toasted sesame oil enhances complexity without overpowering other flavors.
- 1/2 teaspoon kosher salt, or to taste: Elevates overall seasoning and brings out natural flavors; 1/2 teaspoon kosher salt can be adjusted to taste to ensure the chicken is well-seasoned.
- 1/2 teaspoon freshly ground black pepper, or to taste: Adds a subtle warm bite and helps balance flavors; 1/2 teaspoon freshly ground black pepper can be adjusted for desired mild heat.
- 2 pounds boneless skinless chicken breasts, diced into 1 1/2-inch chunks: Serves as the primary protein, providing hearty texture and neutral flavor to absorb the marinade; 2 pounds boneless skinless chicken breasts are diced into 1 1/2-inch chunks for even cooking on skewers.
- 1 green onion, sliced into thin rounds; for garnishing (optional): Provides a fresh, mild oniony garnish that adds color and a bright finish; thin rounds of 1 green onion can be sprinkled just before serving for contrast.
- sesame seeds, to taste; for garnishing (optional): Adds a toasty crunch and visual appeal as a garnish; sesame seeds can be sprinkled to taste to enhance texture and presentation.
Cooking Instructions for Korean BBQ Chicken Skewers
These instructions guide you through marinating, threading, and cooking with sensory cues so you know when each step is right. I like to keep things relaxed, focusing on texture and aroma rather than strict timing, which helps when using different cooking methods.
- Marindade: To a large bowl, add the Gochujuang paste to taste, soy sauce, rice vinegar, brown sugar, sesame oil, salt, pepper, and whisk to combine to create the chicken marinade. Taste, and if desired, add more of a certain ingredient that you desire. Remove 1/3 cup of the marinade and place it in a small saucepan; set aside.: To a large bowl, add the Gochujuang paste to taste, soy sauce, rice vinegar, brown sugar, sesame oil, salt, pepper, and whisk to combine to create the chicken marinade : Close your eyes for a second and smell the first mix, the tang from rice vinegar and the deep savory note from soy sauce will be prominent, followed by the warm, fermented scent of gochujang paste . Whisking aerates the marinade slightly and dissolves the brown sugar , creating a cohesive liquid that clings to the chicken . The reason we reserve a portion is to cook it down into a safe, basting glaze, because uncooked marinade can contain raw chicken juices. A common mistake is adding cooked reserved marinade to the raw chicken without reducing it first; always simmer the reserved portion to kill bacteria and concentrate the flavors.
- Add the diced chicken to the marinade, and allow it to marindade for 15-30 minutes. If you're going to marinade closer to 30 minutes, you should cover it and place the bowl in the fridge. Tip– Do NOT marinade longer than indicated; the acidity of the ingredients will break down the chicken protein fibers too much and the chicken will be mushy.: When the chicken hits the marinade, you should hear a faint splash and see the pieces coated and glossy; the surface will become slightly tacky as it soaks up flavor. Marinating for fifteen minutes adds surface flavor quickly, while thirty minutes lets the acid and seasonings penetrate a bit more. Avoid overmarinating, as the vinegar can start to break down proteins, making the texture mushy. If you notice the chicken turning stringy or overly soft, that indicates too long in acid.
- Soak: Meanwhile, if you're using wooden skewers, soak them in water for at least 15-30 minutes, or while the chicken is marinating. Tip– I prefer wooden skewers because the charred ends of the wood give a smoky fragrance to the chicken, which adds to the overall flavor profile. Reduce: Additionally, place the saucepan with the reserved 1/3 cup marinade on the stove, heat over medium-high for about 2-3 minutes, or until the sauce reduces, thickens, and becomes sticky; stir nearly continuously so it doesn't burn. Set aside off the heat until it's time to baste the chicken.: Meanwhile, if you're using wooden skewers, soak them in water for at least 15 to 30 minutes, or while the chicken is marinating : The soaked skewers will hiss faintly when they meet the hot grill rather than catching fire, and they'll help prevent the ends from burning. At the same time, reduce the reserved marinade in a small saucepan until it thickens and becomes glossy; stirring constantly will prevent scorching and give you a sticky glaze perfect for basting. A frequent slip up is skipping soaking and then losing skewers to flame; always allow adequate soaking time for wooden sticks.
- Thread: After marinating, thread the chicken on approximately 5 to 8 skewers, depending on how much chicken you're using and the exact length of your skewers. Don't compress or overly compact/squish the chicken onto a skewer. If you're running out of space, start a new skewer.: After marinating, thread the chicken on approximately 5 to 8 skewers, depending on how much chicken you're using and the exact length of your skewers : As you assemble, space each chunk so heat circulates and edges get caramelized rather than steamed. The visual cue of evenly spaced pieces helps ensure even cooking and a consistent bite size for serving. If you cram pieces too tightly, steam can build and the exterior will not develop that desirable char. If the chicken looks uneven, pause and rearrange rather than forcing more onto a single skewer.
- Cooking: When ready to cook, follow the method below that's best suited for you. In all cooking methods: Discard the marinade that was in the marinating bowl. Chicken is done at 160 F, rest it on a plate for 5-10 minutes so the internal temp rises to 165 F as measured with a digital thermometer, which is the safe temperature to consume chicken.: When ready to cook, follow the method below that's best suited for you : No matter the method, discard the leftover marinade from the bowl to avoid contamination, and rely on a digital thermometer to confirm the chicken reaches 160 F before resting to 165 F for safe eating. Listen for sizzling on contact and watch for a bronzed edge forming as the sugars caramelize; those sensory signs indicate progress toward doneness. Under cooking is dangerous for poultry, and overcooking dries the chicken out; aim for that sweet spot where juices run clear and the interior is opaque but still yielding.
- Grilling (outdoors): Oil the grill grates, and preheat outdoor gas grill to medium-high heat. When ready to grill, place the skewers on the grill, close the lid, and grill for approximately 3-4 minutes, open the lid, flip the chicken using tongs, baste it generously with the sauce that you reduced, and cook for another 2-4 minutes, or until the chicken is done; baste as much as desired for juicer chicken with richer flavor. Tips– Because most grills are at least 500-600 F and these pieces of chicken are small, it's going to cook very quickly. Use common sense and lower the heat if it's burning, flip and turn as much as necessary, and if it's not done after 8 minutes total, keep grilling until it's done. If it sticks when you are trying to flip it, let it cook for another minute before trying to flip it.: Oil the grill grates, and preheat outdoor gas grill to medium high heat : When the grill is ready, you want to hear an immediate sizzle as the skewers touch the grates; this quick sear locks in juices and builds a caramelized crust. Close the lid to maintain heat, then flip and baste with the reduced sauce so the glaze thickens and sticks, producing glossy, savory bites. A common error is keeping the grill too hot which will char the exterior before the center cooks; if you detect excessive blackening within moments, reduce the flame and move skewers to a cooler zone.
- Grill Pan (indoors on stove): Preheat a grill pan over medium-high to high heat on your stove, place the skewers on top, and cook for approximately 5 minutes, flip the chicken using tongs, baste generously, and cook for another 3-5 minutes, or until the chicken is done; baste as often as desired for juicier more flavorful chicken. Tips– These pieces of chicken are small and will cook very quickly but all grill pans vary in their thickness, composition, the size of the chicken pieces varies, etc. so use common sense and keep cooking until it's done. If it sticks when you are trying to flip it, let it cook for another minute before trying to flip it.: Preheat a grill pan over medium high to high heat on your stove : The pan should be very hot so the chicken makes contact with a smoking surface that crisps the exterior and imparts those grill lines. Flip when you see defined grill marks and baste between flips for layers of flavor. If the pieces stick immediately, give them a little more time to release naturally rather than forcing them, which can tear the surface.
- Oven Baking: Preheat oven to 400 F and place a grill rack over a parchment-lined baking sheet (do not skip lining your baking sheet because the marinade runoff will char your baking sheet otherwise!), and arrange the skewers on the prepared rack. Bake in the preheated oven for about 20 minutes, or until the chicken is cooked through and lightly charred on the edges. Flip midway through baking with tongs, baste generously, and you can even flip and baste another time before chicken is fully done for juicer, moist chicken. Tips– Baking time will vary based on the size of the chicken pieces, personal preference for doneness, heat output of your oven, etc. so use common sense and keep cooking until it's done. If your oven runs hot, and/or the chicken pieces are smaller, it could be done in 16-18 minutes, so I recommend checking early. It may also take longer than 20-22 minutes, which is fine too.: Preheat oven to 400 F and place a grill rack over a parchment lined baking sheet : The oven provides steady, even heat that is forgiving for busy cooks, and the rack allows air to circulate so the undersides get some color rather than stewing in juices. Flip midway and baste to build a sticky finish, watching for the edges to turn lightly charred and the glaze to thicken. If your oven runs hot, check early and adjust the time rather than assuming the recipe timing is absolute.
- Garnish: Optionally garnish with green onions, sesame seeds, fresh herbs such as basil or cilantro, or as desired. Serve the chicken right on the skewers, or remove it from the skewers and serve it alongside rice, over a salad, or as desired.: Optionally garnish with green onions, sesame seeds, fresh herbs such as basil or cilantro, or as desired : The final touch is bright and aromatic; the sliced green onion adds a crisp snap while toasted sesame seeds bring a subtle crunch and nutty smell. Scatter these just before serving so they stay fresh and vivid. A typical misstep is garnishing too early, which causes wilted herbs and muted colors; wait until plating for maximum impact.
Helpful Notes about Korean BBQ Chicken Skewers
I keep these notes handy because little adjustments change the result dramatically, especially with heat and timing. Below you will find expanded tips and practical advice that I actually use when prepping for a crowd or a quick midweek dinner.
- Reserve and reduce: Always set aside about one third cup of the marinade before adding the raw chicken. Simmer this reserved portion until it thickens into a sticky glaze, which is safe for basting and concentrates the flavors into a glossy finish.
- Marinate smartly: Fifteen minutes is enough for surface flavor; thirty minutes deepens the taste. Avoid going much longer to prevent the acid from breaking down the chicken fibers and creating a mushy texture.
- Temperature matters: Use a digital thermometer to remove guesswork, aiming for 160 F internal and then resting to 165 F. This method prevents dry overcooked meat and ensures safety.
- Control flare ups: When grilling outdoors, oil the grates and keep a cooler zone ready; if flames flare, move skewers away and close the lid briefly to reduce oxygen and calm the fire.
- Finish fresh: Add sliced green onion and sesame seeds just before serving for texture and color, and consider a light extra drizzle of reduced glaze to make the skewers shine.
Serving Ideas for Korean BBQ Chicken Skewers
These skewers are incredibly versatile, fitting casual lunches, weekend dinners, and festive summer cookouts. You can plate them multiple ways to suit the occasion, and the recipe stores well so you can prepare components ahead. Below are serving concepts, pairing suggestions, and storage guidance to help you plan a meal around these skewers.
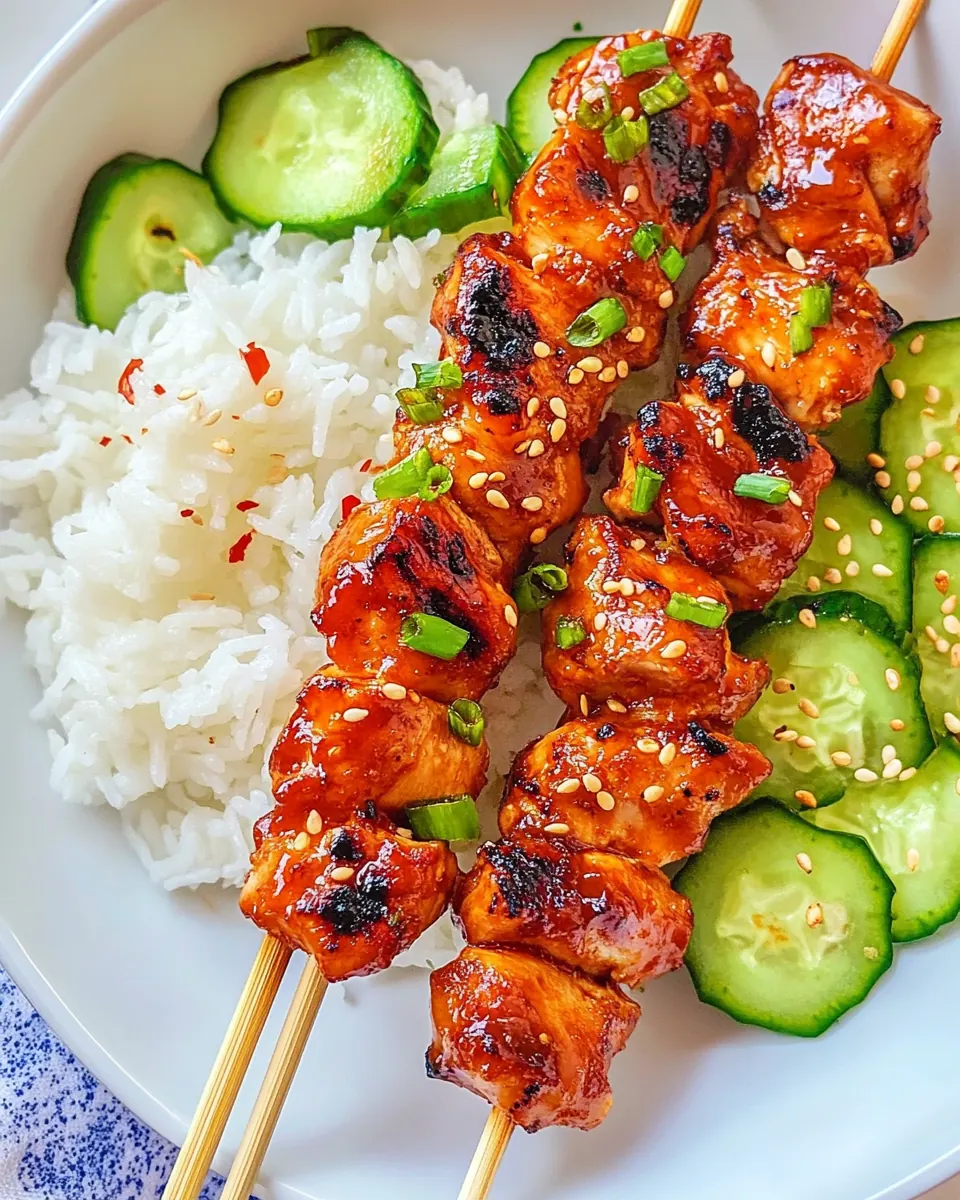
- Serve over steamed rice: Lay the skewers atop a bowl of warm rice to catch the sticky glaze and make a simple, satisfying meal that is perfect for casual dinners.
- Accompany with a fresh salad: Pair the skewers with a crisp green salad dressed lightly so the bold skewer flavors remain central; the salad provides contrast and balances richness.
- Family style platter: Arrange the skewers on a large board, sprinkle with sliced green onion and sesame seeds, and place small bowls of extra reduced glaze on the side for dipping during gatherings.
- Occasion pairing: Great for summer cookouts, weeknight dinners, or Ramadan if breaking fast with something easy to share; the skewers are portable and pair well with simple sides.
- Storage tip: Store leftovers airtight in the refrigerator for up to five days or freeze for up to three months. Reheat gently to avoid drying, using short bursts in the microwave or a brief stint in a hot oven.
- Seasonal note: These skewers feel at home in summer because grilling is common, but their flavor profile works year round when you use a grill pan or oven indoors.
FAQ
Conclusion
Korean BBQ Chicken Skewers stand out because they pair bold Korean inspired flavors with quick, approachable technique that works for weeknights and gatherings alike. Give them a try the next time you want something that is both hands on and impressively flavorful, and you might just find they become a regular on your menu. I hope you enjoy the sticky glaze, the tender chicken, and the simplicity of a recipe that delivers big results with minimal fuss.
Korean BBQ Chicken Skewers
Equipment
- outdoor (gas) grillOR
- large baking sheet with rack
- Pastry Brush
- Digital Thermometer
Ingredients
- 2 to 4 tablespoons Gochujang paste, or to taste Adds a spicy, savory backbone and deep umami flavor; use 2 to 4 tablespoons to adjust heat level and balance the marinade for authentic Korean taste.
- 1/4 cups soy sauce, I use reduced sodium Provides salty, savory depth and helps tenderize the chicken; use 1/4 cup reduced-sodium soy sauce to control overall saltiness while contributing color and umami.
- 3 tablespoons rice vinegar Brightens and balances the marinade with mild acidity; 3 tablespoons rice vinegar cut through sweetness and enrich the overall flavor profile.
- 2 tablespoons light brown sugar, packed Contributes caramelized sweetness and a hint of molasses; 2 tablespoons packed light brown sugar help balance heat and acidity while promoting a glossy finish during grilling.
- 1 tablespoon toasted sesame oil Imparts a nutty, aromatic finish to the marinade and finished skewers; 1 tablespoon toasted sesame oil enhances complexity without overpowering other flavors.
- 1/2 teaspoon kosher salt, or to taste Elevates overall seasoning and brings out natural flavors; 1/2 teaspoon kosher salt can be adjusted to taste to ensure the chicken is well-seasoned.
- 1/2 teaspoon freshly ground black pepper, or to taste Adds a subtle warm bite and helps balance flavors; 1/2 teaspoon freshly ground black pepper can be adjusted for desired mild heat.
- 2 pounds boneless skinless chicken breasts, diced into 1 1/2-inch chunks Serves as the primary protein, providing hearty texture and neutral flavor to absorb the marinade; 2 pounds boneless skinless chicken breasts are diced into 1 1/2-inch chunks for even cooking on skewers.
- 1 green onion, sliced into thin rounds; optional for garnishing Provides a fresh, mild oniony garnish that adds color and a bright finish; thin rounds of 1 green onion can be sprinkled just before serving for contrast.
- sesame seeds, to taste; optional for garnishing Adds a toasty crunch and visual appeal as a garnish; sesame seeds can be sprinkled to taste to enhance texture and presentation.
Instructions
- Marindade: To a large bowl, add the Gochujuang paste to taste, soy sauce, rice vinegar, brown sugar, sesame oil, salt, pepper, and whisk to combine to create the chicken marinade. Taste, and if desired, add more of a certain ingredient that you desire. Remove 1/3 cup of the marinade and place it in a small saucepan; set aside.: To a large bowl, add the Gochujuang paste to taste, soy sauce, rice vinegar, brown sugar, sesame oil, salt, pepper, and whisk to combine to create the chicken marinade : Close your eyes for a second and smell the first mix, the tang from rice vinegar and the deep savory note from soy sauce will be prominent, followed by the warm, fermented scent of gochujang paste . Whisking aerates the marinade slightly and dissolves the brown sugar , creating a cohesive liquid that clings to the chicken . The reason we reserve a portion is to cook it down into a safe, basting glaze, because uncooked marinade can contain raw chicken juices. A common mistake is adding cooked reserved marinade to the raw chicken without reducing it first; always simmer the reserved portion to kill bacteria and concentrate the flavors.
- Add the diced chicken to the marinade, and allow it to marindade for 15-30 minutes. If you're going to marinade closer to 30 minutes, you should cover it and place the bowl in the fridge. Tip– Do NOT marinade longer than indicated; the acidity of the ingredients will break down the chicken protein fibers too much and the chicken will be mushy.: When the chicken hits the marinade, you should hear a faint splash and see the pieces coated and glossy; the surface will become slightly tacky as it soaks up flavor. Marinating for fifteen minutes adds surface flavor quickly, while thirty minutes lets the acid and seasonings penetrate a bit more. Avoid overmarinating, as the vinegar can start to break down proteins, making the texture mushy. If you notice the chicken turning stringy or overly soft, that indicates too long in acid.
- Soak: Meanwhile, if you're using wooden skewers, soak them in water for at least 15-30 minutes, or while the chicken is marinating. Tip– I prefer wooden skewers because the charred ends of the wood give a smoky fragrance to the chicken, which adds to the overall flavor profile. Reduce: Additionally, place the saucepan with the reserved 1/3 cup marinade on the stove, heat over medium-high for about 2-3 minutes, or until the sauce reduces, thickens, and becomes sticky; stir nearly continuously so it doesn't burn. Set aside off the heat until it's time to baste the chicken.: Meanwhile, if you're using wooden skewers, soak them in water for at least 15 to 30 minutes, or while the chicken is marinating : The soaked skewers will hiss faintly when they meet the hot grill rather than catching fire, and they'll help prevent the ends from burning. At the same time, reduce the reserved marinade in a small saucepan until it thickens and becomes glossy; stirring constantly will prevent scorching and give you a sticky glaze perfect for basting. A frequent slip up is skipping soaking and then losing skewers to flame; always allow adequate soaking time for wooden sticks.
- Thread: After marinating, thread the chicken on approximately 5 to 8 skewers, depending on how much chicken you're using and the exact length of your skewers. Don't compress or overly compact/squish the chicken onto a skewer. If you're running out of space, start a new skewer.: After marinating, thread the chicken on approximately 5 to 8 skewers, depending on how much chicken you're using and the exact length of your skewers : As you assemble, space each chunk so heat circulates and edges get caramelized rather than steamed. The visual cue of evenly spaced pieces helps ensure even cooking and a consistent bite size for serving. If you cram pieces too tightly, steam can build and the exterior will not develop that desirable char. If the chicken looks uneven, pause and rearrange rather than forcing more onto a single skewer.
- Cooking: When ready to cook, follow the method below that's best suited for you. In all cooking methods: Discard the marinade that was in the marinating bowl. Chicken is done at 160 F, rest it on a plate for 5-10 minutes so the internal temp rises to 165 F as measured with a digital thermometer, which is the safe temperature to consume chicken.: When ready to cook, follow the method below that's best suited for you : No matter the method, discard the leftover marinade from the bowl to avoid contamination, and rely on a digital thermometer to confirm the chicken reaches 160 F before resting to 165 F for safe eating. Listen for sizzling on contact and watch for a bronzed edge forming as the sugars caramelize; those sensory signs indicate progress toward doneness. Under cooking is dangerous for poultry, and overcooking dries the chicken out; aim for that sweet spot where juices run clear and the interior is opaque but still yielding.
- Grilling (outdoors): Oil the grill grates, and preheat outdoor gas grill to medium-high heat. When ready to grill, place the skewers on the grill, close the lid, and grill for approximately 3-4 minutes, open the lid, flip the chicken using tongs, baste it generously with the sauce that you reduced, and cook for another 2-4 minutes, or until the chicken is done; baste as much as desired for juicer chicken with richer flavor. Tips– Because most grills are at least 500-600 F and these pieces of chicken are small, it's going to cook very quickly. Use common sense and lower the heat if it's burning, flip and turn as much as necessary, and if it's not done after 8 minutes total, keep grilling until it's done. If it sticks when you are trying to flip it, let it cook for another minute before trying to flip it.: Oil the grill grates, and preheat outdoor gas grill to medium high heat : When the grill is ready, you want to hear an immediate sizzle as the skewers touch the grates; this quick sear locks in juices and builds a caramelized crust. Close the lid to maintain heat, then flip and baste with the reduced sauce so the glaze thickens and sticks, producing glossy, savory bites. A common error is keeping the grill too hot which will char the exterior before the center cooks; if you detect excessive blackening within moments, reduce the flame and move skewers to a cooler zone.
- Grill Pan (indoors on stove): Preheat a grill pan over medium-high to high heat on your stove, place the skewers on top, and cook for approximately 5 minutes, flip the chicken using tongs, baste generously, and cook for another 3-5 minutes, or until the chicken is done; baste as often as desired for juicier more flavorful chicken. Tips– These pieces of chicken are small and will cook very quickly but all grill pans vary in their thickness, composition, the size of the chicken pieces varies, etc. so use common sense and keep cooking until it's done. If it sticks when you are trying to flip it, let it cook for another minute before trying to flip it.: Preheat a grill pan over medium high to high heat on your stove : The pan should be very hot so the chicken makes contact with a smoking surface that crisps the exterior and imparts those grill lines. Flip when you see defined grill marks and baste between flips for layers of flavor. If the pieces stick immediately, give them a little more time to release naturally rather than forcing them, which can tear the surface.
- Oven Baking: Preheat oven to 400 F and place a grill rack over a parchment-lined baking sheet (do not skip lining your baking sheet because the marinade runoff will char your baking sheet otherwise!), and arrange the skewers on the prepared rack. Bake in the preheated oven for about 20 minutes, or until the chicken is cooked through and lightly charred on the edges. Flip midway through baking with tongs, baste generously, and you can even flip and baste another time before chicken is fully done for juicer, moist chicken. Tips– Baking time will vary based on the size of the chicken pieces, personal preference for doneness, heat output of your oven, etc. so use common sense and keep cooking until it's done. If your oven runs hot, and/or the chicken pieces are smaller, it could be done in 16-18 minutes, so I recommend checking early. It may also take longer than 20-22 minutes, which is fine too.: Preheat oven to 400 F and place a grill rack over a parchment lined baking sheet : The oven provides steady, even heat that is forgiving for busy cooks, and the rack allows air to circulate so the undersides get some color rather than stewing in juices. Flip midway and baste to build a sticky finish, watching for the edges to turn lightly charred and the glaze to thicken. If your oven runs hot, check early and adjust the time rather than assuming the recipe timing is absolute.
- Garnish: Optionally garnish with green onions, sesame seeds, fresh herbs such as basil or cilantro, or as desired. Serve the chicken right on the skewers, or remove it from the skewers and serve it alongside rice, over a salad, or as desired.: Optionally garnish with green onions, sesame seeds, fresh herbs such as basil or cilantro, or as desired : The final touch is bright and aromatic; the sliced green onion adds a crisp snap while toasted sesame seeds bring a subtle crunch and nutty smell. Scatter these just before serving so they stay fresh and vivid. A typical misstep is garnishing too early, which causes wilted herbs and muted colors; wait until plating for maximum impact.
Notes
- Reserve and reduce: Always set aside about one third cup of the marinade before adding the raw chicken. Simmer this reserved portion until it thickens into a sticky glaze, which is safe for basting and concentrates the flavors into a glossy finish.
- Marinate smartly: Fifteen minutes is enough for surface flavor; thirty minutes deepens the taste. Avoid going much longer to prevent the acid from breaking down the chicken fibers and creating a mushy texture.
- Temperature matters: Use a digital thermometer to remove guesswork, aiming for 160 F internal and then resting to 165 F. This method prevents dry overcooked meat and ensures safety.
- Control flare ups: When grilling outdoors, oil the grates and keep a cooler zone ready; if flames flare, move skewers away and close the lid briefly to reduce oxygen and calm the fire.
- Finish fresh: Add sliced green onion and sesame seeds just before serving for texture and color, and consider a light extra drizzle of reduced glaze to make the skewers shine.