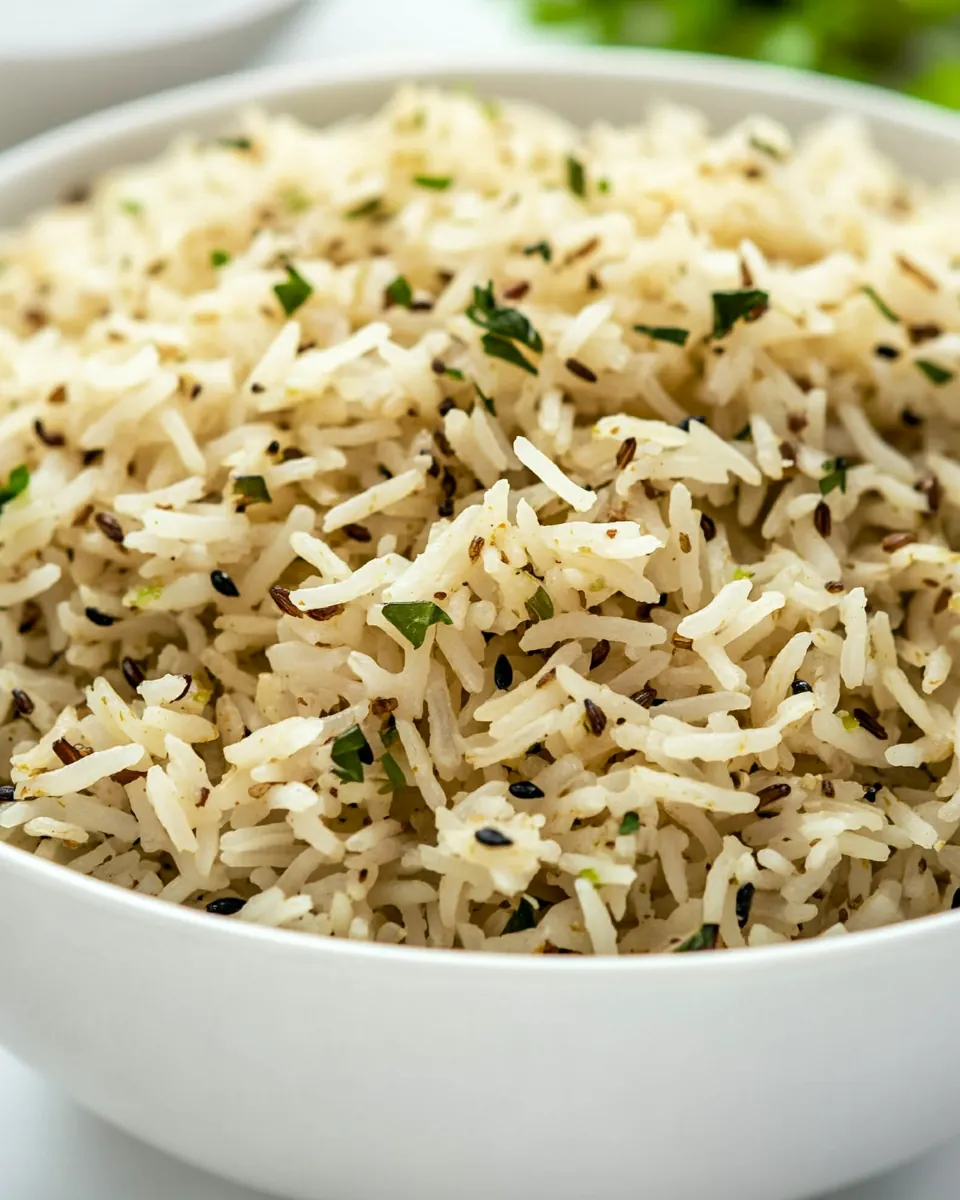
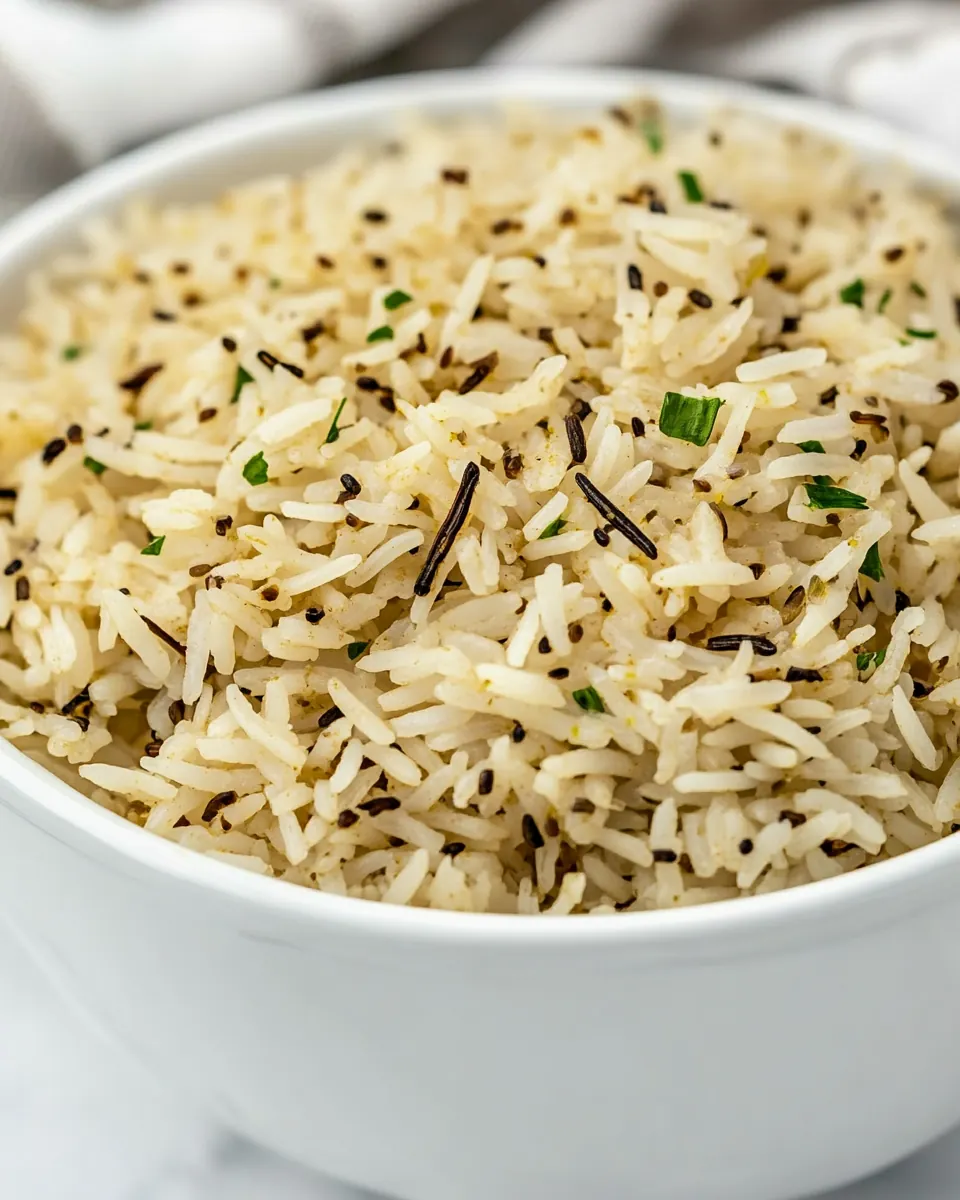
Jeera Rice
Jeera Rice has been my go to when I want something simple yet soulful on the table. The first time I made it for guests, the warm aroma of cumin and cardamom filled the kitchen and everyone kept asking what was cooking. I remember standing by the stove, stirring the pot and feeling proud that such a humble dish could feel so elevated.
Over the years I’ve learned tiny habits that make the difference between sticky rice and perfectly separated grains. There was one rainy afternoon when I scrubbed the rice until the water ran clear, and that ritual alone made the texture sing. I like to think of Jeera Rice as quiet hospitality, the kind that complements louder main dishes and makes weeknight dinners feel special.
Recipe Snapshot
29 mins
15 mins
14 mins
Medium
250 kcal
Indian
Gluten-Free, Low FODMAP
Side Dishes
Medium pot, Instant Pot or Pressure Cooker, Fork
Why We Love This Jeera Rice
Pure, comforting flavor
I love how Jeera Rice delivers a layered, aromatic profile without much fuss. The toasted scent of cumin seeds and the faint perfume from the cardamom pods lift the rice, giving every forkful a gentle complexity. For busy nights, that depth of flavor feels like a small luxury.
Versatility on the table
This rice pairs effortlessly with a wide range of dishes, and I often use it as my neutral base for spicy curries, grilled vegetables, or simple yogurt sides. Because the seasoning is restrained, it never competes with other flavors, instead it supports them.
Reliable technique
There is a clear method that brings consistent results, whether you make it on the stovetop or in an electric pressure cooker. Having a dependable approach means I can make it for guests or for a quiet solo dinner with the same confidence. I appreciate recipes that behave predictably, and this one does.
Minimal, wholesome ingredients
The ingredient list is short and intentional, and that appeals to my practical side. When staples like basmati rice, ghee or oil, and a few whole spices show up, you know the dish will be clean, fragrant, and satisfying. Less truly can be more.
Quick and approachable
Because the active work is modest, Jeera Rice fits into weeknight routines without stress. I often make it when time is tight but I still want a dish that feels well made. That combination of speed and taste is why it’s a regular in my rotation.
Ingredient List for Jeera Rice
These simple elements form the backbone of the recipe. The philosophy here is balance: a fragrant spice profile, a neutral starchy base, and a finishing herb to brighten the whole plate. Each ingredient plays a clear role, and together they produce rice that is aromatic, fluffy, and subtly spiced.
- 2 cups basmati rice: Rinsed thoroughly and soaked briefly to remove excess starch so the grains cook fluffy and separate; provides the primary body and texture of the dish and absorbs the spiced aromatics during cooking.
- 1 tablespoon ghee, butter, or oil: Melted at the start to bloom spices and add richness; contributes a subtle buttery mouthfeel and helps prevent rice from sticking while carrying flavor.
- 2 teaspoons cumin seeds: Toasted briefly to release essential oils and a warm, earthy aroma; acts as the principal spice note that defines the dish’s characteristic cumin flavor.
- 4 green cardamom pods (optional): Crushed slightly and added optionally to infuse a sweet, floral fragrance; lends a delicate cardamom aroma that complements the cumin without overpowering the rice if used.
- 1 green chili finely chopped: Sautéed finely to add a sharp, fresh heat and mild vegetal flavor; provides a bright, spicy undertone that lifts the overall profile of the rice.
- 3 small bay leaves: Torn or fried to impart a subtle, bittersweet background aroma; contributes a layered savory depth that supports the other warm spices in the cooking liquid.
- 1 cinnamon stick: Simmered whole to release warm, sweet, and woody notes gradually; helps build complexity and seasonal spice character throughout the cooking process.
- water to cover the rice by 1/2 inch: Measured to cover the rice by about half an inch to ensure even steaming and proper hydration; acts as the medium through which heat transfers and rice grains become tender.
- 1 and 1/2 teaspoons salt: Dissolved into the cooking water to season the rice evenly; enhances and balances the flavors without overwhelming the delicate spice aromatics.
- 3 tablespoons cilantro chopped – for garnish: Chopped and sprinkled over the finished rice to add a fresh, herbal brightness and visual contrast; provides a lively finish and mild citrusy-green flavor that complements the spices.
Directions for Jeera Rice
This recipe is straightforward, and the key is gentle attention at a few moments. Below, I expand each direction into detailed steps so you can achieve fluffy, aromatic rice with confidence.
- Soak the rice in water for at least 15 minutes. Then rinse it under running water until the water runs clear.: You will notice the water turn cloudy at first, then gradually clear, and that visual change tells you the surface starch is being removed. Rinsing and soaking makes the grains less likely to break and helps them expand evenly during cooking, leading to separate, tender grains. Run the rice through your fingers as you rinse to help dislodge residue, the texture will change and the water will become noticeably clearer. A common mistake is skipping this step, which often results in clumpy or gummy rice. If your tap water is very hard, use a slightly longer soak to compensate. Take care not to agitate the rice aggressively after soaking to prevent damaged grains.
- In a medium-sized pot, heat the ghee and add the cumin seeds, chili, bay leaves, and cinnamon stick. Cook for 15 seconds, when the cumin seeds start spluttering, add the diced green chili and the rinsed rice. Saute for a minute.: At first you will hear tiny pops as the cumin seeds sputter and release their oils, filling the kitchen with a deep, toasty scent. The ghee will shimmer and coat the spices, intensifying aroma. Sautéing the rinsed rice briefly makes each grain glossy and helps it pick up the spice flavors, creating a pleasant toasted note when cooked. Visually, the rice should look glossy and slightly translucent around the edges. Avoid browning the spices too long; burnt seeds give bitter undertones. If your pan is too hot, lower it immediately to protect the fragrance. Keep stirring gently so the rice does not stick or crack.
- Add water, and salt and give the rice a quick stir. Bring to a boil, then cover with a lid and reduce the heat to the lowest setting possible. Let it cook for 10 minutes then remove from heat. Allow to rest for 10 minutes then fluff with a fork, gently stir in the chopped cilantro and serve.: Once you add the water and salt , you will see steam begin to rise and the mixture will move from glossy to actively bubbling. Boiling briefly ensures even heat distribution, but reducing to very low heat preserves delicate grains and prevents vigorous evaporation. During the 10 minutes of simmering, you should hear a gentle, steady sound rather than vigorous bubbling. That restrained simmer creates fully cooked kernels without mush. A common error is cooking on too high a flame, which can evaporate water too fast and undercook the center of the grains, or scorch the bottom. If you notice the pot making louder crackling noises, lower the heat and check the water level quickly.
- Wash the rice with water very well, until the water runs clear. This is the secret to separated grains (you don't want mushy rice!).: After removing from heat, the resting period lets steam finish cooking the interior of the grains while allowing the moisture to redistribute evenly. The rice will smell more rounded and cohesive after resting, and the surface will look set rather than wet. Fluffing with a fork separates the grains and releases trapped steam, creating a light texture. When you fold in the chopped cilantro , you will see bright green flecks and smell fresh herbal notes lift from the warm rice. Overstirring can bruise herbs and make the rice denser, so be gentle. A common oversight is skipping the rest, which often yields uneven texture and sticky clumps.
- On the Instant Pot, press on the SAUTE-normal setting, add butter or ghee, and once it melts add the cumin seeds, diced green chili, cardamom pods, cinnamon stick, and bay leaves and saute for 20-30 seconds.: As you rinse, concentrate on the visual cue of clarity; the transition from milky to clear water is the sign that excess starch is gone. The tactile feedback will change too, the grains will feel less powdery. This step is the practical backbone for achieving distinct grains after cooking, because surface starch is what glues rice together. If you leave starch on, even a perfect technique later will result in clumps. One mistake I see often is using too little water when rinsing; rinse until the flow returns nearly transparent to ensure success.
- Add the washed and drained rice (2 cups), water (about 1 and 1/4 cups), and salt. Give everything a quick mix and cover with the lid.: In the pressure cooker the sauté phase should produce those same toasted aromas within a short window, and you will hear a soft sizzle rather than aggressive popping. The cardamom pods will release tiny aromatic bursts as they warm, and the scene in the pot should smell instantly comforting. Sauteing for the brief period ensures the whole spices bloom without risking a scorch. If your Instant Pot runs hot, reduce the time slightly to avoid bitter flavors. Avoid leaving the lid on during this stage because you want to smell and monitor the toasting.
- Secure the lid and set the vent to SEALING. Select the PRESSURE COOK/MANUAL setting and set the cooking time for 4 minutes at high pressure. The Instant Pot will take around 6-7 minutes to come to pressure and start cooking. When the cooking program ends, allow it to naturally release the steam for 15 minutes. If there's any pressure left after 15 minutes, then quickly release it.: When you add the premeasured water to the toasted mixture, you will see the grains shift from shiny to submerged, and the aromas will bloom into a steamy perfume. The ratio here leans toward slightly less water for firm, separate grains. Stirring once ensures spices and salt are evenly distributed, but avoid excessive stirring which can break grains and release starch. A common pitfall is adding too much water, which leads to soft, clumped rice. Measure carefully or use the cover method described earlier to match your pot and preference.
- Carefully remove the lid, remove the whole spices, fluff with a fork, and gently stir in chopped cilantro before serving.: During pressurization you will notice less aroma escaping, but the pot is building an internal environment that cooks rice gently and evenly. The natural release is crucial because it allows residual steam to finish the grains without a sudden change in pressure that can make rice sticky. After the natural release, the lid will loosen and you will hear a soft sigh; that is the cue to open. A typical mistake is quick releasing immediately which can disturb the texture and cause uneven cooking. If the pressure is stubborn after 15 minutes, a quick release is acceptable but be cautious of hot steam.
- Carefully remove the lid, remove the whole spices, fluff with a fork, and gently stir in chopped cilantro before serving.: Once opened, the pot will release a warm, concentrated fragrance and you will see plump, glistening grains. Removing the whole spices prevents surprise bites of intense flavor and keeps the presentation clean. Fluffing with a fork creates airy separation, and folding in the fresh cilantro brightens the final bowl. Watch out for hot steam when lifting the lid and for trapped pockets of liquid at the base; if you notice wet spots, allow the rice to rest a few more minutes. Avoid mashing with a spoon which compacts the rice, opt for light lifting motions instead.
Making Adjustments
Small adjustments let you dial the dish to your taste and equipment. Below are practical tips I use regularly to get consistent results whether I cook on the stovetop or in an electric pressure cooker.
- Adjust water slightly: If your rice often comes out too soft, reduce water by a couple of tablespoons next time; if it is undercooked, increase slightly.
- Swap fats mindfully: Use ghee for richer flavor, or a neutral oil if you prefer a lighter profile. Butter works well too for a familiar buttery scent.
- Control heat during sauté: Keep the flame medium low to toast spices without burning; burned spices will make the whole pot taste bitter.
- Cardamom use: If you like a floral lift, crack the cardamom pods slightly so they release more aroma while still being easy to fish out before serving.
- Herb timing: Add the chopped cilantro only after resting and fluffing to preserve its fresh color and bright flavor.
- Scale portions: For larger batches, maintain the same rice to water ratio but increase the resting time slightly to accommodate volume.
How to Enjoy Jeera Rice
Jeera Rice is a gentle companion to bolder mains and also works wonderfully as a simple standalone comfort dish. Here are ways I like to present and store it.
- Serve with saucy curries: Pair the rice with robust curries or gravies, letting the rice absorb flavorful sauces while the cumin notes complement the spices in the main dish.
- Weeknight dinners: Use Jeera Rice as an easy weeknight base for quick bowls with roasted vegetables and a dollop of yogurt or chutney, making a balanced meal in minutes.
- Occasions: For family gatherings or festive meals during Ramadan iftar or other communal dinners, the rice scales well and presents beautifully on a large platter garnished with cilantro.
- Storage tips: Cool the rice quickly, then store in an airtight container in the refrigerator for up to three days. Reheat gently with a splash of water to revive the grains and steam them lightly.
- Seasonal pairings: In cooler months I pair it with rich stews, while in warm weather I serve it with grilled vegetables and fresh salads to keep the meal light.
FAQ
Conclusion
What makes this recipe special is its simplicity and the way a few whole spices transform plain rice into something aromatic and comforting. I encourage you to give Jeera Rice a try the next time you want a reliable side that elevates any meal. It’s forgiving, adaptable, and quick, and with the small techniques described here you’ll consistently end up with fragrant, fluffy rice that brings warm, familiar flavors to the table.
Jeera Rice
Equipment
- Medium Pot
- Instant Pot or Pressure Cooker
- Fork
Ingredients
- 2 cups basmati rice Rinsed thoroughly and soaked briefly to remove excess starch so the grains cook fluffy and separate; provides the primary body and texture of the dish and absorbs the spiced aromatics during cooking.
- 1 tablespoon ghee, butter, or oil Melted at the start to bloom spices and add richness; contributes a subtle buttery mouthfeel and helps prevent rice from sticking while carrying flavor.
- 2 teaspoons cumin seeds Toasted briefly to release essential oils and a warm, earthy aroma; acts as the principal spice note that defines the dish’s characteristic cumin flavor.
- 4 green cardamom pods optional Crushed slightly and added optionally to infuse a sweet, floral fragrance; lends a delicate cardamom aroma that complements the cumin without overpowering the rice if used.
- 1 green chili finely chopped Sautéed finely to add a sharp, fresh heat and mild vegetal flavor; provides a bright, spicy undertone that lifts the overall profile of the rice.
- 3 small bay leaves Torn or fried to impart a subtle, bittersweet background aroma; contributes a layered savory depth that supports the other warm spices in the cooking liquid.
- 1 cinnamon stick Simmered whole to release warm, sweet, and woody notes gradually; helps build complexity and seasonal spice character throughout the cooking process.
- water to cover the rice by 1/2 inch Measured to cover the rice by about half an inch to ensure even steaming and proper hydration; acts as the medium through which heat transfers and rice grains become tender.
- 1 and 1/2 teaspoons salt Dissolved into the cooking water to season the rice evenly; enhances and balances the flavors without overwhelming the delicate spice aromatics.
- 3 tablespoons cilantro chopped – for garnish Chopped and sprinkled over the finished rice to add a fresh, herbal brightness and visual contrast; provides a lively finish and mild citrusy-green flavor that complements the spices.
Instructions
- Soak the rice in water for at least 15 minutes. Then rinse it under running water until the water runs clear.: You will notice the water turn cloudy at first, then gradually clear, and that visual change tells you the surface starch is being removed. Rinsing and soaking makes the grains less likely to break and helps them expand evenly during cooking, leading to separate, tender grains. Run the rice through your fingers as you rinse to help dislodge residue, the texture will change and the water will become noticeably clearer. A common mistake is skipping this step, which often results in clumpy or gummy rice. If your tap water is very hard, use a slightly longer soak to compensate. Take care not to agitate the rice aggressively after soaking to prevent damaged grains.
- In a medium-sized pot, heat the ghee and add the cumin seeds, chili, bay leaves, and cinnamon stick. Cook for 15 seconds, when the cumin seeds start spluttering, add the diced green chili and the rinsed rice. Saute for a minute.: At first you will hear tiny pops as the cumin seeds sputter and release their oils, filling the kitchen with a deep, toasty scent. The ghee will shimmer and coat the spices, intensifying aroma. Sautéing the rinsed rice briefly makes each grain glossy and helps it pick up the spice flavors, creating a pleasant toasted note when cooked. Visually, the rice should look glossy and slightly translucent around the edges. Avoid browning the spices too long; burnt seeds give bitter undertones. If your pan is too hot, lower it immediately to protect the fragrance. Keep stirring gently so the rice does not stick or crack.
- Add water, and salt and give the rice a quick stir. Bring to a boil, then cover with a lid and reduce the heat to the lowest setting possible. Let it cook for 10 minutes then remove from heat. Allow to rest for 10 minutes then fluff with a fork, gently stir in the chopped cilantro and serve.: Once you add the water and salt , you will see steam begin to rise and the mixture will move from glossy to actively bubbling. Boiling briefly ensures even heat distribution, but reducing to very low heat preserves delicate grains and prevents vigorous evaporation. During the 10 minutes of simmering, you should hear a gentle, steady sound rather than vigorous bubbling. That restrained simmer creates fully cooked kernels without mush. A common error is cooking on too high a flame, which can evaporate water too fast and undercook the center of the grains, or scorch the bottom. If you notice the pot making louder crackling noises, lower the heat and check the water level quickly.
- Wash the rice with water very well, until the water runs clear. This is the secret to separated grains (you don't want mushy rice!).: After removing from heat, the resting period lets steam finish cooking the interior of the grains while allowing the moisture to redistribute evenly. The rice will smell more rounded and cohesive after resting, and the surface will look set rather than wet. Fluffing with a fork separates the grains and releases trapped steam, creating a light texture. When you fold in the chopped cilantro , you will see bright green flecks and smell fresh herbal notes lift from the warm rice. Overstirring can bruise herbs and make the rice denser, so be gentle. A common oversight is skipping the rest, which often yields uneven texture and sticky clumps.
- On the Instant Pot, press on the SAUTE-normal setting, add butter or ghee, and once it melts add the cumin seeds, diced green chili, cardamom pods, cinnamon stick, and bay leaves and saute for 20-30 seconds.: As you rinse, concentrate on the visual cue of clarity; the transition from milky to clear water is the sign that excess starch is gone. The tactile feedback will change too, the grains will feel less powdery. This step is the practical backbone for achieving distinct grains after cooking, because surface starch is what glues rice together. If you leave starch on, even a perfect technique later will result in clumps. One mistake I see often is using too little water when rinsing; rinse until the flow returns nearly transparent to ensure success.
- Add the washed and drained rice (2 cups), water (about 1 and 1/4 cups), and salt. Give everything a quick mix and cover with the lid.: In the pressure cooker the sauté phase should produce those same toasted aromas within a short window, and you will hear a soft sizzle rather than aggressive popping. The cardamom pods will release tiny aromatic bursts as they warm, and the scene in the pot should smell instantly comforting. Sauteing for the brief period ensures the whole spices bloom without risking a scorch. If your Instant Pot runs hot, reduce the time slightly to avoid bitter flavors. Avoid leaving the lid on during this stage because you want to smell and monitor the toasting.
- Secure the lid and set the vent to SEALING. Select the PRESSURE COOK/MANUAL setting and set the cooking time for 4 minutes at high pressure. The Instant Pot will take around 6-7 minutes to come to pressure and start cooking. When the cooking program ends, allow it to naturally release the steam for 15 minutes. If there's any pressure left after 15 minutes, then quickly release it.: When you add the premeasured water to the toasted mixture, you will see the grains shift from shiny to submerged, and the aromas will bloom into a steamy perfume. The ratio here leans toward slightly less water for firm, separate grains. Stirring once ensures spices and salt are evenly distributed, but avoid excessive stirring which can break grains and release starch. A common pitfall is adding too much water, which leads to soft, clumped rice. Measure carefully or use the cover method described earlier to match your pot and preference.
- Carefully remove the lid, remove the whole spices, fluff with a fork, and gently stir in chopped cilantro before serving.: During pressurization you will notice less aroma escaping, but the pot is building an internal environment that cooks rice gently and evenly. The natural release is crucial because it allows residual steam to finish the grains without a sudden change in pressure that can make rice sticky. After the natural release, the lid will loosen and you will hear a soft sigh; that is the cue to open. A typical mistake is quick releasing immediately which can disturb the texture and cause uneven cooking. If the pressure is stubborn after 15 minutes, a quick release is acceptable but be cautious of hot steam.
- Carefully remove the lid, remove the whole spices, fluff with a fork, and gently stir in chopped cilantro before serving.: Once opened, the pot will release a warm, concentrated fragrance and you will see plump, glistening grains. Removing the whole spices prevents surprise bites of intense flavor and keeps the presentation clean. Fluffing with a fork creates airy separation, and folding in the fresh cilantro brightens the final bowl. Watch out for hot steam when lifting the lid and for trapped pockets of liquid at the base; if you notice wet spots, allow the rice to rest a few more minutes. Avoid mashing with a spoon which compacts the rice, opt for light lifting motions instead.
Notes
- Adjust water slightly: If your rice often comes out too soft, reduce water by a couple of tablespoons next time; if it is undercooked, increase slightly.
- Swap fats mindfully: Use ghee for richer flavor, or a neutral oil if you prefer a lighter profile. Butter works well too for a familiar buttery scent.
- Control heat during sauté: Keep the flame medium low to toast spices without burning; burned spices will make the whole pot taste bitter.
- Cardamom use: If you like a floral lift, crack the cardamom pods slightly so they release more aroma while still being easy to fish out before serving.
- Herb timing: Add the chopped cilantro only after resting and fluffing to preserve its fresh color and bright flavor.
- Scale portions: For larger batches, maintain the same rice to water ratio but increase the resting time slightly to accommodate volume.