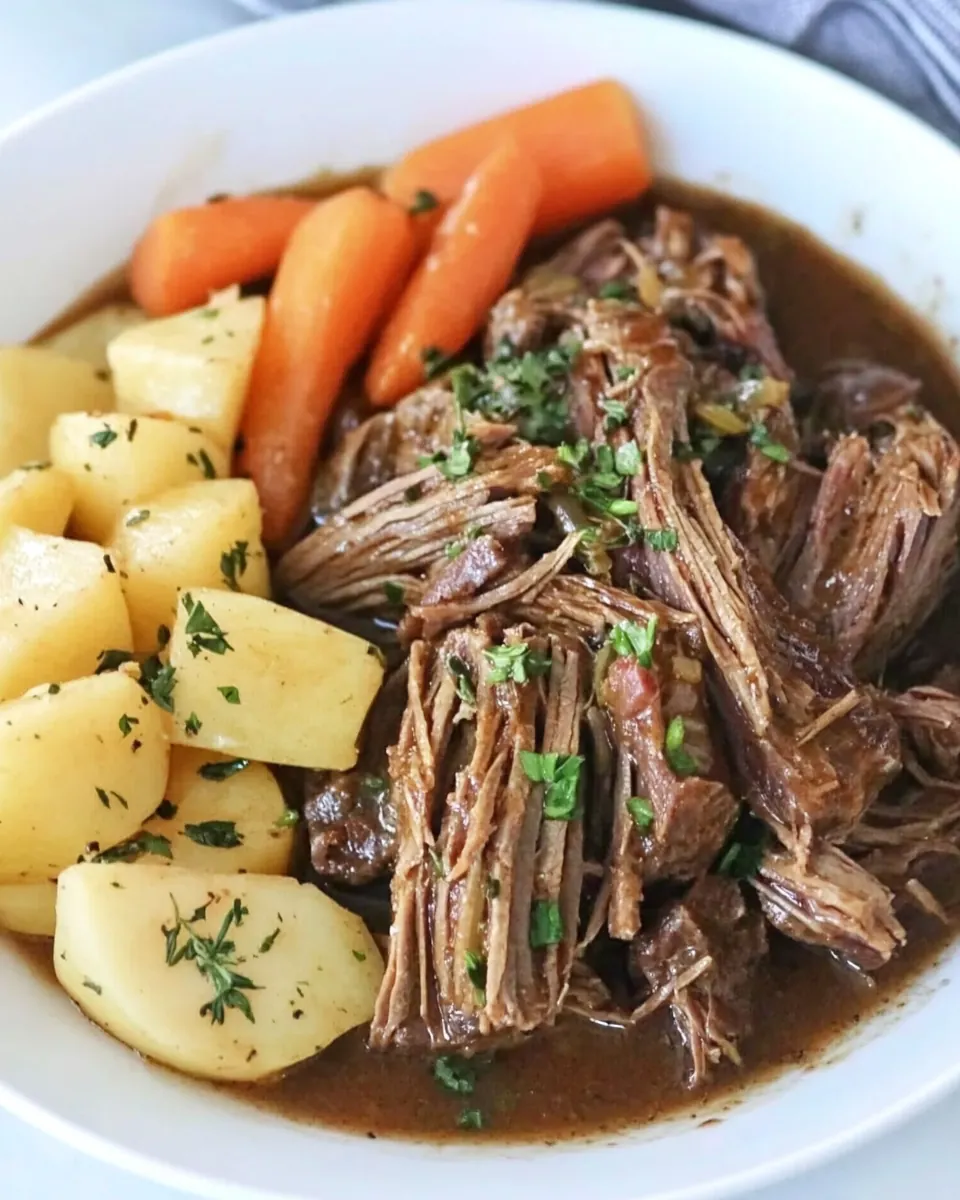
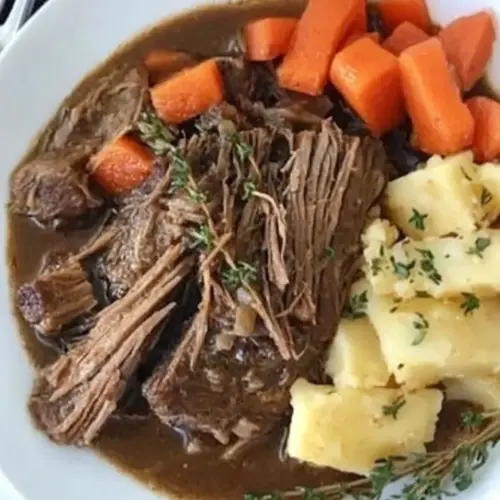
Instant Pot Pot Roast
Instant Pot Pot Roast has been my saving grace on nights when life gets hectic and I still want a comforting, stick to your ribs dinner.
I remember the first time I made this dish for guests who arrived late, hungry, and a bit frazzled; the house smelled rich and savory within an hour, and everyone lingered at the table. I love how the Instant Pot Pot Roast can transform a modest chuck roast and a few pantry stalwarts into something that tastes like it simmered all day, even though the effort was compact and focused. Over the years I learned little tricks that deepen the flavor, like salvaging browned bits from the bottom of the pot and resting the meat before slicing, and those small moves always pay off.
There are evenings when you want a one pot centerpiece that makes the kitchen feel warm and welcoming, and that is exactly where this recipe shines. The melding of the braising liquid with the roast, the way the potatoes and carrots soak up that savory broth, it all feels wonderfully satisfying and uncomplicated. When I serve the Instant Pot Pot Roast, I often find conversation slows, forks pause, and the room inhales a collective, happy sigh. That is the kind of meal I like to make for family and friends, practical yet memorable.
Recipe Snapshot
1 hr 15 mins
5 mins
70 mins
Medium
500 kcal
American
Gluten-Free, Paleo
Dinner
Electric Pressure Cooker (6 or 8 quart)
Why This Instant Pot Pot Roast Is So Good
Hearty flavor without babysitting
I love that Instant Pot Pot Roast gives deep, concentrated taste without hours beside the stove. The high pressure extracts flavors quickly, so you get a melting texture and rich broth while still having time to prep a salad or set the table. I often say it is the perfect compromise between slow cooked comfort and weeknight efficiency.
Great for feeding a crowd
This recipe scales beautifully. When I host, I appreciate that a single 3 to 4 pound chuck roast plus hearty potatoes and carrots feeds a group with leftovers to spare. It becomes the friendly anchor of a meal, freeing me to focus on atmosphere and simple sides rather than juggling multiple dishes.
Versatile gravy and cooking liquid
The strained cooking liquid becomes a luscious gravy with a quick roux, so nothing goes to waste. I often use part of the strained liquid to thin the gravy for a lighter finish, or reduce it for a concentrated sauce. That flexibility makes the dish adaptable to different palates and occasions.
Comfort with bright notes
The unexpected addition of prepared horseradish adds a bright, piquant lift to the savory base, cutting through richness and keeping each bite lively. I enjoy how one modest ingredient can balance the overall profile and make the roast taste fresher and more complex.
Minimal equipment, maximum payoff
Because this recipe centers around an Electric Pressure Cooker, you do not need a fully stocked kitchen to achieve great results. I appreciate recipes that reward a little technique with big flavor, and this one fits that mold perfectly.
Ingredients You’ll Need for Instant Pot Pot Roast
These ingredients are chosen to build a layered, savory profile that is straightforward and dependable. The key players are the chuck roast for its marbling, the braising liquid for depth, and the starch and root vegetables to soak up and carry the sauce. Each item pulls its weight: fats and aromatics create flavor, liquid dissolves and distributes it, and starches give the plate body and comfort.
- 1/2 tablespoon extra virgin olive oil: Heat in the Instant Pot to sear the roast and add a subtle fruity flavor, helping to develop a browned crust that enhances overall depth; use sparingly to avoid smoking and to complement the beef without overpowering it.
- 3 4 pound chuck roast: Provide the main source of rich, marbled beef that becomes tender when pressure-cooked, supplying savory flavors and collagen that break down into a silky mouthfeel; choose a cut with good marbling for best results.
- kosher salt and pepper, to taste: Season generously to enhance the natural beef flavors and balance the dish; apply to the roast before searing and adjust to taste after cooking to ensure savory depth without oversalting.
- 4 cups low-sodium beef stock, divided: Add as the primary braising liquid to create steam for pressure cooking and to infuse the roast and vegetables with savory, beefy flavor; reserve some to adjust sauce consistency or deglaze the pot after searing.
- 1 teaspoon onion powder: Sprinkle to provide an even, concentrated onion flavor without adding moisture, helping to round out the savory profile and complement garlic and beef in the braising liquid.
- 1 tablespoon minced garlic: Stir in to deliver aromatic, pungent flavor that brightens the braising liquid and melds with the roast and vegetables; add before pressure cooking so the garlic infuses throughout.
- 1/4 cup prepared horseradish, NOT horseradish sauce: Introduce a sharp, piquant kick that cuts through the richness of the beef and sauce, adding complexity and a layered finish; fold into the sauce or serve alongside for controlled heat and tang.
- 3 pounds potatoes, cut into 2-inch chunks: Chunk and add to supply starchy body and absorb braising flavors, becoming tender and creamy while complementing the roast; choose uniform sizes so potatoes cook evenly under pressure.
- 1 pound carrots, peeled and cut into 2-inch chunks: Peel and chop to contribute sweetness and a tender texture that contrasts with the meat, helping to balance richness while holding shape when cut into consistent chunks for even cooking.
- 2 tablespoons unsalted butter: Melt into the finished sauce to add richness and a silky mouthfeel, enriching the gravy and helping to smooth flavors before thickening with flour for a glossy finish.
- 2 tablespoons all-purpose flour: Whisk in to thicken the pan sauce into a gravy, creating body and helping the sauce cling to meat and vegetables; cook briefly after adding to remove raw flour taste and achieve desired consistency.
How to Cook Instant Pot Pot Roast
Cooking this roast in the Instant Pot is an invitation to slow cooked flavors with efficient timing. Below I guide you through each action in detail, describing what to watch and how to fix common slips so your roast emerges tender and flavorful.
- Hit Sauté on the Instant Pot, add 1/2 tablespoon extra virgin olive oil, and let heat for about 1 minute.: As the oil warms you will notice a faint, glossy shimmer and a subtle scent of toasted olive; that signals the pan is hot enough for searing. This brief heating step primes the pot so the chuck roast makes steady contact and browns rather than steaming. If the pot is not hot enough you might not develop a crust, leading to a less flavorful final dish. A typical troubleshooting move is to pat the roast dry before searing, which reduces steam and improves browning.
- While the oil is heating, season the chuck roast generously with kosher salt and pepper on both sides. Once seasoned, add the roast to the heated oil and sear the meat on each side, 3-4 minutes per side. Once the roast is browned and slightly caramelized, remove it from the inner pot, placing it onto a plate. Hit cancel to turn the Instant Pot off.: When searing you should hear an assertive sizzle and see a rich, deep brown color develop on the surface within minutes; that caramelization locks in savory notes. I like to rotate the roast to get even contact with the hot surface, and a proper sear also produces browned bits on the pot bottom that will boost the gravy. A common error is crowding the pot, which causes the temperature to drop and prevents searing, so work in a single layer or sear in batches.
- Pour about 1/2 cup of the beef stock into the inner pot and scrape up any browned bits on the bottom of the inner pot using a wooden spoon or spatula.: Pouring a small amount of stock while the pot is still warm releases those caramelized bits, which dissolve into the liquid and become a flavor bomb for the braise. You will hear a soft sizzle as the liquid lifts the fond, and the color will deepen into a glossy brown. If you skip this deglazing step you risk a burnt on flavor and the Instant Pot may throw a burn warning, so always scrape thoroughly.
- Add the seared pot roast back into the pressure cooker, along with any accumulated juices that collected on the plate. Pour the remaining beef stock around the roast. Season the broth with 1 teaspoon onion powder, 1 tablespoon minced garlic, and a generous pinch of salt and pepper. Spread 1/4 cup prepared horseradish over the top of the roast.: Reintroducing the roast to the liquid lets connective tissues begin to unwind as the pressure builds; you will notice a faint steam rising when you add the remaining stock. The aromatics will scent the broth quickly, and the horseradish on top creates a piquant layer that melts into the meat during cooking. A mistake here is undersalting the liquid, which results in a flat sauce, so season confidently but taste as you finish the gravy later.
- Place the lid on the Instant Pot and ensure the vent knob is set to sealed. Select Manual or Pressure Cook, adjust to High Pressure if needed, and use the +/- buttons to set the cooking time. Cook for 20 minutes per pound.: As the pot reaches pressure you may hear the valve hiss softly and then settle; that is normal. The high pressure forces liquid into the meat fibers, breaking down collagen so the roast becomes tender enough to shred or slice. Accuracy with weight based timing matters because undercooking will leave the roast tough, while dramatically overcooking might make the meat too loose for neat slices. If you are uncertain about the roast weight, err slightly longer and allow for a natural release to finish tenderizing.
- Once the cooking time has elapsed, allow for pressure to release for at least 15 minutes. Then open the inner pot, remove the roast, place it on a cutting board or platter, and tent with foil and let rest for while the vegetables cook.: Letting the pressure naturally release for a while helps the meat fibers relax gradually, retaining juices. When you lift the lid you will be greeted by a deep, braised aroma and a glossy broth. Resting the roast under foil keeps heat steady and allows juices to redistribute; slicing too soon will cause juices to spill out onto the cutting board, making the meat drier. People sometimes rush this step, so be patient and use the resting time to prepare vegetables for the next stage.
- After removing the roast from the inner pot, add the prepared potatoes and carrots. Place the lid on the Instant Pot, ensure the vent knob is set to sealed, and using the Manual or Pressure Cook button, set to cook on high pressure for 5 minutes.: The vegetables will soften and absorb the savory broth quickly, and you should aim for tender but not falling apart texture. When you add them, the steam will look dense through the vent as it rebuilds pressure, and the pot will sing gently when cooking. A common slip is cutting potatoes too small which causes them to disintegrate under pressure, so keep the chunks about 2 inches for best texture.
- After the cooking time has elapsed, let pressure release naturally for 5 minutes, then do a quick release of pressure by carefully knocking the venting knob from the sealed to the venting position using the handle of a long utensil. Stand back to prevent yourself from being burned by steam.: That short natural release lets the vegetables finish tenderizing without shock, then the quick release stops cooking so they hold their shape. You will see a rapid burst of steam and hear an energetic hiss during the quick release, so keep hands and face away. A safety note: always use a utensil to move the knob and keep your face to the side to avoid steam burns.
- After the roast and vegetables are cooked, strain the cooking liquid from the inner pot and then return the inner pot to the instant pot.: Straining clarifies the broth and removes bits of sediment so your gravy finishes silky and smooth. The liquid will be richly flavored, with suspended particles that, if left, can cloud the sauce. If you skip straining the gravy may be grainy, so use a fine mesh strainer or cheesecloth for the best texture.
- Hit Sauté on the Instant Pot and add 2 tablespoons unsalted butter. Once the butter has melted, whisk in 2 tablespoons all-purpose flour and then let cook for 1 minute.: As the butter melts it will foam briefly and release a gentle nutty aroma, which is the ideal foundation for a roux. Cooking the flour for a minute removes raw flour taste and develops a subtle toasty color that enriches the gravy. Stir constantly to prevent scorching; a burnt roux will ruin the sauce and is hard to recover from.
- Slowly whisk in 1-2 cups of the leftover cooking liquid, whisking well. Let bubble and thicken for several minutes, whisking constantly. Serve with pot roast and vegetables.: Adding liquid gradually prevents lumps and helps you control thickness; a glossy, velvety sauce should cling slightly to a spoon. You will hear a gentle simmer as the gravy comes together, and the aroma will deepen into a concentrated roast essence. If the gravy becomes too thick, whisk in more strained liquid to loosen it; if too thin, simmer a little longer while stirring to reduce and intensify flavor.
Helpful Hints
I like to keep things practical and specific when I share tips, so you can follow confidently. Below are focused ideas that solve common issues and elevate the final plate. Each tip starts with a bold lead phrase so you can scan quickly and apply what you need.
- Choose the right roast: Selecting a well marbled chuck roast ensures the meat becomes tender and flavorful after pressure cooking. The marbling melts into the braising liquid, creating richness that thinner cuts cannot match. If you pick a lean roast you may end up with drier meat, so aim for visible fat and connective tissue.
- Pat dry before searing: Drying the roast with paper towels removes surface moisture that would otherwise steam the meat. A proper sear creates a deep brown crust and flavorful fond on the pot bottom. If you skip this step the roast may not brown well and the overall flavor will be flatter.
- Deglaze thoroughly: Pour a small amount of the beef stock and scrape the bottom until all browned bits lift into the liquid. Those bits dissolve into the sauce and are essential for a rich gravy. Ignoring this will risk a burned flavor and a less complex sauce.
- Reserve cooking liquid: Save at least 1 to 2 cups of strained broth to adjust gravy thickness and seasoning. The reserved liquid is also great for reheating, as it revives the meat without drying it out. Discarding this liquid wastes a concentrated flavor resource.
- Rest the meat: Tent the roast with foil and let it relax before slicing so juices redistribute. Resting prevents the roast from gushing out all its juices when cut, keeping each slice succulent. Cutting too soon results in drier slices and a disappointingly thin gravy.
- Thicken carefully: Whisk flour into melted butter to form a smooth roux, then add strained liquid slowly to avoid lumps. For a gluten free option use a cornstarch slurry instead, whisking it into a simmering broth. Rushing the addition of liquid can create lumps that are hard to smooth out.
Serving Suggestions
This roast is wonderfully adaptable for family dinners or special occasions, and it pairs well with simple sides that let the meat shine. Below are detailed serving ideas, storage notes, and occasions that suit the dish.
- Classic family dinner: Serve slices of the Instant Pot Pot Roast atop mashed potatoes with a generous ladle of the gravy. The starchy mash soaks up the sauce, creating a classic, satisfying plate that kids and adults enjoy.
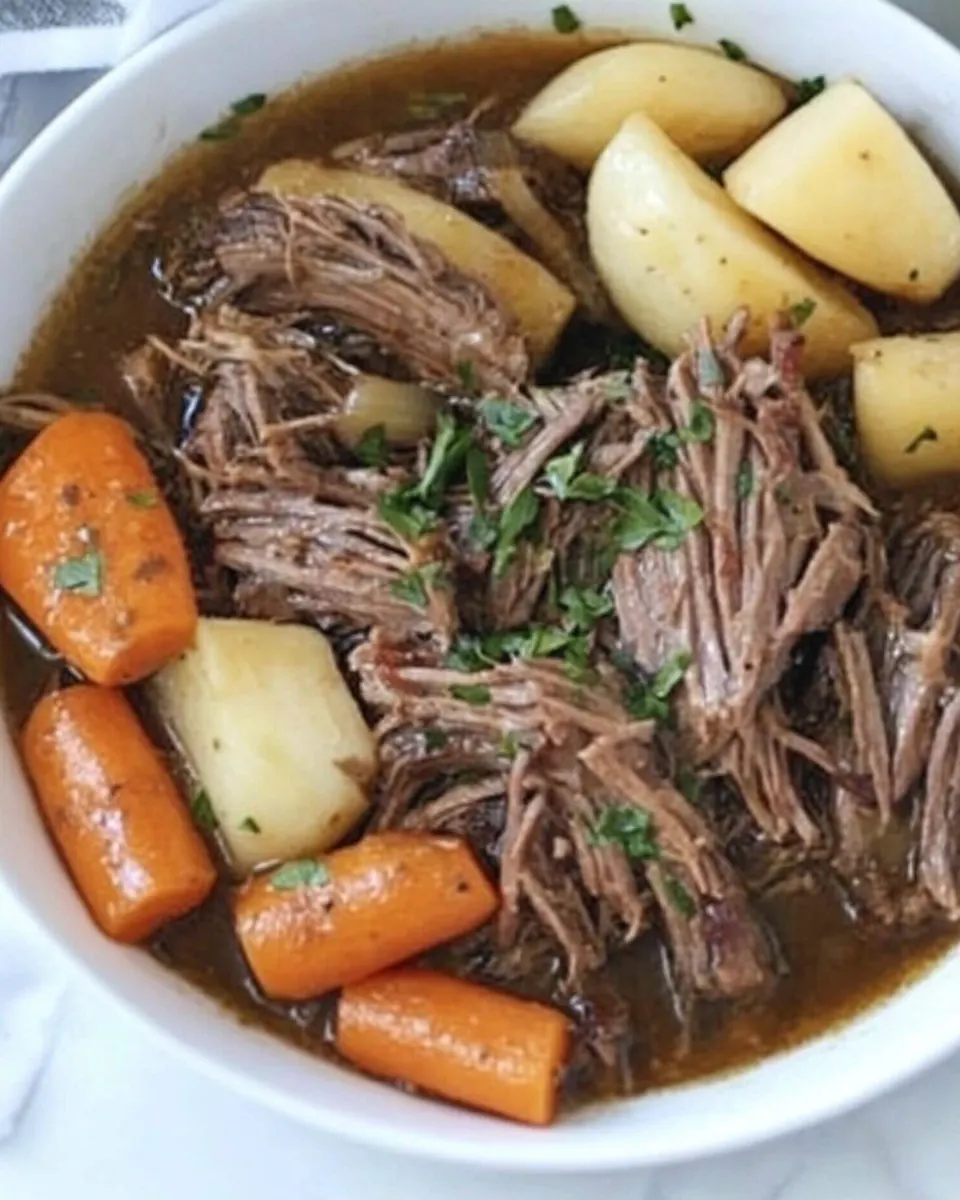
- Hearty holiday centerpiece: Use the roast as a main for winter holiday meals, arranging vegetables around the platter for an attractive family style presentation. It works well when you need a comforting, crowd pleasing main that you can mostly prepare ahead.
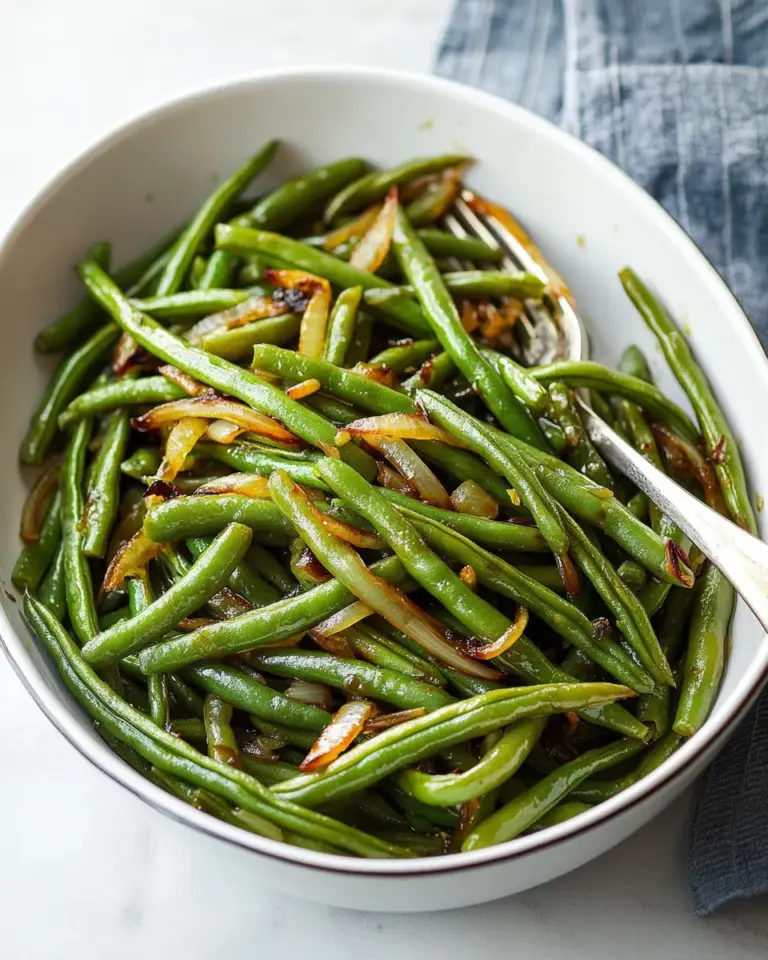
- Weeknight with steamed greens: Pair sliced roast with quickly steamed greens for a brighter plate that balances the rich meat. The greens add color and a slightly bitter counterpoint that keeps the meal feeling balanced and not overly heavy.
- Storage tips: Store leftover meat, vegetables, and strained cooking liquid in separate airtight containers for up to four days in the refrigerator. Reheat gently in a covered skillet with a splash of reserved liquid to keep textures intact, or freeze portions for up to three months, leaving headspace for expansion.
- Meal prep idea: Shred leftover roast and mix with a little gravy for quick sandwiches or potpie filling. The cooked meat keeps well and the concentrated flavors make for easy second day meals.
- Seasonal pairings: In winter, serve with roasted root vegetables and a simple green salad for contrast. For spring gatherings keep sides light, using lemon dressed greens to refresh the plate.
FAQ
Conclusion
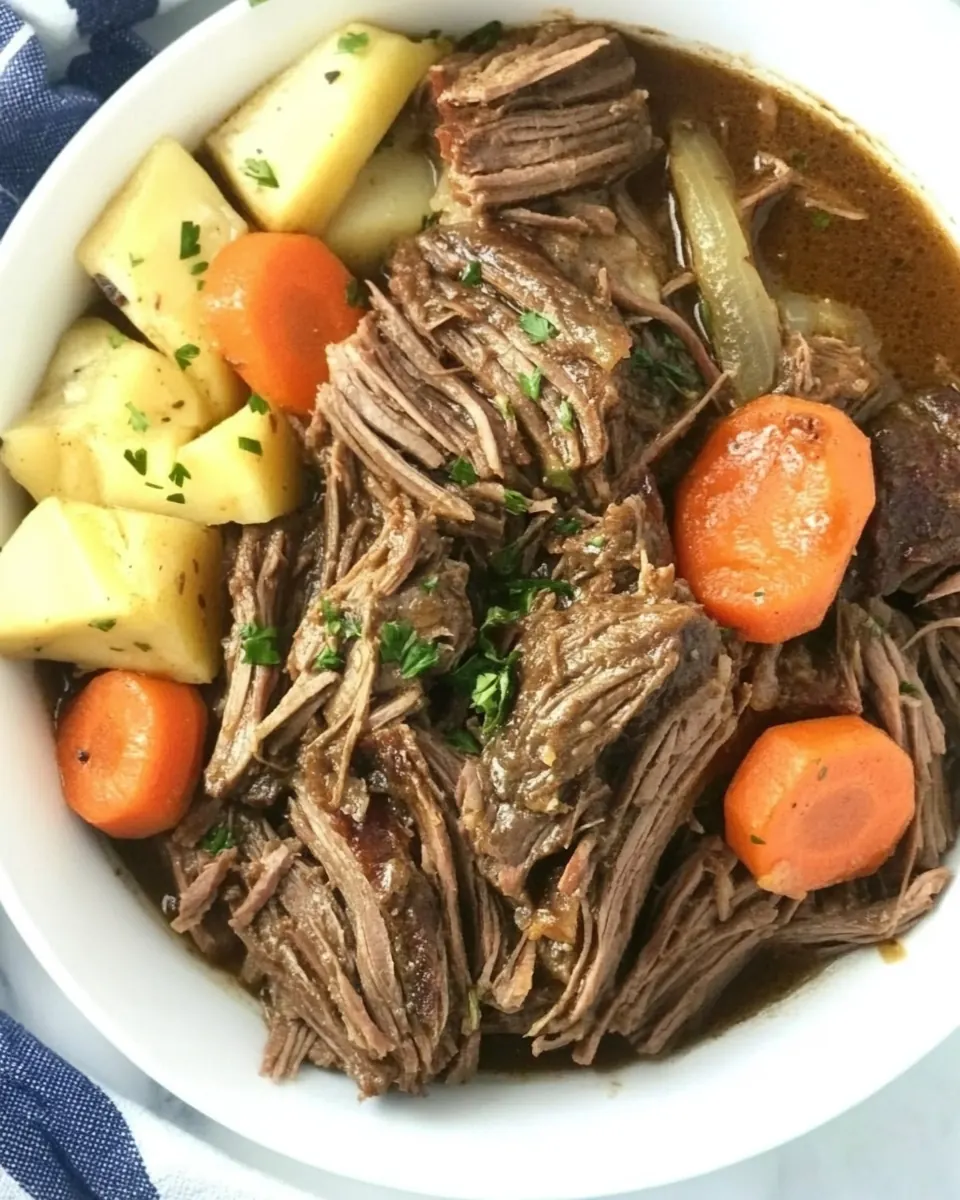
This Instant Pot Pot Roast stands out for delivering deep, braised flavors with minimal hands on time. The combination of a well seared chuck roast, a savory braising liquid, and perfectly cooked potatoes and carrots produces a memorable, comforting meal that feels like it simmered all day. Give this recipe a try on a busy weeknight or for a small gathering, and enjoy how simple techniques create rich results that bring people together around the table.
Instant Pot Pot Roast
Equipment
- Electric Pressure Cooker (6 or 8 quart)
Ingredients
- 1/2 tablespoon extra virgin olive oil Heat in the Instant Pot to sear the roast and add a subtle fruity flavor, helping to develop a browned crust that enhances overall depth; use sparingly to avoid smoking and to complement the beef without overpowering it.
- 3 -4 pound chuck roast Provide the main source of rich, marbled beef that becomes tender when pressure-cooked, supplying savory flavors and collagen that break down into a silky mouthfeel; choose a cut with good marbling for best results.
- kosher salt and pepper, to taste Season generously to enhance the natural beef flavors and balance the dish; apply to the roast before searing and adjust to taste after cooking to ensure savory depth without oversalting.
- 4 cups low-sodium beef stock, divided Add as the primary braising liquid to create steam for pressure cooking and to infuse the roast and vegetables with savory, beefy flavor; reserve some to adjust sauce consistency or deglaze the pot after searing.
- 1 teaspoon onion powder Sprinkle to provide an even, concentrated onion flavor without adding moisture, helping to round out the savory profile and complement garlic and beef in the braising liquid.
- 1 tablespoon minced garlic Stir in to deliver aromatic, pungent flavor that brightens the braising liquid and melds with the roast and vegetables; add before pressure cooking so the garlic infuses throughout.
- 1/4 cup prepared horseradish, NOT horseradish sauce Introduce a sharp, piquant kick that cuts through the richness of the beef and sauce, adding complexity and a layered finish; fold into the sauce or serve alongside for controlled heat and tang.
- 3 pounds potatoes, cut into 2-inch chunks Chunk and add to supply starchy body and absorb braising flavors, becoming tender and creamy while complementing the roast; choose uniform sizes so potatoes cook evenly under pressure.
- 1 pound carrots, peeled and cut into 2-inch chunks Peel and chop to contribute sweetness and a tender texture that contrasts with the meat, helping to balance richness while holding shape when cut into consistent chunks for even cooking.
- 2 tablespoons unsalted butter Melt into the finished sauce to add richness and a silky mouthfeel, enriching the gravy and helping to smooth flavors before thickening with flour for a glossy finish.
- 2 tablespoons all-purpose flour Whisk in to thicken the pan sauce into a gravy, creating body and helping the sauce cling to meat and vegetables; cook briefly after adding to remove raw flour taste and achieve desired consistency.
Instructions
- Hit Sauté on the Instant Pot, add 1/2 tablespoon extra virgin olive oil, and let heat for about 1 minute.: As the oil warms you will notice a faint, glossy shimmer and a subtle scent of toasted olive; that signals the pan is hot enough for searing. This brief heating step primes the pot so the chuck roast makes steady contact and browns rather than steaming. If the pot is not hot enough you might not develop a crust, leading to a less flavorful final dish. A typical troubleshooting move is to pat the roast dry before searing, which reduces steam and improves browning.
- While the oil is heating, season the chuck roast generously with kosher salt and pepper on both sides. Once seasoned, add the roast to the heated oil and sear the meat on each side, 3-4 minutes per side. Once the roast is browned and slightly caramelized, remove it from the inner pot, placing it onto a plate. Hit cancel to turn the Instant Pot off.: When searing you should hear an assertive sizzle and see a rich, deep brown color develop on the surface within minutes; that caramelization locks in savory notes. I like to rotate the roast to get even contact with the hot surface, and a proper sear also produces browned bits on the pot bottom that will boost the gravy. A common error is crowding the pot, which causes the temperature to drop and prevents searing, so work in a single layer or sear in batches.
- Pour about 1/2 cup of the beef stock into the inner pot and scrape up any browned bits on the bottom of the inner pot using a wooden spoon or spatula.: Pouring a small amount of stock while the pot is still warm releases those caramelized bits, which dissolve into the liquid and become a flavor bomb for the braise. You will hear a soft sizzle as the liquid lifts the fond, and the color will deepen into a glossy brown. If you skip this deglazing step you risk a burnt on flavor and the Instant Pot may throw a burn warning, so always scrape thoroughly.
- Add the seared pot roast back into the pressure cooker, along with any accumulated juices that collected on the plate. Pour the remaining beef stock around the roast. Season the broth with 1 teaspoon onion powder, 1 tablespoon minced garlic, and a generous pinch of salt and pepper. Spread 1/4 cup prepared horseradish over the top of the roast.: Reintroducing the roast to the liquid lets connective tissues begin to unwind as the pressure builds; you will notice a faint steam rising when you add the remaining stock. The aromatics will scent the broth quickly, and the horseradish on top creates a piquant layer that melts into the meat during cooking. A mistake here is undersalting the liquid, which results in a flat sauce, so season confidently but taste as you finish the gravy later.
- Place the lid on the Instant Pot and ensure the vent knob is set to sealed. Select Manual or Pressure Cook, adjust to High Pressure if needed, and use the +/- buttons to set the cooking time. Cook for 20 minutes per pound.: As the pot reaches pressure you may hear the valve hiss softly and then settle; that is normal. The high pressure forces liquid into the meat fibers, breaking down collagen so the roast becomes tender enough to shred or slice. Accuracy with weight based timing matters because undercooking will leave the roast tough, while dramatically overcooking might make the meat too loose for neat slices. If you are uncertain about the roast weight, err slightly longer and allow for a natural release to finish tenderizing.
- Once the cooking time has elapsed, allow for pressure to release for at least 15 minutes. Then open the inner pot, remove the roast, place it on a cutting board or platter, and tent with foil and let rest for while the vegetables cook.: Letting the pressure naturally release for a while helps the meat fibers relax gradually, retaining juices. When you lift the lid you will be greeted by a deep, braised aroma and a glossy broth. Resting the roast under foil keeps heat steady and allows juices to redistribute; slicing too soon will cause juices to spill out onto the cutting board, making the meat drier. People sometimes rush this step, so be patient and use the resting time to prepare vegetables for the next stage.
- After removing the roast from the inner pot, add the prepared potatoes and carrots. Place the lid on the Instant Pot, ensure the vent knob is set to sealed, and using the Manual or Pressure Cook button, set to cook on high pressure for 5 minutes.: The vegetables will soften and absorb the savory broth quickly, and you should aim for tender but not falling apart texture. When you add them, the steam will look dense through the vent as it rebuilds pressure, and the pot will sing gently when cooking. A common slip is cutting potatoes too small which causes them to disintegrate under pressure, so keep the chunks about 2 inches for best texture.
- After the cooking time has elapsed, let pressure release naturally for 5 minutes, then do a quick release of pressure by carefully knocking the venting knob from the sealed to the venting position using the handle of a long utensil. Stand back to prevent yourself from being burned by steam.: That short natural release lets the vegetables finish tenderizing without shock, then the quick release stops cooking so they hold their shape. You will see a rapid burst of steam and hear an energetic hiss during the quick release, so keep hands and face away. A safety note: always use a utensil to move the knob and keep your face to the side to avoid steam burns.
- After the roast and vegetables are cooked, strain the cooking liquid from the inner pot and then return the inner pot to the instant pot.: Straining clarifies the broth and removes bits of sediment so your gravy finishes silky and smooth. The liquid will be richly flavored, with suspended particles that, if left, can cloud the sauce. If you skip straining the gravy may be grainy, so use a fine mesh strainer or cheesecloth for the best texture.
- Hit Sauté on the Instant Pot and add 2 tablespoons unsalted butter. Once the butter has melted, whisk in 2 tablespoons all-purpose flour and then let cook for 1 minute.: As the butter melts it will foam briefly and release a gentle nutty aroma, which is the ideal foundation for a roux. Cooking the flour for a minute removes raw flour taste and develops a subtle toasty color that enriches the gravy. Stir constantly to prevent scorching; a burnt roux will ruin the sauce and is hard to recover from.
- Slowly whisk in 1-2 cups of the leftover cooking liquid, whisking well. Let bubble and thicken for several minutes, whisking constantly. Serve with pot roast and vegetables.: Adding liquid gradually prevents lumps and helps you control thickness; a glossy, velvety sauce should cling slightly to a spoon. You will hear a gentle simmer as the gravy comes together, and the aroma will deepen into a concentrated roast essence. If the gravy becomes too thick, whisk in more strained liquid to loosen it; if too thin, simmer a little longer while stirring to reduce and intensify flavor.
Notes
- Choose the right roast: Selecting a well marbled chuck roast ensures the meat becomes tender and flavorful after pressure cooking. The marbling melts into the braising liquid, creating richness that thinner cuts cannot match. If you pick a lean roast you may end up with drier meat, so aim for visible fat and connective tissue.
- Pat dry before searing: Drying the roast with paper towels removes surface moisture that would otherwise steam the meat. A proper sear creates a deep brown crust and flavorful fond on the pot bottom. If you skip this step the roast may not brown well and the overall flavor will be flatter.
- Deglaze thoroughly: Pour a small amount of the beef stock and scrape the bottom until all browned bits lift into the liquid. Those bits dissolve into the sauce and are essential for a rich gravy. Ignoring this will risk a burned flavor and a less complex sauce.
- Reserve cooking liquid: Save at least 1 to 2 cups of strained broth to adjust gravy thickness and seasoning. The reserved liquid is also great for reheating, as it revives the meat without drying it out. Discarding this liquid wastes a concentrated flavor resource.
- Rest the meat: Tent the roast with foil and let it relax before slicing so juices redistribute. Resting prevents the roast from gushing out all its juices when cut, keeping each slice succulent. Cutting too soon results in drier slices and a disappointingly thin gravy.
- Thicken carefully: Whisk flour into melted butter to form a smooth roux, then add strained liquid slowly to avoid lumps. For a gluten free option use a cornstarch slurry instead, whisking it into a simmering broth. Rushing the addition of liquid can create lumps that are hard to smooth out.