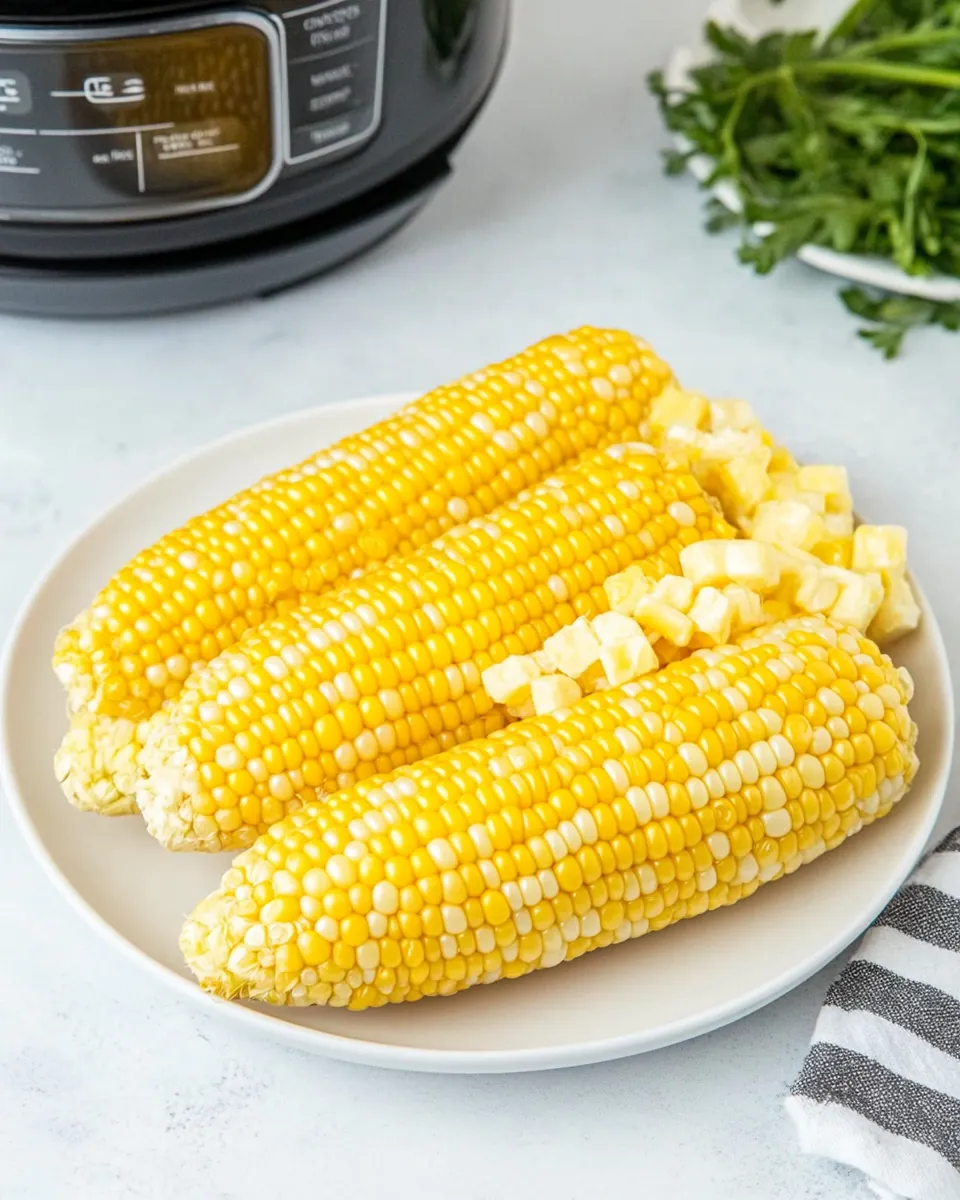
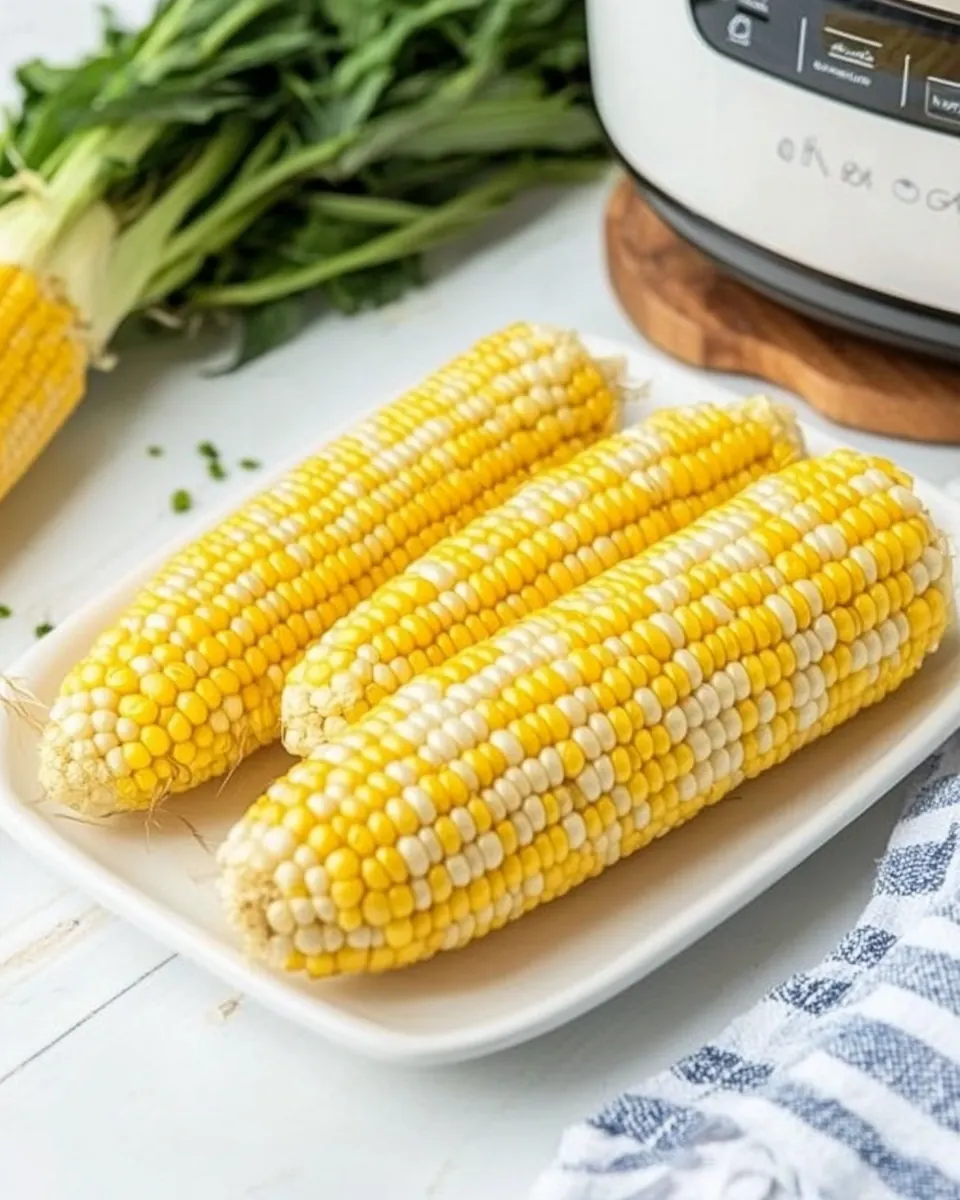
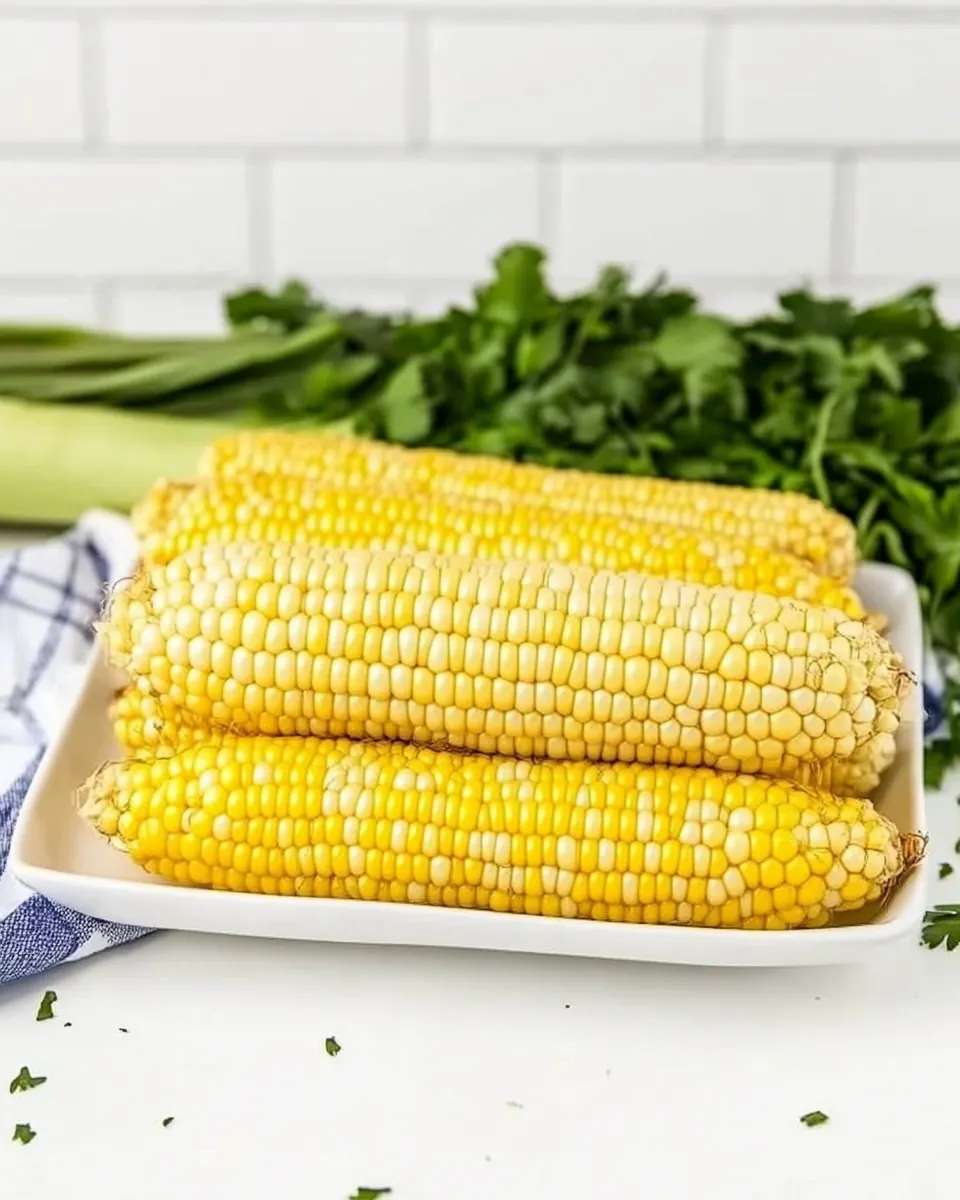
Instant Pot Corn on the Cob
Instant Pot Corn on the Cob is the quickest route to sweet, steaming ears that taste like summer even on a weeknight. I remember the first time I got bold enough to use a pressure cooker for corn, nervous about overcooking yet hopeful for a tender, juicy result. That first bite, still warm and sending up a faint steam, convinced me this is one of those small kitchen miracles I come back to again and again.
There is a simple joy in holding a perfectly cooked ear of corn, the kernels bursting with juice when you bite in. I like to think of this recipe as the answer when you want fresh tasting corn fast, without the fuss of a grill or the guesswork of boiling. Over the years I have adjusted timing and water amounts so the texture stays true, whether I am cooking two ears for a cozy dinner or a stack for a backyard gathering.
Every cook has those tiny rituals that make recipes feel like home; mine is trimming the tips so the corn fit just right in the cooker and listening to the gentle hiss as pressure builds. There is a comforting rhythm to it that turns a practical task into a little kitchen meditation. When I serve these ears, people always comment on how naturally sweet and tender they are, and I enjoy watching the simple pleasure unfold around the table.
Recipe Snapshot
7 mins
5 mins
2 mins
Medium
80 kcal
American
Vegan, Gluten-Free
Side Dishes
Electric Pressure Cooker (6 or 8 quart), Instant Pot Rack
The Beauty of This Instant Pot Corn on the Cob
Speed without sacrifice
I love how Instant Pot Corn on the Cob gets you from prep to plate in minutes, while still preserving natural sweetness. Using pressure means intense heat for a short period, which locks in juices so the kernels remain plump. I often reach for this method on busy nights when I want a side that feels special but does not demand time.
Consistent results every time
One of the best things about this method is reliability. I have cooked corn in many ways, and the pressure approach gives predictability. Once you match water to pot size and set the time, you can expect uniform tenderness. That consistency is what makes it a go to in my recipe rotation.
Minimal equipment, maximum flavor
All you really need is an electric pressure cooker and a rack, and you are set. I appreciate how uncluttered this technique is, and how it keeps the kernels from becoming water logged. It is a lean workflow that still produces rich, sweet results.
Great for any occasion
I find this recipe works equally well for weeknight dinners, backyard barbecues, or when guests drop by. The short hands on time means I can focus on the main dish or conversation, then bring out steaming ears of corn that look and taste like I spent far longer preparing them.
Kid friendly and versatile
Kids usually love the texture and sweetness, and adults can dress the ears up with butter or spices. I appreciate that this approach preserves that fresh corn flavor, so whether you keep it simple or get creative with toppings, the base is always satisfying.
What to Buy for Instant Pot Corn on the Cob

These ingredients are intentionally few, because the beauty of Instant Pot Corn on the Cob is simplicity. The corn is the star, and the small amount of water is there only to create steam, not to boil the kernels. Keeping the ingredient list tight preserves the sweet, fresh texture you want from summer ears.
- 1 to 12 ears corn on the cob: Provide and define the main produce that supplies sweetness, texture, and visual appeal; select fresh ears with plump kernels and trimmed silk to ensure even cooking and best flavor when pressure-cooked.
- 1 to 2 cups cold tap water for pressure cooking, see recipe card for exact amount: Supply and create the necessary steam environment for pressure cooking; measure cold tap water precisely to achieve adequate pressure without diluting flavor, following the recipe card for the exact volume needed.
Recipe Steps for Instant Pot Corn on the Cob
I like to keep the directions reassuring and hands on, so you know what to expect at each moment. These steps are arranged to help you sense when things are going right, and to avoid the small mistakes that can change the final texture.
- Trim off the tip of the corn cob and remove the long stem at the bottom of your corn cobs, so that the corn will fit inside the Instant Pot. If desired, remove the husks and silk from the corn.: When you trim the ear, you might hear the faint snap of the kernel tips, and the exposed end shows a moist, pale interior if the corn is fresh. This sizing step matters because crowded or bent ears will not stack properly, which can lead to uneven cooking. A common mistake is leaving the stem long and forcing the lid closed, which risks damaging the gasket. If silk is stubborn, a soft brush works, but avoid aggressive scraping that can bruise kernels.
- Pour cold tap water into the inner pot and top with the rack or trivet. For 3 or 6-quart Instant Pot: Use 1 cup of water For 8-Quart Instant Pot: Use 1 1/2 cups water For 10-quart Instant Pot: Use 2 cups water.: Use 1 cup of water For 8-Quart Instant Pot: Use 1 1/2 cups water For 10-quart Instant Pot: Use 2 cups water. : The sound of water filling the pot is reassuring, and the cool temperature helps the cooker come up to pressure steadily. Using the correct amount prevents water from splashing onto the corn while ensuring enough steam forms. Overfilling can make corn soggy, while underfilling may not create enough steam, so follow the size guidance. If you misjudge and see water sloshing when placing the rack, re-level and remove a little water.
- Place corn cobs right on the trivet or in the steamer basket, stacking as many corn cobs as desired in Instant Pot.: You will notice a tight, layered look as ears stack, and they should sit above the water line. Proper placement ensures steam circulates evenly, giving each ear a similar texture. Avoid piling them so high the lid cannot seal properly, which would prevent pressure from building. If you cram them too close, the middle ears may cook differently, so leave small gaps when possible.
- Place lid on pressure cooker and be sure lid is sealed and vent knob is closed or pointed towards "seal.": As the lid engages, you might feel a slight resistance when turning it into place, and hearing the valve click into position is normal. A proper seal ensures pressure rises and cooking is efficient. Failing to seal correctly will keep the pot from pressurizing, and you may end up with undercooked corn. If the pot does not seal within a few minutes, check the gasket for obstructions and ensure the lid is seated correctly.
- Set to Pressure Cook on High pressure for 2 minutes for corn without husk. Cook on high pressure for 3-4 minutes for corn with husk. I recommend 4 minutes if your corn cobs are really thick.: During these minutes you will hear the cooker working, a steady, soft hum as steam builds. Short, high pressure preserves kernel integrity and sweetness, producing a tender bite rather than a mushy one. A typical trap is overcooking in hopes of extra tenderness, which actually makes kernels mealy. Stick to the recommended times and err on the shorter side for thinner ears.
- Once the cooking time has elapsed, let the pressure release naturally for 5 minutes and then release any remaining pressure.: You will feel a gradual easing of pressure and may see a gentle steam plume when you finish the quick release. That natural release period allows residual heat to even out, finishing the kernels without shock. A common mistake is forcing an immediate quick release for everything, which can result in slightly firmer centers. Letting a few minutes pass smooths the texture.
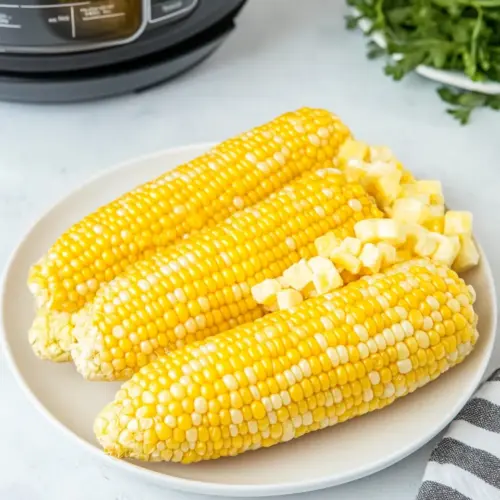
- Serve corn as desired.: The first sensory note is warmth and the glossy shine of freshly cooked kernels, often accompanied by a sweet aroma that fills the kitchen. Serving immediately highlights sweetness and tenderness, while letting ears sit can dull the texture. Avoid leaving them in the cooker for long after cooking, as condensation can create a soggy surface. Plate and dress simply, so the natural corn flavor carries the dish.
Helpful Hints
I like to offer practical pointers that make this method foolproof. These tips address timing, texture, and small equipment workarounds so your Instant Pot Corn on the Cob comes out great every time.
- Cold water matters: Using cold tap water helps the pressure cooker reach pressure in a predictable way, which affects final texture and cooking accuracy.
- Match water to pot size: Follow the specified amounts for 3 to 6 quart, 8 quart, and 10 quart models to prevent watery or undercooked corn.
- Stack without crowding: Leave small gaps when placing ears on the trivet so steam can circulate and cook evenly.
- Trim for fit: Shortening the tip and base ensures the lid closes easily and prevents jamming the gasket or steam valve.
- Natural release first: Allow a five minute natural pressure release before finishing with a quick release to round out the texture.
- Frozen corn adjustment: If using frozen, increase high pressure time to four minutes and use a five minute natural release to avoid chilled centers.
Serving Ideas for Instant Pot Corn on the Cob
This Instant Pot Corn on the Cob fits many occasions, from casual weeknights to festive summer meals. I like to present serving ideas that are simple, seasonal, and flexible so you can pair the ears with mains or sides depending on the menu.
- Classic buttered: Serve hot ears with softened butter and a sprinkle of salt, perfect for casual dinners and family meals.
- Grill finish: After pressure cooking, briefly char on a hot grill for a smoky edge, ideal for cookouts and summer gatherings.
- Herbed companion: Offer chopped herbs and citrus wedges on the side so guests can personalize their ears, which works well for brunches or light lunches.
- Meal pairing: Serve alongside grilled proteins or salads for an easy, balanced dinner that highlights seasonal produce.
- Make ahead and store: Cool leftovers, place in an airtight container, and refrigerate for three to four days, handy for quick reheats during the week.
- Special occasions: Dress ears with compound butter or spiced rubs for holidays or gatherings, giving a simple side a celebratory feel.
FAQ
Conclusion
What makes this recipe special is its ability to deliver naturally sweet, tender ears of corn with almost no fuss. The pressure cooking method preserves the fresh flavors and texture that people love, while shaving minutes off traditional boiling or grilling. Give it a try the next time you want a reliable, crowd pleasing side that feels like summer no matter the season. Once you taste that first perfectly cooked bite, I think you will reach for this technique often, whether for a simple weeknight meal or a festive gathering.
Instant Pot Corn on the Cob
Equipment
- Electric Pressure Cooker (6 or 8 quart)
- Instant Pot Rack
Ingredients
- 1 to 12 ears corn on the cob Provide and define the main produce that supplies sweetness, texture, and visual appeal; select fresh ears with plump kernels and trimmed silk to ensure even cooking and best flavor when pressure-cooked.
- 1 to 2 cups cold tap water for pressure cooking, see recipe card for exact amount Supply and create the necessary steam environment for pressure cooking; measure cold tap water precisely to achieve adequate pressure without diluting flavor, following the recipe card for the exact volume needed.
Instructions
- Trim off the tip of the corn cob and remove the long stem at the bottom of your corn cobs, so that the corn will fit inside the Instant Pot. If desired, remove the husks and silk from the corn.: When you trim the ear, you might hear the faint snap of the kernel tips, and the exposed end shows a moist, pale interior if the corn is fresh. This sizing step matters because crowded or bent ears will not stack properly, which can lead to uneven cooking. A common mistake is leaving the stem long and forcing the lid closed, which risks damaging the gasket. If silk is stubborn, a soft brush works, but avoid aggressive scraping that can bruise kernels.
- Pour cold tap water into the inner pot and top with the rack or trivet. For 3 or 6-quart Instant Pot: Use 1 cup of water For 8-Quart Instant Pot: Use 1 1/2 cups water For 10-quart Instant Pot: Use 2 cups water.: Use 1 cup of water For 8-Quart Instant Pot: Use 1 1/2 cups water For 10-quart Instant Pot: Use 2 cups water. : The sound of water filling the pot is reassuring, and the cool temperature helps the cooker come up to pressure steadily. Using the correct amount prevents water from splashing onto the corn while ensuring enough steam forms. Overfilling can make corn soggy, while underfilling may not create enough steam, so follow the size guidance. If you misjudge and see water sloshing when placing the rack, re-level and remove a little water.
- Place corn cobs right on the trivet or in the steamer basket, stacking as many corn cobs as desired in Instant Pot.: You will notice a tight, layered look as ears stack, and they should sit above the water line. Proper placement ensures steam circulates evenly, giving each ear a similar texture. Avoid piling them so high the lid cannot seal properly, which would prevent pressure from building. If you cram them too close, the middle ears may cook differently, so leave small gaps when possible.
- Place lid on pressure cooker and be sure lid is sealed and vent knob is closed or pointed towards "seal.": As the lid engages, you might feel a slight resistance when turning it into place, and hearing the valve click into position is normal. A proper seal ensures pressure rises and cooking is efficient. Failing to seal correctly will keep the pot from pressurizing, and you may end up with undercooked corn. If the pot does not seal within a few minutes, check the gasket for obstructions and ensure the lid is seated correctly.
- Set to Pressure Cook on High pressure for 2 minutes for corn without husk. Cook on high pressure for 3-4 minutes for corn with husk. I recommend 4 minutes if your corn cobs are really thick.: During these minutes you will hear the cooker working, a steady, soft hum as steam builds. Short, high pressure preserves kernel integrity and sweetness, producing a tender bite rather than a mushy one. A typical trap is overcooking in hopes of extra tenderness, which actually makes kernels mealy. Stick to the recommended times and err on the shorter side for thinner ears.
- Once the cooking time has elapsed, let the pressure release naturally for 5 minutes and then release any remaining pressure.: You will feel a gradual easing of pressure and may see a gentle steam plume when you finish the quick release. That natural release period allows residual heat to even out, finishing the kernels without shock. A common mistake is forcing an immediate quick release for everything, which can result in slightly firmer centers. Letting a few minutes pass smooths the texture.
- Serve corn as desired.: The first sensory note is warmth and the glossy shine of freshly cooked kernels, often accompanied by a sweet aroma that fills the kitchen. Serving immediately highlights sweetness and tenderness, while letting ears sit can dull the texture. Avoid leaving them in the cooker for long after cooking, as condensation can create a soggy surface. Plate and dress simply, so the natural corn flavor carries the dish.
Notes
- Cold water matters: Using cold tap water helps the pressure cooker reach pressure in a predictable way, which affects final texture and cooking accuracy.
- Match water to pot size: Follow the specified amounts for 3 to 6 quart, 8 quart, and 10 quart models to prevent watery or undercooked corn.
- Stack without crowding: Leave small gaps when placing ears on the trivet so steam can circulate and cook evenly.
- Trim for fit: Shortening the tip and base ensures the lid closes easily and prevents jamming the gasket or steam valve.
- Natural release first: Allow a five minute natural pressure release before finishing with a quick release to round out the texture.
- Frozen corn adjustment: If using frozen, increase high pressure time to four minutes and use a five minute natural release to avoid chilled centers.