Hoppy Cottontails Cookies
Hoppy Cottontails Cookies is the sort of recipe that sneaks up on you, turning a hectic spring morning into a cozy baking moment. I remember the year I first made these, juggling a pile of pastel napkins and a toddler who insisted every coconut flake was a treasure. The cookies came together faster than I expected, and by the time the kitchen smelled like warm coconut and vanilla, everyone was gathered at the table, hands sticky and smiles wide.
When you make Hoppy Cottontails Cookies you get both texture and nostalgia in one bite. I like to think of them as part candy, part cookie, because the sweetened condensed milk melds the coconut into tender little domes that toast beautifully at the edges. While assembling, I sipped coffee and watched the neighbor kids hunt for plastic eggs in the yard, which made the whole baking process feel like a small ritual rather than a chore.
These cookies have saved more than one dessert table for me. Once, when an unexpected guest arrived, I pulled the trays from the oven and offered them with a quick cup of tea. They were gone in minutes, and the host asked for the recipe while licking fingers clean. I love that they are forgiving, so I often let novice bakers take the lead while I supervise from the sink. It’s that perfect recipe to hand off, because the instructions are simple yet the results look thoughtful and homemade.
Recipe Snapshot
26 mins
15 mins
11 mins
Medium
150 kcal
American
Gluten-Free, Vegan
Desserts
Oven, Baking sheet, Parchment paper, Cookie scoop, Mixing bowl, Hand mixer, Cooling rack, Mini food processor, Silpat liner
Why You Need This Hoppy Cottontails Cookies
Irresistible Texture
I adore how Hoppy Cottontails Cookies balance chew and crunch. The sweetened coconut flakes stay tender in the middle while the edges toast to a delicate crisp, giving each bite a satisfying contrast. I find that the folded in all purpose flour just stabilizes the structure, so you get a cookie that holds its shape without becoming dense. When I serve these, people comment on the texture first, and that always makes me grin.
Simple, Pantry Friendly Ingredients
One reason I keep coming back to Hoppy Cottontails Cookies is the ingredient list. Most of the items are staples I already have, so it’s easy to bake on a whim. The sweetened condensed milk acts like a binder and sweetener all in one, which reduces steps and keeps the flavors pure. I love recipes that let the main elements shine without a long shopping list, and this is one of them.
Great for Gatherings
I often make these for spring brunches and holiday cookie exchanges. Hoppy Cottontails Cookies are easy to portion, transport, and display. They look festive whether dipped in chocolate or left plain, and I’ve found they pair well with tea, coffee, and even a light sparkling non alcoholic beverage. When I bring a tin to a neighbor, it always goes fast.
Customizable Finishes
Another reason I love these cookies is how easy they are to customize. Dipping the bases in melted chocolate adds a richer layer, while a simple dusting of powdered sugar warms the presentation. I like to toast the pecans for a slightly nutty counterpoint. These tweaks let me adapt the cookie to the crowd, and I enjoy experimenting without risking the core recipe.
Kid Friendly and Hands On
Finally, this recipe is a favorite for baking with kids. The scooping, rolling, and optional dipping are small tasks that little hands can help with. I enjoy handing over the cookie scoop and watching the enthusiasm unfold. There is something joyful about flour on aprons and coconut under fingernails, and Hoppy Cottontails Cookies is one of those recipes that creates memories as much as it creates treats.
What’s In This Hoppy Cottontails Cookies

These ingredients work together to create a cookie that is both tender and structured. The coconut is the star, lending chew and tropical sweetness. The dry ingredients stabilize the texture, while the fats and sugars provide tenderness and flavor. Each player has a clear role, which is why the finished cookie is consistent, approachable, and reliably delicious.
- 2/3 cup all-purpose flour: Provide structure and lightness to the dough, helping cookies hold their shape while contributing a tender crumb when mixed properly.
- 5 1/2 cups sweetened coconut flakes: Add abundant sweet, chewy texture and tropical flavor, giving the cookies chewiness and visible coconut flakes throughout the bite.
- 1 can (14 oz.) sweetened condensed milk full-fat (NOT evaporated milk): Bind ingredients together with rich sweetness and moisture, creating a fudgy interior that helps the coconut mixture set as it bakes.
- 1/4 teaspoon fine sea salt: Enhance overall flavor by balancing sweetness and bringing out other ingredients; a small pinch prevents the cookies from tasting flat.
- 1/2 tablespoon vanilla extract (or 1 teaspoon vanilla bean paste): Impart warm aromatic notes and depth, rounding out sweetness and enhancing the cookie’s overall flavor profile when mixed into the dough.
- 1 1/2 cups chocolate chips milk, semi-sweet, or dark chocolate; + 1 teaspoon coconut or vegetable oil (optional): Melt into a glossy coating that adds chocolate richness and snap; oil optional to thin the chocolate and improve shine and coating coverage.
- 1/3 cup pecan halves: Provide crunchy texture contrast and nutty flavor, adding toasted depth and a pleasant bite when folded or pressed into cookie portions.
- 1 cup unsalted butter: Contribute rich fat and flavor to the base, creating tender, flaky layers while promoting browning and a melt-in-mouth texture in the cookie dough.
- 3/4 cup powdered sugar: Sweeten and lightly thicken the butter mixture, yielding a smooth, fine texture that helps incorporate air for a delicate cookie crumb.
- 1/2 teaspoon fine sea salt: Season and balance sweetness in the dough or coating, sharpening flavors and preventing the final cookies from tasting overly sweet.
- 2 teaspoons vanilla extract: Add aromatic sweetness and enhance other flavors, providing a rounded vanilla backbone that complements the coconut and chocolate components.
- 1 3/4 cups all-purpose flour: Supply bulk and structure to the dough, interacting with fats and liquids to create a cohesive batter and determine cookie density.
- 1 tablespoon cornstarch: Lighten the texture by tenderizing the final crumb, helping to prevent toughness and contributing a subtle silkiness to the bite.
- Powdered sugar for coating the cookies: Coat finished cookies with a sweet, snowy finish that adds visual appeal, a delicate extra sweetness, and a slight melt-on-the-tongue surface.
Step by Step Instructions for Hoppy Cottontails Cookies

These instructions guide you through two complementary cookie types that share ingredients and finishing touches. I walk you through techniques for shaping, toasting, and finishing so each cookie looks and tastes its best. Take your time with sensory cues, and don’t worry if things look rustic; that character is part of the charm.
- PREP: Preheat oven to 350 degrees F. Line two large trays with parchment paper or a Silpat liner and set aside.: Preheat oven to 350 degrees F. Line two large trays with parchment paper or a Silpat liner and set aside. : The smell of the oven warming and the faint warmth from the preheated pans primes the cookies to bake evenly, and lining the trays prevents sticking and promotes even browning. You'll hear a quiet hum from the oven as it stabilizes at temperature, which is your cue to finish mixing and scooping. A common mistake here is not preheating long enough, which leads to uneven bake times and underdeveloped color on the cookies, so wait until the oven indicates readiness before baking.
- COCONUT MACAROONS: In a very large bowl, add in the sweetened coconut flakes, flour, vanilla, and salt. Scoop out every bit of the sweetened condensed milk into the bowl. Use hand mixers to beat ingredients until just combined; do not overmix. Use a large cookie scoop (1-1/2 tablespoons in size) to get about golf ball-sized compressed (press into the cookie scoop) cookies.: In a very large bowl, add in the sweetened coconut flakes, flour, vanilla, and salt. Scoop out every bit of the sweetened condensed milk into the bowl. Use hand mixers to beat ingredients until just combined; do not overmix. Use a large cookie scoop (1-1/2 tablespoons in size) to get about golf ball-sized compressed (press into the cookie scoop) cookies. : When you mix these ingredients the aroma of vanilla will bloom and the coconut will look glossy as the condensed milk is fully incorporated, signaling proper moisture distribution. You want the mixture to be cohesive but not soupy, because overmixing breaks down the texture and yields dense cookies. The correct visual cue is a slightly mounded scoop that holds together when pressed. One common error is overpacking the scoop, which makes the cookies too dense; instead compress just enough for them to hold shape.
- The cookie scoop will get sticky and need to be washed a few times in the process. I also like to spray it with nonstick spray or use another spoon to help coax it out of the cookie scoop. You can leave the cookies as is right out of the scoop (for a more rustic appearance) or quickly roll them with your hands for a nicer appearance.: Handling sticky dough engages your senses, you will feel tackiness and see glossy spots where condensed milk peeks through, and a light spray on the scoop helps release shapes cleanly. Rolling by hand will warm the dough slightly and smooth the exterior, giving a polished look, while leaving them rough keeps them charmingly homespun. Avoid overworking the dough with warm hands for too long, because excess heat can make the cookies lose shape when baked.
- BAKE: Place cookies on the prepared sheet pans, 1 inch apart. Bake for 11 to 14 minutes or until coconut is lightly toasted on top and bottoms are a very light brown. Don't overbake! Remove and allow to cool on the pan for 5 minutes before gently moving them with a metal spatula to a cooling rack.: Place cookies on the prepared sheet pans, 1 inch apart. Bake for 11 to 14 minutes or until coconut is lightly toasted on top and bottoms are a very light brown. Don't overbake! Remove and allow to cool on the pan for 5 minutes before gently moving them with a metal spatula to a cooling rack. : As they bake you'll notice a toasty coconut aroma and the tops will acquire tiny golden flecks while the edges firm slightly, these are signs of doneness. The sound is quiet, but visually the change from pale to lightly toasted is unmistakable. Leaving them on the hot pan for a few minutes lets residual heat finish the set up without drying them out. A frequent slip up is leaving them until deeply brown, which dries the interior, so pull them when the color is just right.
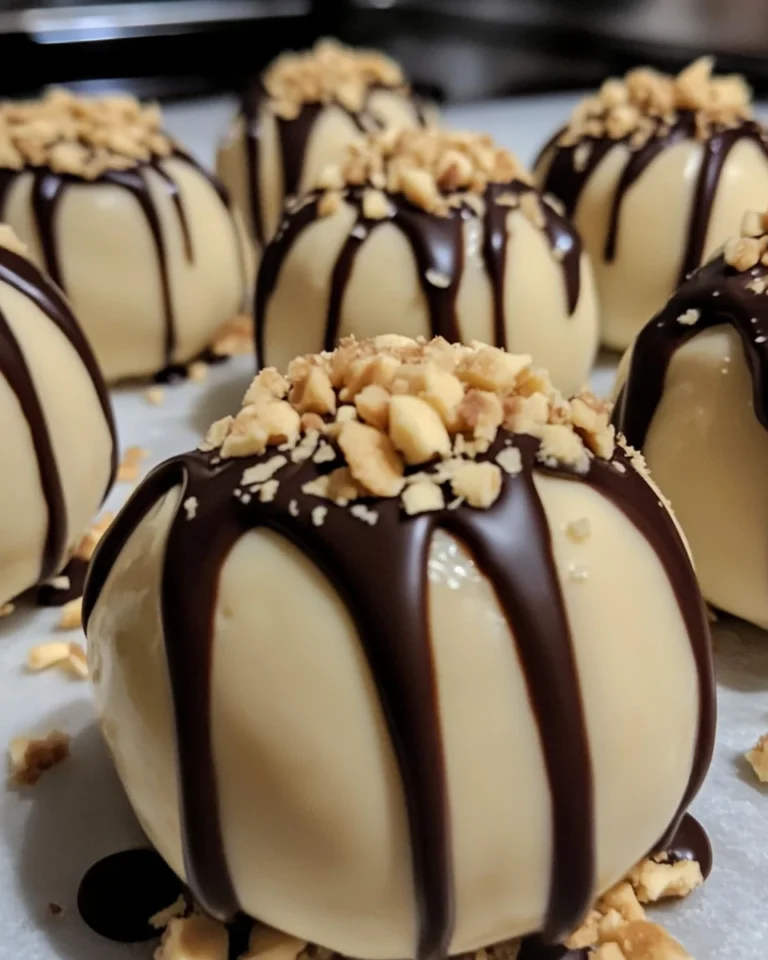
- OPTIONAL CHOCOLATE: If you want to dip these in chocolate, wait for the cookies to fully cool. Then add the chocolate chips and coconut oil to a microwave-safe bowl and microwave in bursts of 20 seconds, stirring in between bursts for 20-25 seconds until the chocolate is melted and smooth. Remember, chocolate is melting even outside of the microwave, so stir for a while to ensure it doesn't get burned. Transfer about 1/4 cup (just eyeball it) of melted chocolate to a plastic bag. Seal the bag without air in it and set aside.: If you want to dip these in chocolate, wait for the cookies to fully cool. Then add the chocolate chips and coconut oil to a microwave-safe bowl and microwave in bursts of 20 seconds, stirring in between bursts for 20-25 seconds until the chocolate is melted and smooth. Remember, chocolate is melting even outside of the microwave, so stir for a while to ensure it doesn't get burned. Transfer about 1/4 cup (just eyeball it) of melted chocolate to a plastic bag. Seal the bag without air in it and set aside. : When melting the chocolate you'll see it transform from glossy chips to a silky ribbon that falls off the spoon, and the faint toasted chocolate scent will become prominent. Adding the oil thins the chocolate for smoother dipping and shine. Be patient with stirring, because overheated chocolate can seize, turning grainy; if that happens, a small splash of warm oil can help rescue it.
- DIP: Generously dip the bases of the cooled cookies in the remaining melted chocolate; then transfer dipped cookies back to your parchment paper-lined trays. Use scissors to cut a tiny tip off the bag with the remaining melted chocolate; drizzle that chocolate over the cookies. Allow to set up at room temperature.: Generously dip the bases of the cooled cookies in the remaining melted chocolate; then transfer dipped cookies back to your parchment paper-lined trays. Use scissors to cut a tiny tip off the bag with the remaining melted chocolate; drizzle that chocolate over the cookies. Allow to set up at room temperature. : Dipping creates a glossy contrast and a satisfying snap when the chocolate firms, and the scent of rich chocolate paired with toasted coconut is a highlight. Drizzling adds a pretty finish and textural interest. A common pitfall is attempting to dip warm cookies, which melts the chocolate unevenly and can ruin the crisp finish, so confirm the cookies are fully cooled.
- STORAGE: These cookies will stay fresh, tightly covered, at room temperature for up to 3 days, or in an air-tight container in the fridge for 5-7 days. We like these cookies best within 1-2 days of being made. These cookies freeze and defrost really well without the chocolate!: These cookies will stay fresh, tightly covered, at room temperature for up to 3 days, or in an air-tight container in the fridge for 5-7 days. We like these cookies best within 1-2 days of being made. These cookies freeze and defrost really well without the chocolate! : Stored properly you'll preserve the chew and prevent the toasted coconut from going stale, and the scent will remain pleasantly coconut forward. If you freeze them, wrap tightly to avoid freezer burn, and thaw at room temperature to avoid condensation forming on the chocolate. One mistake is storing them in a humid spot, which will make them lose crispness quickly.
- TOAST PECANS: Preheat the oven to 350 degrees F. Spread the pecans in an even layer on a sheet pan. Bake for 5-7 minutes or until they smell fragrant. Watch carefully to avoid burning. Remove and allow to completely cool before transferring them to a mini food processor or cutting board. Pulse or finely chop into very small pieces. Avoid over-pulsing in the food processor or you'll end up with pecan butter.: Preheat the oven to 350 degrees F. Spread the pecans in an even layer on a sheet pan. Bake for 5-7 minutes or until they smell fragrant. Watch carefully to avoid burning. Remove and allow to completely cool before transferring them to a mini food processor or cutting board. Pulse or finely chop into very small pieces. Avoid over-pulsing in the food processor or you'll end up with pecan butter. : When toasting you'll notice the aroma deepen and the nuts darken slightly, these cues indicate peak toasty flavor. Cooling is essential so the heat does not melt butter in the dough or alter texture. Overprocessing in the food processor is the usual mistake, so pulse gently until you reach small pieces rather than a paste.
- WET INGREDIENTS: In a bowl of a stand mixer with the whisk attachment or a large bowl (and using a hand mixer), combine butter and 3/4 cup powdered sugar. Cream together until smooth and creamy, about 3-4 minutes. Add in the vanilla, salt, cornstarch, and pulsed/chopped pecans. Beat until smooth and combined. Add in the flour and mix until combined and smooth. It will seem sandy and crumbly at first, but keep mixing; it will come together. Once combined, do not overmix.: In a bowl of a stand mixer with the whisk attachment or a large bowl (and using a hand mixer), combine butter and 3/4 cup powdered sugar. Cream together until smooth and creamy, about 3-4 minutes. Add in the vanilla, salt, cornstarch, and pulsed/chopped pecans. Beat until smooth and combined. Add in the flour and mix until combined and smooth. It will seem sandy and crumbly at first, but keep mixing; it will come together. Once combined, do not overmix. : Creaming until smooth introduces air that lightens the dough, and you will see a paler, fluffier mixture form as the sugar integrates into the butter. Adding the dry ingredients will create a crumbly texture initially, the proper cue is when it comes together into a coherent dough. Overmixing after the flour is added can develop gluten and toughen the cookies, which is a common misstep.
- CHILL: Wrap the dough in plastic wrap and refrigerate for 1 to 2 hours to chill.: Wrap the dough in plastic wrap and refrigerate for 1 to 2 hours to chill. : Chilling firms the fat, making the dough easier to portion and preventing excessive spreading during baking, and you will feel a firmer texture after refrigeration. It also helps the flavors meld and the cornstarch produce that tender crumb. A typical error is under chilling, which leads to flat, misshapen cookies, so be patient and give it the full rest.
- BAKE: Once chilled, measure out cookie dough using a 1 tablespoon measuring spoon (each ball should be exactly 1 tablespoon). If the dough gets too warm, put the dough in the freezer for 10-15 minutes. Preheat the oven to 375 degrees F. Line a light-colored sheet pan with a Silpat liner. Bake for 7-11 minutes (mine take 10 minutes). It's okay if some of the cookies bleed out on the edges and turn brown; this crumbles off easily when ready to roll in powdered sugar). Remove from the oven, let stand on tray for 3-5 minutes and then transfer to a wire cooling rack. Let cool for 2-3 minutes.: Once chilled, measure out cookie dough using a 1 tablespoon measuring spoon (each ball should be exactly 1 tablespoon). If the dough gets too warm, put the dough in the freezer for 10-15 minutes. Preheat the oven to 375 degrees F. Line a light-colored sheet pan with a Silpat liner. Bake for 7-11 minutes (mine take 10 minutes). It's okay if some of the cookies bleed out on the edges and turn brown; this crumbles off easily when ready to roll in powdered sugar). Remove from the oven, let stand on tray for 3-5 minutes and then transfer to a wire cooling rack. Let cool for 2-3 minutes. : As these shortbread style cookies bake you'll notice gentle spreading and a faint golden rim, and the aroma of toasted pecans and butter will increase. The slightly warm cookies are ideal for rolling in sugar because the coating adheres without dissolving. Overbaking leads to a hard texture, so aim for pale edges and a short time in the oven for a tender interior.
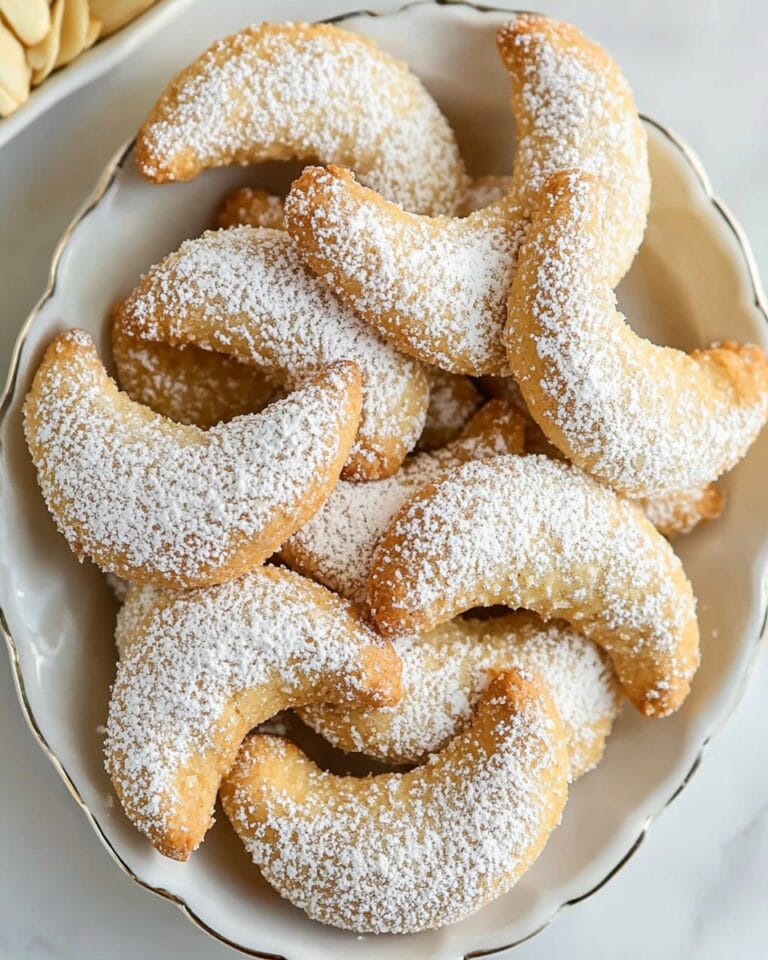
- POWDERED SUGAR: Add powdered sugar to a bowl (I start with 1 cup, but you may need slightly more). Roll the still-warm cookie in the powdered sugar and then return to the wire cooling rack. Let cool down a few more minutes, and then roll in the powdered sugar again.: Add powdered sugar to a bowl (I start with 1 cup, but you may need slightly more). Roll the still-warm cookie in the powdered sugar and then return to the wire cooling rack. Let cool down a few more minutes, and then roll in the powdered sugar again. : Rolling while warm gives a crackled, snow dusted appearance as the sugar clings to the surface, and the contrast between warm cookie and cool sugar creates a lovely mouthfeel. If you wait until the cookie is completely cold the sugar will not adhere as nicely. A common mistake is using too little sugar initially, requiring awkward re coating later, so be generous the first time.
- STORAGE: Store in an airtight container at room temperature. Re-roll in additional powdered sugar as needed. Best enjoyed within 1-3 days.: Store in an airtight container at room temperature. Re-roll in additional powdered sugar as needed. Best enjoyed within 1-3 days. : Proper storage keeps the powdered sugar looking fresh and the cookies tender, and you'll notice the texture remains pleasant for a few days. If moisture accumulates, replace the layer of sugar to refresh appearance. One error is stacking warm cookies, which traps steam and softens their exteriors, so always cool completely before storing.
How to Switch It Up

You can adapt Hoppy Cottontails Cookies in several small ways to suit taste or occasion. Below are practical, tested ideas that I return to again and again. Each tip starts with a short bolded phrase to make scanning easy and useful.
- Swap chocolate types: Use milk, semi-sweet, or dark chocolate depending on preferred sweetness; darker chocolate tones down overall sugar while milk chocolate adds a creamy finish.
- Adjust coconut texture: For a chewier bite, choose larger sweetened coconut flakes, or for a finer crumb, pulse them briefly in a food processor.
- Nut adaptation: Replace pecan halves with toasted walnuts for a slightly earthier flavor, keeping the same toasting time and care to avoid burning.
- Make them gluten free: Substitute a 1-to-1 gluten free flour blend for the all-purpose flour in both recipes, and chill the dough a bit longer to help it hold shape.
- Freeze for later: Freeze baked cookies without chocolate in a single layer on a tray, then transfer to an airtight container; thaw at room temperature for best texture.
- Presentation upgrade: Dip bases in melted chocolate and finish with a dusting of extra powdered sugar or finely chopped toasted nuts for visual contrast.
Serving This Hoppy Cottontails Cookies
These cookies are versatile for spring gatherings, holiday tables, or casual tea. Below are thoughtful serving ideas, pairings, and storage suggestions arranged as list items for easy scanning and reference.
- Casual snack plate: Arrange Hoppy Cottontails Cookies on a plate with paper doilies for a kid friendly snack at an Easter egg hunt.
- Tea time pairing: Serve with hot tea or coffee, the warm beverage complements the sweet toasted coconut and buttery crumb nicely.
- Gift tin: Layer cookies in an airtight tin with parchment for gifting to neighbors or teachers during spring celebrations.
- Brunch spread: Add to a brunch table alongside fruit and muffins; they provide a sweet, textural contrast to softer pastries.
- Storage tips: Keep in an airtight container at room temperature for up to 3 days, or refrigerate for 5 to 7 days; for long term storage, freeze without chocolate and thaw before serving.
- Occasion ideas: Perfect for Easter gatherings, family brunches, cookie exchanges, and school treats where nut use is acceptable and expected.
FAQ
Conclusion
Hoppy Cottontails Cookies combine toasted coconut chew and buttery pecan shortbread into an approachable, festive selection that shines for spring celebrations and everyday treats. Try them because they are forgiving, quick to assemble, and easily customized to suit taste or occasion. Whether you dip them in chocolate, dust them with powdered sugar, or keep them plain for a rustic finish, these cookies reward simple techniques with delightful texture and flavor, making them a dependable favorite whenever you need a sweet springtime offering.

Hoppy Cottontails Cookies
Equipment
- Oven
- Baking Sheet
- Parchment Paper
- Cookie Scoop
- Mixing Bowl
- Hand Mixer
- Cooling rack
- Mini food processor
- Silpat liner
Ingredients
- 2/3 cup all-purpose flour Provide structure and lightness to the dough, helping cookies hold their shape while contributing a tender crumb when mixed properly.
- 5 -1/2 cups sweetened coconut flakes Add abundant sweet, chewy texture and tropical flavor, giving the cookies chewiness and visible coconut flakes throughout the bite.
- 1 can (14 oz.) sweetened condensed milk full-fat (NOT evaporated milk) Bind ingredients together with rich sweetness and moisture, creating a fudgy interior that helps the coconut mixture set as it bakes.
- 1/4 teaspoon fine sea salt Enhance overall flavor by balancing sweetness and bringing out other ingredients; a small pinch prevents the cookies from tasting flat.
- 1/2 tablespoon vanilla extract (or 1 teaspoon vanilla bean paste) Impart warm aromatic notes and depth, rounding out sweetness and enhancing the cookie’s overall flavor profile when mixed into the dough.
- 1 -1/2 cups chocolate chips milk, semi-sweet, or dark chocolate; + 1 teaspoon coconut or vegetable oil; optional Melt into a glossy coating that adds chocolate richness and snap; oil optional to thin the chocolate and improve shine and coating coverage.
- 1/3 cup pecan halves Provide crunchy texture contrast and nutty flavor, adding toasted depth and a pleasant bite when folded or pressed into cookie portions.
- 1 cup unsalted butter Contribute rich fat and flavor to the base, creating tender, flaky layers while promoting browning and a melt-in-mouth texture in the cookie dough.
- 3/4 cup powdered sugar Sweeten and lightly thicken the butter mixture, yielding a smooth, fine texture that helps incorporate air for a delicate cookie crumb.
- 1/2 teaspoon fine sea salt Season and balance sweetness in the dough or coating, sharpening flavors and preventing the final cookies from tasting overly sweet.
- 2 teaspoons vanilla extract Add aromatic sweetness and enhance other flavors, providing a rounded vanilla backbone that complements the coconut and chocolate components.
- 1 -3/4 cups all-purpose flour Supply bulk and structure to the dough, interacting with fats and liquids to create a cohesive batter and determine cookie density.
- 1 tablespoon cornstarch Lighten the texture by tenderizing the final crumb, helping to prevent toughness and contributing a subtle silkiness to the bite.
- Powdered sugar for coating the cookies Coat finished cookies with a sweet, snowy finish that adds visual appeal, a delicate extra sweetness, and a slight melt-on-the-tongue surface.
Instructions
- PREP: Preheat oven to 350 degrees F. Line two large trays with parchment paper or a Silpat liner and set aside.: Preheat oven to 350 degrees F. Line two large trays with parchment paper or a Silpat liner and set aside. : The smell of the oven warming and the faint warmth from the preheated pans primes the cookies to bake evenly, and lining the trays prevents sticking and promotes even browning. You'll hear a quiet hum from the oven as it stabilizes at temperature, which is your cue to finish mixing and scooping. A common mistake here is not preheating long enough, which leads to uneven bake times and underdeveloped color on the cookies, so wait until the oven indicates readiness before baking.
- COCONUT MACAROONS: In a very large bowl, add in the sweetened coconut flakes, flour, vanilla, and salt. Scoop out every bit of the sweetened condensed milk into the bowl. Use hand mixers to beat ingredients until just combined; do not overmix. Use a large cookie scoop (1-1/2 tablespoons in size) to get about golf ball-sized compressed (press into the cookie scoop) cookies.: In a very large bowl, add in the sweetened coconut flakes, flour, vanilla, and salt. Scoop out every bit of the sweetened condensed milk into the bowl. Use hand mixers to beat ingredients until just combined; do not overmix. Use a large cookie scoop (1-1/2 tablespoons in size) to get about golf ball-sized compressed (press into the cookie scoop) cookies. : When you mix these ingredients the aroma of vanilla will bloom and the coconut will look glossy as the condensed milk is fully incorporated, signaling proper moisture distribution. You want the mixture to be cohesive but not soupy, because overmixing breaks down the texture and yields dense cookies. The correct visual cue is a slightly mounded scoop that holds together when pressed. One common error is overpacking the scoop, which makes the cookies too dense; instead compress just enough for them to hold shape.
- The cookie scoop will get sticky and need to be washed a few times in the process. I also like to spray it with nonstick spray or use another spoon to help coax it out of the cookie scoop. You can leave the cookies as is right out of the scoop (for a more rustic appearance) or quickly roll them with your hands for a nicer appearance.: Handling sticky dough engages your senses, you will feel tackiness and see glossy spots where condensed milk peeks through, and a light spray on the scoop helps release shapes cleanly. Rolling by hand will warm the dough slightly and smooth the exterior, giving a polished look, while leaving them rough keeps them charmingly homespun. Avoid overworking the dough with warm hands for too long, because excess heat can make the cookies lose shape when baked.
- BAKE: Place cookies on the prepared sheet pans, 1 inch apart. Bake for 11 to 14 minutes or until coconut is lightly toasted on top and bottoms are a very light brown. Don't overbake! Remove and allow to cool on the pan for 5 minutes before gently moving them with a metal spatula to a cooling rack.: Place cookies on the prepared sheet pans, 1 inch apart. Bake for 11 to 14 minutes or until coconut is lightly toasted on top and bottoms are a very light brown. Don't overbake! Remove and allow to cool on the pan for 5 minutes before gently moving them with a metal spatula to a cooling rack. : As they bake you'll notice a toasty coconut aroma and the tops will acquire tiny golden flecks while the edges firm slightly, these are signs of doneness. The sound is quiet, but visually the change from pale to lightly toasted is unmistakable. Leaving them on the hot pan for a few minutes lets residual heat finish the set up without drying them out. A frequent slip up is leaving them until deeply brown, which dries the interior, so pull them when the color is just right.
- OPTIONAL CHOCOLATE: If you want to dip these in chocolate, wait for the cookies to fully cool. Then add the chocolate chips and coconut oil to a microwave-safe bowl and microwave in bursts of 20 seconds, stirring in between bursts for 20-25 seconds until the chocolate is melted and smooth. Remember, chocolate is melting even outside of the microwave, so stir for a while to ensure it doesn't get burned. Transfer about 1/4 cup (just eyeball it) of melted chocolate to a plastic bag. Seal the bag without air in it and set aside.: If you want to dip these in chocolate, wait for the cookies to fully cool. Then add the chocolate chips and coconut oil to a microwave-safe bowl and microwave in bursts of 20 seconds, stirring in between bursts for 20-25 seconds until the chocolate is melted and smooth. Remember, chocolate is melting even outside of the microwave, so stir for a while to ensure it doesn't get burned. Transfer about 1/4 cup (just eyeball it) of melted chocolate to a plastic bag. Seal the bag without air in it and set aside. : When melting the chocolate you'll see it transform from glossy chips to a silky ribbon that falls off the spoon, and the faint toasted chocolate scent will become prominent. Adding the oil thins the chocolate for smoother dipping and shine. Be patient with stirring, because overheated chocolate can seize, turning grainy; if that happens, a small splash of warm oil can help rescue it.
- DIP: Generously dip the bases of the cooled cookies in the remaining melted chocolate; then transfer dipped cookies back to your parchment paper-lined trays. Use scissors to cut a tiny tip off the bag with the remaining melted chocolate; drizzle that chocolate over the cookies. Allow to set up at room temperature.: Generously dip the bases of the cooled cookies in the remaining melted chocolate; then transfer dipped cookies back to your parchment paper-lined trays. Use scissors to cut a tiny tip off the bag with the remaining melted chocolate; drizzle that chocolate over the cookies. Allow to set up at room temperature. : Dipping creates a glossy contrast and a satisfying snap when the chocolate firms, and the scent of rich chocolate paired with toasted coconut is a highlight. Drizzling adds a pretty finish and textural interest. A common pitfall is attempting to dip warm cookies, which melts the chocolate unevenly and can ruin the crisp finish, so confirm the cookies are fully cooled.
- STORAGE: These cookies will stay fresh, tightly covered, at room temperature for up to 3 days, or in an air-tight container in the fridge for 5-7 days. We like these cookies best within 1-2 days of being made. These cookies freeze and defrost really well without the chocolate!: These cookies will stay fresh, tightly covered, at room temperature for up to 3 days, or in an air-tight container in the fridge for 5-7 days. We like these cookies best within 1-2 days of being made. These cookies freeze and defrost really well without the chocolate! : Stored properly you'll preserve the chew and prevent the toasted coconut from going stale, and the scent will remain pleasantly coconut forward. If you freeze them, wrap tightly to avoid freezer burn, and thaw at room temperature to avoid condensation forming on the chocolate. One mistake is storing them in a humid spot, which will make them lose crispness quickly.
- TOAST PECANS: Preheat the oven to 350 degrees F. Spread the pecans in an even layer on a sheet pan. Bake for 5-7 minutes or until they smell fragrant. Watch carefully to avoid burning. Remove and allow to completely cool before transferring them to a mini food processor or cutting board. Pulse or finely chop into very small pieces. Avoid over-pulsing in the food processor or you'll end up with pecan butter.: Preheat the oven to 350 degrees F. Spread the pecans in an even layer on a sheet pan. Bake for 5-7 minutes or until they smell fragrant. Watch carefully to avoid burning. Remove and allow to completely cool before transferring them to a mini food processor or cutting board. Pulse or finely chop into very small pieces. Avoid over-pulsing in the food processor or you'll end up with pecan butter. : When toasting you'll notice the aroma deepen and the nuts darken slightly, these cues indicate peak toasty flavor. Cooling is essential so the heat does not melt butter in the dough or alter texture. Overprocessing in the food processor is the usual mistake, so pulse gently until you reach small pieces rather than a paste.
- WET INGREDIENTS: In a bowl of a stand mixer with the whisk attachment or a large bowl (and using a hand mixer), combine butter and 3/4 cup powdered sugar. Cream together until smooth and creamy, about 3-4 minutes. Add in the vanilla, salt, cornstarch, and pulsed/chopped pecans. Beat until smooth and combined. Add in the flour and mix until combined and smooth. It will seem sandy and crumbly at first, but keep mixing; it will come together. Once combined, do not overmix.: In a bowl of a stand mixer with the whisk attachment or a large bowl (and using a hand mixer), combine butter and 3/4 cup powdered sugar. Cream together until smooth and creamy, about 3-4 minutes. Add in the vanilla, salt, cornstarch, and pulsed/chopped pecans. Beat until smooth and combined. Add in the flour and mix until combined and smooth. It will seem sandy and crumbly at first, but keep mixing; it will come together. Once combined, do not overmix. : Creaming until smooth introduces air that lightens the dough, and you will see a paler, fluffier mixture form as the sugar integrates into the butter. Adding the dry ingredients will create a crumbly texture initially, the proper cue is when it comes together into a coherent dough. Overmixing after the flour is added can develop gluten and toughen the cookies, which is a common misstep.
- CHILL: Wrap the dough in plastic wrap and refrigerate for 1 to 2 hours to chill.: Wrap the dough in plastic wrap and refrigerate for 1 to 2 hours to chill. : Chilling firms the fat, making the dough easier to portion and preventing excessive spreading during baking, and you will feel a firmer texture after refrigeration. It also helps the flavors meld and the cornstarch produce that tender crumb. A typical error is under chilling, which leads to flat, misshapen cookies, so be patient and give it the full rest.
- BAKE: Once chilled, measure out cookie dough using a 1 tablespoon measuring spoon (each ball should be exactly 1 tablespoon). If the dough gets too warm, put the dough in the freezer for 10-15 minutes. Preheat the oven to 375 degrees F. Line a light-colored sheet pan with a Silpat liner. Bake for 7-11 minutes (mine take 10 minutes). It's okay if some of the cookies bleed out on the edges and turn brown; this crumbles off easily when ready to roll in powdered sugar). Remove from the oven, let stand on tray for 3-5 minutes and then transfer to a wire cooling rack. Let cool for 2-3 minutes.: Once chilled, measure out cookie dough using a 1 tablespoon measuring spoon (each ball should be exactly 1 tablespoon). If the dough gets too warm, put the dough in the freezer for 10-15 minutes. Preheat the oven to 375 degrees F. Line a light-colored sheet pan with a Silpat liner. Bake for 7-11 minutes (mine take 10 minutes). It's okay if some of the cookies bleed out on the edges and turn brown; this crumbles off easily when ready to roll in powdered sugar). Remove from the oven, let stand on tray for 3-5 minutes and then transfer to a wire cooling rack. Let cool for 2-3 minutes. : As these shortbread style cookies bake you'll notice gentle spreading and a faint golden rim, and the aroma of toasted pecans and butter will increase. The slightly warm cookies are ideal for rolling in sugar because the coating adheres without dissolving. Overbaking leads to a hard texture, so aim for pale edges and a short time in the oven for a tender interior.
- POWDERED SUGAR: Add powdered sugar to a bowl (I start with 1 cup, but you may need slightly more). Roll the still-warm cookie in the powdered sugar and then return to the wire cooling rack. Let cool down a few more minutes, and then roll in the powdered sugar again.: Add powdered sugar to a bowl (I start with 1 cup, but you may need slightly more). Roll the still-warm cookie in the powdered sugar and then return to the wire cooling rack. Let cool down a few more minutes, and then roll in the powdered sugar again. : Rolling while warm gives a crackled, snow dusted appearance as the sugar clings to the surface, and the contrast between warm cookie and cool sugar creates a lovely mouthfeel. If you wait until the cookie is completely cold the sugar will not adhere as nicely. A common mistake is using too little sugar initially, requiring awkward re coating later, so be generous the first time.
- STORAGE: Store in an airtight container at room temperature. Re-roll in additional powdered sugar as needed. Best enjoyed within 1-3 days.: Store in an airtight container at room temperature. Re-roll in additional powdered sugar as needed. Best enjoyed within 1-3 days. : Proper storage keeps the powdered sugar looking fresh and the cookies tender, and you'll notice the texture remains pleasant for a few days. If moisture accumulates, replace the layer of sugar to refresh appearance. One error is stacking warm cookies, which traps steam and softens their exteriors, so always cool completely before storing.
Notes
- Swap chocolate types: Use milk, semi-sweet, or dark chocolate depending on preferred sweetness; darker chocolate tones down overall sugar while milk chocolate adds a creamy finish.
- Adjust coconut texture: For a chewier bite, choose larger sweetened coconut flakes, or for a finer crumb, pulse them briefly in a food processor.
- Nut adaptation: Replace pecan halves with toasted walnuts for a slightly earthier flavor, keeping the same toasting time and care to avoid burning.
- Make them gluten free: Substitute a 1-to-1 gluten free flour blend for the all-purpose flour in both recipes, and chill the dough a bit longer to help it hold shape.
- Freeze for later: Freeze baked cookies without chocolate in a single layer on a tray, then transfer to an airtight container; thaw at room temperature for best texture.
- Presentation upgrade: Dip bases in melted chocolate and finish with a dusting of extra powdered sugar or finely chopped toasted nuts for visual contrast.