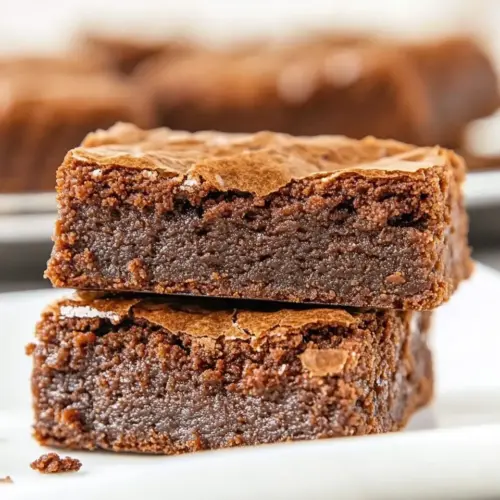
Hersheys Best Brownies
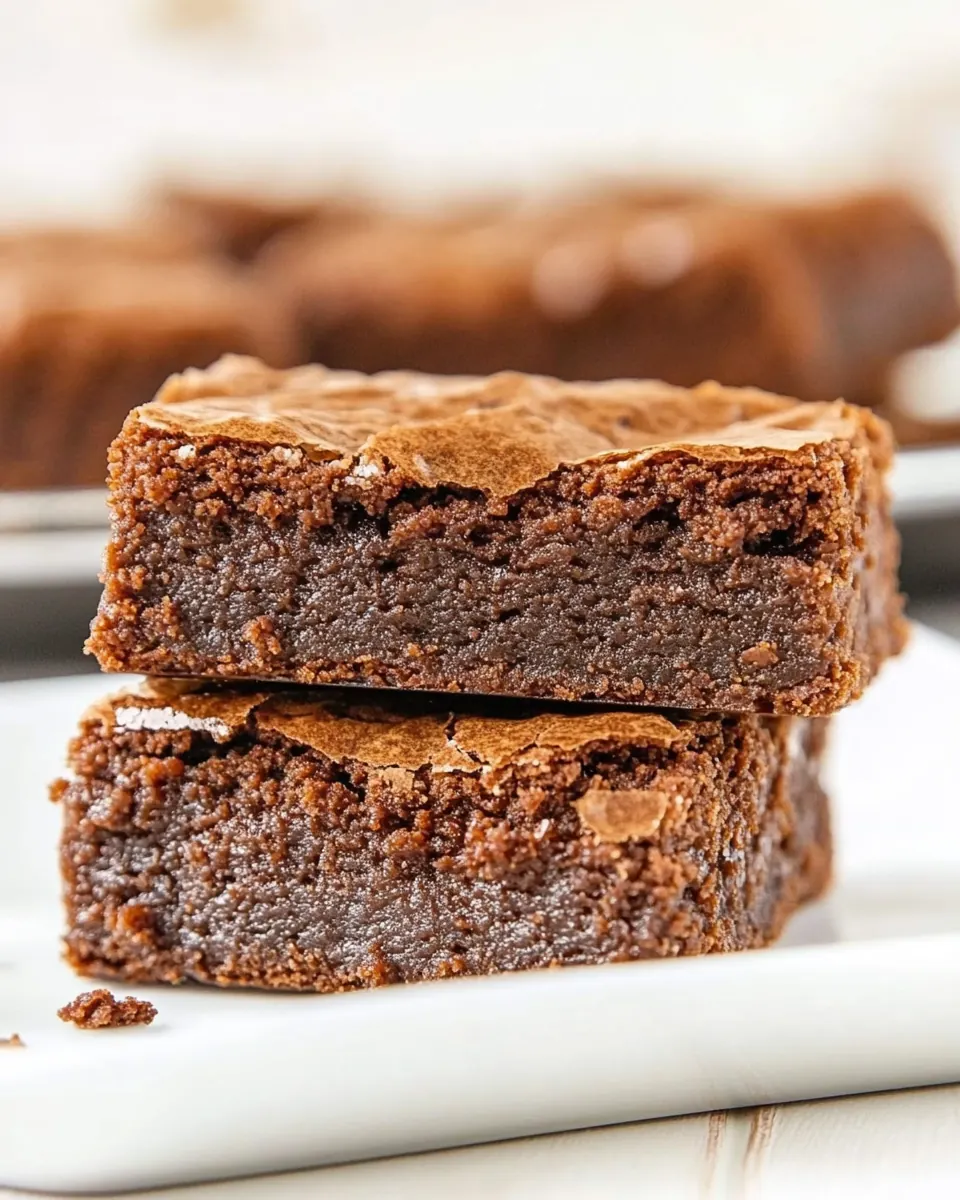
Hersheys Best Brownies have been my comfort go to since college, a simple pan of chocolate that kept weekends feeling like a tiny celebration. The first sentence always tastes the same to me, warm, slightly crackly top giving way to a fudgy center that clings to the teeth just enough to be worth the indulgence. I remember carrying a tin of these to a dorm potluck once, and the way people leaned in for seconds taught me the quiet power of a well made brownie.
I usually make these when the week feels long and I want a small ritual of rhythm and reward. Melting the unsalted butter until it shimmers, stirring in the granulated sugar until it glints, and folding in the dry all-purpose flour—each action is a tiny promise of the finished treat. I like the ritual of lining a pan with parchment, the confident scrape of batter into corners, the comforting hum of the oven starting its work.
Recipe Snapshot
40 mins
15 mins
25 mins
Easy
200 kcal
American
Gluten-Free, Low FODMAP
Desserts
9-inch square baking pan, Parchment paper, Mixing bowl, Wooden spoon, Wire rack
Why This Hersheys Best Brownies Works
Reliable Texture Every Time
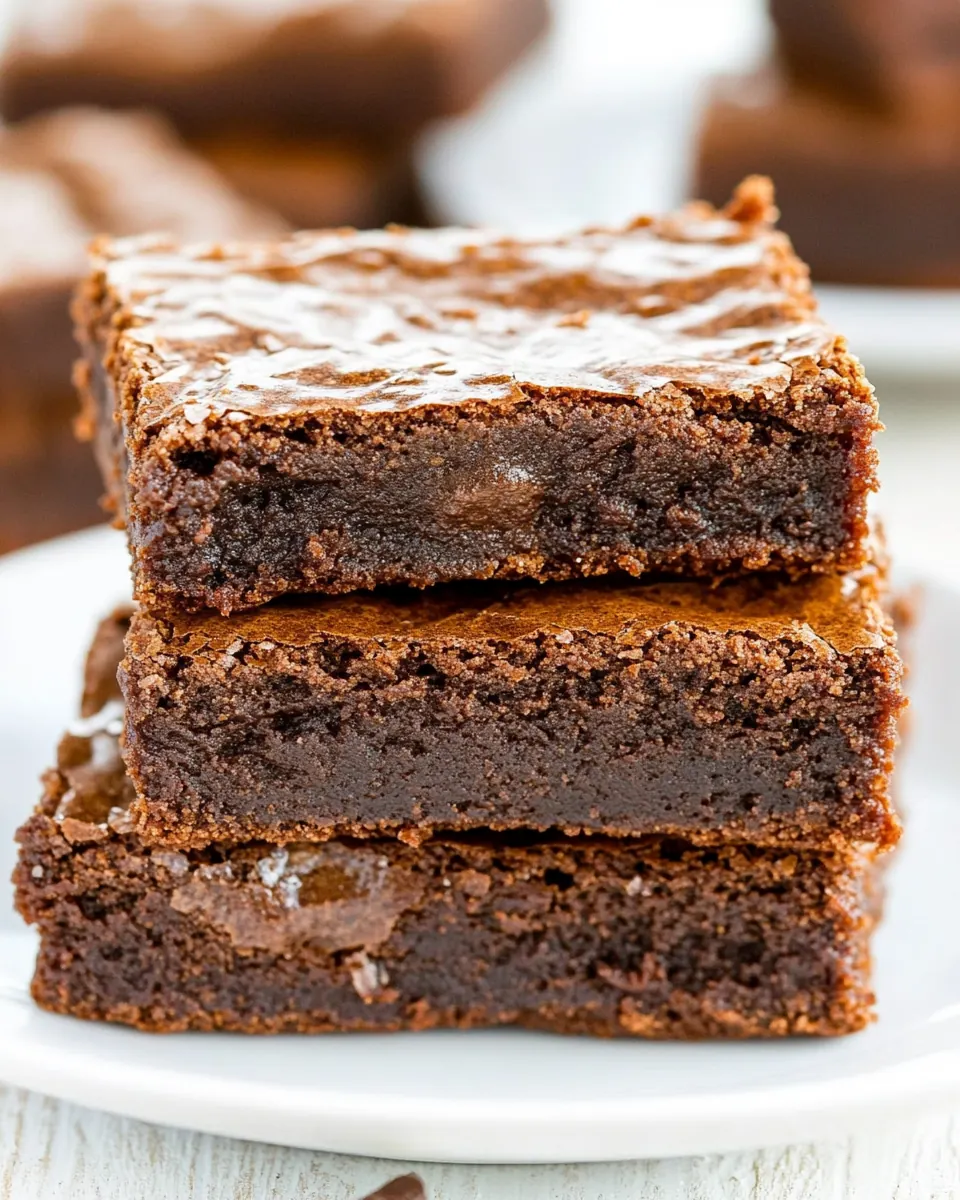
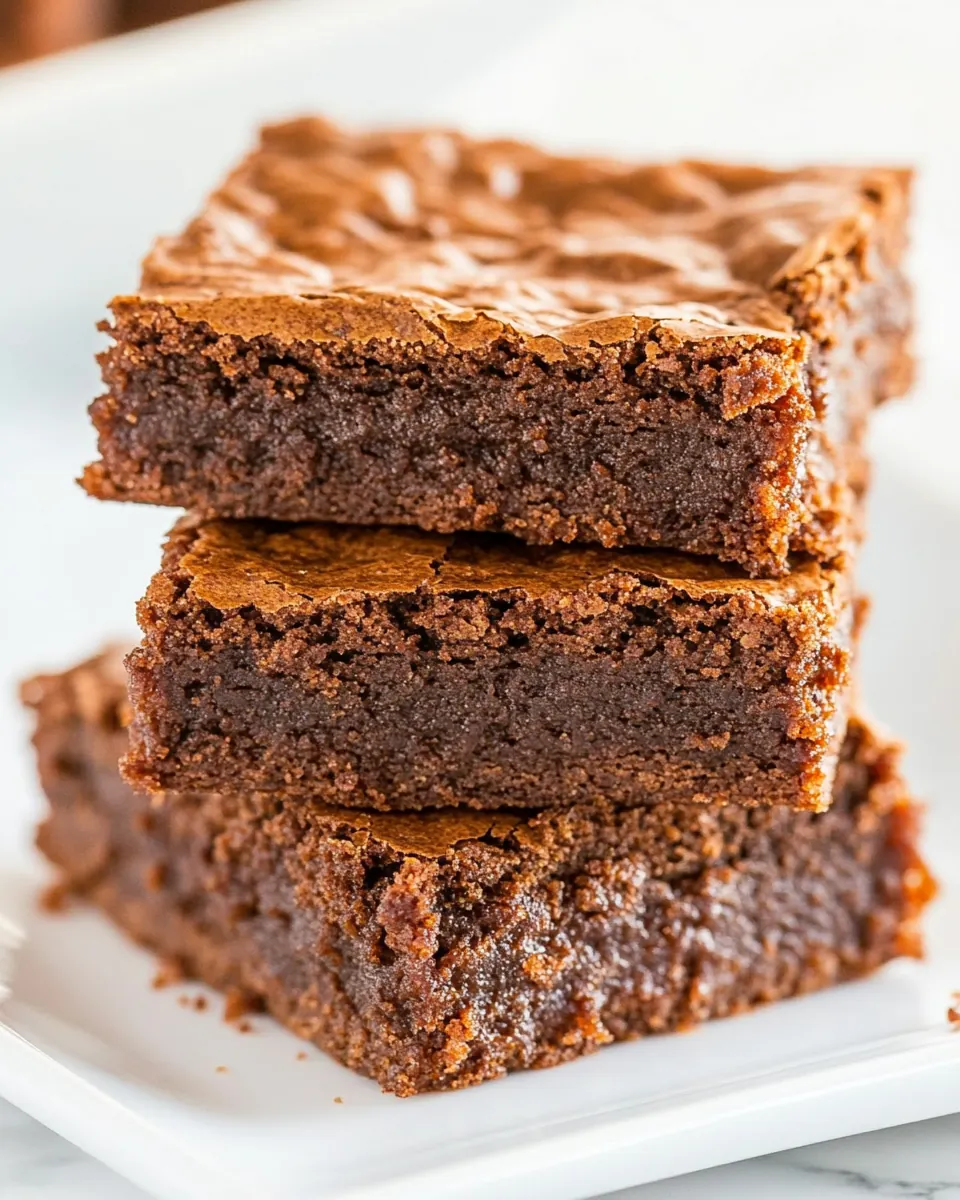
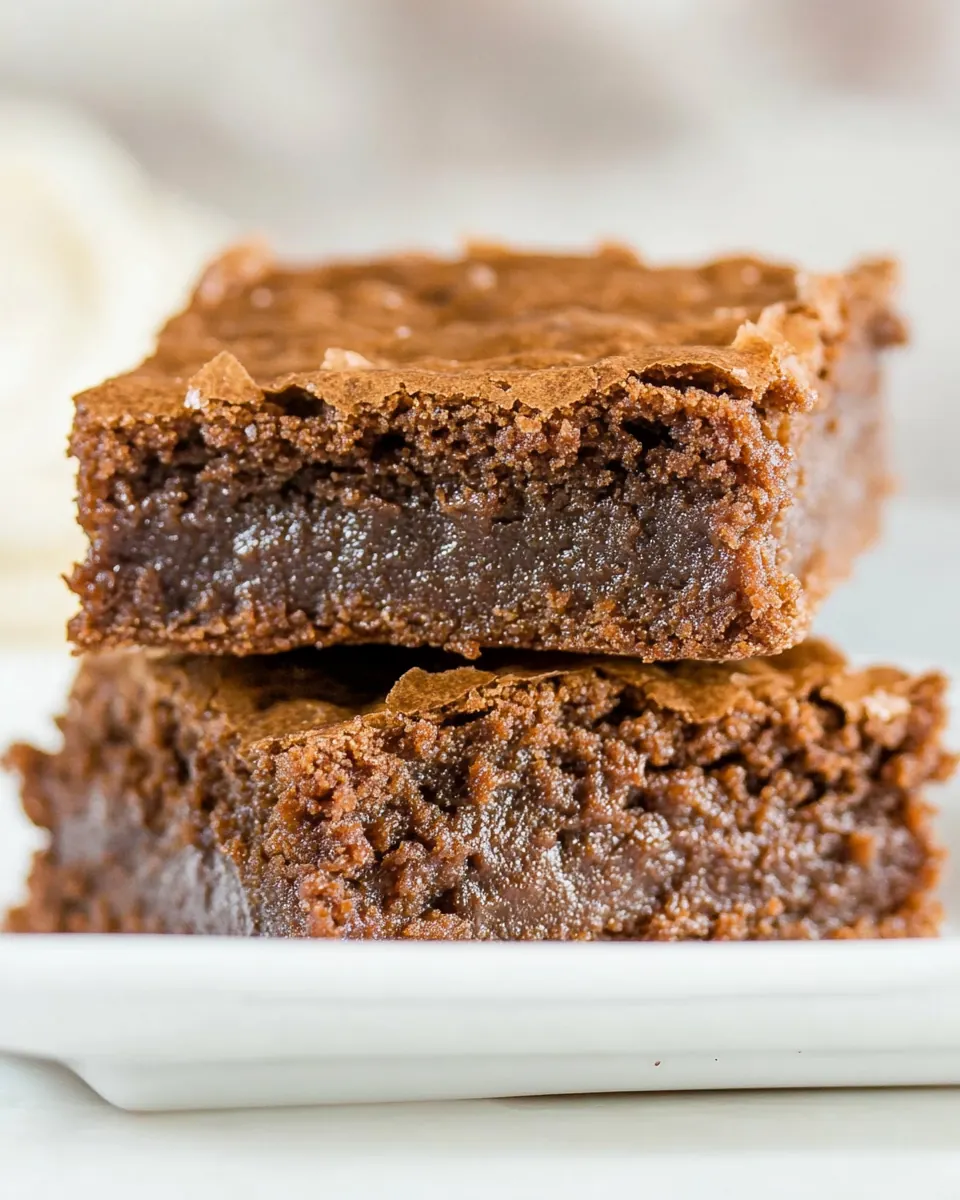
I love how Hersheys Best Brownies deliver that perfect fudgy crumb without fuss. Because the batter is balanced between melted butter, eggs, and a modest amount of flour, you get a dense, moist interior rather than a cakey square. I’ve baked these at different altitudes and small tweaks still preserve the texture, so they become my fallback when I need predictability.
Simple Ingredients, Big Flavor
These brownies shine because they rely on a few strong players such as unsweetened cocoa powder and granulated sugar. I appreciate recipes that do more with less, and this one leans on quality proportions instead of fancy add ins. The result is clean chocolate flavor that feels indulgent without being overcomplicated.
Quick and Approachable
I often make these on a weekday evening when I want something comforting, but I don’t want a marathon of steps. The method is straightforward, which makes it welcoming for newer bakers. From mixing to pan to oven it moves quickly, so you get that satisfying smell of chocolate filling your kitchen in almost no time.
Versatile Serving Options
Whether I keep them plain, tuck them into a lunch box, or dress them up with a dusting of powdered sugar, Hersheys Best Brownies adapt to the moment. They pair easily with a hot beverage or a scoop of ice cream if I’m celebrating something small. The optional chopped nuts give texture for people who like a little crunch.
Friendly for Storage and Sharing
I’m a fan of recipes that travel well. These brownies store at room temperature for several days and maintain their appeal, which makes them perfect for potlucks or for keeping on hand as an afternoon pick me up. I’ll often cut them into squares once cooled and stack them in an airtight container for grab and go moments.
Ingredients Required for Hersheys Best Brownies
The philosophy behind these ingredients is elegant simplicity. A handful of pantry staples come together to create depth and texture: unsweetened cocoa powder brings chocolate intensity, granulated sugar balances bitterness and creates a tender crumb, while unsalted butter and eggs provide richness and structure. The optional chopped nuts add contrast, but the recipe stands strong without them.
- 1/2 cup (113 g) unsalted butter, melted: Melted to provide rich fat and shine, contributes moisture and helps create a tender crumb while carrying flavor throughout the batter; cool slightly before mixing with sugar and eggs to avoid curdling and ensure even incorporation.
- 1 cup (198 g) granulated sugar: Granulated to sweeten the brownies and assist in structure by dissolving into the butter and eggs, creating a proper balance of sweetness and texture; creaming with melted butter helps dissolve sugar for a glossy, fudgy result.
- 1 teaspoon vanilla extract: Aromatic to enhance and deepen chocolate flavor, provides a warm, rounded background note that complements cocoa without overpowering; add with the eggs or batter for even distribution of flavor.
- 2 eggs: Beaten to bind ingredients, add moisture, and contribute to structure and lift through coagulation of proteins during baking; beat briefly with sugar to incorporate air without making the brownies cakey.
- 1/2 cup (71 g) all-purpose flour: All-purpose to provide the necessary gluten for structure and chew, used sparingly here to keep the texture dense and fudgy rather than cakey; sift or whisk with cocoa and leavening for even distribution.
- 1/3 cup (28 g) unsweetened cocoa powder: Unsweetened to deliver concentrated chocolate flavor and color while contributing minimal fat, intensifying the overall chocolate profile; whisk with flour and other dry ingredients to avoid lumps and ensure even chocolate taste.
- 1/4 teaspoon (0.25 teaspoon) baking powder: Leavening to offer a slight lift that counterbalances density, producing a subtle rise without turning the brownies cake-like; measure precisely to maintain the intended fudgy texture.
- 1/4 teaspoon (0.25 teaspoon) salt: Seasoning to enhance overall flavor balance, suppress bitterness and highlight sweetness and chocolate nuances; dissolve with the dry ingredients to distribute evenly throughout the batter.
- 1/2 cup (57 g) chopped nuts () (optional): Optional to add crunch, nutty flavor, and textural contrast, can be toasted beforehand for deeper flavor and stirred into the batter or sprinkled on top before baking for visual appeal.
How to Assemble Hersheys Best Brownies
These directions are straightforward, and I like to approach them calmly to maximize the small sensory wins along the way. Take a moment to ready your pan and ingredients, because small preparations make the baking run smoothly.
- Preheat oven to 350 degrees F. Grease a 9-inch square baking pan and line with parchment paper or foil (for easy removal, if desired).: The warm smell as your oven reaches 350 degrees F cues you that the baking environment is ready, and the gentle preheat hum is satisfying. Greasing and lining the pan prevents sticking and makes lifting the finished squares simple, which helps preserve the glossy crackled top when you slice. Avoid skipping the lining if you want clean edges, because cutting brownies directly from an unlined pan often leads to ragged pieces and can tear the crust.
- In a medium bowl, stir together the butter, sugar and vanilla with a wooden spoon. Add the eggs and beat well with the spoon. Add the flour, cocoa powder, baking powder and salt and stir gently until well blended. Stir in the nuts, if using. Spread the batter evenly into the prepared pan.: When you mix melted butter with granulated sugar , the texture becomes slightly syrupy and the surface reflects light, a visual hint that the sugar is starting to meld. The aroma at this point is warm and vaguely caramel like, which is inviting. Use a wooden spoon for control, and be careful not to over stir which could incorporate air and lighten the final texture.
- Bake for 20 to 25 minutes, or until brownies begin to pull away from sides of the pan and a toothpick inserted in the center comes out with moist crumbs attached. Cool completely in the pan on wire rack. Cut into squares and serve. (If you used parchment paper or foil, use that to lift the brownies out and cut on a cutting board.) The brownies can be stored in an airtight container at room temperature for up to 4 days.: As you add the eggs , the mixture will thicken and become glossy, and you may notice a gentle ribbon forming as you stir. This emulsion is crucial for structure, so mix until just blended for an even crumb. Overbeating here can whip in air, yielding a cakier result rather than a dense, fudgy interior.
- Add the flour, cocoa powder, baking powder and salt and stir gently until well blended: The moment you fold in all-purpose flour and unsweetened cocoa powder , the batter darkens and develops a matte sheen. Stir gently to avoid activating too much gluten, which would toughen the brownies. Look for streak free batter, and stop as soon as it is combined. A common error is vigorous mixing that yields a drier, more crumbly texture.
- Stir in the nuts, if using: Folding in the chopped nuts introduces a crunchy contrast that you can hear as they clink in the bowl, and they toast slightly during baking to deepen flavor. Make sure pieces are evenly distributed so every square has a bit of texture. Avoid overloading the batter with nuts, because that can interfere with the fudgy structure you are aiming for.
- Spread the batter evenly into the prepared pan: As you spread the batter into the lined 9-inch square pan , the surface should be glossy and even, with the spoon or spatula leaving light trails. An even thickness ensures uniform baking and consistent texture from edge to center. If the batter pools high in corners, gently nudge it to level, because uneven batter produces overcooked edges and an undercooked middle.
- Bake for 20 to 25 minutes: During baking you will notice a sweet, chocolate aroma filling the kitchen, and the top will form a shiny, slightly crackled crust. Check at about 20 minutes using a toothpick inserted in the center it should come out with moist crumbs attached, indicating fudgy doneness. A common mistake is overbaking until the toothpick comes out clean, which will dry the brownies and remove that gooey core you want.
- Cool completely in the pan on wire rack: Cooling on a wire rack lets air circulate around the pan so the brownies set evenly and the interior firms up without becoming dry. The cooling period also helps the flavors meld and the texture stabilize, making slicing neater. Cutting too soon often causes the brownies to fall apart, so be patient and allow them to reach room temperature.
- Cut into squares and serve: Once cooled, lift the brownies using the parchment or foil overhang if you used it, then cut on a board for clean edges. The first cut yields a satisfying resistance followed by a soft center, and the aroma is strongest immediately after slicing. A common pitfall is using a serrated knife that tears the top, so use a sharp chef knife and clean it between cuts for tidy squares.
- Store in an airtight container at room temperature for up to 4 days: Stored properly the brownies remain moist and enjoyable, and the flavor actually deepens a touch after a day. Keep them away from direct sunlight and strong odors, as chocolate absorbs nearby scents. Avoid refrigeration which can change the texture and make them firmer than intended.
Substitutions and Tips
Below are practical tips and notes expanded from the recipe notes, written so you can personalize the baking to your taste. I include clear guidelines for texture and timing so you can choose fudgy or a bit thicker squares with confidence.
- Thicker brownies option: If you prefer thicker brownies, use an 8×8 inch pan instead of a 9×9 inch and increase the baking time by a couple of minutes. This concentrates the batter and yields deeper squares. Keep an eye on the toothpick test to prevent overbaking.
- Nut variation guidance: The recipe calls for chopped nuts as optional, and if you include them, toast them briefly beforehand for extra flavor. Chop uniformly so they distribute evenly. Avoid oversized pieces that skew texture in individual bites.
- Mixing caution: Stir gently when adding the dry ingredients to prevent over development of gluten, which would make brownies more cake like. Fold until streaks disappear rather than vigorous beating.
- Pan prep tip: Line the pan with parchment or foil for easy removal and cleaner edges, and lightly grease the liner so the top does not stick when lifted out. This preserves the shiny crust when you slice.
- Storage advice: Store brownies in an airtight container at room temperature for up to four days to retain moisture. If you want to freeze, wrap tightly and freeze for up to two months, thaw slowly at room temperature before serving.
What to Serve With Hersheys Best Brownies
These brownies are versatile and pair well with many serving styles and occasions. I like to describe options so you can match the mood, whether cozy weeknight treat or small celebration dessert.
- Classic scoop pairing: A scoop of vanilla ice cream softens the intensity of chocolate and creates a hot cold contrast, perfect for an indulgent dessert.
- Simple dusting: A light dusting of powdered sugar or cocoa makes brownies look refined for casual gatherings or lunch boxes without changing the taste profile.
- Serve for celebrations: Cut into small squares for party platters, they are ideal for birthdays, potlucks, or holiday trays where guests can sample multiple treats.
- Everyday snack: Pair a square with a warm beverage for an afternoon pick me up, making it a comforting component of a quiet break or study session.
- Storage and make ahead: These keep well in an airtight container at room temperature for up to four days, so bake ahead for ease during busy hosting days.
- Seasonal serving note: They suit year round menus, and their simple chocolate profile makes them easy to dress up for special occasions with toppings like a sprinkle of sea salt or a drizzle of chocolate if desired.
FAQ
Conclusion
These brownies shine because they combine simple pantry ingredients into a reliably fudgy, chocolatey square that feels special without fuss. I encourage you to try this recipe when you want a quick win in the kitchen, especially on busy evenings or when sharing with friends. The method is forgiving, the ingredients are straightforward, and the outcome rewards patience with a glossy top and tender center. Make a batch, savor the aroma while they bake, and enjoy the small ritual of cutting warm squares to share.
Hersheys Best Brownies
Equipment
- 9-inch square baking pan
- Parchment Paper
- Mixing Bowl
- Wooden Spoon
- Wire Rack
Ingredients
- 1/2 cup (113 g) unsalted butter, melted Melted to provide rich fat and shine, contributes moisture and helps create a tender crumb while carrying flavor throughout the batter; cool slightly before mixing with sugar and eggs to avoid curdling and ensure even incorporation.
- 1 cup (198 g) granulated sugar Granulated to sweeten the brownies and assist in structure by dissolving into the butter and eggs, creating a proper balance of sweetness and texture; creaming with melted butter helps dissolve sugar for a glossy, fudgy result.
- 1 teaspoon vanilla extract Aromatic to enhance and deepen chocolate flavor, provides a warm, rounded background note that complements cocoa without overpowering; add with the eggs or batter for even distribution of flavor.
- 2 eggs Beaten to bind ingredients, add moisture, and contribute to structure and lift through coagulation of proteins during baking; beat briefly with sugar to incorporate air without making the brownies cakey.
- 1/2 cup (71 g) all-purpose flour All-purpose to provide the necessary gluten for structure and chew, used sparingly here to keep the texture dense and fudgy rather than cakey; sift or whisk with cocoa and leavening for even distribution.
- 1/3 cup (28 g) unsweetened cocoa powder Unsweetened to deliver concentrated chocolate flavor and color while contributing minimal fat, intensifying the overall chocolate profile; whisk with flour and other dry ingredients to avoid lumps and ensure even chocolate taste.
- 1/4 teaspoon (0.25 teaspoon) baking powder Leavening to offer a slight lift that counterbalances density, producing a subtle rise without turning the brownies cake-like; measure precisely to maintain the intended fudgy texture.
- 1/4 teaspoon (0.25 teaspoon) salt Seasoning to enhance overall flavor balance, suppress bitterness and highlight sweetness and chocolate nuances; dissolve with the dry ingredients to distribute evenly throughout the batter.
- 1/2 cup (57 g) chopped nuts (optional) Optional to add crunch, nutty flavor, and textural contrast, can be toasted beforehand for deeper flavor and stirred into the batter or sprinkled on top before baking for visual appeal.
Instructions
- Preheat oven to 350 degrees F. Grease a 9-inch square baking pan and line with parchment paper or foil (for easy removal, if desired).: The warm smell as your oven reaches 350 degrees F cues you that the baking environment is ready, and the gentle preheat hum is satisfying. Greasing and lining the pan prevents sticking and makes lifting the finished squares simple, which helps preserve the glossy crackled top when you slice. Avoid skipping the lining if you want clean edges, because cutting brownies directly from an unlined pan often leads to ragged pieces and can tear the crust.
- In a medium bowl, stir together the butter, sugar and vanilla with a wooden spoon. Add the eggs and beat well with the spoon. Add the flour, cocoa powder, baking powder and salt and stir gently until well blended. Stir in the nuts, if using. Spread the batter evenly into the prepared pan.: When you mix melted butter with granulated sugar , the texture becomes slightly syrupy and the surface reflects light, a visual hint that the sugar is starting to meld. The aroma at this point is warm and vaguely caramel like, which is inviting. Use a wooden spoon for control, and be careful not to over stir which could incorporate air and lighten the final texture.
- Bake for 20 to 25 minutes, or until brownies begin to pull away from sides of the pan and a toothpick inserted in the center comes out with moist crumbs attached. Cool completely in the pan on wire rack. Cut into squares and serve. (If you used parchment paper or foil, use that to lift the brownies out and cut on a cutting board.) The brownies can be stored in an airtight container at room temperature for up to 4 days.: As you add the eggs , the mixture will thicken and become glossy, and you may notice a gentle ribbon forming as you stir. This emulsion is crucial for structure, so mix until just blended for an even crumb. Overbeating here can whip in air, yielding a cakier result rather than a dense, fudgy interior.
- Add the flour, cocoa powder, baking powder and salt and stir gently until well blended: The moment you fold in all-purpose flour and unsweetened cocoa powder , the batter darkens and develops a matte sheen. Stir gently to avoid activating too much gluten, which would toughen the brownies. Look for streak free batter, and stop as soon as it is combined. A common error is vigorous mixing that yields a drier, more crumbly texture.
- Stir in the nuts, if using: Folding in the chopped nuts introduces a crunchy contrast that you can hear as they clink in the bowl, and they toast slightly during baking to deepen flavor. Make sure pieces are evenly distributed so every square has a bit of texture. Avoid overloading the batter with nuts, because that can interfere with the fudgy structure you are aiming for.
- Spread the batter evenly into the prepared pan: As you spread the batter into the lined 9-inch square pan , the surface should be glossy and even, with the spoon or spatula leaving light trails. An even thickness ensures uniform baking and consistent texture from edge to center. If the batter pools high in corners, gently nudge it to level, because uneven batter produces overcooked edges and an undercooked middle.
- Bake for 20 to 25 minutes: During baking you will notice a sweet, chocolate aroma filling the kitchen, and the top will form a shiny, slightly crackled crust. Check at about 20 minutes using a toothpick inserted in the center it should come out with moist crumbs attached, indicating fudgy doneness. A common mistake is overbaking until the toothpick comes out clean, which will dry the brownies and remove that gooey core you want.
- Cool completely in the pan on wire rack: Cooling on a wire rack lets air circulate around the pan so the brownies set evenly and the interior firms up without becoming dry. The cooling period also helps the flavors meld and the texture stabilize, making slicing neater. Cutting too soon often causes the brownies to fall apart, so be patient and allow them to reach room temperature.
- Cut into squares and serve: Once cooled, lift the brownies using the parchment or foil overhang if you used it, then cut on a board for clean edges. The first cut yields a satisfying resistance followed by a soft center, and the aroma is strongest immediately after slicing. A common pitfall is using a serrated knife that tears the top, so use a sharp chef knife and clean it between cuts for tidy squares.
- Store in an airtight container at room temperature for up to 4 days: Stored properly the brownies remain moist and enjoyable, and the flavor actually deepens a touch after a day. Keep them away from direct sunlight and strong odors, as chocolate absorbs nearby scents. Avoid refrigeration which can change the texture and make them firmer than intended.
Notes
- Thicker brownies option: If you prefer thicker brownies, use an 8x8 inch pan instead of a 9x9 inch and increase the baking time by a couple of minutes. This concentrates the batter and yields deeper squares. Keep an eye on the toothpick test to prevent overbaking.
- Nut variation guidance: The recipe calls for chopped nuts as optional, and if you include them, toast them briefly beforehand for extra flavor. Chop uniformly so they distribute evenly. Avoid oversized pieces that skew texture in individual bites.
- Mixing caution: Stir gently when adding the dry ingredients to prevent over development of gluten, which would make brownies more cake like. Fold until streaks disappear rather than vigorous beating.
- Pan prep tip: Line the pan with parchment or foil for easy removal and cleaner edges, and lightly grease the liner so the top does not stick when lifted out. This preserves the shiny crust when you slice.
- Storage advice: Store brownies in an airtight container at room temperature for up to four days to retain moisture. If you want to freeze, wrap tightly and freeze for up to two months, thaw slowly at room temperature before serving.