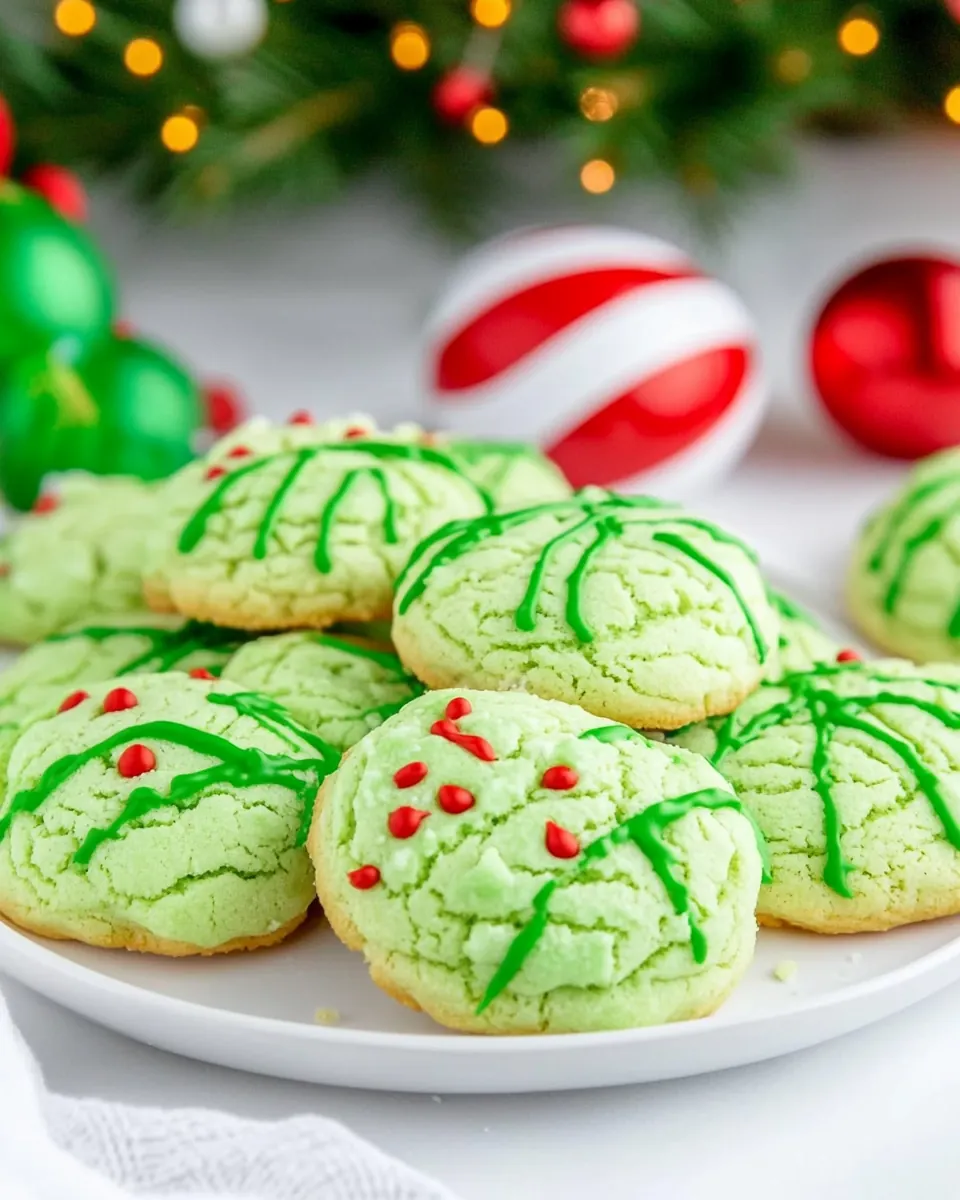
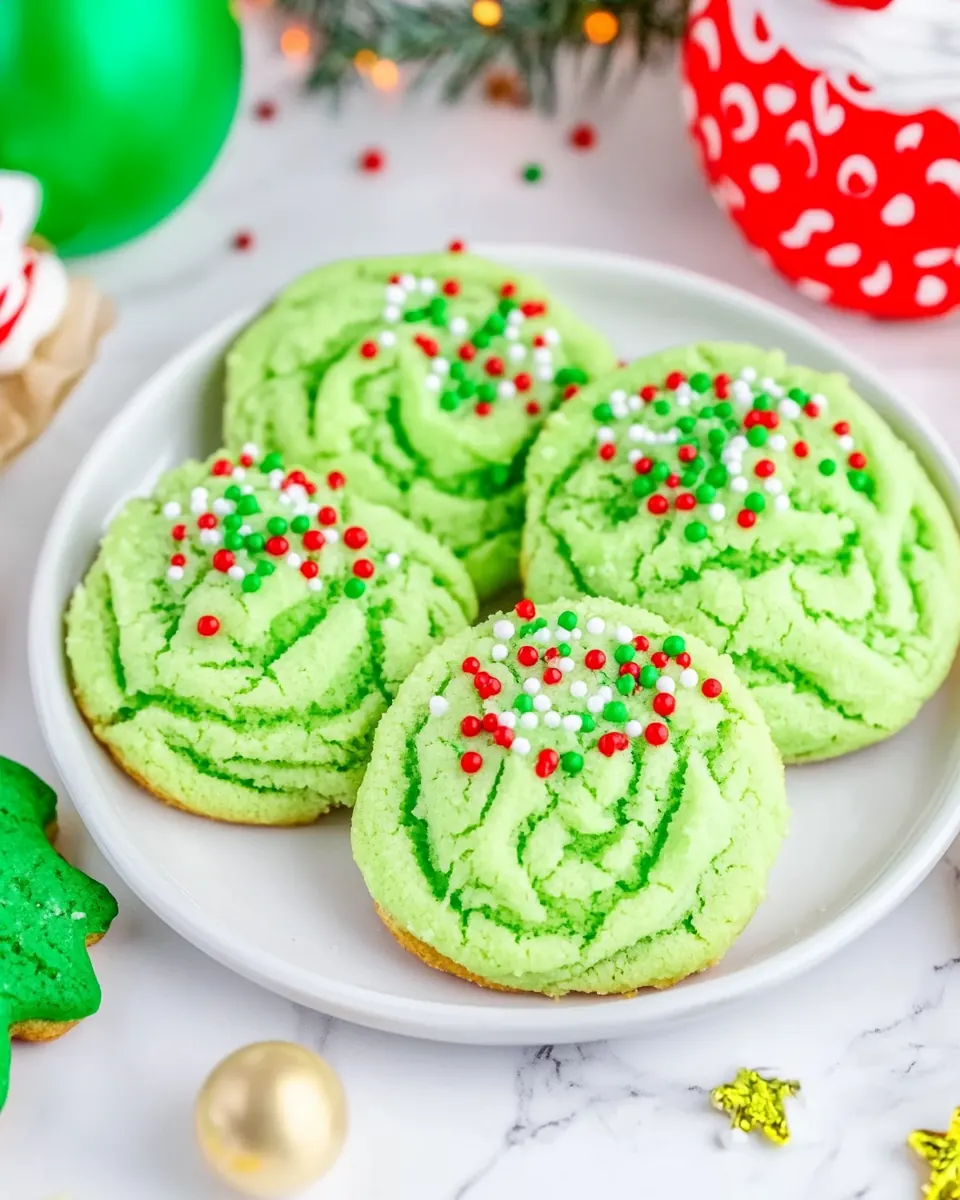
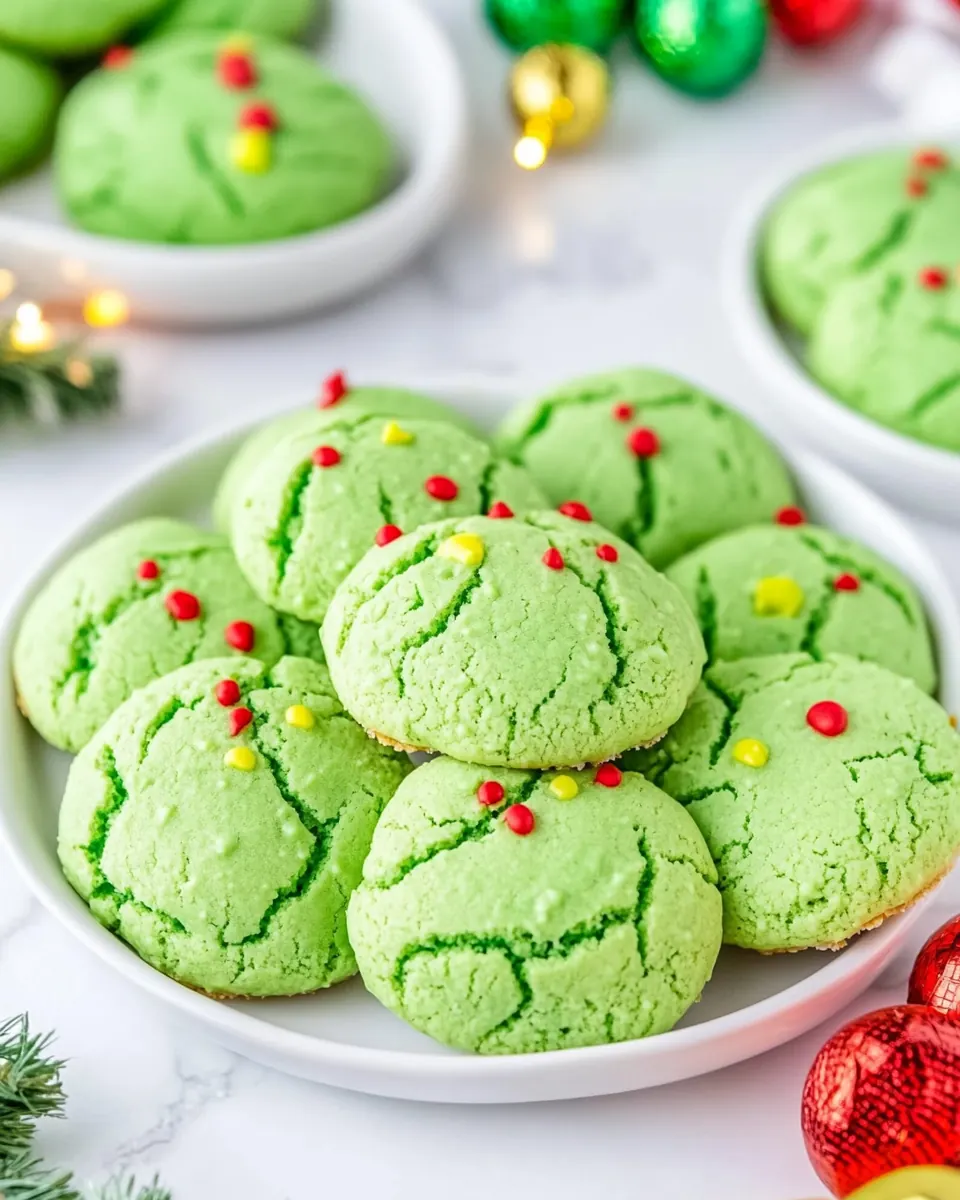
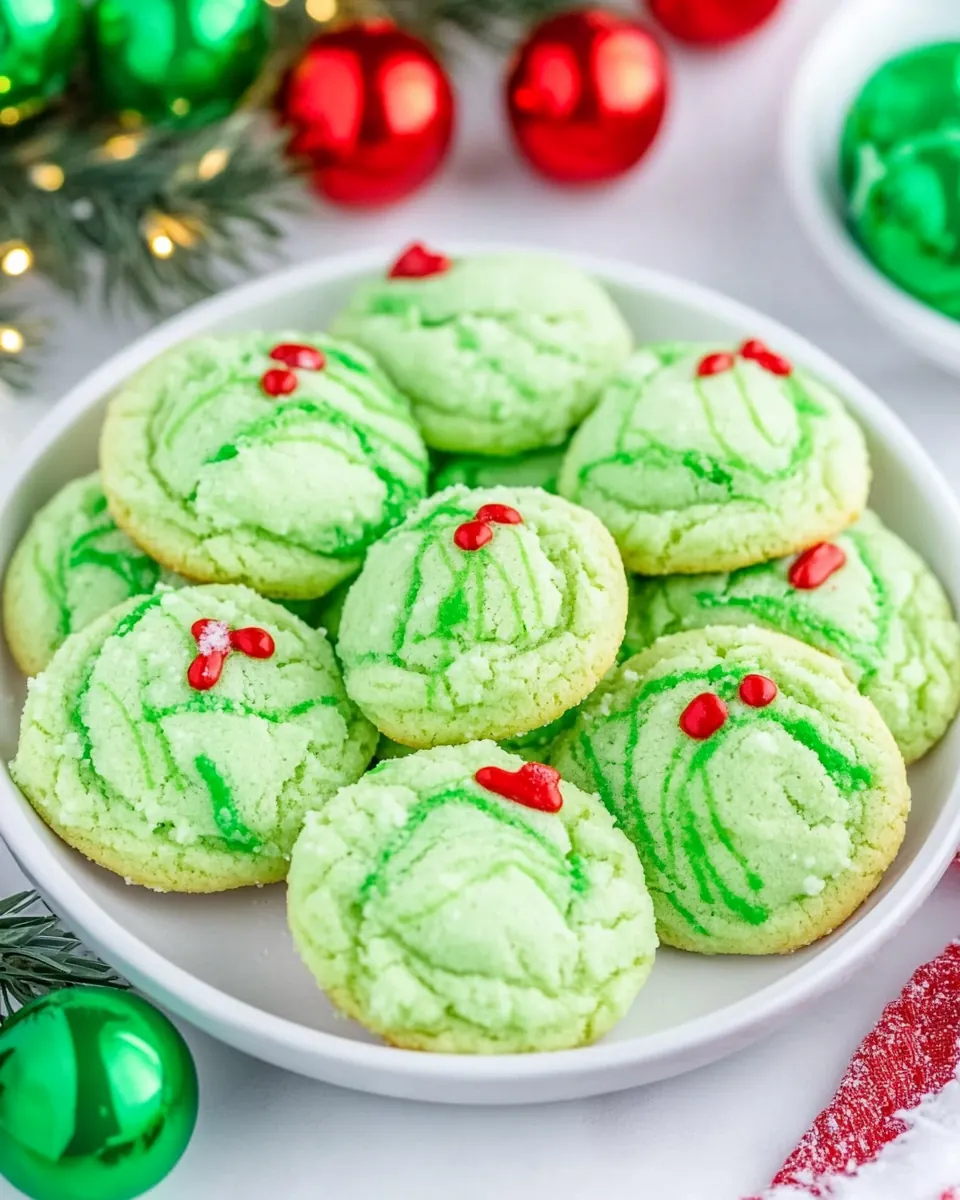
Grinch Cookies
Grinch Cookies were the first holiday treat I ever decorated with green frosting, and that messy, joyful afternoon still makes me smile every year.
I remember baking a huge tray while holiday music played softly in the background, flour on my sleeves, and a cup of cocoa cooling on the counter. The house filled with a sweet, minty aroma, and friends kept popping in to sneak one before I even had a chance to plate them. Those little green rounds, topped with a bright red heart, felt like a tiny edible rebellion against the usual cookie tray. Over time I refined the texture so the centers stay soft and the edges set just right, and now I reach for this recipe whenever I want something festive and fuss free. Between the bright color and the peppermint note, these cookies always spark conversation, and they travel well to parties and potlucks.
Baking these Grinch Cookies has become a ritual for me, something I do when I want a bit of nostalgia and a lot of cheer. I like that the dough starts from a boxed white cake mix, which keeps the process quick without sacrificing a tender crumb. Rolling each ball in a sweet coating gives the finished cookie that classic crinkled look, while the heart sprinkle makes each one feel special. If you enjoy simple swaps that deliver big on presentation and flavor, you will find this recipe reliably satisfying, whether you make a full batch for a crowd or a smaller pan for an afternoon tea.
Recipe Snapshot
27 mins
15 mins
12 mins
Medium
120 kcal
American
Gluten-Free, Low FODMAP
Desserts
Oven, Large baking sheet, Parchment paper, Hand mixer or stand mixer, Small bowl, 1 1/2 tablespoon cookie scoop, Wire rack
Why You Need This Grinch Cookies
They are effortless and festive
I love how Grinch Cookies take pantry staples and turn them into something that looks bakery made. Using a boxed white cake mix means the dough comes together fast, so I can focus on color and finishing touches. For busy holiday prep, being able to whip up a batch in under an hour is a lifesaver, and these cookies never look like they were rushed.
Minty freshness balances the sweetness
The peppermint note from the peppermint extract gives a lively counterpoint to the sugary base. I enjoy that bright lift, it keeps the cookies from feeling cloying. When I want an even subtler touch, I reduce the extract slightly, but honestly the mint is what makes these feel truly seasonal.
Texture you can count on
These cookies manage to be soft and slightly cakey inside, with just enough structure to hold a sprinkle on top. The combination of butter, eggs, and cake mix gives a tender crumb, while the powdered sugar and cornstarch coating creates that delicate outer shell I love. I find this balance pleasing to both kids and adults.
Great for gifting and gatherings
Everyone notices the festive green color, and the tiny red heart turns each cookie into a little gift. I often package them in small boxes for neighbors, and I appreciate that they stack well without sticking when cooled properly. They travel without drama, which is something I value during the busy season.
Flexible and playful
I appreciate recipes that invite creativity, and these cookies certainly do. You can tweak the intensity of the green food coloring, choose different sprinkles, or even swap the peppermint for a milder mint extract. For me, that playfulness is part of the fun of holiday baking, and it keeps me coming back to this recipe year after year.
Ingredients Required for Grinch Cookies
These ingredients are straightforward and work together to create a soft, minty cookie with a festive crunch on the outside. The cake mix forms the tender base, while butter and eggs enrich the dough and provide structure. The powdered sugar and cornstarch coating helps give the cookies their signature crinkled surface, and a dash of peppermint extract lifts the sweetness with cool, bright flavor.
- 15.25 ounces white cake mix 432 g box: Provides a light, sweet base and structure for the cookies, supplying flour, sugar, and leavening agents to ensure proper rise and texture when combined with wet ingredients.
- 8 tablespoons unsalted butter softened: Adds rich fat to tenderize the dough and contribute to mouthfeel, helping create a soft, slightly crisp edge when creamed with the mix.
- 2 large eggs room temperature: Incorporates moisture and helps bind ingredients together while contributing to leavening and a tender crumb through protein and water content.
- 2 teaspoons peppermint extract or mint extract: Imparts a cool, minty flavor profile to the cookies, enhancing the Grinch-themed taste and complementing the sweetness of the cake mix.
- 1/2 teaspoon vanilla extract: Contributes subtle depth and rounds out flavors, balancing the mint and sweet notes without overpowering the overall cookie profile.
- green gel food coloring: Provides concentrated color without altering dough consistency, allowing vivid green coloring for the Grinch aesthetic with minimal added moisture.
- 1/4 cup powdered sugar 32 g: Offers a light dusting of sweetness and slight texture contrast, used after baking to prevent sticking and add a delicate sugary finish.
- 3 tablespoons cornstarch: Acts as an anti-caking and drying agent in the coating, creating a smooth, powdery outer texture that helps set the cookie surface.
- red heart-shaped sprinkle or cinnamon: Gives a festive red accent and a hint of warm spice when using cinnamon, serving as a decorative focal point that contrasts with the green cookies.
Instructions for Grinch Cookies
These instructions will guide you step by step through creating bright, minty cookies with soft centers and slightly set edges. I like to prepare my mise en place first so everything flows, and I talk you through sensory cues so you know when each step is right.
- Preheat the oven to 375°F. Line a large baking sheet with parchment paper and set aside.: You will smell a faint toasty warmth the moment the oven begins to heat, and the steady hum and faint click as it cycles are comforting signs that it is reaching temperature. Getting the oven to an even 375°F is crucial for achieving cookies that set around the edges while staying soft inside, because an oven that is too cool will produce pale, greasy cookies, and an oven that is too hot will brown them too quickly. One common mistake is skipping parchment paper which can cause sticking and uneven bottoms, so always line the sheet for easy removal and even baking. If your oven runs hot or cool, consider using an oven thermometer to confirm accuracy, and slide the sheet onto the middle rack for the most consistent heat exposure.
- Use a hand-held mixer or stand mixer to mix together the cake mix, butter, and eggs until well combined.: As you blend the white cake mix with softened butter and room temperature eggs , listen for a smooth, steady whir rather than a sputtering sound which may indicate overly firm butter. The mixture should transform from powdery to a cohesive, slightly thick dough that pulls away from the bowl, and you will notice a creamy sheen as fats emulsify with the eggs. Mixing too long at high speed can incorporate excess air which alters the texture, leading to cakier cookies than intended, so pulse to combine until the dough is uniform. A common trap is under mixing which leaves streaks of dry mix, so scrape the bowl and check the bottom to ensure everything is combined without overworking the batter.
- Add in the peppermint (or mint) and vanilla extracts and enough green food coloring to achieve your desired color. Mix on low speed just until combined. The batter will be thick and sticky.: When you add peppermint extract and vanilla extract , inhale deeply for a preview of the finished cookie's aroma, the mint should come forward while vanilla softly supports it. Incorporating gel food coloring in small dots and mixing on low prevents sudden streaks and helps you reach that vivid Grinch green gradually, so you stop at the exact hue you want. The dough should be thick and tacky to the touch, which is expected; if it is too loose, it will spread more than desired while baking. Overmixing here can also intensify the gluten just enough to change the texture, so stir only until the color is even and the extracts are distributed.
- In a small bowl, whisk together the powdered sugar and cornstarch.: As you whisk the powdered sugar and cornstarch , you will notice the mixture lighten and become fluffy, which creates the ideal coating that adheres to the sticky dough. This dry blend helps form the delicate outer shell and gives that pleasing matte finish after baking. Be careful to whisk thoroughly to remove any lumps in the powdered sugar, and keep the bowl nearby since the dough will be sticky and demand immediate rolling once scooped. A common error is using granulated sugar instead, which will not produce the same soft exterior and can create a grainy texture on the cookie surface.
- Scoop the dough with a 1 1/2 tablespoon cookie scoop and roll the cookie dough balls in the powdered sugar mixture to coat. (The cookie dough itself is sticky so keep that in mind.) Place about 1 inch apart on the prepared baking sheet.: Using a 1 1/2 tablespoon scoop creates uniformly sized cookies that bake evenly, and rolling each ball in the dry coating gives you that characteristic crinkle. As you roll, you will feel the tackiness give way to a silky coating, and the sight of bright green peeking through the sugar is always satisfying. Spacing them about 1 inch apart accounts for slight spreading, though these remain relatively compact. One mistake to avoid is pressing the balls flat before baking, which prevents the internal crumb from rising properly and results in denser cookies.
- Bake for 10 to 12 minutes, or until the edges are set and the top of the cookies appear dry.: While baking, the kitchen fills with a warm, minty aroma and you may hear a faint crackle as moisture leaves the surface. Look for edges that are set and a top that looks matte rather than wet; these cues signal they are done. Baking at 10 to 12 minutes typically yields soft centers with set edges, and going beyond that window risks drying them out. A frequent error is relying solely on color, since these remain pale; visual texture is the better indicator than browning.
- Remove the cookies from the oven and immediately place a heart-shaped sprinkle on each cookie, gently pressing it down so it sticks to the cookie.: Right out of the oven the cookies are warm and malleable, which makes it easy to press a red heart shaped sprinkle into the surface so it adheres as the cookie cools. The warmth helps the sprinkle sit flush and prevents it from falling off later, and you will notice the sprinkle settle slightly as the cookie gives a little under gentle pressure. Avoid pressing too hard or you will flatten the cookie and ruin the texture, and be mindful that adding the sprinkle too late may result in it not attaching properly.
- Cool the cookies on the baking sheet for 5 minutes before removing to a wire rack to cool completely.: During the brief cooling period on the sheet, the cookies continue to set and firm up around the edges while the centers remain tender, and you can feel the residual warmth if you hover your hand above them. Transferring to a wire rack after about 5 minutes allows air to circulate beneath, preventing soggy bottoms and ensuring even cooling. A common slip is removing them too soon which can cause them to break, or leaving them on the sheet too long which can overcook the bottoms due to residual heat, so stick to the timing for consistent results.
Tips and Variations
I like to keep a few versatile adjustments in mind when making Grinch Cookies. Below are helpful tips and playful variations that keep the process fun and suited to your taste.
- Use high quality sprinkles for the best visual impact, a nicely shaped heart will look cleaner and stay intact during handling.
- Adjust mint intensity by starting with less peppermint extract and tasting a tiny bit of dough if you want to be cautious, extracts vary in strength.
- Gel color control add gel food coloring a drop at a time to the dough to reach the exact green you want without over coloring.
- Prevent sticking roll each dough ball thoroughly in the powdered sugar and cornstarch mixture so they do not stick to your hands or the scoop.
- Make ahead shape and refrigerate the dough balls for up to 24 hours before baking for more convenient timing and slightly thicker cookies.
Side Dish Ideas for Grinch Cookies
These cookies are best enjoyed alongside simple beverages and light accompaniments that complement the minty sweetness. Below I describe serving ideas and occasions where Grinch Cookies really shine.
- Hot cocoa pairing serve with a cup of hot cocoa for a cozy contrast where the mint cookie balances the rich chocolate.
- Tea time a mild black tea or peppermint tea works well, letting the mint note in the cookie harmonize with the drink.
- Holiday cookie plate include with assorted cookies to add a bright, playful color contrast to traditional favorites.
- Gifting stack gently in small boxes lined with parchment, tie with a ribbon, and deliver as neighborly treats during winter gatherings.
- Party tray arrange on a platter with small labels so guests can appreciate the minty flavor and festive decoration.
- Storage tips keep in an airtight container at room temperature for up to 3 days, or freeze fully baked cookies in a single layer then transfer to a sealed bag for longer storage.
FAQ
Conclusion
These Grinch Cookies stand out for their playful color, pleasant mint aroma, and tender, cakey texture that is easy to achieve. I encourage you to give them a try when you want a festive, low fuss cookie that still feels special. Whether you bake them for a holiday plate, a small gathering, or a thoughtful gift, they offer cheerful presentation and reliable results that make baking a joyful part of the season.

Grinch Cookies
Equipment
- Oven
- Large Baking Sheet
- Parchment Paper
- Hand mixer or stand mixer
- Small Bowl
- 1 1/2 tablespoon cookie scoop
- Wire Rack
Ingredients
- 15.25 ounces white cake mix 432 g box Provides a light, sweet base and structure for the cookies, supplying flour, sugar, and leavening agents to ensure proper rise and texture when combined with wet ingredients.
- 8 tablespoons unsalted butter softened Adds rich fat to tenderize the dough and contribute to mouthfeel, helping create a soft, slightly crisp edge when creamed with the mix.
- 2 large eggs room temperature Incorporates moisture and helps bind ingredients together while contributing to leavening and a tender crumb through protein and water content.
- 2 teaspoons peppermint extract or mint extract Imparts a cool, minty flavor profile to the cookies, enhancing the Grinch-themed taste and complementing the sweetness of the cake mix.
- 1/2 teaspoon vanilla extract Contributes subtle depth and rounds out flavors, balancing the mint and sweet notes without overpowering the overall cookie profile.
- green gel food coloring Provides concentrated color without altering dough consistency, allowing vivid green coloring for the Grinch aesthetic with minimal added moisture.
- 1/4 cup powdered sugar 32 g Offers a light dusting of sweetness and slight texture contrast, used after baking to prevent sticking and add a delicate sugary finish.
- 3 tablespoons cornstarch Acts as an anti-caking and drying agent in the coating, creating a smooth, powdery outer texture that helps set the cookie surface.
- red heart-shaped sprinkle or cinnamon Gives a festive red accent and a hint of warm spice when using cinnamon, serving as a decorative focal point that contrasts with the green cookies.
Instructions
- Preheat the oven to 375°F. Line a large baking sheet with parchment paper and set aside.: You will smell a faint toasty warmth the moment the oven begins to heat, and the steady hum and faint click as it cycles are comforting signs that it is reaching temperature. Getting the oven to an even 375°F is crucial for achieving cookies that set around the edges while staying soft inside, because an oven that is too cool will produce pale, greasy cookies, and an oven that is too hot will brown them too quickly. One common mistake is skipping parchment paper which can cause sticking and uneven bottoms, so always line the sheet for easy removal and even baking. If your oven runs hot or cool, consider using an oven thermometer to confirm accuracy, and slide the sheet onto the middle rack for the most consistent heat exposure.
- Use a hand-held mixer or stand mixer to mix together the cake mix, butter, and eggs until well combined.: As you blend the white cake mix with softened butter and room temperature eggs , listen for a smooth, steady whir rather than a sputtering sound which may indicate overly firm butter. The mixture should transform from powdery to a cohesive, slightly thick dough that pulls away from the bowl, and you will notice a creamy sheen as fats emulsify with the eggs. Mixing too long at high speed can incorporate excess air which alters the texture, leading to cakier cookies than intended, so pulse to combine until the dough is uniform. A common trap is under mixing which leaves streaks of dry mix, so scrape the bowl and check the bottom to ensure everything is combined without overworking the batter.
- Add in the peppermint (or mint) and vanilla extracts and enough green food coloring to achieve your desired color. Mix on low speed just until combined. The batter will be thick and sticky.: When you add peppermint extract and vanilla extract , inhale deeply for a preview of the finished cookie's aroma, the mint should come forward while vanilla softly supports it. Incorporating gel food coloring in small dots and mixing on low prevents sudden streaks and helps you reach that vivid Grinch green gradually, so you stop at the exact hue you want. The dough should be thick and tacky to the touch, which is expected; if it is too loose, it will spread more than desired while baking. Overmixing here can also intensify the gluten just enough to change the texture, so stir only until the color is even and the extracts are distributed.
- In a small bowl, whisk together the powdered sugar and cornstarch.: As you whisk the powdered sugar and cornstarch , you will notice the mixture lighten and become fluffy, which creates the ideal coating that adheres to the sticky dough. This dry blend helps form the delicate outer shell and gives that pleasing matte finish after baking. Be careful to whisk thoroughly to remove any lumps in the powdered sugar, and keep the bowl nearby since the dough will be sticky and demand immediate rolling once scooped. A common error is using granulated sugar instead, which will not produce the same soft exterior and can create a grainy texture on the cookie surface.
- Scoop the dough with a 1 1/2 tablespoon cookie scoop and roll the cookie dough balls in the powdered sugar mixture to coat. (The cookie dough itself is sticky so keep that in mind.) Place about 1 inch apart on the prepared baking sheet.: Using a 1 1/2 tablespoon scoop creates uniformly sized cookies that bake evenly, and rolling each ball in the dry coating gives you that characteristic crinkle. As you roll, you will feel the tackiness give way to a silky coating, and the sight of bright green peeking through the sugar is always satisfying. Spacing them about 1 inch apart accounts for slight spreading, though these remain relatively compact. One mistake to avoid is pressing the balls flat before baking, which prevents the internal crumb from rising properly and results in denser cookies.
- Bake for 10 to 12 minutes, or until the edges are set and the top of the cookies appear dry.: While baking, the kitchen fills with a warm, minty aroma and you may hear a faint crackle as moisture leaves the surface. Look for edges that are set and a top that looks matte rather than wet; these cues signal they are done. Baking at 10 to 12 minutes typically yields soft centers with set edges, and going beyond that window risks drying them out. A frequent error is relying solely on color, since these remain pale; visual texture is the better indicator than browning.
- Remove the cookies from the oven and immediately place a heart-shaped sprinkle on each cookie, gently pressing it down so it sticks to the cookie.: Right out of the oven the cookies are warm and malleable, which makes it easy to press a red heart shaped sprinkle into the surface so it adheres as the cookie cools. The warmth helps the sprinkle sit flush and prevents it from falling off later, and you will notice the sprinkle settle slightly as the cookie gives a little under gentle pressure. Avoid pressing too hard or you will flatten the cookie and ruin the texture, and be mindful that adding the sprinkle too late may result in it not attaching properly.
- Cool the cookies on the baking sheet for 5 minutes before removing to a wire rack to cool completely.: During the brief cooling period on the sheet, the cookies continue to set and firm up around the edges while the centers remain tender, and you can feel the residual warmth if you hover your hand above them. Transferring to a wire rack after about 5 minutes allows air to circulate beneath, preventing soggy bottoms and ensuring even cooling. A common slip is removing them too soon which can cause them to break, or leaving them on the sheet too long which can overcook the bottoms due to residual heat, so stick to the timing for consistent results.
Notes
- Use high quality sprinkles for the best visual impact, a nicely shaped heart will look cleaner and stay intact during handling.
- Adjust mint intensity by starting with less peppermint extract and tasting a tiny bit of dough if you want to be cautious, extracts vary in strength.
- Gel color control add gel food coloring a drop at a time to the dough to reach the exact green you want without over coloring.
- Prevent sticking roll each dough ball thoroughly in the powdered sugar and cornstarch mixture so they do not stick to your hands or the scoop.
- Make ahead shape and refrigerate the dough balls for up to 24 hours before baking for more convenient timing and slightly thicker cookies.