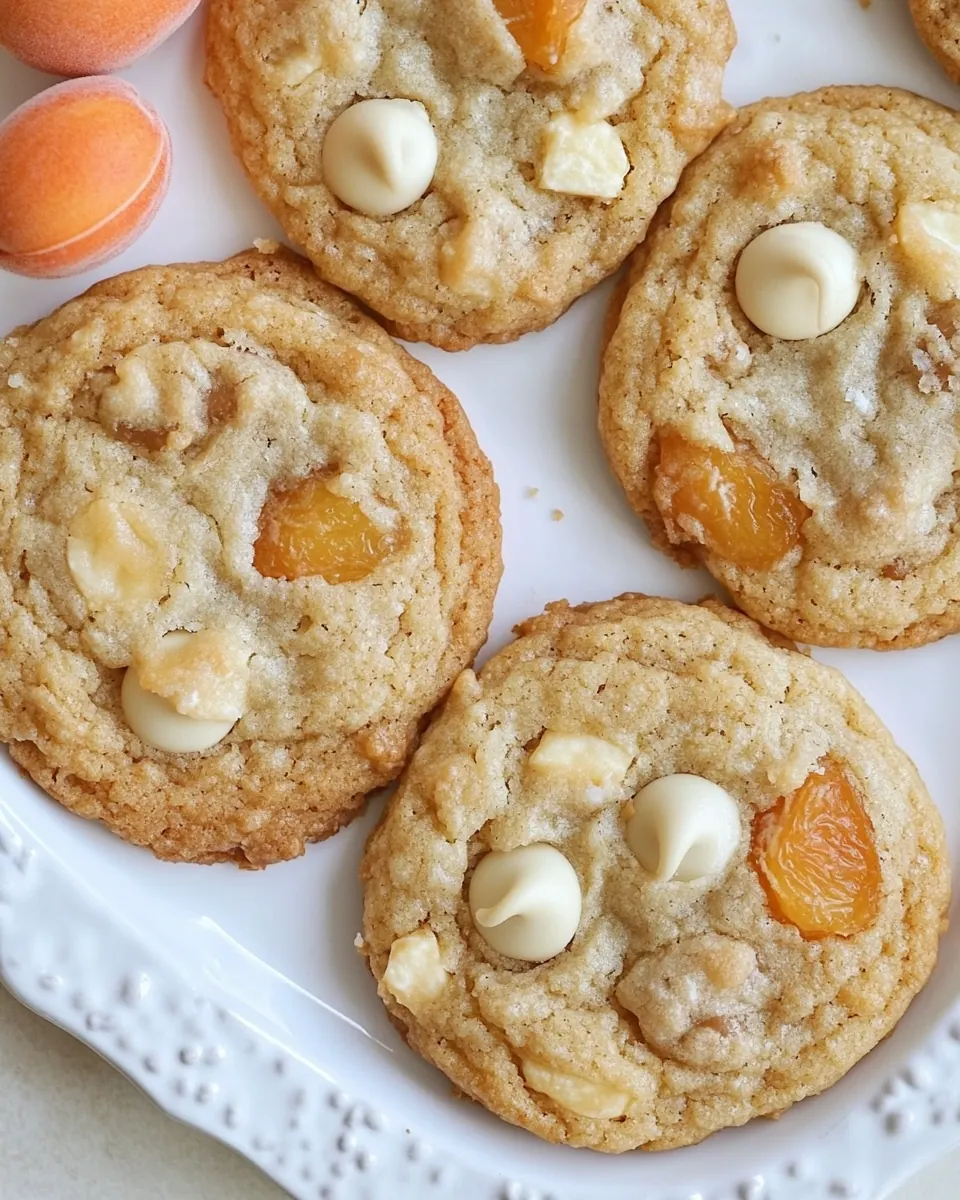
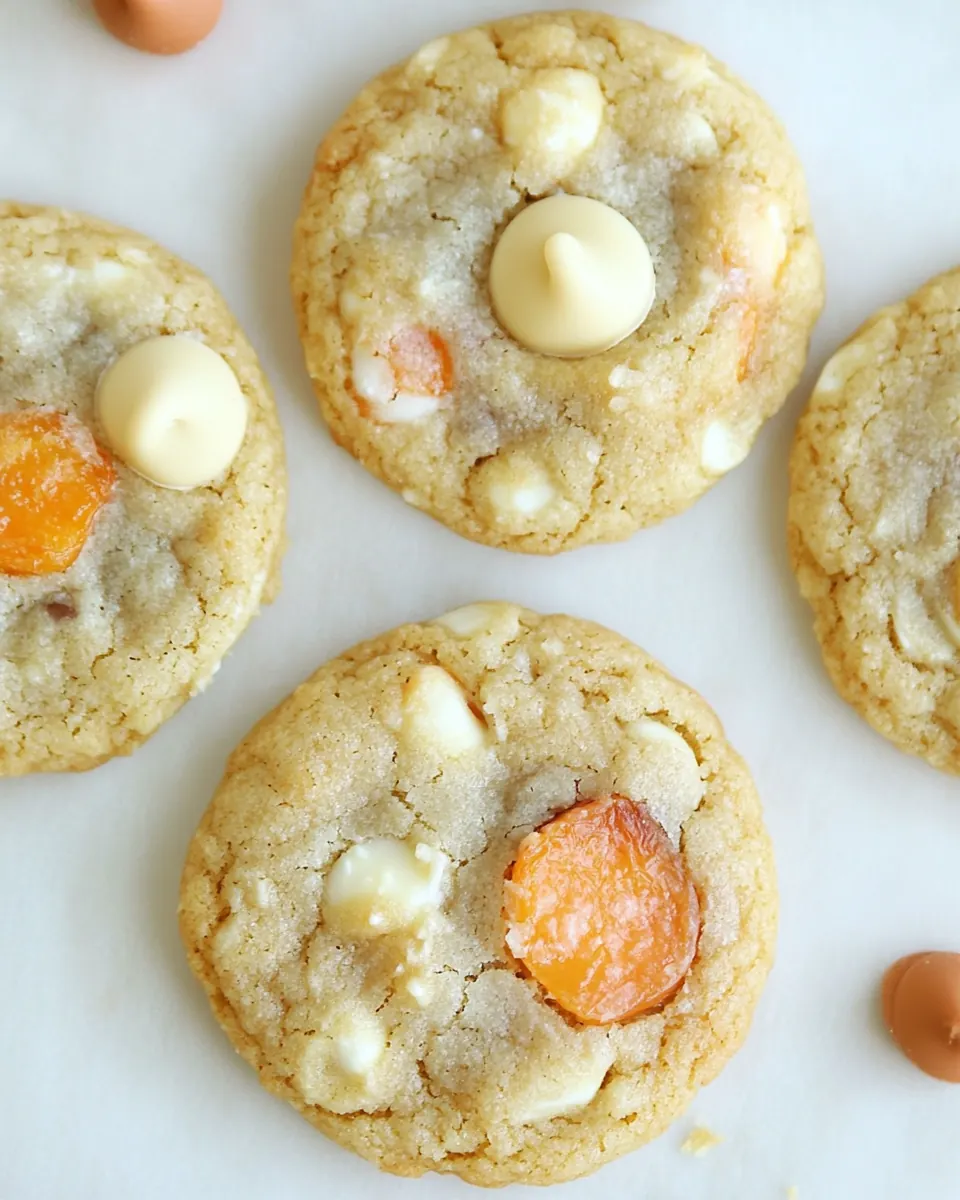
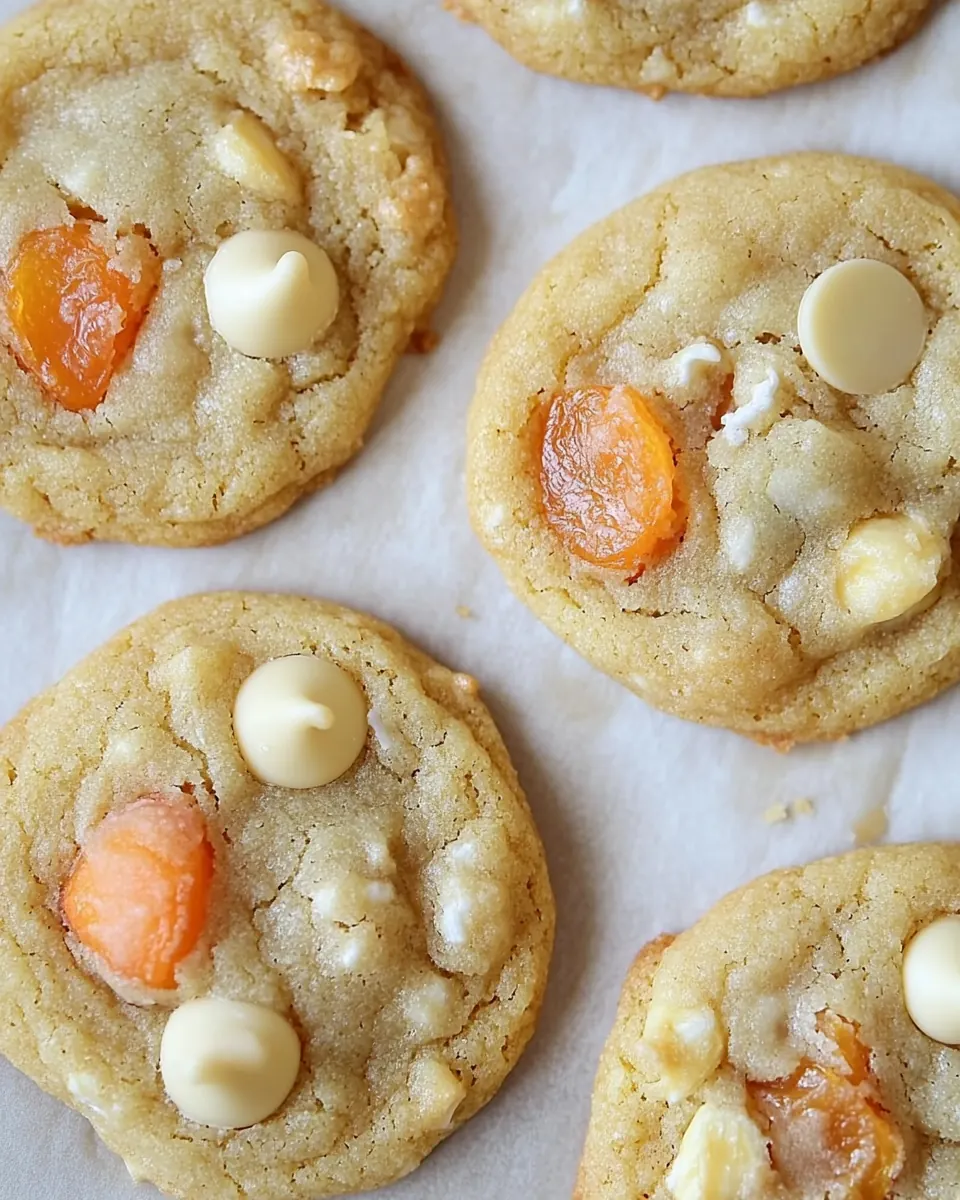
Fresh Apricot and White Chocolate Chip Cookies
Fresh Apricot and White Chocolate Chip Cookies began as an experiment on a humid July afternoon when I had a bowl of sunwarm apricots and a stubborn bag of white chocolate chips that needed using. I remember pulling a wooden chair up to the counter, setting a radio station low, and thinking about how bright fruit and creamy white chocolate could play together in a cookie that was still tender and slightly chewy. That first bite confirmed it was worth the fuss, the apricot pieces lending a gentle tang that cut through the sweetness.
Over the years I’ve tweaked the dough, learned the moment when a cookie is perfectly golden at the edges, and noticed how tiny changes in mixing give very different textures. I like to bake these when friends stop by, because the smell of warm butter and toasted white chips fills the kitchen and people gather without planning. They also travel well to picnics and late afternoon tea, keeping that soft center while giving a slight crisp at the rim.
Recipe Snapshot
38 mins
20 mins
18 mins
Easy
150 kcal
American
Gluten-Free, Low FODMAP
Desserts
Stand mixer, Paddle attachment, Medium bowl, Whisk, Rubber spatula, Medium sized ice cream scoop, Baking sheets, Parchment paper
Why You’ll Love This Fresh Apricot and White Chocolate Chip Cookies
Bright flavor contrast
I love how apricots introduce a natural acidity that balances the rich, creamy notes of white chocolate. When I bite into a cookie, that sweet tang cuts cleanly through the sugar, making each mouthful interesting and preventing sweetness fatigue. This contrast keeps people reaching for another cookie.
Texture that surprises
These cookies deliver a delicate chew with gently crisp edges. The combination of creamed butter and proper chilling time creates a dough that spreads just enough to caramelize around the perimeter while staying tender inside. I find that this texture is what turns a good cookie into a memorable one.
Simple pantry friendly
I often make this recipe with staples I have on hand, and it comes together quickly. Using common items like all purpose flour, sugar, and eggs makes it approachable. Yet the addition of fresh or dried apricots feels special without requiring obscure ingredients.
Flexible and forgiving
I’ve learned you can adapt the mix ins and chilling time to your schedule. If I’m short on time, I let the dough rest briefly and still get great cookies. When I have the patience, a longer chill deepens the flavor. That flexibility makes this recipe reliable whether I’m baking for a crowd or a cozy evening.
Perfect for summer gatherings
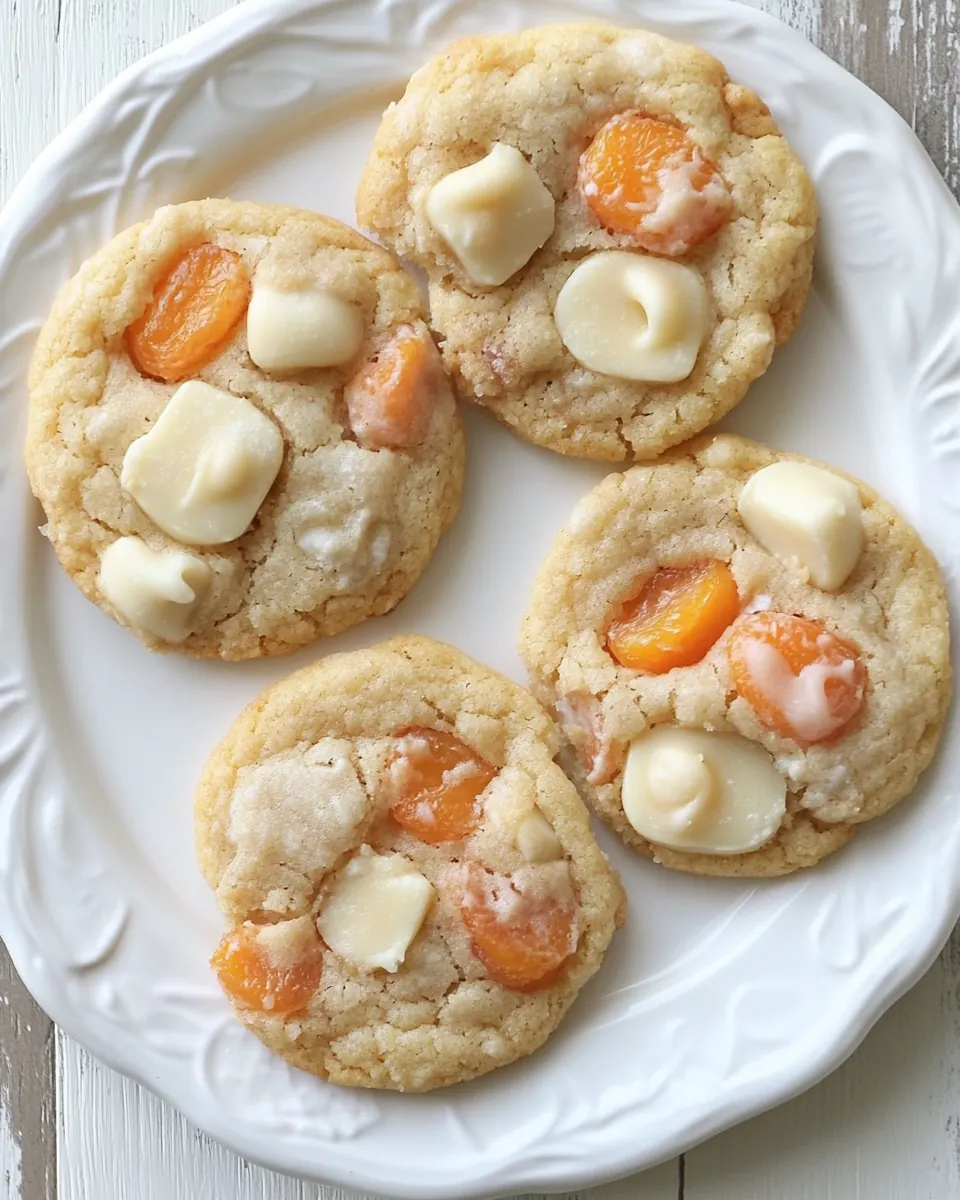
In warm months, the fruity profile feels seasonal and bright. I bring a tin to backyard gatherings, and the cookies vanish fast. Their appearance is inviting, studded with pale chips and flecks of apricot, which always draws compliments before anyone even tastes one.
Ingredients for Fresh Apricot and White Chocolate Chip Cookies
These ingredients are chosen to build a cookie that is tender yet structured. The core players are the flour and butter which form the backbone, while the sugars and eggs provide lift and chew. The white chocolate chips and apricot pieces add bursts of flavor and interest, and a hint of espresso powder sharpens the sweetness so each bite stays balanced.
- 2 1/4 cups unbleached all-purpose flour 1 teaspoon baking soda 1/4 teaspoon salt 1/2 teaspoon finely ground espresso powder or instant coffee 10 ounces white chocolate chips 1 cup finely diced fresh apricots, or 3/4 cup diced dried apricots 8 ounces butter, at room temperature 1 cup granulated sugar 1/2 cup brown sugar 2 eggs 2 teaspoons pure vanilla extract: Combine for structure, leavening, seasoning, and subtle savory depth; unbleached all-purpose flour provides the main body and crumb, baking soda ensures a light rise and slight spread, salt balances and enhances sweetness, and finely ground espresso powder or instant coffee deepens the white chocolate flavor without imparting overt coffee notes.
Fresh Apricot and White Chocolate Chip Cookies Instructions
I like to approach the method as a relaxed but intentional process. Start by assembling your dry ingredients and mix ins, then cream the butter and sugars until pale and airy. Adding the flour in measured additions helps prevent overmixing, and chilling the dough lets flavors meld and control spread. When baking, watch for golden edges and a soft center as your cue to pull the trays from the oven.
- Combine flour, baking soda, salt, and espresso in a medium bowl. Mix with a whisk until evenly distributed. Add chocolate chips and apricot bits and mix well. Set aside.: The scent at this stage is faintly toasty from the espresso , and whisking these dry elements together ensures an even distribution so every cookie rises consistently. Mixing now prevents pockets of leavener that would create uneven texture later, and the small amount of baking soda will interact with the sugars and butter to give the cookies lift. A common mistake is skipping the whisking, which can leave clumped leavener causing odd bumps in the baked cookies, so take the extra minute to blend thoroughly. After whisking, fold in the white chocolate chips and apricot bits so they are coated lightly with flour, this helps them stay suspended in the dough rather than sinking.
- Combine the butter and sugars in a stand mixer. Using the paddle attachment, mix on medium speed for about 5 minutes, until the mixture is smooth and pale in color. Add 1 egg at a time, mixing until incorporated. Scrape down the sides of the bowl, and then add the vanilla. Continue mixing until butter, sugar, eggs, and vanilla are all incorporated (about 1 minute). Scrape down the sides of the bowl.: Once you begin creaming, the sound changes to a gentle hum and the mixture moves from heavy to silky, almost glossy. Creaming for about five minutes at medium speed incorporates air, which is responsible for that tender lift you want. The color will change to a paler shade as tiny air bubbles form, and you will notice a softer texture under the paddle. If you undercream, cookies can be dense, and if you overcream, they may spread too much; aim for that light, pale look described. Add the eggs one at a time so the mixture doesn't break, scraping down the bowl between additions keeps everything integrated and avoids streaks of unmixed butter.
- Add the dry ingredients in 3 additions. Mix on low speed for no more than 1 minute. Remove bowl from mixture and do a final mix with a rubber spatula. Cover and chill for at least one hour.: As you add each egg , listen for the change in rhythm, the batter will momentarily thin then thicken again as it emulsifies. Proper incorporation prevents a greasy texture and ensures even moisture through the dough. If eggs are added too quickly, the mixture can separate and look curdled, which is a sign you should slow down and scrape the bowl more often. Once both eggs and the vanilla are mixed in, the dough should be cohesive and glossy, ready for the dry additions.
- Preheat oven to 350. Line two baking sheets with parchment. Scoop dough with a medium-sized ice cream scoop to form 1-inch balls. Leave at least an inch and a half around each cookie to allow for some spreading. Bake cookies for 15-18 minutes, turning about halfway to ensure even baking. Cookies should be golden at the edges but soft in the middle.: Adding the flour mixture gradually protects the dough from overmixing, which would develop too much gluten and result in a tough cookie. Each addition should be mixed on low speed just until the streaks disappear, you will see the dough thicken and become less sticky. After the third addition, finish by folding with a rubber spatula to bring any residual flour into the dough without excessive agitation. A common pitfall is leaving a pocket of flour unmixed, which creates dry bits after baking, so take a last look to ensure uniformity. Cover and chill for at least one hour to firm the fat and let the flavors meld, which also helps with controlled spreading during baking.
- Cover and chill for at least one hour: Chilling transforms the dough texture, firming the butter so the cookies spread less and hold a thicker, chewier center. During this rest the flavors relax and deepen, making the apricot and white chocolate notes more integrated. If you skip chilling, expect wider, thinner cookies, which may be desirable for some, but not for the soft centered result this recipe aims for. A mistake here is rushing to bake immediately, which changes both texture and flavor development, so set a timer and resist the urge to bake right away.
- Preheat oven to 350: A fully preheated oven ensures consistent rise and browning from the moment the dough hits the heat. You will smell the faint toasty warmth as the oven reaches temperature, signaling readiness. Bakeware also benefits from sitting in a hot oven, so place racks in the middle for even airflow. If the oven is not properly preheated, cookies can spread irregularly and bake unevenly, so allow time for the temperature to stabilize before loading trays.
- Line two baking sheets with parchment: Using parchment prevents sticking and promotes even browning on the bottom of the cookies, plus it makes cleanup effortless. When you transfer the dough balls, keep the parchment flat and avoid crowding the tray. Overcrowding reduces air circulation, causing uneven edges and centers that bake at different rates. Rotate pans halfway to achieve uniform color and texture across both sheets.
- Scoop dough with a medium sized ice cream scoop to form 1 inch balls: Scooping creates evenly sized cookies so they bake at the same rate, producing consistent texture from one to the next. The sound of the scoop releasing dough is small and satisfyingly neat, and the dough should hold a round shape before you place it on the sheet. Leave at least an inch and a half around each cookie to allow for spreading, or they will merge into one another which flattens the edges. If your scoop compresses the dough too much, the cookies may bake denser than intended.
- Leave at least an inch and a half around each cookie to allow for some spreading: This spacing prevents cookies from joining as they expand, and helps heat circulate so edges caramelize while centers stay soft. Visually, you want room so each cookie gets its own heat pocket, producing that desirable golden rim. Packing them too tightly is a frequent mistake that leads to pulled edges when separating the baked cookies.
- Bake cookies for 15 to 18 minutes, turning about halfway to ensure even baking: During baking you will notice the aroma of butter and warm sugar filling the kitchen, and the edges will begin to take on a light golden hue while the centers remain pale and slightly soft. Turning the pans halfway promotes even coloration if your oven has hot spots. Look for cookies that are golden at the edges and still soft in the middle, because they will continue to set on the hot sheet after removal. Overbaking is a common error that yields dry, crisp centers, so err on the side of slightly underdone if you prefer chewier cookies.
- Cookies should be golden at the edges but soft in the middle: When you remove the tray, the centers will wobble a bit but firm as they cool, creating that tender chew that makes these cookies special. Let them rest on the sheet for a few minutes before transferring to a wire rack, this brief pause allows carryover heat to finish the cook without drying them out. If you remove them too quickly, they may be fragile and break apart, so use a thin spatula and gentle motions for best results.
Ways to Customize
These cookies are a great base for small changes that amplify flavor or texture. Below I outline a range of ideas, each presented so you can try one at a time and learn how the cookie responds. Start with one tweak and keep notes so you can repeat the version you like best.
- Boost fruit intensity by using 3 quarter cup diced dried apricots instead of fresh for a chewier texture and concentrated flavor that holds up well in the cookie.
- Adjust sweetness by reducing granulated sugar by two tablespoons if you prefer a less sweet profile while keeping the same structure from the dough.
- Swap mix ins by folding in chopped nuts such as toasted almonds for crunch, ensuring they are added after the flour to avoid overmixing.
- Texture play by chilling the dough overnight to develop deeper flavor and slightly denser chew, which many bakers prefer for make ahead batches.
- Edge caramelization by sprinkling a tiny pinch of coarse sugar on top of each dough ball before baking to encourage a sparkly, crisp rim.
What to Serve With Fresh Apricot and White Chocolate Chip Cookies
These cookies pair wonderfully with beverages and light accompaniments, and they fit a range of occasions from afternoon tea to casual summer get togethers. Below are serving ideas, storage notes, and pairing suggestions to help you present them beautifully.
- Tea and coffee are classic companions, especially a lightly roasted cup that will not overpower the fruity notes of the apricots.
- Picnic friendly pack these cookies in a single layer in a tin for travel, and they will remain soft for several hours if kept out of direct sun.
- Party platter arrange them alongside fresh fruit and simple butter cookies for variety at a gathering.
- Storage keep cooled cookies in an airtight container at room temperature for up to three days, or freeze baked cookies for up to one month and thaw at room temperature.
- Seasonal hosting these are ideal for summer brunches or casual backyard dinners, where their fruity brightness complements lighter menus.
FAQ
Conclusion
What makes these cookies special is the bright interplay between sun kissed apricots and creamy white chocolate, balanced by a tender, chewy cookie base. I encourage you to give them a try because they are forgiving to make, travel well, and consistently earn compliments whether you bring them to a picnic or enjoy them quietly at home. Baking them becomes a small ritual of sensory rewards, from the aroma that fills your kitchen to the contrast of textures in each bite.
Fresh Apricot and White Chocolate Chip Cookies
Equipment
- Stand mixer
- Paddle attachment
- Medium Bowl
- Whisk
- Rubber spatula
- Medium sized ice cream scoop
- Baking Sheets
- Parchment Paper
Ingredients
- 2 1/4 cups unbleached all-purpose flour 1 teaspoon baking soda 1/4 teaspoon salt 1/2 teaspoon finely ground espresso powder or instant coffee 10 ounces white chocolate chips 1 cup finely diced fresh apricots, or 3/4 cup diced dried apricots 8 ounces butter, at room temperature 1 cup granulated sugar 1/2 cup brown sugar 2 eggs 2 teaspoons pure vanilla extract Combine for structure, leavening, seasoning, and subtle savory depth; unbleached all-purpose flour provides the main body and crumb, baking soda ensures a light rise and slight spread, salt balances and enhances sweetness, and finely ground espresso powder or instant coffee deepens the white chocolate flavor without imparting overt coffee notes.
Instructions
- Combine flour, baking soda, salt, and espresso in a medium bowl. Mix with a whisk until evenly distributed. Add chocolate chips and apricot bits and mix well. Set aside.: The scent at this stage is faintly toasty from the espresso , and whisking these dry elements together ensures an even distribution so every cookie rises consistently. Mixing now prevents pockets of leavener that would create uneven texture later, and the small amount of baking soda will interact with the sugars and butter to give the cookies lift. A common mistake is skipping the whisking, which can leave clumped leavener causing odd bumps in the baked cookies, so take the extra minute to blend thoroughly. After whisking, fold in the white chocolate chips and apricot bits so they are coated lightly with flour, this helps them stay suspended in the dough rather than sinking.
- Combine the butter and sugars in a stand mixer. Using the paddle attachment, mix on medium speed for about 5 minutes, until the mixture is smooth and pale in color. Add 1 egg at a time, mixing until incorporated. Scrape down the sides of the bowl, and then add the vanilla. Continue mixing until butter, sugar, eggs, and vanilla are all incorporated (about 1 minute). Scrape down the sides of the bowl.: Once you begin creaming, the sound changes to a gentle hum and the mixture moves from heavy to silky, almost glossy. Creaming for about five minutes at medium speed incorporates air, which is responsible for that tender lift you want. The color will change to a paler shade as tiny air bubbles form, and you will notice a softer texture under the paddle. If you undercream, cookies can be dense, and if you overcream, they may spread too much; aim for that light, pale look described. Add the eggs one at a time so the mixture doesn't break, scraping down the bowl between additions keeps everything integrated and avoids streaks of unmixed butter.
- Add the dry ingredients in 3 additions. Mix on low speed for no more than 1 minute. Remove bowl from mixture and do a final mix with a rubber spatula. Cover and chill for at least one hour.: As you add each egg , listen for the change in rhythm, the batter will momentarily thin then thicken again as it emulsifies. Proper incorporation prevents a greasy texture and ensures even moisture through the dough. If eggs are added too quickly, the mixture can separate and look curdled, which is a sign you should slow down and scrape the bowl more often. Once both eggs and the vanilla are mixed in, the dough should be cohesive and glossy, ready for the dry additions.
- Preheat oven to 350. Line two baking sheets with parchment. Scoop dough with a medium-sized ice cream scoop to form 1-inch balls. Leave at least an inch and a half around each cookie to allow for some spreading. Bake cookies for 15-18 minutes, turning about halfway to ensure even baking. Cookies should be golden at the edges but soft in the middle.: Adding the flour mixture gradually protects the dough from overmixing, which would develop too much gluten and result in a tough cookie. Each addition should be mixed on low speed just until the streaks disappear, you will see the dough thicken and become less sticky. After the third addition, finish by folding with a rubber spatula to bring any residual flour into the dough without excessive agitation. A common pitfall is leaving a pocket of flour unmixed, which creates dry bits after baking, so take a last look to ensure uniformity. Cover and chill for at least one hour to firm the fat and let the flavors meld, which also helps with controlled spreading during baking.
- Cover and chill for at least one hour: Chilling transforms the dough texture, firming the butter so the cookies spread less and hold a thicker, chewier center. During this rest the flavors relax and deepen, making the apricot and white chocolate notes more integrated. If you skip chilling, expect wider, thinner cookies, which may be desirable for some, but not for the soft centered result this recipe aims for. A mistake here is rushing to bake immediately, which changes both texture and flavor development, so set a timer and resist the urge to bake right away.
- Preheat oven to 350: A fully preheated oven ensures consistent rise and browning from the moment the dough hits the heat. You will smell the faint toasty warmth as the oven reaches temperature, signaling readiness. Bakeware also benefits from sitting in a hot oven, so place racks in the middle for even airflow. If the oven is not properly preheated, cookies can spread irregularly and bake unevenly, so allow time for the temperature to stabilize before loading trays.
- Line two baking sheets with parchment: Using parchment prevents sticking and promotes even browning on the bottom of the cookies, plus it makes cleanup effortless. When you transfer the dough balls, keep the parchment flat and avoid crowding the tray. Overcrowding reduces air circulation, causing uneven edges and centers that bake at different rates. Rotate pans halfway to achieve uniform color and texture across both sheets.
- Scoop dough with a medium sized ice cream scoop to form 1 inch balls: Scooping creates evenly sized cookies so they bake at the same rate, producing consistent texture from one to the next. The sound of the scoop releasing dough is small and satisfyingly neat, and the dough should hold a round shape before you place it on the sheet. Leave at least an inch and a half around each cookie to allow for spreading, or they will merge into one another which flattens the edges. If your scoop compresses the dough too much, the cookies may bake denser than intended.
- Leave at least an inch and a half around each cookie to allow for some spreading: This spacing prevents cookies from joining as they expand, and helps heat circulate so edges caramelize while centers stay soft. Visually, you want room so each cookie gets its own heat pocket, producing that desirable golden rim. Packing them too tightly is a frequent mistake that leads to pulled edges when separating the baked cookies.
- Bake cookies for 15 to 18 minutes, turning about halfway to ensure even baking: During baking you will notice the aroma of butter and warm sugar filling the kitchen, and the edges will begin to take on a light golden hue while the centers remain pale and slightly soft. Turning the pans halfway promotes even coloration if your oven has hot spots. Look for cookies that are golden at the edges and still soft in the middle, because they will continue to set on the hot sheet after removal. Overbaking is a common error that yields dry, crisp centers, so err on the side of slightly underdone if you prefer chewier cookies.
- Cookies should be golden at the edges but soft in the middle: When you remove the tray, the centers will wobble a bit but firm as they cool, creating that tender chew that makes these cookies special. Let them rest on the sheet for a few minutes before transferring to a wire rack, this brief pause allows carryover heat to finish the cook without drying them out. If you remove them too quickly, they may be fragile and break apart, so use a thin spatula and gentle motions for best results.
Notes
- Boost fruit intensity by using 3 quarter cup diced dried apricots instead of fresh for a chewier texture and concentrated flavor that holds up well in the cookie.
- Adjust sweetness by reducing granulated sugar by two tablespoons if you prefer a less sweet profile while keeping the same structure from the dough.
- Swap mix ins by folding in chopped nuts such as toasted almonds for crunch, ensuring they are added after the flour to avoid overmixing.
- Texture play by chilling the dough overnight to develop deeper flavor and slightly denser chew, which many bakers prefer for make ahead batches.
- Edge caramelization by sprinkling a tiny pinch of coarse sugar on top of each dough ball before baking to encourage a sparkly, crisp rim.