
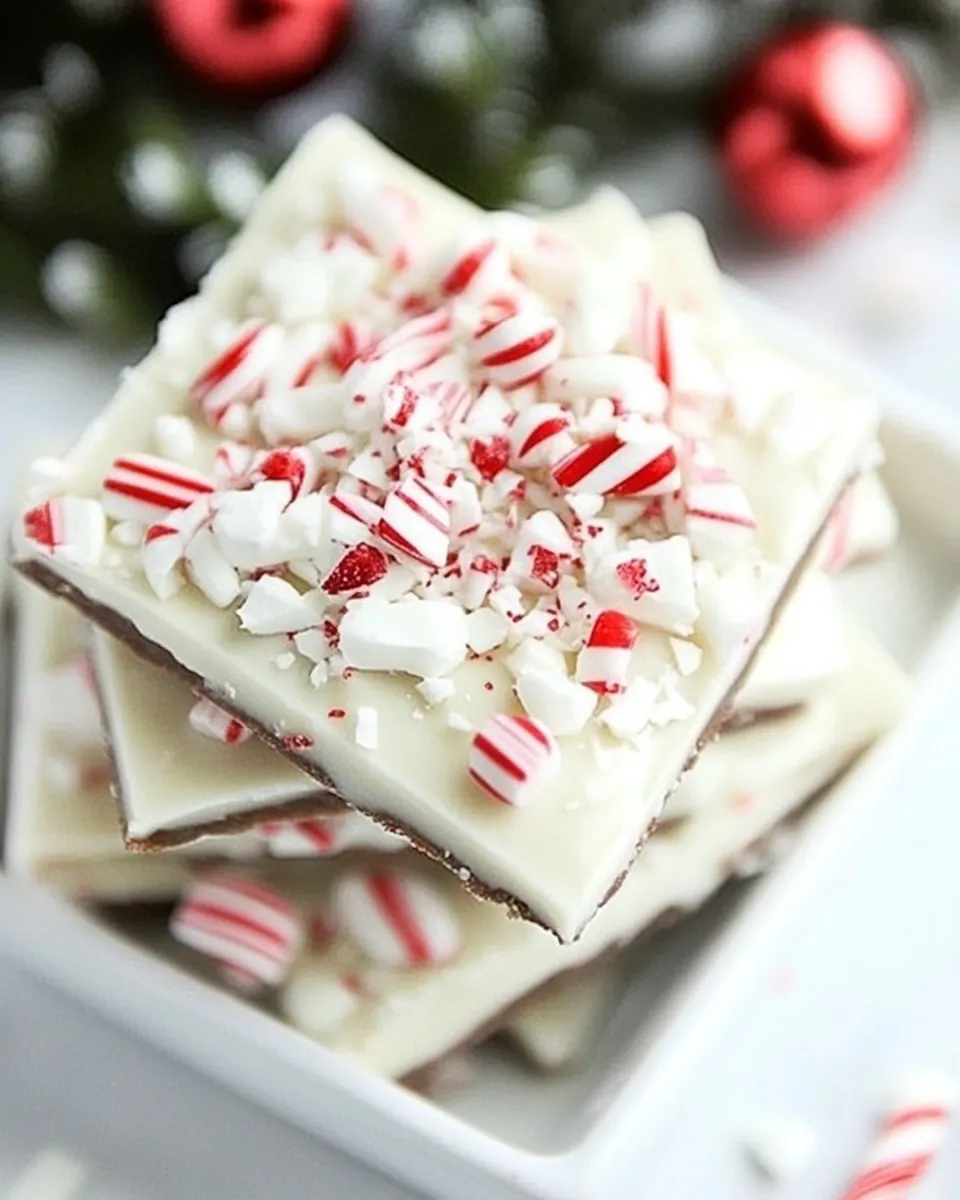
Super Easy 3 Ingredient Peppermint Bark
Super Easy 3 Ingredient Peppermint Bark is one of those recipes I reach for when the calendar fills up and I still want something homemade to bring to a party. The first time I made it I was short on time and long on holiday spirit, and the result felt like a little victory: glossy layers of dark chocolate and white chocolate flecked with bright, crunchy bits of candy canes. I remember standing at the counter, spoon in hand, listening to the gentle clink of the bowl against the pot as the chocolate melted, feeling oddly calm amid the holiday bustle.
Over the years I’ve tweaked my approach, mostly by learning when to be patient and when to move quickly. There is a rhythm to this treat that makes it oddly meditative, from the soft steam of the double boiler to the crisp, refreshing snap when you bite into a piece. I like to make a big sheet, wrap small bundles for neighbors, and keep a few pieces in the freezer for a late night pick me up. That simple ritual of sharing is what keeps me coming back to this recipe season after season.
Recipe Snapshot
25 mins
5 mins
20 mins
Easy
200 kcal
American
Vegan, Gluten-Free
Desserts
Large baking sheet, Parchment paper, Double boiler or heatproof bowl and pot, Spatula, Sharp knife
The Charm of This Super Easy 3 Ingredient Peppermint Bark
Layered Contrast that Works
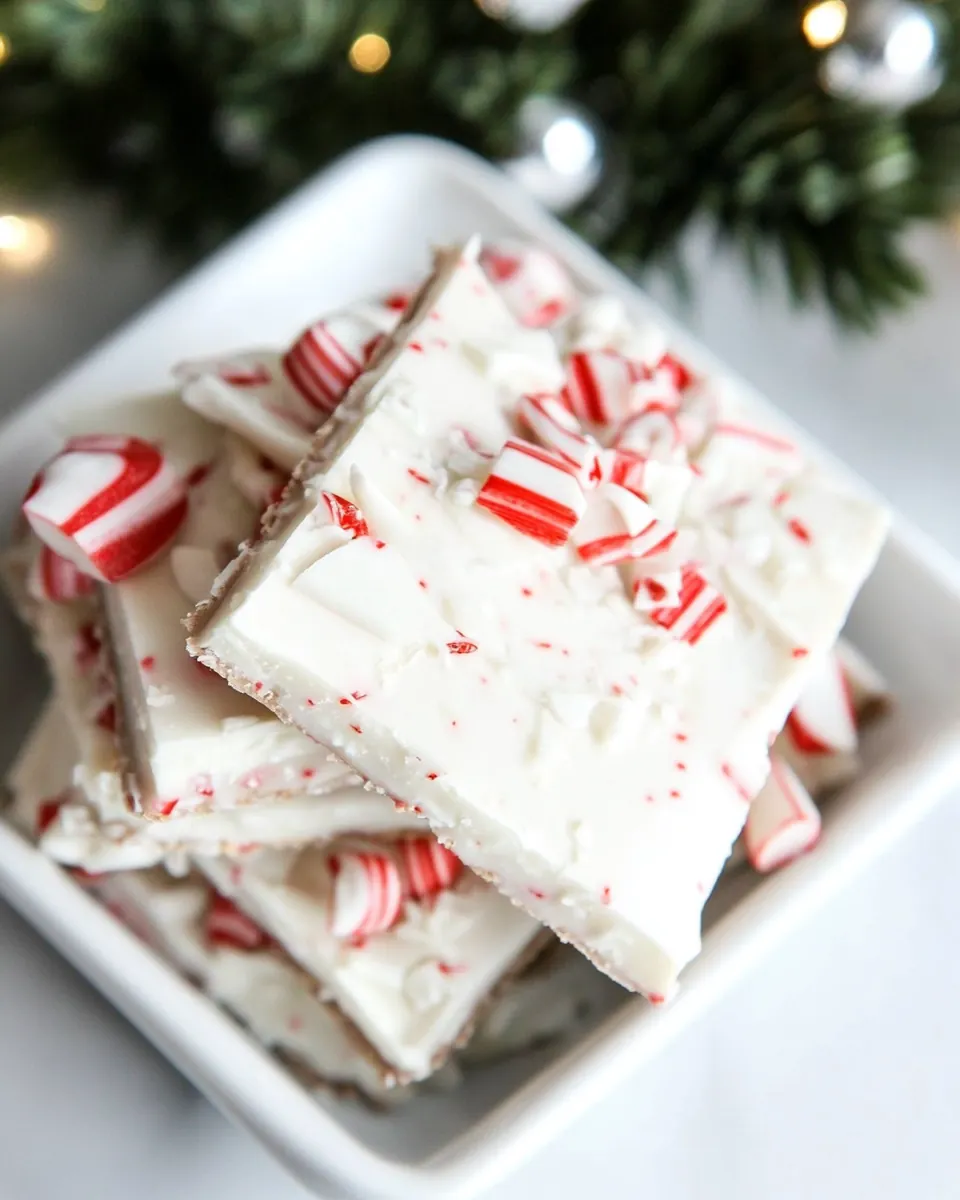
I love how the combination of dark chocolate and white chocolate creates both flavor and visual contrast. The slightly bitter, cocoa forward notes of the dark layer balance the creamy sweetness of the white layer. This interplay keeps each bite interesting, and it is why I often double the recipe when I know guests are coming.
Speed without Sacrifice
This is a dessert that gives you maximum impact with minimal fuss. I can walk you through the steps in minutes, yet the finished product looks and tastes like something you might buy at a gourmet shop. That makes it perfect for last minute gifts or impromptu dessert needs.
Texture Play
The crushed candy canes add a satisfying crunch and a burst of mint that cuts through the richness. I always reserve a portion to sprinkle on top after pouring so you get big shards that shatter pleasingly when you bite them. It is a small detail that makes every piece feel festive.
Customizable and Kid Friendly
While the recipe is simple, you can tailor it subtly depending on the occasion. I sometimes use more dark chocolate for a sophisticated touch, or more white chocolate if I am serving it to children. Kids adore helping with the sprinkling step, and it becomes a lovely little memory building activity.
Great for Gifting
Because it stores well in an airtight container, Super Easy 3 Ingredient Peppermint Bark is an ideal edible gift. I package pieces in small cello bags tied with ribbon, and people always comment on the homemade feel. It is a simple recipe that delivers holiday cheer with very little stress.
What You’ll Need for Super Easy 3 Ingredient Peppermint Bark
These three ingredients are all about harmony. The dark chocolate provides a firm, bittersweet foundation while the white chocolate brings creaminess and visual brightness. The candy canes add both crunch and minty lift, tying the layers together and making each bite festive. I treat them like collaborators: one gives structure, one gives cream and sweetness, and the last gives texture and seasonal character.
- 12 oz dark chocolate morsels: Meltable and rich, provides the deep chocolate base that firms into a glossy layer when cooled; temper gently to avoid bloom and ensure a smooth texture. Adds bittersweet flavor that balances the sweetness of the white chocolate and crushed candy canes for classic peppermint bark contrast. Can be melted in a double boiler or microwave in short bursts, stirring frequently for even consistency.
- 12 oz white chocolate morsels: Creamy and sweet, creates the contrasting top layer that visually pops against the dark chocolate and adds milky vanilla notes. Melts smoothly to spread over the chilled dark layer, then sets into a firm, pale surface ideal for pressing in crushed candy canes. Use gentle heat and stir frequently to prevent scorching and maintain a glossy finish.
- 6 candy canes, crushed, divided: Crunchy and minty, delivers bright peppermint flavor and a festive crunchy texture when sprinkled over the chocolate layers; reserve some finely crushed pieces for decoration. Provides visual contrast with red-and-white flecks and a refreshing palate cleanser between rich chocolate bites. Divide crushed pieces so larger shards add texture while finer bits adhere well to the melted white chocolate.
Recipe Directions for Super Easy 3 Ingredient Peppermint Bark
The directions are straightforward, but I like to walk you through them with the little sensory cues that tell you things are going right. Work in an orderly sequence so the tempered layers set properly, and keep your workspace dry. Below are the cleaned steps expanded into helpful, tactile guidance so you feel confident every step of the way.
- Prepare a large baking sheet with parchment paper and set aside.: The aroma of clean parchment and the cool feel of a sheet pan under your hands signals preparation, and this step matters because it prevents sticking and helps the bark release cleanly. Press the parchment flat so there are no folds that will imprint the chocolate, and make sure the sheet fits in your refrigerator. A common mistake is placing parchment on a warped pan, which can cause uneven thickness. If your pan is cold it will help the chocolate set more quickly when you pour it.
- Melt dark chocolate over a double boiler. (bring a small pot with 1 to 2 inches of water to a slow boil. Place a metal or glass bowl over the pot of water, make sure it fits on top of the pot without touching the water. Place the chocolate chips inside the bowl and stir frequently until chocolate melts and becomes smooth in texture): You will notice the chocolate first soften, then turn glossy and viscous as it melts, emitting a gentle cocoa scent that is comforting and deep. The double boiler keeps the temperature even, preventing scorching; as you stir with a heatproof spatula you will see streaks vanish into a silky sheen. If the chocolate looks grainy, it may have come into contact with water, so remove it from heat and stir vigorously while keeping it dry. Avoid direct high heat because that will alter texture and flavor.
- Pour melted dark chocolate onto prepared baking sheet and smooth out to an even thickness (about 1/4 inch). Place in fridge to let harden.: When you pour, listen for the soft settling sound as the chocolate levels across the parchment, and use a spatula to coax it into a smooth layer with a glossy top. An even thickness is essential for matching bite texture across pieces; if it is too thin the bark will be fragile, if too thick it will be overly rich. One trap is overworking the surface which can introduce air pockets; smooth with confident, gentle strokes. Place in the fridge to let it harden so the next layer will sit cleanly on top.
- Clean out bowl and melt the white chocolates the same way.: The white chocolate will melt faster and become opaque and glossy; its scent is sweeter and creamier, which signals readiness. Scrape the bowl well so no dark chocolate residue remains, otherwise streaks can form. Keep the heat gentle and stir constantly to reach a smooth texture without overheating. A common error is rushing the heat which can cause separation; slow, steady melting preserves the silky finish you want for pouring.
- Once white chocolate is smooth, place 3 crushed candy canes inside the bowl and stir to combine. Pour over hardened dark chocolate and quickly smooth out.: As you stir the candy canes into the warm white chocolate, you will feel occasional gritty fragments that promise crunch. Pouring quickly helps the white layer adhere, and the contrast between the cool dark underside and the warm white top will be visible as it settles. Work with a steady hand so the swirl is even; if you wait too long the white chocolate will start to set and will not spread smoothly. Avoid pouring too hot because it can slightly remelt the dark layer beneath.
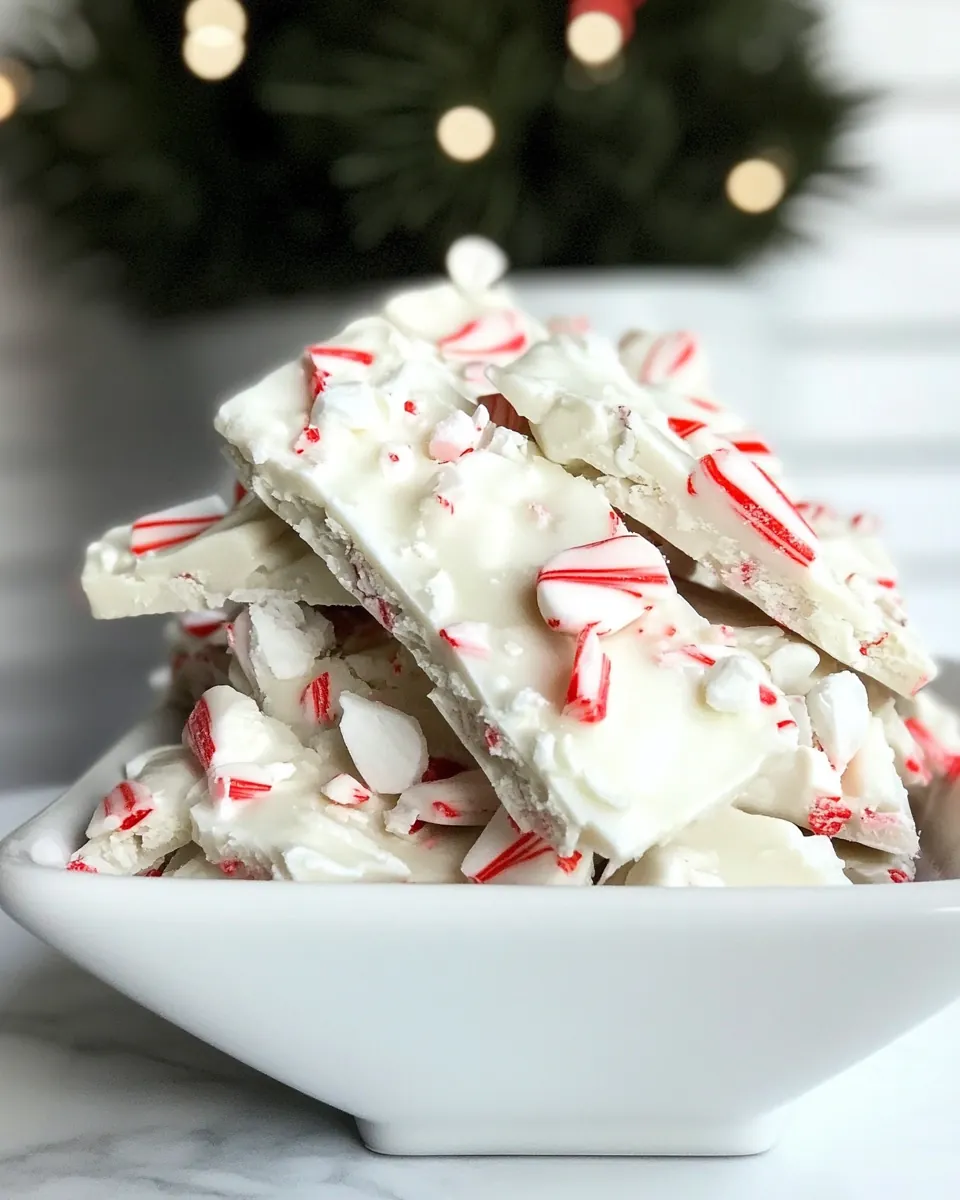
- Sprinkle the remaining crushed candy canes over the wet chocolate. Place in fridge to harden again. After it's hard, use a sharp knife to carefully cut into small pieces. (store in sealed container): As you sprinkle, the pieces will stick and sparkle, making the surface look festive and textured. Chilling until fully firm lets the layers bond while keeping crisp edges, and when you slice the bark you will hear a clean snap if set correctly. Use a sharp knife at room temperature or briefly warm the blade for cleaner cuts, being careful not to melt the chocolate. Store in a sealed container to preserve crispness and prevent the peppermint from softening in humid conditions.
Expert Tips about Super Easy 3 Ingredient Peppermint Bark
I like to share tips that save time and improve texture, especially when making treats for gifting. These notes cover melting, handling, and presentation so your bark looks professional even when you are short on time. Follow them and you will feel proud of every tray you make.
- Choose quality chocolate: Using good quality dark chocolate and white chocolate morsels affects flavor and melt behavior; chocolates with more cocoa butter melt smoother and set with a better snap.
- Avoid water: Even a drop of water will seize chocolate into a grainy mess; always use dry utensils and dry hands while melting and stirring.
- Control temperature: Keep heat low when melting over a double boiler to prevent scorching and to maintain a silky texture in both chocolates.
- Crush candy canes in a bag: Place candy canes in a sealed bag and crush with a rolling pin to keep bits controlled and to protect your countertops.
- Chill between layers: Refrigerate the dark layer until fully firm before adding the white layer so the layers remain distinct and clean when you cut pieces.
- Use a sharp knife for cutting: A clean, sharp blade yields neat edges; warm the knife slightly under hot water and dry it between cuts for smoother slices.
What to Serve Alongside Super Easy 3 Ingredient Peppermint Bark
This treat is versatile and fun to pair, whether you are assembling a dessert board or gifting small packages. Below are serving suggestions, occasions, and storage notes that will help you present the bark beautifully and keep it tasting its best.
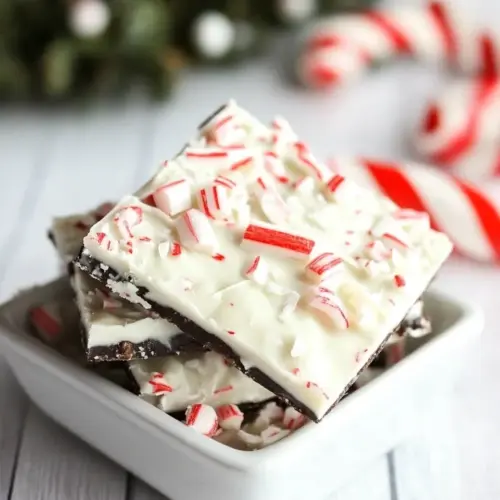
- Holiday dessert platter: Arrange pieces with cookies and nuts for a festive display, placing the bark near softer items so the textures complement each other.
- Gift packaging: Wrap in cellophane bags with twine for neighbor gifts, and include a small card describing the ingredients so recipients know it is homemade.
- After dinner treat: Serve small squares with coffee or tea; the minty crunch pairs especially well with strong brewed beverages.
- Office or classroom share: Portion into small stacks and place in small boxes so pieces stay protected, making them easy to transport and share.
- Storage tips: Keep in an airtight container in a cool, dry place or refrigerate for longer storage, and avoid exposing it to strong odors that can be absorbed by the chocolate.
- Seasonal pairings: This is perfect for winter celebrations and holiday cookie exchanges where bright, minty flavors are appreciated.
FAQ
Conclusion
What makes this recipe special is how little effort produces a striking, festive treat that tastes and looks homemade. The contrast between rich dark chocolate, creamy white chocolate, and crunchy candy canes creates a satisfyingly layered experience that friends and family love. Give it a try the next time you need a quick dessert or a thoughtful edible gift, and enjoy the small ritual of creating something bright and shareable. It is reassuringly simple, and the results always feel celebratory.
Super Easy 3 Ingredient Peppermint Bark
Equipment
- Large Baking Sheet
- Parchment Paper
- Double boiler or heatproof bowl and pot
- Spatula
- Sharp Knife
Ingredients
- 12 oz dark chocolate morsels Meltable and rich, provides the deep chocolate base that firms into a glossy layer when cooled; temper gently to avoid bloom and ensure a smooth texture. Adds bittersweet flavor that balances the sweetness of the white chocolate and crushed candy canes for classic peppermint bark contrast. Can be melted in a double boiler or microwave in short bursts, stirring frequently for even consistency.
- 12 oz white chocolate morsels Creamy and sweet, creates the contrasting top layer that visually pops against the dark chocolate and adds milky vanilla notes. Melts smoothly to spread over the chilled dark layer, then sets into a firm, pale surface ideal for pressing in crushed candy canes. Use gentle heat and stir frequently to prevent scorching and maintain a glossy finish.
- 6 candy canes, crushed, divided Crunchy and minty, delivers bright peppermint flavor and a festive crunchy texture when sprinkled over the chocolate layers; reserve some finely crushed pieces for decoration. Provides visual contrast with red-and-white flecks and a refreshing palate cleanser between rich chocolate bites. Divide crushed pieces so larger shards add texture while finer bits adhere well to the melted white chocolate.
Instructions
- Prepare a large baking sheet with parchment paper and set aside.: The aroma of clean parchment and the cool feel of a sheet pan under your hands signals preparation, and this step matters because it prevents sticking and helps the bark release cleanly. Press the parchment flat so there are no folds that will imprint the chocolate, and make sure the sheet fits in your refrigerator. A common mistake is placing parchment on a warped pan, which can cause uneven thickness. If your pan is cold it will help the chocolate set more quickly when you pour it.
- Melt dark chocolate over a double boiler. (bring a small pot with 1 to 2 inches of water to a slow boil. Place a metal or glass bowl over the pot of water, make sure it fits on top of the pot without touching the water. Place the chocolate chips inside the bowl and stir frequently until chocolate melts and becomes smooth in texture): You will notice the chocolate first soften, then turn glossy and viscous as it melts, emitting a gentle cocoa scent that is comforting and deep. The double boiler keeps the temperature even, preventing scorching; as you stir with a heatproof spatula you will see streaks vanish into a silky sheen. If the chocolate looks grainy, it may have come into contact with water, so remove it from heat and stir vigorously while keeping it dry. Avoid direct high heat because that will alter texture and flavor.
- Pour melted dark chocolate onto prepared baking sheet and smooth out to an even thickness (about 1/4 inch). Place in fridge to let harden.: When you pour, listen for the soft settling sound as the chocolate levels across the parchment, and use a spatula to coax it into a smooth layer with a glossy top. An even thickness is essential for matching bite texture across pieces; if it is too thin the bark will be fragile, if too thick it will be overly rich. One trap is overworking the surface which can introduce air pockets; smooth with confident, gentle strokes. Place in the fridge to let it harden so the next layer will sit cleanly on top.
- Clean out bowl and melt the white chocolates the same way.: The white chocolate will melt faster and become opaque and glossy; its scent is sweeter and creamier, which signals readiness. Scrape the bowl well so no dark chocolate residue remains, otherwise streaks can form. Keep the heat gentle and stir constantly to reach a smooth texture without overheating. A common error is rushing the heat which can cause separation; slow, steady melting preserves the silky finish you want for pouring.
- Once white chocolate is smooth, place 3 crushed candy canes inside the bowl and stir to combine. Pour over hardened dark chocolate and quickly smooth out.: As you stir the candy canes into the warm white chocolate, you will feel occasional gritty fragments that promise crunch. Pouring quickly helps the white layer adhere, and the contrast between the cool dark underside and the warm white top will be visible as it settles. Work with a steady hand so the swirl is even; if you wait too long the white chocolate will start to set and will not spread smoothly. Avoid pouring too hot because it can slightly remelt the dark layer beneath.
- Sprinkle the remaining crushed candy canes over the wet chocolate. Place in fridge to harden again. After it's hard, use a sharp knife to carefully cut into small pieces. (store in sealed container): As you sprinkle, the pieces will stick and sparkle, making the surface look festive and textured. Chilling until fully firm lets the layers bond while keeping crisp edges, and when you slice the bark you will hear a clean snap if set correctly. Use a sharp knife at room temperature or briefly warm the blade for cleaner cuts, being careful not to melt the chocolate. Store in a sealed container to preserve crispness and prevent the peppermint from softening in humid conditions.
Notes
- Choose quality chocolate: Using good quality dark chocolate and white chocolate morsels affects flavor and melt behavior; chocolates with more cocoa butter melt smoother and set with a better snap.
- Avoid water: Even a drop of water will seize chocolate into a grainy mess; always use dry utensils and dry hands while melting and stirring.
- Control temperature: Keep heat low when melting over a double boiler to prevent scorching and to maintain a silky texture in both chocolates.
- Crush candy canes in a bag: Place candy canes in a sealed bag and crush with a rolling pin to keep bits controlled and to protect your countertops.
- Chill between layers: Refrigerate the dark layer until fully firm before adding the white layer so the layers remain distinct and clean when you cut pieces.
- Use a sharp knife for cutting: A clean, sharp blade yields neat edges; warm the knife slightly under hot water and dry it between cuts for smoother slices.