
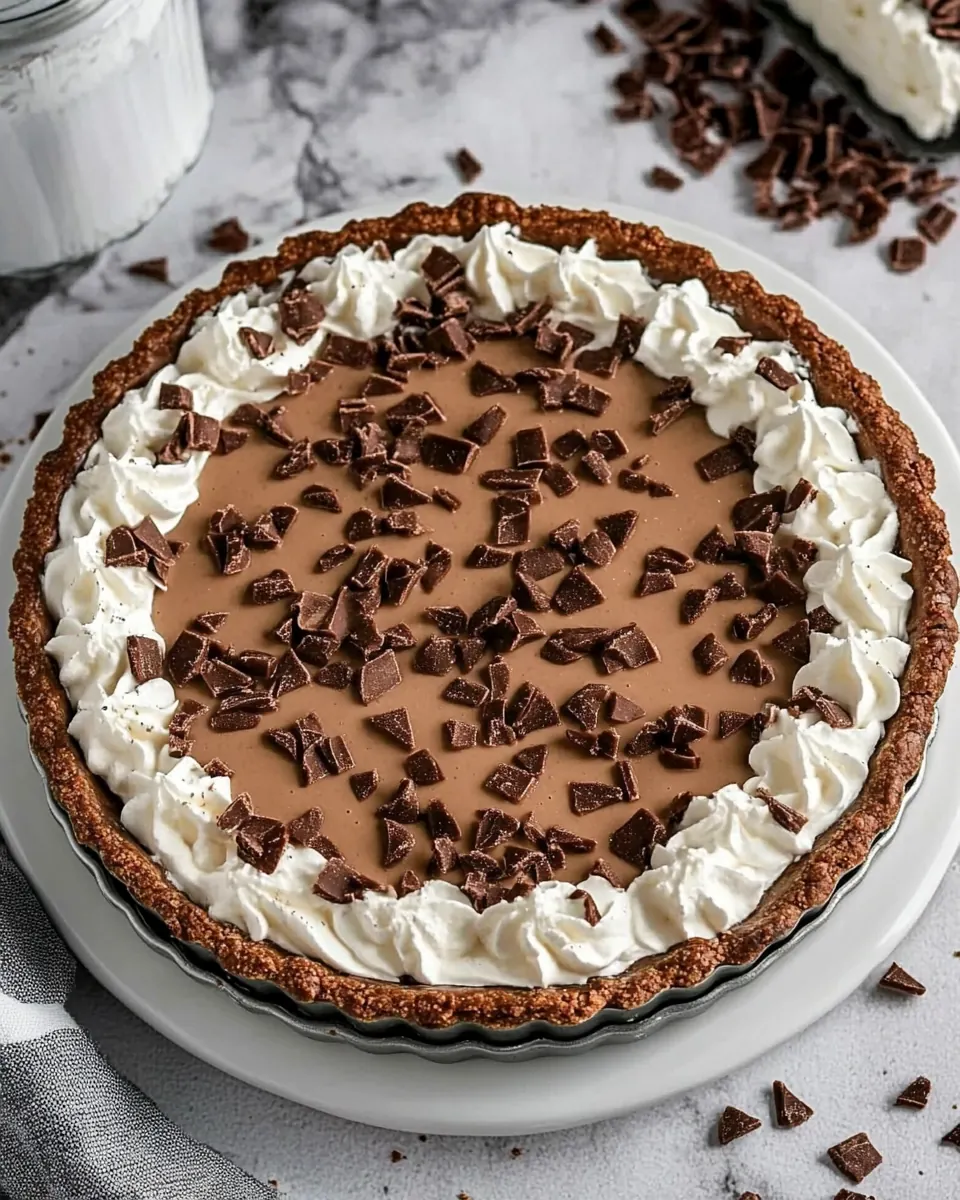
French Silk Tart
French Silk Tart is one of those desserts I reach for when I want to impress without sweating the small stuff. I first tasted a version of this tart at a friend s dinner, where it arrived glossy and calm, the kind of dessert that made everyone pause mid conversation. After that evening I started experimenting in my own kitchen, chasing that silky, chocolate rich filling and the crunch of a cookie crust, and this recipe grew out of those late night tests and happy accidents.
Every time I make French Silk Tart I recall folding chocolate into butter while a record played softly in the background. There s comfort in the routine, and a thrill when I pipe clouds of whipped cream on top. I ve brought this tart to potlucks and quiet dinners alike, and it always sparks questions about how it gets so smooth. I ll walk you through how the components come together without fuss, and share the small tricks I learned that keep the filling silky and stable.
Recipe Snapshot
30 mins
30 mins
Medium
400 kcal
French
Keto, Gluten-Free
Desserts
Stand mixer, Paddle attachment, 10 inch tart pan, Food processor, Mixing bowl
The Best Thing About This French Silk Tart
1. Luxurious texture that feels fancy but is easy
I love how French Silk Tart looks like an indulgent patisserie item, yet it s straightforward to make. The filling is creamy and dense, and when it sets it slices cleanly. I find that the contrast between a crunchy cookie base and a meltingly smooth center is what makes guests lean in for a second bite.
2. Minimal ingredients, maximum impact
Just a handful of pantry items deliver a dessert that tastes expensive. That streamlined ingredient list means you can focus on technique rather than shopping, and I often have everything on hand to pull this together after dinner.
3. Great for make ahead hosting
This tart benefits from time in the refrigerator. I often assemble it the day before, which reduces last minute stress and lets the flavors marry. Having a dessert that improves with a little patience is a host s best friend in my book.
4. Versatile presentation
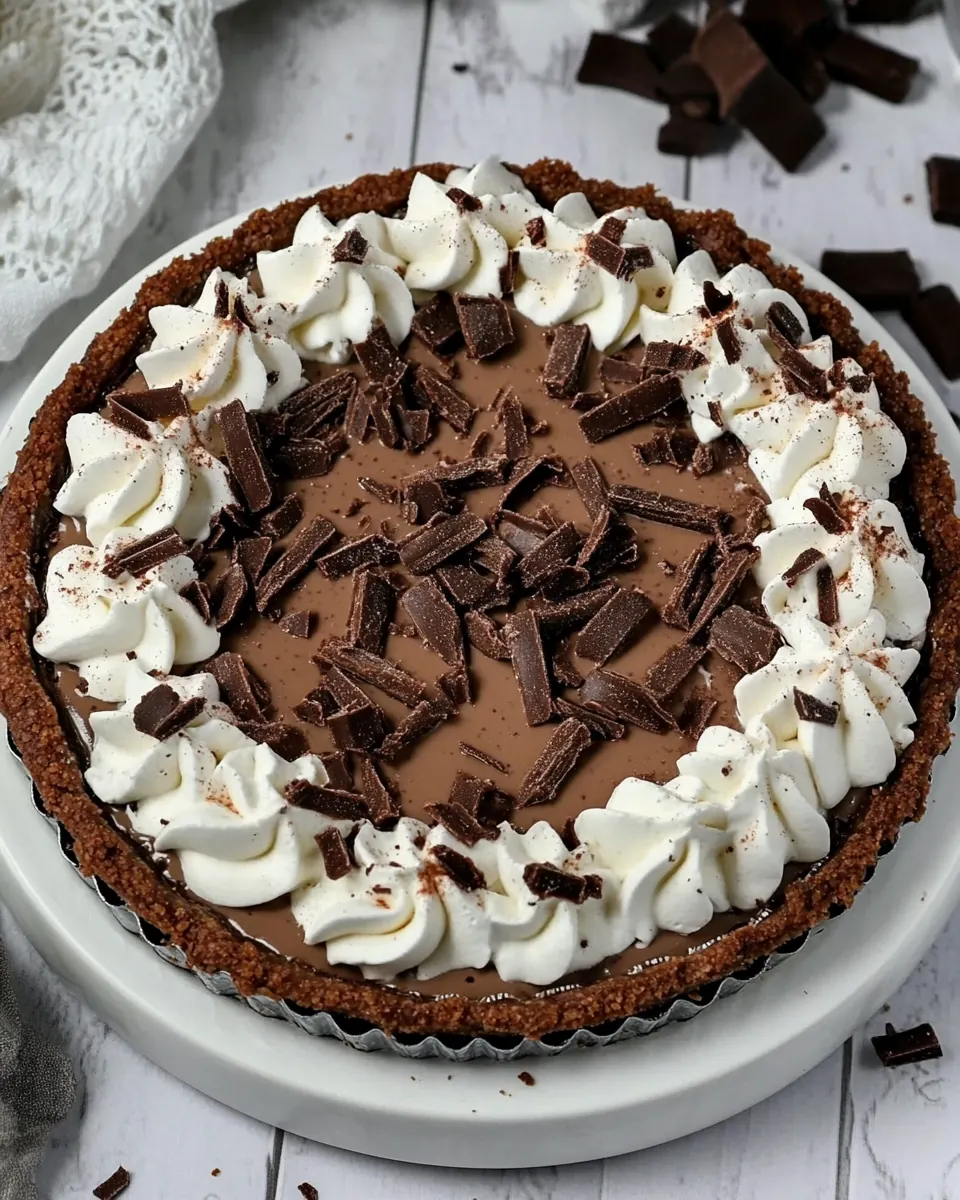
You can keep the top simple with a sweep of whipped cream or dress it up with piped rosettes and shavings. I enjoy switching the garnish depending on the occasion, and the tart always feels appropriate whether it s a casual family dinner or a holiday table.
5. Crowd pleasing and nostalgic
There s a nostalgic quality to the texture and chocolate flavor that resonates across ages. When I bring French Silk Tart to gatherings, it evokes fond memories and invites conversation, which is exactly what I aim for with dessert.
What You’ll Need for French Silk Tart
The ingredient list for this tart leans on a few strong players that do heavy lifting. The cookie crumbs form a crisp shell that contrasts the soft filling, while butter binds the crust and adds richness. Inside the filling, the combination of butter, sugar, chocolate, eggs, and finished whipped cream makes for that classic silky mouthfeel. Each component is simple, yet the balance between crunchy and creamy is what makes the tart sing.
- 32 Regular Oreos, processed to crumbs: Crushed finely to create the tart base, providing structure and a deep chocolate flavor that contrasts with the filling; binds with melted butter to form a cohesive, sliceable crust and contributes both texture and sweetness when pressed into the pan.
- 6 tablespoons butter, melted: Melted and incorporated into the cookie crumbs to moisten and bind them into a compact crust; adds richness and helps the crust set firmly when chilled or baked, enhancing mouthfeel and flavor.
Making French Silk Tart
Working through the steps is where the tart comes alive, and I like to move deliberately while keeping things relaxed. The directions below follow the original sequence, rewritten into vivid, practical guidance so you can feel confident at each stage.
- To make the crust, mix Oreo crumbs and melted butter until well combined.: The first sensory cue is the smell of chocolate as you stir, and you ll notice the crumbs turn uniformly glossy when the butter is distributed. Use a bowl with a flat bottom to press the mixture easily later on. The why: even distribution ensures the crust holds together when sliced. Troubleshooting tip: if pockets of dry crumbs remain, add a teaspoon of melted butter at a time until the mixture holds when pinched. Avoid overworking or pressing too firmly or you may end up with a rock hard crust.
- Pat into the bottom and up the sides of a 10-inch tart pan. Freeze for about 10 minutes.: You will feel the texture change as you press the crumbs into place, and the visual cue is an even layer across the base and sides. Chilling the pan firms the crust so it keeps its shape while you prepare the filling. The reason this matters is it prevents the crust from crumbling when filled. Common mistake to avoid: pressing unevenly which causes thin spots that can break; take time to smooth and build an even edge.
- In the bowl of a stand mixer with the paddle attachment, cream butter and sugar for about 2 minutes, till light and fluffy.: When creaming, watch for a pale color and a fluffier texture, and listen for the gentle, airy sound as the mixture changes. This process traps air, contributing to a lighter mouthfeel in the final filling. If you under-cream, the filling can be dense; over-creaming might warm the mixture too much. If your kitchen is warm, chill the bowl briefly before starting.
- With the mixer running, gradually add the melted chocolate and the vanilla.: As the melted chocolate folds in, the aroma deepens into a rich cocoa scent and the mixture takes on a glossy sheen. Adding the chocolate slowly prevents separation and encourages a uniform emulsion. The why: gradual incorporation keeps the texture silky. A common issue is adding hot chocolate too quickly, which can seize; ensure the chocolate is warm but not scalding, and add in a slow stream.
- Add eggs, one at a time, beating at medium speed for 5 minutes after each addition.: You ll notice the batter becomes progressively lighter and mousse like as each egg is fully integrated, and the sound of the mixer becomes steadier. This long, measured beating whips air into the filling, creating that classic silkiness. The reason this technique matters is it stabilizes the filling without curdling. Mistake to avoid: rushing the eggs, which can lead to a runny or unstable filling; always wait the full beating time for best texture.
- Pour the filling into the cooled crust. Loosely cover with plastic wrap, and cool in the refrigerator for at least 4 hours.: As you pour, you should see the glossy surface level itself, and the fill settles with a slight sheen. Chilling allows the structure to set, turning the mousse like batter into a sliceable tart. Why: patience yields clean slices and a firm mouthfeel. Don t skip chilling or the tart will be too soft; a common error is cutting it too soon, causing the filling to slump.
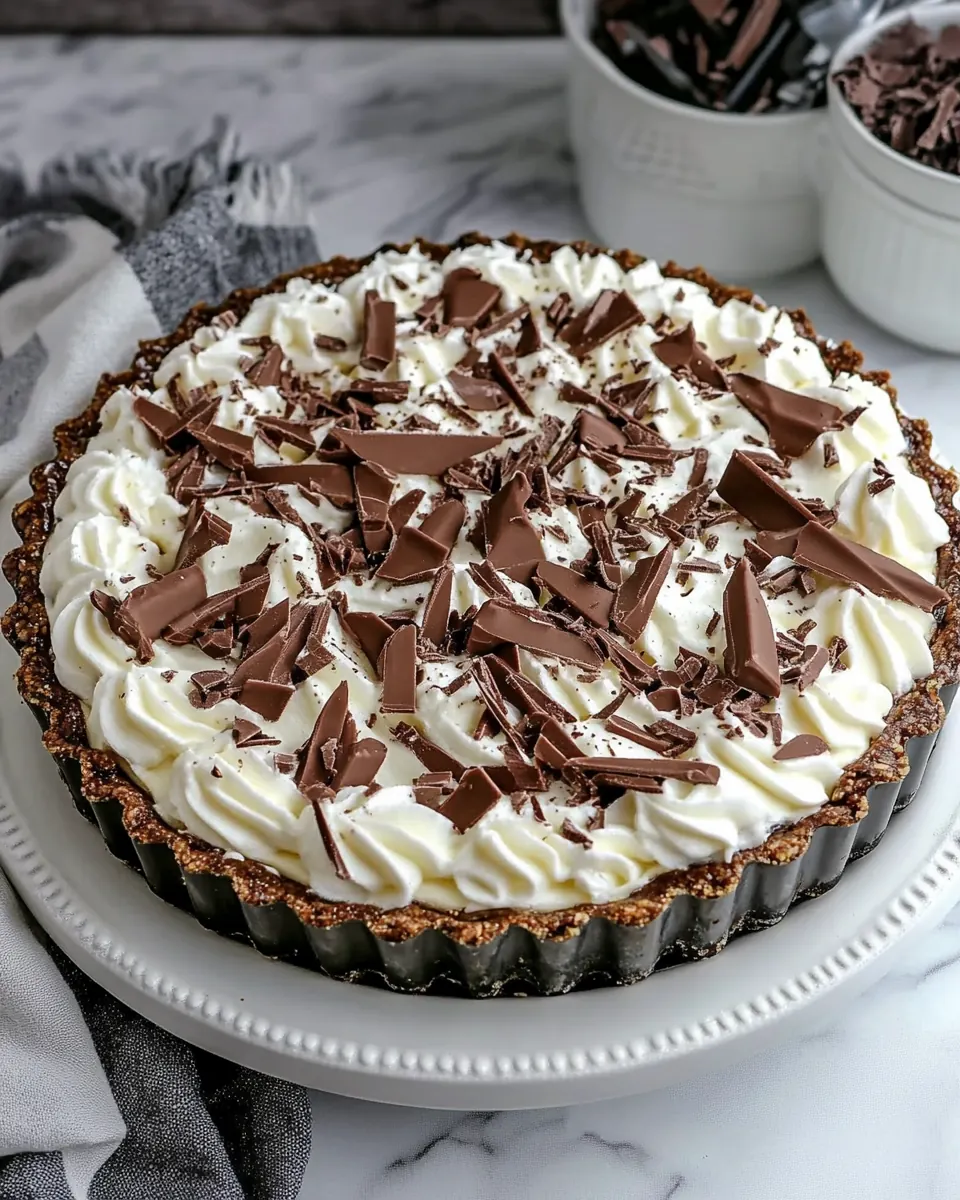
- Whip one cup of heavy cream, adding powdered sugar, Whip It (if using), and vanilla to taste. Pipe stars of whipped cream over the surface of the tart, or just spread the cream over the surface.: You ll hear the change in sound as the cream thickens and see soft peaks form, then firmer peaks depending on how long you beat. Sweetening balances the chocolate and adds a light, airy contrast. The why: the whipped topping brings freshness and textural contrast. Be careful not to overwhip into butter; if the cream starts to look grainy, stop immediately and gently fold in a tablespoon of fresh cream to smooth it.
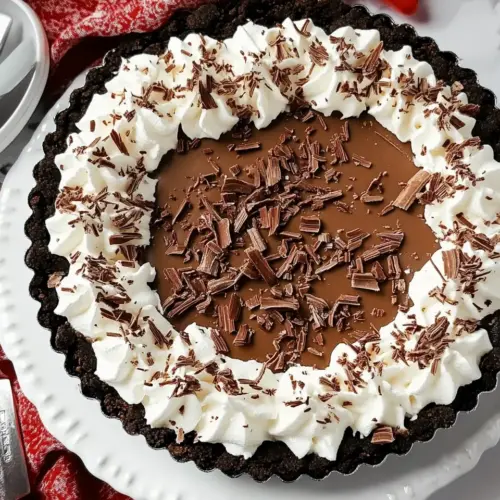
- Garnish with chocolate shavings if desired.: The finishing touch elevates the presentation, and as you shave chocolate you ll catch that rich cocoa aroma. A visual of thin curls or rustic shards provides contrast against the smooth whipped cream. Why: garnish adds both texture and visual drama. Avoid large, heavy pieces that sink into the cream; aim for delicate shavings for the best effect.
Ways to Adapt This Recipe
I like sharing small adaptations that keep the heart of the recipe while offering variation for different occasions. Below are thoughtful ideas to shift texture, presentation, and intensity, while still keeping the method simple and true to the original.
- Make it nutty Add finely chopped toasted nuts to the crust mixture for extra crunch, folding them into the cookie crumbs before adding melted butter. The nuts lend a toasty counterpoint to the chocolate and create a more complex mouthfeel.
- Decorate for a crowd Pipe generous rosettes of whipped cream and top with uniform chocolate shavings so each slice looks like a slice from a bakery, which is perfect for celebrations.
- Turn it into individual portions Press crumbs into tartlet pans instead of a single 10 inch pan and portion the filling into those. Individual tarts chill faster and make serving effortless at parties.
- Adjust sweetness If you prefer slightly less sweetness, reduce the powdered sugar used in the whipped cream and rely on the chocolate s natural richness to carry the dessert.
- Finish with textures Scatter a few delicate sea salt flakes on top of the tart just before serving to heighten the chocolate flavor, creating a savory echo that balances the sweetness.
Pairing Suggestions for French Silk Tart
This tart pairs beautifully with simple accompaniments that complement its richness. I often think in terms of balance and contrast, so lighter sides or gentle finishes are ideal. Below are thoughtful serving suggestions, storage notes, and occasions where the tart shines.
- Serve slightly chilled Cut slices when the tart is well chilled so they hold their shape, and present on a room temperature plate so the filling softens just a touch when served.
- Offer a small spoonful of tart fruit A few berries on the side add brightness and acid that cuts through the richness of the chocolate.
- Perfect for dinner parties Make the tart the day before to reduce stress on the day of your event, letting you focus on main courses and conversation.
- Storage Keep tightly covered in the refrigerator for up to three days to maintain texture, and avoid freezing as it can affect cream stability.
- Seasonal occasions This dessert is ideal for holiday meals and special gatherings where a decadent, chocolate forward finale is appreciated.
FAQ
Conclusion
This French Silk Tart stands out because it pairs a crisp Oreo crust with an impossibly silky chocolate filling for a dessert that looks and tastes elegant. You ll find it forgiving to assemble, and the make ahead nature means less stress on the day of your gathering. Give it a try the next time you want a show stopping finish to a meal, and enjoy the quiet thrill when guests notice how smooth and rich the filling is. I hope this recipe becomes one of your reliable favorites for celebrations and simple dinners alike.
French Silk Tart
Equipment
- Stand mixer
- Paddle attachment
- 10 inch tart pan
- Food Processor
- Mixing Bowl
Ingredients
- 32 Regular Oreos, processed to crumbs Crushed finely to create the tart base, providing structure and a deep chocolate flavor that contrasts with the filling; binds with melted butter to form a cohesive, sliceable crust and contributes both texture and sweetness when pressed into the pan.
- 6 tablespoons butter, melted Melted and incorporated into the cookie crumbs to moisten and bind them into a compact crust; adds richness and helps the crust set firmly when chilled or baked, enhancing mouthfeel and flavor.
Instructions
- To make the crust, mix Oreo crumbs and melted butter until well combined.: The first sensory cue is the smell of chocolate as you stir, and you ll notice the crumbs turn uniformly glossy when the butter is distributed. Use a bowl with a flat bottom to press the mixture easily later on. The why: even distribution ensures the crust holds together when sliced. Troubleshooting tip: if pockets of dry crumbs remain, add a teaspoon of melted butter at a time until the mixture holds when pinched. Avoid overworking or pressing too firmly or you may end up with a rock hard crust.
- Pat into the bottom and up the sides of a 10-inch tart pan. Freeze for about 10 minutes.: You will feel the texture change as you press the crumbs into place, and the visual cue is an even layer across the base and sides. Chilling the pan firms the crust so it keeps its shape while you prepare the filling. The reason this matters is it prevents the crust from crumbling when filled. Common mistake to avoid: pressing unevenly which causes thin spots that can break; take time to smooth and build an even edge.
- In the bowl of a stand mixer with the paddle attachment, cream butter and sugar for about 2 minutes, till light and fluffy.: When creaming, watch for a pale color and a fluffier texture, and listen for the gentle, airy sound as the mixture changes. This process traps air, contributing to a lighter mouthfeel in the final filling. If you under-cream, the filling can be dense; over-creaming might warm the mixture too much. If your kitchen is warm, chill the bowl briefly before starting.
- With the mixer running, gradually add the melted chocolate and the vanilla.: As the melted chocolate folds in, the aroma deepens into a rich cocoa scent and the mixture takes on a glossy sheen. Adding the chocolate slowly prevents separation and encourages a uniform emulsion. The why: gradual incorporation keeps the texture silky. A common issue is adding hot chocolate too quickly, which can seize; ensure the chocolate is warm but not scalding, and add in a slow stream.
- Add eggs, one at a time, beating at medium speed for 5 minutes after each addition.: You ll notice the batter becomes progressively lighter and mousse like as each egg is fully integrated, and the sound of the mixer becomes steadier. This long, measured beating whips air into the filling, creating that classic silkiness. The reason this technique matters is it stabilizes the filling without curdling. Mistake to avoid: rushing the eggs, which can lead to a runny or unstable filling; always wait the full beating time for best texture.
- Pour the filling into the cooled crust. Loosely cover with plastic wrap, and cool in the refrigerator for at least 4 hours.: As you pour, you should see the glossy surface level itself, and the fill settles with a slight sheen. Chilling allows the structure to set, turning the mousse like batter into a sliceable tart. Why: patience yields clean slices and a firm mouthfeel. Don t skip chilling or the tart will be too soft; a common error is cutting it too soon, causing the filling to slump.
- Whip one cup of heavy cream, adding powdered sugar, Whip It (if using), and vanilla to taste. Pipe stars of whipped cream over the surface of the tart, or just spread the cream over the surface.: You ll hear the change in sound as the cream thickens and see soft peaks form, then firmer peaks depending on how long you beat. Sweetening balances the chocolate and adds a light, airy contrast. The why: the whipped topping brings freshness and textural contrast. Be careful not to overwhip into butter; if the cream starts to look grainy, stop immediately and gently fold in a tablespoon of fresh cream to smooth it.
- Garnish with chocolate shavings if desired.: The finishing touch elevates the presentation, and as you shave chocolate you ll catch that rich cocoa aroma. A visual of thin curls or rustic shards provides contrast against the smooth whipped cream. Why: garnish adds both texture and visual drama. Avoid large, heavy pieces that sink into the cream; aim for delicate shavings for the best effect.
Notes
- Make it nutty Add finely chopped toasted nuts to the crust mixture for extra crunch, folding them into the cookie crumbs before adding melted butter. The nuts lend a toasty counterpoint to the chocolate and create a more complex mouthfeel.
- Decorate for a crowd Pipe generous rosettes of whipped cream and top with uniform chocolate shavings so each slice looks like a slice from a bakery, which is perfect for celebrations.
- Turn it into individual portions Press crumbs into tartlet pans instead of a single 10 inch pan and portion the filling into those. Individual tarts chill faster and make serving effortless at parties.
- Adjust sweetness If you prefer slightly less sweetness, reduce the powdered sugar used in the whipped cream and rely on the chocolate s natural richness to carry the dessert.
- Finish with textures Scatter a few delicate sea salt flakes on top of the tart just before serving to heighten the chocolate flavor, creating a savory echo that balances the sweetness.