Flourless Chocolate Cookies
Flourless Chocolate Cookies are the kind of cookie I reach for when I want something intense and uncomplicated, a little chewy, and defiantly chocolatey.
Growing up I had a neighbor who brought over a tin of cracked, shiny cookies that tasted like the best part of a rich brownie, and every time I bake Flourless Chocolate Cookies I think of that afternoon and the way the kitchen smelled like warm cocoa and toasted nuts. I like to make them midweek as a tiny reward, and they always disappear faster than I expect. Over the years I adjusted the nut mix and the amount of chocolate chips until the balance felt just right for my family.
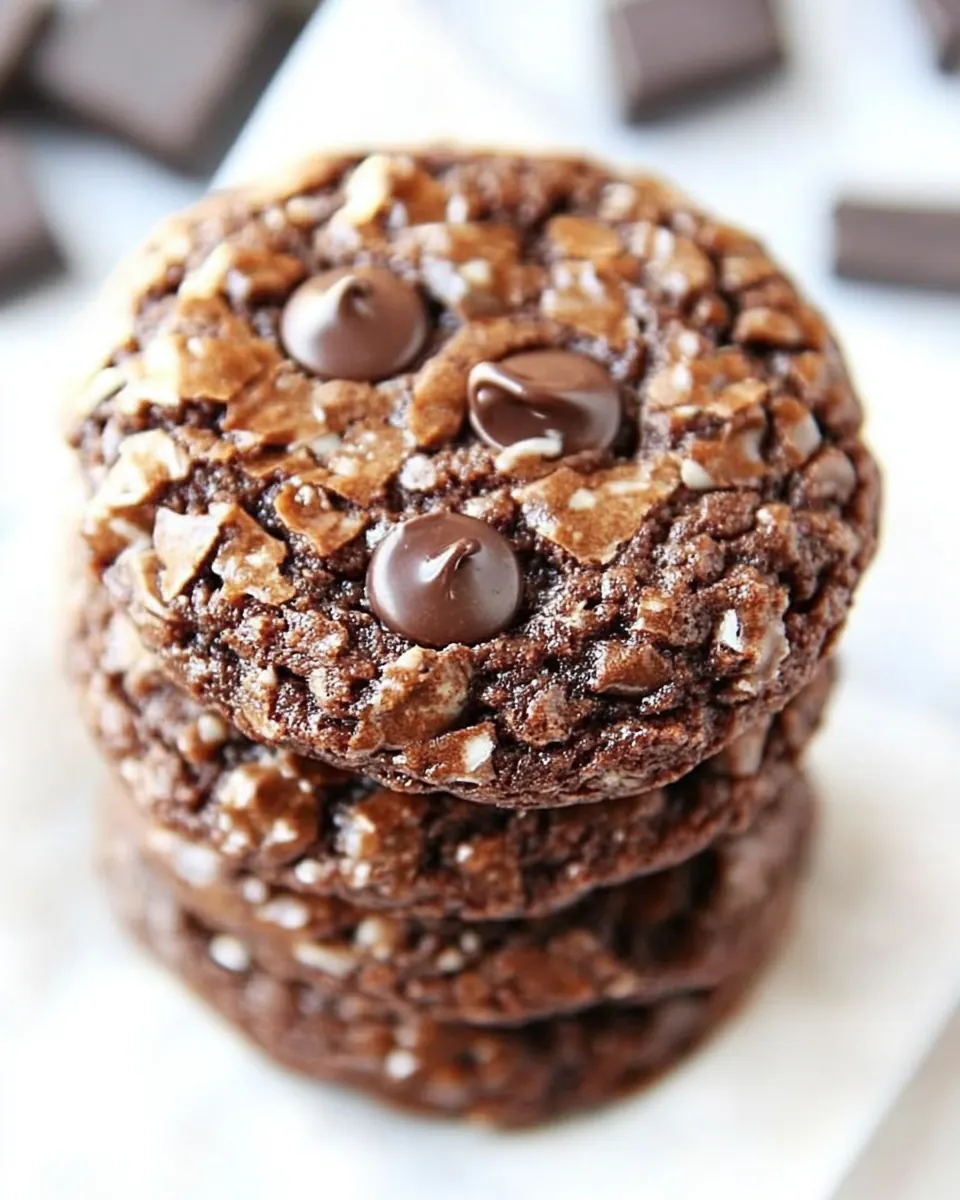
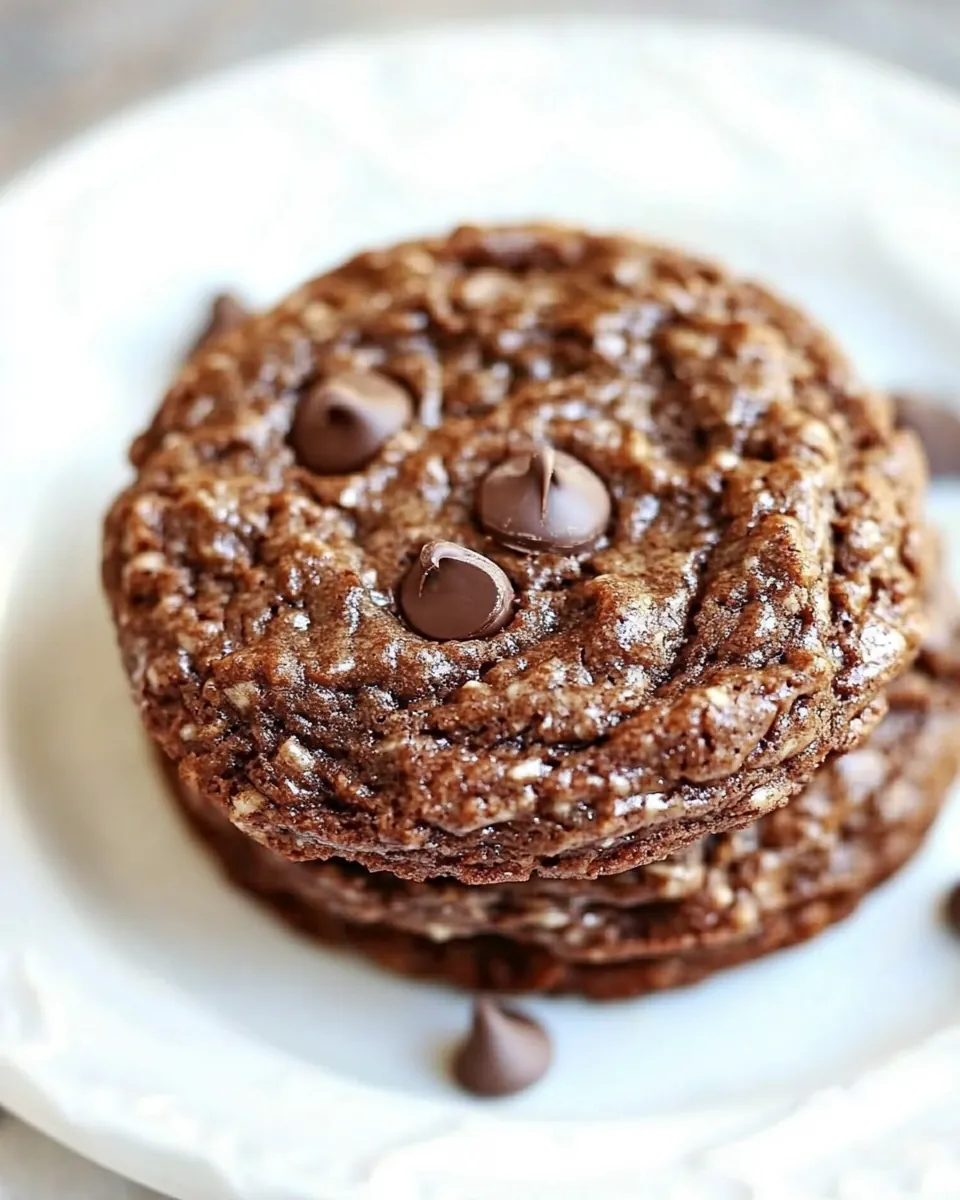
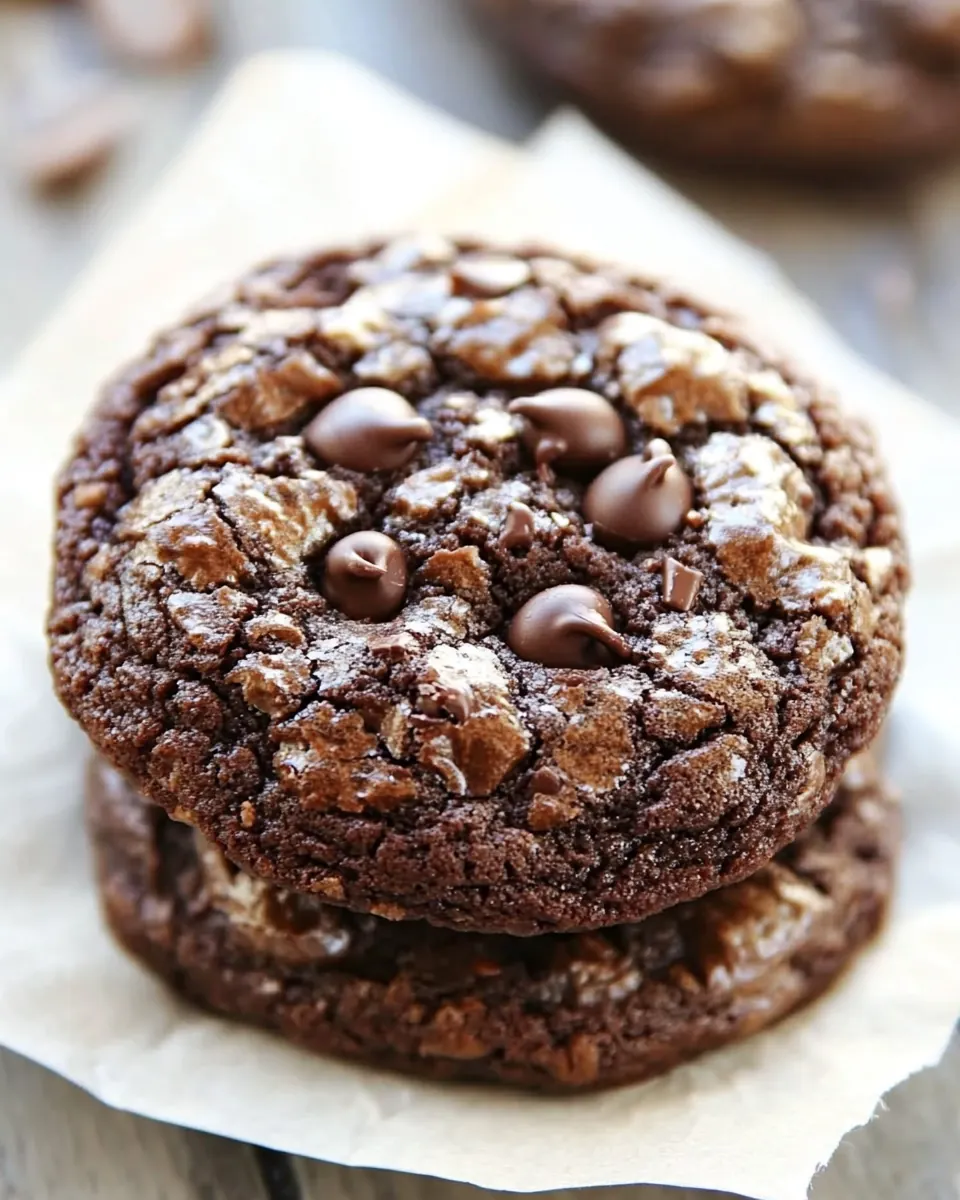
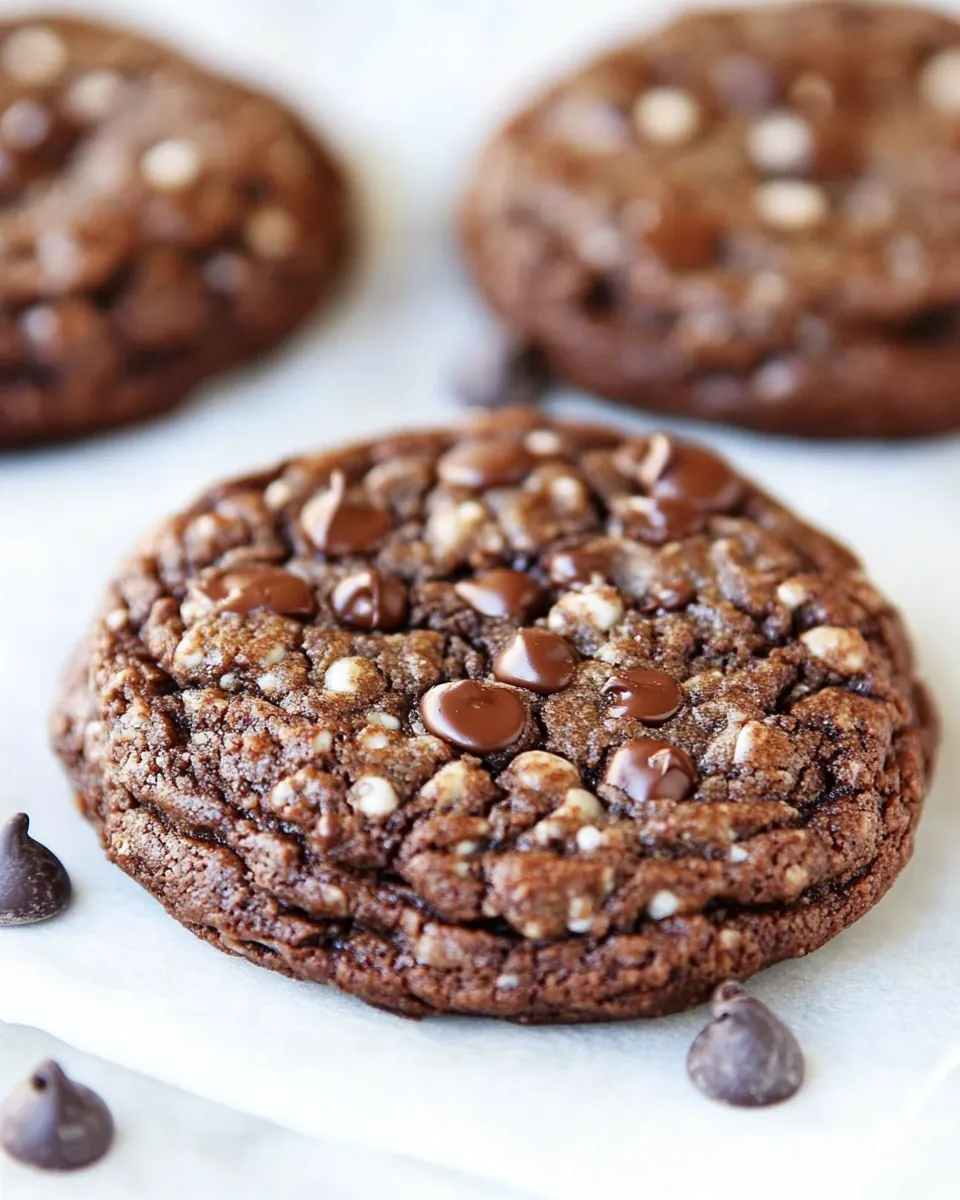
When I teach friends how to shape the dough I tell them to pay attention to the glossy, cracked tops and the way the edges set while the centers remain slightly soft. Those little details matter, and they make these cookies feel special without being fussy. I love that Flourless Chocolate Cookies use simple techniques and ingredients but yield a bold result, so I often bring them to potlucks or pack a few in lunchboxes as a cheerful surprise.
Recipe Snapshot
23 mins
10 mins
13 mins
Medium
150 kcal
American
Gluten-Free, Low FODMAP
Desserts
Stand mixer with whisk attachment, Mixing bowl, Spatula, Cookie scoop, Baking sheet, Parchment paper or Silpat, Wire cooling rack
What Makes This Flourless Chocolate Cookies Special
Intense Chocolate Flavor That Packs a Punch
I adore how Flourless Chocolate Cookies concentrate chocolate into every bite. The combination of chopped Dark Chocolate Almonds, cocoa, and mini semi-sweet chocolate chips creates layers of chocolate notes from bittersweet to sweet, so each mouthful feels complex yet familiar.
Simple Ingredients, Big Impact
One reason I keep coming back to this recipe is the ingredient list. It reads like a pantry scorecard, nothing extravagant, yet the textures and flavors work together to mimic the best qualities of a brownie. The powdered sugar gives structure and tenderness, while the beaten egg whites lend lightness and lift.
Easy Technique for Consistent Results
I love that the method stays approachable. You do a little whisking, folding, and scooping, and the oven does the rest. Because the batter is thick, wearing a spatula and being gentle matters, and once you get the feel of the glossy cracked tops you can produce consistent cookies every batch.
Friendly for Dietary Needs
For many people these cookies are a great option because they are naturally free of traditional flour. I mention this often when friends ask for dessert ideas that avoid wheat. Just check your packaged ingredients if you need them to be strictly gluten free, and you can still enjoy the full chocolate experience.
Versatile and Crowd Friendly
I bring these to gatherings because they travel well and please a crowd. They are simple to scale up, and the texture holds up in transport. Personally, I like to swap nuts when I want a different finish, but the base concept remains reliable and loved by almost everyone who tastes them.
Everything You Need for Flourless Chocolate Cookies
These ingredients are carefully chosen to produce a cookie that is glossy on top, slightly chewy inside, and intensely chocolate flavored. The key players are the chopped Dark Chocolate Almonds which add texture and flavor, the powdered sugar which gives body and tenderness, and the egg whites which aerate and set the batter. Together they create a balance of sweetness, structure, and nutty crunch that makes these cookies moreish.
- 1 1/2 cups chopped Dark Chocolate Almonds (can use regular almonds, pecans, or walnuts): Chopped provides crunchy texture and nutty flavor; use dark chocolate-coated almonds for intense chocolate notes and bite. Substitute regular almonds, pecans, or walnuts if preferred, which will alter oiliness and mouthfeel. Fold into batter or sprinkle on top to maintain chunks for contrast in the finished cookie.
- 3 cups powdered sugar: Sweetens and stabilizes the mixture while contributing to a glossy, crackled surface when sugar dissolves into the egg whites. Powdered form blends smoothly, preventing graininess and ensuring an even sweetness throughout the cookie. Sift if lumpy to promote uniform incorporation and consistent baking results.
- 1/2 cup plus 3 tablespoons Dutch processed cocoa powder: Adds deep chocolate flavor and dry richness while enhancing the cookie's overall cocoa intensity; Dutch–processed cocoa provides mellow, less acidic notes. Using the specified measure influences color and bitterness balance, so adjust only slightly if swapping with natural cocoa. Whisk thoroughly with dry ingredients to ensure even distribution and avoid clumping.
- 1/2 teaspoons ea salt: Balances sweetness and enhances other flavors by providing a subtle savory contrast that heightens chocolate depth. Using the measured amount ensures proper seasoning without overpowering the delicate egg-white structure. Dissolve into the dry mix to distribute evenly and improve overall flavor harmony.
- 1 cup mini semi-sweet chocolate chips: Contributes pockets of melty chocolate for bursts of gooey, semi–sweet richness and texture contrast within the cookie. Mini chips melt partially but retain chewiness, creating layered chocolate intensity against the powdered–sugar exterior. Fold gently late in mixing to preserve chip shape while ensuring even placement.
- 4 egg whites: Aerates and binds the mixture while creating a light, meringue-like structure when beaten; egg whites provide lift without flour. Properly whipped whites set during baking to form the cookie's delicate interior and contribute to a crisp exterior. Bring to room temperature and whip to soft or stiff peaks as the recipe directs for ideal texture.
- 2 teaspoons vanilla extract: Enhances overall flavor with warm, sweet aromatic notes and rounds out chocolate bitterness; vanilla complements and elevates other ingredients. Using the specified amount prevents overpowering the chocolate while adding depth and complexity. Stir into the beaten egg whites or batter to distribute aroma evenly.
Step by Step Guide for Flourless Chocolate Cookies
This recipe flows quickly but rewards attention to texture and timing. Below I expand each direction into a detailed, sensory focused step so you can reproduce the glossy cracked tops and chewy centers every time.
- Preheat oven to 350 degrees F. Line a large baking sheet with a Silpat baking mat or parchment paper and set aside.: When you slide a tray into a fully preheated oven you lock in the initial rise, which is why having the oven at a consistent 350 degrees F matters. You will notice a warm, dry heat when you open the oven, and that immediate blast of temperature encourages the cookie tops to puff and then set with characteristic cracks. A Silpat or parchment prevents sticking and promotes even bottom browning so you get a clean release. A common mistake is placing the pan in a cold oven, which leads to flat, greasy cookies, so always wait until the oven reaches the correct temperature.
- In a medium bowl, combine the chopped almonds, powdered sugar, cocoa, salt, and mini chocolate chips. Stir to combine. Set aside.: At this stage you will smell the rich aroma of cocoa and notice the contrast between the fine powdered sugar and the rough texture of chopped Dark Chocolate Almonds . Mixing these dry components evenly ensures every cookie has a balance of nuts and chocolate pockets. Stir until there are no visible streaks of cocoa or sugar, but avoid overworking the mixture which can create clumps. A typical error is not breaking up the chopped nuts sufficiently, leading to uneven bites, so chop to an even size for consistent distribution.
- In the bowl of a stand mixer, use the whisk attachment to beat egg whites until they are white and foamy, but are not stiff peaks. Fold in the vanilla extract.: As you whisk the egg whites they will transition from clear to opaque and emit a faint, fresh scent. The foam should be airy and glossy without forming rigid peaks, which keeps the batter tender. Adding vanilla at this stage blends the aroma without deflating the foam. Overwhipping is a frequent pitfall because overly stiff whites will break down when folded into the dry mix, producing a drier cookie, so stop as soon as the whites hold soft shape.
- Add the dry ingredients to the bowl of beaten egg whites and gently stir with a spatula until combined. The batter will be thick, like brownie batter.: When you fold in the dry mix you will hear a soft scraping sound and see the batter change from glossy white to chocolate brown. The texture should be dense and fudgy, not runny, and you should still see ribboning from the spatula when you lift it. This density is important because it yields that chewy center and cracked exterior. Stir gently to preserve air; vigorous mixing flattens the cookies and makes them heavy.
- Use a 2 tablespoon sized cookie scoop to form cookie dough balls. Place the dough balls about two inches apart on prepared baking sheet.: Scooping with a consistent measure produces uniform cookies so they bake evenly. The dough will feel tacky and slightly cool, studded with bits of chips and almonds , and the scooped mounds should sit tall on the pan. Leave space between them because they spread slightly and you want room for the shiny cracks to form. A common mistake is overcrowding the tray, which causes cookies to bake into one another and lose their characteristic domed shapes.
- Bake cookies for 12-13 minutes, until the cookies are puffed, shiny and cracked. Remove cookies from oven and allow cookies to cool on the baking sheet for 3-5 minutes. Use a spatula to remove cookies from the baking sheet and place on a wire cooling rack to cool completely.: As they bake you will watch the tops rise and develop a glossy sheen before tiny fissures appear, and the smell of chocolate will grow richer and deeper. The edges will set first and take on a slightly firmer feel while the centers stay tender. Letting them rest briefly on the baking sheet allows residual heat to finish the set without overbaking, so wait the full 3 to 5 minutes before transferring. A typical error is removing them too soon, which can cause them to break, or leaving them too long on a hot sheet, which can continue cooking and dry them out.
- Note – if you don’t have cocoa almonds, you can use regular almonds or walnuts. If you need the cookies to be gluten-free, make sure you check the packaging of the chocolate chips and cocoa to make sure they are gluten-free.: The substitution will subtly shift the flavor and texture, for example walnuts introduce a slightly bitter, earthy note while regular almonds are cleaner and crunchier. Always verify labels if you require certified gluten-free status, because cross contamination can occur in packaged cocoa or chips. A common oversight is assuming all chocolates are gluten free, so double check to avoid any allergic or dietary reactions.
Helpful Hints
These tips will help you master Flourless Chocolate Cookies and avoid common pitfalls. I include practical notes on technique, ingredient handling, and storage so your batch turns out reliably excellent.
- Room temperature egg whites: Let the egg whites sit at room temperature for about 15 to 20 minutes before whisking. Warm whites whip into a finer, more voluminous foam which traps air and yields a lighter cookie texture.
- Sift powdered sugar if clumpy: If your powdered sugar has lumps, sift it into the bowl to ensure smooth incorporation. Clumps can create pockets of sweetness and prevent the batter from forming a uniform, glossy top.
- Chop nuts uniformly: Aim for consistent size when chopping the Dark Chocolate Almonds. Large chunks can cause uneven baking and tearing, while very fine pieces can disappear into the batter and reduce textural interest.
- Use a cookie scoop for consistency: A 2 tablespoon scoop helps all cookies bake evenly, producing uniform rise and matching bake times across the tray.
- Check oven calibration: If your cookies consistently over or under bake adjust your oven temperature or use an oven thermometer to ensure it truly reads 350 degrees F, because small variances change how the tops set.
- Cool briefly on the sheet: Let cookies rest 3 to 5 minutes on the baking sheet so they finish setting gently. Removing them too early risks breakage, while leaving them too long on a very hot pan can overcook.
Perfect Pairings for Flourless Chocolate Cookies
These cookies are versatile and pair well with simple accompaniments. Below I outline serving ideas, occasions, and storage methods to help you enjoy them in many settings.
- Simple beverage pairings: Serve with a cup of coffee or a robust black tea to balance the sweetness and complement the rich chocolate flavor.
- Casual gatherings: Bring these cookies to potlucks or family get togethers, they travel well and hold up at room temperature for several hours.
- Holiday trays: Add them to dessert platters for holiday parties, they provide a dense chocolate option that contrasts with lighter sweets on the table.
- Storage tips: Store in an airtight container at room temperature for up to three days, or freeze baked cookies separated by parchment for longer keeping and thaw at room temperature before serving.
- Occasions: These fit many occasions from casual afternoon treats to dessert after a dinner, and they are lovely when gifted in a simple tin for neighbors or friends.
- Seasonal pairings: In cooler months pair with spiced beverages, while in warmer weather a scoop of ice cream alongside a cooled cookie offers a delightful contrast.
FAQ
Conclusion
What makes these cookies special is how simple ingredients produce a rich, fudgy experience with a crisp, crackled top. They are easy to assemble, forgiving in technique, and deliver concentrated chocolate flavor that feels indulgent without fuss. Give them a try this week, and you may find yourself making them again for friends, gatherings, or a quiet sweet moment at home. They are the kind of recipe that becomes a dependable favorite.

Flourless Chocolate Cookies
Equipment
- Stand mixer with whisk attachment
- Mixing Bowl
- Spatula
- Cookie Scoop
- Baking Sheet
- Parchment paper or Silpat
- wire cooling rack
Ingredients
- 1 1/2 cups chopped Dark Chocolate Almonds (can use regular almonds, pecans, or walnuts) Chopped provides crunchy texture and nutty flavor; use dark chocolate-coated almonds for intense chocolate notes and bite. Substitute regular almonds, pecans, or walnuts if preferred, which will alter oiliness and mouthfeel. Fold into batter or sprinkle on top to maintain chunks for contrast in the finished cookie.
- 3 cups powdered sugar Sweetens and stabilizes the mixture while contributing to a glossy, crackled surface when sugar dissolves into the egg whites. Powdered form blends smoothly, preventing graininess and ensuring an even sweetness throughout the cookie. Sift if lumpy to promote uniform incorporation and consistent baking results.
- 1/2 cup plus 3 tablespoons Dutch processed cocoa powder Adds deep chocolate flavor and dry richness while enhancing the cookie's overall cocoa intensity; Dutch-processed cocoa provides mellow, less acidic notes. Using the specified measure influences color and bitterness balance, so adjust only slightly if swapping with natural cocoa. Whisk thoroughly with dry ingredients to ensure even distribution and avoid clumping.
- 1/2 teaspoons ea salt Balances sweetness and enhances other flavors by providing a subtle savory contrast that heightens chocolate depth. Using the measured amount ensures proper seasoning without overpowering the delicate egg-white structure. Dissolve into the dry mix to distribute evenly and improve overall flavor harmony.
- 1 cup mini semi-sweet chocolate chips Contributes pockets of melty chocolate for bursts of gooey, semi-sweet richness and texture contrast within the cookie. Mini chips melt partially but retain chewiness, creating layered chocolate intensity against the powdered-sugar exterior. Fold gently late in mixing to preserve chip shape while ensuring even placement.
- 4 egg whites Aerates and binds the mixture while creating a light, meringue-like structure when beaten; egg whites provide lift without flour. Properly whipped whites set during baking to form the cookie's delicate interior and contribute to a crisp exterior. Bring to room temperature and whip to soft or stiff peaks as the recipe directs for ideal texture.
- 2 teaspoons vanilla extract Enhances overall flavor with warm, sweet aromatic notes and rounds out chocolate bitterness; vanilla complements and elevates other ingredients. Using the specified amount prevents overpowering the chocolate while adding depth and complexity. Stir into the beaten egg whites or batter to distribute aroma evenly.
Instructions
- Preheat oven to 350 degrees F. Line a large baking sheet with a Silpat baking mat or parchment paper and set aside.: When you slide a tray into a fully preheated oven you lock in the initial rise, which is why having the oven at a consistent 350 degrees F matters. You will notice a warm, dry heat when you open the oven, and that immediate blast of temperature encourages the cookie tops to puff and then set with characteristic cracks. A Silpat or parchment prevents sticking and promotes even bottom browning so you get a clean release. A common mistake is placing the pan in a cold oven, which leads to flat, greasy cookies, so always wait until the oven reaches the correct temperature.
- In a medium bowl, combine the chopped almonds, powdered sugar, cocoa, salt, and mini chocolate chips. Stir to combine. Set aside.: At this stage you will smell the rich aroma of cocoa and notice the contrast between the fine powdered sugar and the rough texture of chopped Dark Chocolate Almonds . Mixing these dry components evenly ensures every cookie has a balance of nuts and chocolate pockets. Stir until there are no visible streaks of cocoa or sugar, but avoid overworking the mixture which can create clumps. A typical error is not breaking up the chopped nuts sufficiently, leading to uneven bites, so chop to an even size for consistent distribution.
- In the bowl of a stand mixer, use the whisk attachment to beat egg whites until they are white and foamy, but are not stiff peaks. Fold in the vanilla extract.: As you whisk the egg whites they will transition from clear to opaque and emit a faint, fresh scent. The foam should be airy and glossy without forming rigid peaks, which keeps the batter tender. Adding vanilla at this stage blends the aroma without deflating the foam. Overwhipping is a frequent pitfall because overly stiff whites will break down when folded into the dry mix, producing a drier cookie, so stop as soon as the whites hold soft shape.
- Add the dry ingredients to the bowl of beaten egg whites and gently stir with a spatula until combined. The batter will be thick, like brownie batter.: When you fold in the dry mix you will hear a soft scraping sound and see the batter change from glossy white to chocolate brown. The texture should be dense and fudgy, not runny, and you should still see ribboning from the spatula when you lift it. This density is important because it yields that chewy center and cracked exterior. Stir gently to preserve air; vigorous mixing flattens the cookies and makes them heavy.
- Use a 2 tablespoon sized cookie scoop to form cookie dough balls. Place the dough balls about two inches apart on prepared baking sheet.: Scooping with a consistent measure produces uniform cookies so they bake evenly. The dough will feel tacky and slightly cool, studded with bits of chips and almonds , and the scooped mounds should sit tall on the pan. Leave space between them because they spread slightly and you want room for the shiny cracks to form. A common mistake is overcrowding the tray, which causes cookies to bake into one another and lose their characteristic domed shapes.
- Bake cookies for 12-13 minutes, until the cookies are puffed, shiny and cracked. Remove cookies from oven and allow cookies to cool on the baking sheet for 3-5 minutes. Use a spatula to remove cookies from the baking sheet and place on a wire cooling rack to cool completely.: As they bake you will watch the tops rise and develop a glossy sheen before tiny fissures appear, and the smell of chocolate will grow richer and deeper. The edges will set first and take on a slightly firmer feel while the centers stay tender. Letting them rest briefly on the baking sheet allows residual heat to finish the set without overbaking, so wait the full 3 to 5 minutes before transferring. A typical error is removing them too soon, which can cause them to break, or leaving them too long on a hot sheet, which can continue cooking and dry them out.
- Note - if you don’t have cocoa almonds, you can use regular almonds or walnuts. If you need the cookies to be gluten-free, make sure you check the packaging of the chocolate chips and cocoa to make sure they are gluten-free.: The substitution will subtly shift the flavor and texture, for example walnuts introduce a slightly bitter, earthy note while regular almonds are cleaner and crunchier. Always verify labels if you require certified gluten-free status, because cross contamination can occur in packaged cocoa or chips. A common oversight is assuming all chocolates are gluten free, so double check to avoid any allergic or dietary reactions.
Notes
- Room temperature egg whites: Let the egg whites sit at room temperature for about 15 to 20 minutes before whisking. Warm whites whip into a finer, more voluminous foam which traps air and yields a lighter cookie texture.
- Sift powdered sugar if clumpy: If your powdered sugar has lumps, sift it into the bowl to ensure smooth incorporation. Clumps can create pockets of sweetness and prevent the batter from forming a uniform, glossy top.
- Chop nuts uniformly: Aim for consistent size when chopping the Dark Chocolate Almonds. Large chunks can cause uneven baking and tearing, while very fine pieces can disappear into the batter and reduce textural interest.
- Use a cookie scoop for consistency: A 2 tablespoon scoop helps all cookies bake evenly, producing uniform rise and matching bake times across the tray.
- Check oven calibration: If your cookies consistently over or under bake adjust your oven temperature or use an oven thermometer to ensure it truly reads 350 degrees F, because small variances change how the tops set.
- Cool briefly on the sheet: Let cookies rest 3 to 5 minutes on the baking sheet so they finish setting gently. Removing them too early risks breakage, while leaving them too long on a very hot pan can overcook.