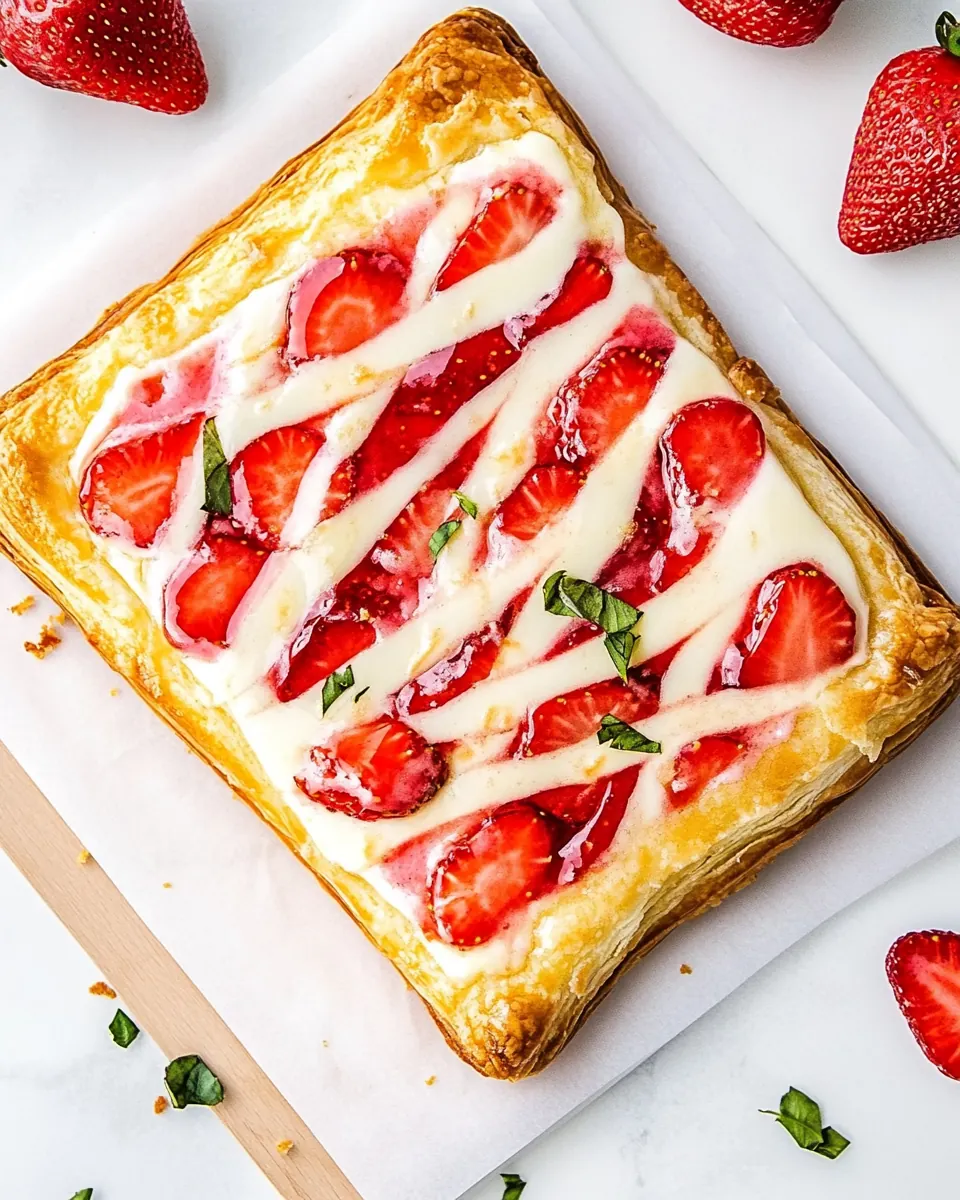
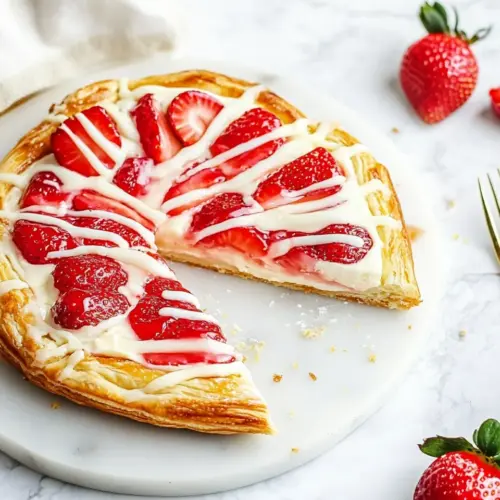
Easy Strawberry Cheesecake Danish
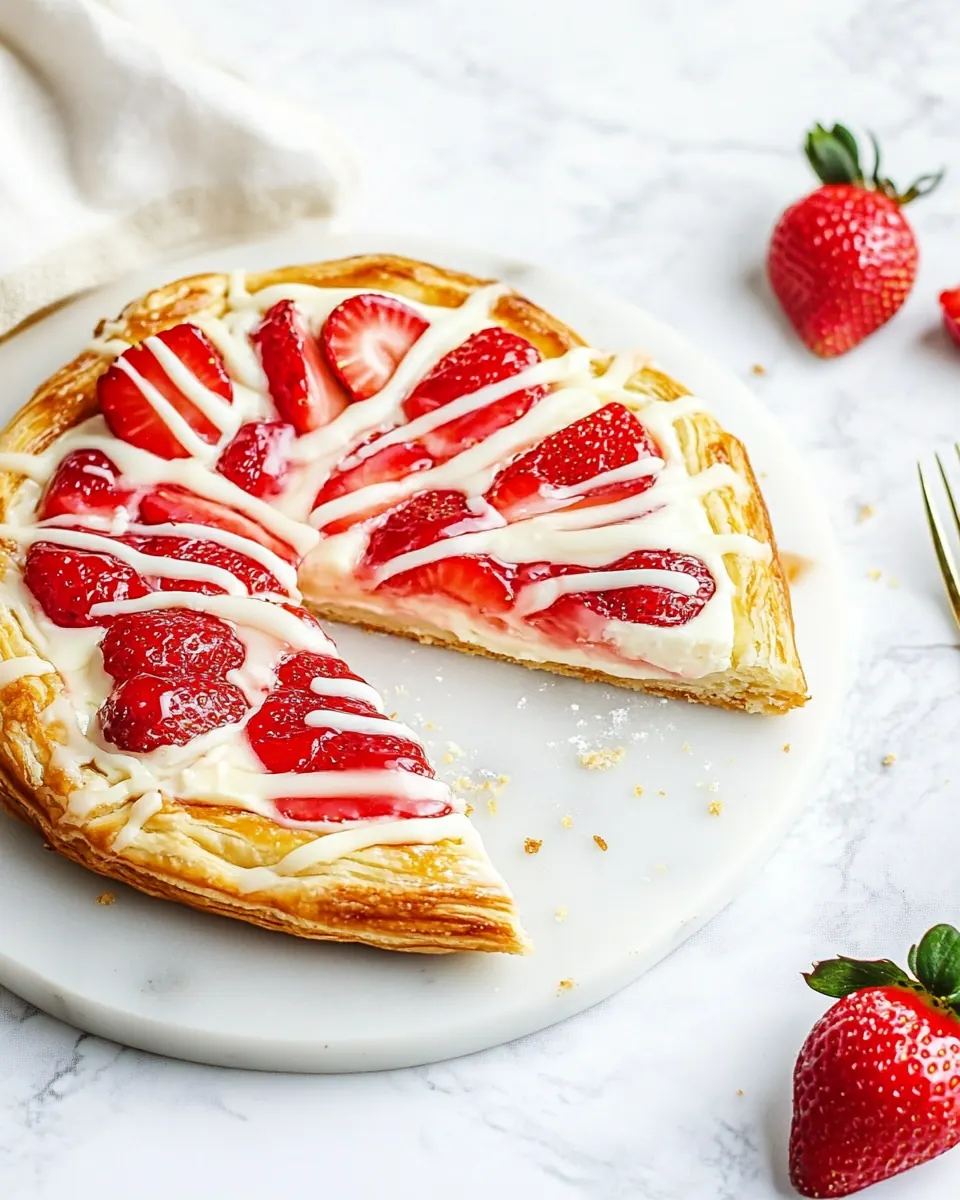
Easy Strawberry Cheesecake Danish has been my weekend happy place for years, a simple pastry that somehow feels like a celebration even on a slow morning. I first made these on an overcast spring afternoon when a friend dropped off a box of strawberries, and the bright, tangy fruit paired with smooth, sweet cream felt instantly comforting. The first batch came out slightly imperfect, edges puffed more in some places, jammy strawberry peeking out in others, but every bite tasted like a small victory.
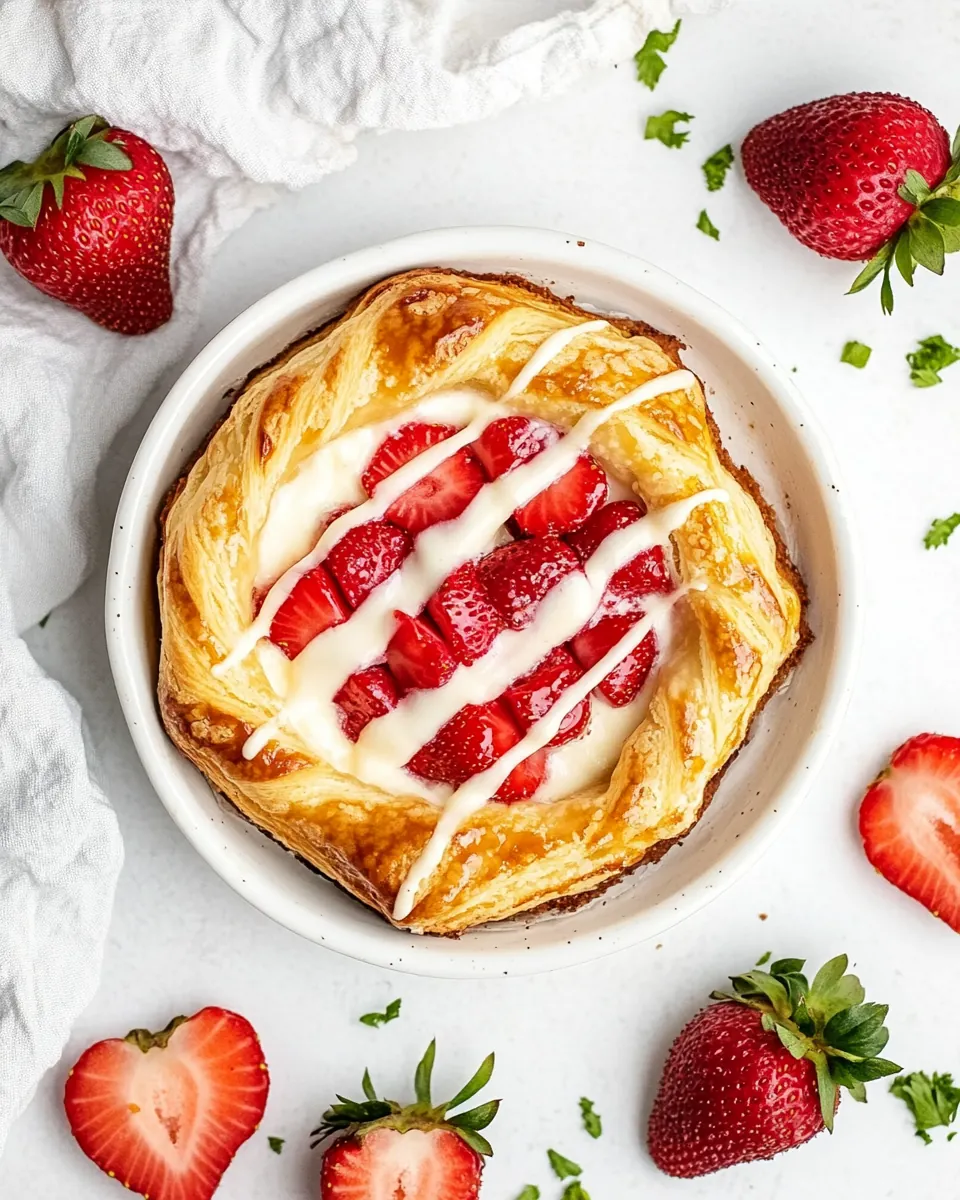
The second time I made Easy Strawberry Cheesecake Danish I tuned into the little things that matter, like keeping the puff pastry cold and letting the cream cheese warm just enough to spread without tearing the dough. Those tweaks turned decent into reliably delicious, and now I love preparing these when friends are coming over because they look fancy but are truly effortless. I still grin when I see the glossy strawberries over the soft, cheesy center, and I love how the edges flake into buttery shards that contrast with the creamy filling.
Making Easy Strawberry Cheesecake Danish has become my go to for casual brunches and last minute desserts, and I enjoy the ritual of arranging the little rectangles on a pan while the house smells like warmed butter and baked fruit. You can customize the sweetness or the strawberry texture, and each variation tells a slightly different story. I encourage you to play with it, but keep a close eye on the oven because that perfect golden edge can shift to dark quickly. This recipe is forgiving, joyful, and one of my favorite ways to turn simple ingredients into something you can be proud to serve.
Recipe Snapshot
30 mins
10 mins
20 mins
Medium
250 kcal
American
Gluten-Free, Low FODMAP
Desserts
Baking Sheet Pan, Silpat, Vanilla Bean Paste
Why You’ll Love This Easy Strawberry Cheesecake Danish
Simple, approachable technique
I adore how Easy Strawberry Cheesecake Danish uses accessible steps that still feel like baking magic. The method relies on a couple of straightforward actions, so I never feel intimidated. When I walk friends through it, they breathe easier knowing this is manageable, and the result still looks bakery worthy.
Bright strawberry flavor with creamy balance
The combination of strawberries and cream cheese is a classic for a reason. I love how the fruit adds freshness and a touch of acidity, while the cheese brings a rich, silky counterpoint. That balance is what keeps each bite interesting and keeps people coming back for more.
Buttery, flaky texture
The puff pastry delivers a flaky, layered shell that contrasts beautifully with the smooth filling. I always tell guests that the contrast in textures is what makes these feel special, and it never fails to impress. The golden, crisp edges provide that satisfying crunch that pairs perfectly with the soft center.
Great for gatherings and quick treats
Because these come together fast, they are my go to when hosting unexpected company. I can assemble them in minutes and pop them into the oven, and they make a lovely display when arranged on a platter. I especially like serving them warm because the filling is softer and the fruit releases a pleasant aroma.
Flexible and forgiving
I’ve learned that small adjustments yield delightful results, so I often tweak sugar levels or how finely I chop the strawberries. You can make this your own without breaking the recipe. That forgiving nature gives me confidence to experiment and personalize the final pastry.
Essential Ingredients for Easy Strawberry Cheesecake Danish
These ingredients are intentionally minimal, each playing a clear role so the flavors sing together. The puff pastry creates the flaky vessel, the cream cheese gives a lush, tangy base, and the strawberries bring bright, juicy notes. Sugars and a touch of lemon juice balance sweetness and add depth, while vanilla warmth ties everything together.
- 1 sheet puff pastry, thawed, but cold: Provide a flaky, golden base for the danish and should be kept cold to ensure proper puffing during baking. Handle gently to avoid warming, and thaw just enough to unfold without tearing. Can be brushed with egg wash for extra shine if desired.
- 4 ounces cream cheese, room temperature: Soften until spreadable to create a rich, creamy filling that contrasts with the crisp pastry. Beat until smooth to eliminate lumps and incorporate air for a lighter texture. Balance sweetness and tang when combined with sugar and vanilla.
- 2 tablespoons granulated sugar: Add sweetness and help stabilize the cream cheese filling while enhancing overall flavor. Dissolve into the softened cheese for an even, pleasant sweetness. Can be adjusted slightly to taste without affecting structure.
- 1/2 teaspoon vanilla bean paste: Provide a concentrated vanilla flavor with visible flecks that elevates the cheesecake taste. Stir into the cream cheese mixture to infuse aromatic depth without adding liquid. Use sparingly to avoid overpowering the delicate strawberry notes.
- 1 cup finely chopped strawberries: Offer fresh, slightly tart fruitiness and texture when finely chopped for even distribution across the danish. Toss with sugar and lemon to macerate and release juices that meld with the filling. Choose ripe berries for the best color and flavor.
- 1 tablespoon brown sugar: Sweeten and caramelize the strawberries slightly when combined, enhancing their natural flavor and adding a hint of molasses. Sprinkle over the chopped berries and let sit briefly to draw out juices. Works well to balance acidity and improve topping cohesion.
- 1/2 teaspoon fresh lemon juice: Brighten the strawberry flavor and balance sweetness with subtle acidity, helping the fruit release juices when macerated. Stir into the chopped berries with brown sugar to heighten freshness and complexity. Use fresh lemon for the best aromatic result.
How to Assemble Easy Strawberry Cheesecake Danish
I like to move through assembly with calm focus, prepping ingredients and tools so everything flows. These steps are forgiving, but paying attention to temperatures and visual cues ensures the best texture and flavor. Keep an eye on the oven as the pastries go from golden to deep quickly.
- Preheat oven to 400 degrees F and line 2 large baking sheets with parchment paper or Silpat liners.: When you open the oven, you should feel an immediate dry, warm rush, and the hot air helps set the puff pastry so it puffs up evenly. Preheating to exactly 400 degrees F creates the high initial heat needed for lift. If the oven is cooler, the pastry may not rise well and can become dense. A common mistake is placing pastry in a partially preheated oven, so always wait until the oven reaches temperature.
- Unroll the puff pastry onto a lightly floured surface and slice in half lengthwise.: As you unroll, you will notice faint layers and a slightly tacky feel from the butter within the dough. Light flour prevents sticking without tearing the delicate layers. Work quickly so the pastry stays cold, because warmth causes the butter to soften and the layers to collapse. If the dough becomes too soft, chill it briefly to firm up.
- Cut each strip into quarters so you have 8 large rectangles.: The clean, sharp edges you aim for influence how evenly each piece bakes, creating uniform pastries that puff and brown at the same pace. Use a sharp knife or bench scraper for tidy cuts. Uneven pieces can bake inconsistently, so take a moment to make them similar in size.
- Using a paring knife, create a 1/2 inch border around the edge of each piece of puff pastry. Make sure to not cut all the way through!: This shallow indent signals where the layers should rise, forming a raised edge that frames the filling. The slight scoring encourages the border to separate and puff higher than the center. Cutting too deep will sever the layers and prevent rise, so keep the blade light and controlled.
- Poke the center square of the puff pastry a few times with a fork, this will ensure the edges rise, but not the center. This helps hold the filling of the Danish.: The tiny punctures let steam escape from the center, keeping it flatter so the filling stays in place. When you poke, you may hear soft clicks from the pastry settling; that is normal. Over piercing can cause the filling to leak through, so just a few pricks are sufficient.
- In a small mixing bowl add cream cheese, granulated sugar, and vanilla bean paste. Stir to combine and set aside.: As you mix, the cream cheese takes on a glossy texture that spreads easily, and the scent of vanilla bean paste becomes more pronounced, offering a comforting bakery aroma. A spatula works best to avoid over aerating, which could make the filling too light and cause it to collapse when heated. If the cheese is too cold, lumps will remain, so let it rest until smooth.
- In another small bowl stir together diced strawberries, dark brown sugar, and lemon juice.: The strawberries will start to glisten as sugar draws out their juices, creating a lightly syrupy coating. The lemon juice sharpens the fruit, and the brown sugar adds depth. If the berries release too much liquid, drain a bit to avoid soggy pastry, but a touch of juice helps meld flavors.
- Divide the cream cheese mixture between the pieces of puff pastry, making sure to only fill within the middle border. Smooth out the cream cheese in the middle as best as you can.: When you spread the filling, aim for an even, glossy layer that does not touch the scored border, so the pastry can rise unimpeded. The cream should look satiny and should hold its shape without spilling. Overfilling is a common error and leads to messy edges and leaks.
- Spoon the strawberry mixture over top the cream cheese mixture.: The strawberries should sit neatly atop the filling, their juices mingling slightly with the cheese to create pockets of flavor. Keep the fruit centered to avoid weighing down the edges. Too many berries can overload the pastry, so portion them evenly for balanced baking.
- Bake for 15-20 minutes or until the edges are golden brown.: You will notice a warm, fruity aroma as the strawberries begin to cook and the puff pastry turns deep golden, with crisp, flaking edges. The contrast of a golden border and set filling is your cue to remove them. Leaving them in too long risks overbrowning; watch carefully after 12 minutes.
- Enjoy warm or at room temperature.: Warm pastries yield a softer filling and a comforting aroma, while cooled ones slice cleaner and highlight the cream cheese texture. Serving temperature affects mouthfeel, so choose based on your preference. A typical slip is trying to stack them while warm, which can squash the flaky layers, so allow them to settle briefly before arranging.
Variations to Try
These ideas let you tweak flavors and presentation while keeping the core technique intact. I often experiment with small swaps to match the season or mood, and each variation offers a new twist without complicating the bake.
- Swapped fruit: Try finely chopped berries or stone fruit in place of the strawberries for seasonal variation, ensuring similar chop size to maintain texture and bake time.
- Sugar tweak: Adjust the granulated sugar in the cream cheese or the brown sugar for the fruit to suit your sweetness preference, tasting the filling before assembling.
- Vanilla substitute advice: If you replace the vanilla bean paste with a milder vanilla, reduce the quantity slightly and taste to avoid overpowering the delicate fruit notes.
- Chill between steps: If your kitchen is warm, pop assembled pastries in the fridge for 10 minutes before baking to preserve the pastry layers and prevent spreading.
- Presentation trick: Brush the edges lightly with a simple sugar syrup after baking to enhance shine and keep the crust from drying out, applying gently with a pastry brush.
Serving Suggestions
These pastries are versatile enough for many occasions, and I enjoy them warm with coffee or cooled on a dessert plate. They pair beautifully with simple accompaniments and are easy to transport to gatherings.
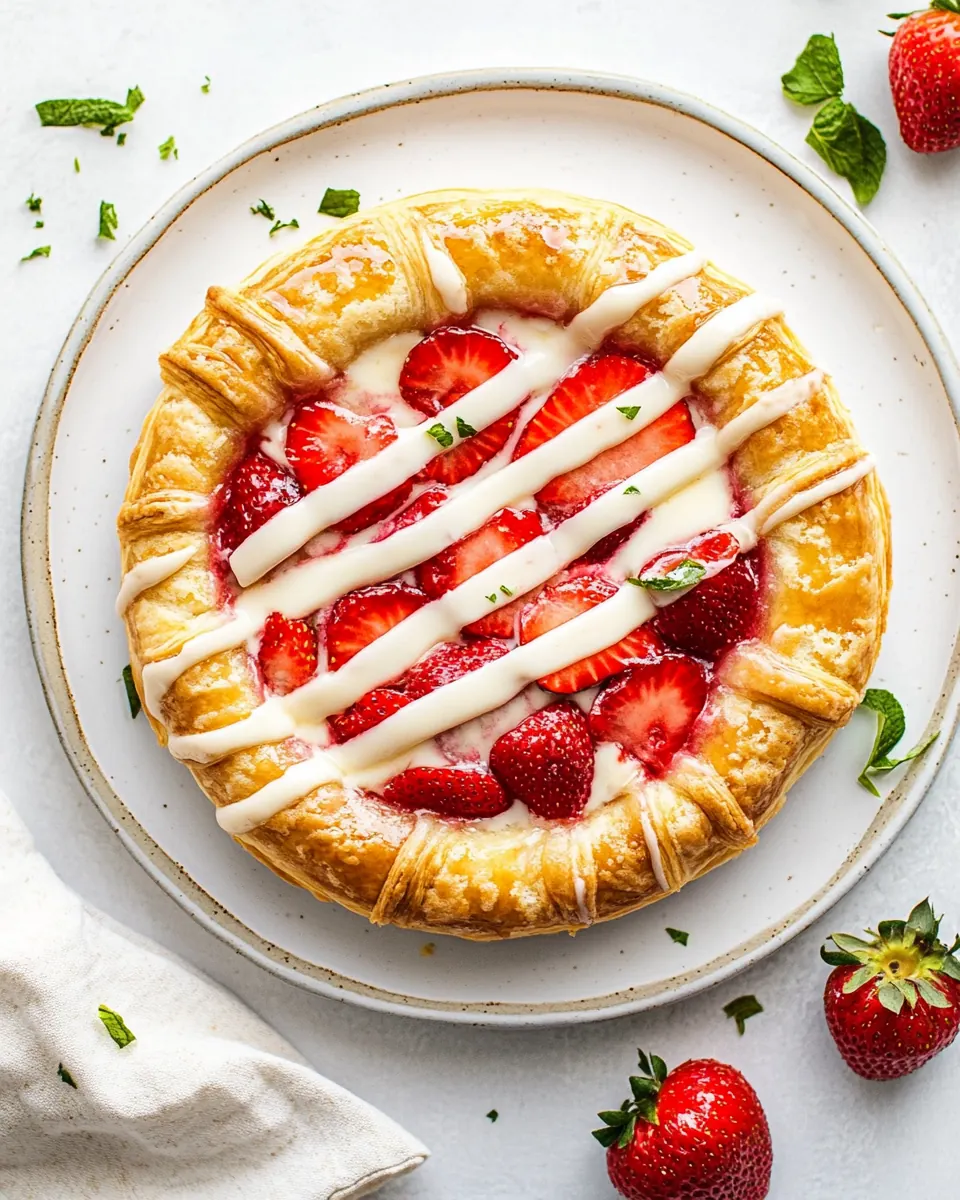
- Brunch centerpiece: Arrange the warm Easy Strawberry Cheesecake Danish on a large platter with a scattering of fresh strawberries and a dusting of powdered sugar for a lovely brunch display.
- Casual dessert: Serve one pastry per person after a weeknight meal, maybe alongside a small scoop of sorbet or a dollop of whipped cream for contrast.
- Party platter: Bake multiple sheets and place them on a tiered stand, allowing guests to take one at room temperature; they travel well for potlucks.
- Storage tip: Store cooled pastries in an airtight container for up to two days, layering parchment between them to protect the flaky edges from moisture.
- Seasonal pairing: In spring, pair these with fresh citrus salads or light herbal teas to complement the bright strawberry notes.
- Serving temperature: Decide whether to serve warm for softness or room temperature for cleaner slices; both are delightful depending on the setting.
FAQ
Conclusion
This recipe stands out because it pairs flaky, buttery puff pastry with a silky cream cheese center and bright strawberries for an elegant yet simple treat. You can confidently make it for a cozy brunch, a last minute dessert, or a festive gathering, and it will always look and taste intentional. Give it a try, enjoy the warm aroma as it bakes, and savor the contrast of textures and flavors that make these Danish so satisfying.
Easy Strawberry Cheesecake Danish
Equipment
- Baking Sheet Pan
- Silpat
- Vanilla Bean Paste
Ingredients
- 1 sheet puff pastry, thawed, but cold Provide a flaky, golden base for the danish and should be kept cold to ensure proper puffing during baking. Handle gently to avoid warming, and thaw just enough to unfold without tearing. Can be brushed with egg wash for extra shine if desired.
- 4 ounces cream cheese, room temperature Soften until spreadable to create a rich, creamy filling that contrasts with the crisp pastry. Beat until smooth to eliminate lumps and incorporate air for a lighter texture. Balance sweetness and tang when combined with sugar and vanilla.
- 2 tablespoons granulated sugar Add sweetness and help stabilize the cream cheese filling while enhancing overall flavor. Dissolve into the softened cheese for an even, pleasant sweetness. Can be adjusted slightly to taste without affecting structure.
- 1/2 teaspoon vanilla bean paste Provide a concentrated vanilla flavor with visible flecks that elevates the cheesecake taste. Stir into the cream cheese mixture to infuse aromatic depth without adding liquid. Use sparingly to avoid overpowering the delicate strawberry notes.
- 1 cup finely chopped strawberries Offer fresh, slightly tart fruitiness and texture when finely chopped for even distribution across the danish. Toss with sugar and lemon to macerate and release juices that meld with the filling. Choose ripe berries for the best color and flavor.
- 1 tablespoon brown sugar Sweeten and caramelize the strawberries slightly when combined, enhancing their natural flavor and adding a hint of molasses. Sprinkle over the chopped berries and let sit briefly to draw out juices. Works well to balance acidity and improve topping cohesion.
- 1/2 teaspoon fresh lemon juice Brighten the strawberry flavor and balance sweetness with subtle acidity, helping the fruit release juices when macerated. Stir into the chopped berries with brown sugar to heighten freshness and complexity. Use fresh lemon for the best aromatic result.
Instructions
- Preheat oven to 400 degrees F and line 2 large baking sheets with parchment paper or Silpat liners.: When you open the oven, you should feel an immediate dry, warm rush, and the hot air helps set the puff pastry so it puffs up evenly. Preheating to exactly 400 degrees F creates the high initial heat needed for lift. If the oven is cooler, the pastry may not rise well and can become dense. A common mistake is placing pastry in a partially preheated oven, so always wait until the oven reaches temperature.
- Unroll the puff pastry onto a lightly floured surface and slice in half lengthwise.: As you unroll, you will notice faint layers and a slightly tacky feel from the butter within the dough. Light flour prevents sticking without tearing the delicate layers. Work quickly so the pastry stays cold, because warmth causes the butter to soften and the layers to collapse. If the dough becomes too soft, chill it briefly to firm up.
- Cut each strip into quarters so you have 8 large rectangles.: The clean, sharp edges you aim for influence how evenly each piece bakes, creating uniform pastries that puff and brown at the same pace. Use a sharp knife or bench scraper for tidy cuts. Uneven pieces can bake inconsistently, so take a moment to make them similar in size.
- Using a paring knife, create a 1/2 inch border around the edge of each piece of puff pastry. Make sure to not cut all the way through!: This shallow indent signals where the layers should rise, forming a raised edge that frames the filling. The slight scoring encourages the border to separate and puff higher than the center. Cutting too deep will sever the layers and prevent rise, so keep the blade light and controlled.
- Poke the center square of the puff pastry a few times with a fork, this will ensure the edges rise, but not the center. This helps hold the filling of the Danish.: The tiny punctures let steam escape from the center, keeping it flatter so the filling stays in place. When you poke, you may hear soft clicks from the pastry settling; that is normal. Over piercing can cause the filling to leak through, so just a few pricks are sufficient.
- In a small mixing bowl add cream cheese, granulated sugar, and vanilla bean paste. Stir to combine and set aside.: As you mix, the cream cheese takes on a glossy texture that spreads easily, and the scent of vanilla bean paste becomes more pronounced, offering a comforting bakery aroma. A spatula works best to avoid over aerating, which could make the filling too light and cause it to collapse when heated. If the cheese is too cold, lumps will remain, so let it rest until smooth.
- In another small bowl stir together diced strawberries, dark brown sugar, and lemon juice.: The strawberries will start to glisten as sugar draws out their juices, creating a lightly syrupy coating. The lemon juice sharpens the fruit, and the brown sugar adds depth. If the berries release too much liquid, drain a bit to avoid soggy pastry, but a touch of juice helps meld flavors.
- Divide the cream cheese mixture between the pieces of puff pastry, making sure to only fill within the middle border. Smooth out the cream cheese in the middle as best as you can.: When you spread the filling, aim for an even, glossy layer that does not touch the scored border, so the pastry can rise unimpeded. The cream should look satiny and should hold its shape without spilling. Overfilling is a common error and leads to messy edges and leaks.
- Spoon the strawberry mixture over top the cream cheese mixture.: The strawberries should sit neatly atop the filling, their juices mingling slightly with the cheese to create pockets of flavor. Keep the fruit centered to avoid weighing down the edges. Too many berries can overload the pastry, so portion them evenly for balanced baking.
- Bake for 15-20 minutes or until the edges are golden brown.: You will notice a warm, fruity aroma as the strawberries begin to cook and the puff pastry turns deep golden, with crisp, flaking edges. The contrast of a golden border and set filling is your cue to remove them. Leaving them in too long risks overbrowning; watch carefully after 12 minutes.
- Enjoy warm or at room temperature.: Warm pastries yield a softer filling and a comforting aroma, while cooled ones slice cleaner and highlight the cream cheese texture. Serving temperature affects mouthfeel, so choose based on your preference. A typical slip is trying to stack them while warm, which can squash the flaky layers, so allow them to settle briefly before arranging.
Notes
- Swapped fruit: Try finely chopped berries or stone fruit in place of the strawberries for seasonal variation, ensuring similar chop size to maintain texture and bake time.
- Sugar tweak: Adjust the granulated sugar in the cream cheese or the brown sugar for the fruit to suit your sweetness preference, tasting the filling before assembling.
- Vanilla substitute advice: If you replace the vanilla bean paste with a milder vanilla, reduce the quantity slightly and taste to avoid overpowering the delicate fruit notes.
- Chill between steps: If your kitchen is warm, pop assembled pastries in the fridge for 10 minutes before baking to preserve the pastry layers and prevent spreading.
- Presentation trick: Brush the edges lightly with a simple sugar syrup after baking to enhance shine and keep the crust from drying out, applying gently with a pastry brush.