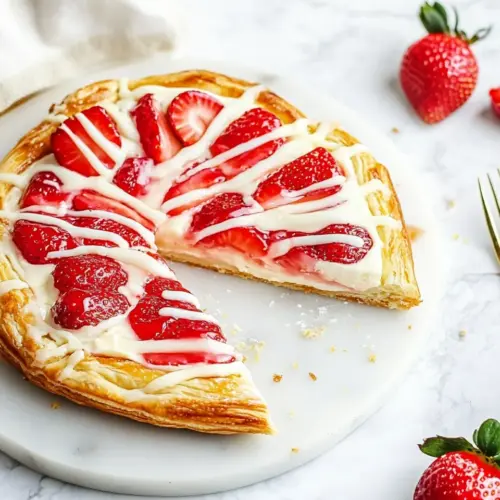
Easy Strawberry Cheesecake Danish
Easy Strawberry Cheesecake Danish is a creamy, flaky pastry that combines buttery puff pastry with a silky cream cheese filling and bright strawberries. This easy treat yields bakery quality results with minimal fuss, perfect for brunch or a simple dessert. Make it for a crowd or a cozy morning, it's irresistibly satisfying.
Equipment
- Baking Sheet Pan
- Silpat
- Vanilla Bean Paste
Ingredients
- 1 sheet puff pastry, thawed, but cold Provide a flaky, golden base for the danish and should be kept cold to ensure proper puffing during baking. Handle gently to avoid warming, and thaw just enough to unfold without tearing. Can be brushed with egg wash for extra shine if desired.
- 4 ounces cream cheese, room temperature Soften until spreadable to create a rich, creamy filling that contrasts with the crisp pastry. Beat until smooth to eliminate lumps and incorporate air for a lighter texture. Balance sweetness and tang when combined with sugar and vanilla.
- 2 tablespoons granulated sugar Add sweetness and help stabilize the cream cheese filling while enhancing overall flavor. Dissolve into the softened cheese for an even, pleasant sweetness. Can be adjusted slightly to taste without affecting structure.
- 1/2 teaspoon vanilla bean paste Provide a concentrated vanilla flavor with visible flecks that elevates the cheesecake taste. Stir into the cream cheese mixture to infuse aromatic depth without adding liquid. Use sparingly to avoid overpowering the delicate strawberry notes.
- 1 cup finely chopped strawberries Offer fresh, slightly tart fruitiness and texture when finely chopped for even distribution across the danish. Toss with sugar and lemon to macerate and release juices that meld with the filling. Choose ripe berries for the best color and flavor.
- 1 tablespoon brown sugar Sweeten and caramelize the strawberries slightly when combined, enhancing their natural flavor and adding a hint of molasses. Sprinkle over the chopped berries and let sit briefly to draw out juices. Works well to balance acidity and improve topping cohesion.
- 1/2 teaspoon fresh lemon juice Brighten the strawberry flavor and balance sweetness with subtle acidity, helping the fruit release juices when macerated. Stir into the chopped berries with brown sugar to heighten freshness and complexity. Use fresh lemon for the best aromatic result.
Instructions
- Preheat oven to 400 degrees F and line 2 large baking sheets with parchment paper or Silpat liners.: When you open the oven, you should feel an immediate dry, warm rush, and the hot air helps set the puff pastry so it puffs up evenly. Preheating to exactly 400 degrees F creates the high initial heat needed for lift. If the oven is cooler, the pastry may not rise well and can become dense. A common mistake is placing pastry in a partially preheated oven, so always wait until the oven reaches temperature.
- Unroll the puff pastry onto a lightly floured surface and slice in half lengthwise.: As you unroll, you will notice faint layers and a slightly tacky feel from the butter within the dough. Light flour prevents sticking without tearing the delicate layers. Work quickly so the pastry stays cold, because warmth causes the butter to soften and the layers to collapse. If the dough becomes too soft, chill it briefly to firm up.
- Cut each strip into quarters so you have 8 large rectangles.: The clean, sharp edges you aim for influence how evenly each piece bakes, creating uniform pastries that puff and brown at the same pace. Use a sharp knife or bench scraper for tidy cuts. Uneven pieces can bake inconsistently, so take a moment to make them similar in size.
- Using a paring knife, create a 1/2 inch border around the edge of each piece of puff pastry. Make sure to not cut all the way through!: This shallow indent signals where the layers should rise, forming a raised edge that frames the filling. The slight scoring encourages the border to separate and puff higher than the center. Cutting too deep will sever the layers and prevent rise, so keep the blade light and controlled.
- Poke the center square of the puff pastry a few times with a fork, this will ensure the edges rise, but not the center. This helps hold the filling of the Danish.: The tiny punctures let steam escape from the center, keeping it flatter so the filling stays in place. When you poke, you may hear soft clicks from the pastry settling; that is normal. Over piercing can cause the filling to leak through, so just a few pricks are sufficient.
- In a small mixing bowl add cream cheese, granulated sugar, and vanilla bean paste. Stir to combine and set aside.: As you mix, the cream cheese takes on a glossy texture that spreads easily, and the scent of vanilla bean paste becomes more pronounced, offering a comforting bakery aroma. A spatula works best to avoid over aerating, which could make the filling too light and cause it to collapse when heated. If the cheese is too cold, lumps will remain, so let it rest until smooth.
- In another small bowl stir together diced strawberries, dark brown sugar, and lemon juice.: The strawberries will start to glisten as sugar draws out their juices, creating a lightly syrupy coating. The lemon juice sharpens the fruit, and the brown sugar adds depth. If the berries release too much liquid, drain a bit to avoid soggy pastry, but a touch of juice helps meld flavors.
- Divide the cream cheese mixture between the pieces of puff pastry, making sure to only fill within the middle border. Smooth out the cream cheese in the middle as best as you can.: When you spread the filling, aim for an even, glossy layer that does not touch the scored border, so the pastry can rise unimpeded. The cream should look satiny and should hold its shape without spilling. Overfilling is a common error and leads to messy edges and leaks.
- Spoon the strawberry mixture over top the cream cheese mixture.: The strawberries should sit neatly atop the filling, their juices mingling slightly with the cheese to create pockets of flavor. Keep the fruit centered to avoid weighing down the edges. Too many berries can overload the pastry, so portion them evenly for balanced baking.
- Bake for 15-20 minutes or until the edges are golden brown.: You will notice a warm, fruity aroma as the strawberries begin to cook and the puff pastry turns deep golden, with crisp, flaking edges. The contrast of a golden border and set filling is your cue to remove them. Leaving them in too long risks overbrowning; watch carefully after 12 minutes.
- Enjoy warm or at room temperature.: Warm pastries yield a softer filling and a comforting aroma, while cooled ones slice cleaner and highlight the cream cheese texture. Serving temperature affects mouthfeel, so choose based on your preference. A typical slip is trying to stack them while warm, which can squash the flaky layers, so allow them to settle briefly before arranging.
Notes
- Swapped fruit: Try finely chopped berries or stone fruit in place of the strawberries for seasonal variation, ensuring similar chop size to maintain texture and bake time.
- Sugar tweak: Adjust the granulated sugar in the cream cheese or the brown sugar for the fruit to suit your sweetness preference, tasting the filling before assembling.
- Vanilla substitute advice: If you replace the vanilla bean paste with a milder vanilla, reduce the quantity slightly and taste to avoid overpowering the delicate fruit notes.
- Chill between steps: If your kitchen is warm, pop assembled pastries in the fridge for 10 minutes before baking to preserve the pastry layers and prevent spreading.
- Presentation trick: Brush the edges lightly with a simple sugar syrup after baking to enhance shine and keep the crust from drying out, applying gently with a pastry brush.