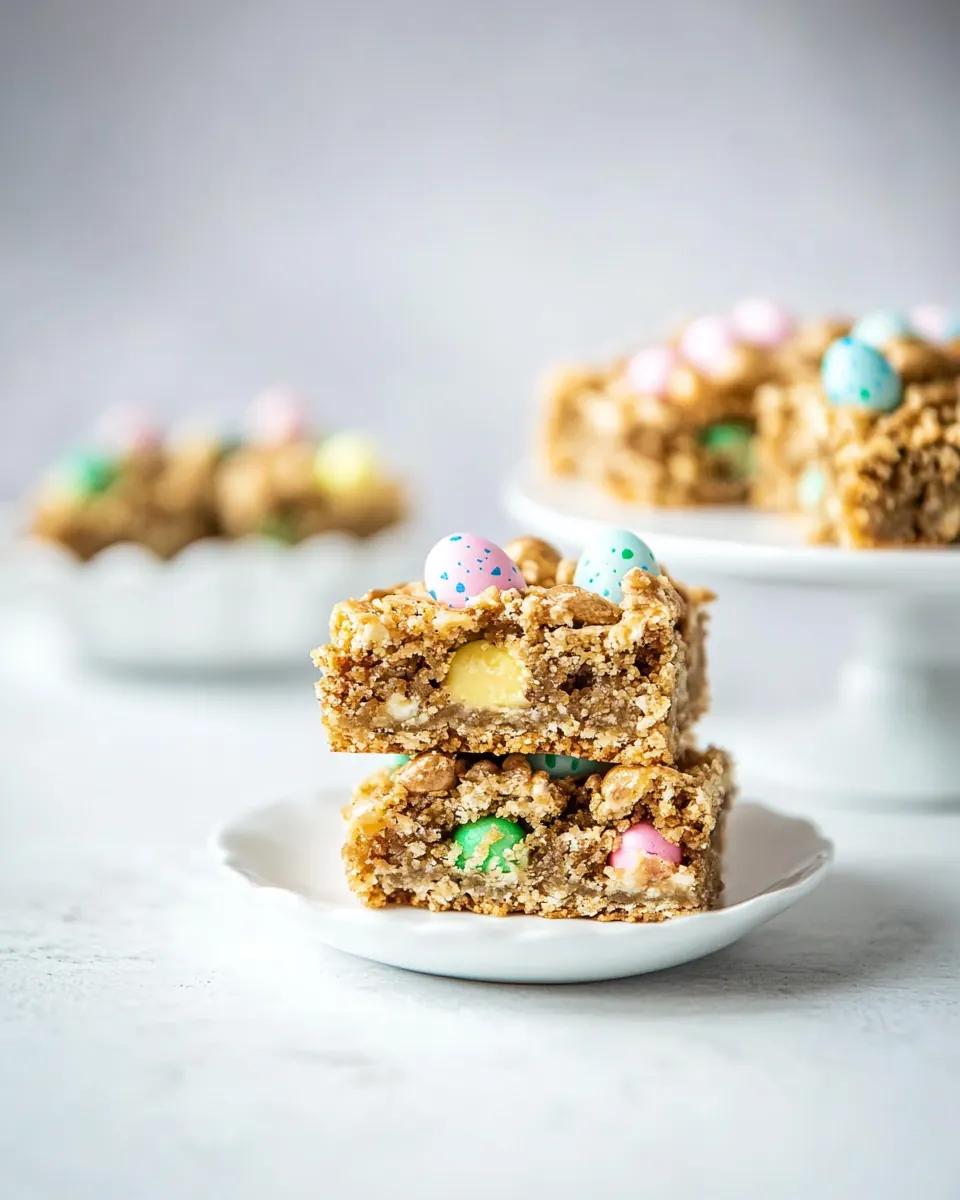
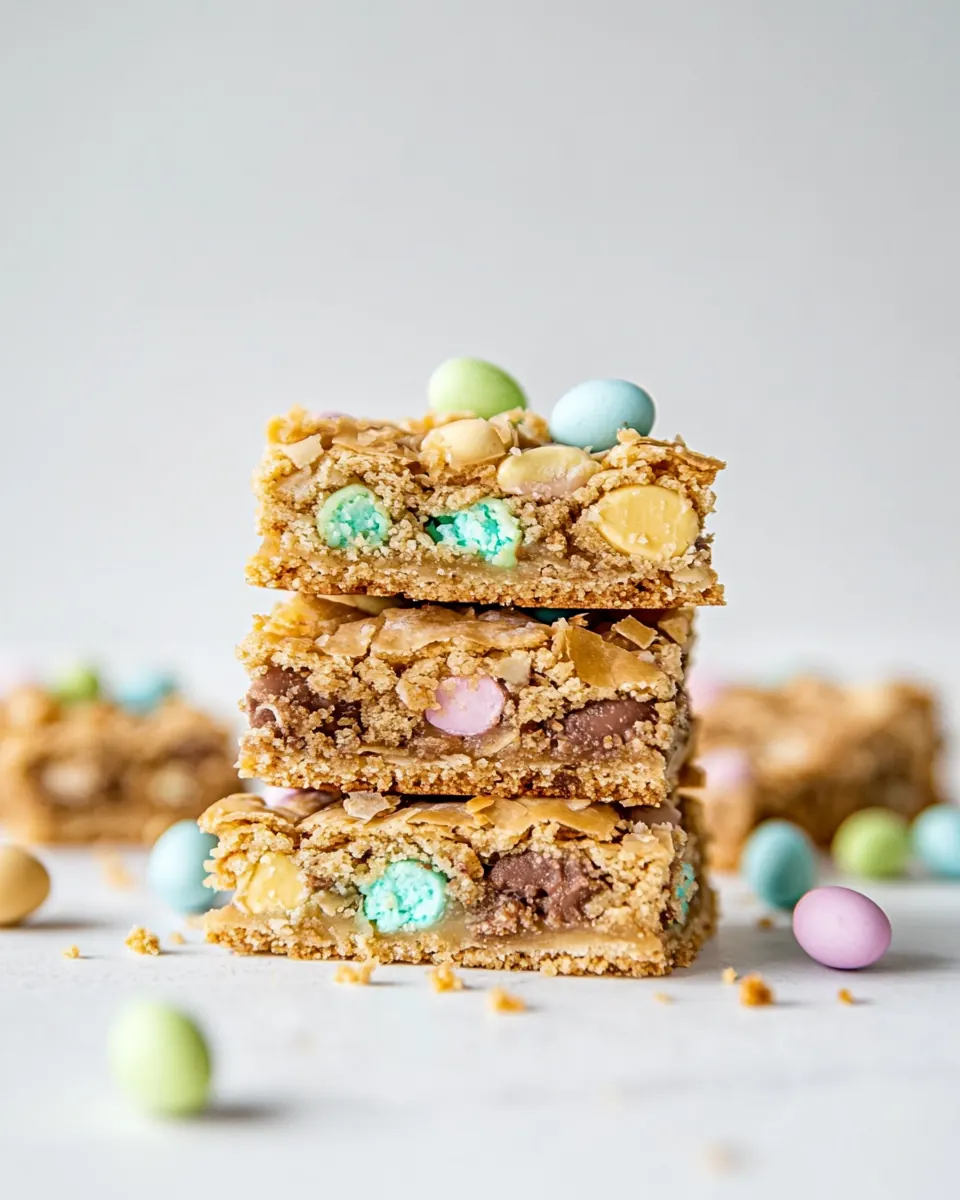
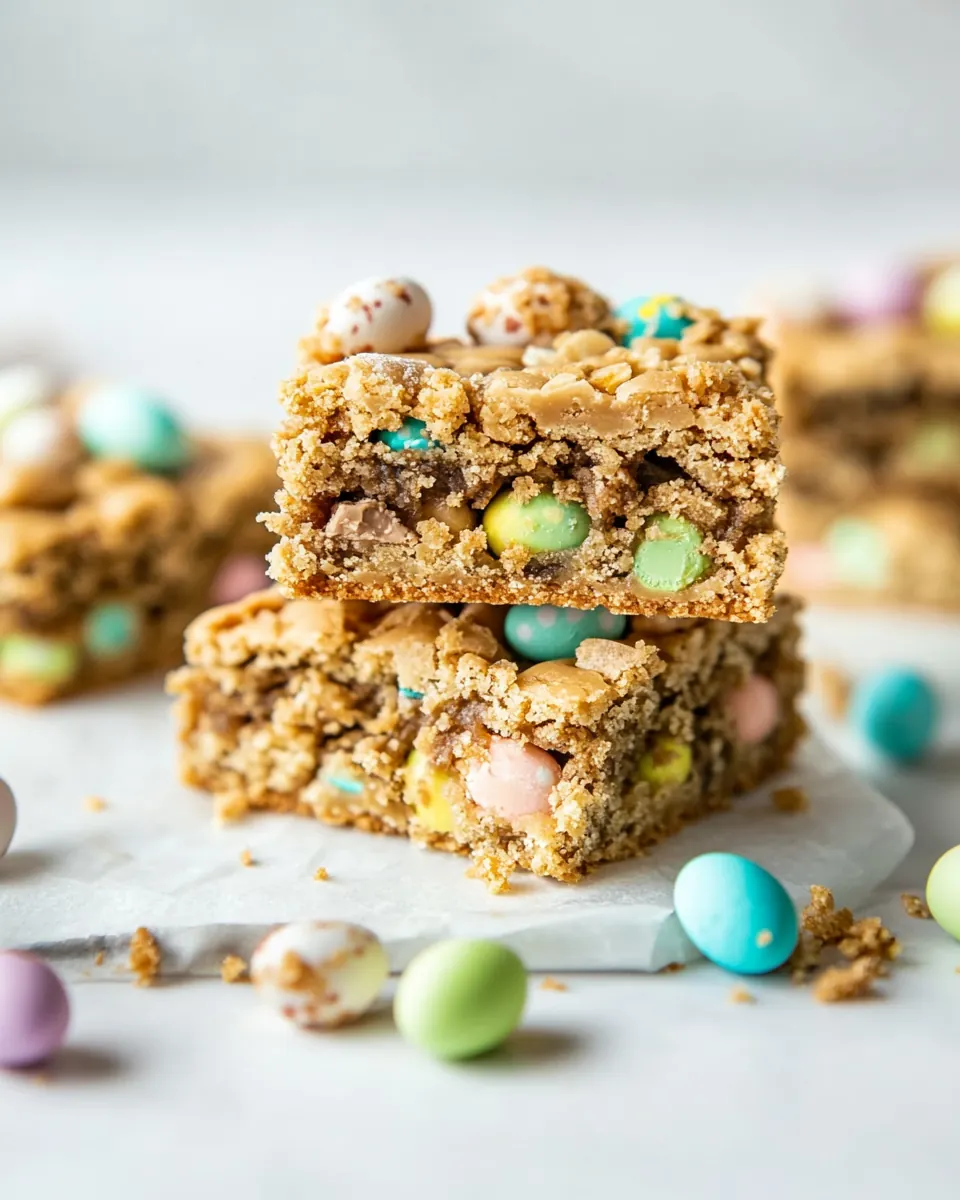
Easter Mini Egg Cookie Bars
Easter Mini Egg Cookie Bars started showing up at family gatherings the year I decided to combine two of my favorite things, childhood candy and warm baked treats, into one shareable pan.
That spring afternoon I was racing the clock between finishing a floral arrangement and getting a dessert on the table for an impromptu tea with neighbors. I reached for pantry staples and a bag of colorful candy, and the result was a pan of squares that vanished before I could pour the tea. I remember the joyful crunch of candy shells and the sweet ribbons of white chocolate melting into pockets of buttery dough as I cut warm squares for everyone to try.
Since then I make Easter Mini Egg Cookie Bars whenever I want something cheery and simple, especially when guests drop by or when I need an easy treat for a school bake sale. The bars travel well, and they hold up in a container without losing that tender chew that I love. Each bite offers buttery richness, a hint of vanilla, and those playful bursts of candy that make people smile.
Every time I slice into a pan I’m struck by how adaptable the recipe is. You can make it last minute, and it still looks like you put in more effort than you did. The memory of neighbors trading pieces and kids comparing the colors on their squares is exactly why this recipe became a staple. It’s my go to when I want a dessert that feels festive without being fussy.
Recipe Snapshot
40 mins
10 mins
30 mins
Easy
200 kcal
American
Gluten-Free, Low FODMAP
Desserts
Oven, 8 x 8 baking dish, Microwave safe bowl, Spatula
What Makes This Easter Mini Egg Cookie Bars Special
They are effortlessly festive
I love how Easter Mini Egg Cookie Bars bring color and whimsy to the table with almost zero fuss. I can toss together the batter in a single bowl and the candy does the rest, creating a visually joyful dessert that people instantly gravitate toward.
Simple pantry friendly ingredients
These bars rely on staples like butter, egg, brown sugar, and all purpose flour, ingredients I usually have on hand. I appreciate recipes that let me bake something memorable without a trip to the store.
Great texture contrast
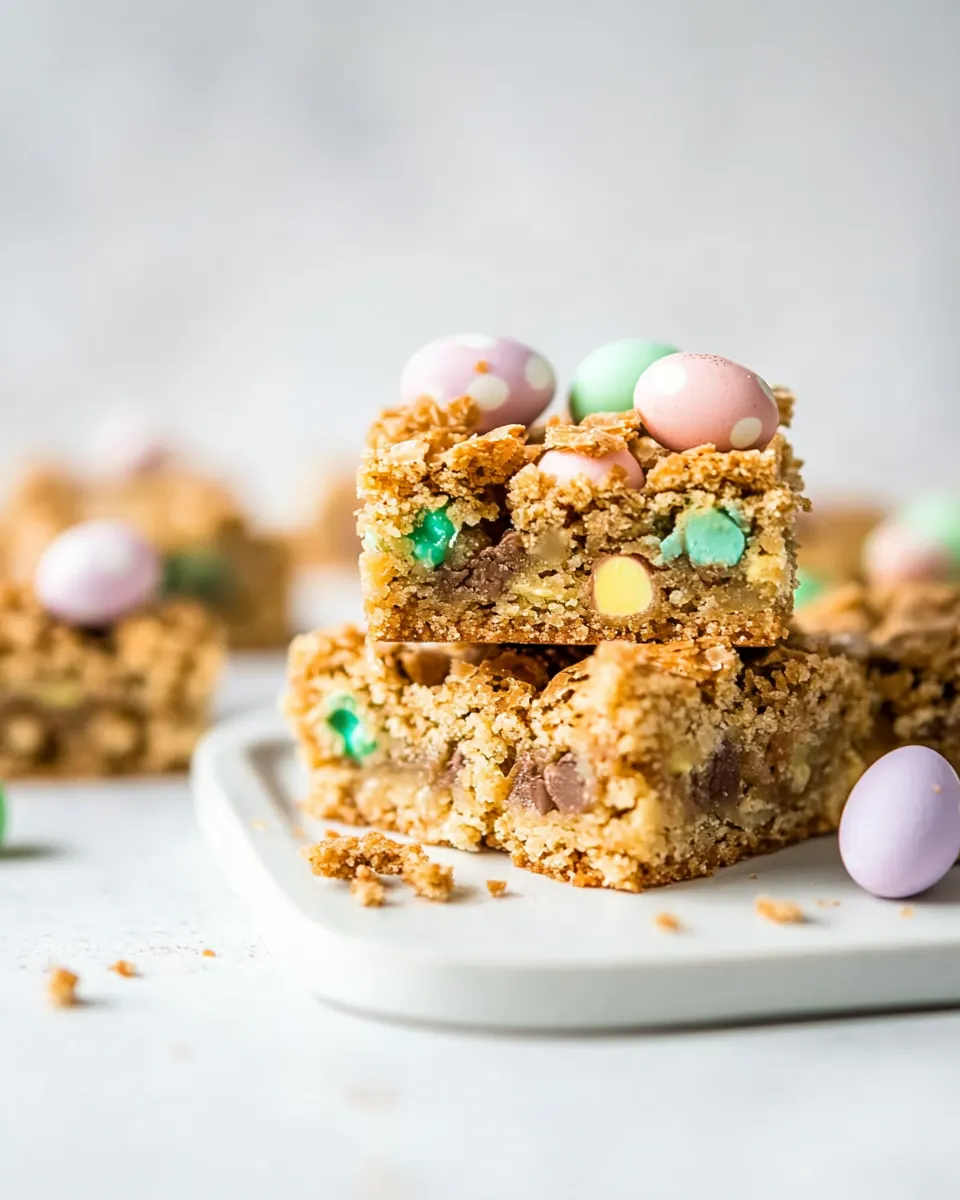
The combination of a tender, chewy base with crunchy, candy coated pieces makes every bite interesting. I find myself pausing to listen for that satisfying crack of a mini egg when I take a bite, it’s small pleasures like that which make this dessert a repeat in my kitchen.
Perfect for sharing and gifting
I often take a pan to neighbors or pack individual squares for brunch. Easter Mini Egg Cookie Bars store well in an airtight container for days, keeping their chew while the candy stays colorful so they still look fresh when I pass them along.
Kid friendly and nostalgic
There is something about the candy that pulls people back to childhood, and I enjoy seeing adults light up the same way kids do when they spot the colorful pieces. For me, baking these bars is as much about creating memories as it is about the taste.
Easter Mini Egg Cookie Bars Shopping List
I like to think of these ingredients as a small team working toward a single goal, a pan of cookie bars that are tender, sweet, and studded with playful candy. The key players are the butter and brown sugar which create chew and caramel notes, the egg for structure, and the all purpose flour to hold it all together. The white chocolate chips add pockets of creamy sweetness, while the Cadbury Mini Eggs bring color and crisp shell crunch.
- 1/2 cup buttermelted: Melted and cooled to provide fat and moisture, ensuring a tender, chewy texture throughout the cookie bars while helping bind dry ingredients together. Adds richness and helps dissolve sugars for even browning in the final bake.
- 1 egg: Beat until combined to act as a primary binder that locks ingredients together and contributes structure through proteins that set while baking. Adds moisture and helps create a light, slightly cakey crumb in each bar.
- 1 teaspoon pure vanilla extract: Infuse a sweet, aromatic vanilla flavor to enhance and round out the overall taste profile without overpowering other elements. Helps amplify the perception of sweetness and complements the chocolate components.
- 1 cup brown sugar packed: Provide caramel-like sweetness and deep molasses notes while contributing soft chewiness and moisture retention in the bars. Packed brown sugar also aids in browning and helps create a slightly fudgy texture when combined with fat.
- 1 teaspoon baking powder: Leaven the batter by producing gas when heated, giving a gentle rise and preventing overly dense bars. Also helps create a tender crumb when used in small amounts appropriate for cookie-style bars.
- 1 cup all purpose flour: Supply the bulk and structure through gluten formation when mixed, creating the framework that holds the bars together. Also contributes to texture and absorbs moisture from wet ingredients, ensuring proper consistency.
- 1/4 cup white chocolate chips: Introduce pockets of creamy sweetness that melt slightly during baking, adding contrast to the dough with subtle vanilla–white chocolate flavor. Small chip amount provides occasional bursts without overwhelming the texture.
- 1 cup Cadbury Mini Eggs: Add crunchy, colorful candy pieces that provide both texture contrast and a festive appearance, melting slightly at the edges while retaining some crunch. Contribute extra chocolate flavor and visual appeal to the finished bars.
How to Assemble Easter Mini Egg Cookie Bars
These directions walk you through assembling the bars in a relaxed, conversational way so you can focus on texture and timing. Expect the kitchen to smell buttery and sweet as the pan goes into the oven. Keep your tools ready and follow the sensory cues to know when the bars are done.
- Preheat oven to 350 F. Move the rack to the middle position.: You will notice a warm, neutral scent as the oven comes to temperature, and moving the rack to the middle ensures even heat circulation so the bars bake uniformly. This step matters because an off center rack can lead to uneven browning, with edges cooking faster than the middle. A common mistake is skipping the preheat, which causes longer bake times and uneven texture.
- Melt the butter in a large, microwave-safe bowl. Let it cool for a few minutes while you prepare/measure out the rest of the ingredients and line an 8 x 8 baking dish with tin foil (and/or spray it with non-stick spray).: As the butter melts you’ll see a glossy, golden pool that smells rich and nutty. Letting it cool slightly prevents the egg from cooking when combined. Lining the pan makes removing the bars simple and protects edges from sticking. Avoid pouring piping hot butter onto the egg , which can produce scrambled bits.
- Add the egg, vanilla, and sugar to the bowl and stir until it's combined, then stir in the baking powder and flour until smooth. Try not to over stir.: When you stir, the mixture will become glossy and slightly thick, releasing a warm sweet aroma from the brown sugar . Adding the dry ingredients gradually and folding them in maintains tenderness; over mixing develops gluten in the all purpose flour and makes the bars tough. Watch for streaks to disappear rather than stirring aggressively.
- Stir in the white chocolate chips and Mini Eggs. Transfer batter to the baking dish and smooth it out.: The batter will feel slightly sticky and supple, and when you fold in the white chocolate chips and Cadbury Mini Eggs you will see colorful flecks throughout. Smoothing the top with a spatula ensures even thickness so the bars bake uniformly. A frequent issue is pressing the candy too deep, which can cause them to bleed color or sink, so fold gently and distribute evenly.
- Bake for 30 minutes, or until a toothpick comes out (mostly) clean. You don't want gobs of raw batter stuck on it, basically. Let cool in the baking dish for at least 30 minutes. Cut into squares and enjoy.: As the pan bakes, the kitchen fills with a warm, sweet aroma, and the edges will set before the center, taking on a light golden hue. The toothpick test helps ensure the center is just set while remaining tender. Cooling allows the bars to firm up and makes cutting cleaner, otherwise you risk squashed squares. Don’t wait until the top is deeply brown, which signals overbaking and a drier bar.
Variations to Try
There are a few small swaps and presentation ideas that keep the heart of the recipe intact while offering different textures and looks. These variations help you personalize the bars for occasions or simply to use what you have on hand.
- Swap the candy try using different candy coated chocolates for seasonal color or flavor, keeping the same cup measurement so texture remains consistent.
- Add a sprinkle topping press a few extra Cadbury Mini Eggs on top before baking to make the squares look extra festive and give a crunchy top layer.
- Increase chocolate pockets fold in up to 1/3 cup more white chocolate chips if you prefer gooey melt pockets throughout the bars.
- Make mini bars bake in a muffin tin for portable single servings, reducing bake time slightly and checking early for doneness with a toothpick.
- Gift wrap cool completely, cut into squares, and layer in a box with parchment for gifting to neighbors or friends.
What to Serve With Easter Mini Egg Cookie Bars
These bars are a sweet centerpiece for many occasions, and they work well on dessert tables, brunch spreads, or packed into lunchboxes. I like pairing them with simple beverages or lighter treats so the bars remain the star. They are perfect for springtime celebrations and holiday gatherings.
- Serve with warm tea a lightly brewed tea complements the buttery, sweet bars without overpowering them, making a cozy pairing for brunch or afternoon visits.
- Pair with coffee offer brewed coffee for adults, the slight bitterness balances the sweetness of the Cadbury Mini Eggs and white chocolate chips.
- Plate with fresh fruit a side of berries or orange slices brightens the plate and adds a fresh contrast to the richness of the bars.
- Pack for picnics these bars travel well in an airtight container, making them ideal for outdoor gatherings or potlucks in spring weather.
- Occasion suggestions great for school bake sales, holiday brunches, Easter dessert tables, or any casual gathering where you want a cheerful treat.
- Storage tips keep squares in an airtight container at room temperature for up to three days, or refrigerate for longer keeping, though refrigeration may firm the texture.
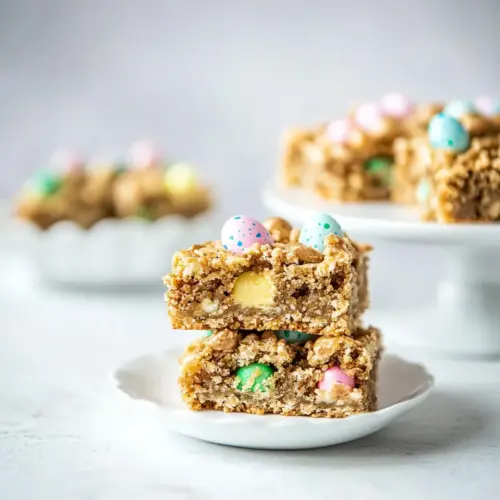
- Presentation idea arrange squares on a platter with extra Cadbury Mini Eggs sprinkled around the edge for an inviting look.
FAQ
Conclusion
These Easter Mini Egg Cookie Bars combine a tender, buttery base with playful candy crunch, making them a standout dessert for spring gatherings and casual sharing. Give them a try when you want something quick, festive, and reliably crowd pleasing. I promise the simple steps and cheerful presentation will leave guests asking for the recipe, and you may find yourself making them season after season.
Easter Mini Egg Cookie Bars
Equipment
- Oven
- 8 x 8 baking dish
- Microwave-safe Bowl
- Spatula
Ingredients
- 1/2 cup buttermelted Melted and cooled to provide fat and moisture, ensuring a tender, chewy texture throughout the cookie bars while helping bind dry ingredients together. Adds richness and helps dissolve sugars for even browning in the final bake.
- 1 egg Beat until combined to act as a primary binder that locks ingredients together and contributes structure through proteins that set while baking. Adds moisture and helps create a light, slightly cakey crumb in each bar.
- 1 teaspoon pure vanilla extract Infuse a sweet, aromatic vanilla flavor to enhance and round out the overall taste profile without overpowering other elements. Helps amplify the perception of sweetness and complements the chocolate components.
- 1 cup brown sugar packed Provide caramel-like sweetness and deep molasses notes while contributing soft chewiness and moisture retention in the bars. Packed brown sugar also aids in browning and helps create a slightly fudgy texture when combined with fat.
- 1 teaspoon baking powder Leaven the batter by producing gas when heated, giving a gentle rise and preventing overly dense bars. Also helps create a tender crumb when used in small amounts appropriate for cookie-style bars.
- 1 cup all purpose flour Supply the bulk and structure through gluten formation when mixed, creating the framework that holds the bars together. Also contributes to texture and absorbs moisture from wet ingredients, ensuring proper consistency.
- 1/4 cup white chocolate chips Introduce pockets of creamy sweetness that melt slightly during baking, adding contrast to the dough with subtle vanilla-white chocolate flavor. Small chip amount provides occasional bursts without overwhelming the texture.
- 1 cup Cadbury Mini Eggs Add crunchy, colorful candy pieces that provide both texture contrast and a festive appearance, melting slightly at the edges while retaining some crunch. Contribute extra chocolate flavor and visual appeal to the finished bars.
Instructions
- Preheat oven to 350 F. Move the rack to the middle position.: You will notice a warm, neutral scent as the oven comes to temperature, and moving the rack to the middle ensures even heat circulation so the bars bake uniformly. This step matters because an off center rack can lead to uneven browning, with edges cooking faster than the middle. A common mistake is skipping the preheat, which causes longer bake times and uneven texture.
- Melt the butter in a large, microwave-safe bowl. Let it cool for a few minutes while you prepare/measure out the rest of the ingredients and line an 8 x 8 baking dish with tin foil (and/or spray it with non-stick spray).: As the butter melts you’ll see a glossy, golden pool that smells rich and nutty. Letting it cool slightly prevents the egg from cooking when combined. Lining the pan makes removing the bars simple and protects edges from sticking. Avoid pouring piping hot butter onto the egg , which can produce scrambled bits.
- Add the egg, vanilla, and sugar to the bowl and stir until it's combined, then stir in the baking powder and flour until smooth. Try not to over stir.: When you stir, the mixture will become glossy and slightly thick, releasing a warm sweet aroma from the brown sugar . Adding the dry ingredients gradually and folding them in maintains tenderness; over mixing develops gluten in the all purpose flour and makes the bars tough. Watch for streaks to disappear rather than stirring aggressively.
- Stir in the white chocolate chips and Mini Eggs. Transfer batter to the baking dish and smooth it out.: The batter will feel slightly sticky and supple, and when you fold in the white chocolate chips and Cadbury Mini Eggs you will see colorful flecks throughout. Smoothing the top with a spatula ensures even thickness so the bars bake uniformly. A frequent issue is pressing the candy too deep, which can cause them to bleed color or sink, so fold gently and distribute evenly.
- Bake for 30 minutes, or until a toothpick comes out (mostly) clean. You don't want gobs of raw batter stuck on it, basically. Let cool in the baking dish for at least 30 minutes. Cut into squares and enjoy.: As the pan bakes, the kitchen fills with a warm, sweet aroma, and the edges will set before the center, taking on a light golden hue. The toothpick test helps ensure the center is just set while remaining tender. Cooling allows the bars to firm up and makes cutting cleaner, otherwise you risk squashed squares. Don’t wait until the top is deeply brown, which signals overbaking and a drier bar.
Notes
- Swap the candy try using different candy coated chocolates for seasonal color or flavor, keeping the same cup measurement so texture remains consistent.
- Add a sprinkle topping press a few extra Cadbury Mini Eggs on top before baking to make the squares look extra festive and give a crunchy top layer.
- Increase chocolate pockets fold in up to 1/3 cup more white chocolate chips if you prefer gooey melt pockets throughout the bars.
- Make mini bars bake in a muffin tin for portable single servings, reducing bake time slightly and checking early for doneness with a toothpick.
- Gift wrap cool completely, cut into squares, and layer in a box with parchment for gifting to neighbors or friends.