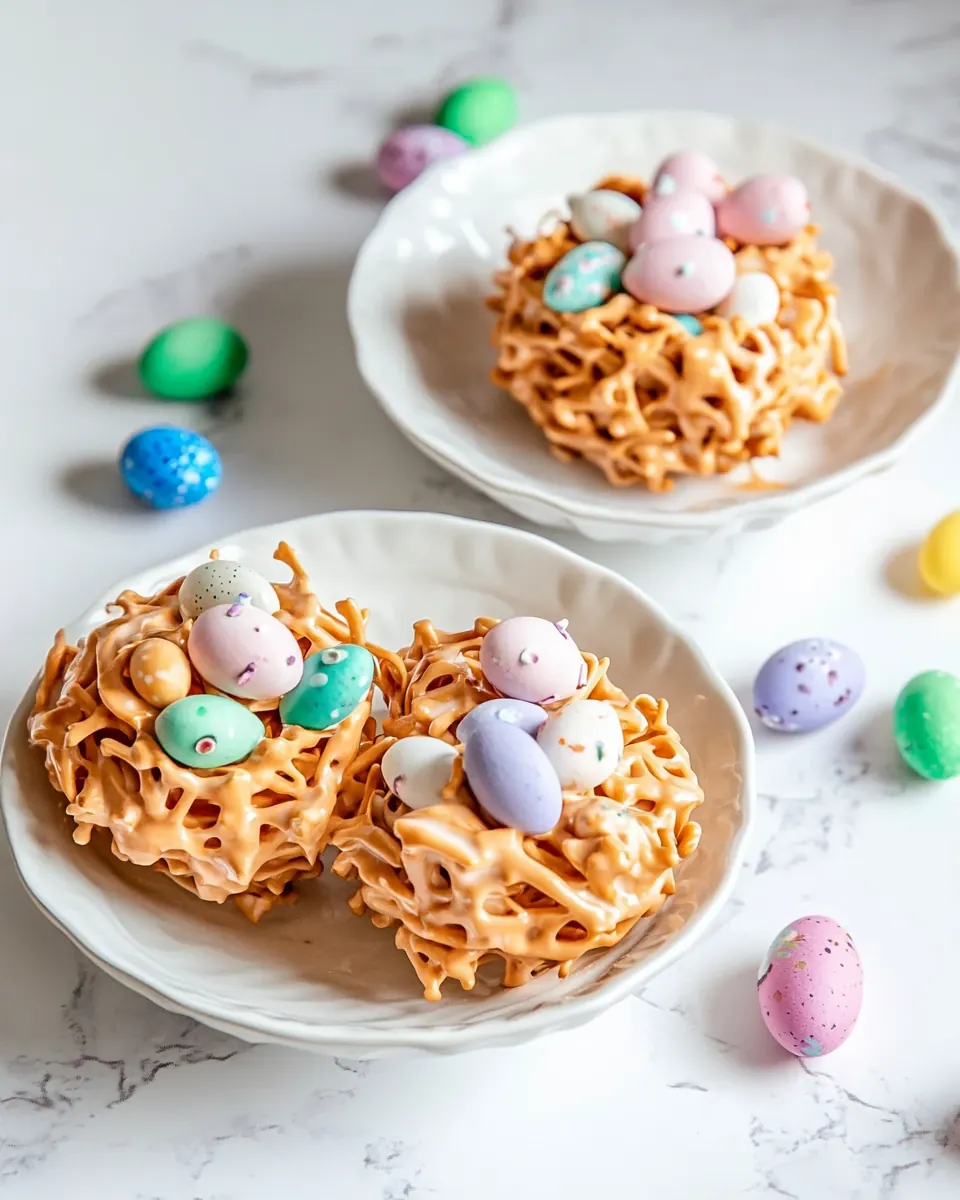
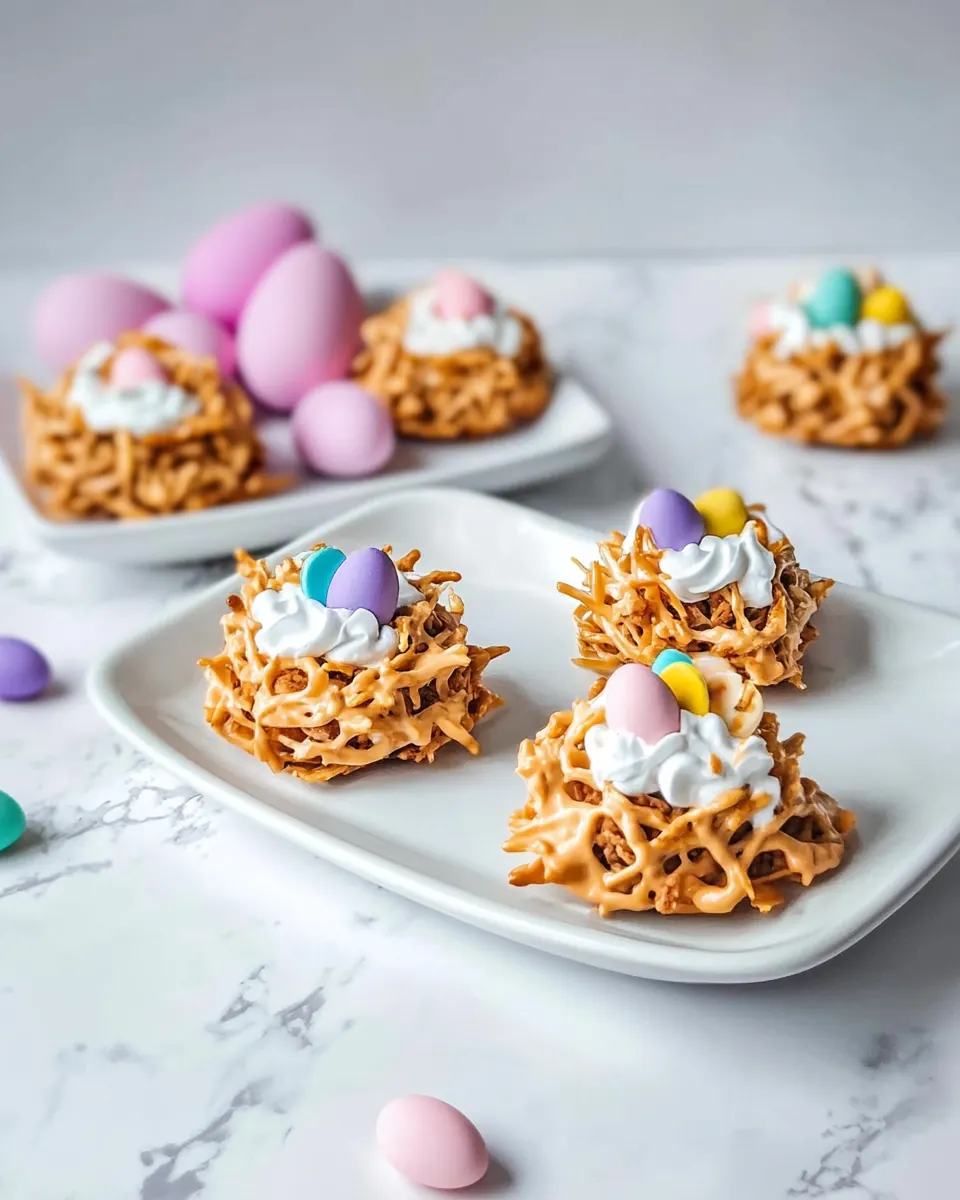
Easter Haystacks
Easter Haystacks are one of those simple treats I reach for when I want something playful and nostalgic, a sweet that brings out the kid in everyone at our family gatherings. I first made these years ago for an impromptu spring potluck, carrying a tray of the little nests through a kitchen full of chatter. Everyone hovered like it was magic, and the way the buttery butterscotch met the crunchy noodles felt like a tiny celebration in each bite.
The memory of my grandmother handing me a nest with three pastel eggs still makes me smile, and that same quirky joy shows up whenever I pull these from the fridge. I like to think of them as edible confetti, small, forgiving, and endlessly adaptable. They also travel well, which is why they became my go to for school events and brunches with friends.
Recipe Snapshot
21 mins
20 mins
1 mins
Easy
150 kcal
American
Gluten-Free, Low FODMAP
Desserts
Microwave safe bowl, Baking sheet, Parchment paper, Spoon
The Best Thing About This Easter Haystacks
Comforting simplicity
I adore how Easter Haystacks rely on a handful of pantry staples to produce a snack that tastes far fancier than it is. The texture contrast between the silky butterscotch chips and the crisp chow mein noodles creates an immediate, comforting bite that always gets thumbs up from guests.
Kid friendly and interactive
We often make these with the kids, and they love shaping the little nests and placing the tiny eggs. That hands on angle makes Easter Haystacks a winner for family events, and it keeps curious hands busy while adults chat.
Fast and forgiving
One of the reasons I return to this recipe is how forgiving it is. Over melted butterscotch chips or slightly undermixed creamy peanut butter still sets into a delightful treat. For busy hosts, that margin of error matters, and I appreciate a recipe that won’t punish a rushed moment.
Visually festive
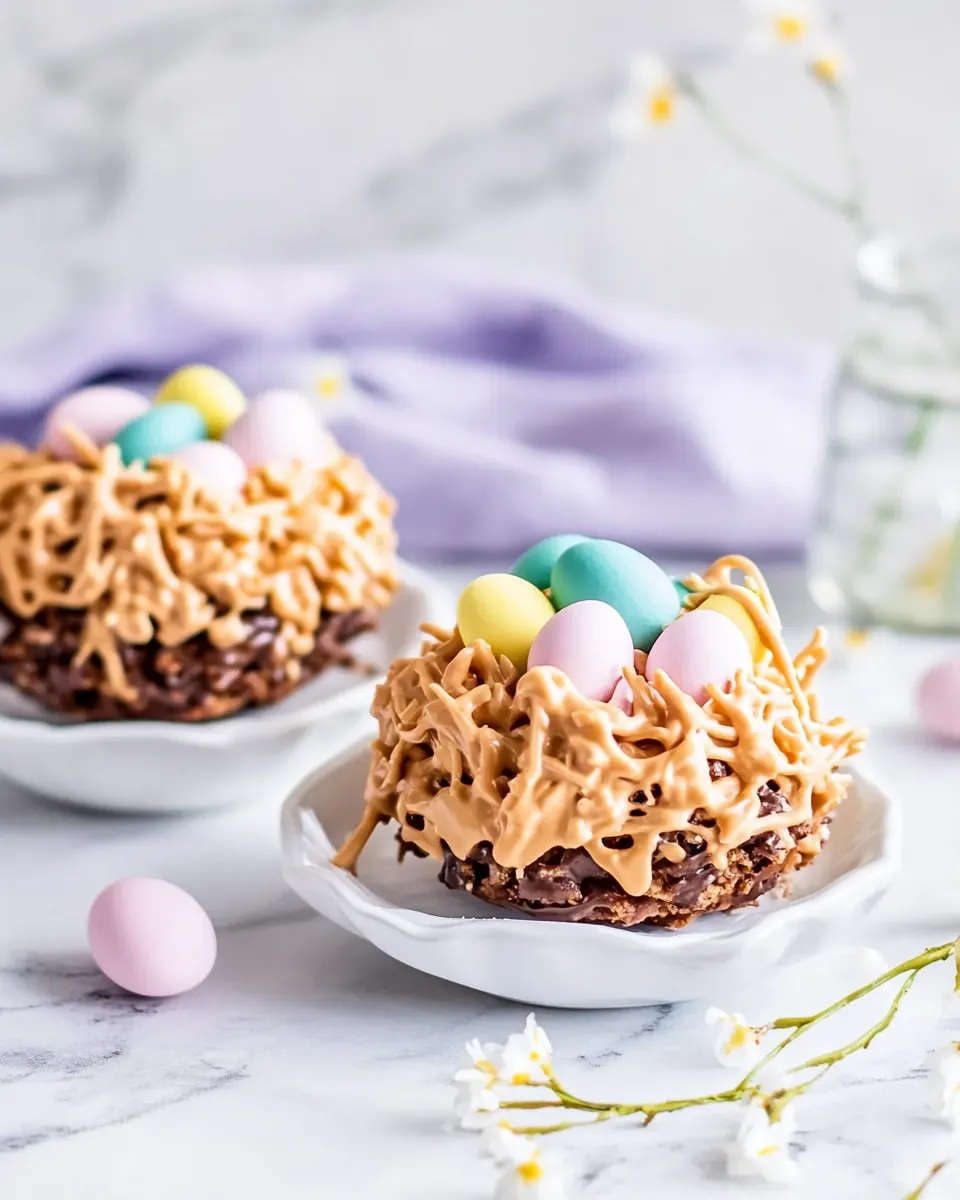
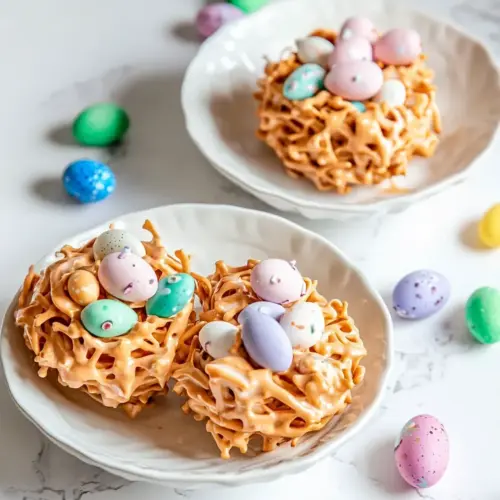
The little nests look charming on a platter, especially with the pastel Cadbury Mini Eggs nestled in the center. I like arranging them on doilies or in small paper cups to amp up the presentation for holiday tables.
Flexible storage and make ahead
I value recipes that let me prep ahead, and Easter Haystacks are perfect for that. You can make a batch hours before guests arrive and keep them chilled until serving, which means less last minute fuss. That flexibility is why I include these in my spring entertaining rotation.
Key Ingredients for Easter Haystacks
These ingredients are honest and straightforward, chosen to balance creamy, sweet, and crunchy elements. The core players build on texture contrasts more than complicated flavor layering. Together they create nests that hold their shape yet melt pleasantly on the tongue.
- 1 cup butterscotch chips: Melting provides a sweet, caramel-forward base that binds the haystack mixture while contributing a rich butterscotch flavor and glossy finish; stir gently until smooth to avoid graininess and ensure even coating of the other components.
- 1/2 cup creamy peanut butter: Adding creamy texture helps create a stable, spreadable binder that melds flavors and holds the noodles and marshmallows together; use warm but not boiling heat to keep the peanut butter smooth and prevent separation.
- 1 cup miniature marshmallows: Contributing light, chewy sweetness offers soft contrast to the crunchy noodles and mini eggs while adding volume and a nostalgic marshmallow bite; fold in gently so the pieces remain fluffy and distributed throughout.
- 5 ounces chow mein noodles: Supplying crisp, airy crunch delivers the haystack structure and a satisfying textural counterpoint to the soft and sticky elements; handle carefully to keep strands intact and evenly coated for consistent clusters.
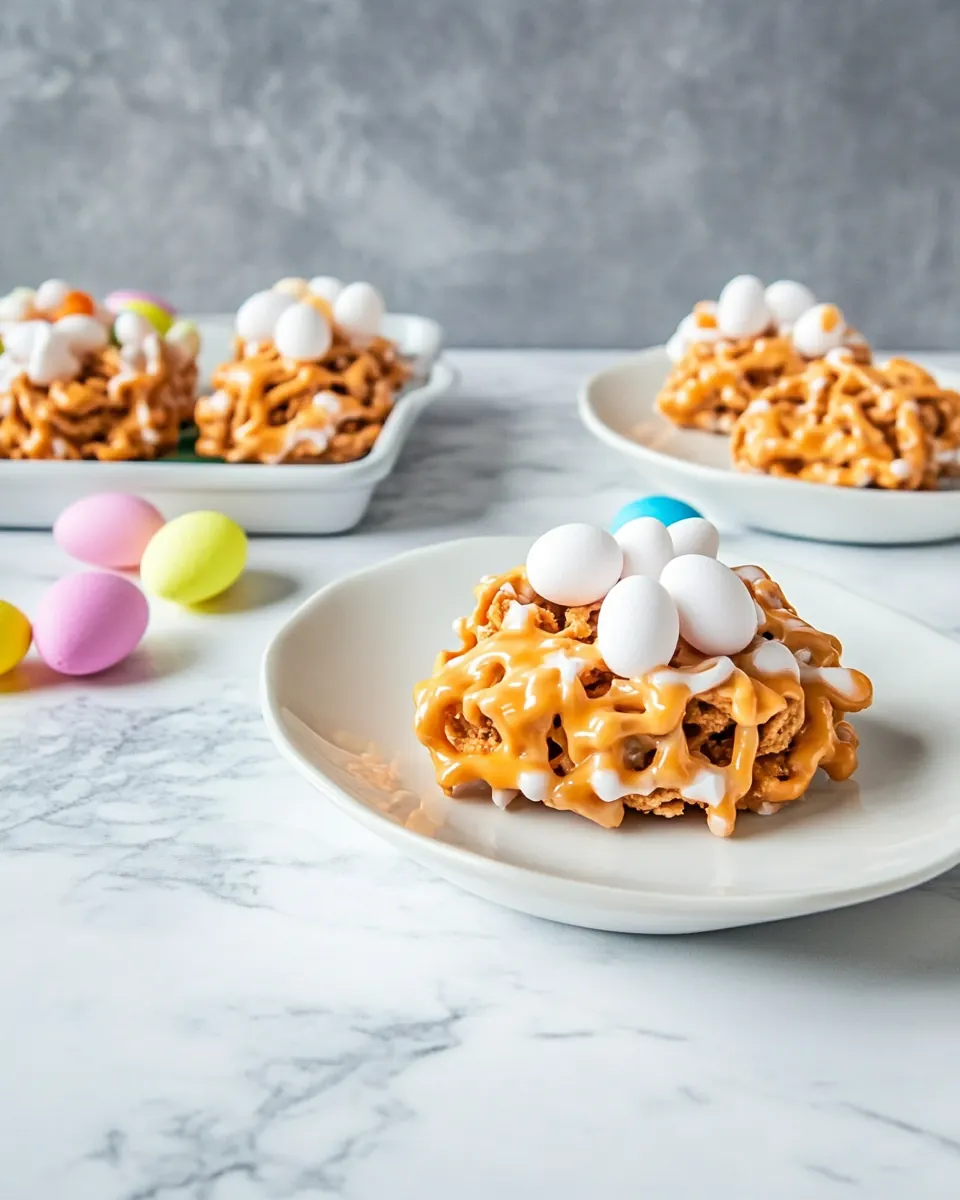
- 72 Cadbury Mini Eggs: Decorating with colorful, candy-coated eggs brings festive sweetness, a crunchy shell, and visual appeal that finishes the haystacks; scatter evenly on top or gently press into clusters so they adhere without crushing.
Making Easter Haystacks
These directions are simple and encourage a relaxed, creative rhythm. As you work, pay attention to texture and temperature because those little details determine how well the nests set and how inviting they feel to bite into.
- Line a baking sheet with parchment paper set aside.: The smell of clean paper and the sight of a ready sheet give you a calm starting point, and the parchment will prevent sticking so the nests lift easily. Use a rimmed sheet to catch any drips, and keep it flat on the counter so the nests set evenly. A common mistake is skipping lining, which can make removal messy and damage the nests, so take the extra minute to prepare the surface.
- Combine butterscotch chips and peanut butter in a large microwave safe bowl. Microwave ingredients for 30 seconds, stir and repeat until completely melted.: When you stir these together pre melting, you notice the chips clinging to the spoon and the peanut butter thick and glossy, which helps them melt uniformly. Use a bowl with high sides to avoid splatter during microwaving, and stir before heating so the peanut butter distributes into the chips for even melting. Avoid using a small bowl, which can cause uneven heating and scorching on the sides.
- Add the chow mein noodles to the peanut butter mixture. Stir until combined then add the marshmallows and stir to combine.: The sound of occasional faint bubbling and the sight of a smooth, glossy mixture tell you it's ready, and stirring between bursts ensures heat spreads evenly. Take care not to overheat, because burnt butterscotch gets grainy and loses its sweet tone. A common error is using long microwave intervals, which can lead to separation or burned spots, so use short bursts and stir thoroughly.
- Drop by spoonfuls onto the prepared baking sheet and shape into nests with an indent in the middle. Place three eggs in the middle of each nest.: As you fold the chow mein noodles in, you should see them becoming lightly coated, their brittle snap softening to a glossy sheen where the mixture clings. Folding gently preserves the airy crunch and prevents the noodles from breaking into dust. If you stir too aggressively you can pulverize them, resulting in a dense cluster rather than a nest, so be gentle and deliberate.
- Let cool at room temperature or place in the refrigerator or freezer to speed up the process.: At this stage the aroma shifts to a sweet, toasty note, and the mini marshmallows will cling, creating small pockets of softness within the nest. Mixing briefly ensures an even distribution without overworking the marshmallows into a gooey mass. Overmixing can make the mixture too sticky and difficult to shape, so stop as soon as the pieces are evenly scattered.
- Drop by spoonfuls onto the prepared baking sheet and shape into nests with an indent in the middle.: When you spoon the clusters onto the parchment, they should hold shape and look rounded, and the practice of creating a slight well gives a defined space for the eggs. Use the back of a spoon to create the indentation, pressing lightly so the nest walls remain intact. A common slip is pressing too hard, which flattens the nest and prevents it from resembling a cozy cup for the eggs.
- Place three eggs in the middle of each nest.: Gently nestle the Cadbury Mini Eggs so they sit attractively in the center, their glossy shells contrasting with the textured nest. The visual pop completes the presentation and signals a festive treat, but avoid pressing them down, which can break the shell or cause the eggs to sink into the cluster.
- Let cool at room temperature or place in the refrigerator or freezer to speed up the process.: Cooling changes the texture from tacky to firm, and as the mixture sets you will notice a muted sheen fade to a matte finish. Room temperature gives a gentler set and maintains some chew, while refrigeration makes them firmer and easier to pack. One common oversight is trying to move them before they are set, which can smear the nests and ruin their shape, so give them time to firm up based on your chosen method.
Make It Your Own
These suggestions help you personalize the recipe while keeping the structure that makes Easter Haystacks so delightful. Small swaps in presentation or timing let you adapt them for parties, classrooms, or casual weekend baking.
- Adjust egg count: Consider using fewer eggs per nest for a minimalist look, or swap placement to create a surprise when bitten into.
- Mix textures: Stir in more miniature marshmallows for extra chew or add a few more noodles for heightened crunch without changing the base ratios.
- Temperature control: If you prefer softer nests, set them at room temperature; for firmer, chilled nests, place them in the fridge until solid.
- Presentation boost: Place nests in small paper candy cups to make serving and gifting simpler and neater.
- Make ahead storage: Follow the storage notes to keep nests fresh for several days at room temperature or longer chilled in the fridge.
Pairing Suggestions for Easter Haystacks
These serving ideas will help you present Easter Haystacks in ways that suit casual snacking or festive tables. Think about contrast and convenience, and pick what feels joyful for the occasion.
- Spring brunch spread: Arrange nests on a platter next to fruit and small pastries for a light, playful dessert option that complements savory breakfast bites.
- Party dessert table: Group nests with other finger desserts like cookies and small tarts, using doilies or paper cups to elevate the look and make picking up easy for guests.
- Classroom treat: Portion nests into single serving paper cups so they are easy for kids to grab, minimizing mess while maximizing the fun factor.
- Storage tips: Keep fully set nests in an airtight container at room temperature for up to a week, or refrigerate to extend freshness; separate layers with parchment to prevent sticking.
- Seasonal pairing: These nests shine at springtime gatherings and holiday brunches, and they pair well with light, fruity beverages or coffee for an afternoon treat.
FAQ
Conclusion
Easter Haystacks are special because they combine minimal effort with maximum charm, delivering crunchy, sweet nests that feel festive and familiar. Give them a try for your next spring gathering or potluck; they are quick to make, easy to transport, and always a crowd pleaser. I hope this recipe brings a bit of playful nostalgia to your table and becomes one of those treats you turn to whenever you want a simple, joyful dessert.
Easter Haystacks
Equipment
- Microwave-safe Bowl
- Baking Sheet
- Parchment Paper
- Spoon
Ingredients
- 1 cup butterscotch chips Melting provides a sweet, caramel-forward base that binds the haystack mixture while contributing a rich butterscotch flavor and glossy finish; stir gently until smooth to avoid graininess and ensure even coating of the other components.
- 1/2 cup creamy peanut butter Adding creamy texture helps create a stable, spreadable binder that melds flavors and holds the noodles and marshmallows together; use warm but not boiling heat to keep the peanut butter smooth and prevent separation.
- 1 cup miniature marshmallows Contributing light, chewy sweetness offers soft contrast to the crunchy noodles and mini eggs while adding volume and a nostalgic marshmallow bite; fold in gently so the pieces remain fluffy and distributed throughout.
- 5 ounces chow mein noodles Supplying crisp, airy crunch delivers the haystack structure and a satisfying textural counterpoint to the soft and sticky elements; handle carefully to keep strands intact and evenly coated for consistent clusters.
- 72 Cadbury Mini Eggs Decorating with colorful, candy-coated eggs brings festive sweetness, a crunchy shell, and visual appeal that finishes the haystacks; scatter evenly on top or gently press into clusters so they adhere without crushing.
Instructions
- Line a baking sheet with parchment paper set aside.: The smell of clean paper and the sight of a ready sheet give you a calm starting point, and the parchment will prevent sticking so the nests lift easily. Use a rimmed sheet to catch any drips, and keep it flat on the counter so the nests set evenly. A common mistake is skipping lining, which can make removal messy and damage the nests, so take the extra minute to prepare the surface.
- Combine butterscotch chips and peanut butter in a large microwave safe bowl. Microwave ingredients for 30 seconds, stir and repeat until completely melted.: When you stir these together pre melting, you notice the chips clinging to the spoon and the peanut butter thick and glossy, which helps them melt uniformly. Use a bowl with high sides to avoid splatter during microwaving, and stir before heating so the peanut butter distributes into the chips for even melting. Avoid using a small bowl, which can cause uneven heating and scorching on the sides.
- Add the chow mein noodles to the peanut butter mixture. Stir until combined then add the marshmallows and stir to combine.: The sound of occasional faint bubbling and the sight of a smooth, glossy mixture tell you it's ready, and stirring between bursts ensures heat spreads evenly. Take care not to overheat, because burnt butterscotch gets grainy and loses its sweet tone. A common error is using long microwave intervals, which can lead to separation or burned spots, so use short bursts and stir thoroughly.
- Drop by spoonfuls onto the prepared baking sheet and shape into nests with an indent in the middle. Place three eggs in the middle of each nest.: As you fold the chow mein noodles in, you should see them becoming lightly coated, their brittle snap softening to a glossy sheen where the mixture clings. Folding gently preserves the airy crunch and prevents the noodles from breaking into dust. If you stir too aggressively you can pulverize them, resulting in a dense cluster rather than a nest, so be gentle and deliberate.
- Let cool at room temperature or place in the refrigerator or freezer to speed up the process.: At this stage the aroma shifts to a sweet, toasty note, and the mini marshmallows will cling, creating small pockets of softness within the nest. Mixing briefly ensures an even distribution without overworking the marshmallows into a gooey mass. Overmixing can make the mixture too sticky and difficult to shape, so stop as soon as the pieces are evenly scattered.
- Drop by spoonfuls onto the prepared baking sheet and shape into nests with an indent in the middle.: When you spoon the clusters onto the parchment, they should hold shape and look rounded, and the practice of creating a slight well gives a defined space for the eggs. Use the back of a spoon to create the indentation, pressing lightly so the nest walls remain intact. A common slip is pressing too hard, which flattens the nest and prevents it from resembling a cozy cup for the eggs.
- Place three eggs in the middle of each nest.: Gently nestle the Cadbury Mini Eggs so they sit attractively in the center, their glossy shells contrasting with the textured nest. The visual pop completes the presentation and signals a festive treat, but avoid pressing them down, which can break the shell or cause the eggs to sink into the cluster.
- Let cool at room temperature or place in the refrigerator or freezer to speed up the process.: Cooling changes the texture from tacky to firm, and as the mixture sets you will notice a muted sheen fade to a matte finish. Room temperature gives a gentler set and maintains some chew, while refrigeration makes them firmer and easier to pack. One common oversight is trying to move them before they are set, which can smear the nests and ruin their shape, so give them time to firm up based on your chosen method.
Notes
- Adjust egg count: Consider using fewer eggs per nest for a minimalist look, or swap placement to create a surprise when bitten into.
- Mix textures: Stir in more miniature marshmallows for extra chew or add a few more noodles for heightened crunch without changing the base ratios.
- Temperature control: If you prefer softer nests, set them at room temperature; for firmer, chilled nests, place them in the fridge until solid.
- Presentation boost: Place nests in small paper candy cups to make serving and gifting simpler and neater.
- Make ahead storage: Follow the storage notes to keep nests fresh for several days at room temperature or longer chilled in the fridge.