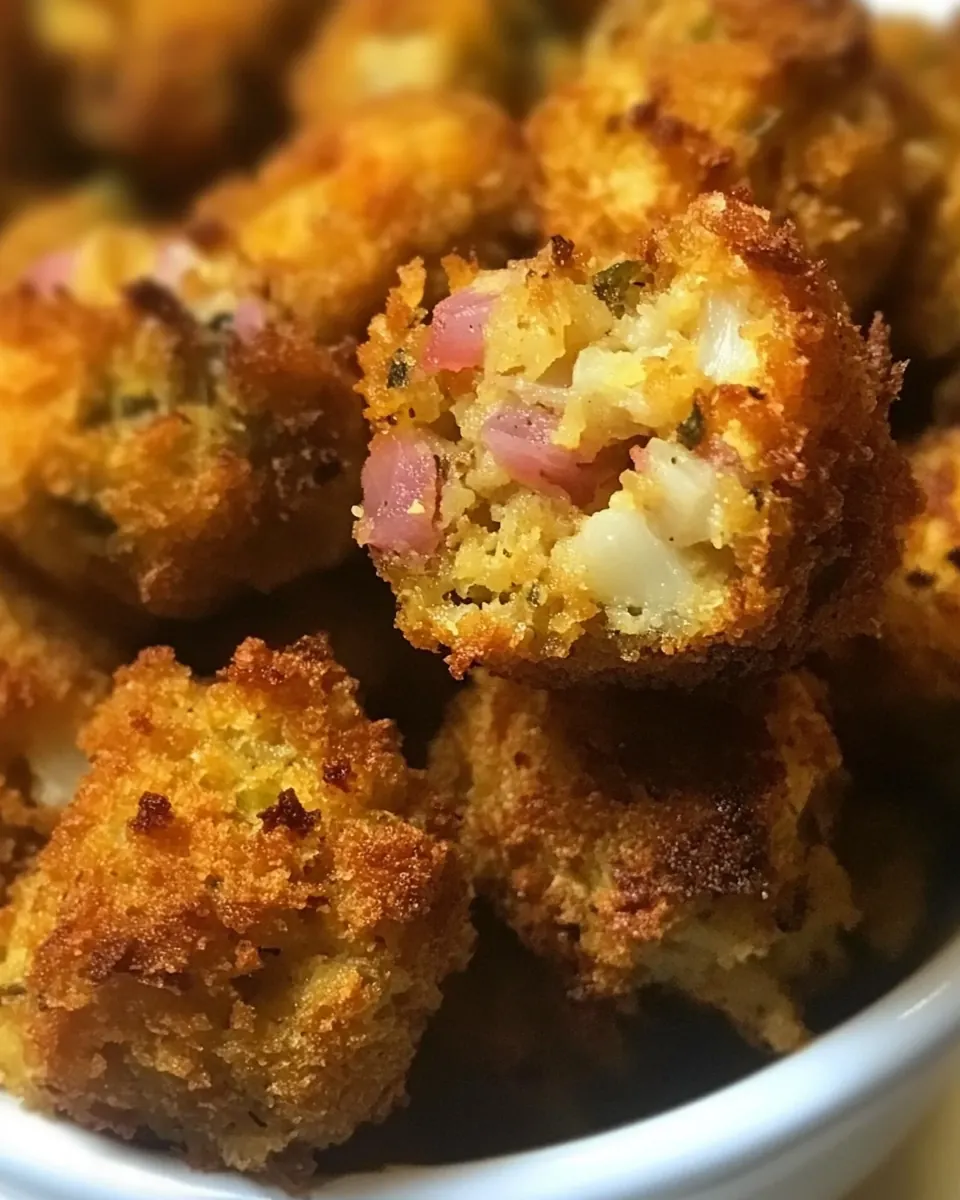
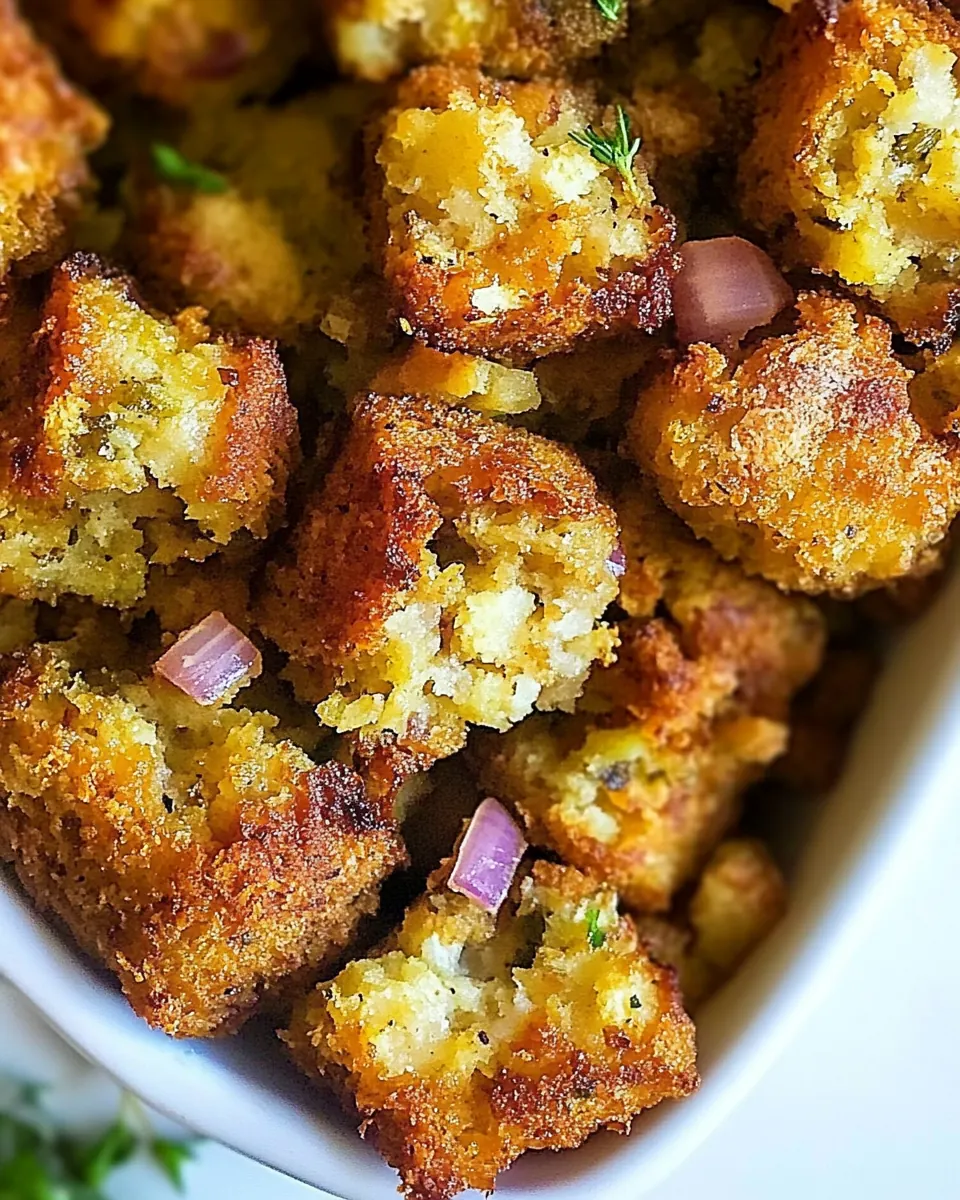
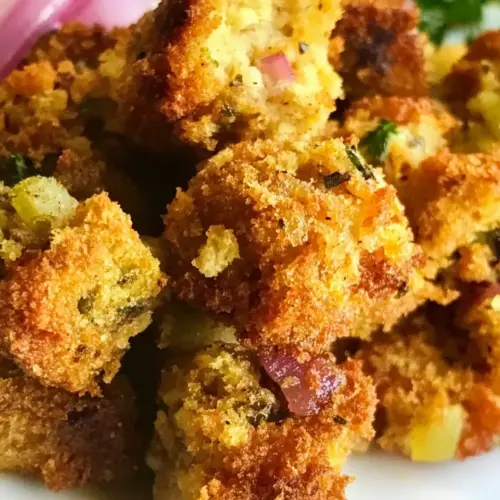
Deep Fried Stuffing
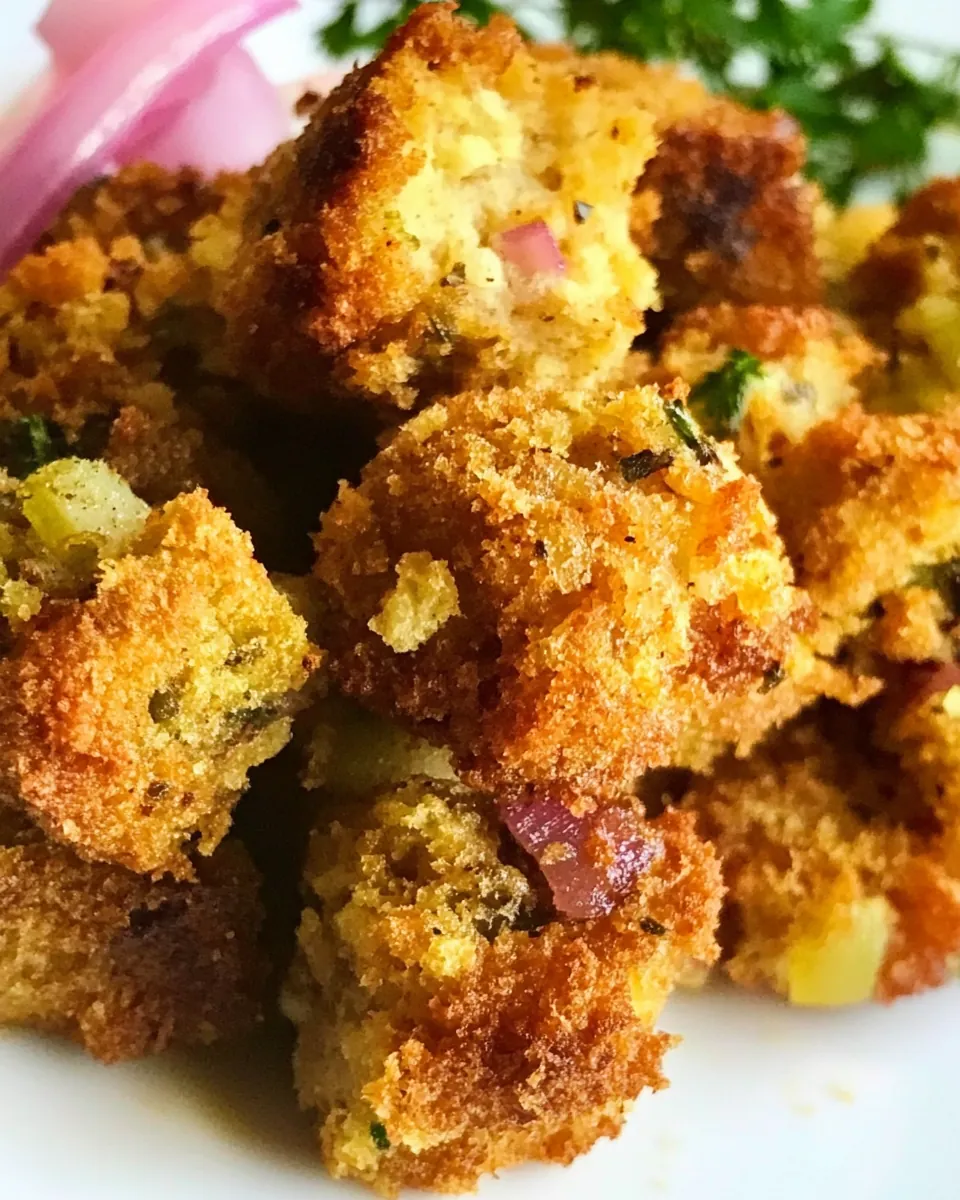
Deep Fried Stuffing came into my life the day after a boisterous Thanksgiving when the fridge was full and the oven was already spoken for, and I wanted something that felt indulgent but used up every last crumb. I remember standing at my counter with a bowl of leftover stuffing and thinking about how much I loved the crunchy edges of a well roasted stuffing, and how lovely it would be if those edges were all over, in one biteable ball. I grabbed a handful, shaped it, and before I knew it I was frying, laughing at the way the house filled with a warm, savory aroma.
That first batch taught me a lot about balance. I learned how wet the mixture should be to hold its shape, how hot the oil needs to get for an even, golden crust, and how a soft, cheesy interior contrasts beautifully with a crisp exterior. Friends arrived just as the first platter came out, and the way they reached for these little rounds made me promise myself I would always make room for a deep fried version of comfort food classics. These are not fancy, they are soulful, and they bring a playful crunch to leftover stuffing you might otherwise reheat quietly.
Recipe Snapshot
20 mins
10 mins
10 mins
Easy
250 kcal
American
Gluten-Free, Low FODMAP
Appetizers
Dutch Oven, Deep Frying Thermometer
What’s Great About This Deep Fried Stuffing
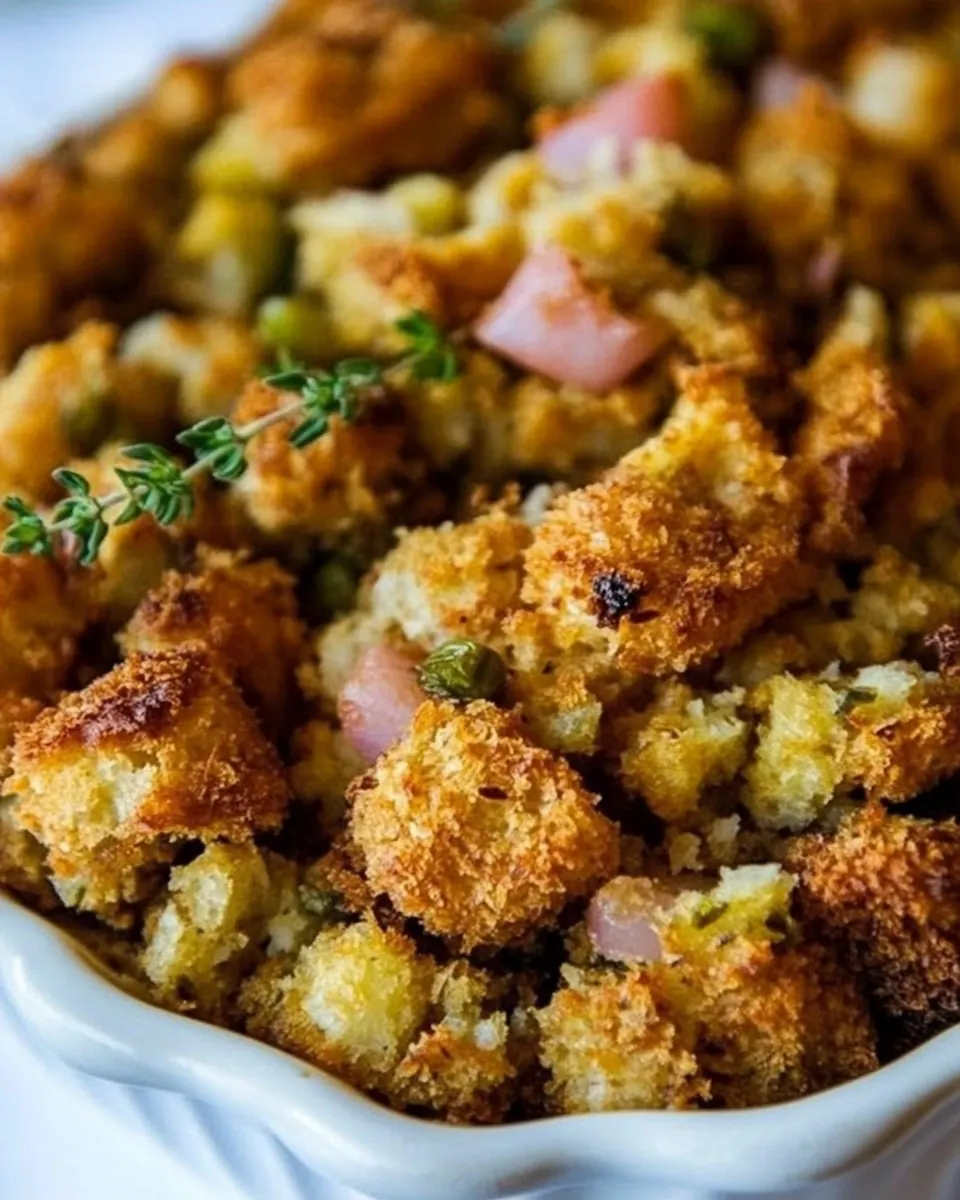
Irresistible Contrast of Textures
One of the first reasons I return to Deep Fried Stuffing is the magical contrast between the crisp outer shell and the pillowy interior. When you bite in, the initial crackle gives way to a warm, familiar stuffing center, and that interplay keeps people coming back for another. I like to think of it as turning one finish into two, because the crunchy coating elevates the whole experience.
Brilliant Use of Leftovers
I adore recipes that feel clever and economical, and this recipe turns leftover stuffing into something celebratory. Instead of worrying about reheating soggy portions, you can rework them into something new and shareable. I often bring these to gatherings because they read as indulgent yet humble, and guests assume more effort went into them than is true.
Customizable and Approachable
We can riff on these balls without losing what makes them great. The base is forgiving, so you can add a touch more butter or a splash of milk if things seem dry, or tuck in extra cheese for a gooey center. I find it’s a recipe that encourages experimentation, and that feels empowering in the kitchen.
Quick Party Food
When I need a last minute appetizer that will disappear, Deep Fried Stuffing is my go to. They take little active time to shape and fry, and the payoff is huge. The sizzling in the pan, the golden color, and the aroma together signal an instantly successful party bite.
Comfort With a Twist
Finally, I love how these manage to be familiar yet novel. The flavors of the original stuffing remain front and center, but the exterior brings a playful twist that elevates the whole dish. It’s the kind of thing that makes people pause, smile, and say yes when you offer another.
What Goes Into Deep Fried Stuffing
The philosophy behind these ingredients is straightforward: take a rich, seasoned base of leftover stuffing and bind it just enough so it forms a tender interior, then coat and fry for a crisp shell. The key players are the binding eggs and a touch of butter, the melty cheese for gooeyness, and the bread crumbs plus oil to build that golden crust. Each component has a clear role, and together they create contrast in texture and a rounded, savory flavor.
- 3 cups leftover stuffing: Reheat and bind leftover stuffing by breaking up clumps so it forms a cohesive base for frying; adds concentrated savory flavor and texture from previously cooked components. Maintain moisture to prevent dryness while allowing it to crisp during deep frying for a contrast of crunchy exterior and tender interior.
- 1 tablespoon melted butter: Coat and enrich the stuffing mixture by adding melted butter to provide fat that promotes browning and a rich mouthfeel during cooking. Use sparingly to avoid greasiness while enhancing aroma and helping ingredients adhere when forming balls or patties.
- 1 egg, lightly beaten: Bind and moisten the stuffing by incorporating a lightly beaten egg, which helps hold the mixture together during shaping and frying. Contributes protein that firms up when cooked, ensuring the interior sets without crumbling.
- 2/3 cups shredded Monterey Jack or Mozzarella cheese: Melt into the stuffing to add gooey, creamy texture and mild milky flavor that complements savory notes; shredded Monterey Jack or mozzarella provides stretchy cheese pull when warmed. Distribute evenly through the mix to create pockets of melted cheese that enhance richness and mouthfeel.
- 2 eggs, lightly beaten: Create a secure outer coating and additional binding by using two lightly beaten eggs to dredge or form the mixture; they help the breading adhere and produce a golden, crisp crust when fried. Ensure even coating to prevent oil penetration and maintain structural integrity of each piece.
- 2 tablespoons milk: Thin and enrich the egg wash by adding two tablespoons of milk, which yields a smoother batter consistency for better adhesion of breadcrumbs. Small amount of milk also contributes to a tender, lightly browned crust during frying.
- 1 cup bread crumbs: Provide a crunchy outer layer and help absorb excess moisture by coating formed stuffing pieces with one cup of bread crumbs to create a uniform crust. Choose fine or panko crumbs depending on desired crispness, and press gently for even coverage before frying.
- 1/2 teaspoons salt: Season the mixture with half a teaspoon of salt to enhance and balance savory flavors throughout the stuffing and crust. Sprinkle evenly and taste-adjust if needed, keeping in mind salt in leftover stuffing or cheese may already contribute to overall seasoning.
- vegetable oil: Fry and crisp the prepared stuffing in hot vegetable oil, which provides a neutral frying medium that reaches high temperatures without overpowering flavors. Maintain proper oil temperature to achieve a golden, non-greasy exterior while fully heating the interior.
The Process for Making Deep Fried Stuffing
These steps are approachable but demand attention to texture and temperature. Read each one through before you begin, and set up your stations so dipping and frying flow smoothly. Keep a plate lined with paper towels handy to rest the finished pieces and absorb excess oil.
- In a medium bowl, mix stuffing, melted butter, 1 egg, and cheese. Shape into balls slightly smaller than a golf ball. (If stuffing mixture is too dry to hold together, add another tablespoon of butter or a splash of chicken broth or milk.): The room fills with a warm savory scent as you fold everything together, and you will notice the mixture becoming glossier from the melted butter and egg . Work with your hands or a spoon until the components are evenly distributed, and you should feel a slightly tacky but cohesive texture that holds when pressed. This step sets the flavor balance and texture for the interior, so mix gently to avoid overcompressing the stuffing . A common pitfall is blending too slowly which leaves dry pockets, or overworking the mix so it becomes dense. If the mix crumbles and will not hold a shape, add a teaspoon of milk at a time until it comes together.
- Whisk together the 2 eggs and milk in a bowl.: As you form balls, notice the way the mixture warms in your palms and compacts just enough to hold shape. Aim for uniform size so they cook evenly; they should feel firm but not packed tight. Consistent sizing ensures simultaneous browning in the oil. Avoid pressing them so hard that they become rock solid, which prevents a tender interior. If the mix sticks to your hands, lightly dampen them or oil them to make shaping easier.
- In another bowl, combine bread crumbs and salt.: The whipped mixture should be smooth and slightly frothy, and it will give the bread crumbs something to cling to when you dip the balls. This egg wash adds moisture and helps the coating form a seamless crust. If the wash separates, whisk it again to re-emulsify. A frequent mistake is using a watery wash which fails to bind the crumbs, or an overly thick one that causes clumps of coating.
- Dip balls in egg mixture and then coat in bread crumbs.: When you stir the crumbs and salt together, take a moment to break any lumps so the coating will be even. The seasoned crumbs should look uniform and smell faintly toasty. Mixing ahead ensures you can dredge quickly and consistently. If you wait too long to combine, crumbs can absorb moisture from the air and clump, leading to patchy coverage. Keep the bowl near your work area for speed.
- Heat about 2 inches of oil in a Dutch oven to 365 degrees.: After dipping, shake off any excess egg wash so the crumbs adhere without sliding, then roll the balls in the crumbs until fully covered. You should hear a subtle rubbing sound as crumbs adhere, and the exterior will feel dry and slightly textured once coated. This double step builds the barrier that crisps in the oil and protects the center. A common error is overloading the crumbs which creates a thick, heavy crust; aim for a single even layer for the best contrast.
- In batches (about 6 at a time) cook the stuffing balls until golden brown on all sides. Place on a paper towel-lined plate to absorb excess oil.: As the oil warms, you will see slight ripples and occasionally a thin wisp of steam. Maintaining a steady temperature close to 365 degrees gives you a fast sear that produces a golden shell without excessive oil absorption. Use a deep frying thermometer to monitor heat throughout, and allow the oil to return to temperature between batches. If the oil is too cool the coating will soak up grease, if too hot the exterior may char before the middle heats through. Take care when adding items to hot oil to avoid splatters.
- In batches about 6 at a time cook the stuffing balls until golden brown on all sides: As they fry, listen for a steady sizzling, and watch the surface transform from pale to a deep golden tan. Turn gently with tongs so each side browns evenly and the crust forms uniformly. The internal cheese will start to soften and the aroma will intensify, signaling doneness. Overcrowding the pot drops the oil temperature and leads to uneven color and a greasy result; fry in modest batches to keep the heat consistent. Remove when evenly browned and place on a paper towel lined plate to drain, and allow a minute of rest so the interior firms slightly.
Ways to Customize
These ideas help you adjust texture, flavor, and presentation while staying true to the recipe. Small swaps make big differences, and each tip below starts with a highlighted action to guide you quickly.
- Make it cheesy, increase the shredded cheese slightly for a gooier center but be careful not to overfill, as too much can lead to leaking during frying.
- Adjust the binder, if your leftover stuffing is very dry add a little more melted butter or a teaspoon of milk at a time until it holds without becoming soggy.
- Use panko crumbs, swap the bread crumbs for panko for an extra crunchy exterior, watching closely as panko browns faster than finer crumbs.
- Season the crumbs, fold a pinch of additional salt into the crumb mixture if the stuffing is mild, but taste the stuffing first to avoid oversalting.
- Control oil temperature, maintain around 365 degrees and allow oil to return to temperature between batches so each batch fries uniformly.
- Serve with sauce, offer gravy or the suggested cranberry mayo for a contrast of sweet and savory that complements the warm, crisp balls.
Best Served With
These serving ideas explore occasions, pairings, and storage so you can make the most of the recipe. The list below offers practical, flavorful ways to present Deep Fried Stuffing for gatherings and weekday meals.
- As an appetizer: Serve a platter of warm balls with small ramekins of gravy and the cranberry mayo suggested in the notes so guests can dip and mix flavors easily. This turns leftovers into a social starter perfect for holiday gatherings.
- For family dinner: Plate alongside roasted vegetables and a simple green salad for contrast, offering a full meal where the Deep Fried Stuffing acts like a hearty side that also functions as a finger food.
- Holiday snack: These are ideal for Thanksgiving leftovers, and they travel well to potlucks. Pack them warm in an insulated container and reheat briefly in a hot oven to restore crispness before serving.
- Storage tip: Keep cooled pieces in an airtight container in the refrigerator for up to two days, then re-crisp in a 350 degree oven for 8 to 10 minutes. Avoid microwaving which will soften the crust.
- Occasion pairing: Bring them to casual gatherings, game day parties, or an informal holiday buffet, as they are easy to eat by hand and pair with bold dipping sauces.
- Seasonal notes: In the fall they feel especially appropriate thanks to traditional stuffing flavors, and they also work well at winter holiday events where savory bites are welcome.
FAQ
Conclusion
What makes this recipe special is how it transforms humble leftover stuffing into a crunchy, melty snack that feels celebratory. The combination of a golden fried crust and a warm, comforting interior gives every bite a joyful textural contrast that people love. Give these a try the next time you have leftover stuffing, and you may find they become one of your favorite ways to repurpose holiday extras. They are quick to shape, fast to fry, and reliably popular at gatherings, offering a playful and delicious way to stretch your leftovers.
Deep Fried Stuffing
Equipment
- Dutch Oven
- Deep-Frying Thermometer
Ingredients
- 3 cups leftover stuffing Reheat and bind leftover stuffing by breaking up clumps so it forms a cohesive base for frying; adds concentrated savory flavor and texture from previously cooked components. Maintain moisture to prevent dryness while allowing it to crisp during deep frying for a contrast of crunchy exterior and tender interior.
- 1 tablespoon melted butter Coat and enrich the stuffing mixture by adding melted butter to provide fat that promotes browning and a rich mouthfeel during cooking. Use sparingly to avoid greasiness while enhancing aroma and helping ingredients adhere when forming balls or patties.
- 1 egg, lightly beaten Bind and moisten the stuffing by incorporating a lightly beaten egg, which helps hold the mixture together during shaping and frying. Contributes protein that firms up when cooked, ensuring the interior sets without crumbling.
- 2/3 cups shredded Monterey Jack or Mozzarella cheese Melt into the stuffing to add gooey, creamy texture and mild milky flavor that complements savory notes; shredded Monterey Jack or mozzarella provides stretchy cheese pull when warmed. Distribute evenly through the mix to create pockets of melted cheese that enhance richness and mouthfeel.
- 2 eggs, lightly beaten Create a secure outer coating and additional binding by using two lightly beaten eggs to dredge or form the mixture; they help the breading adhere and produce a golden, crisp crust when fried. Ensure even coating to prevent oil penetration and maintain structural integrity of each piece.
- 2 tablespoons milk Thin and enrich the egg wash by adding two tablespoons of milk, which yields a smoother batter consistency for better adhesion of breadcrumbs. Small amount of milk also contributes to a tender, lightly browned crust during frying.
- 1 cup bread crumbs Provide a crunchy outer layer and help absorb excess moisture by coating formed stuffing pieces with one cup of bread crumbs to create a uniform crust. Choose fine or panko crumbs depending on desired crispness, and press gently for even coverage before frying.
- 1/2 teaspoons salt Season the mixture with half a teaspoon of salt to enhance and balance savory flavors throughout the stuffing and crust. Sprinkle evenly and taste-adjust if needed, keeping in mind salt in leftover stuffing or cheese may already contribute to overall seasoning.
- vegetable oil Fry and crisp the prepared stuffing in hot vegetable oil, which provides a neutral frying medium that reaches high temperatures without overpowering flavors. Maintain proper oil temperature to achieve a golden, non-greasy exterior while fully heating the interior.
Instructions
- In a medium bowl, mix stuffing, melted butter, 1 egg, and cheese. Shape into balls slightly smaller than a golf ball. (If stuffing mixture is too dry to hold together, add another tablespoon of butter or a splash of chicken broth or milk.): The room fills with a warm savory scent as you fold everything together, and you will notice the mixture becoming glossier from the melted butter and egg . Work with your hands or a spoon until the components are evenly distributed, and you should feel a slightly tacky but cohesive texture that holds when pressed. This step sets the flavor balance and texture for the interior, so mix gently to avoid overcompressing the stuffing . A common pitfall is blending too slowly which leaves dry pockets, or overworking the mix so it becomes dense. If the mix crumbles and will not hold a shape, add a teaspoon of milk at a time until it comes together.
- Whisk together the 2 eggs and milk in a bowl.: As you form balls, notice the way the mixture warms in your palms and compacts just enough to hold shape. Aim for uniform size so they cook evenly; they should feel firm but not packed tight. Consistent sizing ensures simultaneous browning in the oil. Avoid pressing them so hard that they become rock solid, which prevents a tender interior. If the mix sticks to your hands, lightly dampen them or oil them to make shaping easier.
- In another bowl, combine bread crumbs and salt.: The whipped mixture should be smooth and slightly frothy, and it will give the bread crumbs something to cling to when you dip the balls. This egg wash adds moisture and helps the coating form a seamless crust. If the wash separates, whisk it again to re-emulsify. A frequent mistake is using a watery wash which fails to bind the crumbs, or an overly thick one that causes clumps of coating.
- Dip balls in egg mixture and then coat in bread crumbs.: When you stir the crumbs and salt together, take a moment to break any lumps so the coating will be even. The seasoned crumbs should look uniform and smell faintly toasty. Mixing ahead ensures you can dredge quickly and consistently. If you wait too long to combine, crumbs can absorb moisture from the air and clump, leading to patchy coverage. Keep the bowl near your work area for speed.
- Heat about 2 inches of oil in a Dutch oven to 365 degrees.: After dipping, shake off any excess egg wash so the crumbs adhere without sliding, then roll the balls in the crumbs until fully covered. You should hear a subtle rubbing sound as crumbs adhere, and the exterior will feel dry and slightly textured once coated. This double step builds the barrier that crisps in the oil and protects the center. A common error is overloading the crumbs which creates a thick, heavy crust; aim for a single even layer for the best contrast.
- In batches (about 6 at a time) cook the stuffing balls until golden brown on all sides. Place on a paper towel-lined plate to absorb excess oil.: As the oil warms, you will see slight ripples and occasionally a thin wisp of steam. Maintaining a steady temperature close to 365 degrees gives you a fast sear that produces a golden shell without excessive oil absorption. Use a deep frying thermometer to monitor heat throughout, and allow the oil to return to temperature between batches. If the oil is too cool the coating will soak up grease, if too hot the exterior may char before the middle heats through. Take care when adding items to hot oil to avoid splatters.
- In batches about 6 at a time cook the stuffing balls until golden brown on all sides: As they fry, listen for a steady sizzling, and watch the surface transform from pale to a deep golden tan. Turn gently with tongs so each side browns evenly and the crust forms uniformly. The internal cheese will start to soften and the aroma will intensify, signaling doneness. Overcrowding the pot drops the oil temperature and leads to uneven color and a greasy result; fry in modest batches to keep the heat consistent. Remove when evenly browned and place on a paper towel lined plate to drain, and allow a minute of rest so the interior firms slightly.
Notes
- Make it cheesy, increase the shredded cheese slightly for a gooier center but be careful not to overfill, as too much can lead to leaking during frying.
- Adjust the binder, if your leftover stuffing is very dry add a little more melted butter or a teaspoon of milk at a time until it holds without becoming soggy.
- Use panko crumbs, swap the bread crumbs for panko for an extra crunchy exterior, watching closely as panko browns faster than finer crumbs.
- Season the crumbs, fold a pinch of additional salt into the crumb mixture if the stuffing is mild, but taste the stuffing first to avoid oversalting.
- Control oil temperature, maintain around 365 degrees and allow oil to return to temperature between batches so each batch fries uniformly.
- Serve with sauce, offer gravy or the suggested cranberry mayo for a contrast of sweet and savory that complements the warm, crisp balls.