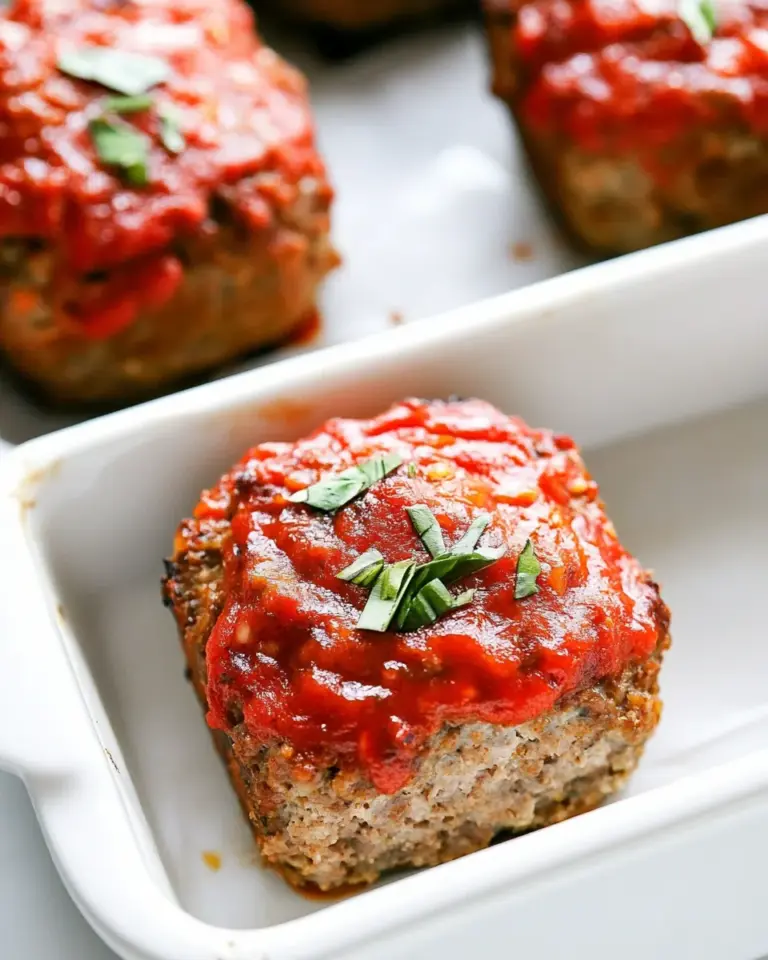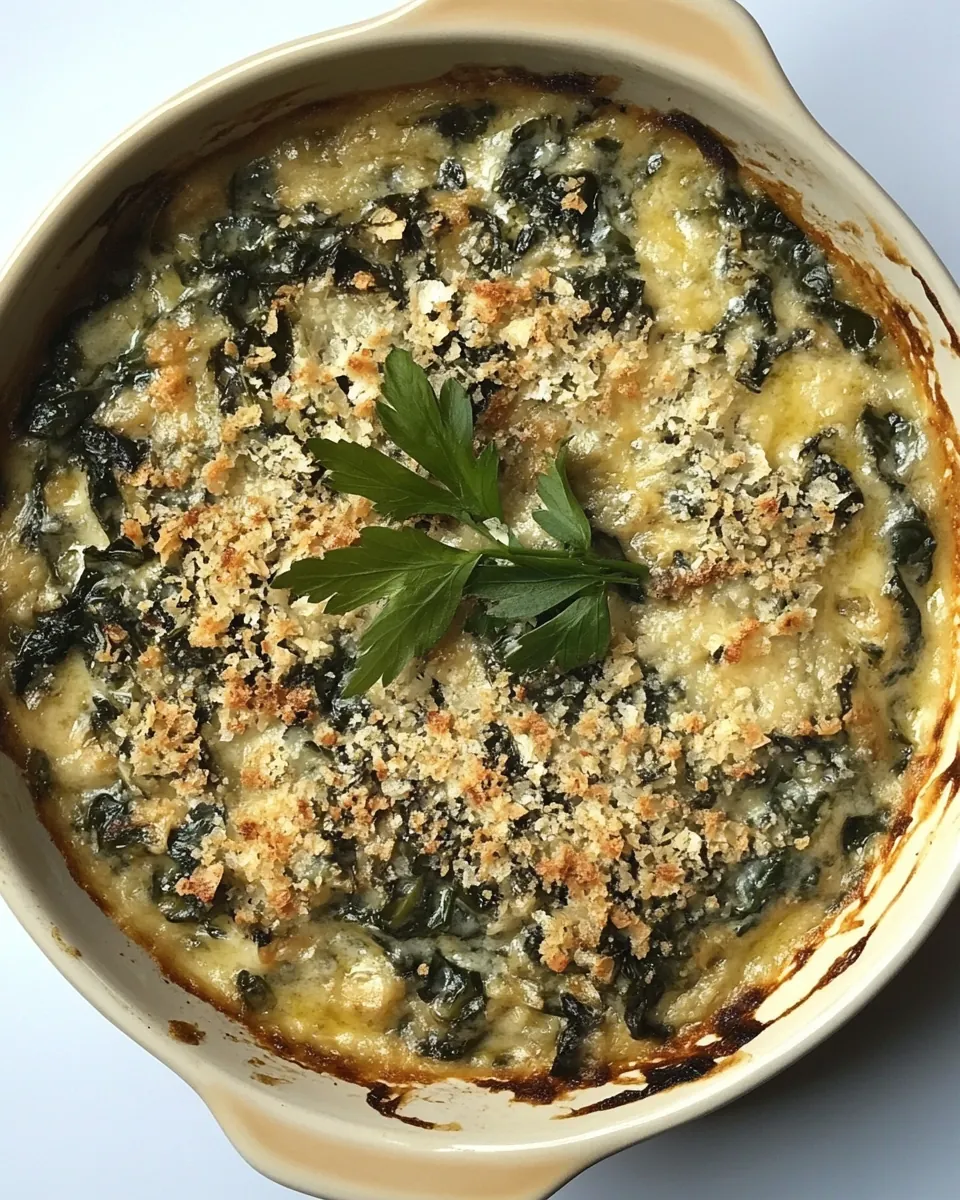
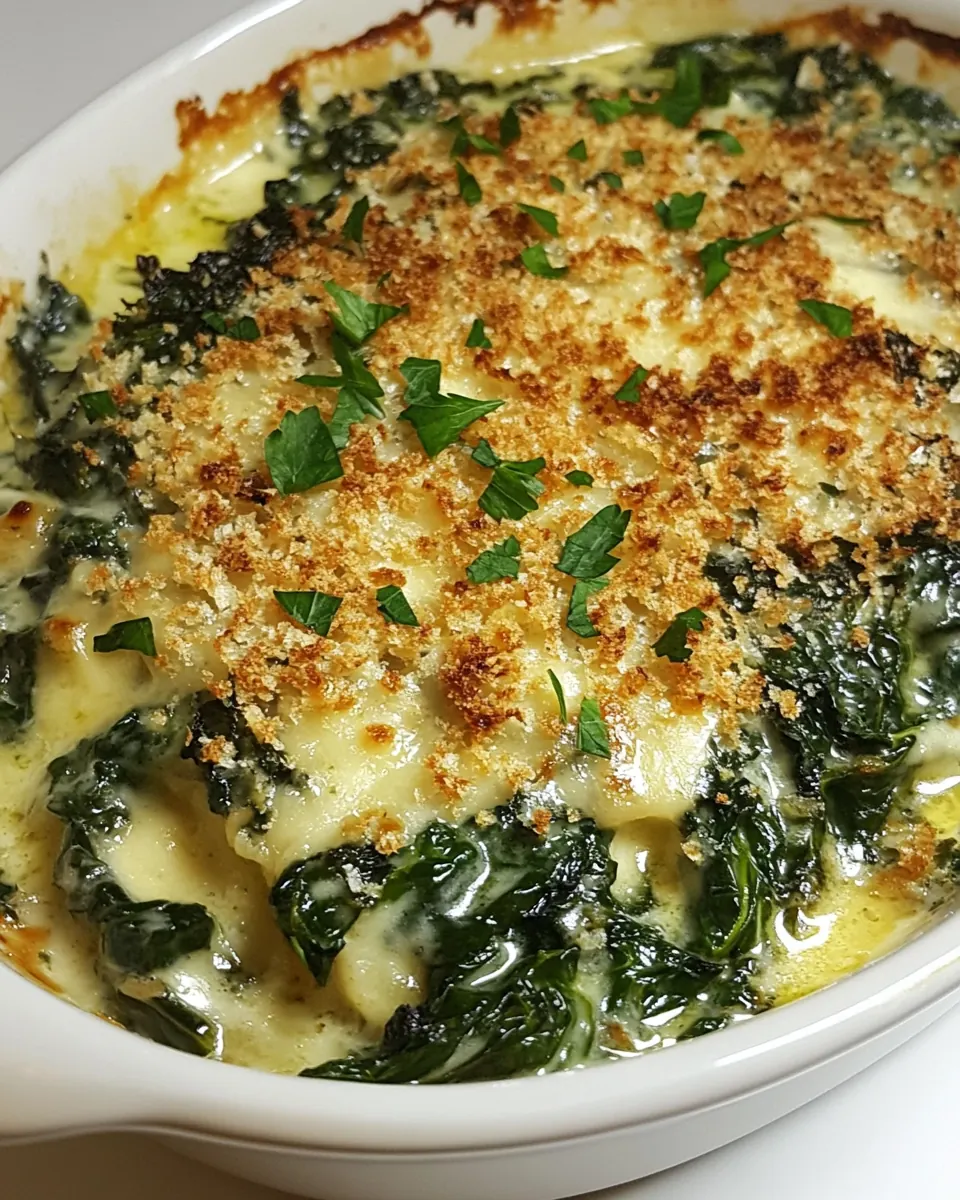
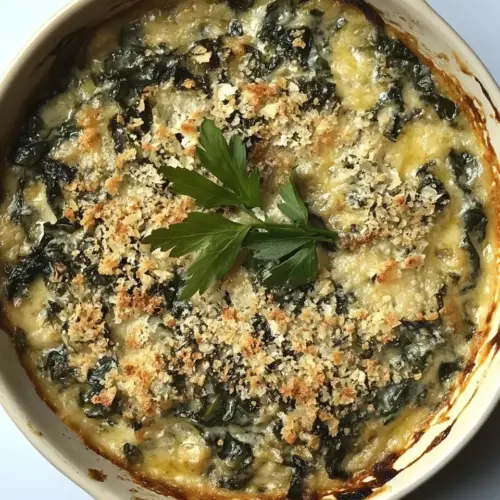
Swiss Chard Gratin
Swiss Chard Gratin is the kind of dish I turn to when I want something comforting yet bright, the kind of recipe that makes a chilly evening feel like a gentle hug. The first time I made it I was drawn to the way the wilted greens folded into a silky sauce, then took on a golden, crunchy finish under the broiler. I still remember the aroma of butter and onion softening in the pan, the faint warmth of nutmeg lifting the milk, and the satisfying crackle of breadcrumbs as I spooned it onto the table.
Over the years I have adapted this dish to whatever I had on hand, yet the heart of it is always the same: tender chard wrapped in a creamy binder, topped with cheese and a crisp crumb. I love how it sits alongside a roast or stands on its own with a simple salad. Each time I make Swiss Chard Gratin I’m reminded why humble vegetables deserve a moment in the spotlight. The textures, the subtle seasoning, and the comforting richness come together in a way that rarely fails to please guests or calm an anxious weeknight.
Recipe Snapshot
30 mins
15 mins
15 mins
Easy
300 kcal
American
Gluten-Free, Low FODMAP
Side Dishes
Large nonstick skillet, Small bowl, 3 quart ceramic baking dish, Oven
What Sets This Swiss Chard Gratin Apart
Versatile and seasonal
I adore how Swiss Chard Gratin works across menus. In winter, when leafy greens feel like a triumph, it brings a bright, earthy note to heavier mains. You can serve it with a simple grain bowl or alongside roasted vegetables. The recipe’s flexibility means I often tweak the ratio of milk to cheese depending on whether I want it silkier or more indulgent.
Comfort with a light touch
What draws me back to this gratin is its balance. The butter and cheese provide richness, while the abundant chard keeps the dish green and fresh. It never feels overly heavy because the vegetables offer structure and lift. I like to remind friends that this is comfort food that still makes you feel good afterward.
Simple techniques, impressive results
I love that straightforward steps produce a dish that feels elevated. Sweating the onion first builds a sweet base, cooking the chard until tender ensures no bitterness, and finishing under the oven gives a crisp, golden top. These little techniques matter, and I enjoy walking people through them because they are easy to master yet transformative.
Great for feeding a few or scaling up
I often make Swiss Chard Gratin for casual dinners or bring it to gatherings. It scales nicely, and the flavors hold up when reheated, making it a reliable option for entertaining. I love that it looks impressive when it comes out of the oven, even though it is forgiving to prepare.
Friendly for dietary needs
Because it relies on simple pantry items like cornstarch and milk, it’s easy to adapt for texture and dietary preferences while still delivering the hallmark creamy nature of a gratin. I appreciate how approachable it feels for cooks of any skill level.
Essential Ingredients for Swiss Chard Gratin
These ingredients form a purposeful team, each playing a clear role in flavor and texture. The leafy chard supplies body and color, while butter and milk create a silky foundation. Gruyere adds savory depth, and breadcrumbs bring that final satisfying crunch. Together they create contrast, balancing creaminess with brightness and a toasty finish.
- 2 tablespoons butter: Melted in the pan to provide a rich cooking fat and help soften the onion, contributing a silky mouthfeel and golden color to the base of the gratin. Also helps bind flavors and promote gentle browning without overpowering the chard.
- 1 large sweet onion diced: Sautéed until translucent to add a sweet, aromatic foundation that balances the earthiness of the greens. Diced small for even cooking and to disperse tender bits through the gratin for texture contrast.
- 12 cups thinly sliced chard leaves about 2 large bunches, thick stems removed: Cooked quickly to wilt and concentrate the leafy flavor while keeping tender texture; thin slicing ensures even, fast cooking and easy layering. Thick stems removed to avoid fibrous bits and maintain a uniform, pleasing bite throughout the dish.
- 2 cups milk: Added to create a creamy sauce that brings moisture and richness to the gratin; gently heated with cornstarch to thicken and coat the chard. Choose a moderate milkfat level to achieve a silky custard-like consistency without being too heavy.
- 2 teaspoons cornstarch: Stirred into the milk to thicken the sauce, producing a smooth, glossy texture that clings to the greens and helps the topping adhere. Dissolved first in cold milk or a little liquid to prevent lumps and create an even finish.
- 1/4 teaspoon ground nutmeg: Sprinkled into the sauce to add warm, nutty aroma and subtle sweetness that complements the cheese and greens. Used sparingly to enhance overall flavor without overwhelming the delicate components.
- Sea salt and pepper: Used to season and balance flavors, ensuring the gratin tastes bright and well-rounded; salt enhances natural sweetness while pepper adds mild heat and complexity. Added to taste during cooking and adjusted at the end for best results.
- 1 cup coarsely grated gruyere: Folded into the warm sauce or layered on top to add a nutty, slightly salty richness that melts into a gooey, golden crust. Coarsely grated to promote even melting and create pockets of flavorful cheese throughout the gratin.
- 1/2 cup gluten-free breadcrumbs: Sprinkled over the top to provide a crisp, crunchy contrast to the creamy interior while keeping the dish gluten–free when appropriate. Toasted golden in the oven to add texture and an attractive finish that complements the melted gruyere.
The Method for Swiss Chard Gratin
These steps are approachable and meant to guide you through sensory cues and small adjustments. I aim to help you achieve tender greens, a silky sauce, and a golden topping that makes the dish sing. Move steadily and pay attention to color and texture at each stage for best results.
- Preheat the oven to 400°F.: The warm, anticipatory smell of a preheated oven primes the gratin for a perfect finish, ensuring the top crisps evenly once it goes in. You should feel confident the oven is fully hot before baking, because placing the dish into a cooler oven will increase cooking time and may prevent the breadcrumbs from becoming golden. A common mistake is starting too early, so let the oven reach temperature and use an oven thermometer if you are unsure about accuracy.
- In a large nonstick skillet, heat the butter. Saute the onion over medium-high heat until soft, about 5 minutes. Add the chard and cook until wilted and the stems are tender, about 5 minutes.: When the butter melts and begins to shimmer, you will notice a rich, nutty scent that sets the stage for building flavor. The pan should be hot enough to sizzle a tiny piece of onion on contact, but not so hot that the butter browns immediately. Using a too-hot pan can scorch the butter and introduce bitter notes, so adjust the flame so the fat warms steadily.
- In a small bowl, whisk together the milk and cornstarch. Add to the pan and simmer until slightly thickened, about 5 minutes. Season with the nutmeg and 1 teaspoon salt.: As you stir the diced onion , listen for a gentle sizzle and watch the pieces turn translucent with edges softening into pale gold. This sweetness is crucial for balancing the earthy chard . If the onion starts to brown too quickly, lower the heat, because rapid caramelization will change the intended flavor profile. Stir frequently to encourage even softening.
- Transfer the greens to a 3-quart ceramic baking dish and sprinkle the cheese over the top, followed by the breadcrumbs. Bake for 15 minutes, until heated through and the top is lightly golden brown.: The sound here will quiet as the moisture releases, and visually the pile of sliced chard will rapidly collapse into a glossy, deep green mass. Tender stems are a subtle textural victory; if stems seem firm, continue cooking briefly until they are easily pierced with a fork. A typical error is overcrowding the pan, which causes steaming instead of sautéing, so cook in batches if necessary.
- In a small bowl, whisk together the milk and cornstarch.: Whisking creates a smooth slurry, eliminating lumps so the sauce will thicken uniformly. You should see a pale, silky liquid with no clumps. If you add cornstarch directly to hot milk , it can form gelatinous bits, so always mix it cold first. Overwhisking is not a problem, but under-whisking invites texture issues later.
- Add to the pan and simmer until slightly thickened, about 5 minutes.: As the slurry hits the pan, the mixture should bubble gently and begin to cling to the back of a spoon, signaling the right consistency. The aroma turns creamier as the sauce integrates with the chard . If it remains runny, simmer a little longer, stirring, until the desired coat forms. Avoid a rolling boil which can break down the sauce and make it thin again.
- Season with the nutmeg and 1 teaspoon salt.: The first whiff of nutmeg is a warm, aromatic lift that harmonizes with the dairy. Stir thoroughly so the seasoning distributes evenly through the sauce. Taste and add salt carefully because the upcoming gruyere will add additional saltiness. A common misstep is over-salting at this point, so err on the side of caution and adjust after cheese is added if needed.
- Transfer the greens to a 3-quart ceramic baking dish and sprinkle the cheese over the top, followed by the breadcrumbs.: Moving the mixture to a shallow dish promotes even browning and a pleasing ratio of creamy interior to crisp top. The gruyere should be scattered so it melts across the surface, and the breadcrumbs offer a final toasted contrast. Be mindful to distribute both uniformly; piling both on one side leads to uneven texture after baking.
- Bake for 15 minutes, until heated through and the top is lightly golden brown.: In the oven you will notice aromas deepen and the top will take on a warm, toasted color with a delicate crunch. The internal temperature rising signals doneness, and the edges will bubble gently. If the breadcrumbs brown faster than the interior heats, tent with foil briefly to prevent burning. Removing the dish too early results in a less cohesive gratin, so wait until the center is hot and bubbling quietly.
Ways to Customize

This section offers practical ways to make Swiss Chard Gratin your own while keeping its essential character. Small adjustments to texture, temperature, and finishing touches let you tailor the dish to your pantry and preferences.
- Swap the cheese sparingly If you want a slightly different flavor profile, choose a similar melting cheese that complements the chard, but keep the quantity close to maintain the gratin’s balance.
- Adjust the milk richness Use whole milk for a richer mouthfeel or lower fat milk for a lighter result, remembering that consistency will change slightly and may need extra simmer time.
- Breadcrumb texture For an extra crunchy top, toss the breadcrumbs with a touch of warmed butter before sprinkling so they brown more evenly in the oven.
- Control the salt Since gruyere is salty, start with a conservative amount of salt when seasoning and adjust after the cheese is added.
- Thin the sauce gently If your mixture becomes too thick, stir in small spoonfuls of milk until it reaches a sauce that clings to the greens without pooling.
Serving This Swiss Chard Gratin
This gratin is versatile for many meals, and a thoughtful presentation elevates its appeal. Below are serving ideas, storage suggestions, and pairing notes to help you make the most of it across occasions.
- Weeknight dinner star Serve a warm scoop of Swiss Chard Gratin alongside roasted vegetables or a simple grain for an easy, comforting meal that feels complete.
- Holiday or gathering side Bring this gratin to a table as a seasonal side for winter gatherings, where its color and texture complement richer mains and roasted dishes.
- Make ahead and reheat Bake fully, cool, and refrigerate; reheat covered at a moderate oven temperature until warmed through, then uncover to re-crisp the topping for about 5 to 10 minutes.
- Portion and present Spoon into shallow ramekins for individual servings, which creates an elegant presentation and ensures the top stays crisp when served.
- Storage tips Keep leftovers in an airtight container in the refrigerator for up to three days; for longer storage, freeze in a shallow container and thaw overnight before reheating.
- Seasonal pairings In winter, pair with roasted root vegetables or a simple braised main, while in spring consider bright, acidic salads to contrast the gratin’s creaminess.
FAQ
Conclusion
Swiss Chard Gratin shines because it turns humble greens into something richly textured and warmly satisfying. The creamy, lightly spiced sauce, nutty melted cheese, and crunchy topping combine into a dish that feels both cozy and refined. Give it a try on a weeknight when you want something simple but special, or serve it at a gathering to showcase how comforting vegetables can be. I hope this recipe becomes one of those staples you return to again and again.
Swiss Chard Gratin
Equipment
- Large Nonstick Skillet
- Small Bowl
- 3 quart ceramic baking dish
- Oven
Ingredients
- 2 tablespoons butter Melted in the pan to provide a rich cooking fat and help soften the onion, contributing a silky mouthfeel and golden color to the base of the gratin. Also helps bind flavors and promote gentle browning without overpowering the chard.
- 1 large sweet onion diced Sautéed until translucent to add a sweet, aromatic foundation that balances the earthiness of the greens. Diced small for even cooking and to disperse tender bits through the gratin for texture contrast.
- 12 cups thinly sliced chard leaves about 2 large bunches, thick stems removed Cooked quickly to wilt and concentrate the leafy flavor while keeping tender texture; thin slicing ensures even, fast cooking and easy layering. Thick stems removed to avoid fibrous bits and maintain a uniform, pleasing bite throughout the dish.
- 2 cups milk Added to create a creamy sauce that brings moisture and richness to the gratin; gently heated with cornstarch to thicken and coat the chard. Choose a moderate milkfat level to achieve a silky custard-like consistency without being too heavy.
- 2 teaspoons cornstarch Stirred into the milk to thicken the sauce, producing a smooth, glossy texture that clings to the greens and helps the topping adhere. Dissolved first in cold milk or a little liquid to prevent lumps and create an even finish.
- 1/4 teaspoon ground nutmeg Sprinkled into the sauce to add warm, nutty aroma and subtle sweetness that complements the cheese and greens. Used sparingly to enhance overall flavor without overwhelming the delicate components.
- Sea salt and pepper Used to season and balance flavors, ensuring the gratin tastes bright and well-rounded; salt enhances natural sweetness while pepper adds mild heat and complexity. Added to taste during cooking and adjusted at the end for best results.
- 1 cup coarsely grated gruyere Folded into the warm sauce or layered on top to add a nutty, slightly salty richness that melts into a gooey, golden crust. Coarsely grated to promote even melting and create pockets of flavorful cheese throughout the gratin.
- 1/2 cup gluten-free breadcrumbs Sprinkled over the top to provide a crisp, crunchy contrast to the creamy interior while keeping the dish gluten-free when appropriate. Toasted golden in the oven to add texture and an attractive finish that complements the melted gruyere.
Instructions
- Preheat the oven to 400°F.: The warm, anticipatory smell of a preheated oven primes the gratin for a perfect finish, ensuring the top crisps evenly once it goes in. You should feel confident the oven is fully hot before baking, because placing the dish into a cooler oven will increase cooking time and may prevent the breadcrumbs from becoming golden. A common mistake is starting too early, so let the oven reach temperature and use an oven thermometer if you are unsure about accuracy.
- In a large nonstick skillet, heat the butter. Saute the onion over medium-high heat until soft, about 5 minutes. Add the chard and cook until wilted and the stems are tender, about 5 minutes.: When the butter melts and begins to shimmer, you will notice a rich, nutty scent that sets the stage for building flavor. The pan should be hot enough to sizzle a tiny piece of onion on contact, but not so hot that the butter browns immediately. Using a too-hot pan can scorch the butter and introduce bitter notes, so adjust the flame so the fat warms steadily.
- In a small bowl, whisk together the milk and cornstarch. Add to the pan and simmer until slightly thickened, about 5 minutes. Season with the nutmeg and 1 teaspoon salt.: As you stir the diced onion , listen for a gentle sizzle and watch the pieces turn translucent with edges softening into pale gold. This sweetness is crucial for balancing the earthy chard . If the onion starts to brown too quickly, lower the heat, because rapid caramelization will change the intended flavor profile. Stir frequently to encourage even softening.
- Transfer the greens to a 3-quart ceramic baking dish and sprinkle the cheese over the top, followed by the breadcrumbs. Bake for 15 minutes, until heated through and the top is lightly golden brown.: The sound here will quiet as the moisture releases, and visually the pile of sliced chard will rapidly collapse into a glossy, deep green mass. Tender stems are a subtle textural victory; if stems seem firm, continue cooking briefly until they are easily pierced with a fork. A typical error is overcrowding the pan, which causes steaming instead of sautéing, so cook in batches if necessary.
- In a small bowl, whisk together the milk and cornstarch.: Whisking creates a smooth slurry, eliminating lumps so the sauce will thicken uniformly. You should see a pale, silky liquid with no clumps. If you add cornstarch directly to hot milk , it can form gelatinous bits, so always mix it cold first. Overwhisking is not a problem, but under-whisking invites texture issues later.
- Add to the pan and simmer until slightly thickened, about 5 minutes.: As the slurry hits the pan, the mixture should bubble gently and begin to cling to the back of a spoon, signaling the right consistency. The aroma turns creamier as the sauce integrates with the chard . If it remains runny, simmer a little longer, stirring, until the desired coat forms. Avoid a rolling boil which can break down the sauce and make it thin again.
- Season with the nutmeg and 1 teaspoon salt.: The first whiff of nutmeg is a warm, aromatic lift that harmonizes with the dairy. Stir thoroughly so the seasoning distributes evenly through the sauce. Taste and add salt carefully because the upcoming gruyere will add additional saltiness. A common misstep is over-salting at this point, so err on the side of caution and adjust after cheese is added if needed.
- Transfer the greens to a 3-quart ceramic baking dish and sprinkle the cheese over the top, followed by the breadcrumbs.: Moving the mixture to a shallow dish promotes even browning and a pleasing ratio of creamy interior to crisp top. The gruyere should be scattered so it melts across the surface, and the breadcrumbs offer a final toasted contrast. Be mindful to distribute both uniformly; piling both on one side leads to uneven texture after baking.
- Bake for 15 minutes, until heated through and the top is lightly golden brown.: In the oven you will notice aromas deepen and the top will take on a warm, toasted color with a delicate crunch. The internal temperature rising signals doneness, and the edges will bubble gently. If the breadcrumbs brown faster than the interior heats, tent with foil briefly to prevent burning. Removing the dish too early results in a less cohesive gratin, so wait until the center is hot and bubbling quietly.
Notes
- Swap the cheese sparingly If you want a slightly different flavor profile, choose a similar melting cheese that complements the chard, but keep the quantity close to maintain the gratin's balance.
- Adjust the milk richness Use whole milk for a richer mouthfeel or lower fat milk for a lighter result, remembering that consistency will change slightly and may need extra simmer time.
- Breadcrumb texture For an extra crunchy top, toss the breadcrumbs with a touch of warmed butter before sprinkling so they brown more evenly in the oven.
- Control the salt Since gruyere is salty, start with a conservative amount of salt when seasoning and adjust after the cheese is added.
- Thin the sauce gently If your mixture becomes too thick, stir in small spoonfuls of milk until it reaches a sauce that clings to the greens without pooling.