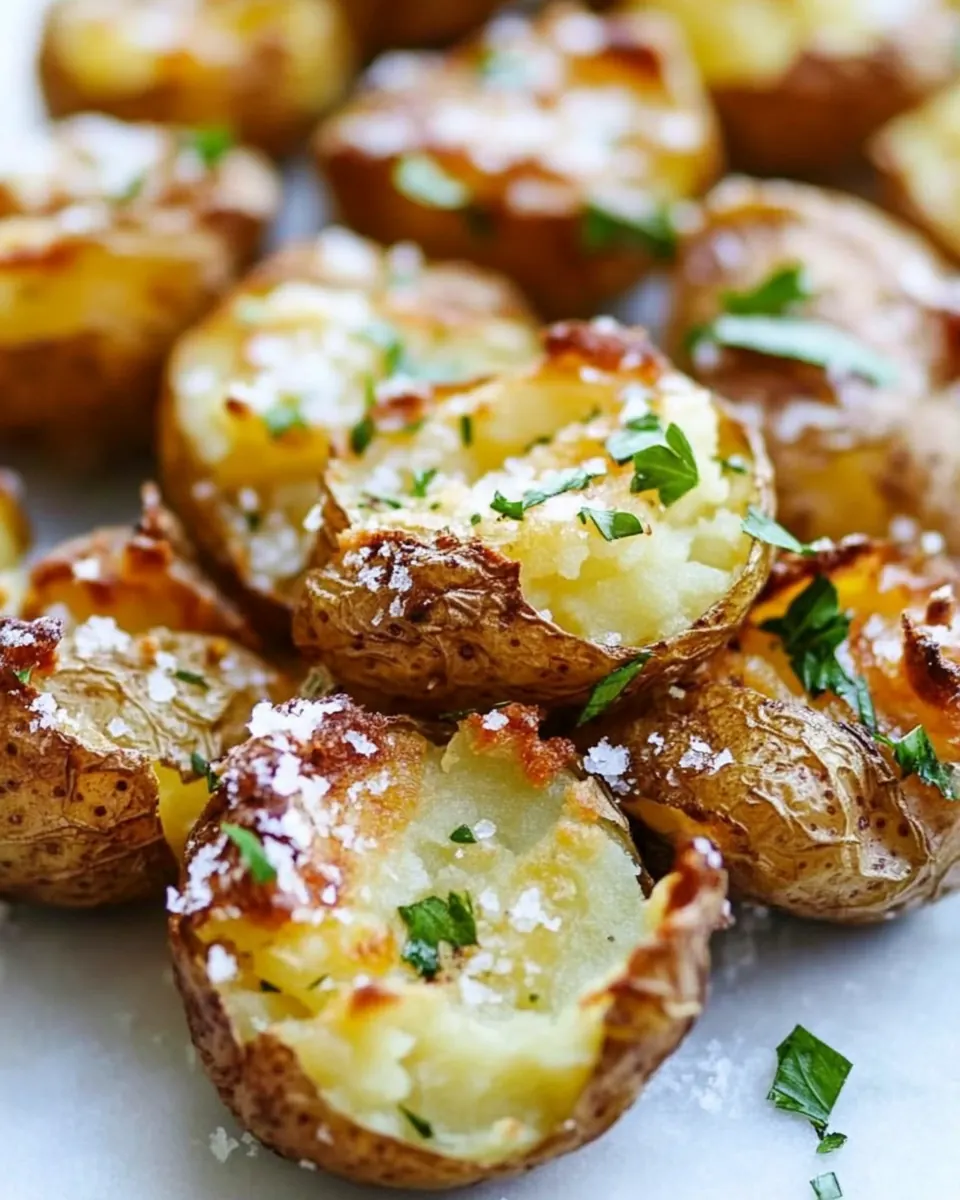
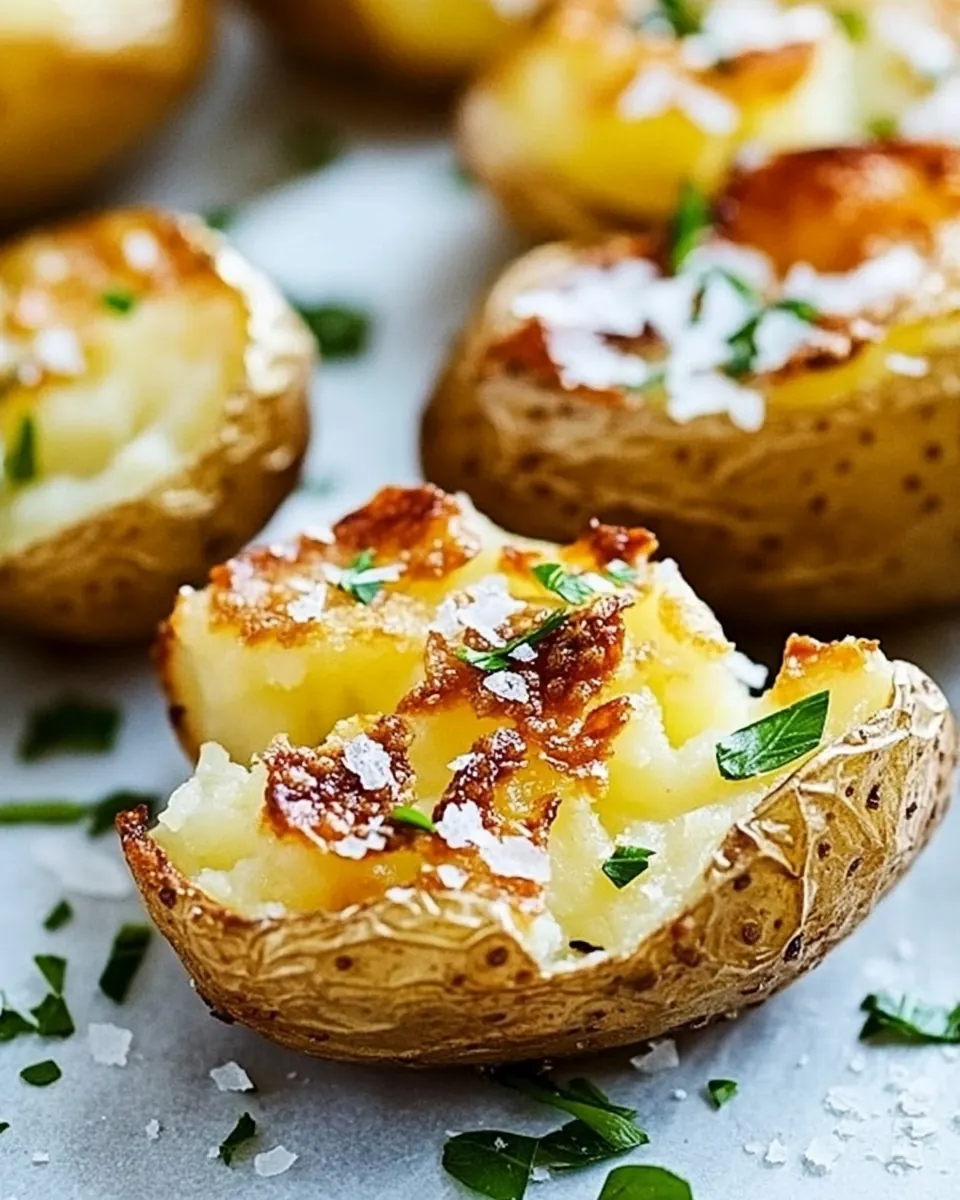
Crispy Smashed Potatoes
Crispy Smashed Potatoes have been one of those recipes I reach for when I want something comforting but a little showy, a side that steals the spotlight without demanding hours in the kitchen. The first time I made them, I was hosting an impromptu weeknight dinner and found a bag of small Yukon Golds hiding in the pantry. I boiled them while I tossed a salad, then smashed them with the bottom of a glass, and the transformation felt a little like kitchen magic, a humble tuber becoming crisp edged little clouds.
Over the years I have adjusted the method so these Crispy Smashed Potatoes come out reliably crunchy on the outside and pillowy inside. I like to use a mix of olive oil and melted butter for both browning and flavor, and a quick herb garlic butter at the end that makes them sing. When I bring these to a gathering people always ask how they got so golden, and it gives me a tiny chef’s thrill.
Recipe Snapshot
45 mins
5 mins
40 mins
Medium
200 kcal
American
Gluten-Free, Low FODMAP
Side Dishes
Large pot, Rimmed baking sheet, Glass or mason jar, Small pan, Colander
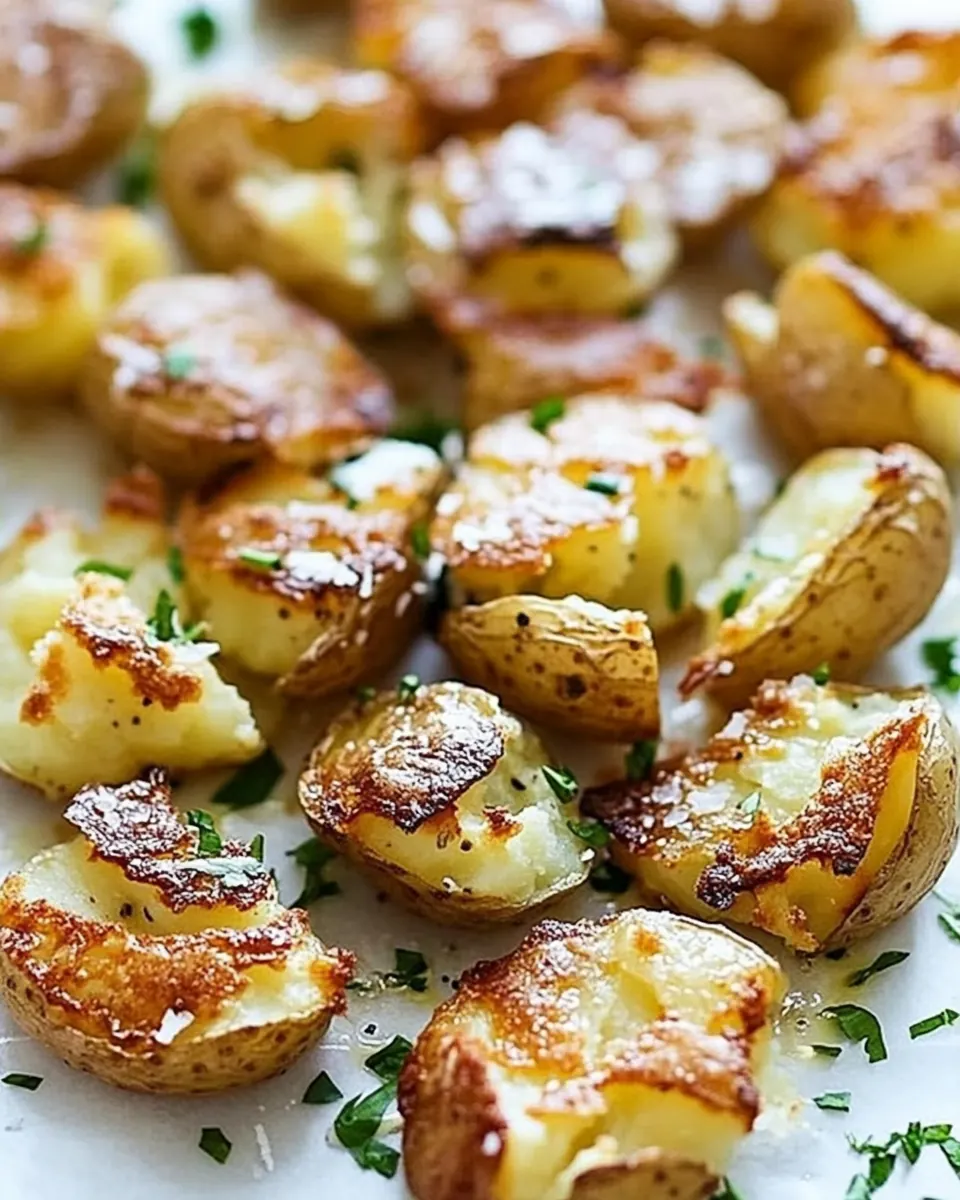
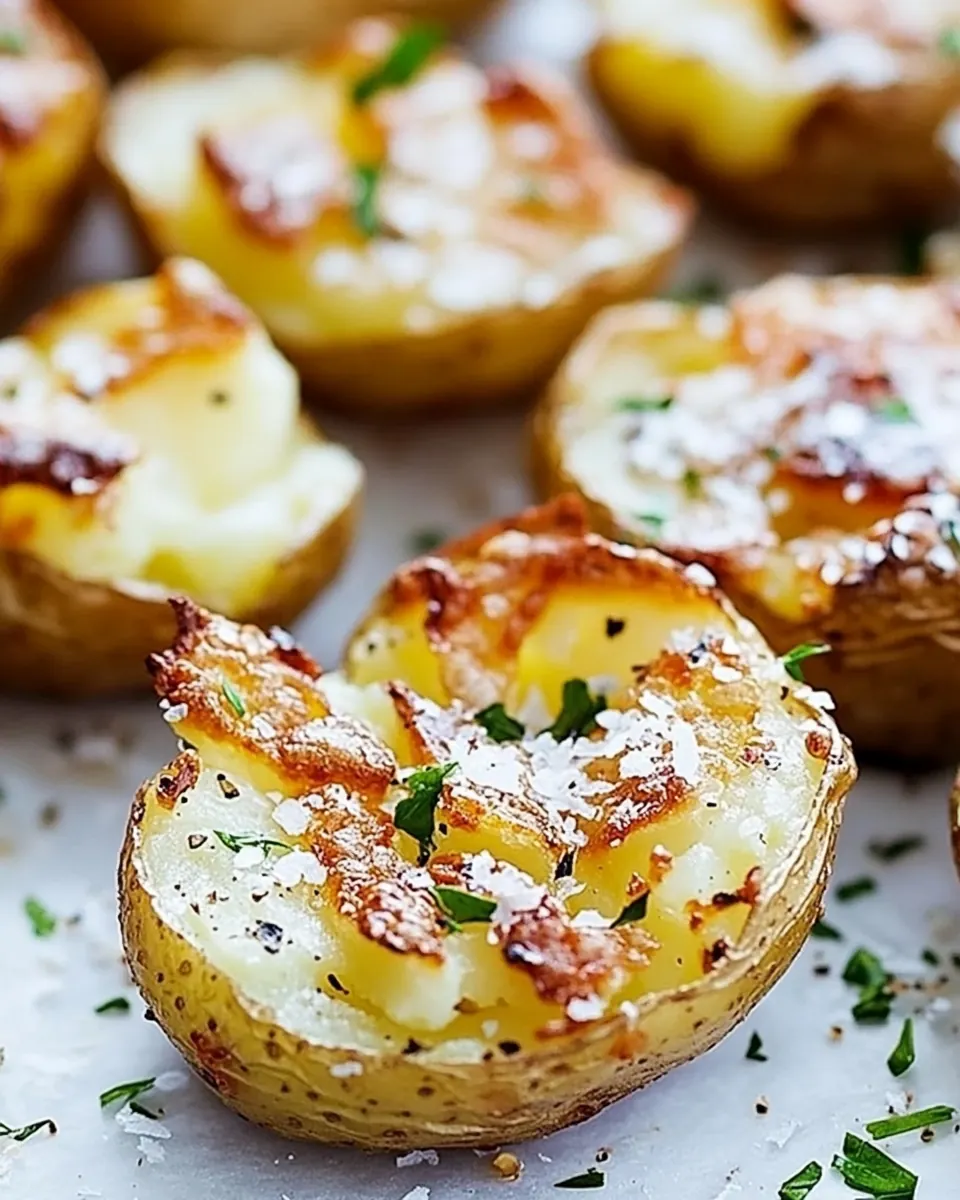
Why This Crispy Smashed Potatoes Shines
Golden crunchy edges, soft centers
One reason I adore these Crispy Smashed Potatoes is the contrast in textures. After boiling the baby potatoes until tender, smashing them creates a larger surface area that crisps gloriously in the oven. The result is a thin, crackling edge and a soft, creamy interior, a combination that makes every bite interesting.
Simple pantry ingredients with big impact
I often say the best recipes are the ones where a few high quality ingredients work together. Here, the trio of olive oil, melted butter, and a sprinkle of Kosher salt is all you need to coax out deep flavor. The garlic and herbs are finishing touches that amplify the aroma, and because the list is short, each element shines through.
Fast and crowd friendly
These are perfect when I need something that travels well to a potluck or plays nicely with mains. They come together quickly, they scale easily, and they hold up for a little while after baking. I can make a double batch without changing technique, which is why they’re my go to for casual get togethers.
Flexible for post cook creativity
I love that once they are crisped, you can dress them up. A spoonful of the garlic herb butter right before a final oven burst transforms them, and this step lets me riff depending on the season. Fresh thyme in spring, a touch more rosemary in winter, each swap nudges the profile in a pleasing way.
Comfort food with a refined edge
Finally, they feel both homey and a little elevated. They are approachable enough for weeknights and polished enough for company, which is why I keep returning to the technique. I trust them to be a satisfying, reliable side that never overstays its welcome.
What Goes Into Crispy Smashed Potatoes
These ingredients are intentionally minimal, chosen to coax out the best textures and flavors from small Yukon Gold potatoes. The potatoes provide a creamy base, the olive oil and butter encourage deep browning and a silky finish, while the fresh herbs and garlic add bright aromatic notes. Together they create a balance between crunch, richness, and freshness.
- 1.5 lb . baby Yukon Gold potatoes: Cook gently until tender and sturdy enough to smash; contributes the creamy interior and thin skins that crisp beautifully when roasted. Provides the bulk and texture of the dish while absorbing flavors from oil, butter, and herbs.
- Kosher salt: Season liberally to enhance and balance flavors throughout the potatoes; helps draw out moisture during cooking and elevates the savory profile. Used to taste at multiple stages to ensure proper seasoning.
- 2 tbsp olive oil: Coat the potatoes before roasting to promote even browning and crisp edges; supplies a clean, fruity fat that withstands high heat. Works with butter to create a golden, crisp exterior while aiding in herb infusion.
- 4 tbsp . melted butter: Melt and drizzle for rich flavor and tender mouthfeel; contributes buttery depth and helps achieve a brittle, flavorful crust when combined with oil. Also aids in carrying garlic and herb flavors across the potatoes.
- 2 cloves garlic minced: Infuse with pungent aromatic flavor when mixed into the butter or scattered on top; provides sharp, savory notes that complement the richness of butter and potatoes. Use minced form to distribute intense garlic flavor evenly.
- 1 tsp . fresh thyme leaves: Add bright, slightly floral herbiness to cut the richness; fresh thyme leaves deliver subtle citrusy and earthy notes that pair well with potatoes and butter. Sprinkle before or after roasting for aromatic lift.
- 1 tsp chopped rosemary: Offer resinous, pine-like aroma and a savory, slightly peppery flavor; chopped rosemary brings a robust herbal backbone that stands up to high-heat roasting. Use sparingly to avoid overpowering the dish.
Preparation Steps for Crispy Smashed Potatoes
I like to walk you through the steps conversationally before we begin, so you feel confident at each turn. This method focuses on building texture through boiling, gentle smashing, and a two phase oven treatment, finishing with a buttery herb spooning that elevates the final dish.
- Preheat oven to 425°. In a large pot, cover potatoes with water and add a generous pinch of salt. Bring water to a boil and simmer until potatoes are tender, about 15 minutes. Drain and let sit until cool enough to handle.: You will immediately notice the oven begin to radiate steady, dry heat, which is essential for crisping the potatoes. A properly heated oven ensures the oil and surfaces sizzle on contact, creating golden edges instead of soggy patches. If the oven is not hot enough the skins will brown slowly and can become leathery rather than crisp. Make sure the rack is centered so air circulates evenly, and avoid opening the door often, which cools the oven and delays browning.
- On a large rimmed baking sheet, toss potatoes with oil, season with kosher salt. Using the flat bottom of a glass or mason jar, press down on potatoes to smash flat.: As the pot warms, the scent of warm starch emerges and the surface of the water will shimmer. Salting the boiling water seasons the potatoes from the inside out, which matters more than you might think for final flavor. A typical mistake is under-salting the water, which makes the finished potatoes taste flat despite later seasoning. Use enough water to cover the potatoes by at least an inch so they cook evenly.
- Bake until bottoms of potatoes are beginning to crisp and golden, about 20 minutes.: You will hear a full rolling boil transform into a gentler simmer, and a fork will slide into the largest potato with little resistance when they are done. This stage is where the interior becomes pillowy, and timing matters, because overcooking can make them mushy and difficult to smash neatly. Check the potatoes at around 12 minutes to avoid overdoing it, especially if they vary in size.
- While potatoes are cooking, melt the butter in a small pan over low heat. When butter is melted, stir in the garlic and herbs. Remove from heat and set aside.: The steam escaping from the colander will smell faintly of starchy potato and salt. Letting them rest briefly firms the surface so they do not crumble when smashed. If you try to press them while they are too hot they may break apart, making uneven shapes and reducing crisping surface. Use a towel under your baking sheet to steady it when you work.
- Spoon the melted butter, garlic, rosemary and thyme mixture over the potatoes, brush to evenly coat them.: When you drizzle olive oil and toss, the potatoes gleam and the oil helps create contact points for browning. Even coating ensures each edge crisps, and the salt beginning here layers flavor. A common misstep is overcrowding the pan, which traps steam and prevents crisping, so give each potato breathing room on the sheet.
- Return potatoes to oven for 5 minutes. Serve immediately.: The sound is a gentle crack as the roastable surface spreads, exposing nooks and ridges that will brown. This action is key to maximizing the crunchy edge, because it increases the surface area touching the hot sheet. If you press too thin they can dry out, and if you press unevenly some bits will brown faster than others, so aim for consistent, slightly flattened discs.
- Bake until bottoms are beginning to crisp and golden about 20 minutes: During this bake you will smell toasty notes and see the undersides take on a deep golden hue where oil has concentrated. This stage creates the essential crunchy baseline before the butter finish. Avoid opening the oven frequently, which cools the surface and slows the Maillard reaction responsible for browning. If you notice smoke, your oven may be hotter than labeled; reduce temperature slightly.
- Melt the butter in a small pan over low heat: The butter will melt to a glossy pool and release a warm, dairy aroma. Gentle heat preserves its sweet nuttiness, which we want to mingle with the garlic and herbs. Overheating the butter will brown it quickly and can scorch the garlic, introducing bitterness. Keep the heat low and watch closely.
- Stir in the garlic and herbs then remove from heat and set aside: As the minced garlic meets warm butter, it blooms fragrant and perfumed oils, and the herbs release piney and floral notes. Removing the pan from heat keeps the garlic from burning while allowing flavors to infuse. A frequent error is letting the garlic sizzle at high heat until it darkens, which yields a bitter finish, so stir and retreat from the heat promptly.
- Spoon the melted butter garlic rosemary and thyme mixture over the potatoes and brush to evenly coat them: When you spoon the mixture over the hot potatoes you will see the butter pool into crevices and the herbs cling to rough edges, coating each crisp patch. This step builds flavor and glossy visual appeal. If you pour too much in one spot you can cause soggy areas, so brush gently and distribute evenly. Taste a small piece to check seasoning before the final crisp.
- Return potatoes to oven for 5 minutes: This short final blast sets the butter into the crust and toasts the herb bits, creating a final lift in aroma. You will notice an intense savory scent and a last round of sizzling as moisture evaporates and edges firm. Removing them too soon can leave the topping unintegrated, while leaving them too long risks overbrowning the garlic. Five minutes should finish them without crossing into bitter territory.
- Serve immediately: When you plate them, the sound is the soft crackle of cooled crisp edges meeting a fork, and the aroma is warm and herbaceous. Serving hot is crucial because the contrast between crunchy outside and tender inside is most pronounced right out of the oven. If you hold them for too long they will soften as steam redistributes, so plan timing so they reach the table at peak texture.
Variations to Try
These suggestions let you play with flavors while keeping the core technique intact. Each tip starts with a bold hook so you can scan options quickly, then I expand on the idea to show how it changes the final dish.
- Add a citrus lift by stirring a little lemon zest into the melted butter after you remove it from the heat; the bright oils lift the richness and add a pleasant contrast to the savory herbs.
- Swap herbs seasonally by using more thyme in spring and a touch more rosemary in colder months; this subtly shifts the aroma profile to match other seasonal dishes on your table.
- Make them extra crispy by preheating the baking sheet in the oven so the potatoes hit a hot surface immediately, which encourages fast searing and crisper bottoms.
- Keep them dairy forward by using clarified butter or ghee if you want richer flavor without burning points; it will brown beautifully while carrying the herb and garlic notes.
- Serve with a dipping sauce by pairing a small bowl of seasoned olive oil or a simple herbed yogurt for contrast; the creaminess pairs nicely with the crunchy bites.
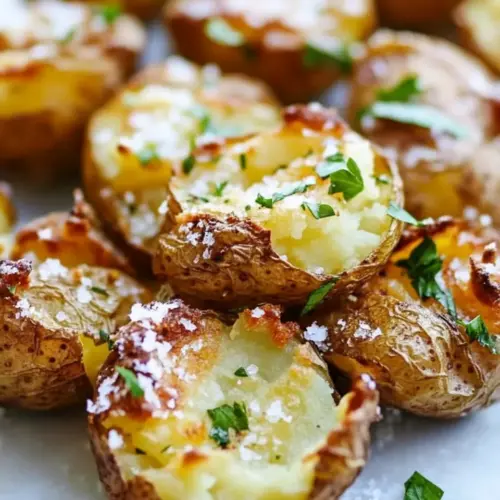
Accompaniments for Crispy Smashed Potatoes
These Crispy Smashed Potatoes are versatile and welcome at many occasions. Below I outline pairing ideas, storage guidance, and serving styles so you can adapt them for casual weeknights or celebrations.
- Weeknight dinners serve these alongside a simple roasted vegetable and a protein for an easy, balanced plate; their texture pairs well with saucy mains that benefit from a crunchy vehicle for sauce.
- Casual gatherings arrange them on a large platter topped with a drizzle of the reserved herb butter; they travel well to potlucks and allow guests to grab warm, hearty bites.
- Seasonal pairings in spring I serve them with bright salads and lemony sides, while in fall and winter I pair them with root vegetables and heartier mains, letting the herb profile guide choices.
- Storage tips keep leftovers in an airtight container in the fridge for up to two days; re-crisp in a hot oven rather than a microwave to restore texture, as microwaving makes them soft.
- Serving styles for a more plated presentation, stack three to four on each plate and finish with an extra drizzle of melted butter and a sprinkle of fresh thyme or sea salt for visual appeal.
FAQ
Conclusion
These Crispy Smashed Potatoes stand out because they deliver a wonderful contrast between crunchy exterior and tender interior with minimal ingredients and effort. I encourage you to try this method the next time you want a side that feels special yet is easy to pull together, whether for a quiet weeknight or when friends are dropping by. The technique is reliable, adaptable, and rewarding, and once you taste that herb garlic butter soaking into the cracks, I think you will be making them on repeat.
Crispy Smashed Potatoes
Equipment
- Large Pot
- Rimmed Baking Sheet
- Glass or mason jar
- Small Pan
- Colander
Ingredients
- 1.5 lb . baby Yukon Gold potatoes Cook gently until tender and sturdy enough to smash; contributes the creamy interior and thin skins that crisp beautifully when roasted. Provides the bulk and texture of the dish while absorbing flavors from oil, butter, and herbs.
- Kosher salt Season liberally to enhance and balance flavors throughout the potatoes; helps draw out moisture during cooking and elevates the savory profile. Used to taste at multiple stages to ensure proper seasoning.
- 2 tbsp olive oil Coat the potatoes before roasting to promote even browning and crisp edges; supplies a clean, fruity fat that withstands high heat. Works with butter to create a golden, crisp exterior while aiding in herb infusion.
- 4 tbsp . melted butter Melt and drizzle for rich flavor and tender mouthfeel; contributes buttery depth and helps achieve a brittle, flavorful crust when combined with oil. Also aids in carrying garlic and herb flavors across the potatoes.
- 2 cloves garlic minced Infuse with pungent aromatic flavor when mixed into the butter or scattered on top; provides sharp, savory notes that complement the richness of butter and potatoes. Use minced form to distribute intense garlic flavor evenly.
- 1 tsp . fresh thyme leaves Add bright, slightly floral herbiness to cut the richness; fresh thyme leaves deliver subtle citrusy and earthy notes that pair well with potatoes and butter. Sprinkle before or after roasting for aromatic lift.
- 1 tsp chopped rosemary Offer resinous, pine-like aroma and a savory, slightly peppery flavor; chopped rosemary brings a robust herbal backbone that stands up to high-heat roasting. Use sparingly to avoid overpowering the dish.
Instructions
- Preheat oven to 425°. In a large pot, cover potatoes with water and add a generous pinch of salt. Bring water to a boil and simmer until potatoes are tender, about 15 minutes. Drain and let sit until cool enough to handle.: You will immediately notice the oven begin to radiate steady, dry heat, which is essential for crisping the potatoes. A properly heated oven ensures the oil and surfaces sizzle on contact, creating golden edges instead of soggy patches. If the oven is not hot enough the skins will brown slowly and can become leathery rather than crisp. Make sure the rack is centered so air circulates evenly, and avoid opening the door often, which cools the oven and delays browning.
- On a large rimmed baking sheet, toss potatoes with oil, season with kosher salt. Using the flat bottom of a glass or mason jar, press down on potatoes to smash flat.: As the pot warms, the scent of warm starch emerges and the surface of the water will shimmer. Salting the boiling water seasons the potatoes from the inside out, which matters more than you might think for final flavor. A typical mistake is under-salting the water, which makes the finished potatoes taste flat despite later seasoning. Use enough water to cover the potatoes by at least an inch so they cook evenly.
- Bake until bottoms of potatoes are beginning to crisp and golden, about 20 minutes.: You will hear a full rolling boil transform into a gentler simmer, and a fork will slide into the largest potato with little resistance when they are done. This stage is where the interior becomes pillowy, and timing matters, because overcooking can make them mushy and difficult to smash neatly. Check the potatoes at around 12 minutes to avoid overdoing it, especially if they vary in size.
- While potatoes are cooking, melt the butter in a small pan over low heat. When butter is melted, stir in the garlic and herbs. Remove from heat and set aside.: The steam escaping from the colander will smell faintly of starchy potato and salt. Letting them rest briefly firms the surface so they do not crumble when smashed. If you try to press them while they are too hot they may break apart, making uneven shapes and reducing crisping surface. Use a towel under your baking sheet to steady it when you work.
- Spoon the melted butter, garlic, rosemary and thyme mixture over the potatoes, brush to evenly coat them.: When you drizzle olive oil and toss, the potatoes gleam and the oil helps create contact points for browning. Even coating ensures each edge crisps, and the salt beginning here layers flavor. A common misstep is overcrowding the pan, which traps steam and prevents crisping, so give each potato breathing room on the sheet.
- Return potatoes to oven for 5 minutes. Serve immediately.: The sound is a gentle crack as the roastable surface spreads, exposing nooks and ridges that will brown. This action is key to maximizing the crunchy edge, because it increases the surface area touching the hot sheet. If you press too thin they can dry out, and if you press unevenly some bits will brown faster than others, so aim for consistent, slightly flattened discs.
- Bake until bottoms are beginning to crisp and golden about 20 minutes: During this bake you will smell toasty notes and see the undersides take on a deep golden hue where oil has concentrated. This stage creates the essential crunchy baseline before the butter finish. Avoid opening the oven frequently, which cools the surface and slows the Maillard reaction responsible for browning. If you notice smoke, your oven may be hotter than labeled; reduce temperature slightly.
- Melt the butter in a small pan over low heat: The butter will melt to a glossy pool and release a warm, dairy aroma. Gentle heat preserves its sweet nuttiness, which we want to mingle with the garlic and herbs. Overheating the butter will brown it quickly and can scorch the garlic, introducing bitterness. Keep the heat low and watch closely.
- Stir in the garlic and herbs then remove from heat and set aside: As the minced garlic meets warm butter, it blooms fragrant and perfumed oils, and the herbs release piney and floral notes. Removing the pan from heat keeps the garlic from burning while allowing flavors to infuse. A frequent error is letting the garlic sizzle at high heat until it darkens, which yields a bitter finish, so stir and retreat from the heat promptly.
- Spoon the melted butter garlic rosemary and thyme mixture over the potatoes and brush to evenly coat them: When you spoon the mixture over the hot potatoes you will see the butter pool into crevices and the herbs cling to rough edges, coating each crisp patch. This step builds flavor and glossy visual appeal. If you pour too much in one spot you can cause soggy areas, so brush gently and distribute evenly. Taste a small piece to check seasoning before the final crisp.
- Return potatoes to oven for 5 minutes: This short final blast sets the butter into the crust and toasts the herb bits, creating a final lift in aroma. You will notice an intense savory scent and a last round of sizzling as moisture evaporates and edges firm. Removing them too soon can leave the topping unintegrated, while leaving them too long risks overbrowning the garlic. Five minutes should finish them without crossing into bitter territory.
- Serve immediately: When you plate them, the sound is the soft crackle of cooled crisp edges meeting a fork, and the aroma is warm and herbaceous. Serving hot is crucial because the contrast between crunchy outside and tender inside is most pronounced right out of the oven. If you hold them for too long they will soften as steam redistributes, so plan timing so they reach the table at peak texture.
Notes
- Add a citrus lift by stirring a little lemon zest into the melted butter after you remove it from the heat; the bright oils lift the richness and add a pleasant contrast to the savory herbs.
- Swap herbs seasonally by using more thyme in spring and a touch more rosemary in colder months; this subtly shifts the aroma profile to match other seasonal dishes on your table.
- Make them extra crispy by preheating the baking sheet in the oven so the potatoes hit a hot surface immediately, which encourages fast searing and crisper bottoms.
- Keep them dairy forward by using clarified butter or ghee if you want richer flavor without burning points; it will brown beautifully while carrying the herb and garlic notes.
- Serve with a dipping sauce by pairing a small bowl of seasoned olive oil or a simple herbed yogurt for contrast; the creaminess pairs nicely with the crunchy bites.