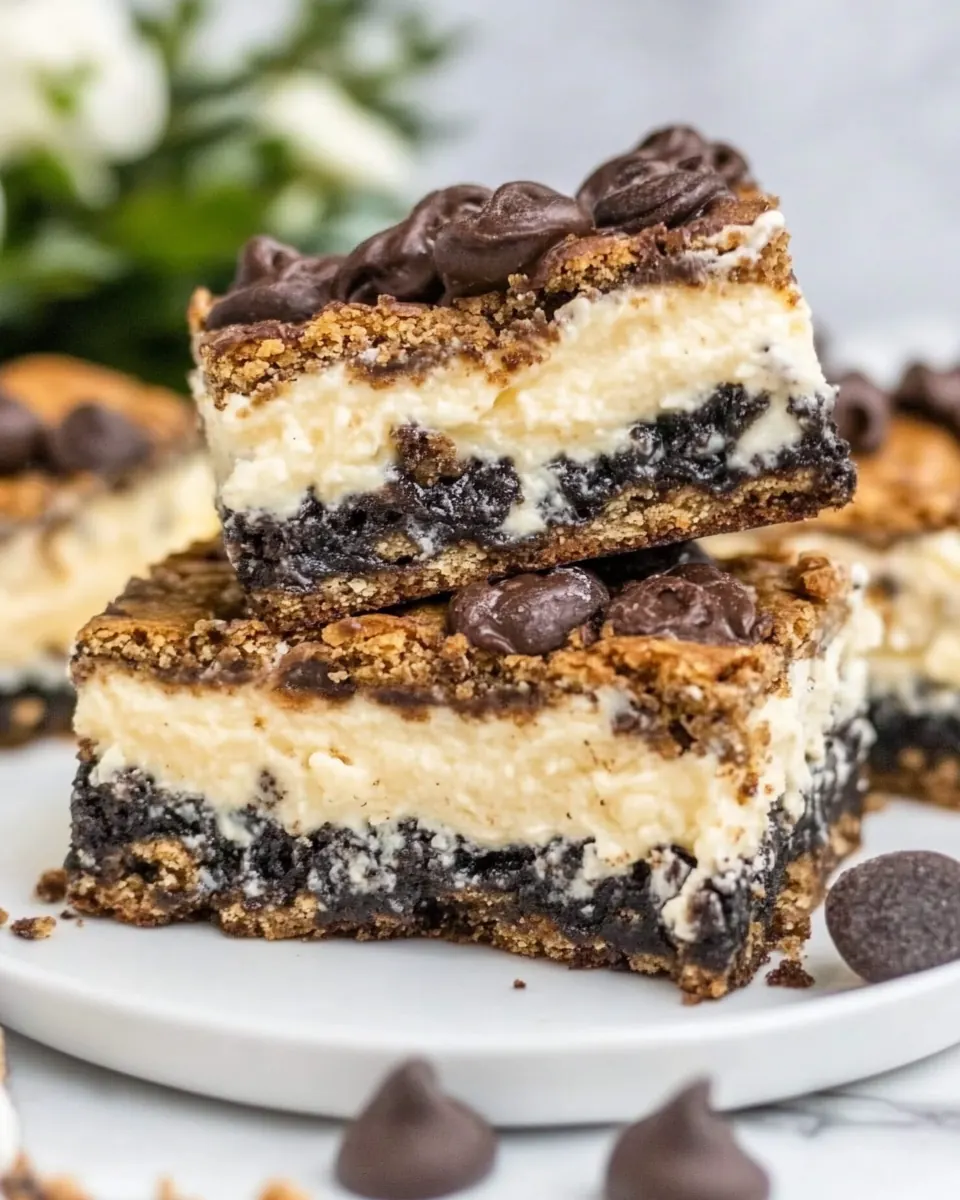
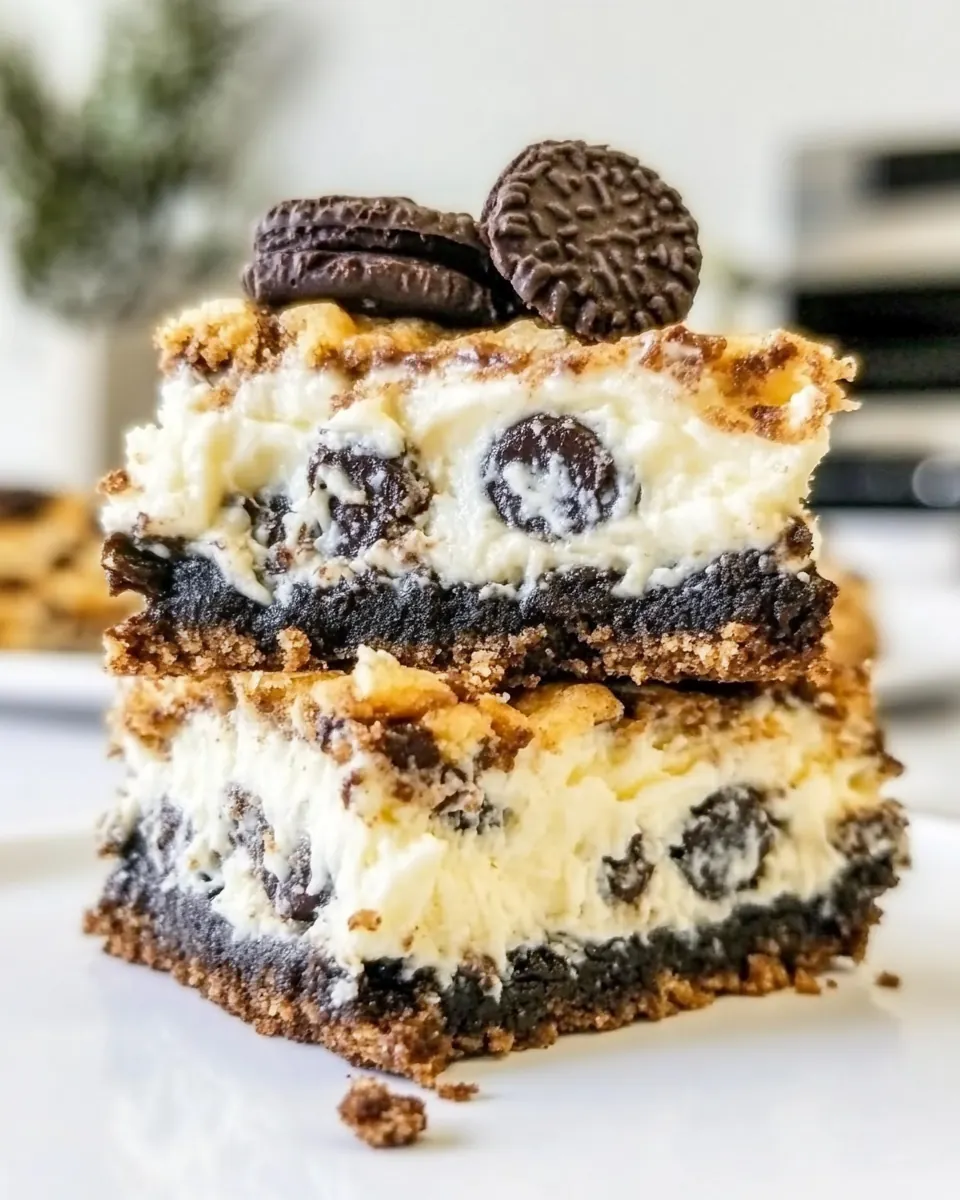
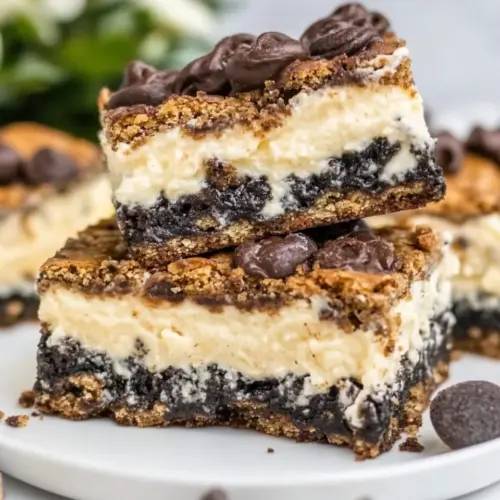
Cookies and Cream Gooey Bars
Cookies and Cream Gooey Bars are the sort of dessert I reach for when I want to crowd please without fuss, because they marry a tender cake base with a lush, creamy layer studded with crunchy cookie bits. The first time I made them I was testing recipes for a bake sale, and the pan came back empty so fast I barely had time to jot down what I did. I remember the way the kitchen smelled, warm and chocolatey, as the bars cooled on the counter while neighbors peeked in to ask what was baking.
Over the years I have tweaked small things, mostly to keep the texture reliably gooey in the center while still holding together when sliced. I like to tell friends these are a hybrid between a brownie and a cheesecake bar, except easier and less temperamental. When I bring a pan to gatherings, someone always asks for the recipe, and I love that these are simple enough for a new baker yet rewarding enough for a seasoned one. If you like rich, creamy bites with a satisfying cookie crunch, these will quickly become a go to in your repertoire.
Recipe Snapshot
1 hr 4 mins
20 mins
44 mins
Medium
320 kcal
American
Gluten-Free, Low FODMAP
Desserts
Electric mixer, 9×13-inch pan, Spatula, Mixing bowls
The Beauty of This Cookies and Cream Gooey Bars
Comforting texture contrast
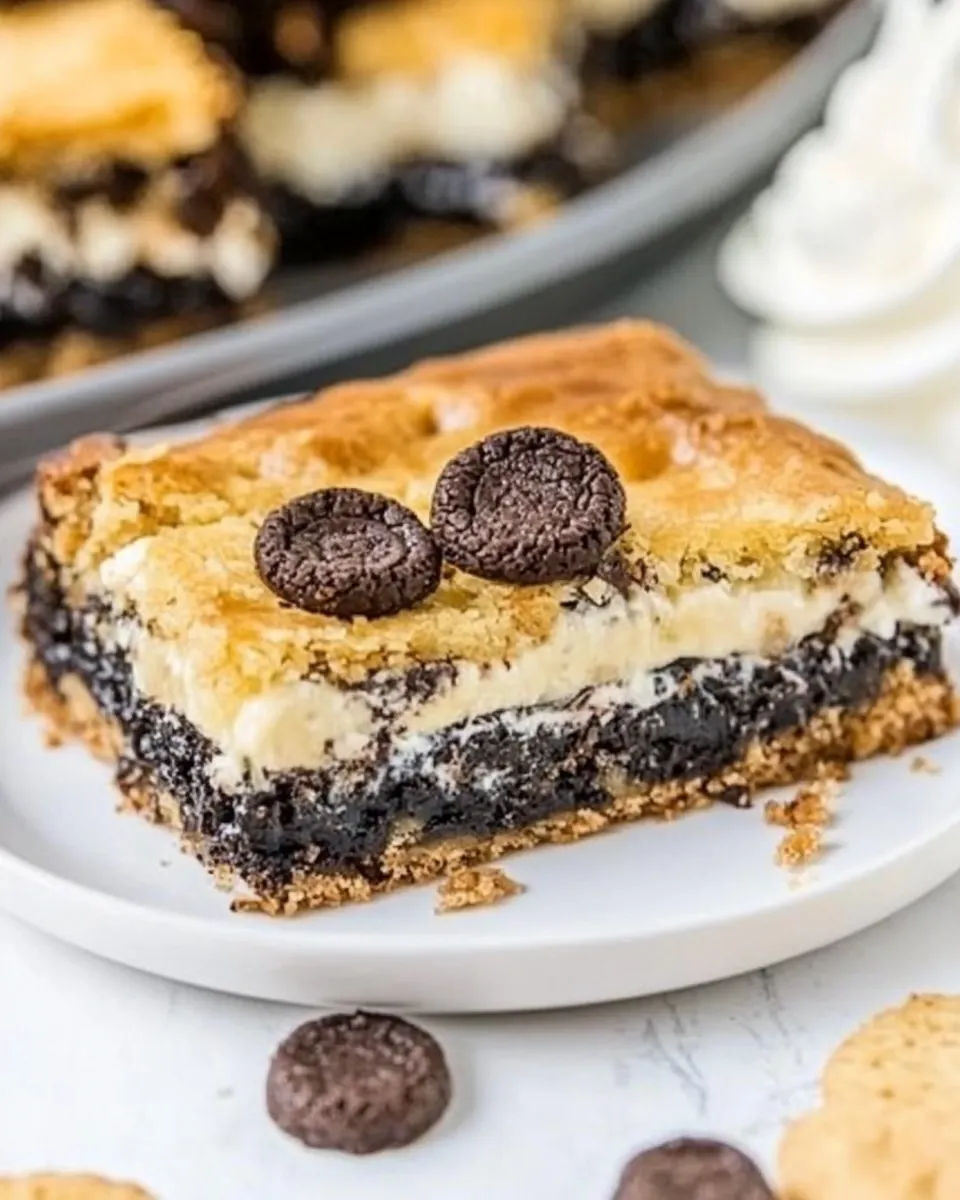
I adore how the base layer bakes into a slightly cakey yet dense platform that contrasts with the silky, slightly tangy cream cheese layer. That interplay of cake mix structure and cream cheese richness makes every bite interesting, and it keeps people coming back for seconds.
Minimal fuss, maximum impact
One of the best things about Cookies and Cream Gooey Bars is how little equipment and technique you need to get spectacular results. With a few straightforward bowls and an electric mixer you can create something that looks and tastes indulgent without complicated steps.
Playful cookie crunch
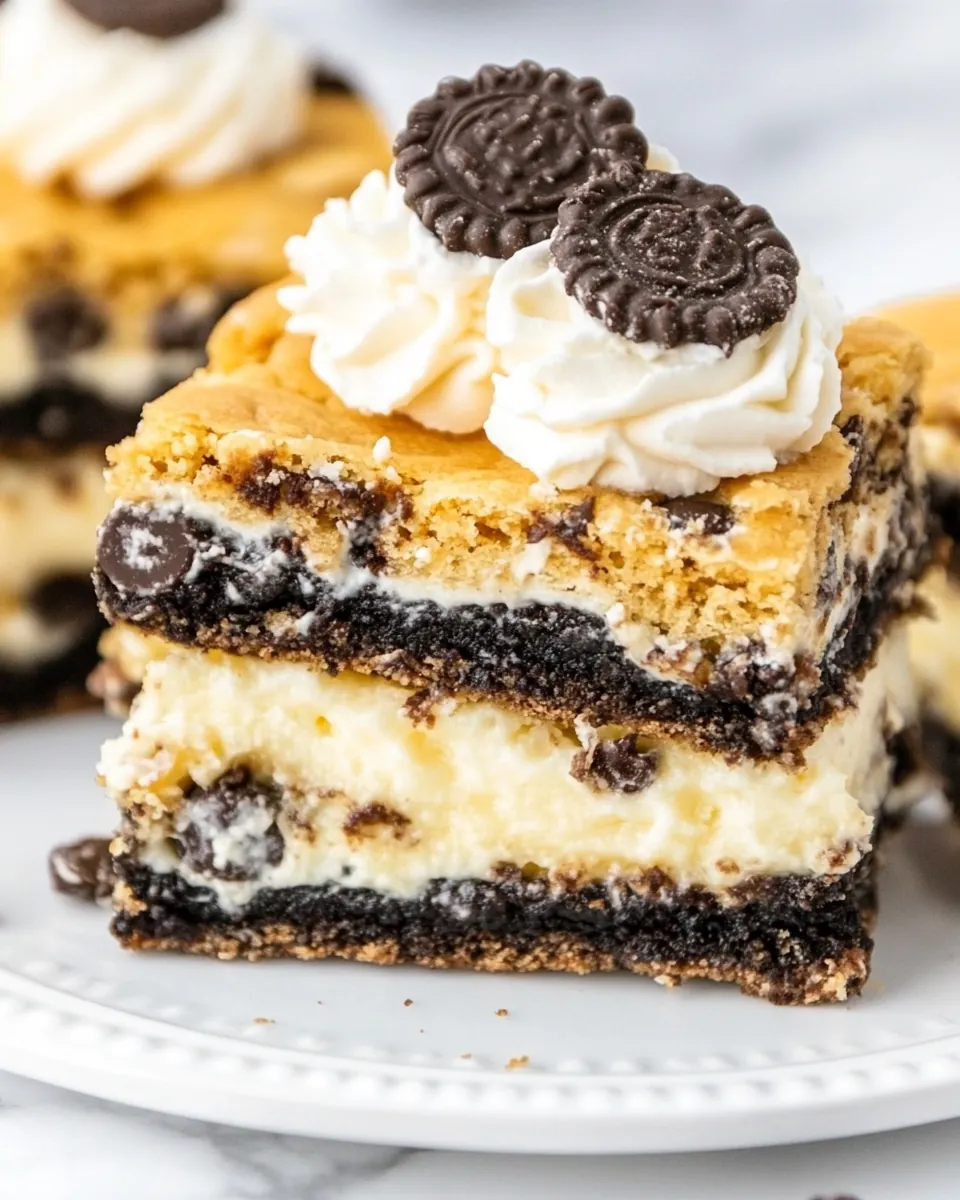
Stirring in coarsely crumbled Oreo Cookies adds a fun textural pop and chocolate pockets throughout the creamy layer. The cookies keep the bars from feeling one note, and they give a delightful surprise in each square.
Family friendly and shareable
These bars travel well and slice into neat portions for potlucks or school events. I love that they appeal to kids and adults alike, and you can garnish with whipped cream and extra cookies for a festive presentation.
Forgiving bake time
The recipe asks you to take the bars out while still slightly gooey in the middle, which is liberating because slight underbaking yields the best texture. I find this forgiving approach helps even beginner bakers avoid a dry final product.
Shopping List for Cookies and Cream Gooey Bars
These ingredients are all about contrast and structure. The boxed cake mix provides a chocolate backbone and stabilizes the base so you do not need to fuss with separate flour and cocoa measurements. Cream cheese brings a silky, tangy richness that balances the sugar while the Oreo Cookies add crunch and chocolate pockets. Small players like vanilla extract and eggs simply round out flavor and help the layers set.
- 1 box chocolate cake mix: Provides a chocolate-flavored base and structure for the bars, bringing sweetness and cocoa depth; combines with other wet ingredients to form a cohesive crust or layer. Offers convenience and consistent texture, simplifying baking by using pre-mixed dry components.
- 1/2 cup melted butter: Adds rich fat to the batter, contributing moisture and tenderness while helping bind the cake mix into a pliable crust; melted form ensures even distribution and a fudgy texture. Enhances mouthfeel and prevents dryness during baking.
- 1 large egg: Acts as a binding and leavening-supporting agent that helps set the cake mix and gives structure to the bar; contributes slight richness and moisture. Beaten into the batter, it promotes cohesive texture and a tender crumb.
- 8 ounces cream cheese: Supplies a creamy, tangy component that balances sweetness and adds a soft, luscious layer when combined with sugar; creates a cheesecake-like filling with smooth mouthfeel. Softened cream cheese enriches flavor and enhances density of the gooey center.
- 1 teaspoon vanilla extract: Contributes aromatic complexity and enhances other flavors, adding warm vanilla notes that round out sweetness; small amount intensifies overall flavor profile. Blended into the filling, it smooths and unifies the taste.
- 1/2 cup melted butter: Provides additional fat for a richer, moister texture in another layer or component; melted butter improves spreadability and contributes to a tender bite. Reinforces flavor and helps create a glossy, cohesive mixture.
- 3 large eggs: Serves as multiple binding agents that build structure, increase volume slightly, and create a firm yet tender filling when combined with sugar and cream cheese. Eggs also contribute moisture and assist in setting the gooey interior during baking.
- 16 ounces confectioners' sugar: Delivers concentrated sweetness and a fine texture that creates a smooth, thick filling when mixed with cream cheese and eggs; helps stabilize and sweeten the gooey layer. Powdered sugar dissolves readily for a glossy, uniform finish.
- 15 Double Stuff Oreo Cookies, coarsely crumbled: Adds crunchy texture and distinctive cookies-and-cream flavor when folded into the filling or sprinkled between layers; coarsely crumbled pieces provide contrast to the gooey interior. Infuses chocolate cookie crumbs and cream bits for the signature taste.
- whipped cream and oreos for garnish (optional): Provides optional finishing touches that enhance presentation and texture; whipped cream adds airiness and lightness while extra Oreos reinforce crunchy contrast. Used sparingly, garnishes create visual appeal and an extra layer of flavor for serving.
Step by Step Instructions for Cookies and Cream Gooey Bars
These directions will walk you through building the two layers and judging doneness so the center stays perfectly gooey. Read them calmly, and I will point out sensory cues and common missteps so you can avoid overbaking or under-mixing. Keep a spatula and an electric mixer handy, and plan to chill the pan before slicing.
- Preheat oven to 350 degrees and spray a 9×13-inch pan with cooking spray.: When you preheat, notice the warmth of the oven ramping up and the faint smell of dry heat when you open the door, that tells you it is ready; preheating ensures even baking from the moment the pan goes in, which helps the base set without relying on oven timing alone. A common mistake is skipping preheat, which can cause uneven rising and a denser texture, so always wait until the oven signal is reached.
- In a large bowl, use an electric mixer to beat cake mix, melted butter and egg until evenly mixed. It will be very thick. Transfer to prepared pan and pat it out evenly.: As you beat, pay attention to how the cake mix absorbs the melted butter , turning into a coarse, almost cookie dough like mass; the texture should be thick and slightly grainy. Pressing it into the pan with your hands or a spatula gives a uniform base that will brown consistently, so work quickly before the butter firms. Avoid overmixing at this stage, which can make the base tough; stop once ingredients are homogenous.
- In the same bowl, beat the cream cheese and vanilla until smooth.: The moment you begin to beat, the room will fill with a faint dairy aroma of the cream cheese , and the mixture will go from lumpy to silky; that smoothness is crucial for a velvety filling. If you still see lumps, scrape the bowl and continue briefly, but overheating the mixer can warm the cheese too much and make the filling runny.
- Add the melted butter and 3 eggs and beat until blended.: Adding warmed butter and eggs should result in a glossy, cohesive batter; the sound of the mixer will soften as it emulsifies. This step helps the filling set while keeping it tender, so make sure the eggs are fully incorporated but do not overbeat, which can whip in air and create unwanted cracks after baking.
- Beat in confectioners' sugar.: As you sift or add the confectioners' sugar , the mixture will thicken and sweeten; mixing should produce a creamy custard like texture that holds peaks softly. If the filling feels grainy, continue beating briefly to dissolve the sugar, but beware of overbeating which can create a fragile structure that weeps when baked.
- Stir in the crushed oreos. Pour over the cake mix layer.: When you fold in the coarsely crumbled Oreo Cookies , you will see dark flecks distributed through the creamy filling, which creates pleasing contrast. Pouring it gently over the base and using an offset spatula to spread prevents tearing the base and ensures even coverage; a common error is pressing too hard and embedding the filling into the crust rather than sitting atop it.
- Bake for 40 to 44 minutes. It should still be gooey in the middle. Be careful not to overbake it.: During baking you will notice the edges set and the center slightly wobble when nudged; the aroma will be a rich mix of chocolate and baked cream. Aim for a gentle jiggle in the middle because carryover heat will finish the set while cooling, and removing it when fully firm will yield a dryer bar. Overbaking is the usual pitfall, resulting in a cakier, less indulgent texture.
- Cool completely and refrigerate for at least 1 hour before cutting into squares.: As the pan cools, the filling firms and the flavors meld; chilling tightens the structure so slices come out clean and glossy. Resist the urge to cut while warm, which makes the filling ooze and ruins presentation; patience here ensures neat squares and a perfect gooey interior.
- Serve with whipped cream and additional cookies.: When plated, the cool whipped topping contrasts with the slightly dense bar and adds lightness, while extra oreos make a pretty garnish. Serve chilled or at room temperature, and avoid drizzling anything hot over the bars which can make them weep and lose structure.
Variations to Try
These variations let you adapt the bars to different occasions while keeping the same basic method. I like to experiment with presentation and small swaps that change texture or richness without altering the heart of the recipe.
- Chocolate swirl Add a few spoonfuls of softened chocolate spread on top of the filling and drag a knife through to create a marbled look and added chocolate depth.
- Extra cookie crunch Press a handful of additional coarsely chopped Oreos onto the top before baking for a crunchy crown and dramatic presentation.
- Whipped topping finish Instead of serving plain, pipe sweetened whipped cream over each cooled square for a bakery style look and lighter mouthfeel.
- Pan size swap Use an 8 by 8 inch pan for thicker bars, just add a few minutes to bake time and watch the center for that gentle jiggle.
- Decorative dusting Sift a little extra confectioners’ sugar over the chilled squares for a delicate, snow like finish before serving.
What to Serve Alongside Cookies and Cream Gooey Bars
These bars are a natural star at casual gatherings and dessert spreads. They pair well with simple beverages and light accompaniments that complement their sweetness. I like to plan the rest of the menu around textures and temperatures to balance the richness.
- Serve with cold milk A classic pairing especially for kids, the milk tempers the sugar and enhances the cookie flavor.
- Offer coffee or espresso The bitter notes of coffee cut through the sweetness and are perfect for an adult dessert table.
- Plate with fresh berries Bright, slightly tart berries add freshness and color to balance the creamy bars.
- Use for celebrations These bars travel well to potlucks and bake sales, they slice neatly after chilling and are easy to display on dessert platters.
- Storage tips Keep cooled bars covered in the refrigerator for up to five days to maintain texture, or freeze tightly wrapped for up to a month.
- Seasonal serving They work year round, yet I especially like them for indoor holiday parties when people crave comforting, shareable sweets.
FAQ
Conclusion
Cookies and Cream Gooey Bars stand out because they combine a sturdy chocolate base with a silky, cookie studded cream cheese layer for a truly indulgent treat. They are simple to assemble, forgiving to bake, and crowd pleasing at gatherings from casual get togethers to special occasions. Give them a try this week, and you will likely find yourself bringing a pan to more events because they store well, slice nicely when chilled, and earn compliments with very little effort. Share them with friends, tuck a few into school lunches, or serve them after dinner for an easy, memorable dessert.
Cookies and Cream Gooey Bars
Equipment
- Electric Mixer
- 9×13-inch pan
- Spatula
- Mixing Bowls
Ingredients
- 1 box chocolate cake mix Provides a chocolate-flavored base and structure for the bars, bringing sweetness and cocoa depth; combines with other wet ingredients to form a cohesive crust or layer. Offers convenience and consistent texture, simplifying baking by using pre-mixed dry components.
- 1/2 cup melted butter Adds rich fat to the batter, contributing moisture and tenderness while helping bind the cake mix into a pliable crust; melted form ensures even distribution and a fudgy texture. Enhances mouthfeel and prevents dryness during baking.
- 1 large egg Acts as a binding and leavening-supporting agent that helps set the cake mix and gives structure to the bar; contributes slight richness and moisture. Beaten into the batter, it promotes cohesive texture and a tender crumb.
- 8 ounces cream cheese Supplies a creamy, tangy component that balances sweetness and adds a soft, luscious layer when combined with sugar; creates a cheesecake-like filling with smooth mouthfeel. Softened cream cheese enriches flavor and enhances density of the gooey center.
- 1 teaspoon vanilla extract Contributes aromatic complexity and enhances other flavors, adding warm vanilla notes that round out sweetness; small amount intensifies overall flavor profile. Blended into the filling, it smooths and unifies the taste.
- 1/2 cup melted butter Provides additional fat for a richer, moister texture in another layer or component; melted butter improves spreadability and contributes to a tender bite. Reinforces flavor and helps create a glossy, cohesive mixture.
- 3 large eggs Serves as multiple binding agents that build structure, increase volume slightly, and create a firm yet tender filling when combined with sugar and cream cheese. Eggs also contribute moisture and assist in setting the gooey interior during baking.
- 16 ounces confectioners' sugar Delivers concentrated sweetness and a fine texture that creates a smooth, thick filling when mixed with cream cheese and eggs; helps stabilize and sweeten the gooey layer. Powdered sugar dissolves readily for a glossy, uniform finish.
- 15 Double Stuff Oreo Cookies, coarsely crumbled Adds crunchy texture and distinctive cookies-and-cream flavor when folded into the filling or sprinkled between layers; coarsely crumbled pieces provide contrast to the gooey interior. Infuses chocolate cookie crumbs and cream bits for the signature taste.
- whipped cream and oreos for garnish, optional Provides optional finishing touches that enhance presentation and texture; whipped cream adds airiness and lightness while extra Oreos reinforce crunchy contrast. Used sparingly, garnishes create visual appeal and an extra layer of flavor for serving.
Instructions
- Preheat oven to 350 degrees and spray a 9×13-inch pan with cooking spray.: When you preheat, notice the warmth of the oven ramping up and the faint smell of dry heat when you open the door, that tells you it is ready; preheating ensures even baking from the moment the pan goes in, which helps the base set without relying on oven timing alone. A common mistake is skipping preheat, which can cause uneven rising and a denser texture, so always wait until the oven signal is reached.
- In a large bowl, use an electric mixer to beat cake mix, melted butter and egg until evenly mixed. It will be very thick. Transfer to prepared pan and pat it out evenly.: As you beat, pay attention to how the cake mix absorbs the melted butter , turning into a coarse, almost cookie dough like mass; the texture should be thick and slightly grainy. Pressing it into the pan with your hands or a spatula gives a uniform base that will brown consistently, so work quickly before the butter firms. Avoid overmixing at this stage, which can make the base tough; stop once ingredients are homogenous.
- In the same bowl, beat the cream cheese and vanilla until smooth.: The moment you begin to beat, the room will fill with a faint dairy aroma of the cream cheese , and the mixture will go from lumpy to silky; that smoothness is crucial for a velvety filling. If you still see lumps, scrape the bowl and continue briefly, but overheating the mixer can warm the cheese too much and make the filling runny.
- Add the melted butter and 3 eggs and beat until blended.: Adding warmed butter and eggs should result in a glossy, cohesive batter; the sound of the mixer will soften as it emulsifies. This step helps the filling set while keeping it tender, so make sure the eggs are fully incorporated but do not overbeat, which can whip in air and create unwanted cracks after baking.
- Beat in confectioners' sugar.: As you sift or add the confectioners' sugar , the mixture will thicken and sweeten; mixing should produce a creamy custard like texture that holds peaks softly. If the filling feels grainy, continue beating briefly to dissolve the sugar, but beware of overbeating which can create a fragile structure that weeps when baked.
- Stir in the crushed oreos. Pour over the cake mix layer.: When you fold in the coarsely crumbled Oreo Cookies , you will see dark flecks distributed through the creamy filling, which creates pleasing contrast. Pouring it gently over the base and using an offset spatula to spread prevents tearing the base and ensures even coverage; a common error is pressing too hard and embedding the filling into the crust rather than sitting atop it.
- Bake for 40 to 44 minutes. It should still be gooey in the middle. Be careful not to overbake it.: During baking you will notice the edges set and the center slightly wobble when nudged; the aroma will be a rich mix of chocolate and baked cream. Aim for a gentle jiggle in the middle because carryover heat will finish the set while cooling, and removing it when fully firm will yield a dryer bar. Overbaking is the usual pitfall, resulting in a cakier, less indulgent texture.
- Cool completely and refrigerate for at least 1 hour before cutting into squares.: As the pan cools, the filling firms and the flavors meld; chilling tightens the structure so slices come out clean and glossy. Resist the urge to cut while warm, which makes the filling ooze and ruins presentation; patience here ensures neat squares and a perfect gooey interior.
- Serve with whipped cream and additional cookies.: When plated, the cool whipped topping contrasts with the slightly dense bar and adds lightness, while extra oreos make a pretty garnish. Serve chilled or at room temperature, and avoid drizzling anything hot over the bars which can make them weep and lose structure.
Notes
- Chocolate swirl Add a few spoonfuls of softened chocolate spread on top of the filling and drag a knife through to create a marbled look and added chocolate depth.
- Extra cookie crunch Press a handful of additional coarsely chopped Oreos onto the top before baking for a crunchy crown and dramatic presentation.
- Whipped topping finish Instead of serving plain, pipe sweetened whipped cream over each cooled square for a bakery style look and lighter mouthfeel.
- Pan size swap Use an 8 by 8 inch pan for thicker bars, just add a few minutes to bake time and watch the center for that gentle jiggle.
- Decorative dusting Sift a little extra confectioners' sugar over the chilled squares for a delicate, snow like finish before serving.