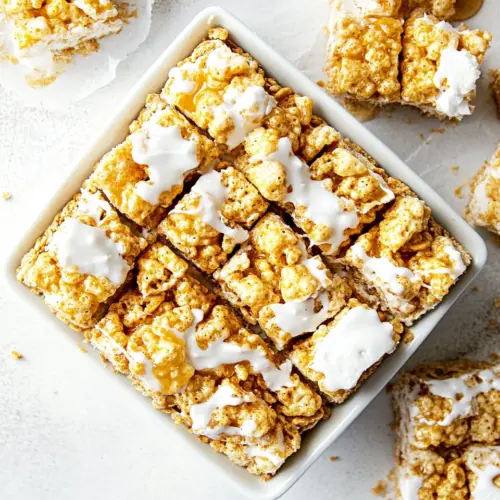
Cinnamon Toast Crunch Rice Krispie Treats
Cinnamon Toast Crunch Rice Krispie Treats are my go to when I want something playful, nostalgic, and impossibly simple. The first time I made these I was chasing a memory of Saturday morning cereal bowls and sticky sweet kitchen counters, and the results felt like a sugar powered time machine. I remember standing over a pot of bubbling browned butter, the air filling with a nutty aroma that made me smile like a kid again.
Over the years I have tweaked tiny details, learning that a light press and a patient cool down make all the difference between a chewy bar and a regrettable hockey puck. I like how the combination of crispy rice cereal and Cinnamon Toast Crunch cereal gives a double crunch and that warm cinnamon hug in every bite. Friends always ask for the recipe after one tasting, and I love how easy these are to assemble when company drops by unexpectedly.
There is something comforting about stirring gooey, melted marshmallow with a wooden spoon, listening to the little pops as pockets of air collapse, and seeing the cereal slowly disappear into the sweet, glossy mixture. I often double the batch for gatherings, and I never skip the sprinkle of flaky sea salt at the end, which somehow lifts the sweetness into something more interesting. These bars have become my signature dessert for casual get togethers, and I hope they find a spot in your recipe rotation too.
Recipe Snapshot
15 mins
5 mins
10 mins
Easy
150 kcal
American
Gluten-Free, Low FODMAP
Desserts
Large pot, Silicone spatula, 9×9 pan or 9×13 pan, Parchment paper
Why This Cinnamon Toast Crunch Rice Krispie Treats Works
Playful nostalgia in every bite
I love how Cinnamon Toast Crunch Rice Krispie Treats tap into childhood memories, while also feeling grown up thanks to browned butter and flaky sea salt. The combination of sweet marshmallow and warm cinnamon creates an immediate emotional connection, and serving these always brings smiles.
Speed and simplicity
These treats come together fast, so they’re perfect when you’re short on time but want a homemade touch. I appreciate a recipe that respects busy schedules, and this one rewards minimal effort with maximum impact.
Texture contrast that sings
The mix of crispy rice cereal and Cinnamon Toast Crunch cereal gives a layered crunch that keeps each bite interesting. The toasted butter aroma and soft marshmallow bind everything without turning the bars into a dense slab.
Flexible and crowd friendly
I often double or halve the recipe to suit the group, and it travels well for potlucks. The bars hold their shape after cooling, and they’re easy to portion into playful squares for kids or adults.
Finishing touches matter
A quick sprinkle of flaky sea salt at the end transforms the flavor, balancing sweetness and highlighting the cinnamon. Little details like that are why I keep returning to this recipe, and why guests always ask for seconds.
What You Need for Cinnamon Toast Crunch Rice Krispie Treats
These ingredients are intentionally simple, working together to deliver sticky chew, sweet cinnamon flavor, and crunchy contrast. The marshmallows provide the glue that binds the dry cereals, while the unsalted butter when browned adds depth and a toasty aroma. The two cereals play complementary roles, one giving classic crisp texture, the other supplying pronounced cinnamon flavor and extra crunch.
- 8 tablespoons unsalted butter, cut into tablespoon pieces: Melted to provide a rich, buttery base that helps bind the marshmallows and cereals together; contributes flavor and a tender chew to the finished bars. Cut into tablespoon pieces to ensure even melting and prevent burning during assembly.
- 16 ounce bag mini marshmallows, plus 2 cups mini marshmallows, divided: Melted and folded into the butter to create the sticky, sweet matrix that holds the cereals in place; using a 16-ounce bag plus an extra 2 cups ensures there is ample marshmallow to coat both cereals and produce a chewy texture. Dividing the marshmallows allows for staged addition and a topping garnish for visual appeal and extra chew.
- 1 teaspoon vanilla extract: Added to brighten and enhance the sweet flavors with a warm, floral note; helps round out the sweetness from the marshmallows and cereals. Stirred in after melting to preserve its aroma and contribute a subtle depth to the bars.
- 1/2 teaspoons ea salt, plus more for sprinkling: Sprinkled in to balance the sweetness and enhance overall flavor; a half teaspoon in the mixture helps round savory notes while additional salt can be used sparingly as a finishing sprinkle. Including salt improves depth and keeps the treat from tasting cloyingly sweet.
- 4 cups crispy rice cereal: Incorporated as a light, crispy component that provides structure and contrasts the gooey marshmallow; four cups ensure enough volume for a satisfying bite and maintain a pleasant crunch. Its neutral rice flavor lets the cinnamon cereal and buttered marshmallow shine.
- 4 cups Cinnamon Toast Crunch cereal: Blended in for bold cinnamon-sugar flavor and additional crunch, creating the signature taste of the dessert; four cups add both sweetness and a textured counterpoint to the rice cereal. Using this cereal imparts the distinct cinnamon–toast profile throughout the bars.
Instructions for Cinnamon Toast Crunch Rice Krispie Treats
These steps are straightforward, but taking your time at key moments ensures the best texture and flavor. Gather your ingredients, choose the pan size based on your thickness preference, and be ready to move quickly once the marshmallows melt. I find that having a greased spatula and parchment ready saves a lot of fuss when transferring the mixture to the pan.
- For super thick Rice Krispie Treats, grease a 9×9-inch baking pan with nonstick cooking spray. For regular Rice Krispie Treats, grease a 9×13-inch baking pan with nonstick cooking spray. You can also line the pan with parchment paper to make it easier for them to come out of the pan. Set pan aside.: When your pan is prepped you can focus on cooking without scrambling, and the choice of pan size directly affects bar thickness. You will notice a faint sheen of oil when the pan is properly greased, which helps prevent sticking and gives the finished edges a clean release. Using parchment creates a crisp rim and makes lifting the slab easier. One common mistake is under greasing, which causes the treats to cling and break when removed. If you hear a slight sizzle when the pan touches the spray, that grease layer is adequate.
- First, brown the butter. Place the butter in a large pot and melt over medium heat, stirring often, until it foams, smells nutty, and browns. This will take about 5 minutes.: Browning the butter builds a rich, toasty aroma you will recognize immediately as the liquid turns from pale yellow to an amber color and little brown specks form. Listen for a gentle bubbling and watch for the foam to subside, then for the fat to sparkle with those warm brown bits. This step deepens the flavor far beyond plain melted butter, giving the final bars a caramel like undertone. Stirring often prevents hot spots that can burn the milk solids. A classic misstep is letting the butter go from browned to burnt, which produces a bitter scent, so pull the pot from heat as soon as you see golden flecks.
- Add the 16 oz bag of marshmallows and stir until the marshmallows are completely melted.: Once the marshmallows hit the warm browned butter, they will begin to puff and collapse into a glossy, viscous mass. Keep the pot over gentle heat and stir with a silicone spatula, scraping the bottom so nothing sticks. The melted mixture should be smooth and shiny, with steam rising and a sweet aroma. If you overheat, marshmallows can become grainy or scorch, so remove from heat as soon as they are fully liquefied. A usual error is leaving the heat too high, which may cause burning at the pot base, producing off flavors.
- Remove the pan from the heat and stir in the vanilla extract and sea salt. Add the Rice Krispies and Cinnamon Toast Crunch; gently stir until well coated with the marshmallows. Stir in the remaining 2 cups of mini marshmallows.: Off the heat is the best time to add vanilla extract so its aroma stays intact, and the salt will bloom against the sweet marshmallow, balancing the profile. Fold in the crispy rice cereal and Cinnamon Toast Crunch cereal with a gentle motion so the flakes remain whole and evenly coated. You will feel the mixture become straighter to the spoon and see cereal pieces glisten under a sticky sheen. The remaining mini marshmallows folded in at the end create soft pockets that contrast the crunch. Overmixing can crush the cereal and yield a dense bar, so fold just until combined.
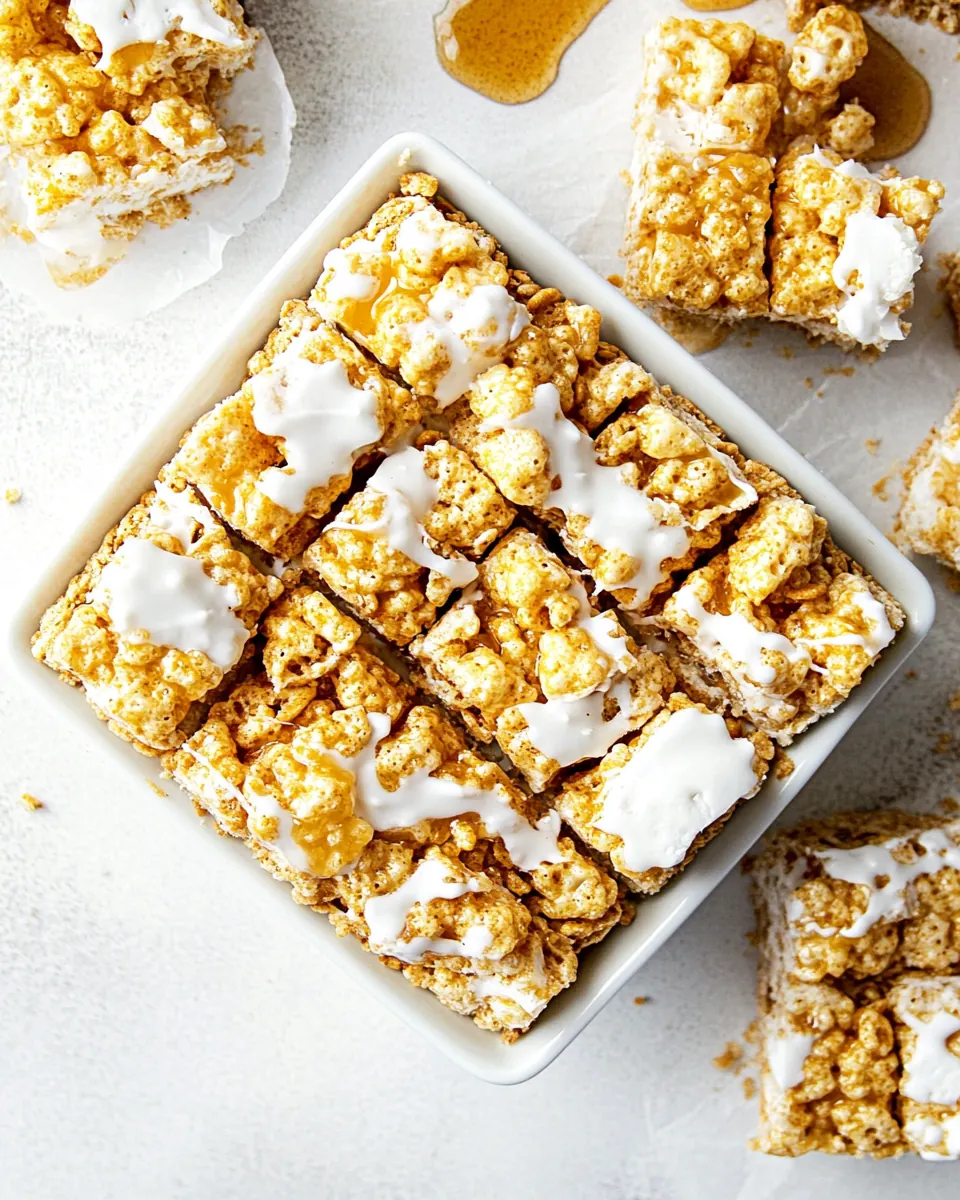
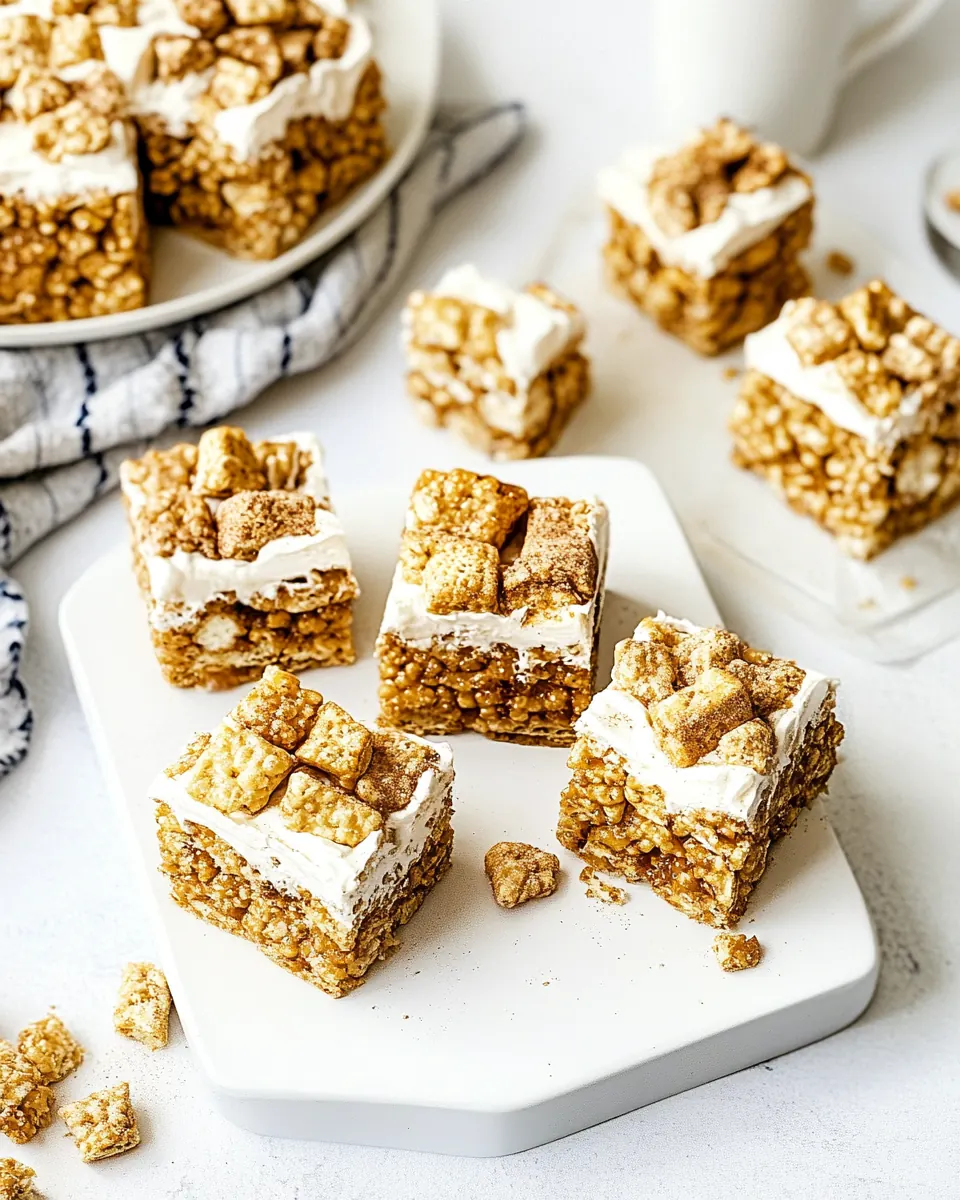
- Transfer mixture to the prepared pan. Lightly press the mixture into the pan, using a greased spatula. You can also lightly grease your hands and press the mixture into the pan. Don’t press too firmly or the treats will end up hard and dry. Sprinkle a little flaky sea salt on top, if desired.: When you move the mixture into the pan, use a light, even pressure to form a cohesive slab while preserving airiness. You want to see the surface smooth but not compacted; a glossy finish is a good visual cue. Greased hands work best for final shaping, pressing from the center to the edges without forcing out all the trapped air. The flaky sea salt on top will glint visually and provide flavorful contrast on the first bite. A frequent mistake is pressing too hard, which squeezes out aeration and yields a rock solid bar, so be gentle.
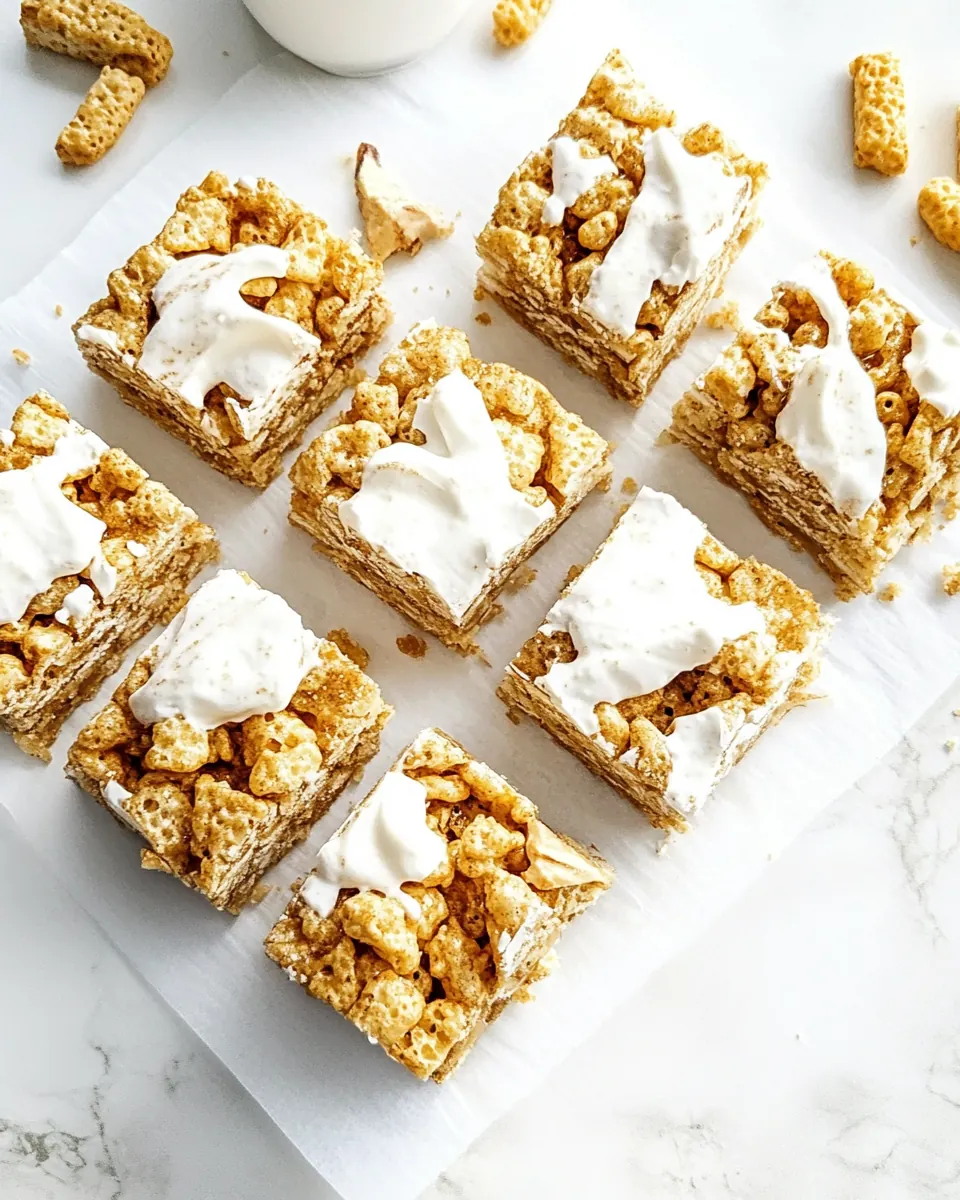
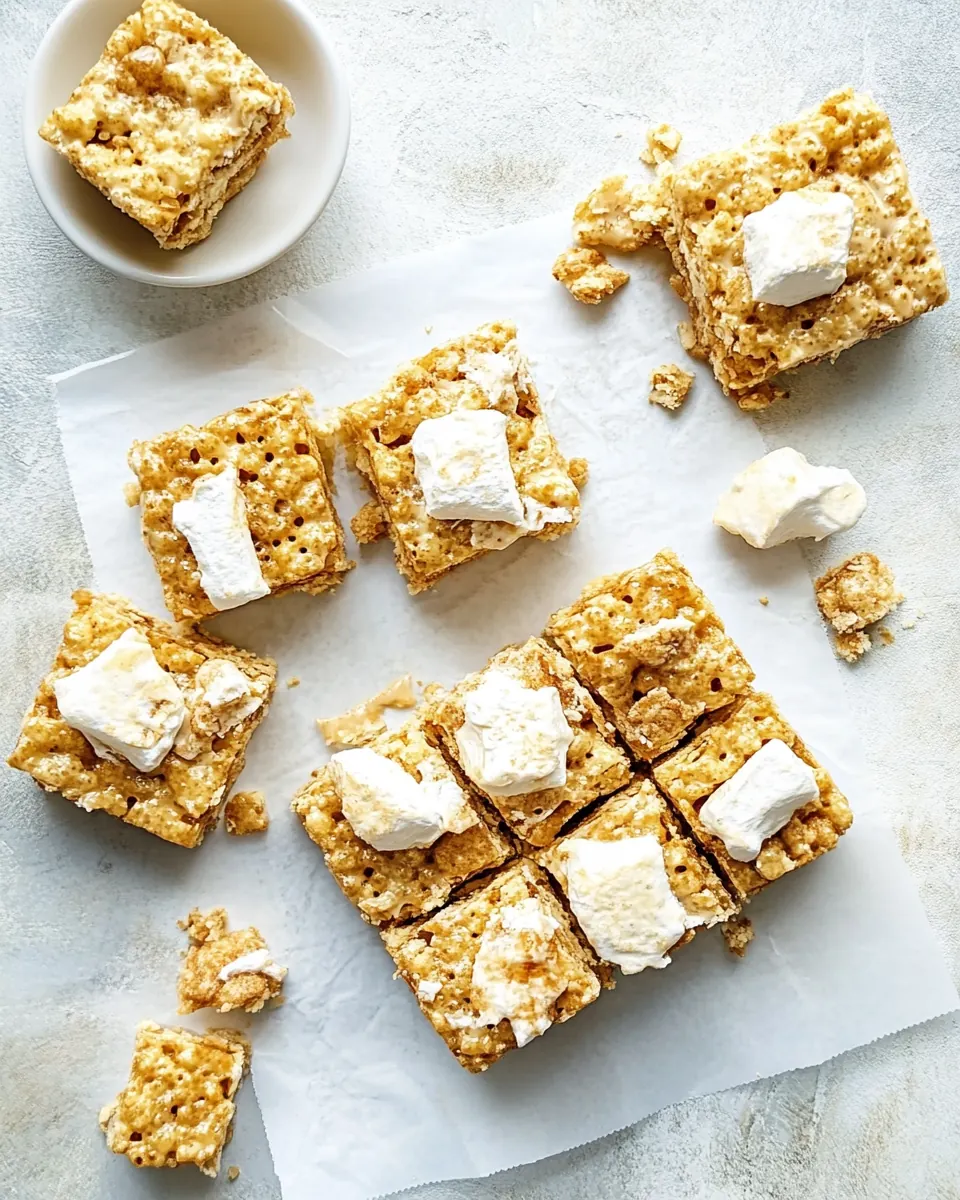
- It's best to let the Rice Krispie Treats sit for about 1 hour before cutting. Cut into squares and serve.: Allowing the bars to rest lets the marshmallow set and the flavors meld, resulting in clean slices and a tender chew. You will notice the surface lose its tackiness and the edges firm slightly, which are good signs that the slab is ready. Use a sharp knife or an offset spatula to slice into even squares, wiping the blade between cuts to keep edges tidy. Cutting too soon creates sticky, misshapen pieces and makes liftoff messy, so patience here pays off.
Ways to Customize
These bars are a friendly canvas for small tweaks that alter texture and flavor. Below are focused suggestions that keep the integrity of the recipe while letting you personalize the outcome. Each tip highlights a simple swap or technique to adjust chew, crunch, or presentation.
- Browned butter boost Fold a few browned butter solids into the melted marshmallow for an even more pronounced nutty flavor that complements the cinnamon notes.
- Thickness control Choose the 9×9 pan for thicker, more substantial bars, or the 9×13 pan for thinner, chewier pieces that are easier to bite into for kids.
- Salt finish A light scatter of flaky sea salt after pressing brightens the sweetness and creates a sophisticated sweet salty balance on the top of each square.
- Mini marshmallow pockets Reserve and fold in extra mini marshmallows at the end to create pockets of pillowy softness amidst the crunch, which contrast with the toasted cereal.
- Parchment lift Line the pan with parchment and leave an overhang so you can lift the entire slab out easily for neater slicing and serving.
Serving Suggestions
These bars are terrific for casual gatherings, after school snacks, and dessert tables. Serve them slightly cooled so they hold shape, and pair with light beverages for balance. Here are thoughtful serving ideas and storage notes to keep your treats tasting their best.
- Party platter Arrange squares on a platter with small paper liners for self serve at birthdays or potlucks.
- Snack box Pack one or two squares in a lunchbox for a playful treat that travels well at room temperature in an airtight container.
- After school Serve warm or at room temperature alongside a cup of milk for a nostalgic snack moment kids love.
- Holiday table These work as casual dessert additions for festive gatherings, offering a whimsical option that complements heavier pies or cakes.
- Storage Keep the bars in an airtight container at room temperature for up to 3 days to preserve chew, or freeze individually wrapped squares for up to 3 months and thaw at room temperature before serving.
- Presentation For a neat finish, trim edges and place squares in a single layer on a decorative board, optionally dusting with extra cinnamon if you want a more pronounced spice aroma.
FAQ
Conclusion
These Cinnamon Toast Crunch Rice Krispie Treats stand out because they combine browned butter, double cereals, and a sprinkle of salt to transform a classic into something memorable. I encourage you to give them a try the next time you want a quick, crowd pleasing dessert that still feels special. They are straightforward to make, fun to share, and reliably disappear fast at any gathering, so enjoy the process and the smiles that follow.
Cinnamon Toast Crunch Rice Krispie Treats
Equipment
- Large Pot
- Silicone spatula
- 9x9 pan or 9x13 pan
- Parchment Paper
Ingredients
- 8 tablespoons unsalted butter, cut into tablespoon pieces Melted to provide a rich, buttery base that helps bind the marshmallows and cereals together; contributes flavor and a tender chew to the finished bars. Cut into tablespoon pieces to ensure even melting and prevent burning during assembly.
- 16 ounce bag mini marshmallows, plus 2 cups mini marshmallows, divided Melted and folded into the butter to create the sticky, sweet matrix that holds the cereals in place; using a 16-ounce bag plus an extra 2 cups ensures there is ample marshmallow to coat both cereals and produce a chewy texture. Dividing the marshmallows allows for staged addition and a topping garnish for visual appeal and extra chew.
- 1 teaspoon vanilla extract Added to brighten and enhance the sweet flavors with a warm, floral note; helps round out the sweetness from the marshmallows and cereals. Stirred in after melting to preserve its aroma and contribute a subtle depth to the bars.
- 1/2 teaspoons ea salt, plus more for sprinkling Sprinkled in to balance the sweetness and enhance overall flavor; a half teaspoon in the mixture helps round savory notes while additional salt can be used sparingly as a finishing sprinkle. Including salt improves depth and keeps the treat from tasting cloyingly sweet.
- 4 cups crispy rice cereal Incorporated as a light, crispy component that provides structure and contrasts the gooey marshmallow; four cups ensure enough volume for a satisfying bite and maintain a pleasant crunch. Its neutral rice flavor lets the cinnamon cereal and buttered marshmallow shine.
- 4 cups Cinnamon Toast Crunch cereal Blended in for bold cinnamon-sugar flavor and additional crunch, creating the signature taste of the dessert; four cups add both sweetness and a textured counterpoint to the rice cereal. Using this cereal imparts the distinct cinnamon-toast profile throughout the bars.
Instructions
- For super thick Rice Krispie Treats, grease a 9×9-inch baking pan with nonstick cooking spray. For regular Rice Krispie Treats, grease a 9×13-inch baking pan with nonstick cooking spray. You can also line the pan with parchment paper to make it easier for them to come out of the pan. Set pan aside.: When your pan is prepped you can focus on cooking without scrambling, and the choice of pan size directly affects bar thickness. You will notice a faint sheen of oil when the pan is properly greased, which helps prevent sticking and gives the finished edges a clean release. Using parchment creates a crisp rim and makes lifting the slab easier. One common mistake is under greasing, which causes the treats to cling and break when removed. If you hear a slight sizzle when the pan touches the spray, that grease layer is adequate.
- First, brown the butter. Place the butter in a large pot and melt over medium heat, stirring often, until it foams, smells nutty, and browns. This will take about 5 minutes.: Browning the butter builds a rich, toasty aroma you will recognize immediately as the liquid turns from pale yellow to an amber color and little brown specks form. Listen for a gentle bubbling and watch for the foam to subside, then for the fat to sparkle with those warm brown bits. This step deepens the flavor far beyond plain melted butter, giving the final bars a caramel like undertone. Stirring often prevents hot spots that can burn the milk solids. A classic misstep is letting the butter go from browned to burnt, which produces a bitter scent, so pull the pot from heat as soon as you see golden flecks.
- Add the 16 oz bag of marshmallows and stir until the marshmallows are completely melted.: Once the marshmallows hit the warm browned butter, they will begin to puff and collapse into a glossy, viscous mass. Keep the pot over gentle heat and stir with a silicone spatula, scraping the bottom so nothing sticks. The melted mixture should be smooth and shiny, with steam rising and a sweet aroma. If you overheat, marshmallows can become grainy or scorch, so remove from heat as soon as they are fully liquefied. A usual error is leaving the heat too high, which may cause burning at the pot base, producing off flavors.
- Remove the pan from the heat and stir in the vanilla extract and sea salt. Add the Rice Krispies and Cinnamon Toast Crunch; gently stir until well coated with the marshmallows. Stir in the remaining 2 cups of mini marshmallows.: Off the heat is the best time to add vanilla extract so its aroma stays intact, and the salt will bloom against the sweet marshmallow, balancing the profile. Fold in the crispy rice cereal and Cinnamon Toast Crunch cereal with a gentle motion so the flakes remain whole and evenly coated. You will feel the mixture become straighter to the spoon and see cereal pieces glisten under a sticky sheen. The remaining mini marshmallows folded in at the end create soft pockets that contrast the crunch. Overmixing can crush the cereal and yield a dense bar, so fold just until combined.
- Transfer mixture to the prepared pan. Lightly press the mixture into the pan, using a greased spatula. You can also lightly grease your hands and press the mixture into the pan. Don’t press too firmly or the treats will end up hard and dry. Sprinkle a little flaky sea salt on top, if desired.: When you move the mixture into the pan, use a light, even pressure to form a cohesive slab while preserving airiness. You want to see the surface smooth but not compacted; a glossy finish is a good visual cue. Greased hands work best for final shaping, pressing from the center to the edges without forcing out all the trapped air. The flaky sea salt on top will glint visually and provide flavorful contrast on the first bite. A frequent mistake is pressing too hard, which squeezes out aeration and yields a rock solid bar, so be gentle.
- It's best to let the Rice Krispie Treats sit for about 1 hour before cutting. Cut into squares and serve.: Allowing the bars to rest lets the marshmallow set and the flavors meld, resulting in clean slices and a tender chew. You will notice the surface lose its tackiness and the edges firm slightly, which are good signs that the slab is ready. Use a sharp knife or an offset spatula to slice into even squares, wiping the blade between cuts to keep edges tidy. Cutting too soon creates sticky, misshapen pieces and makes liftoff messy, so patience here pays off.
Notes
- Browned butter boost Fold a few browned butter solids into the melted marshmallow for an even more pronounced nutty flavor that complements the cinnamon notes.
- Thickness control Choose the 9×9 pan for thicker, more substantial bars, or the 9×13 pan for thinner, chewier pieces that are easier to bite into for kids.
- Salt finish A light scatter of flaky sea salt after pressing brightens the sweetness and creates a sophisticated sweet salty balance on the top of each square.
- Mini marshmallow pockets Reserve and fold in extra mini marshmallows at the end to create pockets of pillowy softness amidst the crunch, which contrast with the toasted cereal.
- Parchment lift Line the pan with parchment and leave an overhang so you can lift the entire slab out easily for neater slicing and serving.