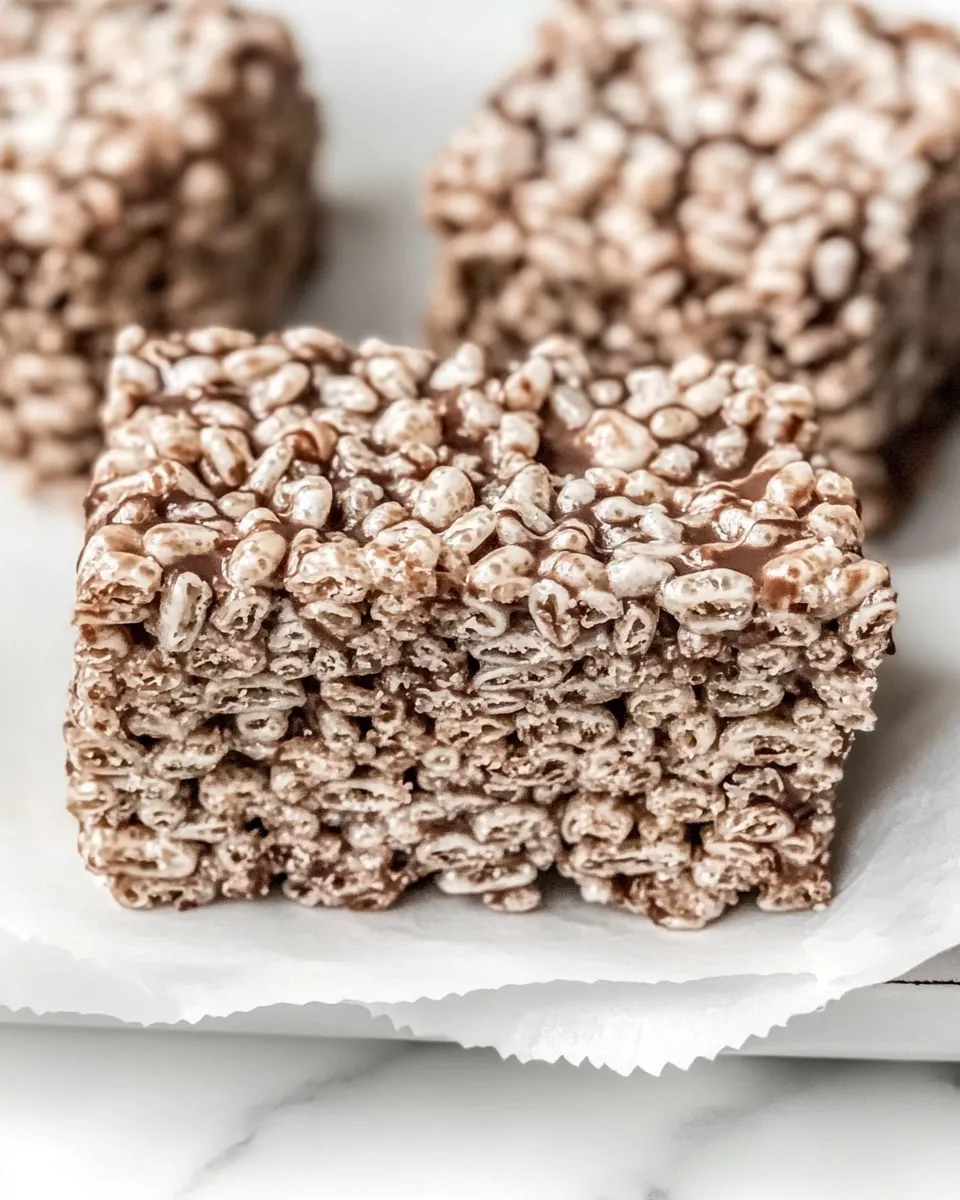
Chocolate Rice Krispie Treats
Chocolate Rice Krispie Treats always take me back to a weekday after school when I would race home with a backpack full of homework, only to be distracted by the sweet smell of butter and melting marshmallows drifting from the kitchen. I remember the way the cereal clinked into the big mixing bowl, and how my fingers inevitably found a sticky corner as we pressed the mixture into a pan together. That first sentence still feels honest, because these treats are comfort and nostalgia folded into each crispy bite.
Years later, I still reach for this recipe on busy days when I want something fast, handheld, and universally adored. I love that Chocolate Rice Krispie Treats require just a few pantry staples, and yet they feel indulgent. When I make them for friends, they always spark a memory exchange, someone telling a story about a childhood picnic, another sharing a twist they tried. I often change the setting, but the ritual remains the same, from melting the butter to the final pressing into the pan.
Recipe Snapshot
20 mins
15 mins
5 mins
Easy
150 kcal
American
Gluten-Free, Low FODMAP
Desserts
9×13-inch pan, Foil, Large pot, Spatula
Why We Love This Chocolate Rice Krispie Treats
They are simple yet showstopping
I adore how Chocolate Rice Krispie Treats take only a handful of ingredients and transform into something celebratory. I know you can make these in under an hour, yet they look like you spent more time on them. That makes them perfect for last minute gatherings when you want to bring a crowd pleaser without fuss.
Textural magic
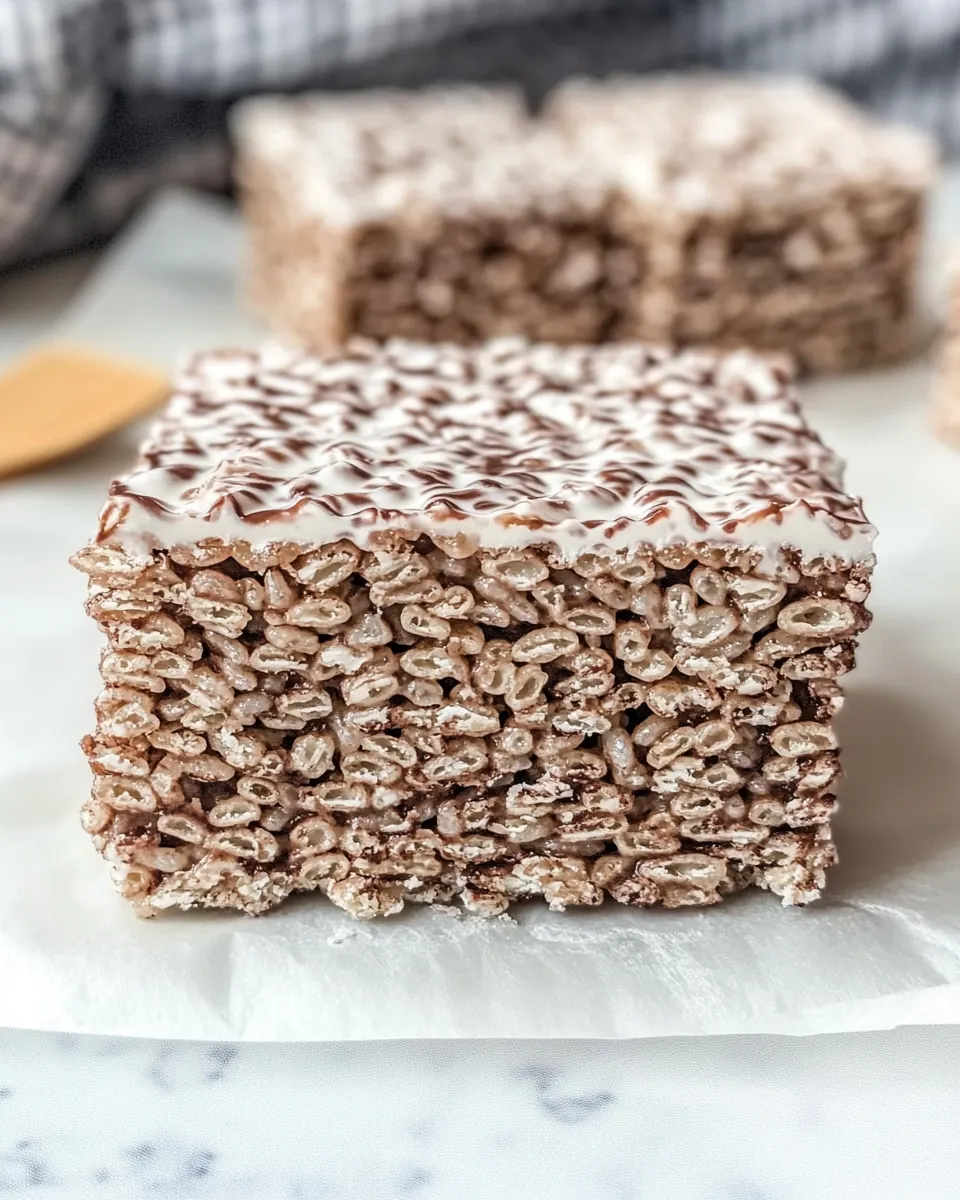
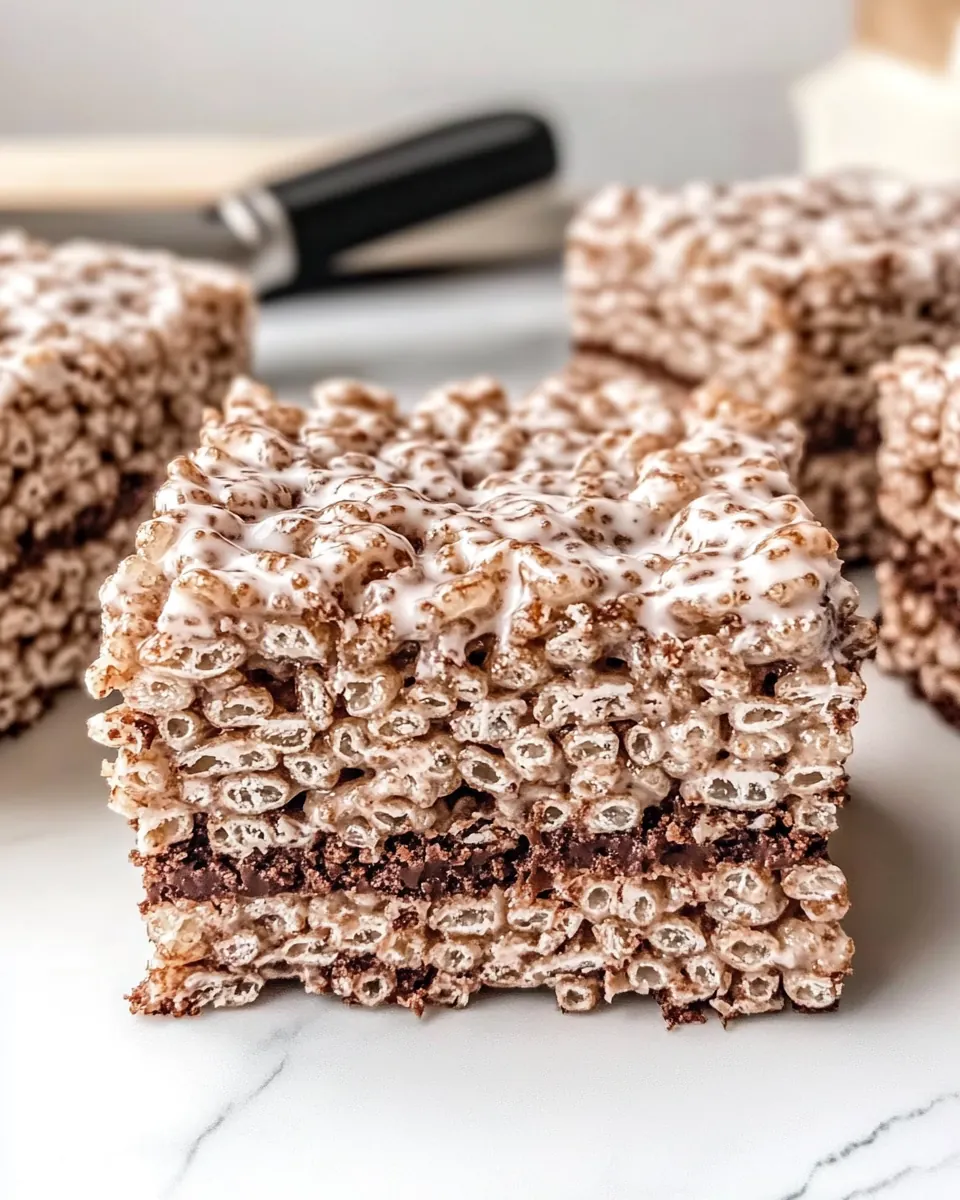
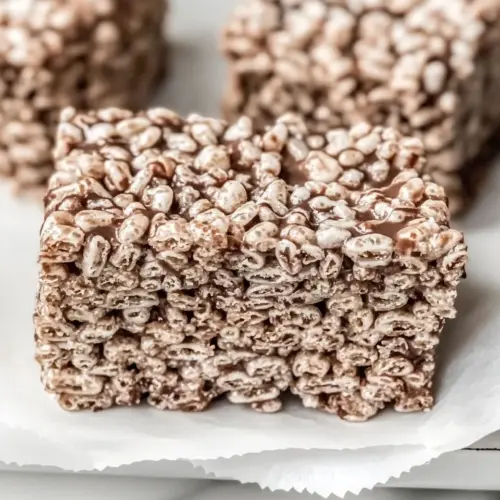
What gets me every time is the contrast between crunchy cereal and the chewy, glossy marshmallow binder. The cocoa flavored cereal adds depth, while the mini marshmallows give that tender chew. When you bite in, you get an audible crisp, followed by a soft, sticky finish that keeps you reaching for another piece.
Kid friendly and shareable
I often make these when kids are hanging around, because they love the hands on part of pressing the mixture into the pan. They are easy for little hands to handle, and I find the process teaches patience, since you must let them set. Sharing these always brings smiles, and they travel well in an airtight container.
Flexible and forgiving
I’ve adjusted proportions and timing many times, and this recipe is forgiving. If the mixture seems a touch dry, a second minute on very low heat to melt a few extra marshmallows fixes it. If it feels too wet, pressing firmly and chilling briefly helps. That forgiving nature is why I keep coming back to the recipe.
Fast crowd pleaser
Whenever I need something quick for a meeting, potluck, or snack plate, Chocolate Rice Krispie Treats deliver. They slice cleanly when fully set and store easily, so they’re perfect for prepping ahead. I love knowing I can feed a group with minimal effort, and still appear like I put thought into dessert.
Everything You Need for Chocolate Rice Krispie Treats
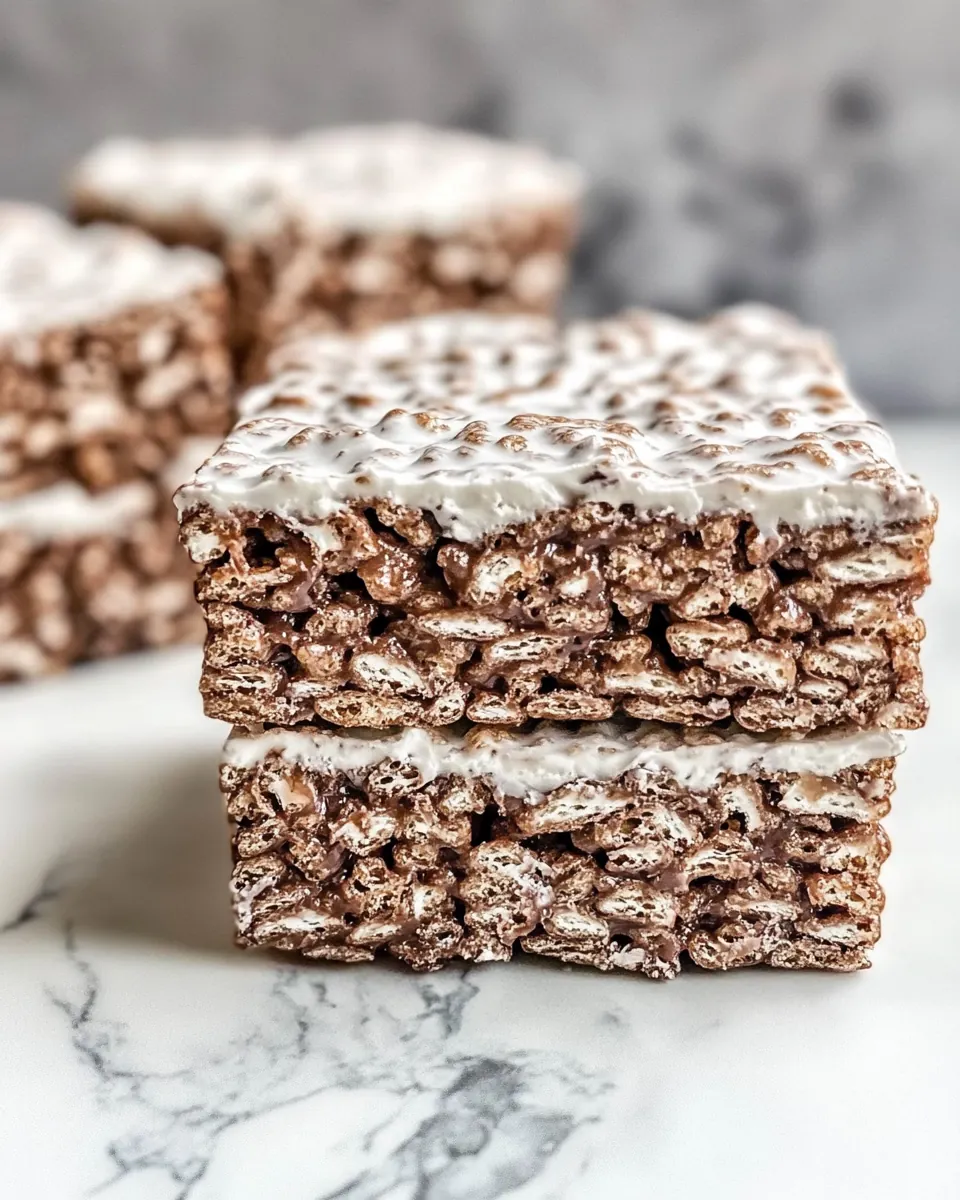
These ingredients are all about balance and simplicity. The key players are the crunchy cereal for texture, the sticky marshmallows for chew and binding, and the butter to add richness and help the marshmallows melt smoothly. A touch of vanilla extract brightens the chocolate notes and rounds the flavor. Together, they create a treat that is crispy, tender, and memorable.
- 9 cups (398 g) Cocoa Pebbles (or Cocoa Rice Krispies): Provides crunchy chocolate-flavored cereal as the base and bulk of the treats, contributing both texture and sweet cocoa taste; holds structure when combined with melted marshmallows and butter. Works well substituted with similar chocolate puffed rice cereals to maintain the intended chocolate profile and crispiness.
- 15 ounces (426 g) mini marshmallows: Adds sticky sweetness and chewiness that binds the cereal together when melted; mini size melts quickly and creates the gooey matrix that sets into bars as it cools. Quantity ensures enough marshmallow to coat nine cups of cereal evenly for cohesive, sliceable treats.
- 8 tablespoons (113 g) unsalted butter: Supplies fat and richness while helping melt and smooth the marshmallows for an easier, glossier coating; unsalted butter keeps the flavor balanced and prevents excessive saltiness. Melting the butter first and stirring it into marshmallows improves texture and helps the mixture release from the pan cleanly.
- 1 teaspoon (5 ml) vanilla extract: Contributes a subtle aromatic warmth and depth that enhances the chocolate and marshmallow sweetness; vanilla rounds flavors without overpowering. A small amount intensifies overall flavor harmony and balances the saccharine elements.
Recipe Steps for Chocolate Rice Krispie Treats
These steps are straightforward and comforting, and I like to narrate them as I work so I do not hurry the crucial moments. Pay attention to the sensory cues, and keep tools handy so you can move smoothly from melting to pressing. The final set time is key for clean slices, so plan for that quiet wait with a cup of tea.
- Line a 9×13-inch pan with foil and spray with nonstick cooking spray.: The first thing I notice is the weight and crispness of the foil as I press it into the pan, making a sling that helps lift the whole slab out later. Lining the pan prevents sticking and makes slicing simple, and the nonstick spray gives a final insurance layer so edges peel away easily. A common mistake is skipping the spray, which can cause edges to adhere; if that happens, run a thin knife around the pan after cooling to free the edges.
- Melt the butter in a large pot over medium low heat. Add the marshmallows and stir until melted. Remove from heat and stir in vanilla extract.: You will hear a gentle sizzle as the butter melts, and a glossy sheen will form when the marshmallows begin to give up their shape. Stir patiently with a heatproof spatula so the marshmallows melt evenly without scorching, and watch for a smooth, elastic mass. As you remove from heat, you can smell a warm sweet note, and adding the vanilla extract off heat preserves its fragrance. Avoid high heat, which can make the marshmallows grainy; if you see any browning, lower the heat immediately and stir continuously.
- Add cereal and stir to coat with the marshmallow mixture. Pour into pan. Press firmly to compact. Tip: spray wax paper with nonstick cooking spray so you can press without it sticking to your hands.: spray wax paper with nonstick cooking spray so you can press without it sticking to your hands. : When you add the cereal , it sounds like a soft cascade as the pieces are folded into the marshmallow, and you should see every flake become glossy. Use a sturdy spoon or spatula and fold in sections to avoid crushing the cereal. Pouring into the lined pan will show a textured surface that becomes smoother as you press. Press firmly and evenly to remove air pockets, which helps the bars hold their shape and slice neatly. If you press too lightly, the bars may crumble; if you press too hard, they might become overly dense and lose their light crispness.
- Let set until firm then slice into bars. Store in an airtight container for up to 3 days.: As the slab cools, you will notice it change from glossy and pliable to matte and slightly springy; that is the sign it is setting. Letting it come to room temperature ensures clean edges when sliced. Use a sharp knife, wiping it clean between cuts for tidy bars. Store in an airtight container to preserve crispness, and avoid stacking while warm, or they may deform. A typical pitfall is slicing too early, which creates ragged edges and sticky hands; patience yields the best presentation.
Make It Your Own
I love personalizing snacks in small, thoughtful ways that elevate the familiar. These ideas will help you tweak texture, flavor, and presentation while keeping the recipe’s simplicity intact. Each tip is practical and easy to adopt the next time you make Chocolate Rice Krispie Treats.
- Toast the cereal briefly: Lightly toasting the cereal for a minute in a dry pan deepens the chocolate aroma, just watch closely so it does not burn.
- Warm your pan: A slightly warm, not hot, pan helps the marshmallow mixture spread more easily when poured, making pressing quicker and smoother.
- Use chilled knife for slicing: Running a sharp knife under warm water and drying it between cuts keeps edges clean and prevents sticking.
- Press with parchment: Place a sheet of sprayed parchment over the top when pressing to avoid sticky hands and ensure an even surface.
- Cut into creative shapes: Use cookie cutters after chilling to make these treats festive, and store them with parchment layers to keep shapes intact.
Serve This Chocolate Rice Krispie Treats With
These bars are naturally portable, and I enjoy thinking through occasions and pairings before I bake. Below are serving ideas, pairing suggestions, and storage tips that help these treats shine whether you are packing lunchboxes or setting a dessert table.
- Snack packs: Wrap individual bars in parchment and tie with twine for an easy grab bag for school or work.
- Dessert platter: Arrange squares with a few fresh berries and a dusting of cocoa powder for a simple party plate.
- Kids parties: Stack smaller cut shapes on a colorful platter, they are easy for little hands and travel well.
- Storage: Keep bars in an airtight container at room temperature for up to three days, placing parchment between layers to prevent sticking.
- Seasonal twist: For holiday gatherings, cut into festive shapes and serve alongside other no bake treats for a quick dessert spread.
FAQ
Conclusion
Chocolate Rice Krispie Treats stand out because they combine crunchy cereal and gooey marshmallow into a simple, fast, and nostalgic dessert. Give this recipe a try the next time you want a no bake treat that feeds a crowd and travels well. I hope you enjoy the familiar textures and flavors, and that these bars become one of those go to recipes you reach for whenever you need a quick, comforting sweet.
Chocolate Rice Krispie Treats
Equipment
- 9×13-inch pan
- Foil
- Large Pot
- Spatula
Ingredients
- 9 cups (398 g) Cocoa Pebbles (or Cocoa Rice Krispies) Provides crunchy chocolate-flavored cereal as the base and bulk of the treats, contributing both texture and sweet cocoa taste; holds structure when combined with melted marshmallows and butter. Works well substituted with similar chocolate puffed rice cereals to maintain the intended chocolate profile and crispiness.
- 15 ounces (426 g) mini marshmallows Adds sticky sweetness and chewiness that binds the cereal together when melted; mini size melts quickly and creates the gooey matrix that sets into bars as it cools. Quantity ensures enough marshmallow to coat nine cups of cereal evenly for cohesive, sliceable treats.
- 8 tablespoons (113 g) unsalted butter Supplies fat and richness while helping melt and smooth the marshmallows for an easier, glossier coating; unsalted butter keeps the flavor balanced and prevents excessive saltiness. Melting the butter first and stirring it into marshmallows improves texture and helps the mixture release from the pan cleanly.
- 1 teaspoon (5 ml) vanilla extract Contributes a subtle aromatic warmth and depth that enhances the chocolate and marshmallow sweetness; vanilla rounds flavors without overpowering. A small amount intensifies overall flavor harmony and balances the saccharine elements.
Instructions
- Line a 9×13-inch pan with foil and spray with nonstick cooking spray.: The first thing I notice is the weight and crispness of the foil as I press it into the pan, making a sling that helps lift the whole slab out later. Lining the pan prevents sticking and makes slicing simple, and the nonstick spray gives a final insurance layer so edges peel away easily. A common mistake is skipping the spray, which can cause edges to adhere; if that happens, run a thin knife around the pan after cooling to free the edges.
- Melt the butter in a large pot over medium low heat. Add the marshmallows and stir until melted. Remove from heat and stir in vanilla extract.: You will hear a gentle sizzle as the butter melts, and a glossy sheen will form when the marshmallows begin to give up their shape. Stir patiently with a heatproof spatula so the marshmallows melt evenly without scorching, and watch for a smooth, elastic mass. As you remove from heat, you can smell a warm sweet note, and adding the vanilla extract off heat preserves its fragrance. Avoid high heat, which can make the marshmallows grainy; if you see any browning, lower the heat immediately and stir continuously.
- Add cereal and stir to coat with the marshmallow mixture. Pour into pan. Press firmly to compact. Tip: spray wax paper with nonstick cooking spray so you can press without it sticking to your hands.: spray wax paper with nonstick cooking spray so you can press without it sticking to your hands. : When you add the cereal , it sounds like a soft cascade as the pieces are folded into the marshmallow, and you should see every flake become glossy. Use a sturdy spoon or spatula and fold in sections to avoid crushing the cereal. Pouring into the lined pan will show a textured surface that becomes smoother as you press. Press firmly and evenly to remove air pockets, which helps the bars hold their shape and slice neatly. If you press too lightly, the bars may crumble; if you press too hard, they might become overly dense and lose their light crispness.
- Let set until firm then slice into bars. Store in an airtight container for up to 3 days.: As the slab cools, you will notice it change from glossy and pliable to matte and slightly springy; that is the sign it is setting. Letting it come to room temperature ensures clean edges when sliced. Use a sharp knife, wiping it clean between cuts for tidy bars. Store in an airtight container to preserve crispness, and avoid stacking while warm, or they may deform. A typical pitfall is slicing too early, which creates ragged edges and sticky hands; patience yields the best presentation.
Notes
- Toast the cereal briefly: Lightly toasting the cereal for a minute in a dry pan deepens the chocolate aroma, just watch closely so it does not burn.
- Warm your pan: A slightly warm, not hot, pan helps the marshmallow mixture spread more easily when poured, making pressing quicker and smoother.
- Use chilled knife for slicing: Running a sharp knife under warm water and drying it between cuts keeps edges clean and prevents sticking.
- Press with parchment: Place a sheet of sprayed parchment over the top when pressing to avoid sticky hands and ensure an even surface.
- Cut into creative shapes: Use cookie cutters after chilling to make these treats festive, and store them with parchment layers to keep shapes intact.