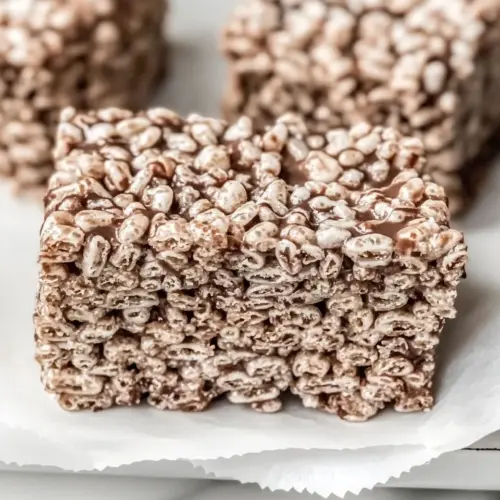
Chocolate Rice Krispie Treats
Chocolate Rice Krispie Treats are crispy, chewy, and irresistibly chocolatey, blending buttery marshmallow goodness with cocoa cereal for an easy sweet snack. This quick no bake treat is perfect for parties, school lunches, or last minute desserts, delivering a nostalgic crunch and gooey center. Make a batch to please a crowd and enjoy an effortless, crowd pleasing dessert that's ready in minutes.
Equipment
- 9×13-inch pan
- Foil
- Large Pot
- Spatula
Ingredients
- 9 cups (398 g) Cocoa Pebbles (or Cocoa Rice Krispies) Provides crunchy chocolate-flavored cereal as the base and bulk of the treats, contributing both texture and sweet cocoa taste; holds structure when combined with melted marshmallows and butter. Works well substituted with similar chocolate puffed rice cereals to maintain the intended chocolate profile and crispiness.
- 15 ounces (426 g) mini marshmallows Adds sticky sweetness and chewiness that binds the cereal together when melted; mini size melts quickly and creates the gooey matrix that sets into bars as it cools. Quantity ensures enough marshmallow to coat nine cups of cereal evenly for cohesive, sliceable treats.
- 8 tablespoons (113 g) unsalted butter Supplies fat and richness while helping melt and smooth the marshmallows for an easier, glossier coating; unsalted butter keeps the flavor balanced and prevents excessive saltiness. Melting the butter first and stirring it into marshmallows improves texture and helps the mixture release from the pan cleanly.
- 1 teaspoon (5 ml) vanilla extract Contributes a subtle aromatic warmth and depth that enhances the chocolate and marshmallow sweetness; vanilla rounds flavors without overpowering. A small amount intensifies overall flavor harmony and balances the saccharine elements.
Instructions
- Line a 9×13-inch pan with foil and spray with nonstick cooking spray.: The first thing I notice is the weight and crispness of the foil as I press it into the pan, making a sling that helps lift the whole slab out later. Lining the pan prevents sticking and makes slicing simple, and the nonstick spray gives a final insurance layer so edges peel away easily. A common mistake is skipping the spray, which can cause edges to adhere; if that happens, run a thin knife around the pan after cooling to free the edges.
- Melt the butter in a large pot over medium low heat. Add the marshmallows and stir until melted. Remove from heat and stir in vanilla extract.: You will hear a gentle sizzle as the butter melts, and a glossy sheen will form when the marshmallows begin to give up their shape. Stir patiently with a heatproof spatula so the marshmallows melt evenly without scorching, and watch for a smooth, elastic mass. As you remove from heat, you can smell a warm sweet note, and adding the vanilla extract off heat preserves its fragrance. Avoid high heat, which can make the marshmallows grainy; if you see any browning, lower the heat immediately and stir continuously.
- Add cereal and stir to coat with the marshmallow mixture. Pour into pan. Press firmly to compact. Tip: spray wax paper with nonstick cooking spray so you can press without it sticking to your hands.: spray wax paper with nonstick cooking spray so you can press without it sticking to your hands. : When you add the cereal , it sounds like a soft cascade as the pieces are folded into the marshmallow, and you should see every flake become glossy. Use a sturdy spoon or spatula and fold in sections to avoid crushing the cereal. Pouring into the lined pan will show a textured surface that becomes smoother as you press. Press firmly and evenly to remove air pockets, which helps the bars hold their shape and slice neatly. If you press too lightly, the bars may crumble; if you press too hard, they might become overly dense and lose their light crispness.
- Let set until firm then slice into bars. Store in an airtight container for up to 3 days.: As the slab cools, you will notice it change from glossy and pliable to matte and slightly springy; that is the sign it is setting. Letting it come to room temperature ensures clean edges when sliced. Use a sharp knife, wiping it clean between cuts for tidy bars. Store in an airtight container to preserve crispness, and avoid stacking while warm, or they may deform. A typical pitfall is slicing too early, which creates ragged edges and sticky hands; patience yields the best presentation.
Notes
- Toast the cereal briefly: Lightly toasting the cereal for a minute in a dry pan deepens the chocolate aroma, just watch closely so it does not burn.
- Warm your pan: A slightly warm, not hot, pan helps the marshmallow mixture spread more easily when poured, making pressing quicker and smoother.
- Use chilled knife for slicing: Running a sharp knife under warm water and drying it between cuts keeps edges clean and prevents sticking.
- Press with parchment: Place a sheet of sprayed parchment over the top when pressing to avoid sticky hands and ensure an even surface.
- Cut into creative shapes: Use cookie cutters after chilling to make these treats festive, and store them with parchment layers to keep shapes intact.