Chocolate Chip Hazelnut Cookie
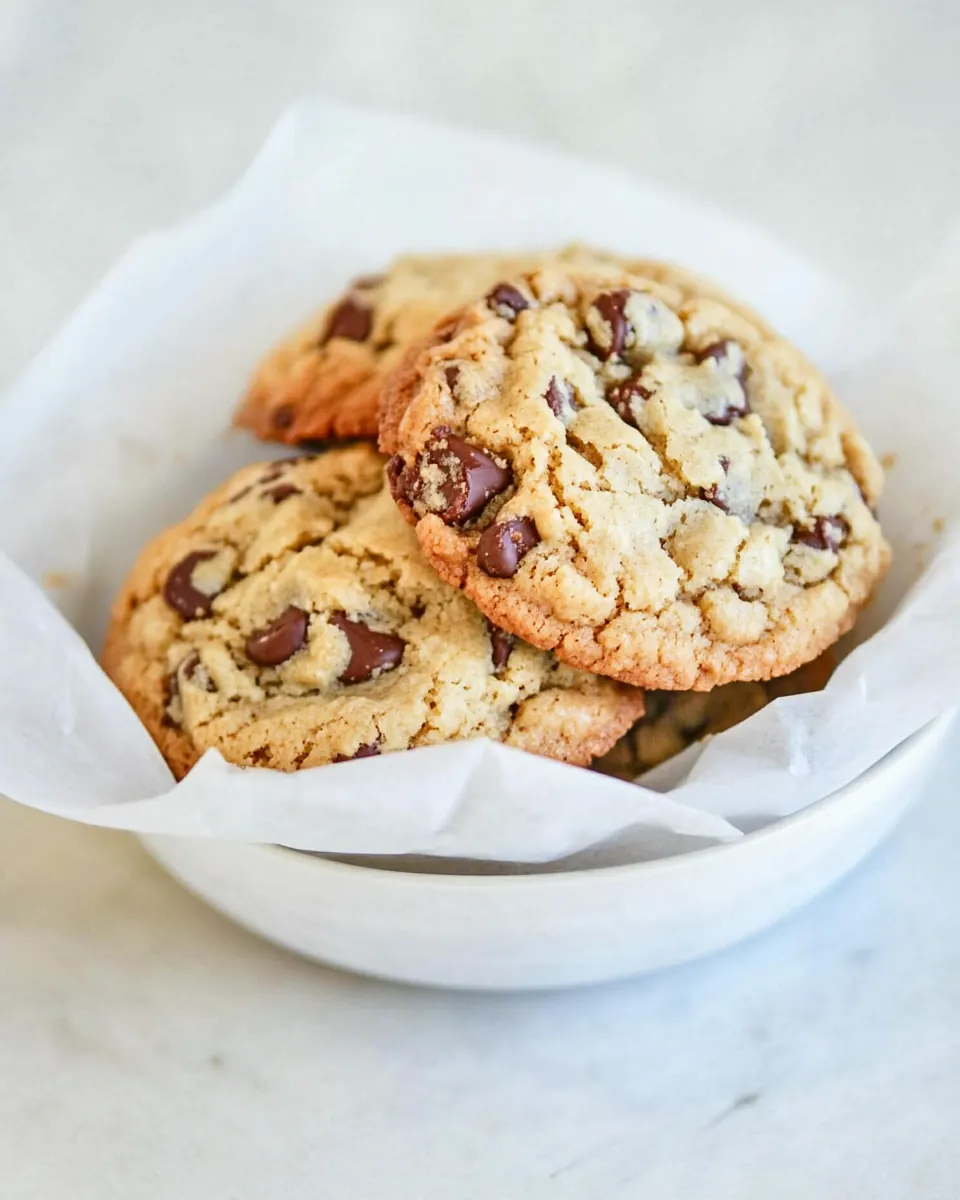
Chocolate Chip Hazelnut Cookie came into my life on an ordinary rainy afternoon when I wanted a treat that felt like warmth and crunch all at once. I remember pulling a tray from the oven and watching the edges set into a gentle, golden rim while dark chocolate pockets glistened, and a subtle nutty scent rose from the pan. That first bite was a lesson in balance, the way toasted hazelnut notes played off the deep, bittersweet chocolate, and I was hooked.
Over the years I’ve tweaked the dough to lean into that hazelnut character, folding in nut flour for both texture and flavor. I love how these cookies hold a slightly crisp exterior with a tender, almost chewy center, and how the crumbs sing when you press one between your fingers. Friends who taste them always ask for the recipe, and I always tell the same thing, this is the cookie you make when you want something reliably comforting yet a little grown up. Even on hectic days these cookies feel like an intentional pause, like a small ritual worth the few minutes of focus they demand.
Recipe Snapshot
30 mins
15 mins
15 mins
Easy
150 kcal
American
Gluten-Free, Low FODMAP
Desserts
Stand mixer with paddle attachment, Mixing bowls, Baking sheets, Parchment paper, Spatula, Cooling rack
Why This Chocolate Chip Hazelnut Cookie Is a Winner
1. Texture that truly sings
I adore how the combination of all purpose flour and hazelnut flour creates a cookie with delicate structure, a crisp edge and a tender interior. The nut flour provides a slightly sandy, melt in your mouth crumb that elevates a classic cookie into something more layered.
2. Flavor depth from two kinds of sugar
I often point out how using both sugar and brown sugar adds complexity. The brown sugar keeps the center soft and contributes caramel like undertones, while the white sugar helps the edges caramelize for a pleasing crunch.
3. Chocolate and hazelnut harmony
When you mix coarsely chopped chocolate with the nutty flour, the result is pockets of molten chocolate that contrast the toasted, slightly savory notes of the nuts. I like the interplay of texture and temperature, it makes each bite interesting.
4. Flexible and forgiving dough
This dough welcomes refrigeration, which means you can slow the process and develop flavor. I love recipes that let you make dough ahead, and these cookies reward patience with a more concentrated taste and sturdier dough that is easier to portion.
5. Approachable technique
Even though the results feel elevated, the method relies on straightforward baking fundamentals. A simple creaming of butter and sugars, measured mixing of dry ingredients, and careful baking produce reliably great cookies. I appreciate recipes that teach technique without fuss, and this one does exactly that.
What Goes Into Chocolate Chip Hazelnut Cookie
The philosophy here is about harmony and balance. Each ingredient pulls its weight, from the foundation of all purpose flour that gives structure, to the hazelnut flour that brings aroma and tenderness. The twin sugars create both chew and caramelized edges, while butter lends richness and mouthfeel. Chocolate provides those decadent molten pockets that make these cookies irresistible. Together they form a cookie that is texturally complex yet classically satisfying.
- 3 1/2 cups all-purpose flour (476 grams): Provide structure and bulk to the dough, creating the cookie’s chew and overall crumb; sift or whisk to prevent lumps and ensure even hydration. Combine with the leavening agents to balance tenderness and firmness, and measure accurately by weight for consistent results.
- 1 1/4 teaspoons fine sea salt: Enhance and elevate the overall flavor by balancing sweetness and rounding other savory notes; dissolve into the dough for even distribution. Use fine sea salt to avoid grainy pockets and adjust slightly to taste if using salted butter.
- 3/4 teaspoon baking soda: Lightly aerate the dough and contribute to rise and texture, giving a subtle lift without altering flavor; distribute evenly with the dry ingredients. Use precise measurement to avoid over-leavening, which can cause excessive spread.
- 1/2 teaspoon baking powder: Provide a small additional lift and help lighten the crumb when combined with baking soda, ensuring a tender interior; mix fully with the dry ingredients. Use sparingly, as excess baking powder can create a metallic aftertaste.
- 8 ounces unsalted butter, at room temperature (2 sticks): Cream with sugars to incorporate air and create a tender, flaky texture while providing richness and flavor; keep at room temperature for proper creaming. Contribute to mouthfeel and help carry flavor compounds from vanilla and chocolate throughout the dough.
- 1 cup sugar (200 grams): Sweeten and contribute to the cookie’s crisp edges when creamed with butter, while also aiding in spreading; use granulated sugar for texture contrast. Dissolve somewhat during mixing to help create a balanced sweetness and structure.
- 1 cup packed brown sugar (200 grams): Add moisture, caramel-like flavor, and chewiness while helping retain softness over time; pack firmly when measuring for accurate sugar content. Pair with granulated sugar to produce a deeper flavor profile and ideal texture.
- 1 1/2 teaspoons pure vanilla extract: Impart aromatic sweetness and deepen overall flavor complexity, supporting chocolate and nut elements; fold in with the wet ingredients. Use pure vanilla extract for best flavor clarity and avoid imitation extracts for a cleaner taste.
- 2 large eggs, at room temperature: Bind ingredients together, add moisture and richness, and assist with leavening when creamed with butter and sugar; use at room temperature for better emulsification. Incorporate one at a time to ensure uniform mixing and avoid overworking the dough.
- 12 ounces semisweet or bittersweet chocolate, coarsely chopped (or 2 cups chocolate chips): Introduce intense chocolate flavor, texture contrast, and pockets of melted richness; chop coarsely to create varied melting and bite. Choose quality semisweet or bittersweet chocolate for depth, or substitute chips for convenience while maintaining proportion.
- 1 1/2 cups hazelnut or almond flour (150 grams): Contribute nutty flavor, tender crumb, and subtle texture while enhancing richness without large nut pieces; fold in gently with the dry ingredients. Use hazelnut or almond flour to amplify nut character and maintain gluten balance for a tender cookie.
The Method for Chocolate Chip Hazelnut Cookie
These instructions are a friendly, step by step guide that walks you through making the dough, building flavor through chilling, and getting the oven timing just right. Take your time with mixing and chilling, and you’ll be rewarded with consistent cookies that have crisp edges and tender centers.
- In a medium bowl, whisk the flour, salt, baking soda and baking powder together.: The aroma here is faintly toasted and flour forward, and whisking blends the all purpose flour and leaveners so the lift is even throughout the dough. You should notice a uniform pale mixture with no streaks of baking powder or soda, which is important because clumps of leavener will cause isolated bubbles in the cookies. If you skip thorough whisking you risk uneven rise, so take a moment to stir until homogeneous; a common mistake is to add the dry mix without sifting, which can yield pockets of flavorless dry flour in finished cookies.
- In the bowl of the stand mixer fitted with a paddle attachment, beat the butter on medium speed for 1 minute, until smooth. Add the sugar and brown sugar and beat for 2 minutes, until well blended. Beat in the vanilla.: At this stage the kitchen fills with a rich, sweet scent as the butter aerates and the sugars begin to dissolve. The texture should change from glossy butter to a lighter, creamier mixture, indicating air incorporation that will contribute to a tender crumb. You will see tiny air bubbles and the color will pale slightly. Avoid overbeating, which can collapse the structure and lead to flat cookies; if you notice the mixture getting too soft, chill briefly before proceeding.
- Add in the eggs, one at a time, beating for a minute after each egg goes in. Reduce the speed to low and add in the flour mixture in 4-5 additions, mixing only until each addition is just incorporated (about 5 seconds for each addition – don't over-mix!): When the eggs are added the batter becomes more fluid and glossy, and beating after each addition ensures the emulsion stays stable, preventing separation. Adding the dry mix in small batches prevents gluten from developing excessively, which keeps the cookies tender. You should stop mixing as soon as you see no streaks of flour; little dry specs are okay because continued mixing will toughen the dough. A typical error is to rush and dump all the flour in at once, producing a dense, rubbery cookie.
- Still on low speed, mix in the chocolate chips and the hazelnut (or almond) flour. Refrigerate dough for 2 hours or up to 3 days. If you are planning to freeze a portion – you can scoop out 1 1/2-inch rounds of dough to freeze.: As you fold in the chocolate and hazelnut flour the dough takes on a rustic, studded appearance, and the nut flour subtly changes texture to a slightly grainier, fragrant mix. Chilling firms the fats, allowing flavors to meld and preventing over spread during baking, which leads to thicker, chewier centers. If you choose to freeze scoops now, make sure they are well separated on a tray so they do not fuse. A frequent slip up is skipping the chill, which often results in overly thin cookies that brown too quickly at the edges.
- Preheat oven to 350 F with rack centered. Line two baking sheets with parchment paper. Scoop out 1 1/2" rounds of dough onto baking sheet, about 2-inches apart.: Preheating brings the oven to an even temperature so the first few minutes of baking set structure properly, and centering the rack ensures even heat circulation. The dough scoops should glisten slightly and hold their shape; you will hear a soft thump when placing the tray in the oven. Proper spacing prevents cookies from joining as they spread, and parchment aids in even browning and easy transfer. One mistake is overcrowding the sheet, which leads to misshapen, unevenly baked cookies.
- Bake the cookies one sheet at a time for 8 minutes, and then, using a spatula, gently press each mound down just a little; rotate the baking sheet when returning to oven. Bake for another 7 minutes, or so, until the cookies are pale brown. They'll still be slightly soft in the center, but that's fine – they'll firm up as they cool. Transfer to rack to cool. Repeat with remainder of dough, always using a cool baking sheet.: During the first bake the edges set and the centers remain soft, the surface will look matte and slightly puffed. Pressing the mounds gently encourages an even thickness so the cookies finish with consistent chew. After the second bake you want to see pale brown edges and slightly soft centers, which indicates they are not overbaked; they will continue to cook on the hot sheet once removed, leading to the perfect tender middle. Using a cool baking sheet between batches prevents premature melting of the next tray, which can cause spreading and thin cookies. A common error is leaving them in too long until deeply brown, which sacrifices the tender center for crispness.
Make It Your Own
These small adjustments and ideas help you personalize the dough while keeping the recipe reliable. Below are practical tips you can use to modify texture, flavor, and storage without changing the fundamental method.
- Swap nut flours carefully, if you use almond flour instead of hazelnut flour expect a milder, sweeter nut note and slightly different crumb; measure by weight and not volume to maintain balance.
- Freeze dough for quick baking later, portion into 1 1/2 inch scoops and freeze solid on a tray, then transfer to a freezer bag so you can bake fresh cookies from frozen as needed.
- Control chewiness with bake time, shorter bake yields a softer center while longer bake makes them crisper, so test one cookie to dial in your oven behavior before committing all sheets.
- Mix chocolate sizes, using both chopped chocolate and chips gives you nice melty pools and satisfying chunks, which adds contrast in every bite.
- Store properly, cooled cookies keep best in an airtight container at room temperature for up to four days, or freeze up to three months for longer keeping.
What Complements This Chocolate Chip Hazelnut Cookie
These cookies pair well with simple serving ideas and suit multiple occasions, from casual snack plates to festive gatherings. Below are thoughtful ways to present and store them so you get the most enjoyment.
- Classic coffee or tea pairing, serve a few warmed cookies alongside a cup of black coffee or a robust tea to balance the sweetness and amplify the roasted hazelnut notes.
- Cookie platter for gatherings, arrange these cookies with a few simple biscuits for texture contrast, and label them so guests know there is hazelnut inside for those with allergies.
- Gift box idea, stack cooled cookies between sheets of parchment in a decorative tin or box, adding a ribbon for a homemade gift perfect for holidays or hostess presents.
- Storage instructions, keep baked cookies in an airtight container at room temperature for up to four days, or freeze baked cookies for up to two months, thawing gently at room temperature before serving.
- Seasonal serving, these cookies are great year round and work especially well during cooler months when nutty flavors feel cozy; include them on dessert trays at casual dinners or festive holiday spreads.
- Presentation tip, warm briefly in a low oven for a few minutes before serving to revive the chocolate pools, but avoid over warming which can make them greasy.
FAQ
Conclusion
What makes this Chocolate Chip Hazelnut Cookie special is the combination of nutty hazelnut flour and rich chocolate that creates a complex, comforting cookie with crisp edges and a tender center. I encourage you to give these a try because the method is straightforward and the results reward the small extra step of chilling the dough. Bake a batch for a cozy afternoon, a gift tin, or to elevate a simple coffee break; you might find it becomes your go to cookie for occasions big and small.
Chocolate Chip Hazelnut Cookie
Equipment
- Stand mixer with paddle attachment
- Mixing Bowls
- Baking Sheets
- Parchment Paper
- Spatula
- Cooling rack
Ingredients
- 3 1/2 cups all-purpose flour (476 grams) Provide structure and bulk to the dough, creating the cookie’s chew and overall crumb; sift or whisk to prevent lumps and ensure even hydration. Combine with the leavening agents to balance tenderness and firmness, and measure accurately by weight for consistent results.
- 1 1/4 teaspoons fine sea salt Enhance and elevate the overall flavor by balancing sweetness and rounding other savory notes; dissolve into the dough for even distribution. Use fine sea salt to avoid grainy pockets and adjust slightly to taste if using salted butter.
- 3/4 teaspoon baking soda Lightly aerate the dough and contribute to rise and texture, giving a subtle lift without altering flavor; distribute evenly with the dry ingredients. Use precise measurement to avoid over-leavening, which can cause excessive spread.
- 1/2 teaspoon baking powder Provide a small additional lift and help lighten the crumb when combined with baking soda, ensuring a tender interior; mix fully with the dry ingredients. Use sparingly, as excess baking powder can create a metallic aftertaste.
- 8 ounces unsalted butter, at room temperature (2 sticks) Cream with sugars to incorporate air and create a tender, flaky texture while providing richness and flavor; keep at room temperature for proper creaming. Contribute to mouthfeel and help carry flavor compounds from vanilla and chocolate throughout the dough.
- 1 cup sugar (200 grams) Sweeten and contribute to the cookie’s crisp edges when creamed with butter, while also aiding in spreading; use granulated sugar for texture contrast. Dissolve somewhat during mixing to help create a balanced sweetness and structure.
- 1 cup packed brown sugar (200 grams) Add moisture, caramel-like flavor, and chewiness while helping retain softness over time; pack firmly when measuring for accurate sugar content. Pair with granulated sugar to produce a deeper flavor profile and ideal texture.
- 1 1/2 teaspoons pure vanilla extract Impart aromatic sweetness and deepen overall flavor complexity, supporting chocolate and nut elements; fold in with the wet ingredients. Use pure vanilla extract for best flavor clarity and avoid imitation extracts for a cleaner taste.
- 2 large eggs, at room temperature Bind ingredients together, add moisture and richness, and assist with leavening when creamed with butter and sugar; use at room temperature for better emulsification. Incorporate one at a time to ensure uniform mixing and avoid overworking the dough.
- 12 ounces semisweet or bittersweet chocolate, coarsely chopped (or 2 cups chocolate chips) Introduce intense chocolate flavor, texture contrast, and pockets of melted richness; chop coarsely to create varied melting and bite. Choose quality semisweet or bittersweet chocolate for depth, or substitute chips for convenience while maintaining proportion.
- 1 1/2 cups hazelnut or almond flour (150 grams) Contribute nutty flavor, tender crumb, and subtle texture while enhancing richness without large nut pieces; fold in gently with the dry ingredients. Use hazelnut or almond flour to amplify nut character and maintain gluten balance for a tender cookie.
Instructions
- In a medium bowl, whisk the flour, salt, baking soda and baking powder together.: The aroma here is faintly toasted and flour forward, and whisking blends the all purpose flour and leaveners so the lift is even throughout the dough. You should notice a uniform pale mixture with no streaks of baking powder or soda, which is important because clumps of leavener will cause isolated bubbles in the cookies. If you skip thorough whisking you risk uneven rise, so take a moment to stir until homogeneous; a common mistake is to add the dry mix without sifting, which can yield pockets of flavorless dry flour in finished cookies.
- In the bowl of the stand mixer fitted with a paddle attachment, beat the butter on medium speed for 1 minute, until smooth. Add the sugar and brown sugar and beat for 2 minutes, until well blended. Beat in the vanilla.: At this stage the kitchen fills with a rich, sweet scent as the butter aerates and the sugars begin to dissolve. The texture should change from glossy butter to a lighter, creamier mixture, indicating air incorporation that will contribute to a tender crumb. You will see tiny air bubbles and the color will pale slightly. Avoid overbeating, which can collapse the structure and lead to flat cookies; if you notice the mixture getting too soft, chill briefly before proceeding.
- Add in the eggs, one at a time, beating for a minute after each egg goes in. Reduce the speed to low and add in the flour mixture in 4-5 additions, mixing only until each addition is just incorporated (about 5 seconds for each addition - don't over-mix!): When the eggs are added the batter becomes more fluid and glossy, and beating after each addition ensures the emulsion stays stable, preventing separation. Adding the dry mix in small batches prevents gluten from developing excessively, which keeps the cookies tender. You should stop mixing as soon as you see no streaks of flour; little dry specs are okay because continued mixing will toughen the dough. A typical error is to rush and dump all the flour in at once, producing a dense, rubbery cookie.
- Still on low speed, mix in the chocolate chips and the hazelnut (or almond) flour. Refrigerate dough for 2 hours or up to 3 days. If you are planning to freeze a portion - you can scoop out 1 1/2-inch rounds of dough to freeze.: As you fold in the chocolate and hazelnut flour the dough takes on a rustic, studded appearance, and the nut flour subtly changes texture to a slightly grainier, fragrant mix. Chilling firms the fats, allowing flavors to meld and preventing over spread during baking, which leads to thicker, chewier centers. If you choose to freeze scoops now, make sure they are well separated on a tray so they do not fuse. A frequent slip up is skipping the chill, which often results in overly thin cookies that brown too quickly at the edges.
- Preheat oven to 350 F with rack centered. Line two baking sheets with parchment paper. Scoop out 1 1/2" rounds of dough onto baking sheet, about 2-inches apart.: Preheating brings the oven to an even temperature so the first few minutes of baking set structure properly, and centering the rack ensures even heat circulation. The dough scoops should glisten slightly and hold their shape; you will hear a soft thump when placing the tray in the oven. Proper spacing prevents cookies from joining as they spread, and parchment aids in even browning and easy transfer. One mistake is overcrowding the sheet, which leads to misshapen, unevenly baked cookies.
- Bake the cookies one sheet at a time for 8 minutes, and then, using a spatula, gently press each mound down just a little; rotate the baking sheet when returning to oven. Bake for another 7 minutes, or so, until the cookies are pale brown. They'll still be slightly soft in the center, but that's fine - they'll firm up as they cool. Transfer to rack to cool. Repeat with remainder of dough, always using a cool baking sheet.: During the first bake the edges set and the centers remain soft, the surface will look matte and slightly puffed. Pressing the mounds gently encourages an even thickness so the cookies finish with consistent chew. After the second bake you want to see pale brown edges and slightly soft centers, which indicates they are not overbaked; they will continue to cook on the hot sheet once removed, leading to the perfect tender middle. Using a cool baking sheet between batches prevents premature melting of the next tray, which can cause spreading and thin cookies. A common error is leaving them in too long until deeply brown, which sacrifices the tender center for crispness.
Notes
- Swap nut flours carefully, if you use almond flour instead of hazelnut flour expect a milder, sweeter nut note and slightly different crumb; measure by weight and not volume to maintain balance.
- Freeze dough for quick baking later, portion into 1 1/2 inch scoops and freeze solid on a tray, then transfer to a freezer bag so you can bake fresh cookies from frozen as needed.
- Control chewiness with bake time, shorter bake yields a softer center while longer bake makes them crisper, so test one cookie to dial in your oven behavior before committing all sheets.
- Mix chocolate sizes, using both chopped chocolate and chips gives you nice melty pools and satisfying chunks, which adds contrast in every bite.
- Store properly, cooled cookies keep best in an airtight container at room temperature for up to four days, or freeze up to three months for longer keeping.