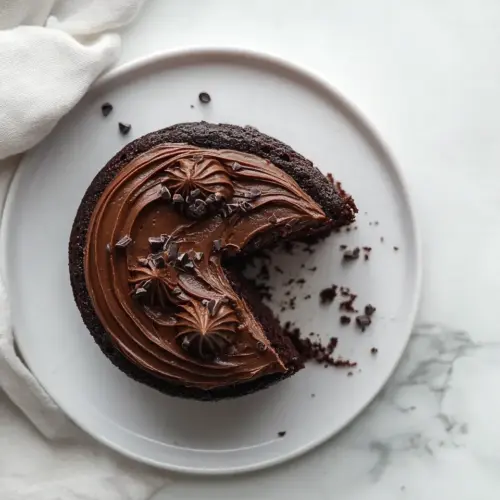
Chocolate Cake for Two
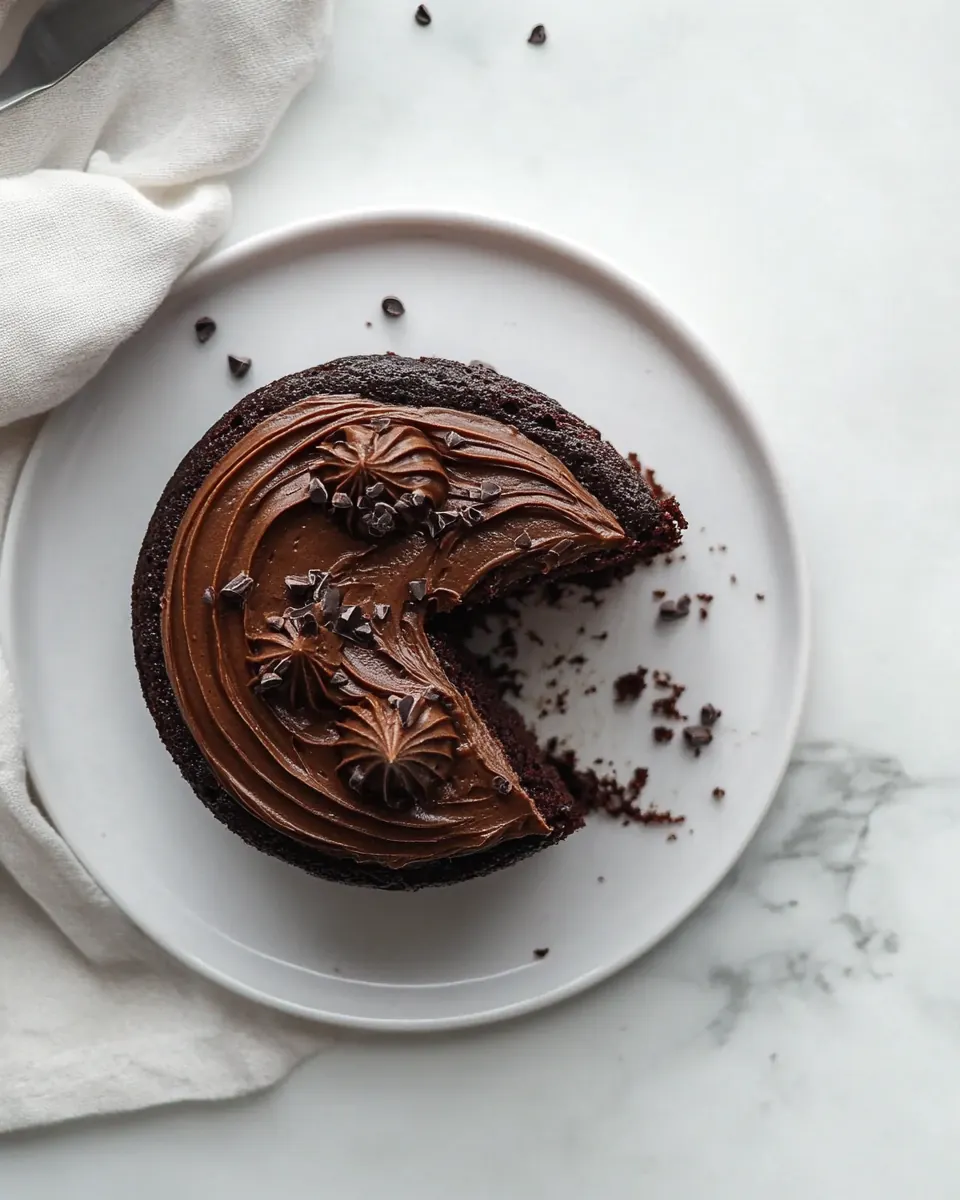
Chocolate Cake for Two is the little indulgence I reach for when I want something rich, intimate, and undeniably chocolatey.
I remember the first time I made this cake for a close friend on a rainy evening, the apartment smelling like warm cocoa as we talked and laughed. The batter was thin and glossy, and when the pans went into the oven the whole kitchen went quiet except for the soft hum of the oven. When I lifted the lid, the edges had pulled away slightly and the tops were matte and slightly springy to the touch, a reliable hint that they were ready. That night we sliced into tender, moist layers and I could tell from the way the crumbs clung to the fork that this was a recipe I would return to again and again.
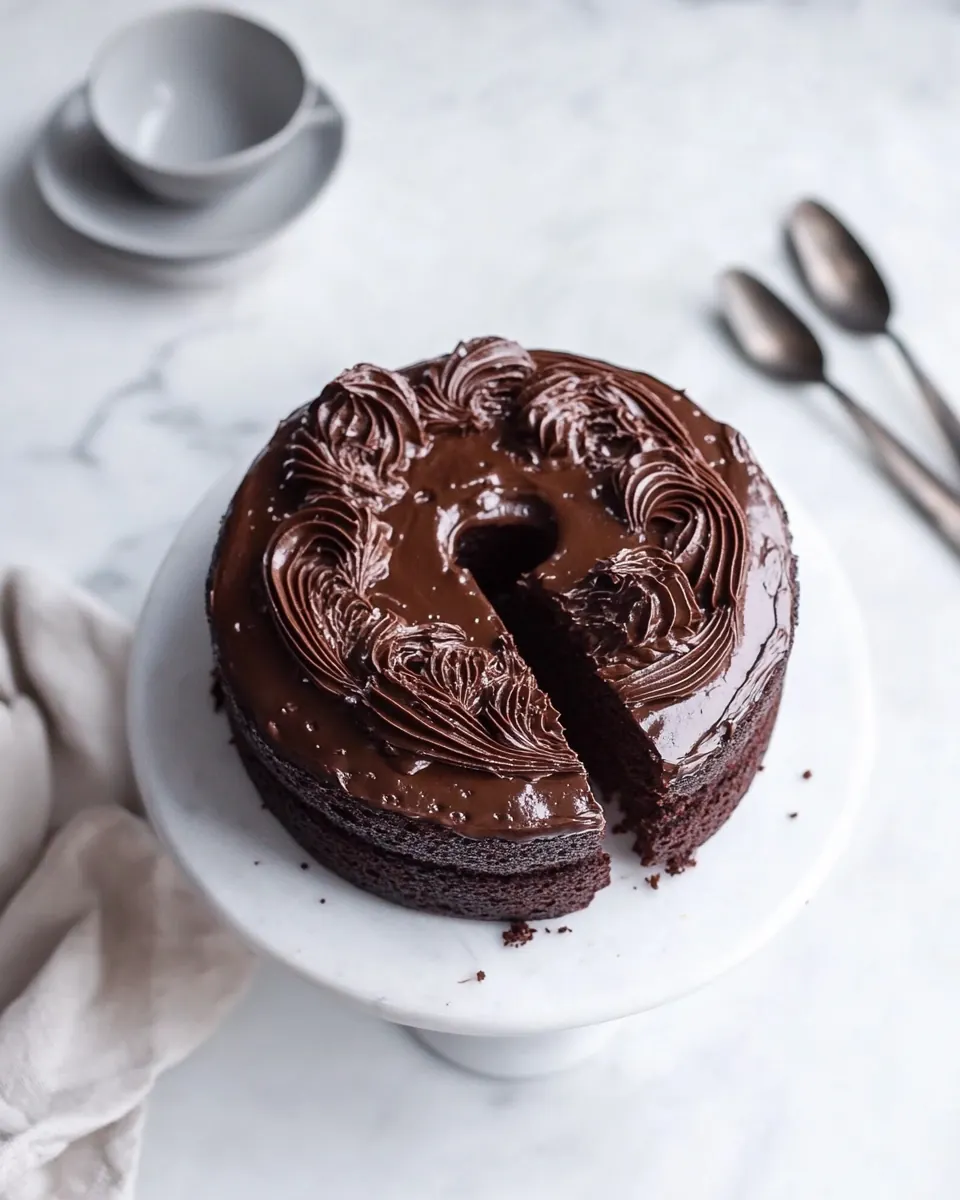
Over time I adjusted small things, learning how the little details matter, like warming the water so the cocoa blooms, or resting the frosting bowl after melting the chocolate so it stays glossy and smooth. This cake taught me patience and the joy of small celebrations, moments meant for two people who want to savor an evening. I like that it feels luxurious without being fussy, and that the finished cake, topped with a scattering of flaky sea salt, reads like a thoughtful dessert rather than a showy centerpiece.
Recipe Snapshot
50 mins
20 mins
30 mins
Medium
350 kcal
American
Gluten-Free, Low FODMAP
Desserts
26 inch cake pans, Stand up Mixer, large bowl, Whisk, spatula
Why Try This Chocolate Cake for Two
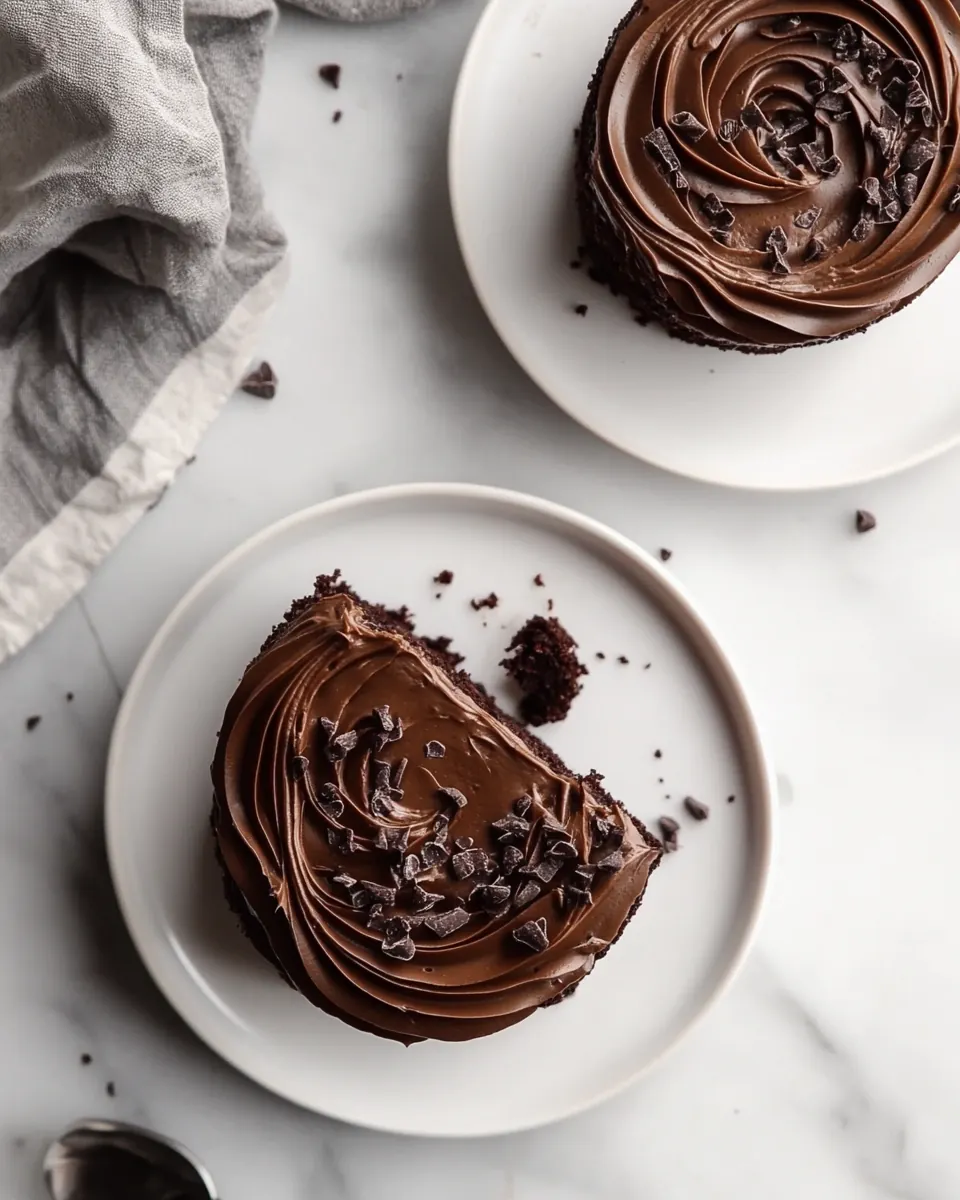
Perfect portioning
I love how Chocolate Cake for Two gives you the satisfaction of a full layered cake while staying perfectly sized. I’ve always hated wasting half a cake, and this version solves that. It’s just enough to feel celebratory, without overwhelming your fridge.
Hands on but simple
What draws me in is how approachable the method is. I often reach for this when I want something that feels homemade and intentional. The steps are straightforward, and the rhythm of mixing, baking and frosting becomes almost meditative. The ingredient list is pantry friendly, so I can usually pull everything together in one go.
Texture and balance
I find the crumb exceptionally tender, and the frosting is silkily rich. The recipe balances cocoa with a touch of instant espresso powder to deepen the chocolate notes, and the final sprinkle of flakey sea salt lifts the sweetness. When I bite into it, I’m getting contrasting sensations, the softness of the cake and the creamy density of the frosting, which makes every forkful interesting.
Flexible timing
This recipe is forgiving. You can bake and freeze layers ahead, or make the frosting in advance, which means I can assemble it the day of my gathering without stress. That flexibility has saved me more than once when my schedule was unpredictable.
Great for intimate occasions
I turn to Chocolate Cake for Two for anniversaries, quiet date nights or anytime I want a dessert that feels dressed up without being over the top. It’s a small gesture that reads like a lot of attention and care.
Essential Ingredients for Chocolate Cake for Two
These ingredients are chosen to create a moist, tender cake with a deeply chocolatey flavor and a luscious frosting. The dry elements build structure, the liquids contribute moisture and tenderness, while the fats and chocolate deliver richness. Together they create a balanced, classic profile that works well for an intimate two layer cake.
- 3/4 cups all-purpose flour: Sifted and measured to provide structure and bulk to the cake batter; helps create a tender crumb when combined with the wet ingredients. Ensures proper gluten development while balancing moisture and volume for a light, yet sturdy cake.
- 3/4 cups white granulated sugar: Granulated and creaming-friendly to sweeten the cake while aiding in tenderizing the crumb; dissolves into the batter to contribute to texture and caramelization. Helps balance bitterness from cocoa and enriches overall flavor.
- 1/3 cup baking cocoa powder: Fine cocoa powder added for deep chocolate flavor and color; contributes dry cocoa solids that intensify chocolate notes without adding fat. Works with sugar and liquids to create a moist, chocolatey crumb.
- 1 teaspoon instant espresso powder: Soluble espresso powder used to enhance and intensify chocolate flavor through subtle bitter and roasted notes; dissolves easily into liquids without contributing coffee flavor if used sparingly. Accentuates cocoa’s depth and rounds out the cake’s profile.
- 3/4 teaspoon baking soda: Leavening agent in powdered form that reacts with acids and liquids to provide lift; helps form air pockets for a lighter texture. Balances with baking powder to control rise and crumb structure.
- 1/2 teaspoon baking powder: Additional leavening that releases gas when heated to produce rise; provides predictable lift and helps achieve an even, tender crumb. Works with baking soda to fine-tune acidity and texture.
- 1/2 teaspoon kosher salt: Coarse salt that seasons and enhances all other flavors; controls sweetness perception and strengthens gluten bonds slightly for better structure. Adds necessary mineral notes to highlight chocolate and balance sweetness.
- 1 large egg: Whole large egg that binds ingredients, adds moisture, and contributes to structure and richness through proteins and fat. Helps emulsify the batter for uniform texture and supports rise when beaten.
- 1/3 cup plus 1 tablespoon buttermilk: Slightly acidic liquid dairy that tenderizes the crumb and reacts with baking soda for leavening; contributes tangy flavor and moisture to the batter. Provides a soft mouthfeel and enhances overall tenderness.
- 1/3 cup plus 1 tablespoon warm water: Warm water used to hydrate dry ingredients and help bloom cocoa for deeper flavor extraction; adjusts batter consistency for proper mixing. Contributes to steam-based lift during baking, aiding moist crumb formation.
- 2 teaspoons olive oil: Neutral-flavored oil that adds moisture and keeps the cake tender without solidifying at room temperature; contributes slight richness and extensibility to the batter. Helps maintain softness and extends freshness.
- 1 teaspoon vanilla extract: Aromatic extract used to provide fragrant vanilla notes and round out flavors; boosts perceived sweetness and complexity. Small amounts significantly enhance the cake’s overall flavor profile.
- 3/4 cup unsalted butter, at room temperature: Room–temperature unsalted butter beaten to create a smooth frosting base with rich flavor and creamy texture; provides structure and spreadability to the icing. Salt control allows precise seasoning when combined with other frosting components.
- 2 cups powdered sugar, sifted: Finely powdered sugar incorporated into frosting to sweeten and stabilize texture; dissolves easily for a smooth, silky icing. Sifting ensures no lumps and contributes to a light, pipeable consistency.
- 3 ounces dark chocolate or semi-sweet chocolate, melted and cooled: Melted and cooled dark or semi–sweet chocolate added to frosting for intensified chocolate richness and depth; contributes both flavor and a glossy sheen when incorporated. Cooled state prevents melting the butter while blending for a stable ganache-like finish.
- 1 1/2 tablespoons heavy cream or milk: Heavy cream or milk added in small amounts to loosen frosting and improve mouthfeel; adjusts consistency for spreading or piping while adding a touch of richness. Contributes to a smoother, more luxurious icing texture.
- 1 teaspoon vanilla extract: Vanilla extract used again in the frosting to impart warm, aromatic flavor and balance the chocolate’s bitterness; enhances overall sweetness and complexity. Small quantity fine-tunes the final flavor of the icing.
- Flakey sea salt, for topping: Delicate flaky sea salt sprinkled on top as a finishing touch to provide a crunchy contrast and burst of savory flavor; highlights and balances the cake’s sweetness. Adds visual appeal and elevates the overall tasting experience.
Recipe Directions for Chocolate Cake for Two
I like to think of the process as a gentle, measured rhythm. Start with the oven and pans, mix the batter into a smooth, thin consistency, bake until the centers spring back, then bring everything together with a glossy frosting and a few finishing touches.
- Preheat oven to 350 degrees F. Butter and flour two 6-inch cake pans. This batter is sticky so I also lined the bottoms with parchment. I highly recommend this. You don’t want to bake the whole thing up and have it stick. Set the pans aside. See below for link in the notes on baking cake layers flat. I do this every single time and it’s SO helpful.: As you heat the oven, notice the warm, dry air rising and how the kitchen begins to hold heat, which helps your cakes rise steadily. Buttering and flouring the pans creates a thin barrier that prevents sticking, while parchment ensures the bottoms release cleanly. If you skip lining, the delicate layers may tear when you remove them. A common mistake is not prepping pans until right before batter goes in, which can let butter settle and become uneven. Aim for even coating and press parchment snugly so it lies flat.
- In a large bowl or the bowl of a stand-up mixer (with the paddle attachment), add the all-purpose flour, sugar, cocoa powder, espresso powder, baking soda, baking powder and salt. Mix until combined. Next, crack in the egg, pour in the buttermilk, warm water, olive oil and vanilla. Mix until thoroughly combined and the batter is smooth, about 1 minute. The batter will be thinner than cake batter that you’re probably used to—that’s ok!: You should smell the cocoa blooming as the warm water wakes it up, and the batter will move like a silky ribbon. Mixing dry then wet avoids overworking gluten and keeps the crumb tender, which is why I combine components in stages. If you overmix, the cake can become tough, so blend only until smooth. Watch for visual cues, such as a uniform color and no streaks of flour, to know you are done.
- Divide the cake batter amongst the two cake pans and transfer to the oven to bake for 27 to 30 minutes, or until a skewer inserted into the center comes out clean. Clean out the bowl you used to make the cake and dry it thoroughly. While the cake is cooling, use it to make the frosting.: As the layers bake you will notice the tops change from glossy to matte and the edges pull away slightly, both signs of doneness. The aroma will be warm and chocolate forward, and you may hear a soft settling sound as moisture redistributes. Let the cakes cool slightly before turning them out so they set and do not split. A common error is opening the oven too often, which can cause uneven rise, so trust the time and peek only near the end.
- Add all of the ingredients to the cleaned large bowl or the bowl of the stand-up mixer (with the paddle attachment), add the butter, powdered sugar, melted chocolate, cream or milk and vanilla extract. Beat until thoroughly combined and fluffy, about 1 minute. Scrape down the sides of the bowl and mix one last time, just to ensure everything is combined.: When you combine the unsalted butter and powdered sugar with melted dark chocolate and cream, the aroma will be intensely chocolatey and the texture will shift from grainy to velvety. This step is about aeration, which gives the frosting lightness, so beat until it looks glossy and holds soft peaks. If butter or chocolate are too warm the frosting will appear loose or greasy, so allow the melted chocolate to cool slightly. A typical slip is adding liquid too quickly, which can break the frosting, so add cream gradually.
- Add a few tablespoons of frosting to the center of one of the rounds of cake. Smooth it around, until it reaches the edges. Add a pinch of salt all around. Place the second layer on top. Since I was going for a naked cake look, I added more frosting to the seam of the two cakes and smoothed it all around. Neat is not the goal!: As you spread, you will feel the gentle resistance of the frosting against the cake, and crumbs may cling to the spatula if you press too hard. The thin initial layer helps seat the top, and the pinch of flakey sea salt contrasts the sweetness while brightening flavors. If you see large crumbs in the frosting, pause and press them away or use a thin crumb coat before adding more frosting. Avoid heavy pressure which can compress the layers.
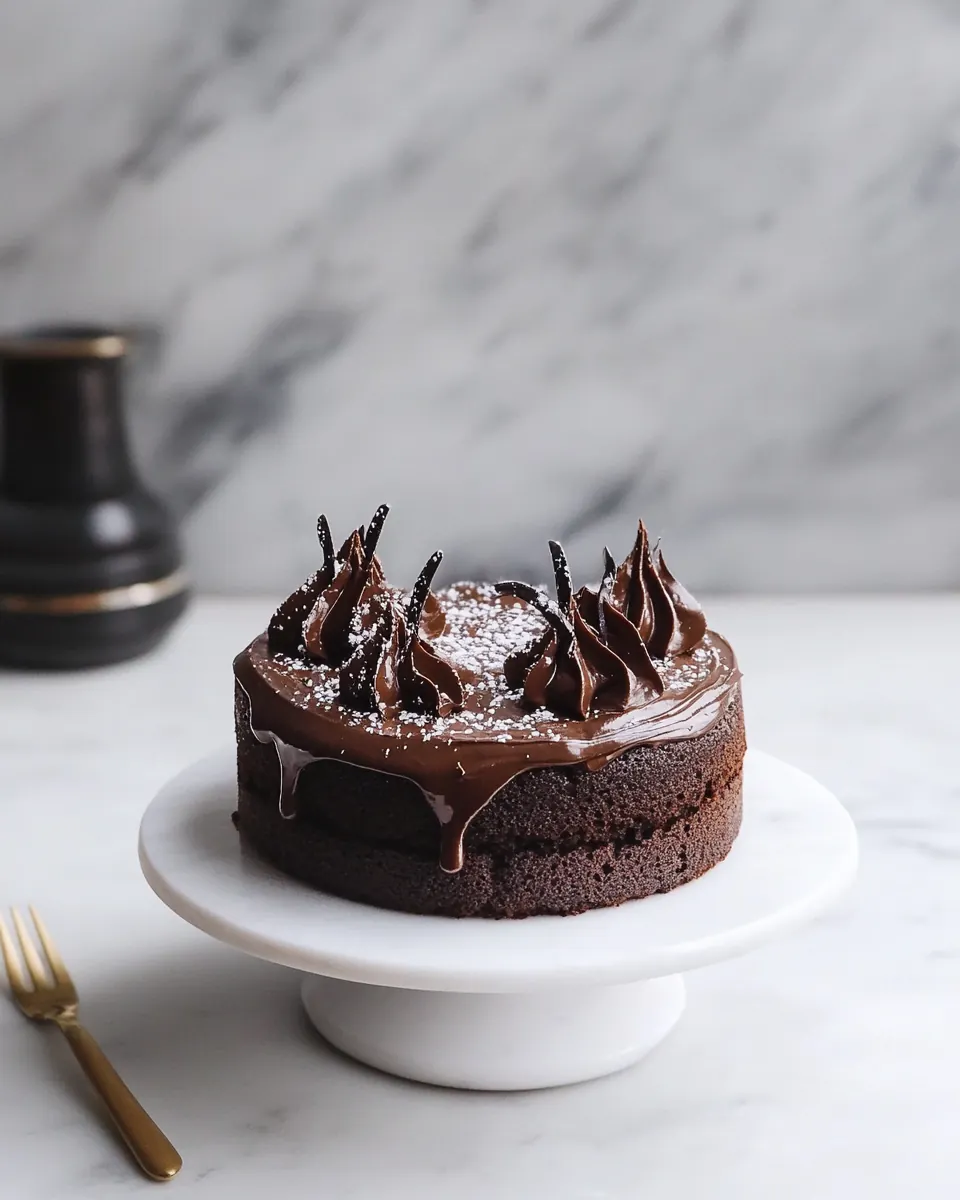
- Add the remaining frosting to piping bag with a star tip attached. In the center of the top layer of cake, pipe out a rose by starting in the center and going all the way around twice. Complete the cake by adding smaller roses around the center rose. Don’t be shy to practice on a piece of parchment first and then simply add the frosting back to the piping bag—no waste!: When piping, you’ll notice the frosting holds its shape and offers a satiny sheen. The motion should be steady and confident, and practicing on parchment helps you get comfortable with pressure and speed. If the frosting is too soft to hold detail, chill it briefly. A frequent mistake is squeezing unevenly which makes uneven petals, so keep your wrist steady and rotate the cake if possible rather than moving your hand around the cake.
- Top the cake with a sprinkling of flaked sea salt.: The final touch is visual and gustatory, a delicate scatter of flakey sea salt that catches the light and offers tiny bursts of savory crunch. Apply sparingly, tasting a small bit first so the salt does not dominate. If you over salt, you can brush some off gently with a clean finger or spoon.
Recipe Notes about Chocolate Cake for Two
This cake is forgiving and adaptable. Below are practical notes and expansions based on the recipe’s own guidance and my experience, designed to make assembly and storage easier and to preserve flavor and texture.
- Freezing layers You can freeze baked layers up to three months. Wrap each layer tightly in plastic wrap and then place in an airtight container or freezer bag to prevent freezer burn. When ready to use, thaw overnight in the refrigerator before bringing to room temperature for an hour before frosting.
- Freezing the frosting Make the frosting ahead and store in a freezer safe container for up to three months. Thaw overnight in the refrigerator and bring to room temperature, then rewhip briefly to restore texture before piping or spreading.
- Refrigeration timing To keep things fresh in the fridge, bake the cake layers up to two days ahead, wrapped tightly in plastic wrap. Frosting can be stored in an airtight container in the fridge for up to two days. Bring both to room temperature before assembly for best texture.
- Measuring tips Spoon flour into the measuring cup and level off rather than scooping directly, which prevents overpacking and a dense cake. Likewise, measure cocoa and powdered sugar by spooning and leveling.
- Adjusting sweetness If you prefer a less sweet frosting, reduce powdered sugar gradually and taste as you go, keeping in mind that structure can be affected if you remove too much sugar.
What Goes Well With This Chocolate Cake for Two
This cake is ideal for close celebrations, romantic dinners, cozy evenings, or as a sweet finish to a small gathering. Below are serving ideas, pairing suggestions, and storage guidance to help you present this dessert beautifully.
- Serve with fresh berries A small bowl of raspberries or strawberries brightens the rich chocolate with acidity and texture, providing a refreshing counterpoint on the plate.
- Pairing beverage For a non alcoholic option, a warm cup of coffee or a rich hot chocolate complements the cake’s deep chocolate notes, adding warmth and a comforting contrast.
- Occasions This is perfect for anniversaries, quiet date nights, or Valentine’s Day. Its size and presentation make it feel intimate, ideal for when you want to make an evening special without a lot of fuss.
- Plating suggestion Place a slice on a small dessert plate, add a few berries and a light dusting of cocoa or powdered sugar around the edge for a café style finish. A tiny flake of sea salt on the slice will highlight the flavors.
- Storage after serving Keep leftover cake covered in the refrigerator for up to three days. For best texture, let slices come to room temperature for 20 to 30 minutes before serving so the frosting regains softness.
- Seasonal pairings In cooler months, accompany the cake with warm spices like a cinnamon garnish on the side, and in warmer months, serve with chilled berries or a dollop of lightly whipped cream.
FAQ
Conclusion
What makes this cake special is its balance of tender cake and silky, deep chocolate frosting finished with a sprinkle of flakey sea salt. It feels indulgent yet intimate, perfect for small celebrations or cozy nights in. Try it when you want a dessert that is both approachable and memorable, and enjoy the warm aromas and rich textures that make every bite satisfying.
Chocolate Cake for Two
Equipment
- 26 inch cake pans
- Stand up Mixer
- Large Bowl
- Whisk
- Spatula
Ingredients
- 3/4 cups all-purpose flour Sifted and measured to provide structure and bulk to the cake batter; helps create a tender crumb when combined with the wet ingredients. Ensures proper gluten development while balancing moisture and volume for a light, yet sturdy cake.
- 3/4 cups white granulated sugar Granulated and creaming-friendly to sweeten the cake while aiding in tenderizing the crumb; dissolves into the batter to contribute to texture and caramelization. Helps balance bitterness from cocoa and enriches overall flavor.
- 1/3 cup baking cocoa powder Fine cocoa powder added for deep chocolate flavor and color; contributes dry cocoa solids that intensify chocolate notes without adding fat. Works with sugar and liquids to create a moist, chocolatey crumb.
- 1 teaspoon instant espresso powder Soluble espresso powder used to enhance and intensify chocolate flavor through subtle bitter and roasted notes; dissolves easily into liquids without contributing coffee flavor if used sparingly. Accentuates cocoa’s depth and rounds out the cake’s profile.
- 3/4 teaspoon baking soda Leavening agent in powdered form that reacts with acids and liquids to provide lift; helps form air pockets for a lighter texture. Balances with baking powder to control rise and crumb structure.
- 1/2 teaspoon baking powder Additional leavening that releases gas when heated to produce rise; provides predictable lift and helps achieve an even, tender crumb. Works with baking soda to fine-tune acidity and texture.
- 1/2 teaspoon kosher salt Coarse salt that seasons and enhances all other flavors; controls sweetness perception and strengthens gluten bonds slightly for better structure. Adds necessary mineral notes to highlight chocolate and balance sweetness.
- 1 large egg Whole large egg that binds ingredients, adds moisture, and contributes to structure and richness through proteins and fat. Helps emulsify the batter for uniform texture and supports rise when beaten.
- 1/3 cup plus 1 tablespoon buttermilk Slightly acidic liquid dairy that tenderizes the crumb and reacts with baking soda for leavening; contributes tangy flavor and moisture to the batter. Provides a soft mouthfeel and enhances overall tenderness.
- 1/3 cup plus 1 tablespoon warm water Warm water used to hydrate dry ingredients and help bloom cocoa for deeper flavor extraction; adjusts batter consistency for proper mixing. Contributes to steam-based lift during baking, aiding moist crumb formation.
- 2 teaspoons olive oil Neutral-flavored oil that adds moisture and keeps the cake tender without solidifying at room temperature; contributes slight richness and extensibility to the batter. Helps maintain softness and extends freshness.
- 1 teaspoon vanilla extract Aromatic extract used to provide fragrant vanilla notes and round out flavors; boosts perceived sweetness and complexity. Small amounts significantly enhance the cake’s overall flavor profile.
- 3/4 cup unsalted butter, at room temperature Room-temperature unsalted butter beaten to create a smooth frosting base with rich flavor and creamy texture; provides structure and spreadability to the icing. Salt control allows precise seasoning when combined with other frosting components.
- 2 cups powdered sugar, sifted Finely powdered sugar incorporated into frosting to sweeten and stabilize texture; dissolves easily for a smooth, silky icing. Sifting ensures no lumps and contributes to a light, pipeable consistency.
- 3 ounces dark chocolate or semi-sweet chocolate, melted and cooled Melted and cooled dark or semi-sweet chocolate added to frosting for intensified chocolate richness and depth; contributes both flavor and a glossy sheen when incorporated. Cooled state prevents melting the butter while blending for a stable ganache-like finish.
- 1 1/2 tablespoons heavy cream or milk Heavy cream or milk added in small amounts to loosen frosting and improve mouthfeel; adjusts consistency for spreading or piping while adding a touch of richness. Contributes to a smoother, more luxurious icing texture.
- 1 teaspoon vanilla extract Vanilla extract used again in the frosting to impart warm, aromatic flavor and balance the chocolate’s bitterness; enhances overall sweetness and complexity. Small quantity fine-tunes the final flavor of the icing.
- Flakey sea salt, for topping Delicate flaky sea salt sprinkled on top as a finishing touch to provide a crunchy contrast and burst of savory flavor; highlights and balances the cake’s sweetness. Adds visual appeal and elevates the overall tasting experience.
Instructions
- Preheat oven to 350 degrees F. Butter and flour two 6-inch cake pans. This batter is sticky so I also lined the bottoms with parchment. I highly recommend this. You don’t want to bake the whole thing up and have it stick. Set the pans aside. See below for link in the notes on baking cake layers flat. I do this every single time and it’s SO helpful.: As you heat the oven, notice the warm, dry air rising and how the kitchen begins to hold heat, which helps your cakes rise steadily. Buttering and flouring the pans creates a thin barrier that prevents sticking, while parchment ensures the bottoms release cleanly. If you skip lining, the delicate layers may tear when you remove them. A common mistake is not prepping pans until right before batter goes in, which can let butter settle and become uneven. Aim for even coating and press parchment snugly so it lies flat.
- In a large bowl or the bowl of a stand-up mixer (with the paddle attachment), add the all-purpose flour, sugar, cocoa powder, espresso powder, baking soda, baking powder and salt. Mix until combined. Next, crack in the egg, pour in the buttermilk, warm water, olive oil and vanilla. Mix until thoroughly combined and the batter is smooth, about 1 minute. The batter will be thinner than cake batter that you’re probably used to—that’s ok!: You should smell the cocoa blooming as the warm water wakes it up, and the batter will move like a silky ribbon. Mixing dry then wet avoids overworking gluten and keeps the crumb tender, which is why I combine components in stages. If you overmix, the cake can become tough, so blend only until smooth. Watch for visual cues, such as a uniform color and no streaks of flour, to know you are done.
- Divide the cake batter amongst the two cake pans and transfer to the oven to bake for 27 to 30 minutes, or until a skewer inserted into the center comes out clean. Clean out the bowl you used to make the cake and dry it thoroughly. While the cake is cooling, use it to make the frosting.: As the layers bake you will notice the tops change from glossy to matte and the edges pull away slightly, both signs of doneness. The aroma will be warm and chocolate forward, and you may hear a soft settling sound as moisture redistributes. Let the cakes cool slightly before turning them out so they set and do not split. A common error is opening the oven too often, which can cause uneven rise, so trust the time and peek only near the end.
- Add all of the ingredients to the cleaned large bowl or the bowl of the stand-up mixer (with the paddle attachment), add the butter, powdered sugar, melted chocolate, cream or milk and vanilla extract. Beat until thoroughly combined and fluffy, about 1 minute. Scrape down the sides of the bowl and mix one last time, just to ensure everything is combined.: When you combine the unsalted butter and powdered sugar with melted dark chocolate and cream, the aroma will be intensely chocolatey and the texture will shift from grainy to velvety. This step is about aeration, which gives the frosting lightness, so beat until it looks glossy and holds soft peaks. If butter or chocolate are too warm the frosting will appear loose or greasy, so allow the melted chocolate to cool slightly. A typical slip is adding liquid too quickly, which can break the frosting, so add cream gradually.
- Add a few tablespoons of frosting to the center of one of the rounds of cake. Smooth it around, until it reaches the edges. Add a pinch of salt all around. Place the second layer on top. Since I was going for a naked cake look, I added more frosting to the seam of the two cakes and smoothed it all around. Neat is not the goal!: As you spread, you will feel the gentle resistance of the frosting against the cake, and crumbs may cling to the spatula if you press too hard. The thin initial layer helps seat the top, and the pinch of flakey sea salt contrasts the sweetness while brightening flavors. If you see large crumbs in the frosting, pause and press them away or use a thin crumb coat before adding more frosting. Avoid heavy pressure which can compress the layers.
- Add the remaining frosting to piping bag with a star tip attached. In the center of the top layer of cake, pipe out a rose by starting in the center and going all the way around twice. Complete the cake by adding smaller roses around the center rose. Don’t be shy to practice on a piece of parchment first and then simply add the frosting back to the piping bag—no waste!: When piping, you’ll notice the frosting holds its shape and offers a satiny sheen. The motion should be steady and confident, and practicing on parchment helps you get comfortable with pressure and speed. If the frosting is too soft to hold detail, chill it briefly. A frequent mistake is squeezing unevenly which makes uneven petals, so keep your wrist steady and rotate the cake if possible rather than moving your hand around the cake.
- Top the cake with a sprinkling of flaked sea salt.: The final touch is visual and gustatory, a delicate scatter of flakey sea salt that catches the light and offers tiny bursts of savory crunch. Apply sparingly, tasting a small bit first so the salt does not dominate. If you over salt, you can brush some off gently with a clean finger or spoon.
Notes
- Freezing layers You can freeze baked layers up to three months. Wrap each layer tightly in plastic wrap and then place in an airtight container or freezer bag to prevent freezer burn. When ready to use, thaw overnight in the refrigerator before bringing to room temperature for an hour before frosting.
- Freezing the frosting Make the frosting ahead and store in a freezer safe container for up to three months. Thaw overnight in the refrigerator and bring to room temperature, then rewhip briefly to restore texture before piping or spreading.
- Refrigeration timing To keep things fresh in the fridge, bake the cake layers up to two days ahead, wrapped tightly in plastic wrap. Frosting can be stored in an airtight container in the fridge for up to two days. Bring both to room temperature before assembly for best texture.
- Measuring tips Spoon flour into the measuring cup and level off rather than scooping directly, which prevents overpacking and a dense cake. Likewise, measure cocoa and powdered sugar by spooning and leveling.
- Adjusting sweetness If you prefer a less sweet frosting, reduce powdered sugar gradually and taste as you go, keeping in mind that structure can be affected if you remove too much sugar.