
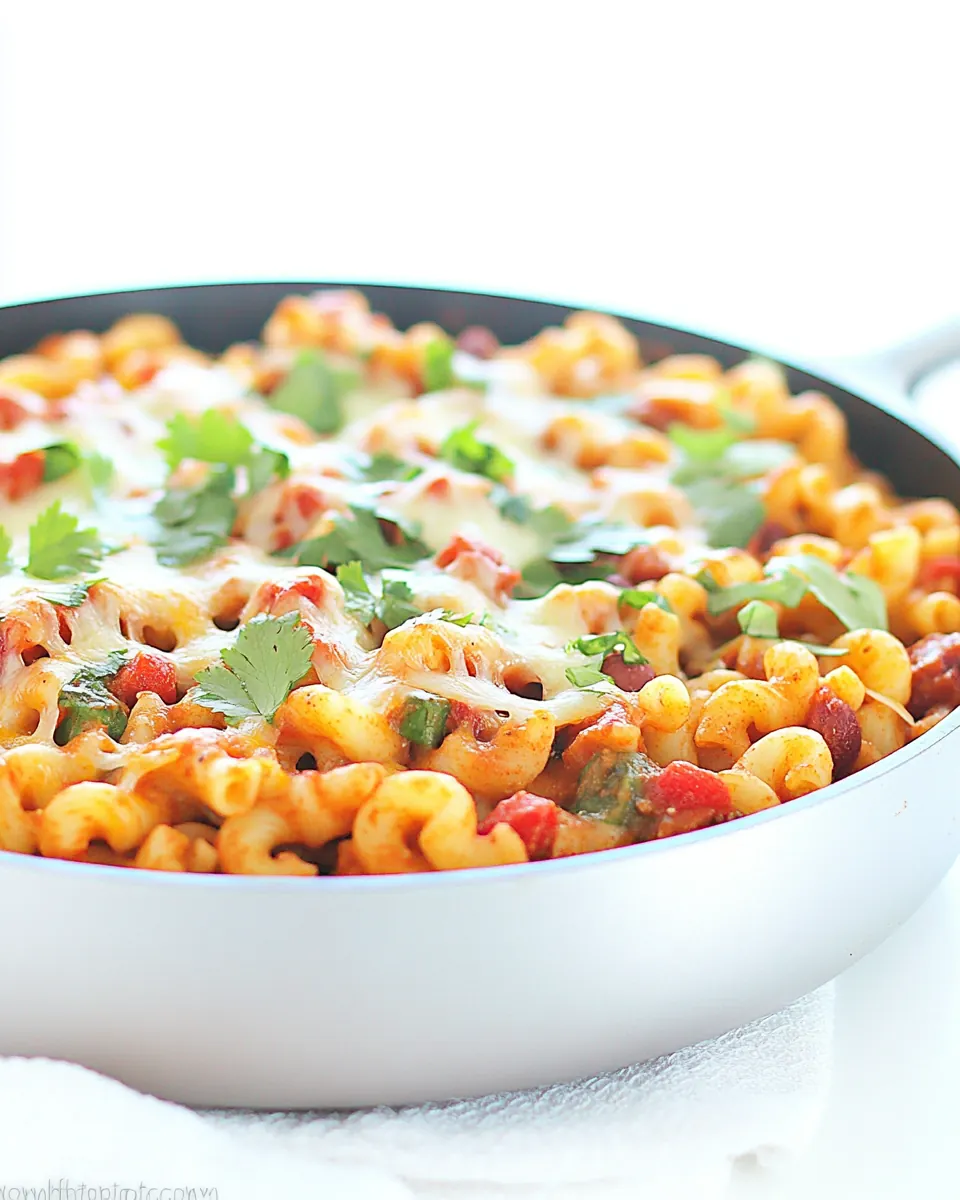
Chili Pasta Skillet
Chili Pasta Skillet is the kind of comforting one pan meal I reach for when I want something hearty, hands off, and full of personality.
I first made Chili Pasta Skillet on a chilly weeknight when I had a tired crew of hungry friends dropping by with little notice. The aroma of sizzling ground beef and caramelizing onion filled the kitchen, and within minutes the whole apartment felt like a cozy diner. I remember stirring in the bright, fire roasted tomatoes and the warm, earthy scent of chili powder took over, promising something bold yet homey. That evening taught me that a single skillet can produce layers of texture, from tender pasta to creamy tomato sauce, all crowned by melty marbled cheddar cheese.
Over many repeats I tuned the timing and the rhythm of stirring, learning to watch for the small clues that signal doneness. I like how the beans add body, the diced green chile peppers bring a little zip without stealing the show, and the green onions on top brighten every bite. It is the type of dinner that feeds a group, yet feels personal and satisfying.
Recipe Snapshot
30 mins
5 mins
25 mins
Easy
400 kcal
Mexican
Gluten-Free, Keto
Dinner
Large skillet, Spatula, Can opener, Colander
Why This Chili Pasta Skillet Is So Good
A true one skillet wonder
I love that Chili Pasta Skillet cooks mostly in one pan, which means less cleanup and more time at the table. The method blends the starch, protein, and sauce so they finish together, creating a unified texture that makes every forkful comforting and cohesive.
Bold flavor with minimal effort
I appreciate how simple pantry items like canned tomatoes and tomato sauce layer with chili powder to give a deep, smoky backbone. You get complex taste without exotic ingredients, which is perfect when you want rich results fast.
Flexible and family friendly
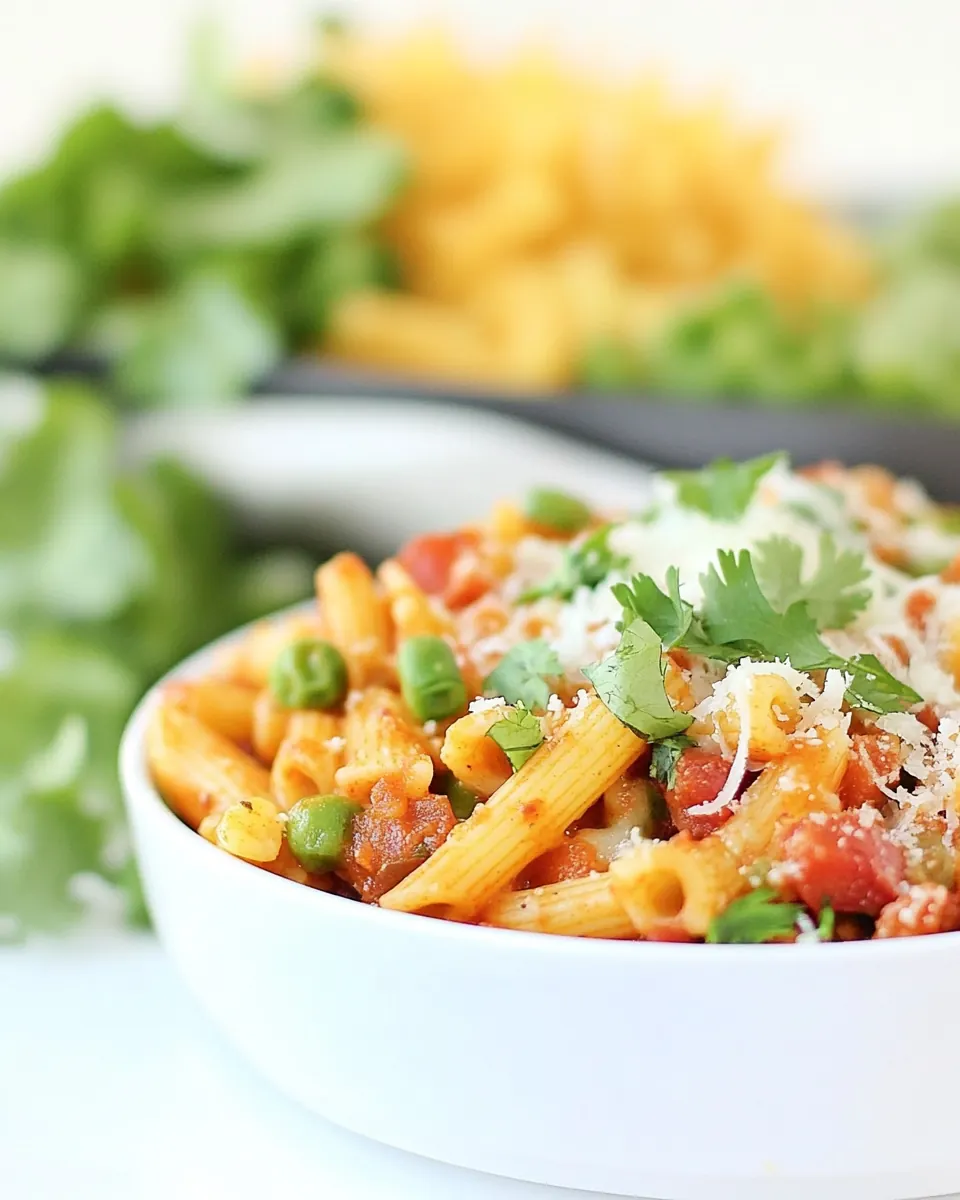
I often make this when feeding a mix of ages because it satisfies both picky eaters and those who want more adventurous spice. The soft elbow macaroni soaks up the sauce and the black beans add texture and a hint of creaminess so everyone ends up satisfied.
Comfort food that stretches
I love that this recipe stretches to feed more with no fuss. The combination of starch, protein, and beans makes it economical, so it is perfect when your grocery budget needs to do more work. It also reheats really well for lunches.
Quick weeknight win
What keeps me coming back is the speed. From skillet to table in a single hour or less, Chili Pasta Skillet is ideal for busy evenings when you want something warm, filling, and honest.
Ingredients Required for Chili Pasta Skillet
These ingredients come together to create a balanced skillet meal. The core players are the protein and starch, supported by tomatoes and spices that form the sauce, while cheese and green onions finish the dish with creaminess and brightness. Each item has a job, and together they produce a satisfying, cohesive plate.
- 1 pound lean ground beef: Brown thoroughly to develop savory flavor and render fat; use medium-high heat and break into small crumbles to ensure even cooking. Combine with spices and liquids to form the hearty protein base of the skillet, absorbing chili and tomato flavors well.
- 3/4 cup chopped onion: Sauté until translucent to add sweet, aromatic depth; finely chopped pieces will soften and blend into the sauce during simmering. Provide textural contrast and balance the richness of the beef and tomatoes in the final dish.
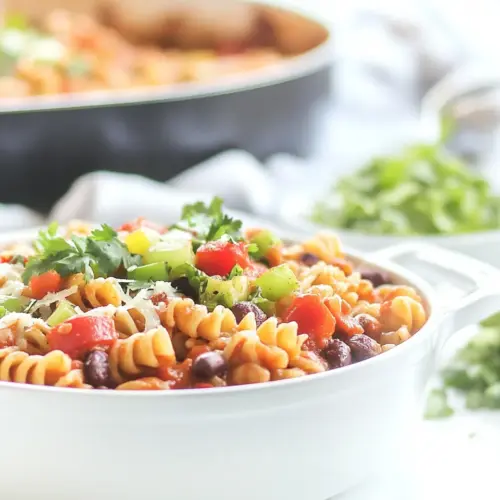
- 115 oz can black beans, rinsed and drained: Rinse and drain well to remove canning liquid and reduce excess sodium; add near the end of cooking so beans retain firmness. Contribute creamy texture, plant-based protein, and bulk that stretches the meal and complements the chili profile.
- 114.5 oz can diced fire-roasted tomatoes, undrained: Stir in with liquids without draining to impart smoky, roasted tomato flavor and extra moisture to the sauce; break up larger pieces as it simmers. Deliver bright acidity and charred complexity that enhances the overall chili-pasta combination.
- 18 oz can tomato sauce: Pour in as a saucy base to create a cohesive, tomato-forward cooking liquid; whisk or stir to integrate with diced tomatoes and spices. Supply body, tang, and a smooth consistency that helps the pasta and beef meld together.
- 1/2 cup dried elbow macaroni, 2 ounces: Add dry and cook directly in the sauce to absorb flavors while reaching al dente tenderness; measure precisely to maintain proper liquid ratio. Provide pasta texture and carbohydrate bulk that transforms the skillet into a filling, comforting one-pan meal.
- 14 oz can diced green chile peppers, drained: Drain well and fold in for mild, piquant heat and a subtle green chili flavor; distribute evenly for little bursts of brightness. Contribute mild spice and southwestern character that complements the chili powder and tomato base.
- 2 teaspoons chili powder: Sprinkle and toast briefly in the hot pan to release warm, earthy notes; adjust quantity to taste for desired heat and complexity. Act as the primary chili spice, unifying the dish with classic southwestern chili flavors.
- 1/2 teaspoon garlic salt: Season lightly during cooking to add a gentle garlic flavor and enhance overall seasoning; use sparingly if also using other salty components. Provide savory, slightly pungent notes that round out the flavor profile without overpowering the chili spices.
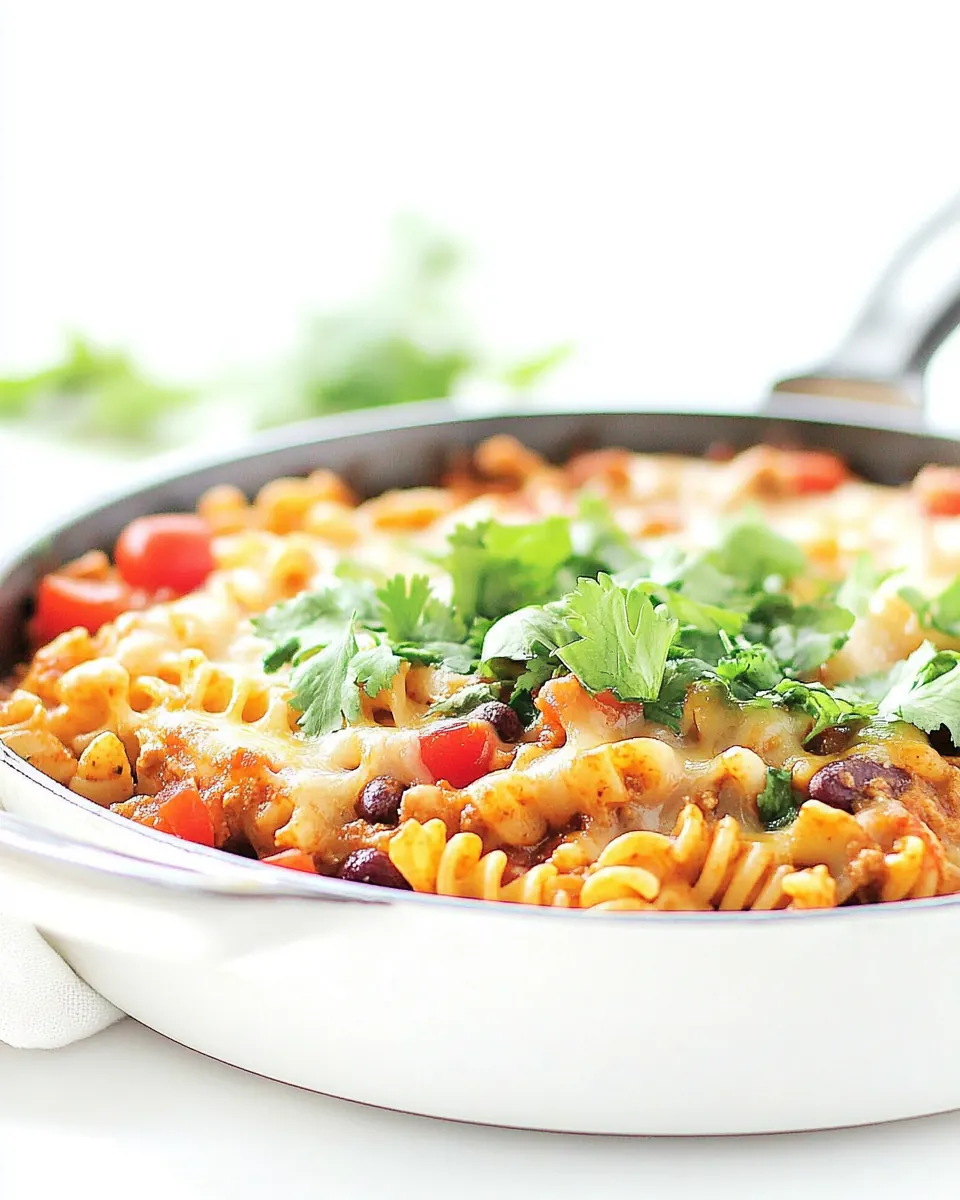
- 1/2 cup shredded marbled cheddar cheese: Top toward the end to melt into a creamy, sharp layer that binds ingredients and adds richness; use freshly shredded for optimal melting. Offer cheesy, slightly tangy flavor and a gooey texture that elevates the skillet presentation.
- 1/4 cup diced green onions: Garnish thinly sliced on the finished dish to add a crisp, mild onion bite and fresh green color; sprinkle just before serving to retain crunch. Deliver a bright, oniony finish that lightens and freshens each spoonful.
The Method for Chili Pasta Skillet
This method is straightforward yet precise, so I like to stay attentive while the skillet simmers. The following steps guide you through building flavor, developing texture, and finishing with melty cheese and bright green onion garnish.
- In a large skillet cook meat and onion until meat is brown and onion is tender. Drain off fat.: The air will fill with a toasty, savory aroma as the ground beef sears and the onion softens, signaling that the Maillard reaction is doing its work to develop deep flavor. You should hear a steady sizzle and see small browned bits forming on the pan surface, which will later dissolve into the sauce and add richness. This step matters because proper browning gives the sauce a meaty foundation; if you skip it the final flavor will be flatter. A common mistake is cooking at too low a temperature, which steams the meat instead of browning it, so keep the heat at medium high and give the meat room to brown. Stir occasionally to prevent burning, and when the pieces are evenly browned and the onion is translucent, you are ready to move on.
- Stir in beans, undrained tomatoes, tomato sauce, uncooked macaroni, chile peppers, chili powder, and garlic salt. Bring to boiling; reduce heat.: After browning, the rendered fat will pool in the skillet and carry much of the cooked beef flavor. Carefully pouring off excess fat leaves enough to coat the pan and carry flavor, while preventing an overly greasy final dish. You may tilt the pan and use a spoon to remove fat, or transfer meat to a colander briefly. This step helps the sauce cling properly to the macaroni and keeps the mouthfeel balanced. Avoid removing all the fat, because that layer helps carry and amplify flavors; removing too little leaves the dish heavy. A typical mistake is discarding too quickly and splashing, so let the skillet rest briefly for the fat to gather before draining.
- Simmer, covered, about 20 minutes or until macaroni is tender, stirring often. Remove skillet from heat; sprinkle mixture with cheese. Cover and let stand about 2 minutes or until cheese is melted. Garnish with the green onions and enjoy!: As you add the cans of black beans , the undrained fire roasted tomatoes , and the tomato sauce , a rich, tomato forward steam will rise and signal the sauce coming together. Adding the uncooked elbow macaroni at this stage lets it absorb liquid and release starch, helping the sauce thicken and meld with the other components. The diced green chile peppers and chili powder fold in warmth and brightness, while the garlic salt lifts the savory notes. This technique is crucial because cooking the pasta in the sauce integrates flavors, rather than having separate elements. Stir thoroughly to distribute the pasta and prevent clumps. A common error is not stirring well and letting the pasta stick to the bottom, so give it a good initial stir and scrape up any browned bits to incorporate their flavor.
- Bring to boiling; reduce heat: When the liquid edges break into a steady boil, you will see bubbling across the surface and smell concentrated tomato and spice. Bringing to a boil activates the starch in the macaroni , but high heat must be reduced to avoid aggressive boiling that can overcook and break apart the pasta. Lower to a gentle simmer so the sauce thickens gradually and the pasta cooks evenly. This controlled simmer is important for texture; boiling too hard will churn the ingredients and cause the beans to fall apart. A common slip is leaving the heat too high, which can also cause splattering and loss of sauce, so watch the bubbles and adjust promptly.
- Simmer, covered, about 20 minutes or until macaroni is tender, stirring often: During this covered simmer, the macaroni will absorb liquid and swell, the sauce will concentrate, and the flavors will come together. You should hear a quiet, gentle bubbling and see the sauce thicken around the pasta. Stirring often prevents sticking and ensures even cooking; it also releases starch that helps thicken the pan. The right timing will yield pasta that is tender yet intact, beans that hold shape, and a sauce that clings. A typical mistake is skipping the stirring, which leads to scorched pasta at the bottom; be diligent and scrape the pan gently each time you stir. If the mixture looks dry before the pasta is done, add a splash of water to finish cooking without scorching.
- Remove skillet from heat; sprinkle mixture with cheese: Once the pasta is tender, take the pan off the burner so residual heat melts the shredded marbled cheddar cheese gently into a silky layer. The cheese will soften and ooze, adding creaminess and a slight tang that balances the tomato and spice. This step matters because adding cheese off heat prevents it from breaking or becoming grainy. A common mistake is returning the pan to high heat after adding cheese, which can make the texture greasy or separated; instead, cover and let it sit briefly to melt evenly.
- Cover and let stand about 2 minutes or until cheese is melted: Covering the skillet traps steam and promotes even melting without direct heat. You will notice the cheese yielding into the sauce and the surface becoming glossy. Letting it rest also allows the flavors to settle and the sauce to thicken slightly. Avoid removing the cover too soon, as the cheese may not fully integrate; two minutes is usually sufficient. If you lift the lid and find the cheese not fully melted, replace the cover for another minute rather than returning to heat.
- Garnish with the green onions and enjoy: The final sprinkle of diced green onions adds a fresh, crisp contrast to the warm, dense skillet. You will hear the change in texture and taste a bright pop against the rich, cheesy surface. Serving immediately preserves the contrast between creamy interior and crisp garnish. A frequent error is adding the green onions too early, which wilts them and dulls their flavor, so reserve them for the finish to maintain their bite and color.
Recipe Tips about Chili Pasta Skillet
I like to think of tips as small chef cheats that keep the dinner on schedule and full of flavor. These pointers focus on timing, texture, and finishing touches so your Chili Pasta Skillet comes out reliably great every time.
- Brown well: Take the time to brown the ground beef properly for the richest flavor, and avoid overcrowding the skillet so the meat sears instead of steams.
- Keep a close eye on the pasta: Since the elbow macaroni cooks in the sauce, stir regularly to prevent sticking and check texture toward the end so it remains tender not mushy.
- Taste as you go: After the sauce has reduced, taste for salt and spice; canned tomatoes and beans vary, so minor adjustments make a big difference.
- Control the heat: Bring to a gentle boil then lower to a simmer to ensure even pasta cooking and to avoid breaking the beans or separating the sauce.
- Finish off-heat: Add the shredded marbled cheddar cheese with the skillet off heat and cover to melt it smoothly, preserving a creamy texture.
Side Dish Ideas for Chili Pasta Skillet
This section lays out thoughtful serving ideas and pairings that make Chili Pasta Skillet feel like a complete meal, whether you are feeding a family, prepping for lunches, or hosting a casual dinner.
- Simple green salad: A crisp salad with a light vinaigrette offers a refreshing contrast to the warm, hearty skillet and helps balance the meal.
- Warm crusty bread: Serve slices for scooping up sauce and cheese, adding a satisfying chew that complements the soft elbow macaroni.
- Weeknight family dinner: This skillet is ideal for a busy weeknight because it is quick to assemble and stretches well for leftovers.
- Meal prep lunches: Portion into containers, refrigerate, and reheat gently for creamy leftovers that hold up over a few days.
- Seasonal serving: In cooler months this hearty skillet feels especially comforting; add a simple side of roasted vegetables to round out the plate.
- Occasion pairing: For casual gatherings, serve straight from the pan at the table so guests can help themselves and enjoy the communal feeling.
- Storage tip: Cool to room temperature, then refrigerate in an airtight container for up to three days; reheat over low heat with a splash of water to restore creaminess.
FAQ
Conclusion
Chili Pasta Skillet is special because it combines pantry staples into a single, comforting skillet that delivers bold flavor and satisfying texture. Give it a try on a busy evening when you want a hearty meal with minimal fuss, and invite friends or family to dig in straight from the pan. The balance of savory beef, smoky tomatoes, creamy cheese, and tender pasta makes it a dependable favorite you will return to again and again.
Chili Pasta Skillet
Equipment
- Large Skillet
- Spatula
- Can opener
- Colander
Ingredients
- 1 pound lean ground beef Brown thoroughly to develop savory flavor and render fat; use medium-high heat and break into small crumbles to ensure even cooking. Combine with spices and liquids to form the hearty protein base of the skillet, absorbing chili and tomato flavors well.
- 3/4 cup chopped onion Sauté until translucent to add sweet, aromatic depth; finely chopped pieces will soften and blend into the sauce during simmering. Provide textural contrast and balance the richness of the beef and tomatoes in the final dish.
- 115 oz can black beans, rinsed and drained Rinse and drain well to remove canning liquid and reduce excess sodium; add near the end of cooking so beans retain firmness. Contribute creamy texture, plant-based protein, and bulk that stretches the meal and complements the chili profile.
- 114.5 oz can diced fire-roasted tomatoes, undrained Stir in with liquids without draining to impart smoky, roasted tomato flavor and extra moisture to the sauce; break up larger pieces as it simmers. Deliver bright acidity and charred complexity that enhances the overall chili-pasta combination.
- 18 oz can tomato sauce Pour in as a saucy base to create a cohesive, tomato-forward cooking liquid; whisk or stir to integrate with diced tomatoes and spices. Supply body, tang, and a smooth consistency that helps the pasta and beef meld together.
- 1/2 cup dried elbow macaroni, 2 ounces Add dry and cook directly in the sauce to absorb flavors while reaching al dente tenderness; measure precisely to maintain proper liquid ratio. Provide pasta texture and carbohydrate bulk that transforms the skillet into a filling, comforting one-pan meal.
- 14 oz can diced green chile peppers, drained Drain well and fold in for mild, piquant heat and a subtle green chili flavor; distribute evenly for little bursts of brightness. Contribute mild spice and southwestern character that complements the chili powder and tomato base.
- 2 teaspoons chili powder Sprinkle and toast briefly in the hot pan to release warm, earthy notes; adjust quantity to taste for desired heat and complexity. Act as the primary chili spice, unifying the dish with classic southwestern chili flavors.
- 1/2 teaspoon garlic salt Season lightly during cooking to add a gentle garlic flavor and enhance overall seasoning; use sparingly if also using other salty components. Provide savory, slightly pungent notes that round out the flavor profile without overpowering the chili spices.
- 1/2 cup shredded marbled cheddar cheese Top toward the end to melt into a creamy, sharp layer that binds ingredients and adds richness; use freshly shredded for optimal melting. Offer cheesy, slightly tangy flavor and a gooey texture that elevates the skillet presentation.
- 1/4 cup diced green onions Garnish thinly sliced on the finished dish to add a crisp, mild onion bite and fresh green color; sprinkle just before serving to retain crunch. Deliver a bright, oniony finish that lightens and freshens each spoonful.
Instructions
- In a large skillet cook meat and onion until meat is brown and onion is tender. Drain off fat.: The air will fill with a toasty, savory aroma as the ground beef sears and the onion softens, signaling that the Maillard reaction is doing its work to develop deep flavor. You should hear a steady sizzle and see small browned bits forming on the pan surface, which will later dissolve into the sauce and add richness. This step matters because proper browning gives the sauce a meaty foundation; if you skip it the final flavor will be flatter. A common mistake is cooking at too low a temperature, which steams the meat instead of browning it, so keep the heat at medium high and give the meat room to brown. Stir occasionally to prevent burning, and when the pieces are evenly browned and the onion is translucent, you are ready to move on.
- Stir in beans, undrained tomatoes, tomato sauce, uncooked macaroni, chile peppers, chili powder, and garlic salt. Bring to boiling; reduce heat.: After browning, the rendered fat will pool in the skillet and carry much of the cooked beef flavor. Carefully pouring off excess fat leaves enough to coat the pan and carry flavor, while preventing an overly greasy final dish. You may tilt the pan and use a spoon to remove fat, or transfer meat to a colander briefly. This step helps the sauce cling properly to the macaroni and keeps the mouthfeel balanced. Avoid removing all the fat, because that layer helps carry and amplify flavors; removing too little leaves the dish heavy. A typical mistake is discarding too quickly and splashing, so let the skillet rest briefly for the fat to gather before draining.
- Simmer, covered, about 20 minutes or until macaroni is tender, stirring often. Remove skillet from heat; sprinkle mixture with cheese. Cover and let stand about 2 minutes or until cheese is melted. Garnish with the green onions and enjoy!: As you add the cans of black beans , the undrained fire roasted tomatoes , and the tomato sauce , a rich, tomato forward steam will rise and signal the sauce coming together. Adding the uncooked elbow macaroni at this stage lets it absorb liquid and release starch, helping the sauce thicken and meld with the other components. The diced green chile peppers and chili powder fold in warmth and brightness, while the garlic salt lifts the savory notes. This technique is crucial because cooking the pasta in the sauce integrates flavors, rather than having separate elements. Stir thoroughly to distribute the pasta and prevent clumps. A common error is not stirring well and letting the pasta stick to the bottom, so give it a good initial stir and scrape up any browned bits to incorporate their flavor.
- Bring to boiling; reduce heat: When the liquid edges break into a steady boil, you will see bubbling across the surface and smell concentrated tomato and spice. Bringing to a boil activates the starch in the macaroni , but high heat must be reduced to avoid aggressive boiling that can overcook and break apart the pasta. Lower to a gentle simmer so the sauce thickens gradually and the pasta cooks evenly. This controlled simmer is important for texture; boiling too hard will churn the ingredients and cause the beans to fall apart. A common slip is leaving the heat too high, which can also cause splattering and loss of sauce, so watch the bubbles and adjust promptly.
- Simmer, covered, about 20 minutes or until macaroni is tender, stirring often: During this covered simmer, the macaroni will absorb liquid and swell, the sauce will concentrate, and the flavors will come together. You should hear a quiet, gentle bubbling and see the sauce thicken around the pasta. Stirring often prevents sticking and ensures even cooking; it also releases starch that helps thicken the pan. The right timing will yield pasta that is tender yet intact, beans that hold shape, and a sauce that clings. A typical mistake is skipping the stirring, which leads to scorched pasta at the bottom; be diligent and scrape the pan gently each time you stir. If the mixture looks dry before the pasta is done, add a splash of water to finish cooking without scorching.
- Remove skillet from heat; sprinkle mixture with cheese: Once the pasta is tender, take the pan off the burner so residual heat melts the shredded marbled cheddar cheese gently into a silky layer. The cheese will soften and ooze, adding creaminess and a slight tang that balances the tomato and spice. This step matters because adding cheese off heat prevents it from breaking or becoming grainy. A common mistake is returning the pan to high heat after adding cheese, which can make the texture greasy or separated; instead, cover and let it sit briefly to melt evenly.
- Cover and let stand about 2 minutes or until cheese is melted: Covering the skillet traps steam and promotes even melting without direct heat. You will notice the cheese yielding into the sauce and the surface becoming glossy. Letting it rest also allows the flavors to settle and the sauce to thicken slightly. Avoid removing the cover too soon, as the cheese may not fully integrate; two minutes is usually sufficient. If you lift the lid and find the cheese not fully melted, replace the cover for another minute rather than returning to heat.
- Garnish with the green onions and enjoy: The final sprinkle of diced green onions adds a fresh, crisp contrast to the warm, dense skillet. You will hear the change in texture and taste a bright pop against the rich, cheesy surface. Serving immediately preserves the contrast between creamy interior and crisp garnish. A frequent error is adding the green onions too early, which wilts them and dulls their flavor, so reserve them for the finish to maintain their bite and color.
Notes
- Brown well: Take the time to brown the ground beef properly for the richest flavor, and avoid overcrowding the skillet so the meat sears instead of steams.
- Keep a close eye on the pasta: Since the elbow macaroni cooks in the sauce, stir regularly to prevent sticking and check texture toward the end so it remains tender not mushy.
- Taste as you go: After the sauce has reduced, taste for salt and spice; canned tomatoes and beans vary, so minor adjustments make a big difference.
- Control the heat: Bring to a gentle boil then lower to a simmer to ensure even pasta cooking and to avoid breaking the beans or separating the sauce.
- Finish off-heat: Add the shredded marbled cheddar cheese with the skillet off heat and cover to melt it smoothly, preserving a creamy texture.