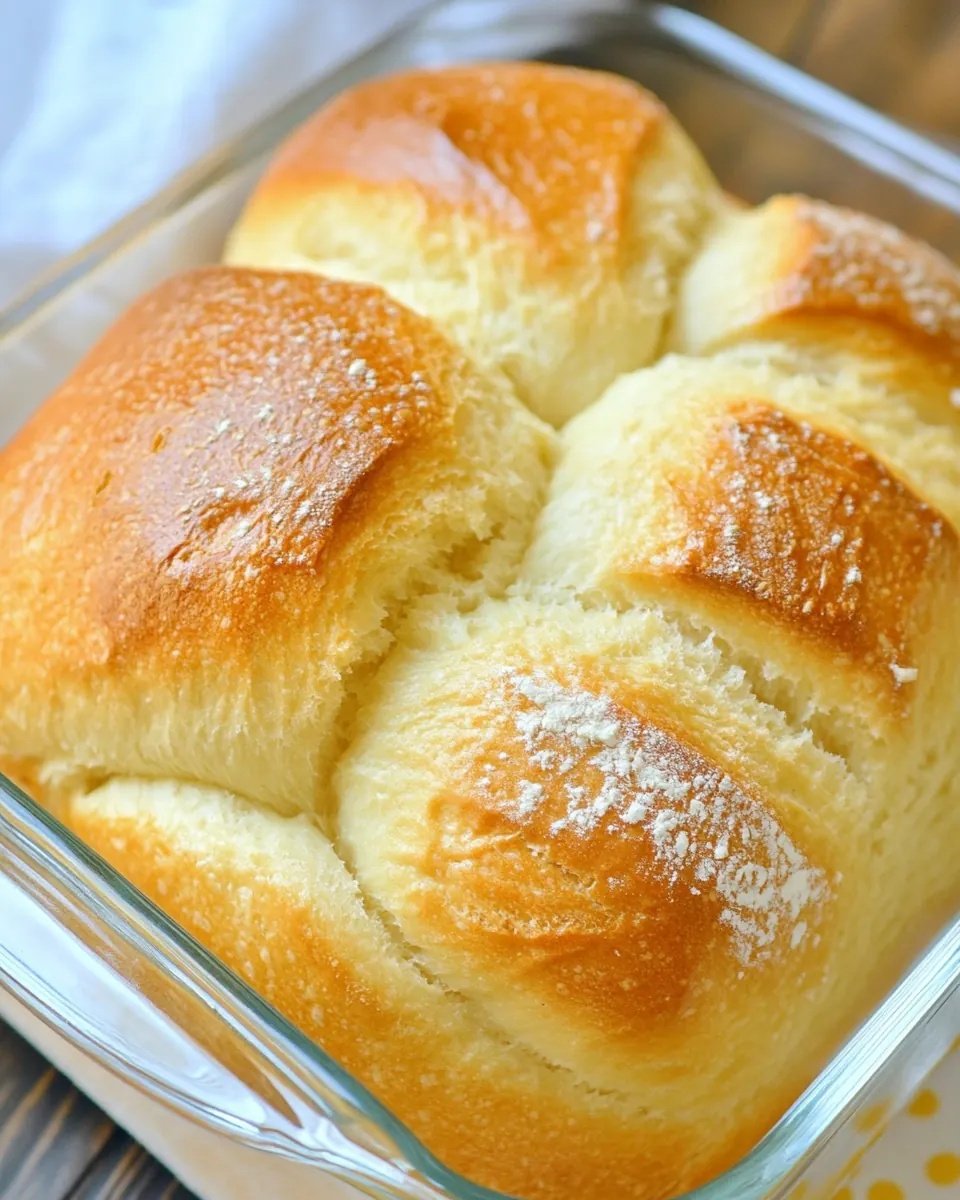
Challah Bread
Challah Bread is the loaf I reach for when I want to fill the house with a scent that feels like home. The first time I braided one, I was nervous about the shaping, but the rhythm of weaving strands together quickly became unexpectedly calming. I still remember the warm kitchen light, the soft clack of measuring spoons, and the way the dough responded under my palms, sticky at first then silky as it smoothed into a ball.
Over the years I have learned to trust slow, patient rises and to pay attention to small signals the dough gives. When I make Challah Bread now, I think about the people who will tear into it, the honey glazed crust, and the soft, pillowy crumb inside. Sometimes I bake it for simple weekend breakfasts, other times I bring it to a gathering where slices disappear faster than I can cut them. Each loaf seems to carry a little story, and I enjoy inventing one as the oven does its finishing work.
Recipe Snapshot
4 hr 30 mins
240 mins
30 mins
Hard
120 kcal
Jewish
Gluten-Free, Low FODMAP
Breakfast
Stand mixer, Dough hook, Mixing bowl, Baking sheet, Parchment paper, Instant read thermometer
The Magic of This Challah Bread
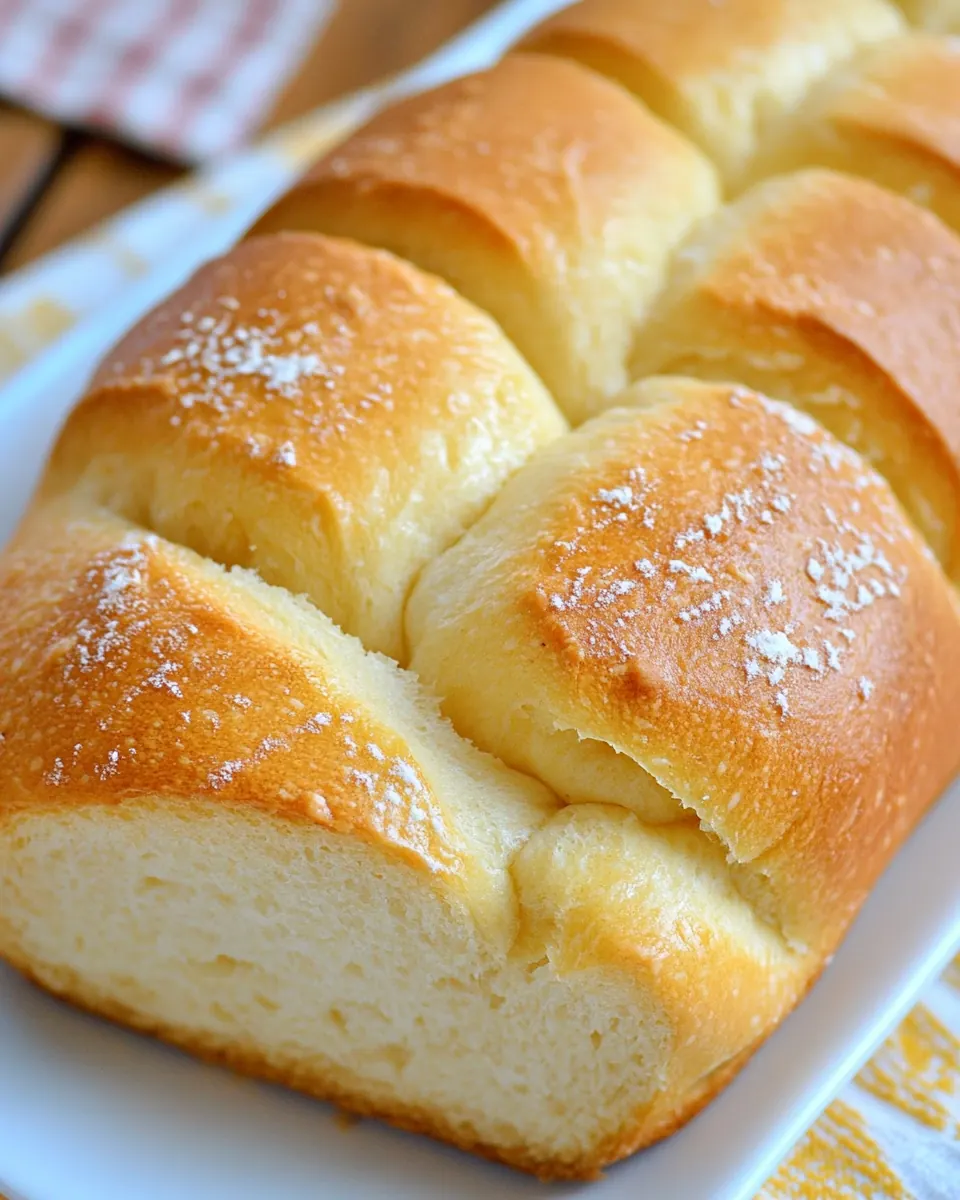
Rich, tender crumb that sings
I love how Challah Bread yields a soft interior that pulls apart in gentle ribbons. The combination of all purpose flour, eggs, and a touch of honey creates a tender texture that feels luxurious without being heavy. When I slice it warm, the steam and aroma are a small reward for the patience of rising.
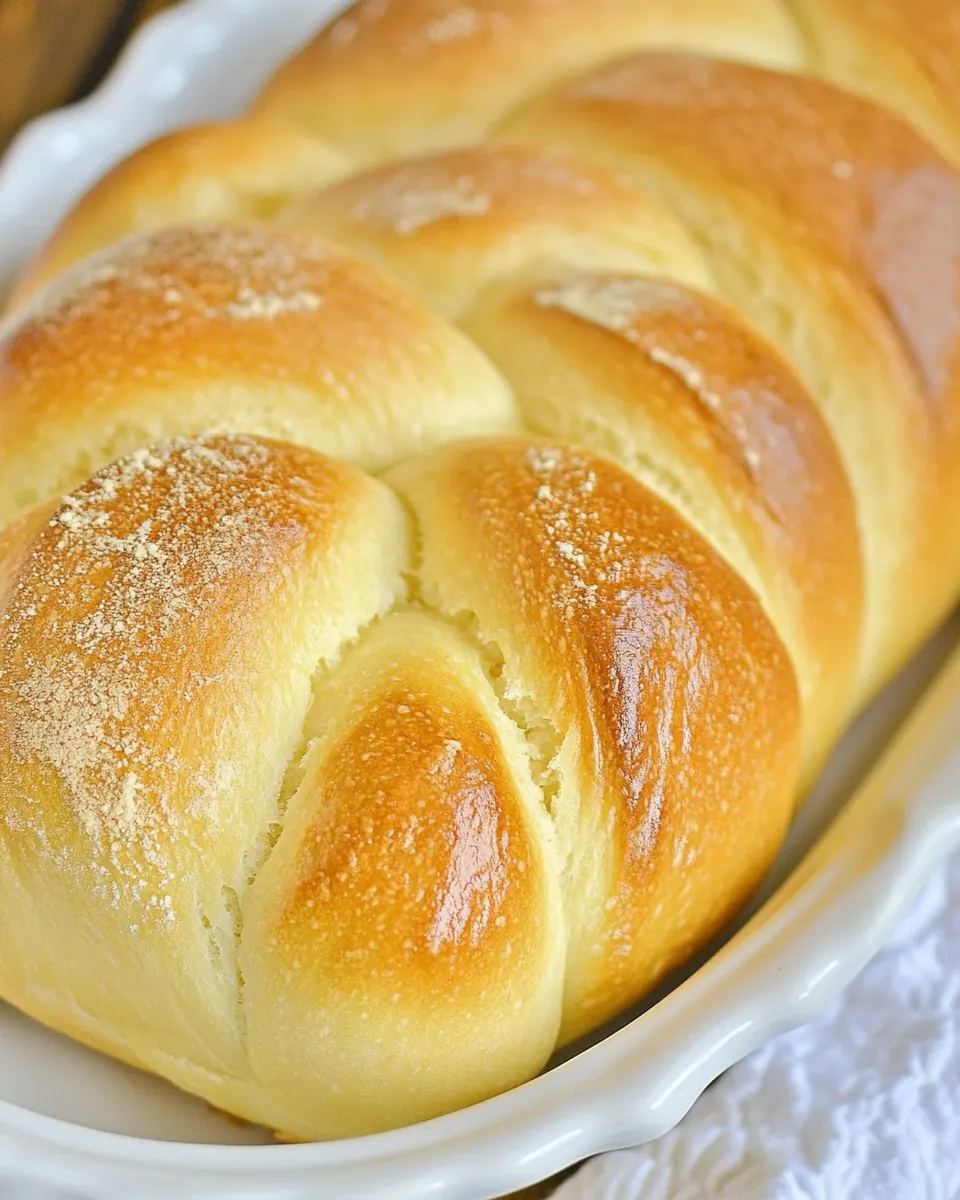
Beautiful, tactile braiding ritual
The braid is more than decoration, it is a moment to slow down. Working with four ropes of dough becomes almost meditative. I find that the visual payoff, a glossy, golden crust, invites admiration and makes any meal feel special.
Flexible for occasions
This loaf suits breakfasts, sandwiches, and festive tables with equal grace. I often double the recipe for company because it slices well and keeps a few days when stored wrapped at room temperature.
Approachable technique, impressive result
Even though it seems fancy, the method is straightforward. With a stand mixer and simple timing you can produce consistent results. I like to remind myself that small details like water temperature and gentle kneading matter far more than complicated steps.
Flavor balance that pleases everyone
The marriage of vegetable oil and honey brings a subtle sweetness and moistness that complements savory toppings and sweet spreads alike. I often reach for this bread when I want something universally liked and reliably delicious.
Challah Bread Shopping List
These ingredients are straightforward, but they work in harmony to create the classic texture and flavor of Challah Bread. The flour provides structure, eggs enrich and tenderize, and a bit of honey gives a warm, lingering sweetness. Yeast and warm water create the lift we need, while oil keeps the crumb soft. Each item plays a clear role, and together they yield a loaf that is both beautiful and versatile.
- 4 1/4 cups all-purpose flour plus more for dusting: Provides structure and bulk to the dough; develops gluten when mixed and kneaded to create the bread's chewy crumb. Adds a neutral base flavor that allows other ingredients like honey and eggs to shine, and can be dusted on work surfaces to prevent sticking during shaping.
- 1 tablespoon instant yeast: Leavens the dough by producing carbon dioxide, causing the challah to rise and become light and airy. Activates quickly in lukewarm liquid, ensuring consistent fermentation and contributing to the bread's tender texture and open crumb.
- 1 1/2 teaspoons salt: Enhances flavor and regulates yeast activity by strengthening gluten and controlling fermentation pace, ensuring balanced rise and good texture. Contributes to the dough's seasoning so the finished bread has a subtle savory note that complements its sweetness.
- 3/4 cup lukewarm water: Hydrates flour and activates yeast to form the dough, with temperature influencing fermentation speed; lukewarm water encourages proper yeast activity without killing it. Also helps dissolve sugar and salt, enabling even distribution and consistent dough development.
- 6 tablespoons vegetable oil: Adds tenderizing fat that enriches the crumb and extends shelf life, producing a softer, silkier texture in the finished challah. Contributes neutral flavor so the bread's sweetness and egginess remain prominent while ensuring pliable dough for braiding.
- 6 tablespoons honey or maple syrup: Sweetens the dough and promotes browning for an attractive crust while feeding the yeast to support fermentation. Imparts subtle flavor complexity—honey adds floral notes while maple syrup provides caramel-like depth—enhancing the overall taste.
- 3 eggs at room temperature: Enriches the dough with fat and proteins that yield a rich, tender crumb and contribute to the bread's distinctive color and elasticity. Helps create a soft, glossy interior and improves binding, making the dough easier to braid and shape.
- 1 egg yolk at room temperature: Provides an enriched, glossy finish when brushed on the loaf and adds concentrated fat and color to the dough if incorporated. Enhances browning and sheen on the crust, producing the classic attractive appearance of challah.
How to Prepare Challah Bread
These directions are where rhythm and attention matter most. I like to move through them deliberately, noticing texture changes and trusting the dough. Follow the sequence, and allow time for rises, because that patience is what creates the airy crumb and beautiful crust.
- In a stand mixer fitted with the dough hook, combine the flour, yeast, and salt. After that, mix on low speed for 30 seconds.: Close your eyes to sense how dry ingredients tumble and meld as the mixer starts, a faint scent of yeast rising into the air. The flour should look uniform and the salt evenly distributed, which helps predictable gluten formation later. Why this matters, the even mix prevents pockets of salt that can inhibit yeast in spots, creating uneven rise. Troubleshooting tip, if your dry mix seems clumpy or uneven, stop and break up any lumps with a spoon before adding liquids, or the dough may not hydrate evenly.
- In a separate bowl, combine the lukewarm water, oil, honey, or maple syrup, 2 eggs, and the egg yolk. Whisk gently to combine.: You will hear a steady, low whir as the hook turns, just enough to marry the dry components. This short pulse makes sure yeast and salt are fully incorporated without developing gluten prematurely. Sensory cue, you should not see dough yet, only a slightly fluffed dry mixture. Why this technique, gentle early mixing prevents overworking the dough in the initial stage. Troubleshooting, avoid increasing speed, too fast will fling flour and create a mess and uneven hydration.
- Add the egg mixture to the dry ingredients and knead at medium-low speed until a sticky dough that clings to the bottom of the bowl forms, which will take 5 to 7 minutes. The dough will seem wet.: As you whisk, the liquid takes on a golden sheen from the eggs and honey, and a subtle sweet aroma will rise. Mixing separately ensures even distribution of fat and sugar so they do not weigh down yeast once added. The warm water feels slightly warm to the wrist, signaling an ideal temperature. Troubleshooting, if the water feels hot, let it cool a bit or it could weaken the yeast.
- Dust your hands generously with flour and also dust a working surface with flour. After that, transfer the dough to the working surface and dust the top with flour. Knead it into a soft, smooth ball.: Listen to the soft whisking sound and watch the mixture become homogenous, glossy and slightly frothy from the eggs. This gentle action blends the oil into the watery base so that when it meets flour it integrates smoothly. Why this matters, a well combined liquid prevents streaks of oil in the dough which can hinder consistent hydration. Troubleshooting, vigorous whisking is unnecessary, it creates too many bubbles which can alter dough behavior slightly.
- Lightly grease a large bowl with oil and place the dough into the bowl, flip it over to make sure it's evenly oiled so it won't dry out, and then cover the bowl with plastic wrap. Place it in a warm place, and allow it to rise until doubled in size, 2 to 3 hours.: Expect the mixer to change tone as a cohesive mass forms and the hook begins pulling the dough away from the bowl sides, while some sticky scraps may cling to the bottom. The dough will feel tacky to your fingers, indicating proper hydration, and a gentle sheen signals gluten development. Why this matters, kneading builds the gluten network that traps gas for a light crumb. Troubleshooting, if the dough remains powdery after several minutes, add a tablespoon of water at a time; if overly wet, add small pinches of flour until tacky but manageable.
- After that, place the dough onto a lightly floured work surface and dust with flour. It will deflate.: At this point the dough's tackiness means it is correctly hydrated and you should not overflour it, which can create a dense loaf. Feel the dough, it should give under your fingers and rebound slightly, and you may see small bubbles where fermentation is starting. Why this matters, a slightly wetter dough produces a more open, tender crumb than an overly dry one. Troubleshooting, avoid adding too much flour here, instead plan to incorporate extra flour only during hand kneading if absolutely necessary.
- Cut it into four even 9-oz pieces, and then stretch each piece into a rope about 20-inches long.: The surface will take on a soft dusting and your hands will be lightly coated, making handling less sticky. This step prevents sticking while you shape, and the flour barrier lets you knead briefly by hand. Sensory cues include the dry, powdery smell and the slight scratch of flour on your palms. Why this technique works, it preserves dough hydration while giving you control during shaping. Troubleshooting, avoid using too much flour which can cause the dough to become dry at the surface and create a tougher crust.
- Lay the ropes parallel to one another and pinch them tightly together at the top, and then fan them out.: The dough will release from the bowl with a soft plop and will look matte where the flour clings. As you press and fold it, you will feel it become smoother and more elastic. Why this matters, hand finish kneading evens out the dough temperature and smooths the surface for better rising. Troubleshooting, if the dough sticks excessively, lift and re dust the surface lightly rather than forcefully scraping, which can tear the gluten structure.
- You start by taking the strand farthest to the right and weaving it toward the left through the other strands. Take the strand furthest to the right and repeat the weaving pattern again: over, under, over. Repeat this pattern until the whole loaf is braided. Tuck the ends under to give the loaf a finished look.: Use your palms to push and fold, turning the dough as you go until the exterior becomes taut and satiny. You will notice the surface become less sticky and more elastic, and it should hold its shape when rested. This finishing technique ensures even fermentation and a uniform crumb. Troubleshooting, if the ball collapses quickly when prodded, let it rest covered for a few minutes to relax the gluten before retrying.
- Transfer the braided loaf to a parchment-lined 13 x 18-inch baking sheet. Cover the loaf loosely with plastic wrap or a clean kitchen towel and let it rise in a warm, draft-free place until about 1.5 times the size, 1 to 2 hours.: The dough will glisten where it contacts the oil, and as it rests the surface will smooth. Oiling prevents a crust from forming on the dough as it proofs. Why this matters, an even oil sheen allows the dough to expand freely without sticking to the bowl. Troubleshooting, if your bowl is too small the dough will press against the wrap and deflate, so use generous space for expansion.
- Preheat the oven to 350 degrees F and set an oven rack in the middle position.: As it rises you will notice the dough swell and the surface may show small bubbles, with a pleasantly yeasty aroma filling the air. The doubled size is a visual cue that fermentation produced ample gas for light texture. Why this timing matters, a slower rise develops more flavor while a rapid, overheated rise can yield poor structure. Troubleshooting, if your kitchen is cool, create a warm proof by placing the bowl near a warm oven or on top of a lightly warmed appliance, but avoid excessive heat.
- In a small bowl, beat the remaining egg and brush dough with it.: The dough will gently deflate as you transfer it, releasing a faint puff of warm steam, an expected sign of proper fermentation. This deflation makes the dough easier to shape and redistribute gas pockets. Why this step matters, degassing controls large air pockets that can create uneven crumb. Troubleshooting, do not overwork the dough when deflating, handle it gently to preserve some gas for lightness.
- Place the baking sheet atop another baking sheet; this will prevent the bottom crust from browning too much. Bake for 25 to 35 minutes, or until the crust is a rich brown color and the internal temperature is between 190 degrees F to 200 degrees F on an instant-read thermometer.: The sound is a soft sigh and the texture softens, allowing you to shape without resistance. You should notice a more pliable feel, ready for portioning. Why this happens, gas escapes when the dough is moved, which is normal and healthy for shaping. Troubleshooting, if the dough feels slack and overly loose, chill it briefly to firm up for easier cutting and rolling.
- Remove the bread from the oven and place it on a cooling rack. Slice and serve.: Each piece will feel uniform when weighed, and stretching into ropes develops surface tension, smoothing the exterior for braiding. You will hear the faint scratch of dough on the countertop as you roll. Why this measurement matters, even ropes produce an evenly braided loaf that bakes uniformly. Troubleshooting, if ropes are uneven in thickness, roll them gently from center to ends to even out the thickness before braiding.
- Lay the ropes parallel to one another and pinch them tightly together at the top, and then fan them out: The initial pinch secures the braid and the fanned start sets the alignment. You will feel the tension when you press the strands together and then sense the relief as you spread them out for weaving. Why this technique matters, a strong anchor keeps the braid intact during rising and baking. Troubleshooting, if the anchor slips, re pinch and press firmly into the work surface for stability.
- You start by taking the strand farthest to the right and weaving it toward the left through the other strands: The first over under motion creates the pattern, and you will hear the soft sliding of dough as strands move past each other. This motion builds the classic braided look and encourages even expansion. Why this pattern matters, consistent weaving keeps the loaf balanced so it rises uniformly. Troubleshooting, if a strand tears, pinch the tear together and continue, slight repairs are invisible after baking.
- Take the strand furthest to the right and repeat the weaving pattern again: Over, under, over becomes a satisfying rhythm and the braid begins to hold shape. As you continue, watch for symmetry and even tension so the loaf is not lopsided. Why repetition matters, uniform tension results in a professional looking loaf and consistent crumb. Troubleshooting, if the braid tightens too much it can restrict oven rise, so keep the tension gentle, not constricting.
- Repeat this pattern until the whole loaf is braided: By the time you finish the braid you will notice the loaf has a refined silhouette, the strands aligned and the surface slightly glossy from handling. The braid traps small air pockets that continue to expand during the final proof, creating that open, tender crumb inside. Troubleshooting, if the braid looks uneven, tuck and adjust the strands slightly before final proofing; minor tweaks are forgiving.
- Tuck the ends under to give the loaf a finished look: The tucked ends create a neat base and prevent loose tips from burning in the oven. Press gently to seal, the tuck should be smooth and unobtrusive. Why this finishing touch matters, neat ends help the loaf maintain shape while baking. Troubleshooting, if ends pop out during proof, re tuck and brush lightly with egg wash later to secure.
- Transfer the braided loaf to a parchment lined 13 x 18 inch baking sheet: The parchment provides a nonstick surface and the large sheet gives room for expansion. You will sense the weight of the loaf as it moves and the parchment will ease transfer. Why this matters, a roomy sheet helps the bottom brown evenly and prevents overflow. Troubleshooting, if parchment slides, crease the corners slightly to create a stable base during transfer.
- Cover the loaf loosely with plastic wrap or a clean kitchen towel and let it rise in a warm, draft free place until about 1.5 times the size, 1 to 2 hours: The covered loaf will slowly puff and the braid will soften as gas accumulates, releasing a faint sweet yeast scent. This second rise builds final volume and sets the crumb structure. Why timing matters, under proofing yields dense loaf, over proofing may collapse in the oven. Troubleshooting, watch visual cues rather than clock time alone to judge readiness.
- Preheat the oven to 350 degrees F and set an oven rack in the middle position: You will hear the oven clicks and feel a wave of warm air when opening the door, indicating the right environment for even baking. A middle rack position promotes balanced browning. Why this matters, consistent oven temperature ensures the loaf cooks through without burning. Troubleshooting, use an oven thermometer if your oven runs hot or cool, otherwise adjust temperature slightly to avoid overbrowning.
- In a small bowl, beat the remaining egg and brush dough with it: The egg wash brings a glossy, deep golden finish and slight sheen under the light when baked. Brush evenly across the braid, catching the tips and nestled curves for full color. Why this step matters, the wash improves appearance and creates a slight barrier that keeps the crust tender. Troubleshooting, if the wash pools, dab excess gently so it does not create blistered spots.
- Place the baking sheet atop another baking sheet; this will prevent the bottom crust from browning too much: The double sheet creates insulation and moderates direct heat from the oven floor, resulting in an evenly colored bottom. You may notice less intense crackle as the loaf bakes, and a more even, gentle rise. Why this matters, it prevents an overly dark base while maintaining an evenly baked crumb. Troubleshooting, if your oven heats unevenly, rotate the sheet midway through baking for balanced results.
- Bake for 25 to 35 minutes, or until the crust is a rich brown color and the internal temperature is between 190 degrees F to 200 degrees F on an instant read thermometer: Baking fills the kitchen with warm aromas, and you will see the crust deepen to a golden brown while the braid firms. The internal temperature indicates doneness, ensuring the center is fully cooked. Why this matters, relying on visual cues and temperature prevents underbaked, doughy centers. Troubleshooting, if the crust browns too quickly, tent with foil and continue baking until the center reaches temperature.
- Remove the bread from the oven and place it on a cooling rack: As it cools you will notice a mellowing of aroma and the loaf will settle into a slightly softer feel, steam escaping in small wisps. Cooling prevents a gummy interior and helps slices hold shape. Why this matters, cutting too soon ruins texture, so allow adequate cooling. Troubleshooting, if you must slice warm, do so with a very sharp serrated knife and expect slightly less tidy slices.
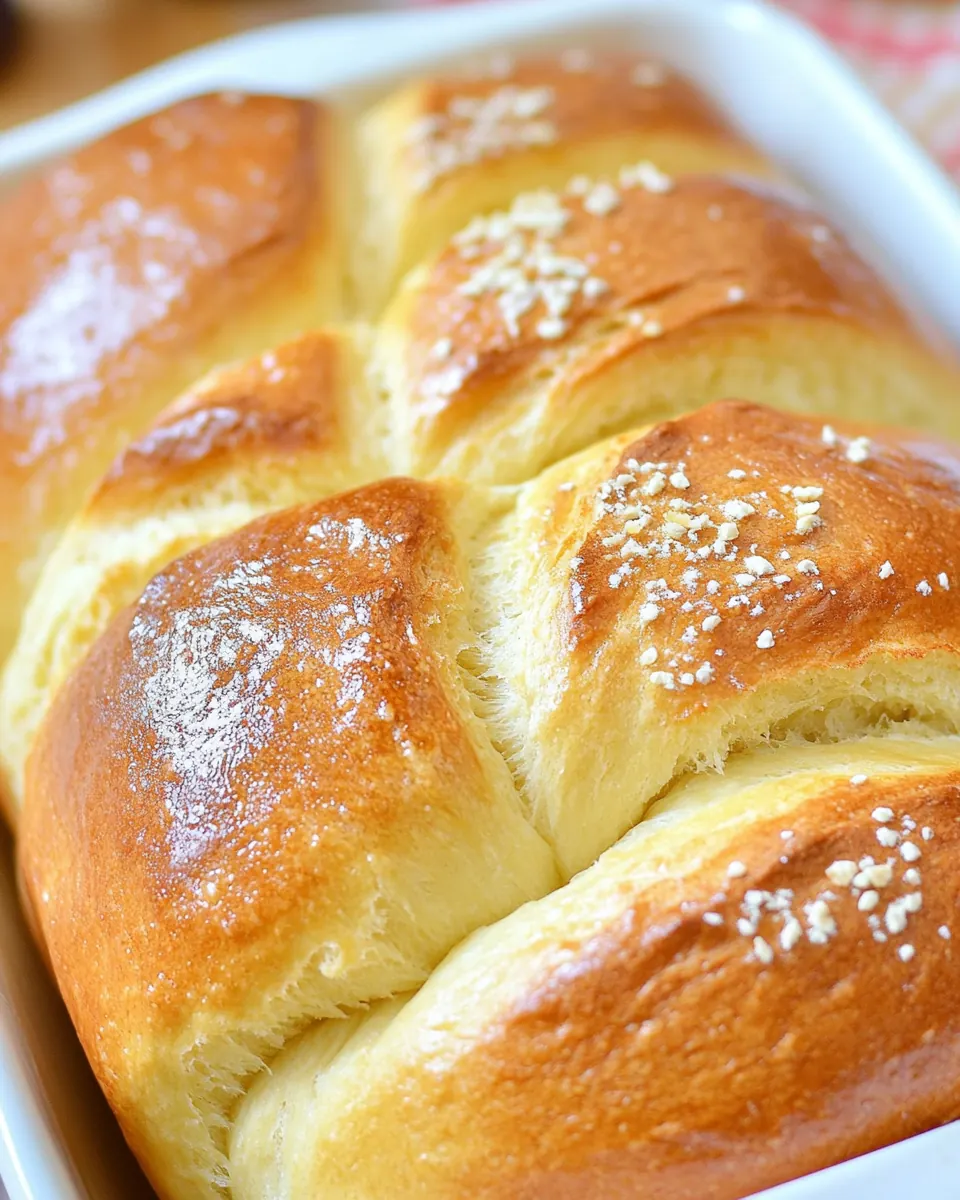
- Slice and serve: The loaf yields tender slices that tear in soft ribbons, with a glossy crust and pillowy center. Serve slightly warm to enjoy the best texture and aroma. Why this final moment matters, the first slice is the payoff for your attention to timing and technique. Troubleshooting, store leftover slices wrapped to maintain freshness and softness.
Recipe Variations about Challah Bread
I like to tinker with small changes that highlight different aspects of Challah Bread. Below are practical variations and ideas to adapt the loaf for texture, sweetness, or occasions while preserving the classic character.
- Richer egg wash Use the reserved egg yolk mixed with a splash of water for an extra glossy, deeper colored crust, brushing gently just before baking.
- Lightly sweet Reduce the honey by a tablespoon if you prefer a less pronounced sweetness while preserving moisture and browning.
- Neutral oil swap Use any light tasting vegetable oil for a clean flavor that lets the egg and honey shine through in the crumb.
- Braid size Make smaller rolls by dividing the dough into more pieces for individual challah rolls that are perfect for lunches or gatherings.
- Longer fermentation For more depth of flavor, proof in the refrigerator overnight, then shape and allow a shorter final rise the next day before baking.
What to Pair With Challah Bread
Challah Bread is versatile and pairs beautifully across meals. Whether you want a simple breakfast, a festive centerpiece, or a cozy sandwich, this bread adapts. Below I outline pairing ideas, occasions, and storage tips to help you serve it at its best.
- Breakfast spread, Serve thick slices warmed with butter and jam or honey for a comforting start to a weekend morning; the soft crumb soaks up spreads without falling apart.
- Sandwich base, Use slices for egg salad or deli style sandwiches; the tender, slightly sweet crumb complements savory fillings without overpowering them.
- Holiday table, Present a whole braided loaf as part of a celebratory table, arranging it on a board so guests can tear off pieces; its glossy crust makes an attractive centerpiece.
- French toast, Day old Challah Bread makes exceptional French toast because the slightly denser crumb soaks custard for a thick, custardy interior and crisp exterior when fried.
- Picnic or potluck, Bring a sliced loaf wrapped in a linen towel for portable sharing; it keeps well at room temperature for a day when covered.
- Storage for freshness, To store, wrap in plastic or place in an airtight container at room temperature for up to three days; freeze slices for longer keeping and thaw in the microwave or toaster.
- Seasonal serving, In cooler months serve warm with hearty soups or stews; in milder weather enjoy with fresh cheeses and fruit for a lighter option.
- Occasion ideas, Great for family brunches, celebrations, and casual gatherings where you want a comforting, shareable bread that appeals to many palates.
- Presentation tip, Warm briefly in a low oven before serving and brush with a touch more warmed honey for extra shine if you want a slightly glazed finish.
- Leftover uses, Turn slices into croutons or breadcrumbs if they begin to stale, rescuing the loaf into a new pantry staple.
FAQ
Conclusion
This Challah Bread stands out for its tender crumb, glossy braid, and comforting sweetness. I encourage you to try shaping and baking one yourself, because the ritual of braiding and the reward of warm, fragrant slices are genuinely satisfying. Let the dough guide you with its textures and rising pace, and enjoy the simple pleasure of sharing warm bread with family and friends.
Challah Bread
Equipment
- Stand mixer
- Dough Hook
- Mixing Bowl
- Baking Sheet
- Parchment Paper
- Instant read thermometer
Ingredients
- 4 1/4 cups all-purpose flour plus more for dusting Provides structure and bulk to the dough; develops gluten when mixed and kneaded to create the bread's chewy crumb. Adds a neutral base flavor that allows other ingredients like honey and eggs to shine, and can be dusted on work surfaces to prevent sticking during shaping.
- 1 tablespoon instant yeast Leavens the dough by producing carbon dioxide, causing the challah to rise and become light and airy. Activates quickly in lukewarm liquid, ensuring consistent fermentation and contributing to the bread's tender texture and open crumb.
- 1 1/2 teaspoons salt Enhances flavor and regulates yeast activity by strengthening gluten and controlling fermentation pace, ensuring balanced rise and good texture. Contributes to the dough's seasoning so the finished bread has a subtle savory note that complements its sweetness.
- 3/4 cup lukewarm water Hydrates flour and activates yeast to form the dough, with temperature influencing fermentation speed; lukewarm water encourages proper yeast activity without killing it. Also helps dissolve sugar and salt, enabling even distribution and consistent dough development.
- 6 tablespoons vegetable oil Adds tenderizing fat that enriches the crumb and extends shelf life, producing a softer, silkier texture in the finished challah. Contributes neutral flavor so the bread's sweetness and egginess remain prominent while ensuring pliable dough for braiding.
- 6 tablespoons honey or maple syrup Sweetens the dough and promotes browning for an attractive crust while feeding the yeast to support fermentation. Imparts subtle flavor complexity—honey adds floral notes while maple syrup provides caramel-like depth—enhancing the overall taste.
- 3 eggs at room temperature Enriches the dough with fat and proteins that yield a rich, tender crumb and contribute to the bread's distinctive color and elasticity. Helps create a soft, glossy interior and improves binding, making the dough easier to braid and shape.
- 1 egg yolk at room temperature Provides an enriched, glossy finish when brushed on the loaf and adds concentrated fat and color to the dough if incorporated. Enhances browning and sheen on the crust, producing the classic attractive appearance of challah.
Instructions
- In a stand mixer fitted with the dough hook, combine the flour, yeast, and salt. After that, mix on low speed for 30 seconds.: Close your eyes to sense how dry ingredients tumble and meld as the mixer starts, a faint scent of yeast rising into the air. The flour should look uniform and the salt evenly distributed, which helps predictable gluten formation later. Why this matters, the even mix prevents pockets of salt that can inhibit yeast in spots, creating uneven rise. Troubleshooting tip, if your dry mix seems clumpy or uneven, stop and break up any lumps with a spoon before adding liquids, or the dough may not hydrate evenly.
- In a separate bowl, combine the lukewarm water, oil, honey, or maple syrup, 2 eggs, and the egg yolk. Whisk gently to combine.: You will hear a steady, low whir as the hook turns, just enough to marry the dry components. This short pulse makes sure yeast and salt are fully incorporated without developing gluten prematurely. Sensory cue, you should not see dough yet, only a slightly fluffed dry mixture. Why this technique, gentle early mixing prevents overworking the dough in the initial stage. Troubleshooting, avoid increasing speed, too fast will fling flour and create a mess and uneven hydration.
- Add the egg mixture to the dry ingredients and knead at medium-low speed until a sticky dough that clings to the bottom of the bowl forms, which will take 5 to 7 minutes. The dough will seem wet.: As you whisk, the liquid takes on a golden sheen from the eggs and honey, and a subtle sweet aroma will rise. Mixing separately ensures even distribution of fat and sugar so they do not weigh down yeast once added. The warm water feels slightly warm to the wrist, signaling an ideal temperature. Troubleshooting, if the water feels hot, let it cool a bit or it could weaken the yeast.
- Dust your hands generously with flour and also dust a working surface with flour. After that, transfer the dough to the working surface and dust the top with flour. Knead it into a soft, smooth ball.: Listen to the soft whisking sound and watch the mixture become homogenous, glossy and slightly frothy from the eggs. This gentle action blends the oil into the watery base so that when it meets flour it integrates smoothly. Why this matters, a well combined liquid prevents streaks of oil in the dough which can hinder consistent hydration. Troubleshooting, vigorous whisking is unnecessary, it creates too many bubbles which can alter dough behavior slightly.
- Lightly grease a large bowl with oil and place the dough into the bowl, flip it over to make sure it's evenly oiled so it won't dry out, and then cover the bowl with plastic wrap. Place it in a warm place, and allow it to rise until doubled in size, 2 to 3 hours.: Expect the mixer to change tone as a cohesive mass forms and the hook begins pulling the dough away from the bowl sides, while some sticky scraps may cling to the bottom. The dough will feel tacky to your fingers, indicating proper hydration, and a gentle sheen signals gluten development. Why this matters, kneading builds the gluten network that traps gas for a light crumb. Troubleshooting, if the dough remains powdery after several minutes, add a tablespoon of water at a time; if overly wet, add small pinches of flour until tacky but manageable.
- After that, place the dough onto a lightly floured work surface and dust with flour. It will deflate.: At this point the dough's tackiness means it is correctly hydrated and you should not overflour it, which can create a dense loaf. Feel the dough, it should give under your fingers and rebound slightly, and you may see small bubbles where fermentation is starting. Why this matters, a slightly wetter dough produces a more open, tender crumb than an overly dry one. Troubleshooting, avoid adding too much flour here, instead plan to incorporate extra flour only during hand kneading if absolutely necessary.
- Cut it into four even 9-oz pieces, and then stretch each piece into a rope about 20-inches long.: The surface will take on a soft dusting and your hands will be lightly coated, making handling less sticky. This step prevents sticking while you shape, and the flour barrier lets you knead briefly by hand. Sensory cues include the dry, powdery smell and the slight scratch of flour on your palms. Why this technique works, it preserves dough hydration while giving you control during shaping. Troubleshooting, avoid using too much flour which can cause the dough to become dry at the surface and create a tougher crust.
- Lay the ropes parallel to one another and pinch them tightly together at the top, and then fan them out.: The dough will release from the bowl with a soft plop and will look matte where the flour clings. As you press and fold it, you will feel it become smoother and more elastic. Why this matters, hand finish kneading evens out the dough temperature and smooths the surface for better rising. Troubleshooting, if the dough sticks excessively, lift and re dust the surface lightly rather than forcefully scraping, which can tear the gluten structure.
- You start by taking the strand farthest to the right and weaving it toward the left through the other strands. Take the strand furthest to the right and repeat the weaving pattern again: over, under, over. Repeat this pattern until the whole loaf is braided. Tuck the ends under to give the loaf a finished look.: Use your palms to push and fold, turning the dough as you go until the exterior becomes taut and satiny. You will notice the surface become less sticky and more elastic, and it should hold its shape when rested. This finishing technique ensures even fermentation and a uniform crumb. Troubleshooting, if the ball collapses quickly when prodded, let it rest covered for a few minutes to relax the gluten before retrying.
- Transfer the braided loaf to a parchment-lined 13 x 18-inch baking sheet. Cover the loaf loosely with plastic wrap or a clean kitchen towel and let it rise in a warm, draft-free place until about 1.5 times the size, 1 to 2 hours.: The dough will glisten where it contacts the oil, and as it rests the surface will smooth. Oiling prevents a crust from forming on the dough as it proofs. Why this matters, an even oil sheen allows the dough to expand freely without sticking to the bowl. Troubleshooting, if your bowl is too small the dough will press against the wrap and deflate, so use generous space for expansion.
- Preheat the oven to 350 degrees F and set an oven rack in the middle position.: As it rises you will notice the dough swell and the surface may show small bubbles, with a pleasantly yeasty aroma filling the air. The doubled size is a visual cue that fermentation produced ample gas for light texture. Why this timing matters, a slower rise develops more flavor while a rapid, overheated rise can yield poor structure. Troubleshooting, if your kitchen is cool, create a warm proof by placing the bowl near a warm oven or on top of a lightly warmed appliance, but avoid excessive heat.
- In a small bowl, beat the remaining egg and brush dough with it.: The dough will gently deflate as you transfer it, releasing a faint puff of warm steam, an expected sign of proper fermentation. This deflation makes the dough easier to shape and redistribute gas pockets. Why this step matters, degassing controls large air pockets that can create uneven crumb. Troubleshooting, do not overwork the dough when deflating, handle it gently to preserve some gas for lightness.
- Place the baking sheet atop another baking sheet; this will prevent the bottom crust from browning too much. Bake for 25 to 35 minutes, or until the crust is a rich brown color and the internal temperature is between 190 degrees F to 200 degrees F on an instant-read thermometer.: The sound is a soft sigh and the texture softens, allowing you to shape without resistance. You should notice a more pliable feel, ready for portioning. Why this happens, gas escapes when the dough is moved, which is normal and healthy for shaping. Troubleshooting, if the dough feels slack and overly loose, chill it briefly to firm up for easier cutting and rolling.
- Remove the bread from the oven and place it on a cooling rack. Slice and serve.: Each piece will feel uniform when weighed, and stretching into ropes develops surface tension, smoothing the exterior for braiding. You will hear the faint scratch of dough on the countertop as you roll. Why this measurement matters, even ropes produce an evenly braided loaf that bakes uniformly. Troubleshooting, if ropes are uneven in thickness, roll them gently from center to ends to even out the thickness before braiding.
- Lay the ropes parallel to one another and pinch them tightly together at the top, and then fan them out: The initial pinch secures the braid and the fanned start sets the alignment. You will feel the tension when you press the strands together and then sense the relief as you spread them out for weaving. Why this technique matters, a strong anchor keeps the braid intact during rising and baking. Troubleshooting, if the anchor slips, re pinch and press firmly into the work surface for stability.
- You start by taking the strand farthest to the right and weaving it toward the left through the other strands: The first over under motion creates the pattern, and you will hear the soft sliding of dough as strands move past each other. This motion builds the classic braided look and encourages even expansion. Why this pattern matters, consistent weaving keeps the loaf balanced so it rises uniformly. Troubleshooting, if a strand tears, pinch the tear together and continue, slight repairs are invisible after baking.
- Take the strand furthest to the right and repeat the weaving pattern again: Over, under, over becomes a satisfying rhythm and the braid begins to hold shape. As you continue, watch for symmetry and even tension so the loaf is not lopsided. Why repetition matters, uniform tension results in a professional looking loaf and consistent crumb. Troubleshooting, if the braid tightens too much it can restrict oven rise, so keep the tension gentle, not constricting.
- Repeat this pattern until the whole loaf is braided: By the time you finish the braid you will notice the loaf has a refined silhouette, the strands aligned and the surface slightly glossy from handling. The braid traps small air pockets that continue to expand during the final proof, creating that open, tender crumb inside. Troubleshooting, if the braid looks uneven, tuck and adjust the strands slightly before final proofing; minor tweaks are forgiving.
- Tuck the ends under to give the loaf a finished look: The tucked ends create a neat base and prevent loose tips from burning in the oven. Press gently to seal, the tuck should be smooth and unobtrusive. Why this finishing touch matters, neat ends help the loaf maintain shape while baking. Troubleshooting, if ends pop out during proof, re tuck and brush lightly with egg wash later to secure.
- Transfer the braided loaf to a parchment lined 13 x 18 inch baking sheet: The parchment provides a nonstick surface and the large sheet gives room for expansion. You will sense the weight of the loaf as it moves and the parchment will ease transfer. Why this matters, a roomy sheet helps the bottom brown evenly and prevents overflow. Troubleshooting, if parchment slides, crease the corners slightly to create a stable base during transfer.
- Cover the loaf loosely with plastic wrap or a clean kitchen towel and let it rise in a warm, draft free place until about 1.5 times the size, 1 to 2 hours: The covered loaf will slowly puff and the braid will soften as gas accumulates, releasing a faint sweet yeast scent. This second rise builds final volume and sets the crumb structure. Why timing matters, under proofing yields dense loaf, over proofing may collapse in the oven. Troubleshooting, watch visual cues rather than clock time alone to judge readiness.
- Preheat the oven to 350 degrees F and set an oven rack in the middle position: You will hear the oven clicks and feel a wave of warm air when opening the door, indicating the right environment for even baking. A middle rack position promotes balanced browning. Why this matters, consistent oven temperature ensures the loaf cooks through without burning. Troubleshooting, use an oven thermometer if your oven runs hot or cool, otherwise adjust temperature slightly to avoid overbrowning.
- In a small bowl, beat the remaining egg and brush dough with it: The egg wash brings a glossy, deep golden finish and slight sheen under the light when baked. Brush evenly across the braid, catching the tips and nestled curves for full color. Why this step matters, the wash improves appearance and creates a slight barrier that keeps the crust tender. Troubleshooting, if the wash pools, dab excess gently so it does not create blistered spots.
- Place the baking sheet atop another baking sheet; this will prevent the bottom crust from browning too much: The double sheet creates insulation and moderates direct heat from the oven floor, resulting in an evenly colored bottom. You may notice less intense crackle as the loaf bakes, and a more even, gentle rise. Why this matters, it prevents an overly dark base while maintaining an evenly baked crumb. Troubleshooting, if your oven heats unevenly, rotate the sheet midway through baking for balanced results.
- Bake for 25 to 35 minutes, or until the crust is a rich brown color and the internal temperature is between 190 degrees F to 200 degrees F on an instant read thermometer: Baking fills the kitchen with warm aromas, and you will see the crust deepen to a golden brown while the braid firms. The internal temperature indicates doneness, ensuring the center is fully cooked. Why this matters, relying on visual cues and temperature prevents underbaked, doughy centers. Troubleshooting, if the crust browns too quickly, tent with foil and continue baking until the center reaches temperature.
- Remove the bread from the oven and place it on a cooling rack: As it cools you will notice a mellowing of aroma and the loaf will settle into a slightly softer feel, steam escaping in small wisps. Cooling prevents a gummy interior and helps slices hold shape. Why this matters, cutting too soon ruins texture, so allow adequate cooling. Troubleshooting, if you must slice warm, do so with a very sharp serrated knife and expect slightly less tidy slices.
- Slice and serve: The loaf yields tender slices that tear in soft ribbons, with a glossy crust and pillowy center. Serve slightly warm to enjoy the best texture and aroma. Why this final moment matters, the first slice is the payoff for your attention to timing and technique. Troubleshooting, store leftover slices wrapped to maintain freshness and softness.
Notes
- Richer egg wash Use the reserved egg yolk mixed with a splash of water for an extra glossy, deeper colored crust, brushing gently just before baking.
- Lightly sweet Reduce the honey by a tablespoon if you prefer a less pronounced sweetness while preserving moisture and browning.
- Neutral oil swap Use any light tasting vegetable oil for a clean flavor that lets the egg and honey shine through in the crumb.
- Braid size Make smaller rolls by dividing the dough into more pieces for individual challah rolls that are perfect for lunches or gatherings.
- Longer fermentation For more depth of flavor, proof in the refrigerator overnight, then shape and allow a shorter final rise the next day before baking.